ignition Seat Mii 2017 Workshop Manual
[x] Cancel search | Manufacturer: SEAT, Model Year: 2017, Model line: Mii, Model: Seat Mii 2017Pages: 232, PDF Size: 4.91 MB
Page 149 of 232
Driving
Note
The recommended gear display is switched
off when the c lut
ch pedal is pressed.Steering
Introduction The power steering* is not hydraulic but elec-
tromec
h
anical. The advantage of this steer-
ing system is that it disposes of hydraulic
tubes, hydraulic oil, the pump, filter and oth-
er components. The electromechanical sys-
tem saves fuel. While a hydraulic system re-
quires oil pressure to be maintained, electro-
mechanical steering only requires energy
when the steering wheel is turned.
With the power steering system, the assisted
steering function automatically adjusts ac-
cording to the vehicle speed, the steering tor-
que and the wheel turning angle. The power
steering only works when the engine is run-
ning. WARNING
If the power steering is not working then the
st eerin
g wheel is much more difficult to turn
and the vehicle more difficult to control.
● The power steering only works when the
engine is
running. ●
Never a l
low the vehicle to move when the
engine is switched off.
● Never remove the key from the ignition if
the vehic
le is in motion. The steering may
lock and it will not be possible to turn the
steering wheel. Control and warning lamps
It lights up red
Power steer-
ing faulty.The steering system should be checked
by a specialised workshop as soon as
possible.
It lights up yellow
Power steer-
ing opera-
tion re-
duced.
The steering system should be checked
by a specialised workshop as soon as
possible.
If, after restarting the engine and driv-
ing for a short distance, the yellow
warning lamp no longer comes on, it will
not be necessary to take the vehicle to a
specialised workshop.
Flashes red
Fault in the
steering col-
umn elec-
tronic lock.
Do not drive on!
Seek professional advice.
It flashes yellow
Steering col-
umn devia-
tion.Gently turn the steering wheel to and
fro.
Steering
wheel not
unlocked or
locked.
Remove the key from the ignition and
then switch the ignition back on. If nec-
essary, check the messages displayed
on the instrument panel display.
Do not drive on, if
the steering column
remains locked after the ignition has
been switched on. Seek specialist assis-
tance. Several warning and control lamps light up
f
or a f
ew sec
onds when the ignition is switch-
ed on, signalling that the function is being
verified. They will switch off after a few sec-
onds. WARNING
If the warning lamps are ignored, the vehicle
ma y
stall in traffic, or may cause accidents
and severe injuries.
● Never ignore the warning lamps.
● Stop the vehicle safely as soon as possible. CAUTION
Failure to heed the warning lamps when they
appe ar m
ay result in faults in the vehicle. 147
Technical data
Advice
Operation
Emergencies
Safety
Page 150 of 232
Operation
Information on the steering To prevent theft, we recommend you lock the
st
eerin
g before leaving the vehicle.
Steering column mechanical lock
Lock the steering column by removing the
key from the ignition when the vehicle is
stopped.
Please engage steer-
ing lockUnlocking the steering
Parking the vehicle
››› page 135.Insert the key in the igni-
tion lock.
Remove the key from the
ignition.Turn the steering wheel
slightly to release the
steering lock.
Turn the steering wheel
slightly until you hear the
steering lock.Hold the steering wheel in
this position and switch
on the ignition. Electromechanical power steering
W
ith the po
w
er steering system, the assisted
steering function automatically adjusts ac-
cording to the vehicle speed, the steering tor-
que and the wheel turning angle. The power
steering only works when the engine is run-
ning.
You should remember that you will need con-
siderably more power than normal to steer
the vehicle if the power steering is not work-
ing correctly or not at all. Run-in and economical driving
Runnin
g in Please observe the instructions for running-in
new components.
R u
nning-in the engine
The engine needs to be run in over the first
1,500 km. During its first few hours of run-
ning, the internal friction in the engine is
greater than later on when all the moving
parts have bedded down.
How the vehicle is driven for the first 1,500
km influences the future engine perform-
ance. Throughout the life of the vehicle, it
should be driven at a moderate speed, espe-
cially when the engine is cold, as this will re-
duce engine wear and increase its useful life.
Never drive at extremely low engine speeds.
Change down to a lower gear when the en-
gine no longer runs “smoothly”. Up to 1,000
kilometres the following instructions apply:
● Do not use full throttle.
● Do not force the engine above two thirds of
its m ax
imum speed.
Between 1,000 and 1,500 kilometres, gradu-
ally increase power until reaching the maxi-
mum speed and high engine speeds. Running in new tyres and brake pads
●
Replacement of wheel rims and new tyres
›››
page 200
● Notes on the brakes ›››
page 135 For the sake of the environment
If the engine is run in gently, the life of the
engine w i
ll be increased and the engine oil
consumption reduced. Environmental compatibility
Environmental protection is a top priority in
the de
s
ign, c
hoice of materials and manufac-
ture of your new SEAT.
Constructive measures to encourage recy-
cling
● Joints and connections designed for easy
dismantlin
g.
● Modular construction to facilitate disman-
tling.
● Incr
eased use of single-grade materials.
● Plastic parts and elastomers are marked in
accor
dance with ISO 1043, ISO 11469 and
ISO 1629.
Choice of materials
● Use of recycled materials.
148
Page 153 of 232
Driving
When purchasing engine oil, always observe
l e
g
al requirements and ensure that the oil is
approved by SEAT.
Avoid carrying unnecessary loads
The lighter the vehicle, the more economical
and ecological the driving style. For example,
an additional weight of 100 kg will increase
fuel consumption up to 0.3 l/100 km.
Remove any unnecessary objects or loads
from the vehicle.
Remove optional equipment and unnecessa-
ry accessories
The more aerodynamic the vehicle, the lower
the fuel consumption. Optional equipment
and accessories (such as roof racks or bike
carriers) reduce the aerodynamic benefits of
the vehicle.
Therefore, we recommend you remove all op-
tional and unnecessary equipment and racks,
especially if you intend to drive at high
speeds.
Other factors which increase fuel consump-
tion (examples):
● Fault in engine management.
● Driving on hills. WARNING
Always adapt your speed and the distance to
the v ehic
les ahead in line with visibility,
weather conditions, the condition of the road
and the traffic situation. Engine management and ex-
hau
s
t gas purification system
Introduction WARNING
The components of the exhaust system reach
ver y
high temperatures. This could cause a
fire.
● Always park your vehicle so that no part of
the exhau
st system can come in contact with
flammable materials (such as dried grass).
● Never apply additional underseal or anti-
corro
sion coatings to the exhaust pipes, cata-
lytic converter or the heat shields on the ex-
haust system. Control and warning lamps
It lights up
fault in the pet-
rol engine man-
agement.Take the vehicle to a specialised
workshop as soon as possible and
have the engine checked.
It lights up
Fault in the
emission control
system.Reduce speed and drive carefully to
the nearest specialised workshop to
have the engine checked.
Flashes
Combustion
fault which could
damage the cat-
alytic converter.Reduce speed and drive carefully to
the nearest specialised workshop to
have the engine checked.
Several warning and control lamps light up
f
or a f
ew sec
onds when the ignition is switch-
ed on, signalling that the function is being
verified. They will switch off after a few sec-
onds. CAUTION
Always pay attention to any lit control lamps
and to the c orr
esponding descriptions and in-
structions to avoid damage to the vehicle. Note
While the or c
ontrol lamps remain lit,
the engine may have faults, there will be
higher fuel consumption and a possible loss
of engine power. 151
Technical data
Advice
Operation
Emergencies
Safety
Page 156 of 232
Operation
●
When cl e
aning the sensors with high-pres-
sure or steam cleaning equipment, spray the
sensors briefly at a distance of no less than
10 cm.
● Different sources of noise can produce er-
rors
in the parking distance warning system,
e.g. parking distance warning systems from
other vehicles, inductive loops or construc-
tion works machines.
● Retrofitting of components to the vehicle,
such a
s a bicycle carrier, may interfere with
the function of the parking distance warning
system. Parking distance warning system
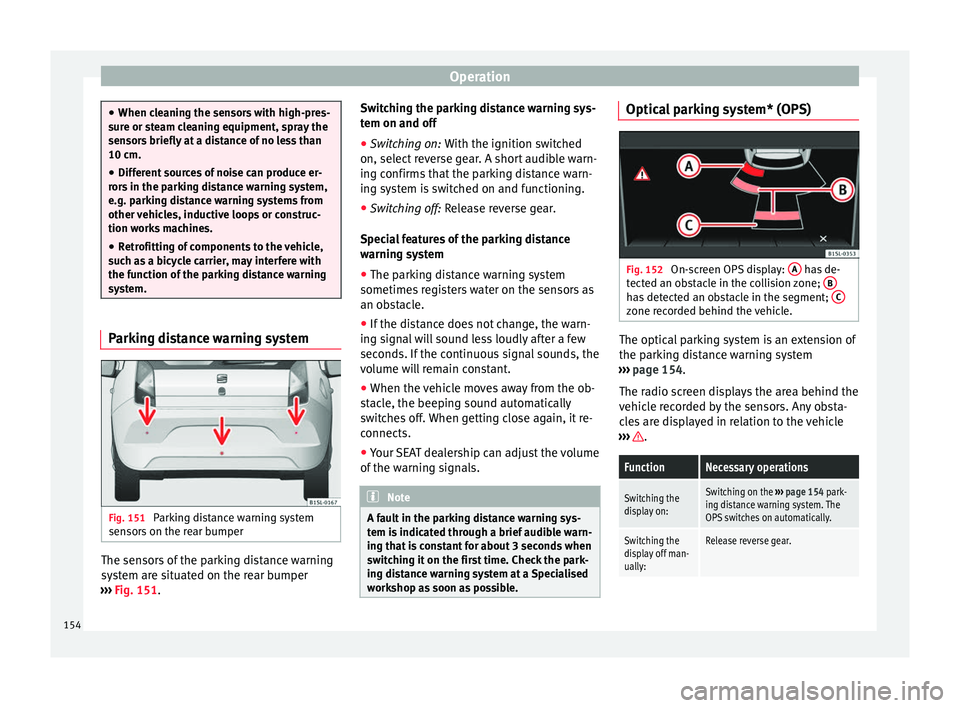
Fig. 151
Parking distance warning system
sen sor
s
on the rear bumper The sensors of the parking distance warning
sy
s
t
em are situated on the rear bumper
››› Fig. 151. Switching the parking distance warning sys-
tem on and off
●
Swit
ching on: With the ignition swit
ched
on, select reverse gear. A short audible warn-
ing confirms that the parking distance warn-
ing system is switched on and functioning.
● Switching off: Rele
ase reverse gear.
Special features of the parking distance
warning system
● The parking distance warning system
sometimes r
egisters water on the sensors as
an obstacle.
● If the distance does not change, the warn-
ing sign
al will sound less loudly after a few
seconds. If the continuous signal sounds, the
volume will remain constant.
● When the vehicle moves away from the ob-
stac
le, the beeping sound automatically
switches off. When getting close again, it re-
connects.
● Your SEAT dealership can adjust the volume
of the warnin
g signals. Note
A fault in the parking distance warning sys-
tem i s
indicated through a brief audible warn-
ing that is constant for about 3 seconds when
switching it on the first time. Check the park-
ing distance warning system at a Specialised
workshop as soon as possible. Optical parking system* (OPS)
Fig. 152
On-screen OPS display: A has de-
tect ed an o
bstacle in the collision zone; B has detected an obstacle in the segment;
C zone recorded behind the vehicle.
The optical parking system is an extension of
the p
ark
in
g distance warning system
››› page 154.
The radio screen displays the area behind the
vehicle recorded by the sensors. Any obsta-
cles are displayed in relation to the vehicle
››› .
FunctionNecessary operations
Switching the
display on:Switching on the
››› page 154 park-
ing distance warning system. The
OPS switches on automatically.
Switching the
display off man-
ually:Release reverse gear. 154
Page 157 of 232
Driver assistance systems
Zones explored
B ehind the
v
ehicle ››› Fig. 152 C , the zone
an aly
sed r
eaches a distance of up to 150 cm
and around 60 cm to the sides.
Screen display
The image displayed represents the super-
vised zones in several segments. As the vehi-
cle moves closer to an obstacle, the segment
moves closer to the vehicle displayed A or
B . When the penultimate segment is dis-
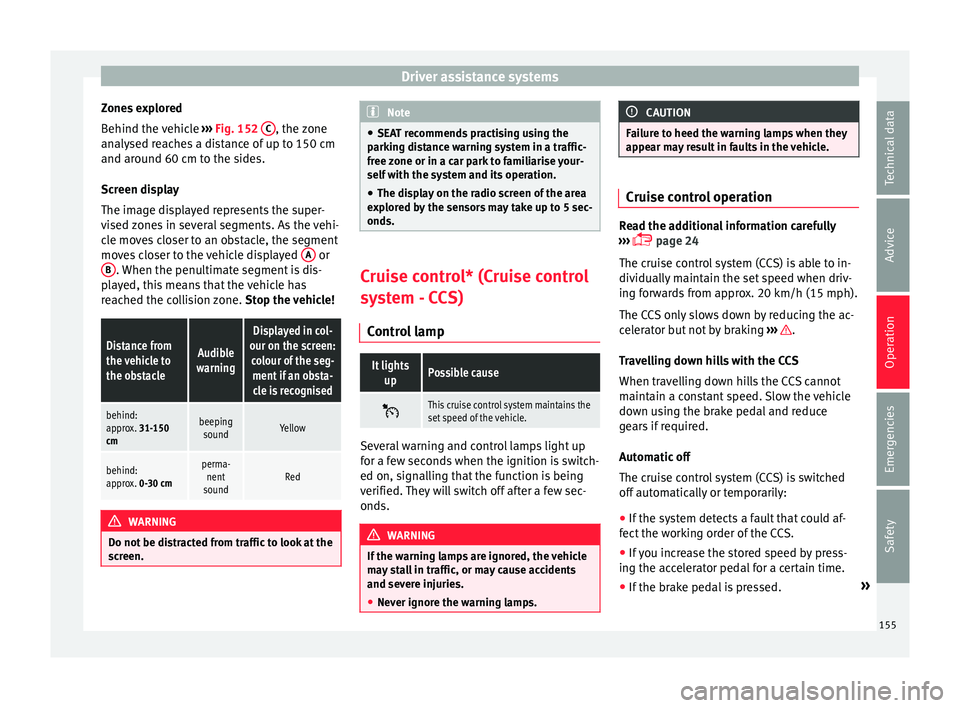
p l
a
yed, this means that the vehicle has
reached the collision zone. Stop the vehicle!
Distance from
the vehicle to
the obstacleAudible
warning
Displayed in col-
our on the screen: colour of the seg-ment if an obsta-cle is recognised
behind:
approx. 31-150
cmbeeping soundYellow
behind:
approx. 0-30 cmperma- nent
soundRed WARNING
Do not be distracted from traffic to look at the
sc r
een. Note
● SEA T r
ecommends practising using the
parking distance warning system in a traffic-
free zone or in a car park to familiarise your-
self with the system and its operation.
● The display on the radio screen of the area
explor
ed by the sensors may take up to 5 sec-
onds. Cruise control* (Cruise control
sys
t
em - CCS)
Control lamp
It lights upPossible cause
This cruise control system maintains the
set speed of the vehicle.
Several warning and control lamps light up
f
or a f
ew sec
onds when the ignition is switch-
ed on, signalling that the function is being
verified. They will switch off after a few sec-
onds. WARNING
If the warning lamps are ignored, the vehicle
ma y
stall in traffic, or may cause accidents
and severe injuries.
● Never ignore the warning lamps. CAUTION
Failure to heed the warning lamps when they
appe ar m
ay result in faults in the vehicle. Cruise control operation
Read the additional information carefully
›› ›
page 24
The cruise control system (CCS) is able to in-
dividually maintain the set speed when driv-
ing forwards from approx. 20 km/h (15 mph).
The CCS only slows down by reducing the ac-
celerator but not by braking ››› .
T r
av
elling down hills with the CCS
When travelling down hills the CCS cannot
maintain a constant speed. Slow the vehicle
down using the brake pedal and reduce
gears if required.
Automatic off
The cruise control system (CCS) is switched
off automatically or temporarily:
● If the system detects a fault that could af-
fect the w
orking order of the CCS.
● If you increase the stored speed by press-
ing the acc
elerator pedal for a certain time.
● If the brake pedal is pressed. »
155
Technical data
Advice
Operation
Emergencies
Safety
Page 159 of 232

Driver assistance systems
●
Any r
eparation of the laser sensor requires
specialist knowledge. SEAT recommends tak-
ing your car in for technical service. Note
● If the C ity
Safety Assist function activates a
brake, the brake pedal range is reduced. This
makes the brake pedal seem “harder”.
● Automatic brake intervention by the City
Safety As
sist function can be cancelled by
pressing the clutch pedal, the accelerator
pedal or by a corrective intervention.
● During automatic braking by the City Safety
Assi
st function you may hear unusual noises.
This is normal and is produced in the brake
system. Warning and control lamp
The City Safety Assist function is switched on
ev
er
y
time the ignition is switched on. No
special indication is produced.
If the City Safety Assist function is switched
off or on, or if there is an error in the system,
it will be shown by a control lamp on the in-
strument panel display.
It lights up
The City Safety Assist
function has been
switched on manual-
ly using the
button ››› Fig. 155.
The control lamp turns off after
about 5 seconds.
Flashes
Fast: The City Safety
Assist system func-
tion brakes automat-
ically or has braked
automatically.
Control lamp turns off automati-
cally.
Slow: City Safety As-
sist function is not
currently available.
If the vehicle is stopped, switch
off the engine and switch it on
again. If necessary, inspect the
laser sensor (dirt, frost)
›››
in
Laser sensor on page 158. If it
still does not function, refer to a
Specialised workshop to have
the system inspected.
Flashes
Within the operating
area of 5-30 km/h
(3-19 mph): the City
Safety Assist func-
tion has been
switched off manual-
ly using the
button
››› Fig. 155.
Switch on the City Safety Assist
function manually using the
button ››› Fig. 155. Several warning and control lamps should
light
up f
or a f
ew seconds when the ignition is switched on, signalling that the function is
being v
erified. They will switch off after a few
seconds. WARNING
If the warning lamps are ignored, the vehicle
ma y
stall in traffic, or may cause accidents
and severe injuries.
● Never ignore the warning lamps.
● Stop the vehicle safely as soon as possible. CAUTION
Failure to heed the warning lamps when they
appe ar m
ay result in faults in the vehicle. 157
Technical data
Advice
Operation
Emergencies
Safety
Page 163 of 232
Driver assistance systems
It lights up
The Start-Stop sys-
tem is enabled but
the engine cannot
be automatically
stopped.
Contact a specialised workshop.
It lights up
The Start-Stop sys-
tem cannot start the
engine.Start the engine by hand using
the vehicle's key
››› page 133.
There is a fault in the
alternator.››› page 196
Flashes
The Start-Stop sys-
tem is not available.Contact a specialised workshop.
Some warning and control lamps will light up
briefly
when the ignition i
s
switched on to
check certain functions. They will switch off
after a few seconds. WARNING
Observe the safety warnings ›››
in On the
ins trument
panel on page 26. Start-Stop system
Fig. 158
At the top of the centre console:
St ar
t
-Stop system button. With the Start-Stop system enabled, the en-
gine i
s
aut
omatically stopped when the vehi-
cle is at a standstill. It will start again auto-
matically as required.
This function remains enabled while the igni-
tion is switched on. The instrument panel dis-
play shows information on the current status
››› page 160.
Disconnect the Start-Stop system by hand
whenever crossing water.
Vehicles with a manual gearbox
● When the vehicle is stopped, put it into
neutral and r
elease the clutch pedal. The en-
gine will stop.
● To restart, simply engage the clutch. Vehicles with an automatic gearbox
●
When the vehicle is at a standstill, depress
the brake or k
eep it pressed down. The en-
gine switches off.
● The engine will start again as soon as you
rele
ase the brake pedal.
● With the selector lever set to position N,
the engine wi
ll not start until a range of gears
is selected or the accelerator pedal is de-
pressed.
Important conditions for the engine to stop
automatically
● The driver's seat belt must be fastened.
● The driver door must be closed.
● The bonnet must be closed.
● The engine must have reached a minimum
temperat
ure.
● The vehicle must have moved since the last
time the engine wa
s stopped.
● The vehicle's battery must be sufficiently
char
ged.
● The battery temperature must not be too
low or too high.
● The
vehicle must not be on a very steep
slope. »
161
Technical data
Advice
Operation
Emergencies
Safety
Page 184 of 232
Advice
●
In those c ou
ntries where unleaded petrol is
not available, you may refuel with a fuel with
a low lead content. Natural gas
Natural gas can be compressed or in liquid
form, a
d
dition to others.
Liquefied natural gas (LNG) is the result of
heavy cooling of natural gas. Therefore its
volume is considerably reduced compared
with compressed natural gas (CNG). In vehi-
cles with a natural gas engine, liquefied nat-
ural gas cannot be directly refilled, as the gas
would expand excessively in the vehicle gas
tank.
Therefore, vehicles with a natural gas engine
must only be refuelled using compressed
natural gas ››› .
Nat ur
a
l gas quality and consumption
Natural gas is divided into the groups H and
L depending on its quality.
Gas type H has a superior heating power and
inferior nitrogen and carbon dioxide content
than type L. The higher the heating power of
the natural gas, the lower the consumption
will be.
However, the heating power and the propor-
tion of nitrogen and carbon dioxide can fluc-
tuate within the quality groups. Therefore, ve- hicle consumption can also vary when using
a singl
e type of gas only.
The engine management automatically
adapts to the natural gas used according to
its quality. Therefore, different quality gases
can be mixed in the tank, without the need
for comprehensive draining before applying a
different quality gas.
Natural gas and safety
If you can smell gas or suspect that there is a
leak ››› :
● Stop the vehicle immediately.
● Switch the ignition off.
● Open the doors to appropriately ventilate
the v
ehic
le.
● Extinguish cigarettes immediately.
● Move away from the vehicle or switch off
obj
ects that may cause sparks or a fire.
● If you continue to smell gas, do not contin-
ue driving!
● Seek
specialist assistance. Have the fault
repair
ed.
Regular checks of the natural gas system
The natural gas tanks may be damaged or
corroded by external factors. The walls of the
gas tanks are weakened by deformations,
damage or corrosion. As a result, the tanks
could burst and result in serious injuries or even death. For this reason, the vehicle own-
er must
have a specialised workshop check
(visual check) the gas system every 4 years
at least . The vehicle owner must have a spe-
cialised workshop replace the natural gas
tanks before they reach the end of their serv-
ice life. For further information about the
service life of gas tanks, go to a SEAT dealer
service or a specialised workshop WARNING
Failure to act when you can smell gas in the
vehic l
e or when refuelling can cause serious
injuries.
● Carry out the necessary operations.
● Leave the danger zone.
● If necessary, warn the emergency services. WARNING
The vehicle is not prepared to use liquefied
nat ur
al gas (LNG) and this fuel must not be
added under any circumstances. Liquefied
natural gas can cause the natural gas tank to
explode, resulting in serious injury. WARNING
Damaged, corroded or rusted tanks can result
in serious injur
y or even death.
● Have the natural gas deposits checked at
lea
st every 4 years (visual check). 182
Page 185 of 232
Checking and refilling levels
●
Natur a
l gas tanks have a limited service
life. Have the natural gas tanks replaced
when required. You can obtain further infor-
mation about this at SEAT dealers or special-
ised workshops. WARNING
If the vehicle underbody touches the ground
or in the ev ent of
a rear collision, there could
be damage to the natural gas tanks.
● Check whether there is a smell of gas.
● If you notice a smell of gas, take the vehicle
to a spec
ialised workshop immediately and
have the natural gas system checked. Note
Have the natural gas system checked regular-
ly b y
a specialised workshop, according to
the Maintenance Programme. Filling the tank
Intr oduction The fuel tank flap is on the rear right of the
v
ehic
l
e. WARNING
Refuelling or handling fuel carelessly can
cau se an e
xplosion or fire resulting in serious
burns and injuries.
● Always make sure that you correctly close
the fuel c
ap to avoid evaporation and fuel
spillage.
● Fuels are highly explosive and inflammable
subs
tances that can cause serious burns and
injuries.
● Fuel could leak out or be spilt if the engine
is not
switched off or if the filler fuel nozzle is
not fully inserted into the tank filler neck
when refuelling. This could lead to a fire, ex-
plosion and severe injuries.
● When refuelling, turn off the engine and
turn off the ignition f
or safety reasons.
● Always turn off mobile telephones, radio
appar
atus and other radio wave emitting
equipment before refuelling. Electromagnetic
waves could cause sparks and lead to a fire.
● Never enter the vehicle while refuelling. If it
is ab
solutely necessary to enter, close the
door and touch a metal surface before touch-
ing the filler nozzle again. This will prevent
the generation of static electricity. Sparks
could cause a fire when refuelling.
● Never handle fuel close to flames, sparks or
obj
ects with slow combustion (e.g. ciga-
rettes).
● Avoid static electricity and electro-magnet-
ic ra
diation when refuelling. ●
Ob ser
ve the safety regulations of the serv-
ice station.
● Never spill fuel on the vehicle or in the lug-
gage c
ompartment. WARNING
For safety reasons, SEAT does not recommend
c arr y
ing a spare fuel canister in the vehicle.
Fuel could be spilled and catch fire, above all
in case of an accident and this applies to a
full container as well as empty containers.
This could lead to explosions, fires and inju-
ries.
● Observe the following if you exceptionally
have t
o carry fuel in a canister:
– Never place a fuel container, to fill it, in-
side the vehicle or on the vehicle, for ex-
ample, in the luggage compartment. Fill-
ing in these circumstances could create
an electrostatic charge and spark that
could ignite fuel fumes.
– Always place the canister on the ground
to fill it.
– Insert the fuel nozzle into the neck of the
canister as far as possible.
– If you are using a metal fuel canister, the
nozzle must always touch the canister
while it is being filled to avoid static elec-
tricity.
– Follow the legal requirements for the use,
storage and transport of spare fuel canis-
ters. » 183
Technical data
Advice
Operation
Emergencies
Safety
Page 186 of 232
Advice
–
Ins ur
e that the fuel container complies
with manufacturing standards, for exam-
ple, ANSI or ASTM F852-86. CAUTION
● Alw a
ys remove any fuel spilled anywhere
on the vehicle to avoid damage to the wheel
housing, the tyre and vehicle paintwork.
● Refuelling a petrol engine with diesel can
cause seriou
s engine and fuel system dam-
age; the resulting malfunctions are not cov-
ered by the SEAT warranty. If you refuel with
the wrong type of fuel, never start the engine.
This applies to even the smallest amount of
the wrong fuel. Seek specialist assistance.
With the engine running, the composition of
the wrong fuel could significantly damage the
fuel system and the engine itself. For the sake of the environment
Fuels can contaminate the environment. Col-
lect an
y spilt service fluids and allow a pro-
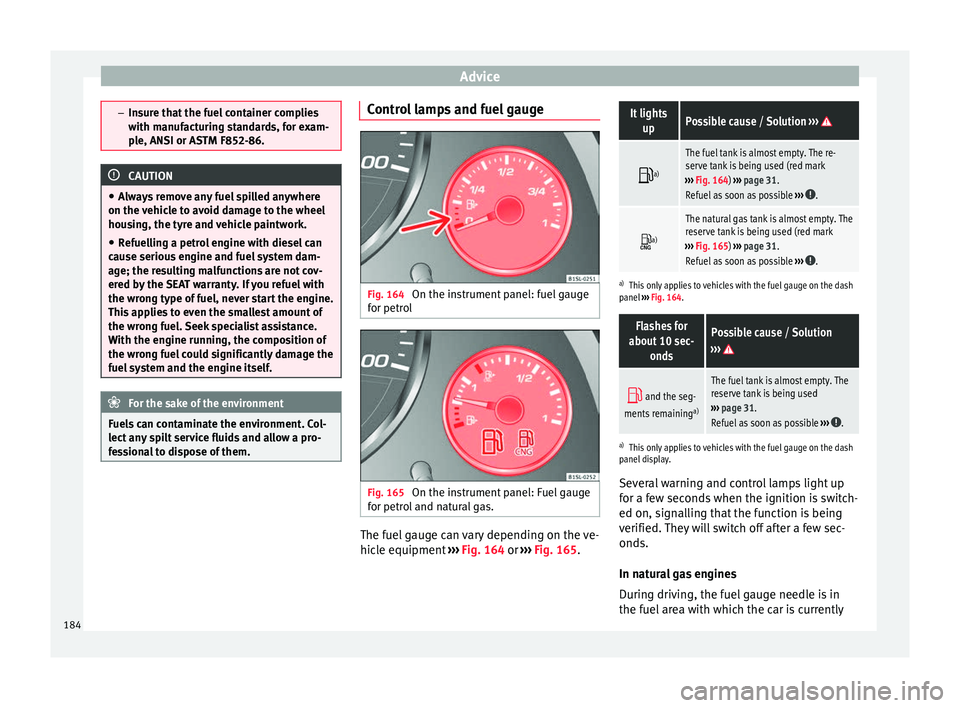
fessional to dispose of them. Control lamps and fuel gauge
Fig. 164
On the instrument panel: fuel gauge
f or petr
o
l Fig. 165
On the instrument panel: Fuel gauge
f or petr
o
l and natural gas. The fuel gauge can vary depending on the ve-
hic
l
e equipment
››› Fig. 164 or ››› Fig. 165.
It lights
upPossible cause / Solution ›››
a)
The fuel tank is almost empty. The re-
serve tank is being used (red mark
››› Fig. 164) ››› page 31.
Refuel as soon as possible ›››
.
a)
The natural gas tank is almost empty. The
reserve tank is being used (red mark
››› Fig. 165) ››› page 31.
Refuel as soon as possible ›››
.
a)
This only applies to vehicles with the fuel gauge on the dash
panel ››› Fig. 164.
Flashes for
about 10 sec- ondsPossible cause / Solution
›››
and the seg-
ments remaining a)The fuel tank is almost empty. The
reserve tank is being used
››› page 31.
Refuel as soon as possible ›››
.
a)
This only applies to vehicles with the fuel gauge on the dash
panel display.
Several warning and control lamps light up
for a few seconds when the ignition is switch-
ed on, signalling that the function is being
verified. They will switch off after a few sec-
onds.
In natural gas engines
During driving, the fuel gauge needle is in
the fuel area with which the car is currently
184