airbag Seat Toledo 2014 Owner's Guide
[x] Cancel search | Manufacturer: SEAT, Model Year: 2014, Model line: Toledo, Model: Seat Toledo 2014Pages: 200, PDF Size: 4.37 MB
Page 31 of 200
Controls and displays
Operation
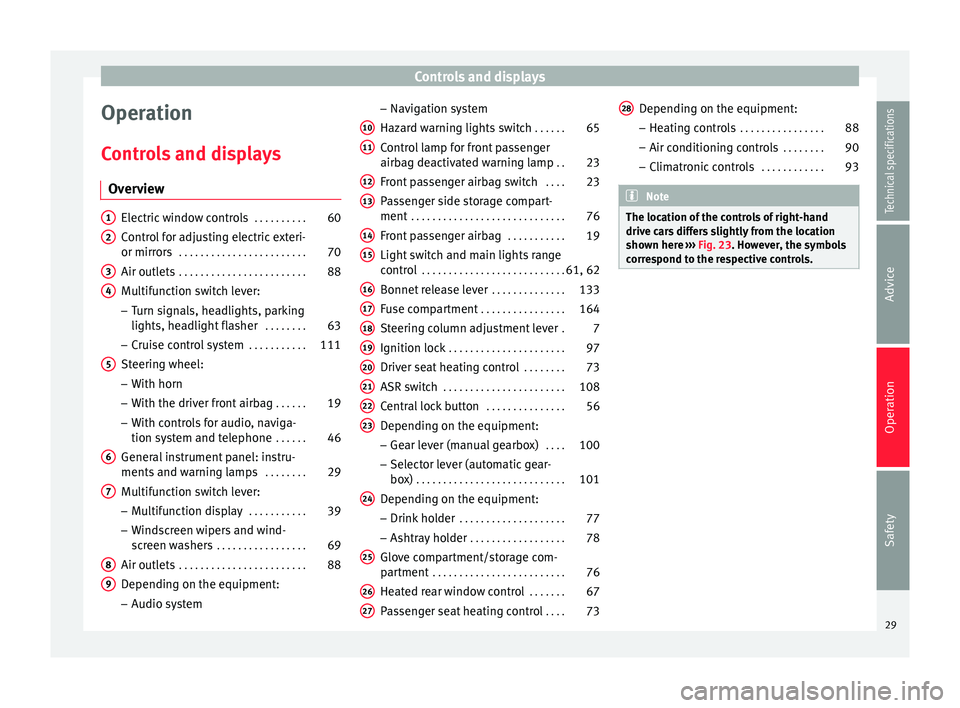
Controls and displays Overview Electric window controls
. . . . . . . . . .60
Control for adjusting electric exteri-
or mirrors . . . . . . . . . . . . . . . . . . . . . . . . 70
Air outlets . . . . . . . . . . . . . . . . . . . . . . . . 88
Multifunction switch lever:
– Turn signals, headlights, parking
lights, headlight flasher . . . . . . . .63
– Cruise control system . . . . . . . . . . .111
Steering wheel:
– With horn
– With the driver front airbag . . . . . .19
– With controls for audio, naviga-
tion system and telephone . . . . . .46
General instrument panel: instru-
ments and warning lamps . . . . . . . .29
Multifunction switch lever:
– Multifunction display . . . . . . . . . . .39
– Windscreen wipers and wind-
screen washers . . . . . . . . . . . . . . . . . 69
Air outlets . . . . . . . . . . . . . . . . . . . . . . . . 88
Depending on the equipment:
– Audio system
1 2
3
4
5
6
7
8
9 –
Navigation system
Hazard warning lights switch . . . . . .65
Control lamp for front passenger
airbag deactivated warning lamp . .23
Front passenger airbag switch . . . .23
Passenger side storage compart-
ment . . . . . . . . . . . . . . . . . . . . . . . . . . . . . 76
Front passenger airbag . . . . . . . . . . .19
Light switch and main lights range
control . . . . . . . . . . . . . . . . . . . . . . . . . . . 61, 62
Bonnet release lever . . . . . . . . . . . . . .133
Fuse compartment . . . . . . . . . . . . . . . . 164
Steering column adjustment lever .7
Ignition lock . . . . . . . . . . . . . . . . . . . . . . 97
Driver seat heating control . . . . . . . .73
ASR switch . . . . . . . . . . . . . . . . . . . . . . . 108
Central lock button . . . . . . . . . . . . . . .56
Depending on the equipment:
– Gear lever (manual gearbox) . . . .100
– Selector lever (automatic gear-
box) . . . . . . . . . . . . . . . . . . . . . . . . . . . . 101
Depending on the equipment:
– Drink holder . . . . . . . . . . . . . . . . . . . . 77
– Ashtray holder . . . . . . . . . . . . . . . . . . 78
Glove compartment/storage com-
partment . . . . . . . . . . . . . . . . . . . . . . . . . 76
Heated rear window control . . . . . . .67
Passenger seat heating control . . . .73
10 11
12
13
14
15
16
17
18
19
20
21
22
23
24
25
26
27 Depending on the equipment:
– Heating controls . . . . . . . . . . . . . . . . 88
– Air conditioning controls . . . . . . . .90
– Climatronic controls . . . . . . . . . . . .93 Note
The location of the controls of right-hand
drive cars differs slightly from the location
shown here ››› Fig. 23. However, the symbols
c orr
espond to the respective controls. 28
29
Technical specifications
Advice
Operation
Safety
Page 35 of 200
Instruments and warning lamps
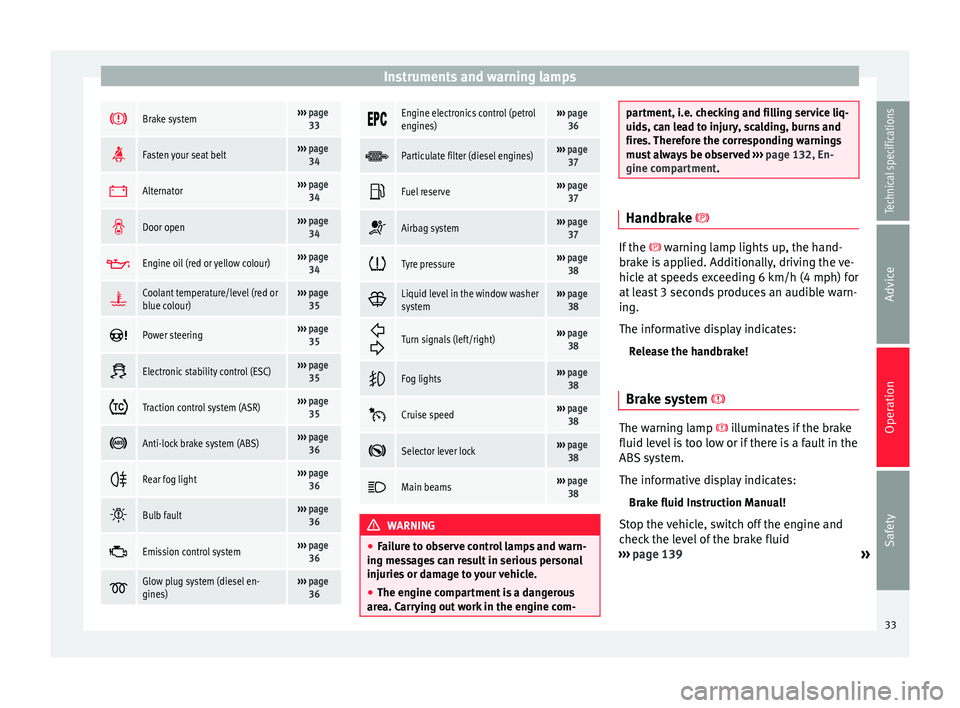
Brake system›››
page
33
Fasten your seat belt›››
page
34
Alternator›››
page
34
Door open›››
page
34
Engine oil (red or yellow colour)›››
page
34
Coolant temperature/level (red or
blue colour)›››
page
35
Power steering›››
page
35
Electronic stability control (ESC)›››
page
35
Traction control system (ASR)›››
page
35
Anti-lock brake system (ABS)›››
page
36
Rear fog light›››
page
36
Bulb fault›››
page
36
Emission control system›››
page
36
Glow plug system (diesel en-
gines)›››
page
36
Engine electronics control (petrol
engines)›››
page
36
Particulate filter (diesel engines)›››
page
37
Fuel reserve›››
page
37
Airbag system›››
page
37
Tyre pressure›››
page
38
Liquid level in the window washer
system›››
page
38
Turn signals (left/right)››› page
38
Fog lights›››
page
38
Cruise speed›››
page
38
Selector lever lock›››
page
38
Main beams›››
page
38 WARNING
● Failure to observe control lamps and warn-
ing messages can result in serious personal
injuries or damage to your vehicle.
● The engine compartment is a dangerous
area. Carrying out work in the engine com- partment, i.e. checking and filling service liq-
uids, can lead to injury, scalding, burns and
fires. Therefore the corresponding warnings
must always be observed
››› page 132, En-
gine compartment. Handbrake
If the
warning lamp lights up, the hand-
br ak
e is applied. Additionally, driving the ve-
hicle at speeds exceeding 6 km/h (4 mph) for
at least 3 seconds produces an audible warn-
ing.
The informative display indicates:
Release the handbrake!
Brake system The warning lamp
illuminates if the brake
fluid level is too low or if there is a fault in the
ABS system.
The informative display indicates:
Brake fluid Instruction Manual!
Stop the vehicle, switch off the engine and
check the level of the brake fluid
››› page 139
»
33
Technical specifications
Advice
Operation
Safety
Page 39 of 200

Instruments and warning lamps
Go to a technical service.
Particulate filter (diesel engines)The particulate filter eliminates soot from
emissions. The particles accumulate in the
filter where they are normally burned off.
If the warning lamp
is illuminated, the fil-
ter is obstructed by soot.
In order for the filter to clean itself (if the traf-
fic conditions ››› so permit) it is essential
to drive for at least 15 minutes (or until the
warning lamp switches off) with 4th or 5th
gear engaged (automatic gearbox: position
S) at a minimum speed of 60 km/h (37 mph)
with the engine speed between
1,800-2,500 rpm.
The warning lamp switches off once the
filter has been successfully cleaned.
If the cleaning process is not successful, the
warning lamp does not switch off and the
warning lamp starts to flash.
The informative display indicates:
Diesel particulate filter. Instruction Manual!
The engine control unit allows driving to con-
tinue in an emergency program. When
switching the ignition off and on again, the
warning lamp also illuminates.
Go to a technical service. WARNING
● The particulate filter attains very high tem-
peratures. Therefore, do not park the vehicle
in places where the exhaust pipe could come
into contact with dry grass or with highly-
flammable materials. Risk of fire! CAUTION
While the warning lamp is lit up, the fuel
c
onsumption is high, and in certain condi-
tions, the engine power is reduced. Note
● In order for the particulate filter to burn off
soot in a correct manner, avoid carrying out
frequent short journeys.
● Using diesel fuel with a high sulphur count
can considerably reduce the useful life of the
particulate filter. The specialised service pro-
vides information about the countries where
fuel with a high sulphur content is used. Fuel reserve
The warning lamp illuminates when ap-
proximately only 7 litres of fuel remain in the
tank
The informative display indicates:
Refuel! Fuel range…km...(miles) Note
The message on the display switches off only
after refuelling and carrying out a short jour-
ney. Airbag system
If the warning lamp
is lit up, there is a
f au
lt in the airbag system.
The informative display indicates: Airbag fault!
The airbag system availability is controlled
electronically, regardless of whether an air-
bag is disabled.
If the front airbag, side airbag, head protec-
tion airbag or the belt tensioner are disabled
using the diagnostics system:
● After switching on the ignition, the warn-
ing lamp illuminates for about 4 seconds and
flashes for another 12 seconds.
The informative display indicates:
Airbag/belt tensioner disabled! »
37
Technical specifications
Advice
Operation
Safety
Page 40 of 200
Operation
If the front passenger airbag has been disa-
bled with the airbag switch located in the
storage compartment side:
● When the ignition is turned on, the
warning lamp illuminates for about 4 sec-
onds.
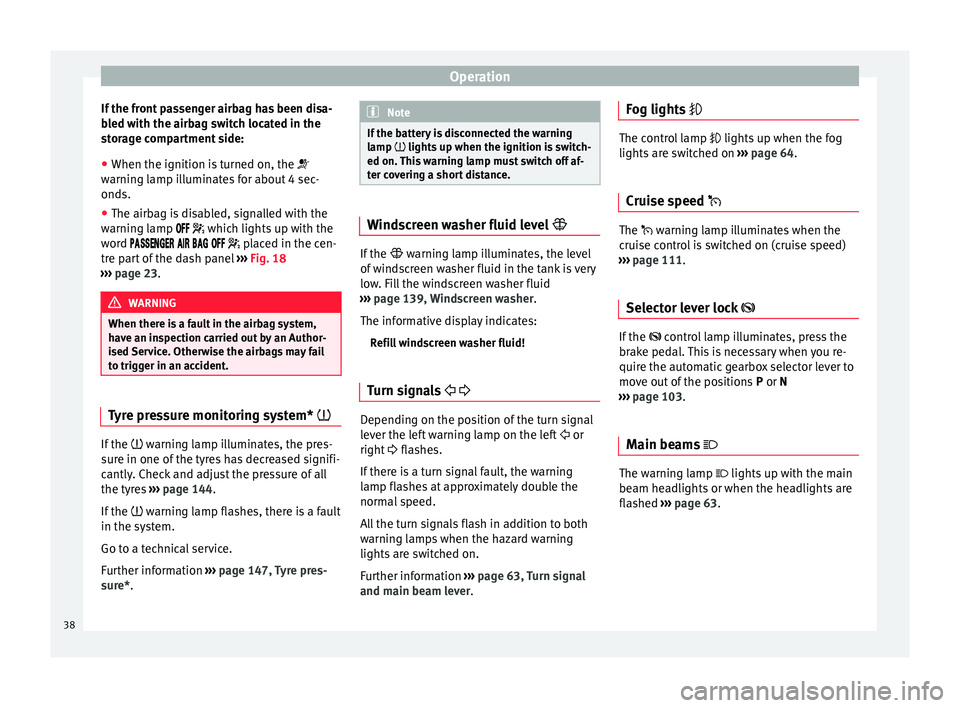
● The airbag is disabled, signalled with the
warning lamp
which lights up with the
word placed in the cen-
tre part of the dash panel ››› Fig. 18
››› page 23. WARNING
When there is a fault in the airbag system,
have an inspection carried out by an Author-
ised Service. Otherwise the airbags may fail
to trigger in an accident. Tyre pressure monitoring system*
If the
warning lamp illuminates, the pres-
sure in one of the tyres has decreased signifi-
cantly. Check and adjust the pressure of all
the tyres ›››
page 144 .
If the
warning lamp flashes, there is a fault
in the system.
Go to a technical service.
Further information ›››
page 147, Tyre pres-
sure*
. Note
If the battery is disconnected the warning
lamp lights up when the ignition is switch-
ed on.
This warning lamp must switch off af-
ter covering a short distance. Windscreen washer fluid level
If the
warning lamp illuminates, the level
of w
indscreen washer fluid in the tank is very
low. Fill the windscreen washer fluid
››› page 139, Windscreen washer.
The informative display indicates: Refill windscreen washer fluid!
Turn signals Depending on the position of the turn signal
lever the left warning lamp on the left
or
right flashes.
If there is a turn signal fault, the warning
lamp flashes at approximately double the
normal speed.
All the turn signals flash in addition to both
warning lamps when the hazard warning
lights are switched on.
Further information ›››
page 63, Turn signal
and main beam lever. Fog lights
The control lamp
lights up when the fog
lights are switched on ››› page 64.
Cruise speed The warning lamp illuminates when the
cruise control is switched on (cruise speed)
››› page 111.
Sel ect
or lever lock If the
control lamp illuminates, press the
brake pedal. This is necessary when you re-
quire the automatic gearbox selector lever to
move out of the positions P or
N
›
›› page 103.
Main be
ams The warning lamp lights up with the main
beam headlights or when the headlights are
flashed
›››
page 63 .38
Page 67 of 200

Lights and visibility
“Coming Home”/“Leaving Home”*
function This function makes it possible, under poor
visibility conditions, to automatically turn on
the lights for a brief period of time after the
vehicle has been parked or when approach-
ing the vehicle.
The function is automatically turned on if the
following conditions are met:
● The light switch is in position
››› page 63
.
● The v
isibility around the vehicle is reduced.
● The ignition is switched off.
To turn on this function, switch on the head-
light flasher prior to exiting the vehicle.
The light is adjusted according to the data re-
corded by the light sensor that is installed
between the windscreen and the inside rear
view mirror.
The function automatically turns on the side
lights and headlights, the lighting for the en-
try area on the exterior mirrors and the num-
ber plate light.
“Coming Home” function
The light is automatically switched on when
the driver door is opened (for 60 seconds af-
ter the ignition is switched off). The lights is switched off when all the doors
and the boot lid are closed.
If a door or the boot lid remains open, the
light will switch off after 60 seconds.
“Leaving Home” function
The light is automatically switched on when
the vehicle is unlocked using the remote con-
trol.
The light is switched off after 10 seconds or
when the vehicle is locked.
Hazard warning light switch Fig. 49
Instrument panel: switch for hazard
warning lights. –
Press the button ››› Fig. 49 to switch the
h az
ard warning lights on or off.
The warning lamps on the instrument panel
and the warning lamp on the switch will flash at the same time as the turn signals when
the hazard warning lights are switched on.
The hazard warning lights also work when
the ignition is switched off.
The hazard warning lights come on automati-
cally in the event of an accident in which an
airbag is triggered.
Note
Switch on the hazard warning lights to warn
other road users, for example:
● When reaching the tail end of a traffic jam
● if the vehicle has a technical fault or you
are involved in an emergency situation. Parking lights*
Parking lights
– Switch the ignition off.
– Move the turn signal lever ›››
Fig. 47
››› page 63 up or down to turn on the right
or l ef
t-hand parking lights respectively.
Parking light on both sides – Turn the light switch ›››
Fig. 45
››
› page 61 to position and eng age the
steering lock. »
65
Technical specifications
Advice
Operation
Safety
Page 70 of 200

Operation
Note
In the event of a drop in voltage in the on-
board systems, the heated rear window
switches off automatically to ensure enough
power to control the engine ››› page 143, Au-
tomatic disconnection of electrical equip-
ment. Sun visors
Fig. 54
Driver's sun visor. Fig. 55
Front passenger's sun visor. The sun visors for the driver and the front
passenger can be pulled out of their central
supports and turned towards the doors in the
direction of arrow
1
››› Fig. 54 and 2 ›››
Fig. 55 respectively.
The s trip A is to store small objects such as
notepaper, etc.
The front passenger sun visor includes a van-
ity mirror B with a cover. The cover is
opened by sliding it in the direction indicated
by arrow 3
››› Fig. 55 . WARNING
Do not turn sun visors with attached objects
such as ball-pens, etc. toward the head pro-
tection airbag triggering zone on the side
windows. The head protection airbags could
injure occupants if triggered. Windscreen wipers and
windscreen washers
Introduction The windscreen wipers and windscreen
washers only work when the ignition is
switched on.
The speed of the automatic wipe in case of
rain is automatically adjusted according to
the intensity of the rainfall.The rear window is wiped once if the wind-
screen wipers are switched on and reverse
gear is engaged.
Fill the windscreen washer fluid
››› page 139. WARNING
● Make sure the blades ››› page 162 are in
perfect condition for good visibility and safe
driving.
● In cold conditions, you should not use the
wash/wipe system unless you have warmed
the windscreen with the heating and ventila-
tion system. The windscreen washer fluid
could otherwise freeze on the windscreen and
obscure your view of the road. CAUTION
● During winter, always check that the wind-
screen wiper blades are not frozen to the
glass before each trip or before switching on
the ignition. If you switch on the windscreen
wipers when the wiper blades are frozen to
the glass, this could damage both the wiper
blades and the wiper motor.
● If the ignition is switched off when the
windscreen wipers are on, they will start op-
erating in the same mode when the ignition
is switched back on. The wiper blades may be
frozen to the glass at low temperatures when
the ignition is switched off.
● Carefully separate the frozen wipers from
the windscreen or rear window. 68
Page 73 of 200

Seats and head restraints
●
Do not touch the exterior mirrors when the
heating system is running.
● If the electrical adjustment should ever fail
to operate, the rear vision mirrors can be ad-
justed by hand by pressing the edge of the
mirror glass.
● Visit the technical service in the event of a
fault in the electrical rear vision mirror ad-
justment system. Seats and head restraints
Adjusting seats and head
restraints
Introduction Set the driver seat in such a way that the
pedals can be fully depressed with your legs
slightly bent.
Set the driver seat backrest so that you can
reach the upper point of the steering wheel
with your arms slightly bent.
The correct seat position is very important
for:
●
reaching all of the controls safely and
quickly,
● a relaxed posture that will not produce fati-
gue,
● maximum protection from the seat belts
and airbag system WARNING
● Adjust the driver seat only when the vehi-
cle is stationary. Risk of accident!
● Be careful when adjusting the front seats!
Careless and uncontrolled adjustment can
cause injuries. ●
The backrests must not be reclined too far
back while driving. This could limit the effect
of the seat belts and the airbag system. Risk
of injury!
● Never transport more than the permitted
amount of people in your vehicle.
● Every occupant in the vehicle must properly
fasten and wear the seat belt belonging to
his or her seat. Children must be protected
with an appropriate child restraint system
››› page 24, Transporting children safety.
● The front seats, head restraints and seat
belts must always be adjusted to the size of
the vehicle occupant to provide you and your
passengers with the greatest possible protec-
tion.
● Your feet should remain in the footwell
while the vehicle is moving; never rest them
on the dash panel, on the window or on the
seat! This also applies to passengers. An in-
correct sitting position exposes you to an in-
creased risk of injury in case of a sudden
braking or an accident. If the airbag is trig-
gered, you could sustain severe injuries due
to an incorrect sitting position!
● It is important for the driver and front pas-
senger to keep a distance of at least 25 cm
from the steering wheel and dash panel. Fail-
ure to respect the minimum distance means
that the airbag will not protect you. Risk of
fatal injury if triggered!
● Objects must not be placed in the footwell,
as they could move to the area of the pedals
in the event of a braking manoeuvre or
change of direction. This would prevent the » 71Technical specifications
Advice
Operation
Safety
Page 82 of 200
Operation
Storage compartment for
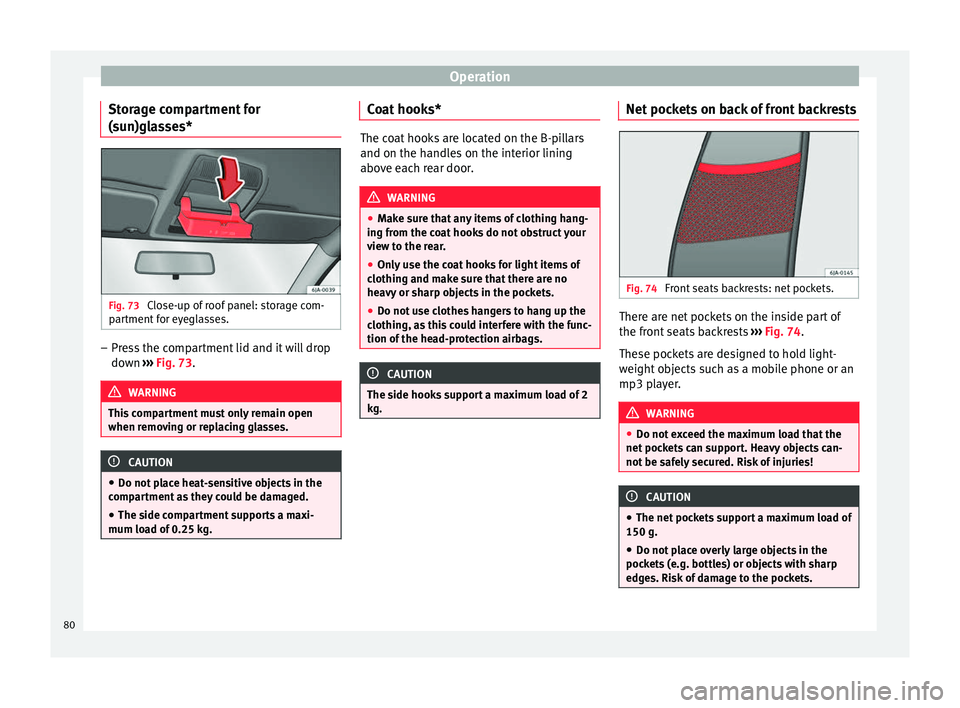
(sun)glasses* Fig. 73
Close-up of roof panel: storage com-
partment for eyeglasses. –
Press the compartment lid and it will drop
down ››› Fig. 73 . WARNING
This compartment must only remain open
when removing or replacing glasses. CAUTION
● Do not place heat-sensitive objects in the
compartment as they could be damaged.
● The side compartment supports a maxi-
mum load of 0.25 kg. Coat hooks*
The coat hooks are located on the B-pillars
and on the handles on the interior lining
above each rear door.
WARNING
● Make sure that any items of clothing hang-
ing from the coat hooks do not obstruct your
view to the rear.
● Only use the coat hooks for light items of
clothing and make sure that there are no
heavy or sharp objects in the pockets.
● Do not use clothes hangers to hang up the
clothing, as this could interfere with the func-
tion of the head-protection airbags. CAUTION
The side hooks support a maximum load of 2
kg. Net pockets on back of front backrests
Fig. 74
Front seats backrests: net pockets. There are net pockets on the inside part of
the front seats backrests
››› Fig. 74 .
The se poc
kets are designed to hold light-
weight objects such as a mobile phone or an
mp3 player. WARNING
● Do not exceed the maximum load that the
net pockets can support. Heavy objects can-
not be safely secured. Risk of injuries! CAUTION
● The net pockets support a maximum load of
150 g.
● Do not place overly large objects in the
pockets (e.g. bottles) or objects with sharp
edges. Risk of damage to the pockets. 80
Page 83 of 200

Transport and practical equipment
Storage compartments in centre
console Fig. 75
Centre console: storage compartment Open storage compartment in centre console
››› Fig. 75 .
St or
age compartment in front door Fig. 76
Storage compartment in door trim. There is a bottle carrier in part
B
››› Fig. 76
of the storage compartment in the front door. WARNING
Only use part A
››› Fig. 76 of the compart-
ment in the fr
ont door to store objects that do
not protrude from it so as not obstruct the de-
ployment area of the side airbags. Storage compartment in luggage
compartment*
Fig. 77
Luggage compartment: storage com-
partment The lid from the side storage compartment
can be removed to increase the size of the
boot.
– Hold onto the top of the lid and pull it out
in the direction indicated by the arrow
››› Fig. 77 . CAUTION
● The compartments are designed to hold
small objects with a total weight of 1.5 kg.
● Make sure you do not damage the storage
compartment or the boot trim when using the
compartment. Storing objects
Loading the luggage compartment All luggage and other loose objects must be
safely secured in the luggage compartment.
Unsecured objects which shift back and forth
could impair the driving safety or driving
characteristics of the vehicle by shifting the
centre of gravity.
– Distribute the load evenly in the luggage
compartment.
– Place heavy objects as far forward as possi-
ble in the luggage compartment.
– Place the heavy objects first.
– Secure heavy objects to the fastening rings
››› page 82 . WARNING
● Loose luggage and other objects in the lug-
gage compartment could cause serious inju-
ries. » 81
Technical specifications
Advice
Operation
Safety
Page 85 of 200
Transport and practical equipment
During an accident, even small and light ob-
jects can have so much kinetic energy that
they can cause very severe injuries. The
amount of kinetic energy depends on the
speed of the vehicle and the weight of the
object. However, the speed of the vehicle is
the most important factor.
Example: An unsecured object weighing 4.5
kg produces energy corresponding to 20
times its weight in a frontal collision at 50
km/h (31 mph). This means that its weight
reaches around 90 kg. You can imagine the
severity of the injuries that might be sus-
tained if this “projectile” strikes an occupant
as it flies through the vehicle interior. WARNING
● Store objects in the luggage compartment
and secure to the fastening points.
● In an accident or sudden manoeuvre, loose
objects in the interior can be flung forward
and possibly injure vehicle occupants or oth-
ers. This risk is even greater if the flying ob-
jects hit a triggering airbag. In this case, any
rebounding objects could injure vehicle occu-
pants. Risk of fatal injuries!
● Take into account that transporting heavy
objects changes the centre of gravity that
could also cause changes in vehicle handling.
Risk of accident! Therefore, always adjust
your speed and driving style to suit these cir-
cumstances. ●
Securing the load to the rings using unsuit-
able or damaged straps could lead to injuries
in the event of an accident or sudden braking
manoeuvre. Secure suitable straps safely to
the rings to ensure this does not happen.
● Position the load so it cannot move forward
during a sudden braking manoeuvre. Risk of
injuries!
● If transporting sharp or dangerous objects
in the space provided when the rear seats are
folded, ensure the safety of the occupant of
the remaining rear seat ››› page 8.
● If the r
ear seat located alongside a folded
seat is occupied, ensure safety, for example,
by placing the load so that it stops the seat
from folding backward in the event of being
hit from behind.
● Never drive with the rear lid open or half-
closed, exhaust gases may penetrate into the
interior of the vehicle. Danger of poisoning!
● Never exceed the allowed axle loads or al-
lowed maximum weight. Risk of accident!
● Never transport passengers in the luggage
compartment! CAUTION
Make sure sharp objects stored in the boot
cannot not damage the rear window heating
filaments. Note
Tyre pressure must be adapted to suit the
load ››› page 144, Life cycle of tyres . Category N1 vehicles
Category N1 vehicles with no protection grille
must use a retaining set compliant with
Standard EN 12195 (1 – 4) to secure the
load.
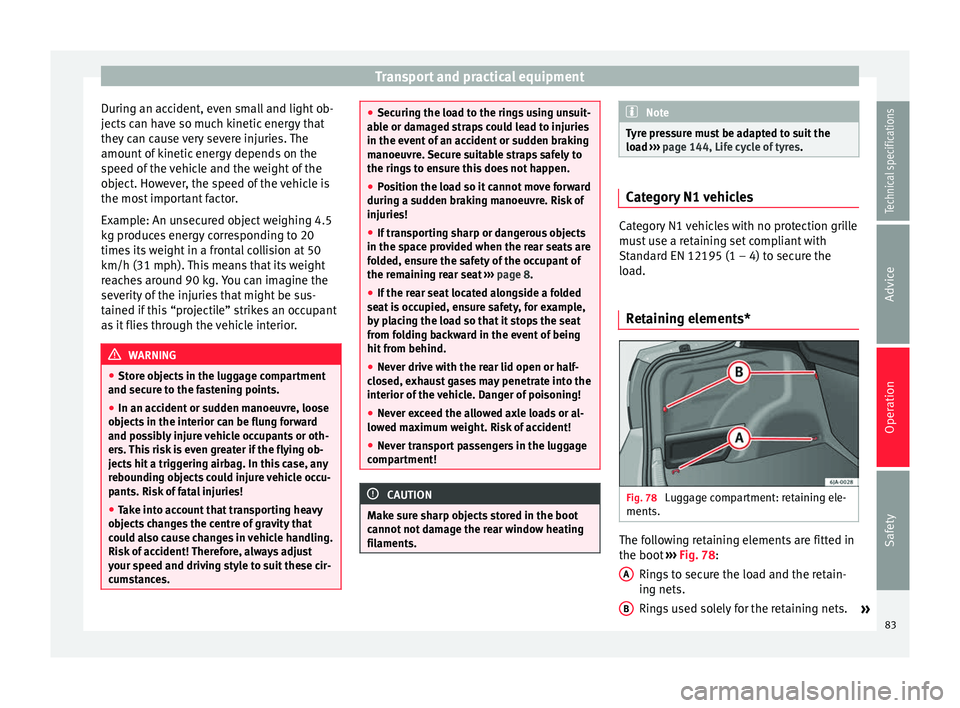
Retaining elements* Fig. 78
Luggage compartment: retaining ele-
ments. The following retaining elements are fitted in
the boot
›››
Fig. 78 :
Rin g
s to secure the load and the retain-
ing nets.
Rings used solely for the retaining nets. »
A B
83
Technical specifications
Advice
Operation
Safety