ECU Seat Toledo 2017 MEDIA SYSTEM PLUS - NAVI SYSTEM - NAVI SYSTEM PLUS
[x] Cancel search | Manufacturer: SEAT, Model Year: 2017, Model line: Toledo, Model: Seat Toledo 2017Pages: 108, PDF Size: 2.84 MB
Page 20 of 108
Connectivity
Connectivity Dat a tr
an
sferThis communication can allow data to be
re
a
d and/or written.
From the SETTINGS menu > Data transfer for
SEAT apps, there is a checkbox to acti-
vate/deactivate the function and a dropdown
menu called Operation via apps which con-
trols the level of interaction between the
apps and the system ››› table on page 92.
Related video Fig. 13
Full Link (Toledo) Fig. 14
Connectivity
(Atec a) Full Link*
Fu
l
l Link technology description The Full Link system provides a way of bring-
ing t
og
ether technologies that allow commu-
nication between the Infotainment System
and mobile devices:
● MirrorLink ®
● Android Auto™
● Apple CarPlay™
Interf
aces
Depending on the versions, to access the Full
Link system press the APP
› ›
› Fig. 2 7 button
of the Inf
ot
ainment system or press the Info-
tainment MENU button
››
›
Fig. 1 9 and then
pr e
s
s the Full Link icon.
The connection to Full Link is made through a
USB interface. WARNING
If a mobile terminal is not secured or is incor-
rectly sec
ured in the vehicle, it could move
around the passenger compartment in the
event of a sudden driving manoeuvre, emer-
gency stop or accident, resulting in injury.
● While driving, mobile terminals must be se-
curely
fastened in position, outside the air-
bag deployment zones, or safely stowed
away. WARNING
Any applications that are not suitable or exe-
cut e inc
orrectly may cause damage to the ve-
hicle, accidents and serious injuries.
● SEAT recommends the use of the Apps that
SEAT pr
ovides for this vehicle.
● To make full use of SEAT Apps, you must ac-
tivate the option
Setup, “Data transfer for
SEAT apps” ››› page 92.
● The interaction level of the Apps on the
syst
em must be: ALLOW.
● Protect the mobile terminal with its appli-
cations
from improper use.
● Never make modifications to the applica-
tions.
● Con
sult the instruction manual for the mo-
bil
e terminal. WARNING
The use of applications while driving can dis-
tract
your attention from the traffic. Distract-
ing the driver in any way can lead to an acci-
dent and cause injuries.
● Always drive carefully and responsibly. CAUTION
● In are a
s where special regulations apply or
the use of mobile terminals is forbidden, the
mobile terminal must be switched off at all
times. The radiation produced by the mobile
terminal when switched on may interfere with 18
Page 30 of 108
Connectivity
Note
● Data tr an
smission may incur charges. Due
to the high volume of data exchanged, SEAT
recommends the use of a flat rate mobile
phone deal for data transmission. Mobile
phone operators can provide the relevant in-
formation.
● The exchange of data packages over the in-
ternet m
ay generate additional costs, de-
pending on your mobile phone rate, particu-
larly if you are abroad (for example, roaming
rates). Configure WLAN hotspot
The Infotainment System can be used as a
w
ir
el
ess hotspot to connect up to 8 wireless
devices.
Establishing the connection with the wire-
less network (WLAN)
● Press the Infotainment MENU button and
then pr
ess the SETTINGS menu.
● Activate the wireless network (WLAN) on
the Infotainment
System. To do so, press the
WLAN function button.
● Activate the wireless network (WLAN) on
the wirel
ess device that is to be connected. If
necessary, refer to the manufacturer’s in-
struction manual. ●
Activat
e the mobile device assignment on
the Infotainment System. To do so, press the
Mobile hotspot function button and activate
the checkbox.
● Enter and confirm the network key dis-
pla
yed on the wireless device.
The following hotspot settings can also be
made on the Hotspot settings menu:
WPA2 encryption automatical-
ly generates a network key.
Network key automatically gen-
erated. Press the function button to
manually change the network key. The
network key must have a minimum of 8
characters and a maximum of 63.
WLAN Network name (maximum of 32
characters).
Activate
the checkbox to deactivate the visibility
of the wireless (WLAN) network.
The wireless (WLAN) connection is establish-
ed. To complete the connection, it may be
necessary to enter other data into the wire-
less device.
Repeat this process to connect other wireless
devices. Security level:
Network key:
SSID:
Do not send network name (SSID): Configuring internet access The Infotainment System can use the WLAN
hotspot
of
an external wireless device to es-
tablish an internet connection.
Establishing the connection with the wire-
less network (WLAN)
● Activate the wireless hotspot on the exter-
nal dev
ice. If necessary, refer to the manufac-
turer’s instruction manual.
● Press the Infotainment MENU button and
then pr
ess the SETTINGS menu; OR access
Media or SEAT Media Control mode and
press the SETTINGS menu.
● Press the WLAN menu and then enter IN-
TERNET A
CCESS SETTINGS and activate the
checkbox.
● Press the Find f
unction button and select
the wireless device you want from the list.
● If necessary, enter the network key of the
wirel
ess device in the Infotainment System
and confirm with OK.
To manually enter the net-
work settings of an external wireless
(WLAN) device.
The wireless (WLAN) connection is establish-
ed. To complete the connection, it may be
necessary to enter other data into the wire-
less device. Manual settings:
28
Page 56 of 108
Audio and Media Mode
● Pr e
s
s the Configuration function button
to configure the WLAN network.
Function button: function
Mobile hotspot: To switch the WLAN network on/off.
Security level: WPA2 encryption automatically gener-
ates an 8-character network key.
Network key: Network key automatically generated.
Press the function button to manually change the
network key. The network key must have a minimum
of 8 characters and a maximum of 63.
SSID: Name of the Infotainment system WLAN net-
work.
Do not send network name (SSID): Activate the check-
box to deactivate the visibility of the WLAN network. To save the changes made to the mobile hot-
s
pot
c
onfiguration, press the STORE button.DVD video mode 3 Only available for the model: Navi System Plus
Fig. 43
DVD main menu. Fig. 44
DVD mode control menu. DVD video regional code
Quit
e of
t
en, the playback of DVD video is
limited to certain regions (for example, to the
US and Canada) by so-called “region codes”.
These DVDs can only be played on units that
are coded for the same region. The unit's DVD drive is configured to read the
region
al code for the region in which the ve-
hicle was originally sold.
Start DVD mode
● Insert a compatible DVD in the DVD drive.
The rea
ding of DVD data may take a few sec-
onds.
The DVD's “intro” (short initial sequence) is
played. Next, the different DVD menus are
displayed.
Controlling the DVD menu
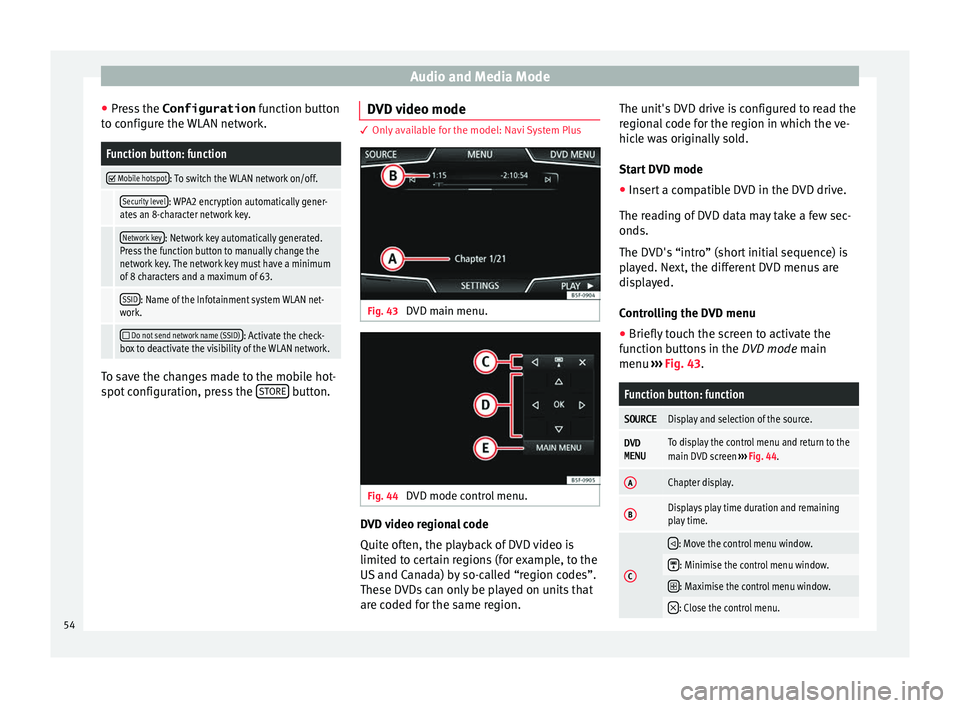
● Briefly touch the screen to activate the
function b
uttons in the DVD mode main
menu ››› Fig. 43.
Function button: function
SOURCEDisplay and selection of the source.
DVD
MENUTo display the control menu and return to the
main DVD screen ››› Fig. 44.
AChapter display.
BDisplays play time duration and remaining
play time.
C
: Move the control menu window.
: Minimise the control menu window.
: Maximise the control menu window.
: Close the control menu.
54
Page 81 of 108
Telephone management system (PHONE)
Telephone management sys-
t em (PHONE)
Intr oduction t
o the telephone
management system
Related video Fig. 71
Telephone man-
agement sy
stem
(Toledo) Fig. 72
Telephone man-
agement sy
stem (Ateca) General information
The Telephone functions described below
c
an be u
sed thr
ough the Infotainment system
if there is a mobile telephone connected to it
via Bluetooth ®
›››
page 81. In order for the mobile telephone to be able
to connect
to the Infotainment system the tel-
ephone must be equipped with Bluetooth®
.
If there is no mobile telephone connected to
the Infotainment system, the telephone man-
agement system will not be available.
The instructions shown on the screen for the
telephone menus will depend on the mobile
telephone used. There may be variations.
Only use compatible Bluetooth ®
devices. For
further information on compatible Blue-
tooth ®
products, ask your nearest SEAT deal-
er or check on the internet.
Use the instruction manual of the mobile tel-
ephone and of any accessories.
If you detect any operating issues between
your mobile telephone and the Infotainment
system, restart your mobile by switching it off
and on again.
You may experience poor reception or may be
cut off in areas where the signal is weak.
Most electronic devices are shielded against
HF (high-frequency) signals. In any case, the
electronic equipment may not be protected
from the HF signals of the telephone man-
agement system. This may cause interfer-
ence. WARNING
Speaking by telephone and operating the mo-
bi l
e telephone whilst driving can distract you
from the road and cause an accident.
● Always drive carefully and responsibly.
● Select volume settings that allow you to
eas
ily hear signals from outside the vehicle
at all times (e.g. emergency services sirens
and horns).
● In areas of little or no coverage or, in some
case
s, in a tunnel, garage or underpass, your
call may be cut off and you may not be able to
make even emergency calls. WARNING
If a mobile telephone is not secured or is in-
corr ectly
secured in the vehicle, it could move
around the passenger compartment in the
event of a sudden driving manoeuvre or emer-
gency stop, resulting in injury.
● While the vehicle is in motion, always se-
cure the mo
bile telephone properly outside
the airbag deployment zone. WARNING
Mobile telephones may interfere with and al-
ter the c orr
ect operation of pacemakers if
they are carried directly over them.
● Maintain a minimum distance of at least
20 centimetre
s between the aerials of the » 79
Page 94 of 108
Setup
Setup
M enu and sy
s
tem settings
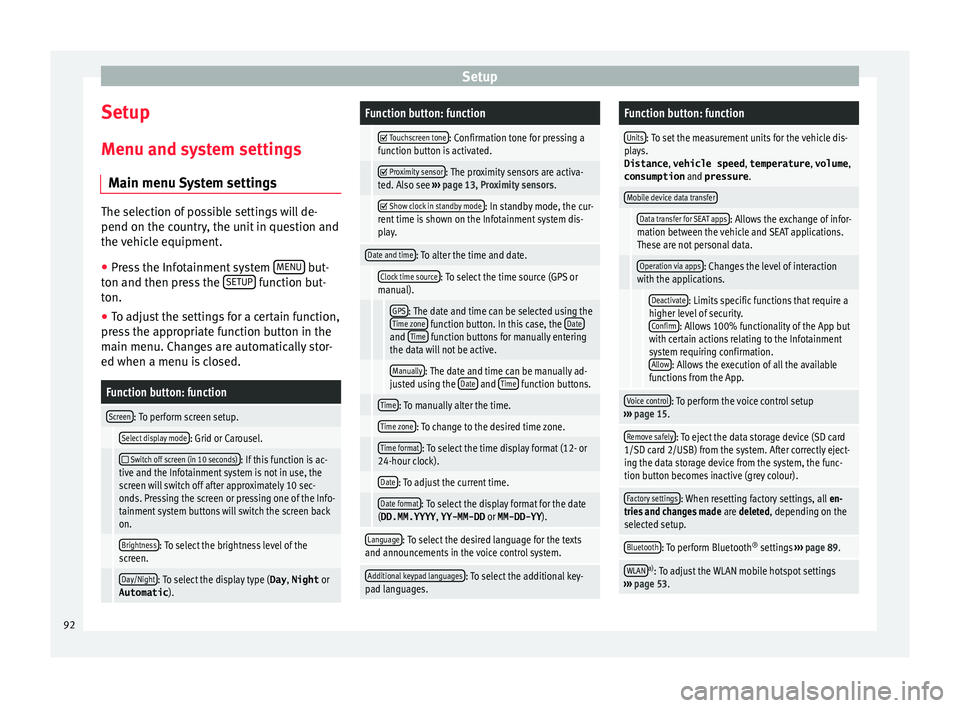
Main menu System settings The selection of possible settings will de-
pend on the cou
ntr
y, the unit in question and
the vehicle equipment.
● Press the Infotainment system MENU but-
ton and then pr e
ss the SETUP function but-
ton.
● To a
djust the settings for a certain function,
pre s
s the appropriate function button in the
main menu. Changes are automatically stor-
ed when a menu is closed.
Function button: function
Screen: To perform screen setup.
Select display mode: Grid or Carousel.
Switch off screen (in 10 seconds): If this function is ac-
tive and the Infotainment system is not in use, the
screen will switch off after approximately 10 sec-
onds. Pressing the screen or pressing one of the Info-
tainment system buttons will switch the screen back
on.
Brightness: To select the brightness level of the
screen.
Day/Night: To select the display type ( Day, Night or
Automatic ).
Function button: function
Touchscreen tone: Confirmation tone for pressing a
function button is activated.
Proximity sensor: The proximity sensors are activa-
ted. Also see ››› page 13, Proximity sensors .
Show clock in standby mode: In standby mode, the cur-
rent time is shown on the Infotainment system dis-
play.
Date and time: To alter the time and date.
Clock time source: To select the time source (GPS or
manual).
GPS: The date and time can be selected using the
Time zone function button. In this case, the Dateand Time function buttons for manually entering
the data will not be active.
Manually: The date and time can be manually ad-
justed using the Date and Time function buttons.
Time: To manually alter the time.
Time zone: To change to the desired time zone.
Time format: To select the time display format (12- or
24-hour clock).
Date: To adjust the current time.
Date format: To select the display format for the date
(DD.MM.YYYY , YY-MM-DD or MM-DD-YY ).
Language: To select the desired language for the texts
and announcements in the voice control system.
Additional keypad languages: To select the additional key-
pad languages.
Function button: function
Units: To set the measurement units for the vehicle dis-
plays.
Distance , vehicle speed , temperature, volume,
consumption and pressure .
Mobile device data transfer
Data transfer for SEAT apps: Allows the exchange of infor-
mation between the vehicle and SEAT applications.
These are not personal data.
Operation via apps: Changes the level of interaction
with the applications.
Deactivate: Limits specific functions that require a
higher level of security. Confirm
: Allows 100% functionality of the App but
with certain actions relating to the Infotainment
system requiring confirmation. Allow
: Allows the execution of all the available
functions from the App.
Voice control: To perform the voice control setup
››› page 15.
Remove safely: To eject the data storage device (SD card
1/SD card 2/USB) from the system. After correctly eject-
ing the data storage device from the system, the func-
tion button becomes inactive (grey colour).
Factory settings: When resetting factory settings, all en-
tries and changes made are deleted, depending on the
selected setup.
Bluetooth: To perform Bluetooth ®
settings ››› page 89.
WLANa)
: To adjust the WLAN mobile hotspot settings
››› page 53. 92