display Seat Toledo 2017 MEDIA SYSTEM TOUCH - COLOUR
[x] Cancel search | Manufacturer: SEAT, Model Year: 2017, Model line: Toledo, Model: Seat Toledo 2017Pages: 52, PDF Size: 1.56 MB
Page 24 of 52
Media
Search and press on the track/folder list or
on the de s
ir
ed track/folder. If there is infor-
mation available, the track name is displayed
(for audio CDs) or the name of the file (MP3)
instead of Track + number .
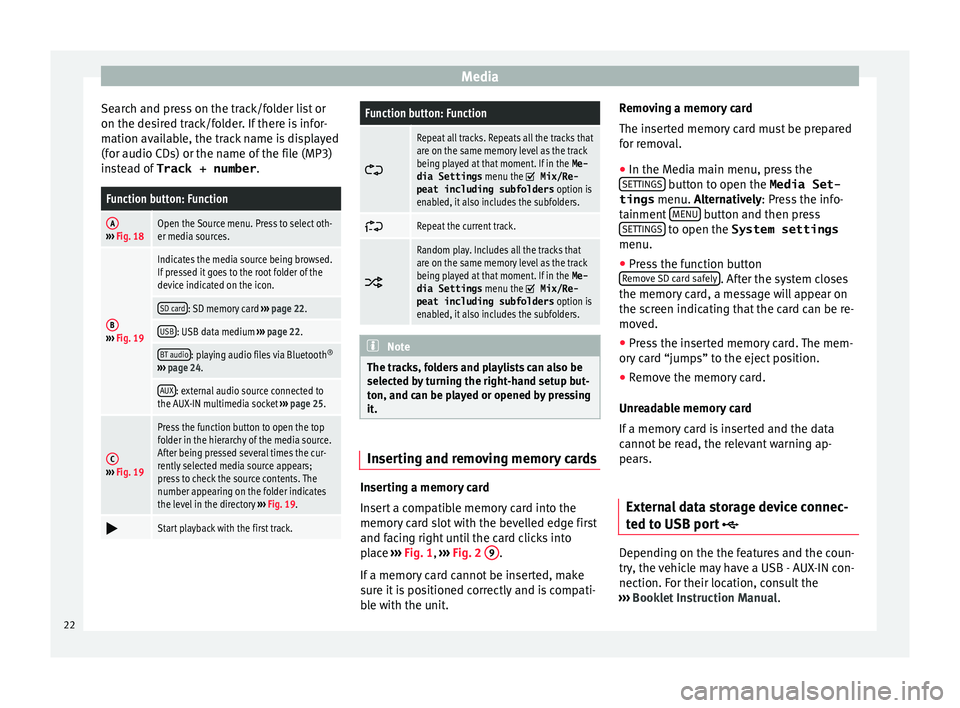
Function button: Function
A››› Fig. 18Open the Source menu. Press to select oth-
er media sources.
B››› Fig. 19
Indicates the media source being browsed.
If pressed it goes to the root folder of the
device indicated on the icon.
SD card: SD memory card ››› page 22.
USB: USB data medium ››› page 22.
BT audio: playing audio files via Bluetooth ®
››› page 24.
AUX: external audio source connected to
the AUX-IN multimedia socket ››› page 25.
C››› Fig. 19
Press the function button to open the top
folder in the hierarchy of the media source.
After being pressed several times the cur-
rently selected media source appears;
press to check the source contents. The
number appearing on the folder indicates
the level in the directory ››› Fig. 19.
Start playback with the first track.
Function button: Function
Repeat all tracks. Repeats all the tracks that
are on the same memory level as the track
being played at that moment. If in the
Me-
dia Settings menu the
Mix/Re‐
peat including subfolders option is
enabled, it also includes the subfolders.
Repeat the current track.
Random play. Includes all the tracks that
are on the same memory level as the track
being played at that moment. If in the
Me-
dia Settings menu the
Mix/Re‐
peat including subfolders option is
enabled, it also includes the subfolders. Note
The tracks, folders and playlists can also be
select ed b
y turning the right-hand setup but-
ton, and can be played or opened by pressing
it. Inserting and removing memory cards
Inserting a memory card
In
ser
t
a compatible memory card into the
memory card slot with the bevelled edge first
and facing right until the card clicks into
place ››› Fig. 1, ››› Fig. 2 9 .
If a memor
y
card cannot be inserted, make
sure it is positioned correctly and is compati-
ble with the unit. Removing a memory card
The insert
ed memory card must be prepared
for removal.
● In the Media main menu, press the
SETTINGS button to open the Media Set-
tings menu. A lt
ern
atively: Press the info-
tainment MENU button and then press
S ET
TINGS to open the System settings
menu.
● Press the function button
R emo
v
e SD card safely . After the system closes
the memor y
c
ard, a message will appear on
the screen indicating that the card can be re-
moved.
● Press the inserted memory card. The mem-
ory c
ard “jumps” to the eject position.
● Remove the memory card.
Unrea
dable memory card
If a memory card is inserted and the data
cannot be read, the relevant warning ap-
pears.
External data storage device connec-
ted to USB por
t Depending on the the features and the coun-
tr
y
, the
vehicle may have a USB - AUX-IN con-
nection. For their location, consult the
››› Booklet Instruction Manual.
22
Page 25 of 52
Media
Audio files on an external data storage de-
v ic
e c
onnected to the USB port can be
played and controlled via the Infotainment
system.
Where this manual refers to external data
storage devices, this means USB mass stor-
age devices containing supported audio
files, such as MP3 players, iPods™ and USB
sticks.
Only supported audio files are displayed and
played. Other files are ignored.
Further operation of the external data medi-
um (changing track, selecting tracks and
playback modes) is described in the appro-
priate chapters of this manual ››› page 18.
Instructions and restrictions
Compatibility with Apple™ devices and other
media players depends on the unit.
The USB port supplies the usual USB volt-
age of 5 volts for a USB connection.
External hard disks with a capacity greater
than 32 GB must be reformatted for the
FAT32 file system in some circumstances. You
will find the necessary software and informa-
tion on the Internet. Take into account all other instructions and
limitations
regarding requirements for media
sources ››› page 18.
iPod™, iPad™ and iPhone™
Depending on the country and the equip-
ment, iPods™, iPads™ or iPhones™ can be
connected using the device's USB cable to
the USB port of the vehicle and used as
audio sources.
After connecting an iPod™, iPad™ or
iPhone™, the specific list views of the iPod
are displayed in the upper selection level
( Playlists , Artists , Albums,
Tracks , Podcasts etc.).
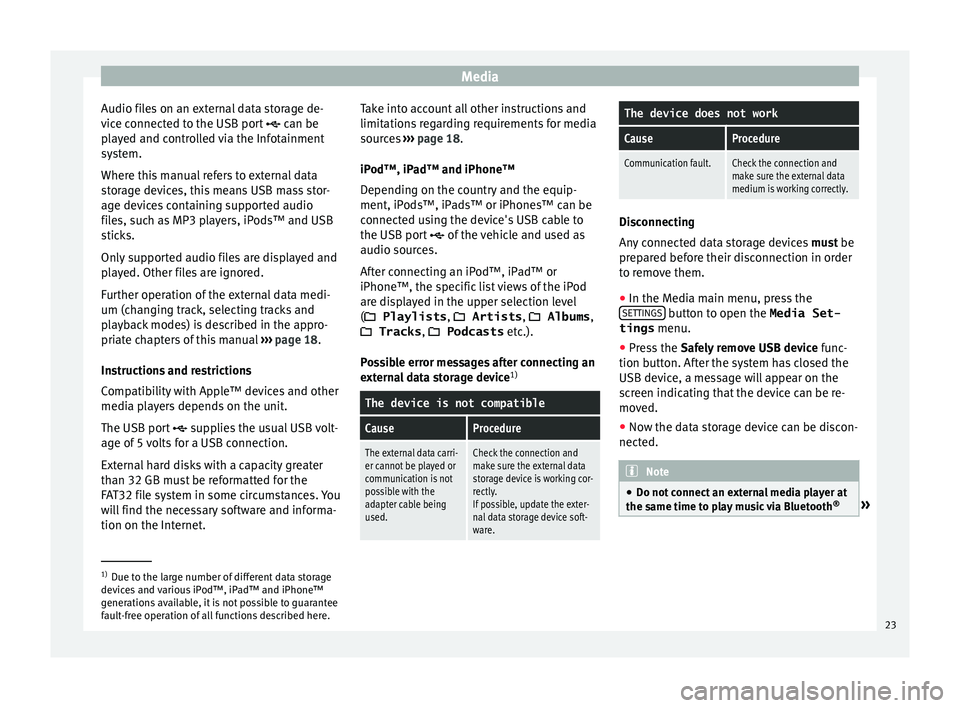
Possible error messages after connecting an
external data storage device 1)
The device is not compatible
CauseProcedure
The external data carri-
er cannot be played or
communication is not
possible with the
adapter cable being
used.Check the connection and
make sure the external data
storage device is working cor-
rectly.
If possible, update the exter-
nal data storage device soft-
ware.
The device does not work
CauseProcedure
Communication fault.Check the connection and
make sure the external data
medium is working correctly. Disconnecting
Any
c
onnected data storage devices must be
prepared before their disconnection in order
to remove them.
● In the Media main menu, press the
SET TINGS button to open the Media Set-
tings menu.
● Press the Safely
r
emove USB device func-
tion button. After the system has closed the
USB device, a message will appear on the
screen indicating that the device can be re-
moved.
● Now the data storage device can be discon-
nected. Note
● Do not c onnect
an external media player at
the same time to play music via Bluetooth ®
» 1)
Due to the large number of different data storage
devic e
s and various iPod™, iPad™ and iPhone™
generations available, it is not possible to guarantee
fault-free operation of all functions described here. 23
Page 30 of 52
Telephone management system (PHONE)*
For your safety, we recommend you make the
link when the
v
ehicle is stationary. In some
countries it is not possible to perform the
pairing with the vehicle running.
Conditions
You must guarantee the following setup in
the mobile phone and the Infotainment sys-
tem:
● The ignition must be switched on.
● The Bluetooth ®
fu
nction of the mobile tele-
phone and the Infotainment system must be
active as well as visibility.
● The keypad lock on the mobile telephone
mus
t be deactivated.
Follow instructions in the manual for the mo-
bile telephone.
After turning on the ignition, the visibility of
the Bluetooth ®
function activates.
During the pairing process it is necessary to
enter data via the mobile telephone's key-
pad. To do so, the mobile telephone must be
ready.
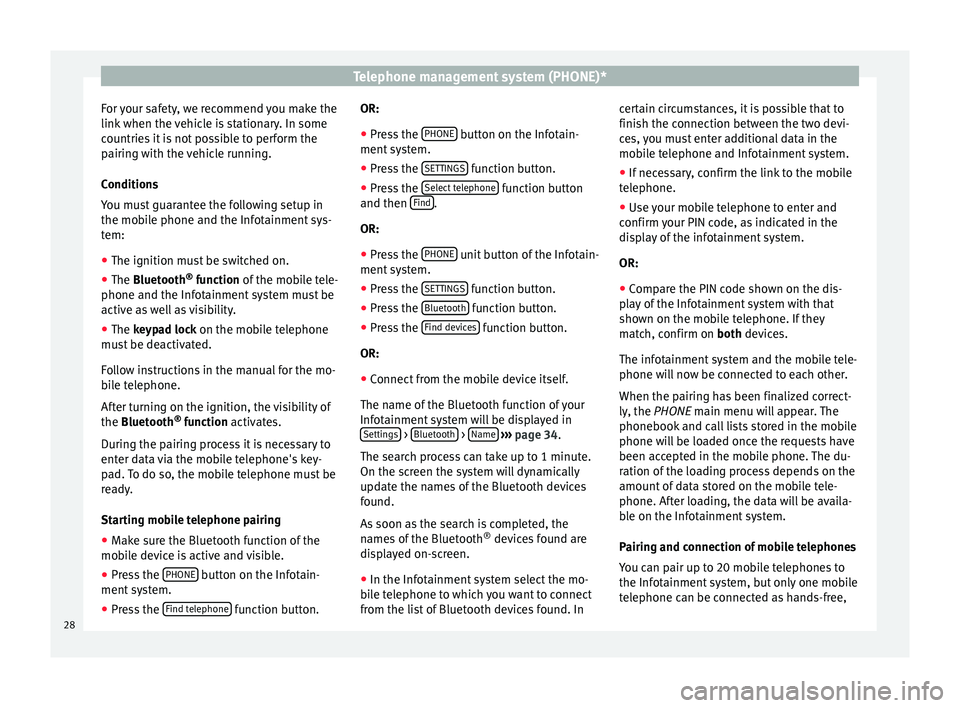
Starting mobile telephone pairing ● Make sure the Bluetooth function of the
mobi
le device is active and visible.
● Press the PHONE button on the Infotain-
ment sy
s
tem.
● Press the Find telephone function button.OR:
● Press the PHONE button on the Infotain-
ment sy
s
tem.
● Press the SETTINGS function button.
● Press the Sel
ect
t
elephone function button
and then Find .
OR:
● Press the PHONE unit button of the Infotain-
ment sy
s
tem.
● Press the SETTINGS function button.
● Press the Bluet
ooth function button.
● Press the Find dev
ic
e
s function button.
OR:
● Connect from the mobile device itself.
The n ame of
the Bluet
ooth function of your
Infotainment system will be displayed in Settings >
Bluet
ooth >
Name
› ›
› p
age 34.
The search process can take up to 1 minute.
On the screen the system will dynamically
update the names of the Bluetooth devices
found.
As soon as the search is completed, the
names of the Bluetooth ®
devices found are
displayed on-screen.
● In the Infotainment system select the mo-
bil
e telephone to which you want to connect
from the list of Bluetooth devices found. In certain circumstances, it is possible that to
finish the connection betw
een the two devi-
ces, you must enter additional data in the
mobile telephone and Infotainment system.
● If necessary, confirm the link to the mobile
telephone.
● U
se your mobile telephone to enter and
confirm y
our PIN code, as indicated in the
display of the infotainment system.
OR:
● Compare the PIN code shown on the dis-
pla
y of the Infotainment system with that
shown on the mobile telephone. If they
match, confirm on both devices.
The infotainment system and the mobile tele-
phone will now be connected to each other.
When the pairing has been finalized correct-
ly, the PHONE main menu will appear. The
phonebook and call lists stored in the mobile
phone will be loaded once the requests have
been accepted in the mobile phone. The du-
ration of the loading process depends on the
amount of data stored on the mobile tele-
phone. After loading, the data will be availa-
ble on the Infotainment system.
Pairing and connection of mobile telephones
You can pair up to 20 mobile telephones to
the Infotainment system, but only one mobile
telephone can be connected as hands-free,
28
Page 32 of 52
Telephone management system (PHONE)*
update of the phonebook data can be initi-
at ed fr
om the
User profile settings
menu ››› page 34.
Telephone management can store a maxi-
mum of 4 user profiles for mobile tele-
phones. If you wish to link/connect another
mobile phone, the oldest user profile will au-
tomatically be replaced.
Telephone management system function but-
tons ● Press the PHONE button on the Infotain-
ment sy
s
tem to open the PHONE main menu.
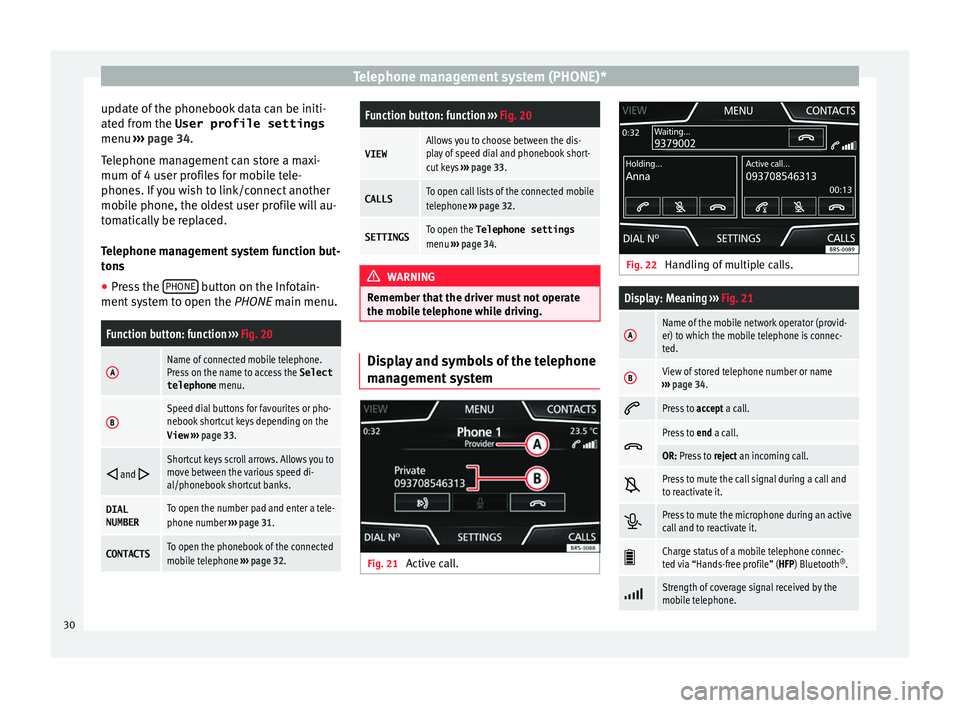
Function button: function ››› Fig. 20
AName of connected mobile telephone.
Press on the name to access the Select
telephone menu.
BSpeed dial buttons for favourites or pho-
nebook shortcut keys depending on the
View ››› page 33.
and Shortcut keys scroll arrows. Allows you to
move between the various speed di-
al/phonebook shortcut banks.
DIAL
NUMBERTo open the number pad and enter a tele-
phone number
››› page 31.
CONTACTSTo open the phonebook of the connected
mobile telephone ››› page 32.
Function button: function ››› Fig. 20
VIEWAllows you to choose between the dis-
play of speed dial and phonebook short-
cut keys ››› page 33.
CALLSTo open call lists of the connected mobile
telephone ››› page 32.
SETTINGSTo open the Telephone settings
menu ››› page 34. WARNING
Remember that the driver must not operate
the mobi
le telephone while driving. Display and symbols of the telephone
m
an
ag
ement system Fig. 21
Active call. Fig. 22
Handling of multiple calls.
Display: Meaning ››› Fig. 21
AName of the mobile network operator (provid-
er) to which the mobile telephone is connec-
ted.
BView of stored telephone number or name
››› page 34.
Press to
accept a call.
Press to
end a call.
OR: Press to reject an incoming call.
Press to mute the call signal during a call and
to reactivate it.
Press to mute the microphone during an active
call and to reactivate it.
Charge status of a mobile telephone connec-
ted via “Hands-free profile” (HFP) Bluetooth
®
.
Strength of coverage signal received by the
mobile telephone.
30
Page 34 of 52
Telephone management system (PHONE)*
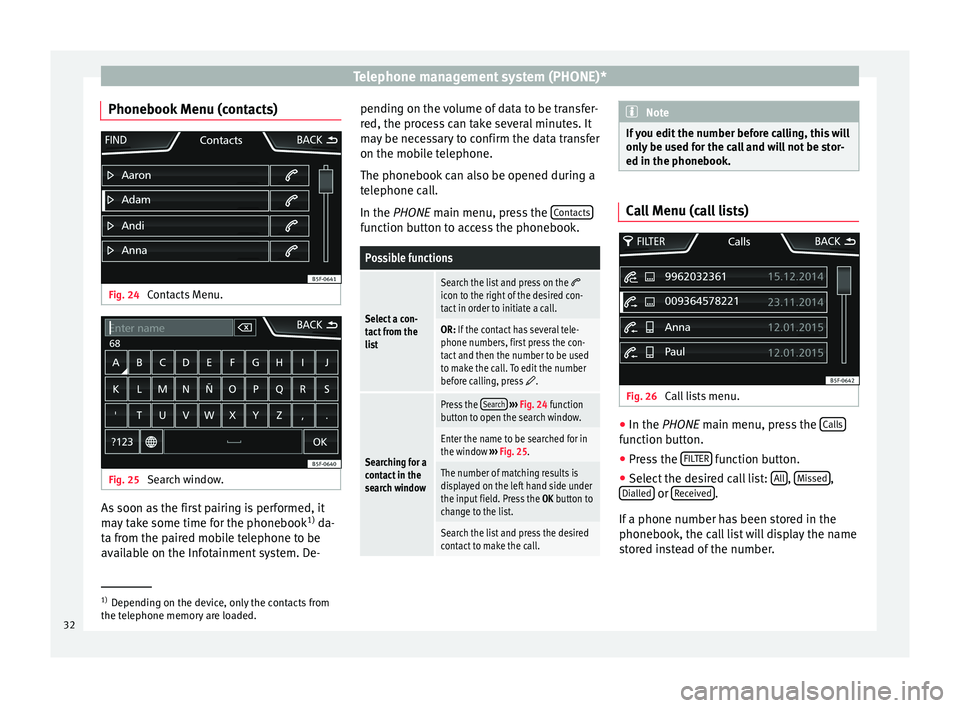
Phonebook Menu (contacts) Fig. 24
Contacts Menu. Fig. 25
Search window. As soon as the first pairing is performed, it
m
a
y
take some time for the phonebook 1)
da-
ta from the paired mobile telephone to be
available on the Infotainment system. De- pending on the volume of data to be transfer-
red, the proc
ess can take several minutes. It
may be necessary to confirm the data transfer
on the mobile telephone.
The phonebook can also be opened during a
telephone call.
In the PHONE main menu, press the Contacts function button to access the phonebook.
Possible functions
Select a con-
tact from the
list
Search the list and press on the icon to the right of the desired con-
tact in order to initiate a call.
OR: If the contact has several tele-
phone numbers, first press the con-
tact and then the number to be used
to make the call. To edit the number
before calling, press
.
Searching for a
contact in the
search window
Press the
Search
››› Fig. 24 function
button to open the search window.
Enter the name to be searched for in
the window ››› Fig. 25.
The number of matching results is
displayed on the left hand side under
the input field. Press the OK button to
change to the list.
Search the list and press the desired
contact to make the call. Note
If you edit the number before calling, this will
only be u
sed for the call and will not be stor-
ed in the phonebook. Call Menu (call lists)
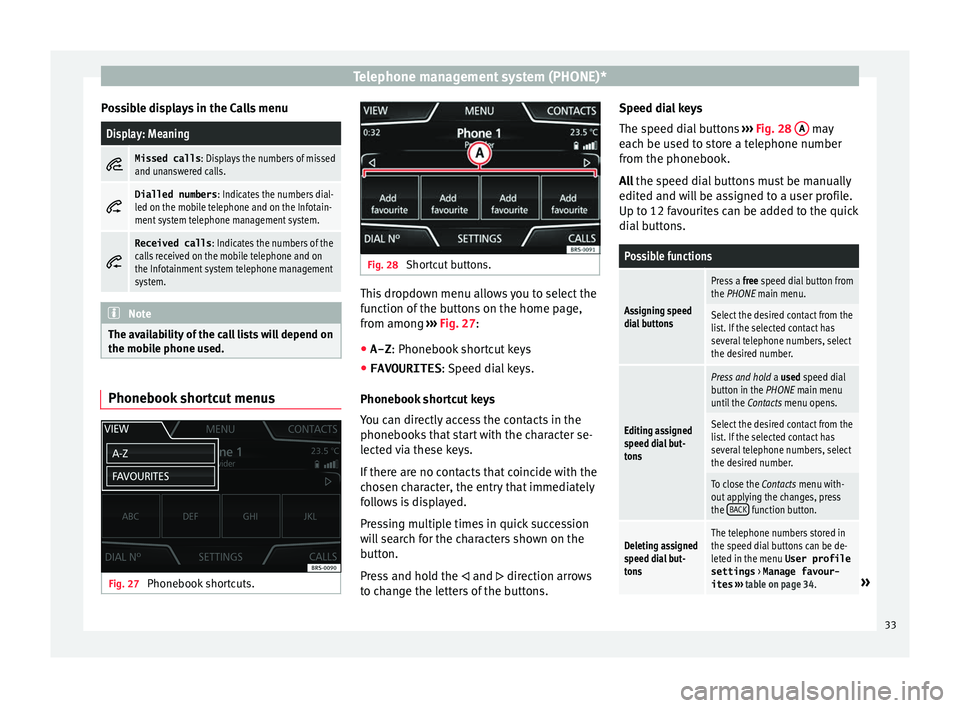
Fig. 26
Call lists menu. ●
In the PHONE m ain menu, pr
e
ss the Calls function button.
● Press the FIL
TER function button.
● Select the desired call list: A
l
l ,
Mi
s
sed ,
Di al
l
ed or
R
ec
eiv ed .
If a phone number h
a
s been stored in the
phonebook, the call list will display the name
stored instead of the number. 1)
Depending on the device, only the contacts from
the tel ephone memor
y are loaded.
32
Page 35 of 52
Telephone management system (PHONE)*
Possible displays in the Calls menuDisplay: Meaning
Missed calls
: Displays the numbers of missed
and unanswered calls.
Dialled numbers
: Indicates the numbers dial-
led on the mobile telephone and on the Infotain-
ment system telephone management system.
Received calls
: Indicates the numbers of the
calls received on the mobile telephone and on
the Infotainment system telephone management
system. Note
The availability of the call lists will depend on
the mob i
le phone used. Phonebook shortcut menus
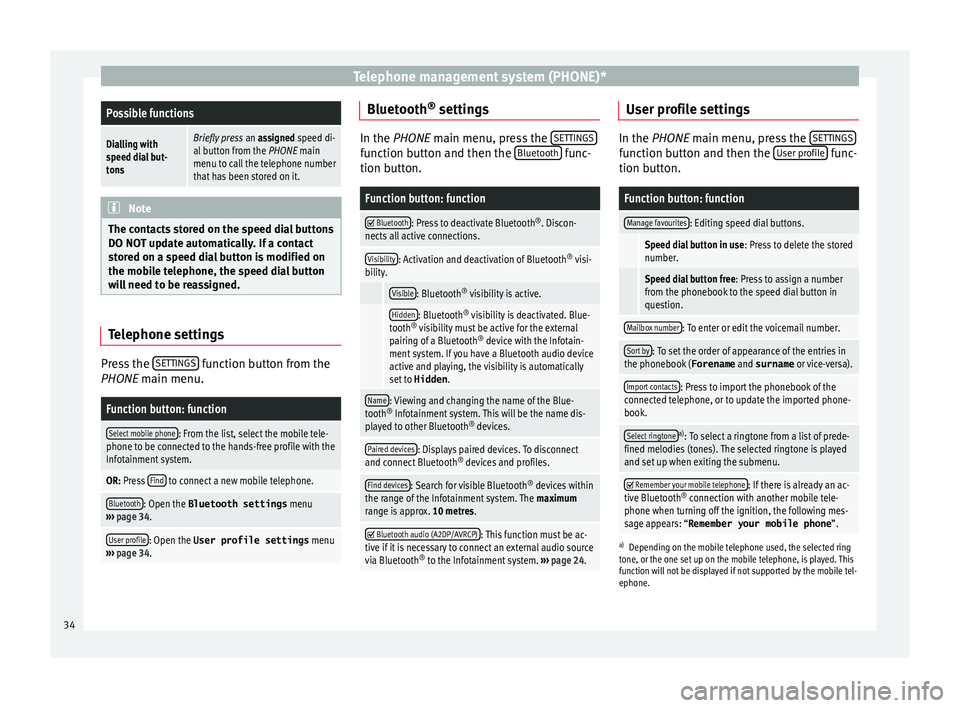
Fig. 27
Phonebook shortcuts. Fig. 28
Shortcut buttons. This dropdown menu allows you to select the
f
u
nction of
the buttons on the home page,
from among ››› Fig. 27:
● A-Z : Phonebook shor
tcut keys
● FAVOURITES : Speed di
al keys.
Phonebook shortcut keys
You can directly access the contacts in the
phonebooks that start with the character se-
lected via these keys.
If there are no contacts that coincide with the
chosen character, the entry that immediately
follows is displayed.
Pressing multiple times in quick succession
will search for the characters shown on the
button.
Press and hold the and direction arrows
to change the letters of the buttons. Speed dial keys
The speed di
al
buttons ››› Fig. 28 A may
e ac
h be u
sed to store a telephone number
from the phonebook.
All the speed dial buttons must be manually
edited and will be assigned to a user profile.
Up to 12 favourites can be added to the quick
dial buttons.
Possible functions
Assigning speed
dial buttons
Press a free speed dial button from
the PHONE main menu.
Select the desired contact from the
list. If the selected contact has
several telephone numbers, select
the desired number.
Editing assigned
speed dial but-
tons
Press and hold a used speed dial
button in the PHONE main menu
until the Contacts menu opens.
Select the desired contact from the
list. If the selected contact has
several telephone numbers, select
the desired number.
To close the Contacts menu with-
out applying the changes, press
the BACK
function button.
Deleting assigned
speed dial but-
tonsThe telephone numbers stored in
the speed dial buttons can be de-
leted in the menu User profile
settings
> Manage favour-
ites ››› table on page 34.
» 33
Page 36 of 52
Telephone management system (PHONE)*Possible functions
Dialling with
speed dial but-
tonsBriefly press
an assigned speed di-
al button from the PHONE main
menu to call the telephone number
that has been stored on it. Note
The contacts stored on the speed dial buttons
DO NOT upd at
e automatically. If a contact
stored on a speed dial button is modified on
the mobile telephone, the speed dial button
will need to be reassigned. Telephone settings
Press the
S
ET
TINGS function button from the
PHONE m ain menu.
Function button: function
Select mobile phone: From the list, select the mobile tele-
phone to be connected to the hands-free profile with the
Infotainment system.
OR: Press Find to connect a new mobile telephone.
Bluetooth: Open the Bluetooth settings
menu
››› page 34.
User profile: Open the User profile settings menu
››› page 34. Bluetooth
®
settin g
s In the PHONE main menu, pr
e
ss the SETTINGS function button and then the
Bluetooth func-
tion butt on.
Function button: function
Bluetooth: Press to deactivate Bluetooth
®
. Discon-
nects all active connections.
Visibility: Activation and deactivation of Bluetooth ®
visi-
bility.
Visible: Bluetooth ®
visibility is active.
Hidden: Bluetooth ®
visibility is deactivated. Blue-
tooth ®
visibility must be active for the external
pairing of a Bluetooth ®
device with the Infotain-
ment system. If you have a Bluetooth audio device
active and playing, the visibility is automatically
set to Hidden .
Name: Viewing and changing the name of the Blue-
tooth ®
Infotainment system. This will be the name dis-
played to other Bluetooth ®
devices.
Paired devices: Displays paired devices. To disconnect
and connect Bluetooth ®
devices and profiles.
Find devices: Search for visible Bluetooth ®
devices within
the range of the Infotainment system. The maximum
range is approx. 10 metres.
Bluetooth audio (A2DP/AVRCP): This function must be ac-
tive if it is necessary to connect an external audio source
via Bluetooth ®
to the Infotainment system. ››› page 24. User profile settings
In the PHONE main menu, pr
e
ss the SETTINGS function button and then the
User pr
ofi le func-
tion butt on.
Function button: function
Manage favourites: Editing speed dial buttons.
Speed dial button in use : Press to delete the stored
number.
Speed dial button free : Press to assign a number
from the phonebook to the speed dial button in
question.
Mailbox number: To enter or edit the voicemail number.
Sort by: To set the order of appearance of the entries in
the phonebook ( Forename and surname or vice-versa).
Import contacts: Press to import the phonebook of the
connected telephone, or to update the imported phone-
book.
Select ringtonea) : To select a ringtone from a list of prede-
fined melodies (tones). The selected ringtone is played
and set up when exiting the submenu.
Remember your mobile telephone: If there is already an ac-
tive Bluetooth ®
connection with another mobile tele-
phone when turning off the ignition, the following mes-
sage appears: “Remember your mobile phone ”.
a)
Depending on the mobile telephone used, the selected ring
tone, or the one set up on the mobile telephone, is played. This
function will not be displayed if not supported by the mobile tel-
ephone.
34
Page 39 of 52
CAR menu
Since refuelling
Di s
p
lay and storage of the values for the jour-
ney and the consumption. By refuelling, the
memory will be erased automatically.
Long-term
The memory records the values for a specific
number of partial trips, up to a total of 19
hours and 59 minutes or 99 hours and 59 mi-
nutes, or 1999.9 km (or miles) for 9999 km
(or miles), depending on the model of instru-
ment panel.
When one of these values is reached (de-
pending on the version of the instrument
panel), the memory is automatically deleted
and it starts counting from 0 again. Note
The values that appear in the figure are indi-
cativ e and m
ay vary depending on the fea-
tures. Ecotrainer*
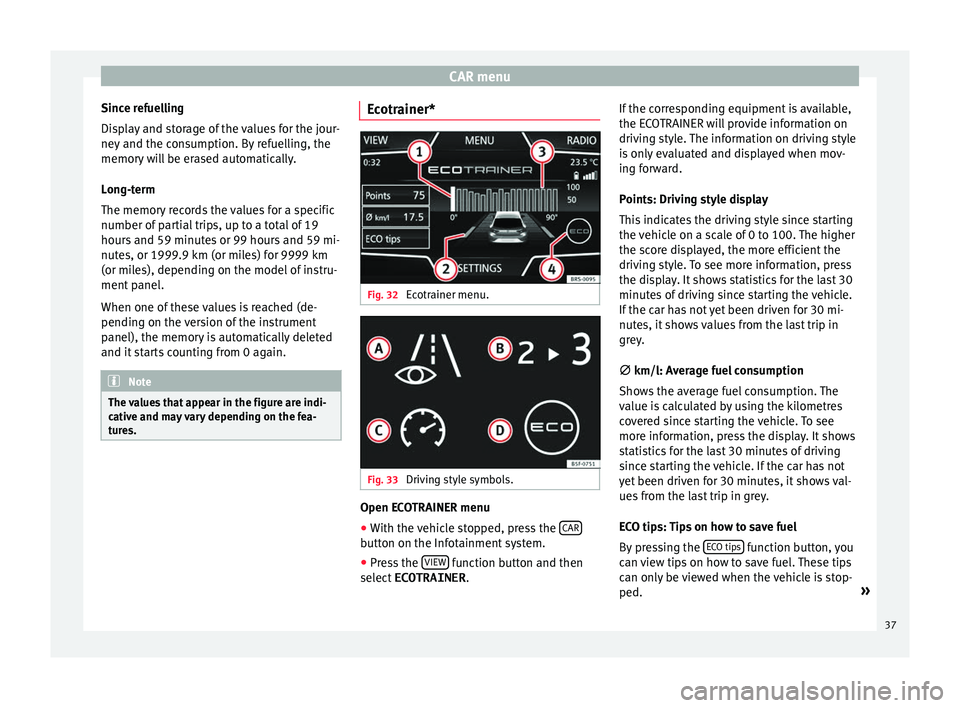
Fig. 32
Ecotrainer menu. Fig. 33
Driving style symbols. Open ECOTRAINER menu
● With the vehicle stopped, press the CAR button on the Infotainment system.
● Press the VIEW function button and then
sel ect
ECOTRAINER . If
the corresponding equipment is available,
the ECO
TRAINER will provide information on
driving style. The information on driving style
is only evaluated and displayed when mov-
ing forward.
Points: Driving style display
This indicates the driving style since starting
the vehicle on a scale of 0 to 100. The higher
the score displayed, the more efficient the
driving style. To see more information, press
the display. It shows statistics for the last 30
minutes of driving since starting the vehicle.
If the car has not yet been driven for 30 mi-
nutes, it shows values from the last trip in
grey.
∅ km/l: Average fuel consumption
Shows the average fuel consumption. The
value is calculated by using the kilometres
covered since starting the vehicle. To see
more information, press the display. It shows
statistics for the last 30 minutes of driving
since starting the vehicle. If the car has not
yet been driven for 30 minutes, it shows val-
ues from the last trip in grey.
ECO tips: Tips on how to save fuel
By pressing the ECO tips function button, you
c an
v
iew tips on how to save fuel. These tips
can only be viewed when the vehicle is stop-
ped. »
37
Page 40 of 52
CAR menu
Evaluation of efficient driving style
The effic iency
of
the driving style is reflected
by different elements on the display.
Display ››› Fig. 32: Meaning
1The white column represents the current time.
It shows the position of the evaluation that is cur-
rently being performed.
2
Bars to represent acceleration.
The position of the car represents the acceleration.
If speed is constant, the car remains in the central
area. When accelerating or braking, the car moves
forward or backward respectively.
3
Columns to show driving style efficiency.
On the horizon, the columns represent the effi-
ciency of the driving style in a retrospective man-
ner and move from left to right every five seconds
or so. The higher the height of the columns, the
more efficient the driving style.
The colour of the sky represents the average of the
last three minutes. The colour changes from grey
(less efficient) to blue (more efficient).
4
Different symbols can be displayed on the right of
the vehicle representation; these provide informa-
tion on the current driving style. ››› table on
page 38.
Symbols ››› Fig. 33: Meaning
AForesight when driving. If sudden changes of ac-
celeration occur, driving style efficiency is re-
duced.
BGear-change indicator.
Symbols ››› Fig. 33: Meaning
CThe current vehicle speed is having a negative im-
pact on fuel consumption.
DEcological driving style. Vehicle status
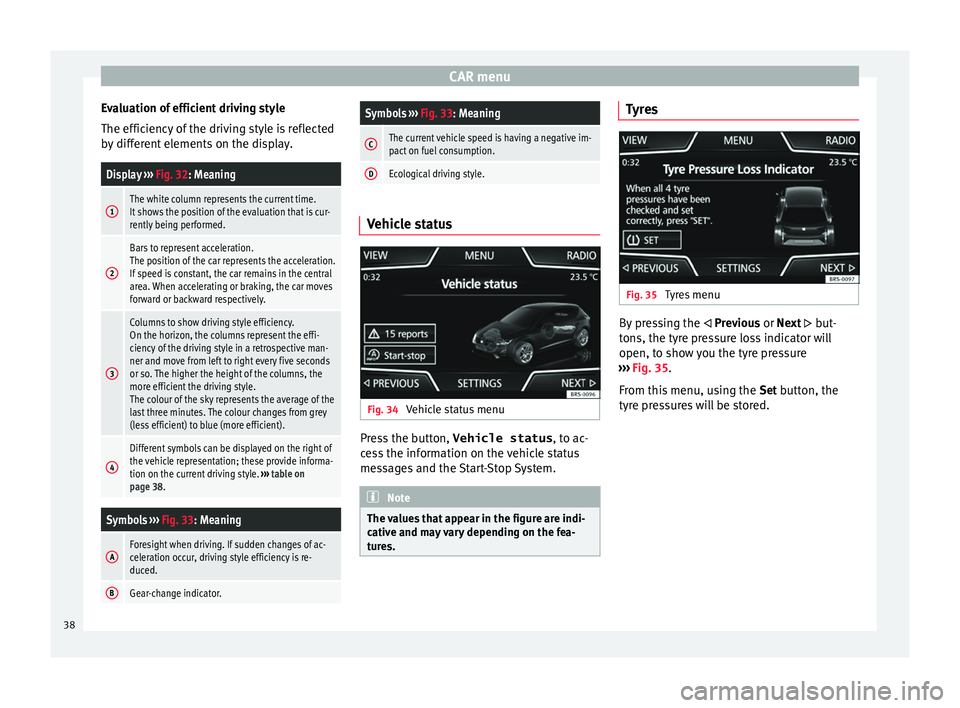
Fig. 34
Vehicle status menu Press the button,
Vehicle status , to ac
-
c
ess the information on the vehicle status
messages and the Start-Stop System. Note
The values that appear in the figure are indi-
cativ e and m
ay vary depending on the fea-
tures. Tyres
Fig. 35
Tyres menu By pressing the
Prev
iou
s or Next but-
tons, the tyre pressure loss indicator will
open, to show you the tyre pressure
››› Fig. 35.
From this menu, using the Set button, the
tyre pressures will be stored. 38
Page 41 of 52
Setup
Setup
S y
s
tem setup Menu (SETUP)
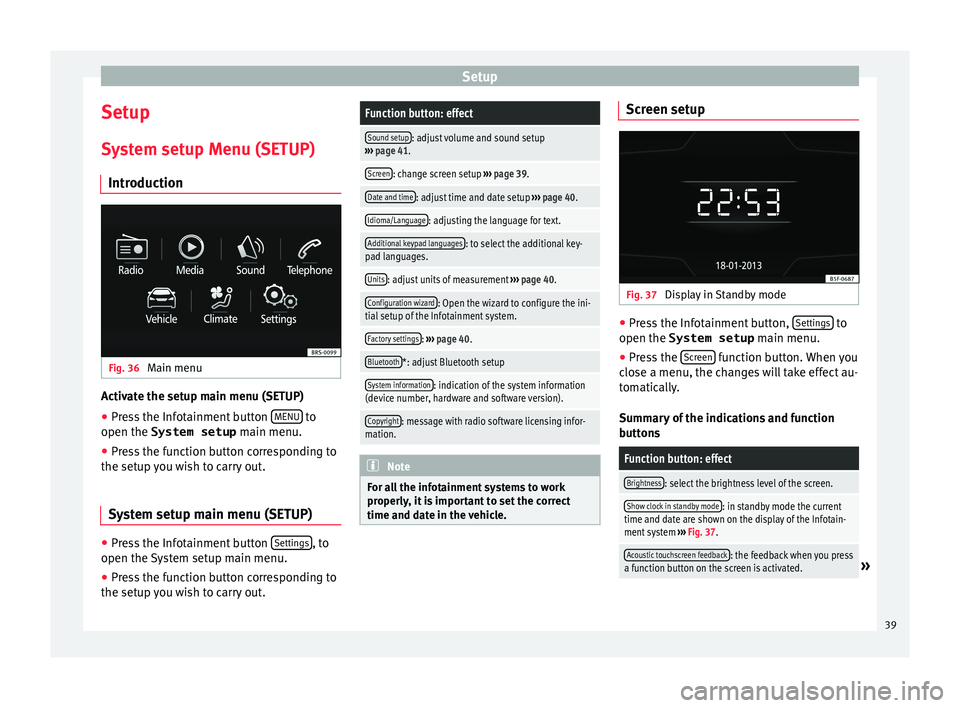
Introduction Fig. 36
Main menu Activate the setup main menu (SETUP)
● Press the Infotainment button MENU to
open the System setup main menu.
● Pr e
ss the function button corresponding to
the setup y
ou wish to carry out.
System setup main menu (SETUP) ●
Press the Infotainment button Settin
g
s , to
open the S
y
stem setup main menu.
● Press the function button corresponding to
the setup y
ou wish to carry out.
Function button: effect
Sound setup: adjust volume and sound setup
››› page 41.
Screen: change screen setup ››› page 39.
Date and time: adjust time and date setup ››› page 40.
Idioma/Language: adjusting the language for text.
Additional keypad languages: to select the additional key-
pad languages.
Units: adjust units of measurement ››› page 40.
Configuration wizard: Open the wizard to configure the ini-
tial setup of the Infotainment system.
Factory settings: ››› page 40.
Bluetooth*: adjust Bluetooth setup
System information: indication of the system information
(device number, hardware and software version).
Copyright: message with radio software licensing infor-
mation. Note
For all the infotainment systems to work
properly , it
is important to set the correct
time and date in the vehicle. Screen setup
Fig. 37
Display in Standby mode ●
Press the Infotainment button, Settin
g
s to
open the System setup main menu.
● Pr e
ss the Screen function button. When you
c lo
se a menu, the c
hanges will take effect au-
tomatically.
Summary of the indications and function
buttons
Function button: effect
Brightness: select the brightness level of the screen.
Show clock in standby mode: in standby mode the current
time and date are shown on the display of the Infotain-
ment system ››› Fig. 37.
Acoustic touchscreen feedback: the feedback when you press
a function button on the screen is activated.» 39