buttons Seat Toledo 2017 MEDIA SYSTEM TOUCH - COLOUR
[x] Cancel search | Manufacturer: SEAT, Model Year: 2017, Model line: Toledo, Model: Seat Toledo 2017Pages: 52, PDF Size: 1.56 MB
Page 7 of 52
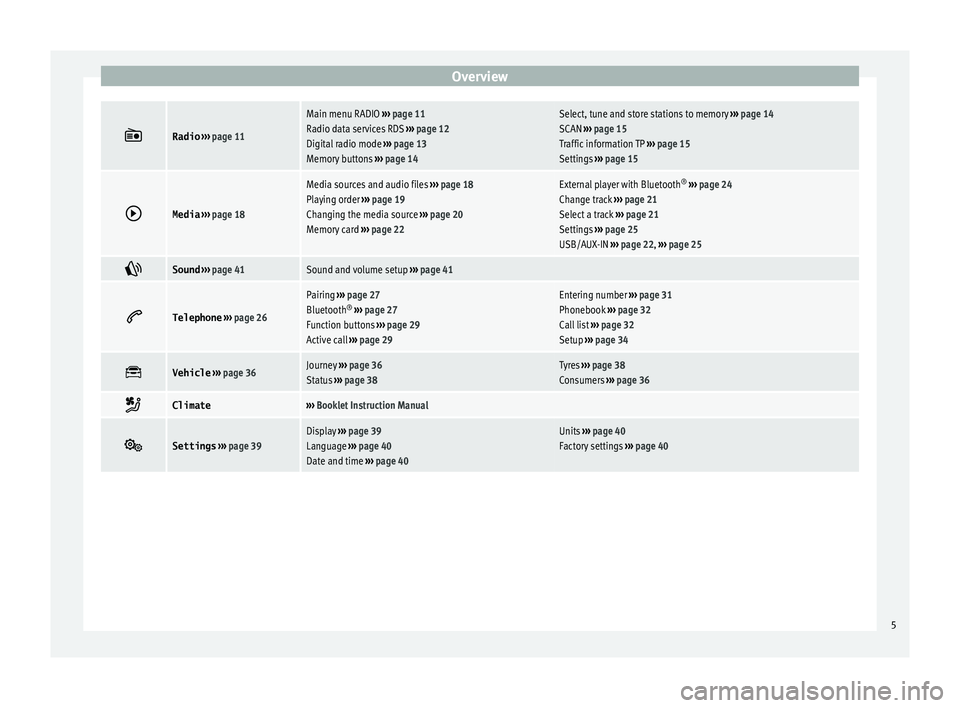
Overview
Radio
››› page 11
Main menu RADIO ››› page 11
Radio data services RDS ››› page 12
Digital radio mode ››› page 13
Memory buttons ››› page 14Select, tune and store stations to memory ››› page 14
SCAN ››› page 15
Traffic information TP ››› page 15
Settings ››› page 15
Media
››› page 18
Media sources and audio files ››› page 18
Playing order ››› page 19
Changing the media source ››› page 20
Memory card ››› page 22External player with Bluetooth ®
››› page 24
Change track ››› page 21
Select a track ››› page 21
Settings ››› page 25
USB/AUX-IN ››› page 22, ››› page 25
Sound
››› page 41Sound and volume setup ››› page 41
Telephone
››› page 26
Pairing ››› page 27
Bluetooth ®
››› page 27
Function buttons ››› page 29
Active call ››› page 29Entering number ››› page 31
Phonebook ››› page 32
Call list ››› page 32
Setup ››› page 34
Vehicle
››› page 36Journey ››› page 36
Status ››› page 38Tyres ››› page 38
Consumers ››› page 36
Climate›››
Booklet Instruction Manual
Settings
››› page 39Display ››› page 39
Language ››› page 40
Date and time ››› page 40Units ››› page 40
Factory settings ››› page 40 5
Page 9 of 52
Introduction
●
Lightly pr e
ssing the buttons or briefly
pressing the touchscreen is sufficient to op-
erate the unit.
● It is possible that not all the functions and
function b
uttons are available as the software
of the unit responds to the specific character-
istics of each market. A missing function but-
ton on the screen is not the result of an error
in the unit.
● Due to country-specific legislation, certain
function
s cannot be selected on the screen
when the vehicle is travelling above a certain
speed.
● Using a mobile telephone inside the vehicle
can cau
se noise in the speakers.
● There may be restrictions on the use of
Bluetooth devic
es in some countries. Infor-
mation is available from the local authorities.
● In some vehicles equipped with a parking
dist
ance warning system, the volume of the
audio source is automatically lowered when
the gear is engaged.
● If the steering wheel has a voice control
button
, it will not work in this radio mod-
el, so it has no function in relation to the ra-
dio. Rotary knobs and buttons
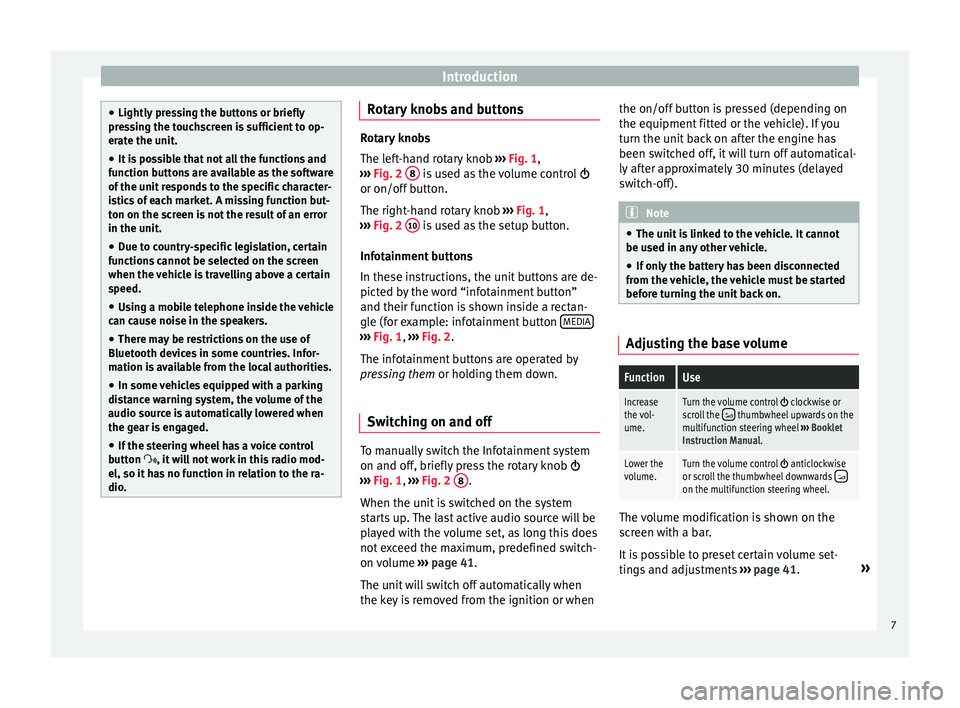
Rotary knobs
The lef
t
-hand rotary knob ››› Fig. 1,
››› Fig. 2 8 is used as the volume control
or on/off b utt
on.
The right-hand rotary knob ››› Fig. 1,
››› Fig. 2 10 is used as the setup button.
Infot ainment
buttons
In these instructions, the unit buttons are de-
picted by the word “infotainment button”
and their function is shown inside a rectan-
gle (for example: infotainment button MEDIA ›››
Fig. 1, ›››
Fig. 2 .
The inf
otainment buttons are operated by
pressing them or holding them down.
Switching on and off To manually switch the Infotainment system
on and off
, briefly
pr
ess the rotary knob
››› Fig. 1, ›››
Fig. 2 8 .
When the u nit
i
s switched on the system
starts up. The last active audio source will be
played with the volume set, as long this does
not exceed the maximum, predefined switch-
on volume ›››
page 41.
The unit will switch off automatically when
the key is removed from the ignition or when the on/off button is pressed (depending on
the equipment fitted or the
vehicle). If you
turn the unit back on after the engine has
been switched off, it will turn off automatical-
ly after approximately 30 minutes (delayed
switch-off). Note
● The unit i
s linked to the vehicle. It cannot
be used in any other vehicle.
● If only the battery has been disconnected
from the v
ehicle, the vehicle must be started
before turning the unit back on. Adjusting the base volume
FunctionUse
Increase
the vol-
ume.Turn the volume control clockwise or
scroll the thumbwheel upwards on the
multifunction steering wheel ››› Booklet
Instruction Manual.
Lower the
volume.Turn the volume control anticlockwise
or scroll the thumbwheel downwards on the multifunction steering wheel. The volume modification is shown on the
s
c
r
een with a bar.
It is possible to preset certain volume set-
tings and adjustments ›››
page 41. »
7
Page 10 of 52
Introduction
Silence the unit
● Turn the volume control anticloc
k wise
until you see .
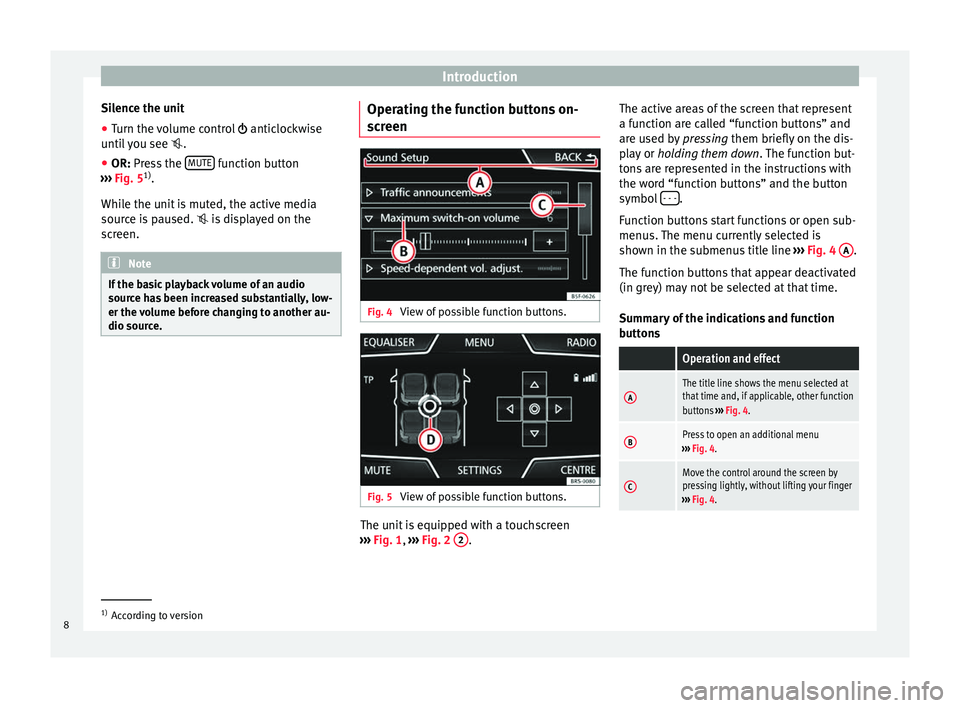
● OR: Press the MUTE function button
› ›
›
Fig. 5 1)
.
While the unit is muted, the active media
source is paused. is displayed on the
screen. Note
If the basic playback volume of an audio
sourc e h
as been increased substantially, low-
er the volume before changing to another au-
dio source. Operating the function buttons on-
s
c
r
een Fig. 4
View of possible function buttons. Fig. 5
View of possible function buttons. The unit is equipped with a touchscreen
› ›
›
Fig. 1, ››› Fig. 2 2 .The active areas of the screen that represent
a f
u
nction ar
e called “function buttons” and
are used by pressing them briefly on the dis-
play or holding them down . The function but-
tons are represented in the instructions with
the word “function buttons” and the button
symbol - - - .
F u
nction b
uttons start functions or open sub-
menus. The menu currently selected is
shown in the submenus title line ››› Fig. 4 A .
The f u
nction b
uttons that appear deactivated
(in grey) may not be selected at that time.
Summary of the indications and function
buttons
Operation and effect
AThe title line shows the menu selected at
that time and, if applicable, other function
buttons ››› Fig. 4.
BPress to open an additional menu
››› Fig. 4.
CMove the control around the screen by
pressing lightly, without lifting your finger
››› Fig. 4. 1)
According to version
8
Page 12 of 52
Introduction
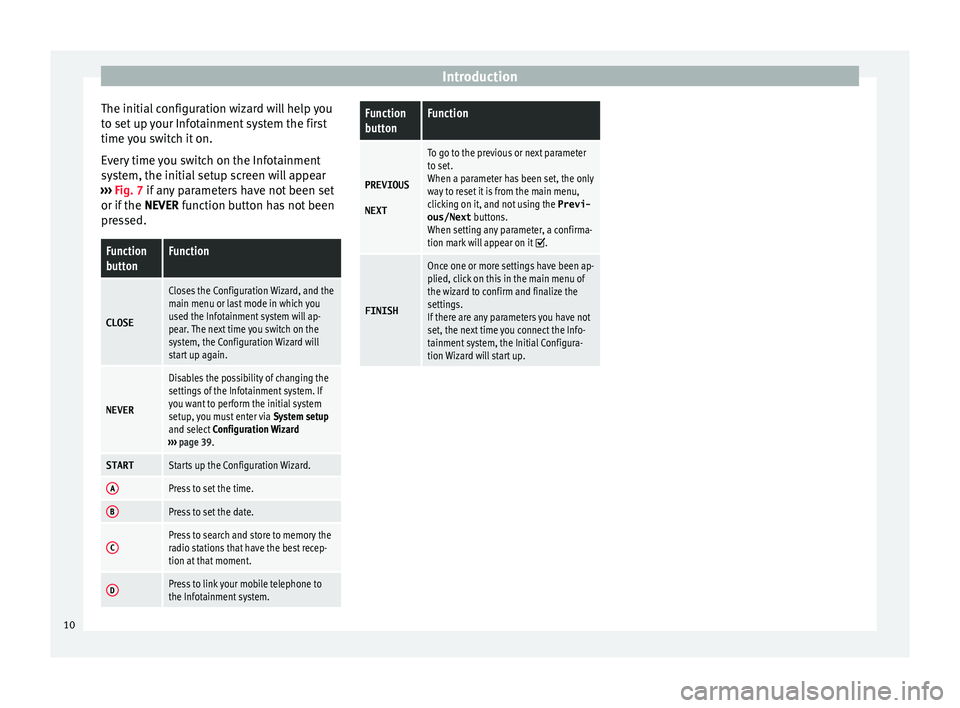
The initial configuration wizard will help you
t o set
up
your Infotainment system the first
time you switch it on.
Every time you switch on the Infotainment
system, the initial setup screen will appear
››› Fig. 7 if any parameters have not been set
or if the NEVER function button has not been
pressed.
Function
buttonFunction
CLOSE
Closes the Configuration Wizard, and the
main menu or last mode in which you
used the Infotainment system will ap-
pear. The next time you switch on the
system, the Configuration Wizard will
start up again.
NEVER
Disables the possibility of changing the
settings of the Infotainment system. If
you want to perform the initial system
setup, you must enter via System setup
and select Configuration Wizard
››› page 39.
STARTStarts up the Configuration Wizard.
APress to set the time.
BPress to set the date.
CPress to search and store to memory the
radio stations that have the best recep-
tion at that moment.
DPress to link your mobile telephone to
the Infotainment system.
Function
buttonFunction
PREVIOUS
NEXT
To go to the previous or next parameter
to set.
When a parameter has been set, the only
way to reset it is from the main menu,
clicking on it, and not using the Previ-
ous/Next buttons.
When setting any parameter, a confirma-
tion mark will appear on it
.
FINISH
Once one or more settings have been ap-
plied, click on this in the main menu of
the wizard to confirm and finalize the
settings.
If there are any parameters you have not
set, the next time you connect the Info-
tainment system, the Initial Configura-
tion Wizard will start up. 10
Page 13 of 52
Radio
Radio R a
dio mode
Intr
oduction Note
● Ple a
se bear in mind that in car parks, tun-
nels, areas with high buildings or mountains
the radio signal can be impaired.
● Foil or metal-coated stickers attached to
the window
s may affect reception on vehicles
with a window aerial.
● The availability of AM and DAB bands de-
pends on the c
ountry and/or equipment.
● The radio stations are responsible for the
content
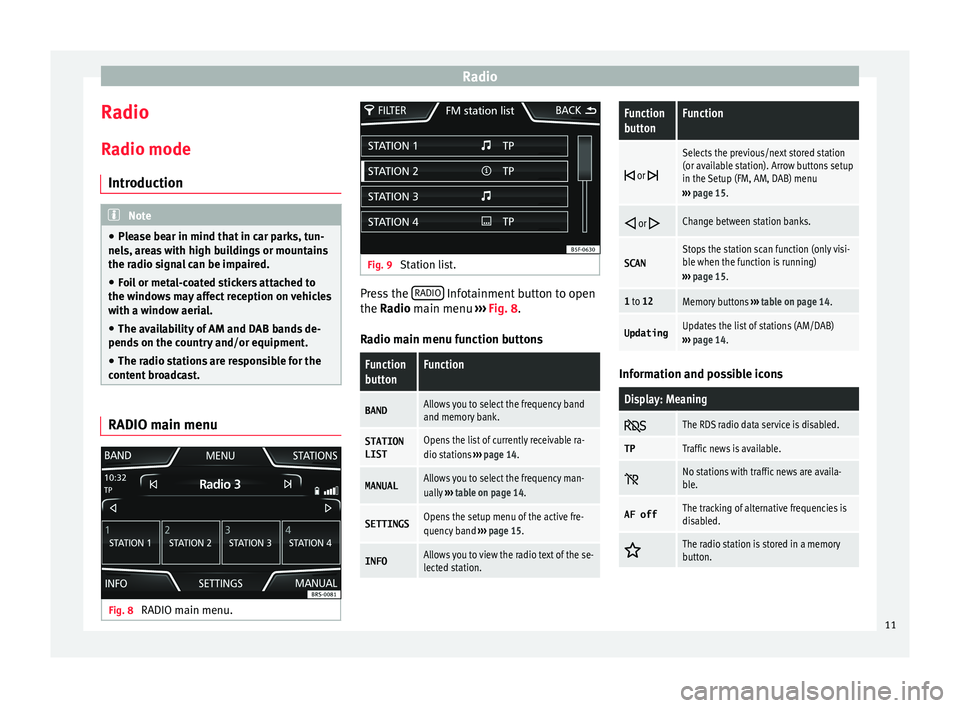
broadcast. RADIO main menu
Fig. 8
RADIO main menu. Fig. 9
Station list. Press the
RADIO Infotainment button to open
the R a
dio
main menu ››› Fig. 8.
Radio main menu function buttons
Function
buttonFunction
BANDAllows you to select the frequency band
and memory bank.
STATION
LISTOpens the list of currently receivable ra-
dio stations ››› page 14.
MANUALAllows you to select the frequency man-
ually ››› table on page 14.
SETTINGSOpens the setup menu of the active fre-
quency band ››› page 15.
INFOAllows you to view the radio text of the se-
lected station.
Function
buttonFunction
or
Selects the previous/next stored station
(or available station). Arrow buttons setup
in the Setup (FM, AM, DAB) menu
››› page 15.
or Change between station banks.
SCANStops the station scan function (only visi-
ble when the function is running)
››› page 15.
1 to 12Memory buttons ››› table on page 14.
UpdatingUpdates the list of stations (AM/DAB)
››› page 14. Information and possible icons
Display: Meaning
The RDS radio data service is disabled.
TPTraffic news is available.
No stations with traffic news are availa-
ble.
AF offThe tracking of alternative frequencies is
disabled.
The radio station is stored in a memory
button.
11
Page 16 of 52
Radio
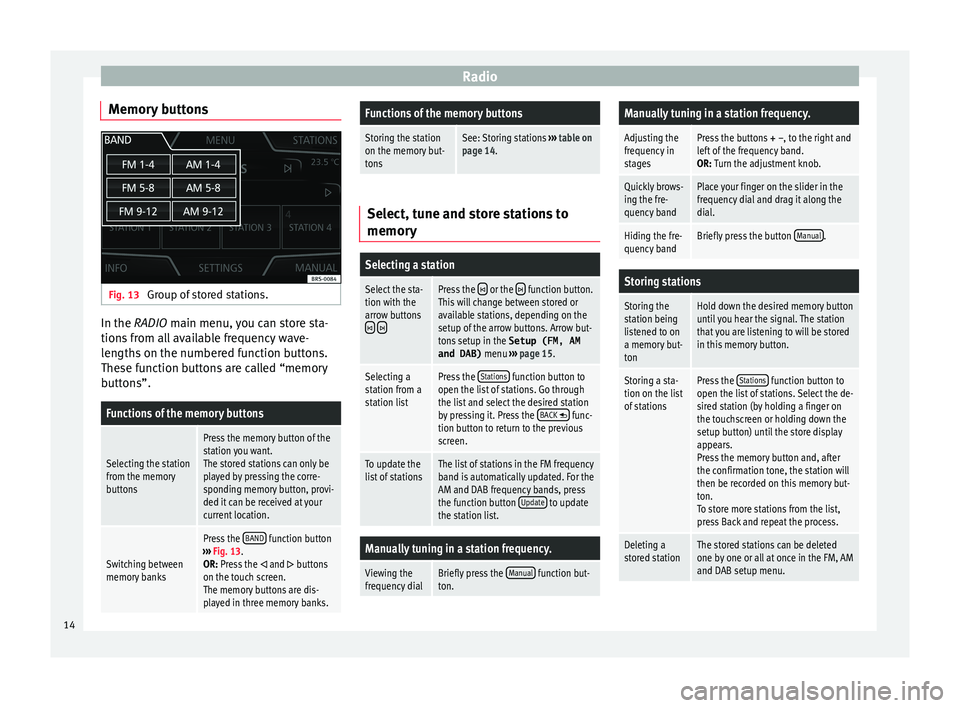
Memory buttons Fig. 13
Group of stored stations. In the RADIO m
ain menu,
y ou can store sta-
tions from all available frequency wave-
lengths on the numbered function buttons.
These function buttons are called “memory
buttons”.
Functions of the memory buttons
Selecting the station
from the memory
buttons
Press the memory button of the
station you want.
The stored stations can only be
played by pressing the corre-
sponding memory button, provi-
ded it can be received at your
current location.
Switching between
memory banks
Press the BAND function button
››› Fig. 13.
OR: Press the
and buttons
on the touch screen.
The memory buttons are dis-
played in three memory banks.
Functions of the memory buttons
Storing the station
on the memory but-
tonsSee: Storing stations ››› table on
page 14. Select, tune and store stations to
memory
Selecting a station
Select the sta-
tion with the
arrow buttons
Press the or the function button.
This will change between stored or
available stations, depending on the
setup of the arrow buttons. Arrow but-
tons setup in the Setup (FM, AM
and DAB) menu ››› page 15.
Selecting a
station from a
station listPress the Stations function button to
open the list of stations. Go through
the list and select the desired station
by pressing it. Press the BACK
func-
tion button to return to the previous
screen.
To update the
list of stationsThe list of stations in the FM frequency
band is automatically updated. For the
AM and DAB frequency bands, press
the function button Update
to update
the station list.
Manually tuning in a station frequency.
Viewing the
frequency dialBriefly press the Manual function but-
ton.
Manually tuning in a station frequency.
Adjusting the
frequency in
stagesPress the buttons + –, to the right and
left of the frequency band.
OR: Turn the adjustment knob.
Quickly brows-
ing the fre-
quency bandPlace your finger on the slider in the
frequency dial and drag it along the
dial.
Hiding the fre-
quency bandBriefly press the button Manual.
Storing stations
Storing the
station being
listened to on
a memory but-
tonHold down the desired memory button
until you hear the signal. The station
that you are listening to will be stored
in this memory button.
Storing a sta-
tion on the list
of stationsPress the Stations function button to
open the list of stations. Select the de-
sired station (by holding a finger on
the touchscreen or holding down the
setup button) until the store display
appears.
Press the memory button and, after
the confirmation tone, the station will
then be recorded on this memory but-
ton.
To store more stations from the list,
press Back and repeat the process.
Deleting a
stored stationThe stored stations can be deleted
one by one or all at once in the FM, AM
and DAB setup menu. 14
Page 17 of 52
Radio
Scan function (SCAN) When the scan function is running, all availa-
bl
e s
tations on the current frequency band
are played in sequence for about 5 seconds
each.
Starting and stopping the scan function
Starting the
scan functionPress the SETTINGS function button
and then select SCAN.
Stopping the
scan functionPress the function button to
stop the scan function at the station
that is currently playing.
OR: Briefly press the adjustment
knob.
Manually selecting a station with the
memory buttons or changing the
screen also stops the scan function. Traffic information (TP)
Traffic information tracking with the TP func-
tion i
s
on
ly possible if the station is availa-
ble. The stations with the traffic information
function are indicated in the Radio main
menu and in the list of stations by the TP
symbol ›››
Fig. 8 and ›››
Fig. 9.
Some stations that do not have their own
traffic news support the TP function by broad-
casting traffic announcements from other
stations (EON). Switching the TP function on and off
● In the menu Setup (FM, AM and
DAB), pres
s the function button
Traffic programme (TP) to activate or de
acti-
v at
e this function ››› page 15.
Active TP function and station selection
Traffic warnings are played in Audio mode.
In FM mode, the station tuned in must have
the TP function. If a station without the TP
function is selected, this will be indicated
half way up the left of the screen .
In AM mode or media mode, the unit will al-
ways automatically tune to a traffic news sta-
tion in the background, provided that one is
available. Depending on your location, this
process can take some time.
Incoming traffic information
In active Audio mode, an incoming traffic an-
nouncement will play automatically.
During the traffic announcement, a pop-up
window is displayed and the radio changes,
depending on the case, to the traffic news
station (EON).
The media mode is paused and the volume is
adjusted to the preset level ›››
page 41.
The volume of the traffic announcement can
be adjusted with the volume control. The ad- justed volume setting will be applied to sub-
sequent announc
ements.
● Press the function button Cancel to end the
c urr
ent
traffic announcement. The TP function
remains activated.
● OR: Press the function button De
activate to
end the c urr
ent
traffic announcement and
permanently deactivate the TP function. This
can be reactivated in the setup menu.
Setup (FM, AM, DAB) FM setup
● Select the frequency band FM by
pr
essing
the infotainment button RADIO .
● Press the function button Settin
g
s to open
the menu FM setup .
Function button: function
SCAN: Scan function. When the scan function is active,
all available stations on the current frequency band are
played in sequence for approximately 5 seconds each
››› page 15.
Seek mode: determines the setup of the buttons with ar-
rows and . This setting applies to all frequency
bands (FM, AM and DAB).
Preset list: All stored stations on the selected frequen-
cy band can be selected with the arrow buttons.
Station list: All available stations on the selected fre-
quency band can be selected with the arrow buttons.» 15
Page 18 of 52
RadioFunction button: function
Sort by: to choose the mode in which the stations will be
arranged a)
.
Group: sort by station group.
Alphabet: sort by alphabetical order.
Traffic programme (TP): The TP function (traffic news sta-
tion tracking) is active ››› page 15 a)
.
Delete presets: to delete all or some of the stored sta-
tions.
Advanced settingsa) :
Radio Data System (RDS)a)
: radio data system (RDS) ac-
tivated ››› page 12. With the checkbox deselected ,
the functions depending on the RDS system will not
be available. The function buttons depending on the
RDS system will remain inactive (in grey).
Alternative frequency (AF): the automatic station track-
ing is active. With the checkbox deselected the
function button Regional RDS remains inactive (grey). a)
RDS Regional: determines the setup for the regional au-
tomatic station tracking via the RDS ››› page 12 a)
.
Fixed: the unit only switches to alternative frequen-
cies for the selected station if the same regional
service is being broadcast.
Automatic: the unit always switches to the station's
frequency that currently offers the best reception. As
a result, regional programmes may be interrupted.
a) This depends on the country and unit in question.
AM setup
● Select the AM frequency b
and by pressing
the RADIO infotainment button.
● Press the function button Settin
g
s to open
the menu AM setup .
Function button: function
SCAN: Scan function. When the scan function is active,
all available stations on the current frequency band are
played in sequence for approximately 5 seconds each
››› page 15.
Traffic programme (TP): the TP function (traffic news sta-
tion tracking) is active ››› page 15.
Seek mode: determines the setup of the buttons with ar-
rows and . This setting applies to all frequency
bands (FM, AM and DAB).
Preset list: all stored stations on the selected frequen-
cy band can be selected with the arrow buttons.
Station list: all available stations on the selected fre-
quency band can be selected with the arrow buttons.
Delete presets: to delete all or some of the stored sta-
tions. DAB setup
● Select the DAB
fr
equency band by pressing
the RADIO infotainment button.
● Press the function button Settin
g
s to open
the menu DAB setup .
Function button: function
SCAN: Scan function. When the scan function is active,
all available stations on the current frequency band are
played in sequence for approximately 5 seconds each
››› page 15.
Seek mode: determines the setup of the buttons with ar-
rows and . This setting applies to all frequency
bands (FM, AM and DAB).
Preset list: all stored stations on the selected frequen-
cy band can be selected with the arrow buttons.
Station list: all available stations on the selected fre-
quency band can be selected with the arrow buttons.
VIEW: to select the type of view of the DAB station list.
Ensemble: hierarchical view of stations and ensembles
in alphabetical order.
Station list: overall view of stations in alphabetical or-
der.
Traffic programme (TP): the TP function (traffic news station
tracking) is active ››› page 15.
Delete presets: to delete all or some of the stored sta-
tions.
Advanced settings: DAB services setup.
DAB traffic announcements: DAB traffic announcements
are played in the same way as TP traffic announce-
ments in all operating modes.
Other DAB announcements: DAB announcements
(news, sport, weather, warnings etc.) will interrupt the
current DAB radio mode. 16
Page 22 of 52
Media
Function buttons of the main menu MediaFunction button: Function
MEDIA
Press to select another media source
››› page 20.
SD card
: SD memory card ››› page 22.
Bluetooth audio: Bluetooth audio
››› page 24.
USB
: USB data medium ››› page 22.
AUX: external audio source ››› page 25.
SELECTIONOpens the track list ››› page 21.
or Changes track in Media mode or fast for-
ward/rewind
››› page 21.
Playback will stop. The function button changes to
››› page 21.
Playback will continue. The function but-
ton changes to
››› page 21.
SETTINGSOpens the menu Media settings
››› page 25.
Repeat all tracks. Repeats all the tracks
that are on the same memory level as the
track being played at that moment. If
Mix/Repeat/Scan including subfolders
is
active in the Media Settings menu , the
sub-folders will also be included.
The current track will be repeated.
Random play. Information and possible icons
Display: Meaning
A›››
Fig. 15
Displays track information (ID3 tag in
MP3 files).
Audio files: displays the artist's name,
album title and song title.
B››› Fig. 15
Playing time so far.
The time bar allows you to select the de-
sired playing time.
RDS radio data service deactivated. The
RDS can be activated in the menu
Setup
(FM, AM) ››› page 15.
TPThe TP is active and receiving ››› page 15.
No traffic announcement station can be
received.
Note
When the media source is inserted, playing
wi l
l not start automatically; it is necessary for
the user to select the source. Nor will the me-
dia source change when it is ejected. Changing the media source
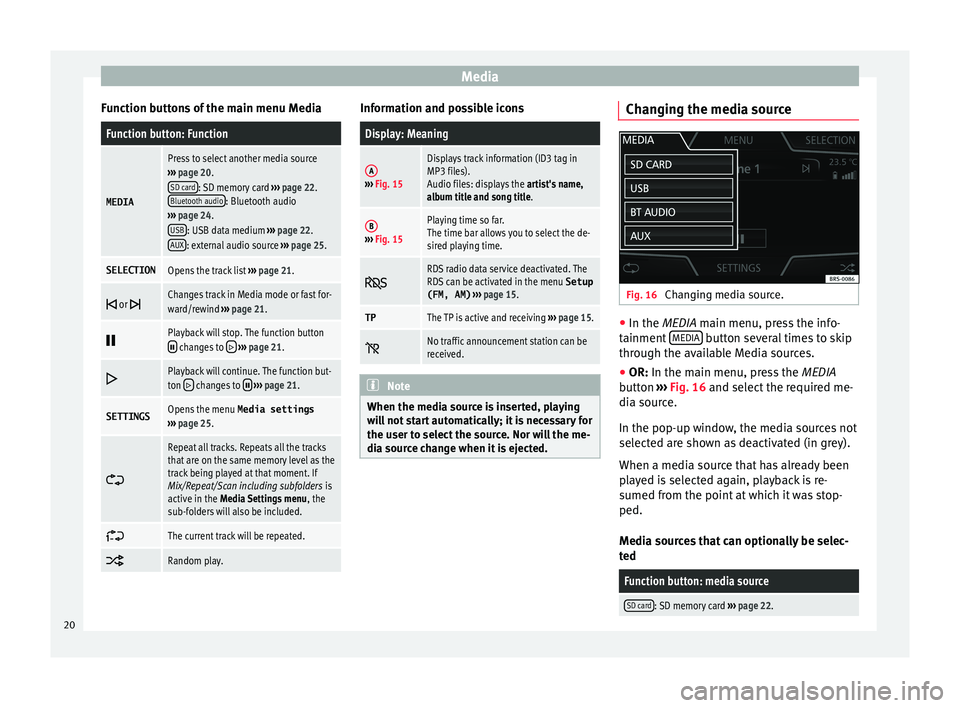
Fig. 16
Changing media source. ●
In the MEDIA m ain menu, pr
e
ss the info-
tainment MEDIA button several times to skip
thr ough the av
ai
lable Media sources.
● OR: In the main menu, pre
ss the MEDIA
button ››› Fig. 16 and select the required me-
dia source.
In the pop-up window, the media sources not
selected are shown as deactivated (in grey).
When a media source that has already been
played is selected again, playback is re-
sumed from the point at which it was stop-
ped.
Media sources that can optionally be selec-
ted
Function button: media source
SD card: SD memory card ››› page 22. 20
Page 23 of 52
MediaFunction button: media source
USB: USB data medium
››› page 22.
BT audio: playing audio files via Bluetooth ®
››› page 24.
AUX: external audio source connected to the AUX-IN
multimedia socket ››› page 25. Change the track in the MEDIA main
menu
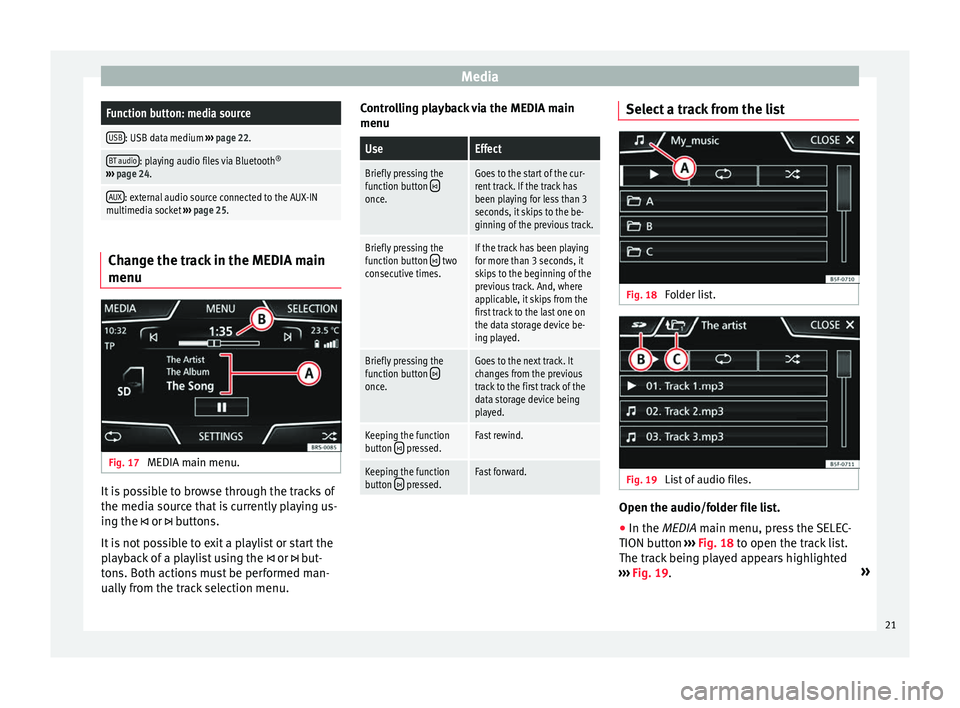
Fig. 17
MEDIA main menu. It is possible to browse through the tracks of
the medi
a sour
c
e that is currently playing us-
ing the or buttons.
It is not possible to exit a playlist or start the
playback of a playlist using the or but-
tons. Both actions must be performed man-
ually from the track selection menu. Controlling playback via the MEDIA main
menu
UseEffect
Briefly pressing the
function button once.
Goes to the start of the cur-
rent track. If the track has
been playing for less than 3
seconds, it skips to the be-
ginning of the previous track.
Briefly pressing the
function button two
consecutive times.If the track has been playing
for more than 3 seconds, it
skips to the beginning of the
previous track. And, where
applicable, it skips from the
first track to the last one on
the data storage device be-
ing played.
Briefly pressing the
function button once.
Goes to the next track. It
changes from the previous
track to the first track of the
data storage device being
played.
Keeping the function
button pressed.Fast rewind.
Keeping the function
button pressed.Fast forward. Select a track from the list
Fig. 18
Folder list. Fig. 19
List of audio files. Open the audio/folder file list.
● In the MEDIA m ain menu, pr
e
ss the SELEC-
TION button ››› Fig. 18 to open the track list.
The track being played appears highlighted
››› Fig. 19. »
21