steering Seat Toledo 2017 Owner's Guide
[x] Cancel search | Manufacturer: SEAT, Model Year: 2017, Model line: Toledo, Model: Seat Toledo 2017Pages: 248, PDF Size: 5.86 MB
Page 72 of 248
Safety
should have a specialised workshop check
the sy s
t
em immediately.
The airbag system availability is controlled
electronically, regardless of whether an air-
bag is disabled.
If the front airbag, side airbag, head protec-
tion airbag or the belt tensioner are disabled
using the diagnostics system:
● After switching on the ignition, the warn-
ing l
amp illuminates for about 4 seconds and
flashes for another 12 seconds.
The informative display indicates:
Airbag/belt tensioner disabled!
If the front passenger airbag has been disa-
bled with the airbag switch located in the
storage compartment side: ● When the ignition is turned on, the
warning l
amp illuminates for about 4 sec-
onds.
● The airbag is disabled, signalled with the
warning l
amp which lights up with the
word placed in the cen-
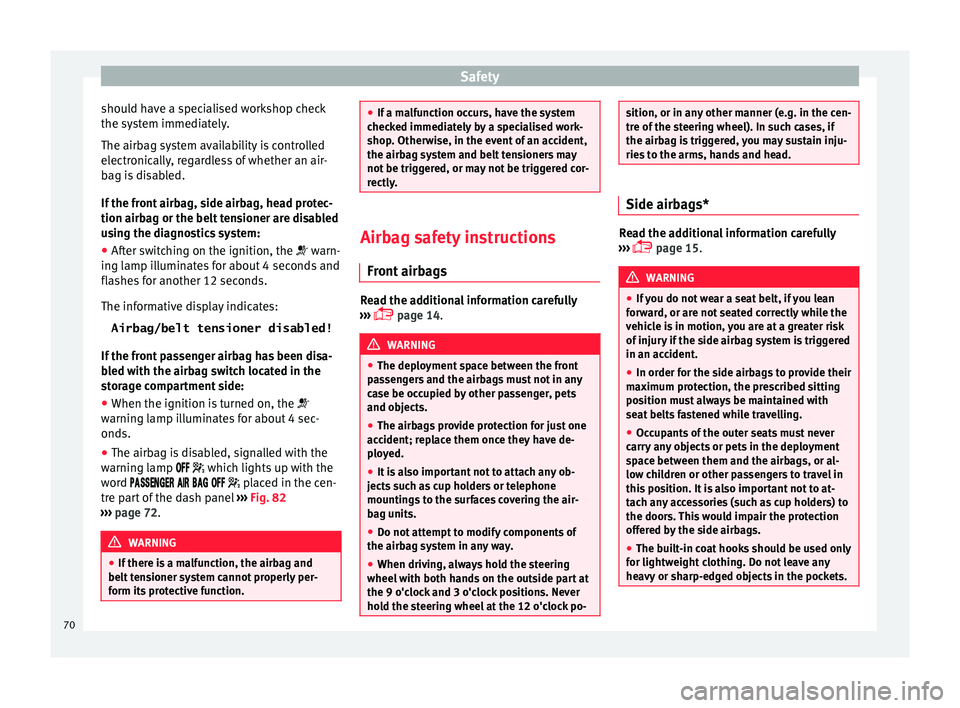
tre part of the dash panel ››› Fig. 82
››› page 72. WARNING
● If ther e i
s a malfunction, the airbag and
belt tensioner system cannot properly per-
form its protective function. ●
If a m a
lfunction occurs, have the system
checked immediately by a specialised work-
shop. Otherwise, in the event of an accident,
the airbag system and belt tensioners may
not be triggered, or may not be triggered cor-
rectly. Airbag safety instructions
Front airb
ags Read the additional information carefully
› ›
›
page 14. WARNING
● The deplo yment
space between the front
passengers and the airbags must not in any
case be occupied by other passenger, pets
and objects.
● The airbags provide protection for just one
accident; r
eplace them once they have de-
ployed.
● It is also important not to attach any ob-
jects
such as cup holders or telephone
mountings to the surfaces covering the air-
bag units.
● Do not attempt to modify components of
the airbag sys
tem in any way.
● When driving, always hold the steering
wheel with both h
ands on the outside part at
the 9 o'clock and 3 o'clock positions. Never
hold the steering wheel at the 12 o'clock po- sition, or in any other manner (e.g. in the cen-
tre of
the s
teering wheel). In such cases, if
the airbag is triggered, you may sustain inju-
ries to the arms, hands and head. Side airbags*
Read the additional information carefully
›› ›
page 15. WARNING
● If y
ou do not wear a seat belt, if you lean
forward, or are not seated correctly while the
vehicle is in motion, you are at a greater risk
of injury if the side airbag system is triggered
in an accident.
● In order for the side airbags to provide their
maximum pr
otection, the prescribed sitting
position must always be maintained with
seat belts fastened while travelling.
● Occupants of the outer seats must never
carry
any objects or pets in the deployment
space between them and the airbags, or al-
low children or other passengers to travel in
this position. It is also important not to at-
tach any accessories (such as cup holders) to
the doors. This would impair the protection
offered by the side airbags.
● The built-in coat hooks should be used only
for lightweight
clothing. Do not leave any
heavy or sharp-edged objects in the pockets. 70
Page 74 of 248
Safety
●
The side and he a
d airbags are managed
through sensors located in the interior of the
front doors. To ensure the correct operation of
the side and curtain airbags neither the
doors nor the door panels should be modified
in any way (e.g. fitting loudspeakers). If the
front door is damaged, the airbag system
may not work correctly. All work carried out
on the front door must be done in a special-
ised workshop. Deactivating airbags
D e
activ
ation of the front airbagThe disabling of airbags is only carried out in
c
er
t
ain cases, i.e. if:
● a child seat is required in the front passen-
ger seat
with the child facing in the opposite
direction to the direction of travel (in some
countries, due to divergent legal require-
ments, facing in the direction of travel)
››› page 75;
● despite the driver's seat being in the cor-
rect po
sition, a minimum distance of 25 cm
cannot be maintained between the centre of
the steering wheel and the driver's torso,
● installation of special devices is required in
the steerin
g wheel area due to a physical dis-
ability, ●
if y
ou have special seats installed (e.g. an
orthopaedic seat without side airbags).
The front passenger front airbag can be disa-
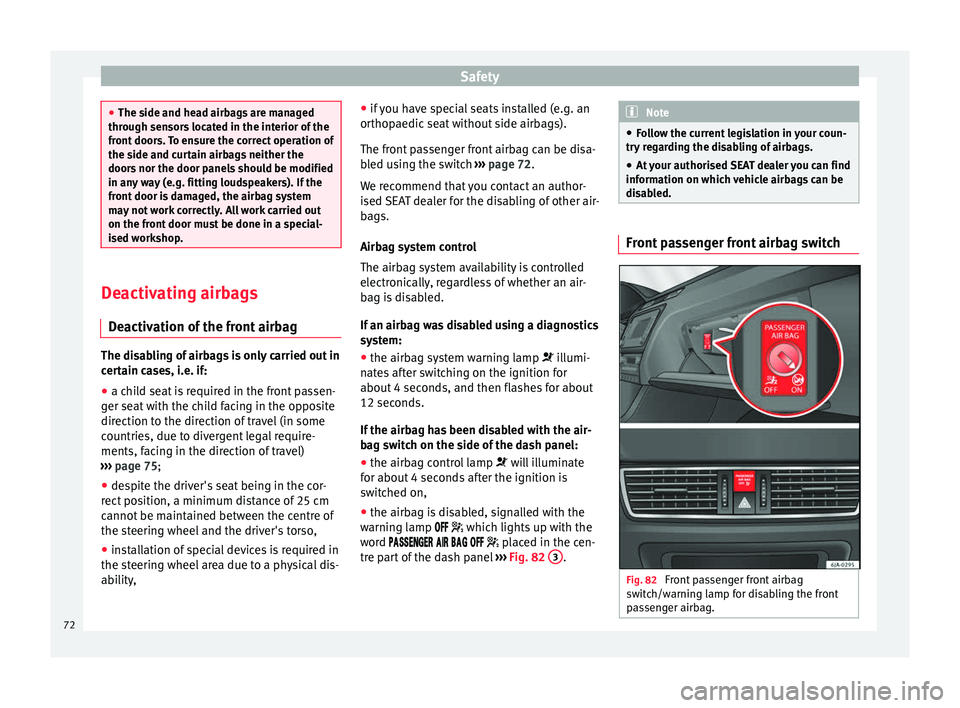
bled using the switch ››› page 72.
We recommend that you contact an author-
ised SEAT dealer for the disabling of other air-
bags.
Airbag system control
The airbag system availability is controlled
electronically, regardless of whether an air-
bag is disabled.
If an airbag was disabled using a diagnostics
system: ● the airbag system warning lamp illumi-
n
ates after switching on the ignition for
about 4 seconds, and then flashes for about
12 seconds.
If the airbag has been disabled with the air-
bag switch on the side of the dash panel:
● the airbag control lamp wil
l illuminate
for about 4 seconds after the ignition is
switched on,
● the airbag is disabled, signalled with the
warning l
amp which lights up with the
word placed in the cen-
tre part of the dash panel ›››
Fig. 82 3 . Note
● Fo l
low the current legislation in your coun-
try regarding the disabling of airbags.
● At your authorised SEAT dealer you can find
information on whic
h vehicle airbags can be
disabled. Front passenger front airbag switch
Fig. 82
Front passenger front airbag
sw it
c
h/warning lamp for disabling the front
passenger airbag. 72
Page 84 of 248
Emergencies
●
Prot ect
the fuse boxes when open to pre-
vent the entry of dust or humidity as they can
damage the electrical system.
● Always carefully remove the fuse box cov-
ers and r
efit them correctly to avoid problems
with your vehicle. Note
● One c omponent m
ay have more than one
fuse.
● Several components may run on a single
fuse.
● In the
vehicle, there are more fuses than
those indicat
ed in this chapter. These should
only be changed by a specialised workshop.
● Positions not containing a fuse do not ap-
pear in the fo
llowing tables.
● Some of the equipment listed in the tables
below pert
ain only to certain versions of the
model or are optional extras.
● Please note that the above lists, while cor-
rect at
the time of printing, are subject to
change. Fuses in the dash panel
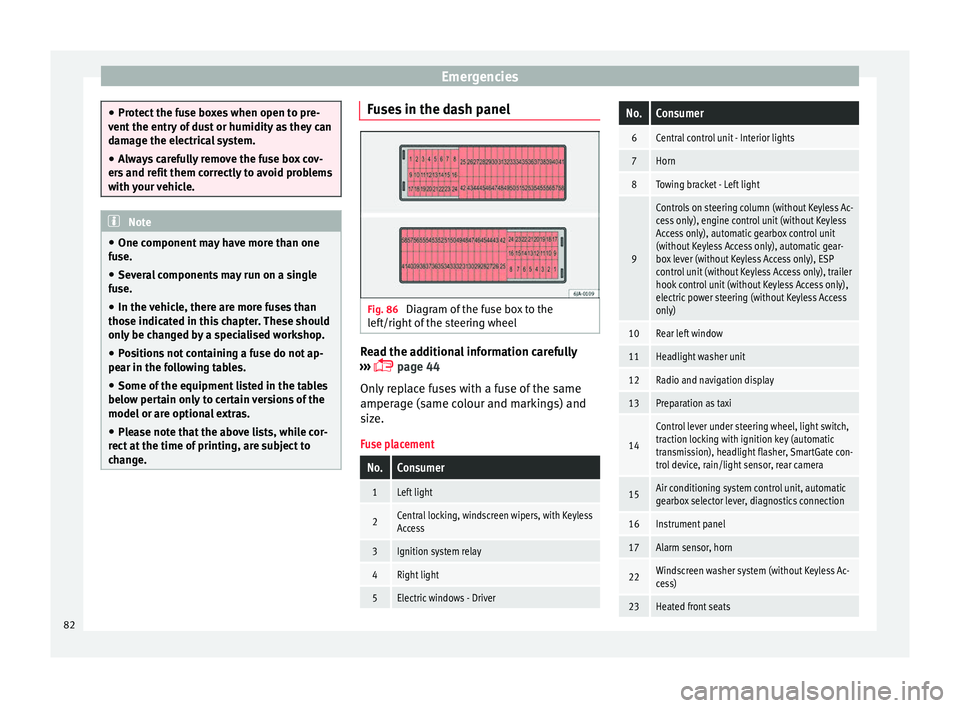
Fig. 86
Diagram of the fuse box to the
l ef
t/right
of the steering wheel Read the additional information carefully
› ›
›
page 44
Only replace fuses with a fuse of the same
amperage (same colour and markings) and
size.
Fuse placement
No.Consumer
1Left light
2Central locking, windscreen wipers, with Keyless
Access
3Ignition system relay
4Right light
5Electric windows - Driver
No.Consumer
6Central control unit - Interior lights
7Horn
8Towing bracket - Left light
9
Controls on steering column (without Keyless Ac-
cess only), engine control unit (without Keyless
Access only), automatic gearbox control unit
(without Keyless Access only), automatic gear-
box lever (without Keyless Access only), ESP
control unit (without Keyless Access only), trailer
hook control unit (without Keyless Access only),
electric power steering (without Keyless Access
only)
10Rear left window
11Headlight washer unit
12Radio and navigation display
13Preparation as taxi
14
Control lever under steering wheel, light switch,
traction locking with ignition key (automatic
transmission), headlight flasher, SmartGate con-
trol device, rain/light sensor, rear camera
15Air conditioning system control unit, automatic
gearbox selector lever, diagnostics connection
16Instrument panel
17Alarm sensor, horn
22Windscreen washer system (without Keyless Ac-
cess)
23Heated front seats 82
Page 85 of 248
Fuses and bulbsNo.Consumer
24Air conditioning fan, heating, control unit for air
conditioning, heating
26Front seat heating switch.
27Rear window wiper
29Airbag
30
Electric windows, reversing light switch, air con-
ditioning control unit, Park Assist control unit,
exterior mirror, power supply for middle button
bar, power supply for the side button bar, interi-
or mirror
31Fuel pump, radiator fan control unit, cruise con-
trol, relay coil for the windscreen and rear win-
dow washer system, switch for the lights
32Diagnostics socket, headlight range regulator,
control lever under the steering wheel, ambient
lighting regulator
33Ignition relay coil, clutch pedal switch
34Heatable washer jets of windscreen washer
36USB charging socket
37Radar
39Additional electric heating
41Rear window heater
42Electric windows - passenger
43Towing bracket - Connector contact
No.Consumer
4412 V connection in the interior, 12 V connection
in the boot
45Rear right window
46Windshield and front window washing system,
control lever under the steering wheel
47Towing bracket - Connector contact
48Towing bracket - Right hand light
49Fuel pump control unit
50Radio
51Heat for exterior mirrors
52Keyless Access
53Steering lock (Keyless Access)
54ABS/ESC control unit
56Diagnosis
59Full LED
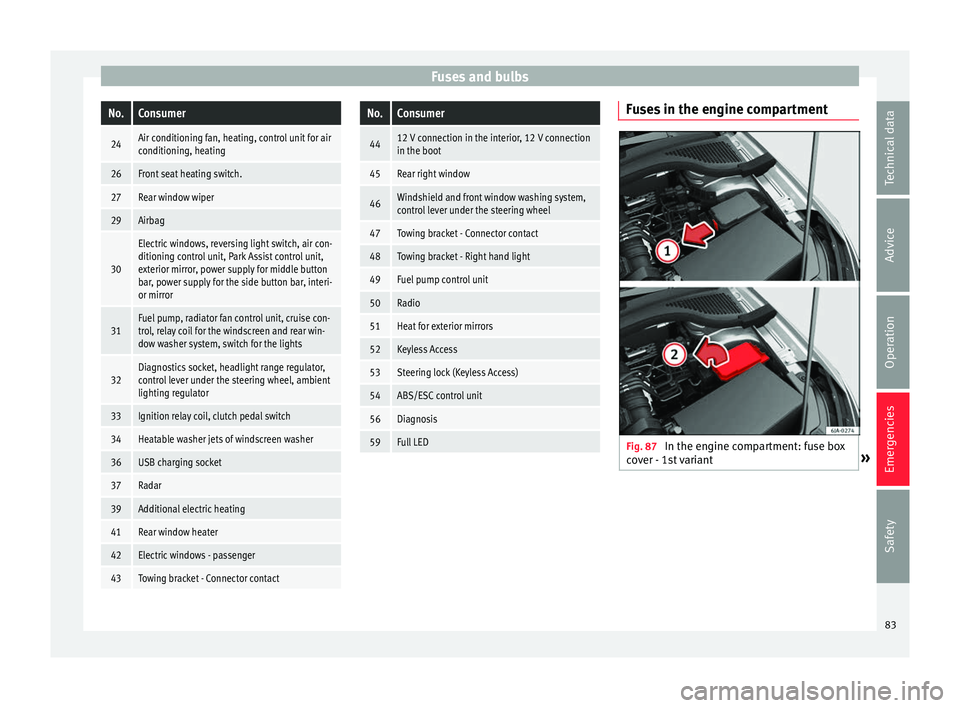
Fuses in the engine compartment
Fig. 87
In the engine compartment: fuse box
c o
v
er - 1st variant » 83
Technical data
Advice
Operation
Emergencies
Safety
Page 97 of 248
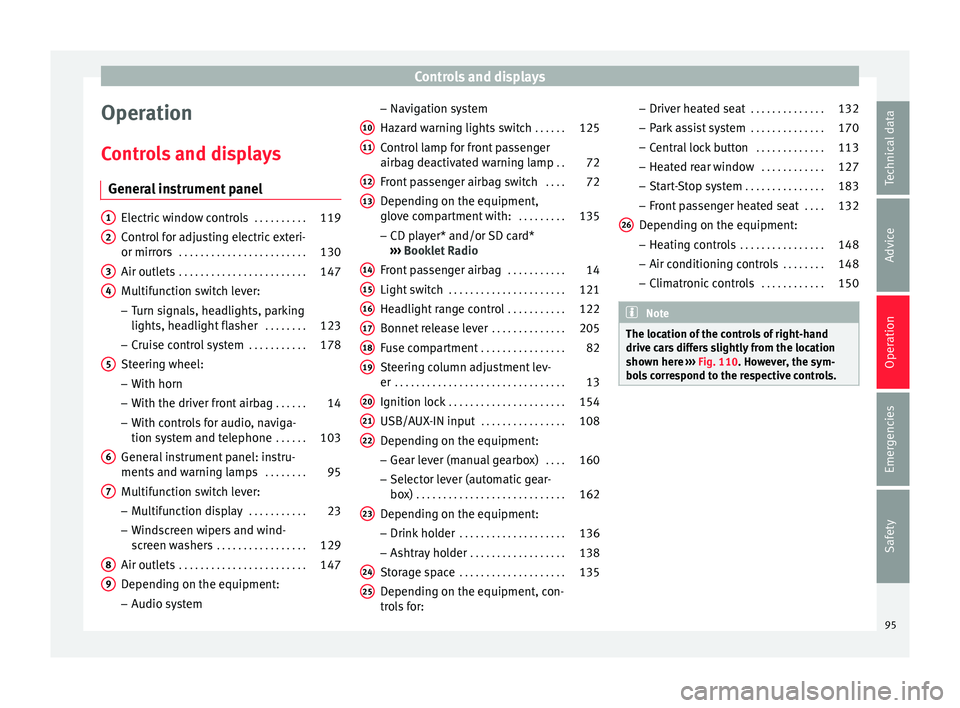
Controls and displays
Operation
C ontr
o
ls and displays
General instrument panel Electric window controls
. . . . . . . . . .119
Control for adjusting electric exteri-
or mirror s . . . . . . . . . . . . . . . . . . . . . . . . 130
Air outl
ets . . . . . . . . . . . . . . . . . . . . . . . . 147
Multifunction switch lever:
– Turn s ign
als, headlights, parking
lights, headlight flasher . . . . . . . .123
– Crui se c
ontrol system . . . . . . . . . . .178
Steering wheel:
– With horn
– With the driv
er front airbag . . . . . .14
– With c ontr
ols for audio, naviga-
tion system and telephone . . . . . .103
General instrument panel: instru-
ments and w arnin
g lamps . . . . . . . . 95
Multifunction switch lever:
– Multif
unction display . . . . . . . . . . .23
– Wind s
creen wipers and wind-
screen washers . . . . . . . . . . . . . . . . . 129
Air outlets . . . . . . . . . . . . . . . . . . . . . . . . 147
Depending on the equipment:
– Audio sy st
em
1 2
3
4
5
6
7
8
9 –
Nav ig
ation sy
stem
Hazard warning lights switch . . . . . .125
Control lamp for front passenger
airbag deactiv
ated warning lamp . .72
Front passenger airbag switch . . . .72
Depending on the equipment,
glove c
ompartment with: . . . . . . . . .135
– CD pla
yer* and/or SD card*
››› Booklet Radio
Front passenger airbag . . . . . . . . . . .14
Light switch . . . . . . . . . . . . . . . . . . . . . . 121
Headlight range control . . . . . . . . . . .122
Bonnet release lever . . . . . . . . . . . . . .205
Fuse compartment . . . . . . . . . . . . . . . . 82
Steering column adjustment lev-
er . . . . . . . . . . . . . . . . . . . . . . . . . . . . . . . . 13
Ignition lock . . . . . . . . . . . . . . . . . . . . . . 154
USB/AUX-IN input . . . . . . . . . . . . . . . . 108
Depending on the equipment: – Gear lev
er (manual gearbox) . . . .160
– Select or l
ever (automatic gear-
box) . . . . . . . . . . . . . . . . . . . . . . . . . . . . 162
Depending on the equipment:
– Drink ho l
der . . . . . . . . . . . . . . . . . . . . 136
– Ashtra y
holder . . . . . . . . . . . . . . . . . . 138
Storage space . . . . . . . . . . . . . . . . . . . . 135
Depending on the equipment, con-
tro l
s for:
10 11
12
13
14
15
16
17
18
19
20
21
22
23
24
25 –
Driv er he
at
ed seat . . . . . . . . . . . . . . 132
– Park a
ssist system . . . . . . . . . . . . . . 170
– Central
lock button . . . . . . . . . . . . . 113
– Heated r
ear window . . . . . . . . . . . . 127
– Start
-Stop system . . . . . . . . . . . . . . . 183
– Front p
assenger heated seat . . . .132
Depending on the equipment: – Heating c
ontrols . . . . . . . . . . . . . . . . 148
– Air conditioning c
ontrols . . . . . . . . 148
– Climatr
onic controls . . . . . . . . . . . . 150 Note
The location of the controls of right-hand
drive c ar
s differs slightly from the location
shown here ››› Fig. 110. However, the sym-
bols correspond to the respective controls. 26
95
Technical data
Advice
Operation
Emergencies
Safety
Page 105 of 248
Communications and multimedia
Communications and multi-
medi a
St eerin
g wheel controls*
General information The steering wheel includes a multifunction
modul
e fr
om where it is possible to control
the audio, telephone and radio/navigation
functions without needing to distract the
driver.
There are two versions of the multifunction
module:
● Audio, telephone and navigation with voice
contr o
l version : for controlling the audio
functions available (radio, audio CD, MP3,
iPod ®1)
, USB 1)
, SD 1)
) and Bluetooth system
from the steering wheel.
● Audio, telephone and navigation without
voice c
ontrol version : for controlling the au-
dio functions available (radio, audio CD,
MP3, iPod ®1)
, USB 1)
, SD 1)
) and Bluetooth sys-
tem from the steering wheel. 1)
Depending on the vehicle equipment.
103
Technical data
Advice
Operation
Emergencies
Safety
Page 106 of 248
Operation
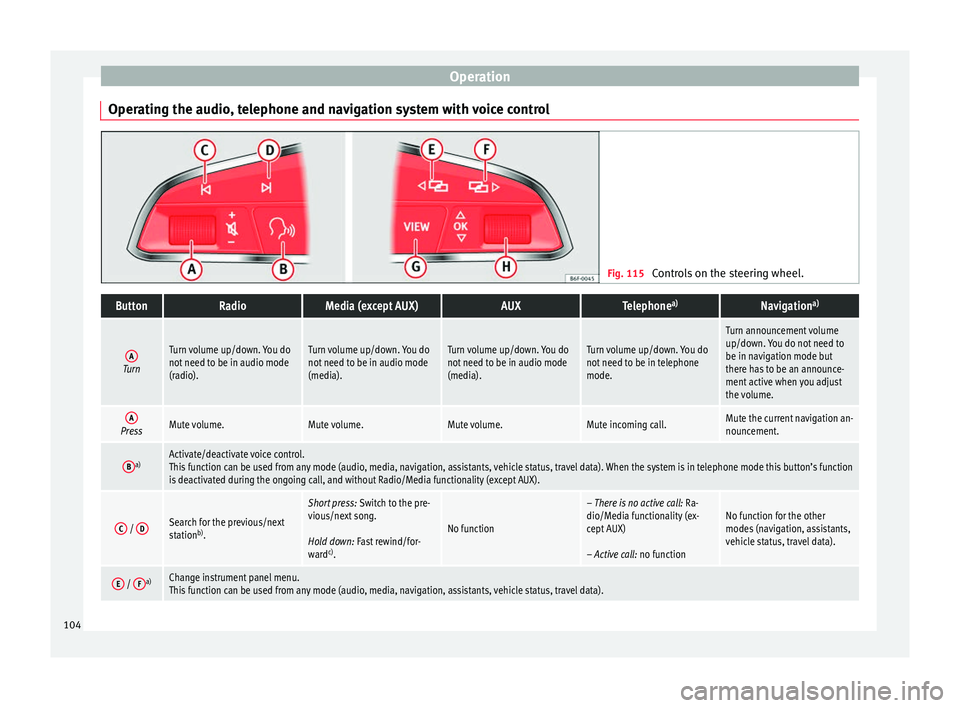
Operating the audio, telephone and navigation system with voice control Fig. 115
Controls on the steering wheel.ButtonRadioMedia (except AUX)AUXTelephone a)Navigation a)
ATurn
Turn volume up/down. You do
not need to be in audio mode
(radio).Turn volume up/down. You do
not need to be in audio mode
(media).Turn volume up/down. You do
not need to be in audio mode
(media).Turn volume up/down. You do
not need to be in telephone
mode.
Turn announcement volume
up/down. You do not need to
be in navigation mode but
there has to be an announce-
ment active when you adjust
the volume.
APressMute volume.Mute volume.Mute volume.Mute incoming call.Mute the current navigation an-
nouncement.
Ba)Activate/deactivate voice control.
This function can be used from any mode (audio, media, navigation, assistants, vehicle status, travel data). When the system is in telephone mode this button’s function
is deactivated during the ongoing call, and without Radio/Media functionality (except AUX).
C /
DSearch for the previous/next
station b)
.
Short press: Switch to the pre-
vious/next song.
Hold down: Fast rewind/for-
ward c)
.
No function
– There is no active call: Ra-
dio/Media functionality (ex-
cept AUX)
– Active call: no functionNo function for the other
modes (navigation, assistants,
vehicle status, travel data).
E / Fa)Change instrument panel menu.
This function can be used from any mode (audio, media, navigation, assistants, vehicle status, travel data).104
Page 108 of 248
Operation
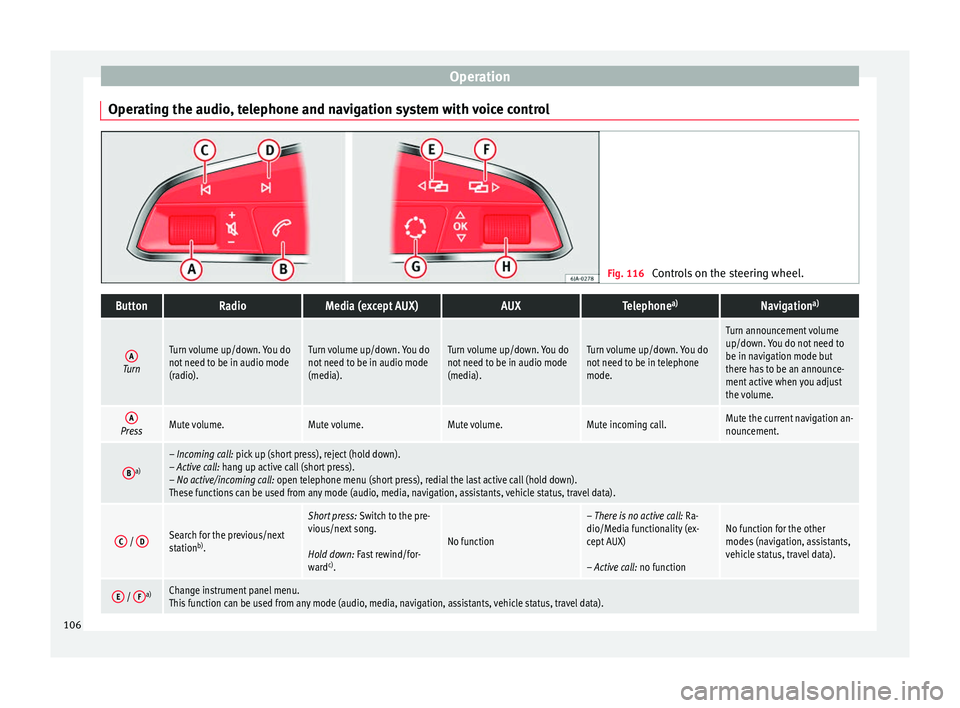
Operating the audio, telephone and navigation system with voice control Fig. 116
Controls on the steering wheel.ButtonRadioMedia (except AUX)AUXTelephone a)Navigation a)
ATurn
Turn volume up/down. You do
not need to be in audio mode
(radio).Turn volume up/down. You do
not need to be in audio mode
(media).Turn volume up/down. You do
not need to be in audio mode
(media).Turn volume up/down. You do
not need to be in telephone
mode.
Turn announcement volume
up/down. You do not need to
be in navigation mode but
there has to be an announce-
ment active when you adjust
the volume.
APressMute volume.Mute volume.Mute volume.Mute incoming call.Mute the current navigation an-
nouncement.
Ba)– Incoming call: pick up (short press), reject (hold down).
– Active call: hang up active call (short press).
– No active/incoming call: open telephone menu (short press), redial the last active call (hold down).
These functions can be used from any mode (audio, media, navigation, assistants, vehicle status, travel data).
C /
DSearch for the previous/next
station b)
.
Short press: Switch to the pre-
vious/next song.
Hold down: Fast rewind/for-
ward c)
.
No function
– There is no active call: Ra-
dio/Media functionality (ex-
cept AUX)
– Active call: no functionNo function for the other
modes (navigation, assistants,
vehicle status, travel data).
E / Fa)Change instrument panel menu.
This function can be used from any mode (audio, media, navigation, assistants, vehicle status, travel data).106
Page 112 of 248
Operation
WARNING
● Never l e
ave the key inside whenever you
leave the vehicle - even if only for a moment.
This is particularly important if children are
to remain in the vehicle. Children might start
the engine or some other electrical compo-
nent, e.g. electric windows. Risk of injury!
● Wait until the vehicle has completely stop-
ped before t
aking the key out of the ignition.
Otherwise the steering wheel may lock sud-
denly. Risk of accident! CAUTION
● Eac h k
ey contains electronic components
and must, therefore, be protected from damp-
ness and strong vibrations.
● Keep the grooves in the key shaft clean.
Any dir
t (fibre from clothing, dust, etc.) has a
negative impact on locks, ignition, etc. Note
Should a key be lost, request a duplicate key
from an Authori sed S
EAT dealer. Replacing the battery in the remote
c
ontr
o
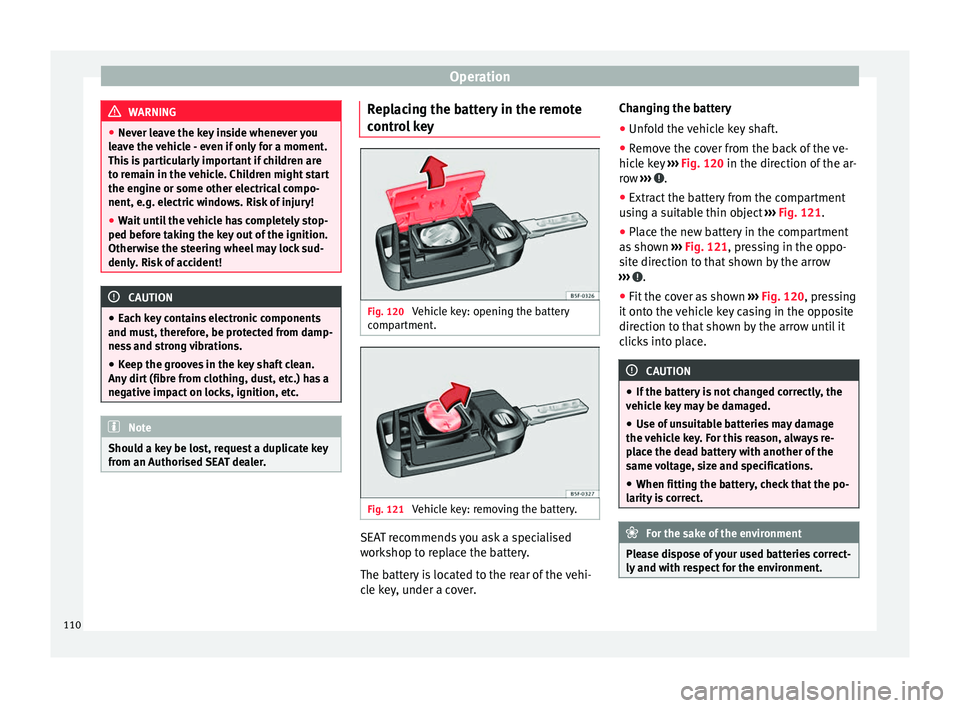
l key Fig. 120
Vehicle key: opening the battery
c omp
ar
tment. Fig. 121
Vehicle key: removing the battery. SEAT recommends you ask a specialised
w
ork
shop t
o replace the battery.
The battery is located to the rear of the vehi-
cle key, under a cover. Changing the battery
● Unfold the vehicle key shaft.
● Remove the cover from the back of the ve-
hicle k
ey ››› Fig. 120 in the direction of the ar-
row ››› .
● Extract the battery from the compartment
u s
in
g a suitable thin object ››› Fig. 121.
● Place the new battery in the compartment
as sho
wn ››› Fig. 121, pressing in the oppo-
site direction to that shown by the arrow
››› .
● Fit the cover as shown ››
›
Fig. 120 , pressing
it onto the vehicle key casing in the opposite
direction to that shown by the arrow until it
clicks into place. CAUTION
● If the b att
ery is not changed correctly, the
vehicle key may be damaged.
● Use of unsuitable batteries may damage
the vehic
le key. For this reason, always re-
place the dead battery with another of the
same voltage, size and specifications.
● When fitting the battery, check that the po-
larity i
s correct. For the sake of the environment
Please dispose of your used batteries correct-
ly and w ith r
espect for the environment.110
Page 126 of 248
Operation
If the light switch is in position
, the
symbol located next to the light switch will
light up. If the light illuminates automatically,
symbol located next to the light switch
will also illuminate.
Automatic headlights in case of rain
If the light switch is in position and the
automatic wiping in rain is on for more than
10 seconds, or the wipe (position 2 or
3 )
i s
on f
or longer than 15 seconds,
››› page 129 then the side lights and dipped
beam headlights will automatically switch
on.
The light automatically switches off if more
than 4 minutes have elapsed and the auto-
matic wipe or wipe (position 2 or
3 ) have
not been sw
it
ched on. CAUTION
Do not cover the windscreen light sensor with
stic k
ers or similar objects; this could impair
operation. Fog lights*
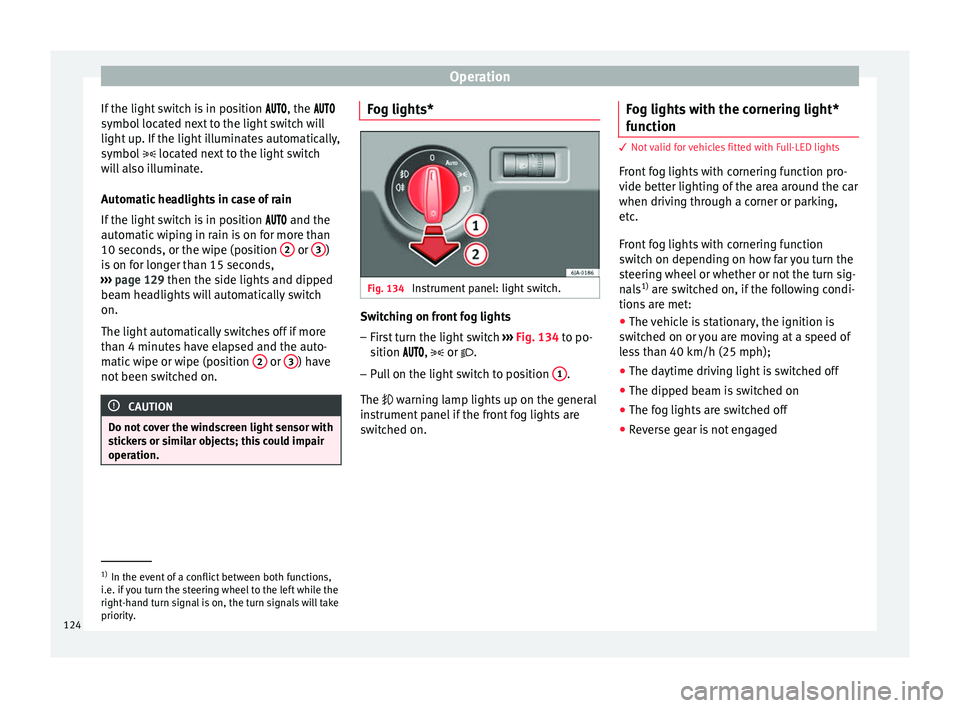
Fig. 134
Instrument panel: light switch. Switching on front fog lights
– First turn the light switch ››
›
Fig. 134 to po-
sition , or .
– Pull on the light switch to position 1 .
The w arnin
g l
amp lights up on the general
instrument panel if the front fog lights are
switched on. Fog lights with the cornering light*
function 3
Not valid for vehicles fitted with Full-LED lights
Fr ont
fog lights with cornering function pro-
vide better lighting of the area around the car
when driving through a corner or parking,
etc.
Front fog lights with cornering function
switch on depending on how far you turn the
steering wheel or whether or not the turn sig-
nals 1)
are switched on, if the following condi-
tions are met:
● The vehicle is stationary, the ignition is
swit c
hed on or you are moving at a speed of
less than 40 km/h (25 mph);
● The daytime driving light is switched off
● The dipped beam is switched on
● The fog lights are switched off
● Reverse gear is not engaged 1)
In the event of a conflict between both functions,
i.e. if
you turn the steering wheel to the left while the
right-hand turn signal is on, the turn signals will take
priority.
124