winter tyres Seat Toledo 2017 Owner's manual
[x] Cancel search | Manufacturer: SEAT, Model Year: 2017, Model line: Toledo, Model: Seat Toledo 2017Pages: 248, PDF Size: 5.86 MB
Page 6 of 248
Table of Contents
Engine management and emission control sys-
t em
. . . . . . . . . . . . . . . . . . . . . . . . . . . . . . . . . . . 167
Driv
ing tips . . . . . . . . . . . . . . . . . . . . . . . . . . . . . 169
Driver assistance systems . . . . . . . . . . . . . . . . . 170
Parking aid . . . . . . . . . . . . . . . . . . . . . . . . . . . . . 170
Rear Assist “Rear View Camera”* . . . . . . . . . . . 175
Cruise speed (Cruise Control)* . . . . . . . . . . . . . 178
Emergency brake assist system (Front As-
sis
t)* . . . . . . . . . . . . . . . . . . . . . . . . . . . . . . . . . . 179
Start-Stop System* . . . . . . . . . . . . . . . . . . . . . . . 183
Fatigue detection (break recommendation)* . . 185
Towing bracket device . . . . . . . . . . . . . . . . . . . . 186
Driving with a trailer . . . . . . . . . . . . . . . . . . . . . . 186
Towing bracket device . . . . . . . . . . . . . . . . . . . . 188
Advice . . . . . . . . . . . . . . . . . . . . . . . . . . . . . . . . 194
Care and maintenance . . . . . . . . . . . . . . . . . . . . 194
Accessories and modifications to the vehi-
cle
. . . . . . . . . . . . . . . . . . . . . . . . . . . . . . . . . . . . 194
Care and cleaning . . . . . . . . . . . . . . . . . . . . . . . 195
Checking and refilling levels . . . . . . . . . . . . . . . 201
Fuel . . . . . . . . . . . . . . . . . . . . . . . . . . . . . . . . . . . 201
Engine compartment . . . . . . . . . . . . . . . . . . . . . 204
Engine oil . . . . . . . . . . . . . . . . . . . . . . . . . . . . . . 207
Coolant . . . . . . . . . . . . . . . . . . . . . . . . . . . . . . . . 210
Brake fluid . . . . . . . . . . . . . . . . . . . . . . . . . . . . . 211
Window washer system . . . . . . . . . . . . . . . . . . . 212
Battery . . . . . . . . . . . . . . . . . . . . . . . . . . . . . . . . . 213
Wheels and tyres . . . . . . . . . . . . . . . . . . . . . . . . 217
Tyres . . . . . . . . . . . . . . . . . . . . . . . . . . . . . . . . . . 217
Spare wheel . . . . . . . . . . . . . . . . . . . . . . . . . . . . 220
Tyre monitoring systems . . . . . . . . . . . . . . . . . . 221
Winter service . . . . . . . . . . . . . . . . . . . . . . . . . . . 222
Technical data . . . . . . . . . . . . . . . . . . . . . . . . 223
Technical specifications . . . . . . . . . . . . . . . . . . 223
Important information . . . . . . . . . . . . . . . . . . . . 223
Information on fuel consumption . . . . . . . . . . . 224 Driving with a trailer . . . . . . . . . . . . . . . . . . . . . . 225
Wheels . . . . . . . . . . . . . . . . . . . . . . . . . . . . . . . . 226
Engine data . . . . . . . . . . . . . . . . . . . . . . . . . . . . . 227
Dimensions . . . . . . . . . . . . . . . . . . . . . . . . . . . . . 233
Index . . . . . . . . . . . . . . . . . . . . . . . . . . . . . . . . . 235
4
Page 24 of 248
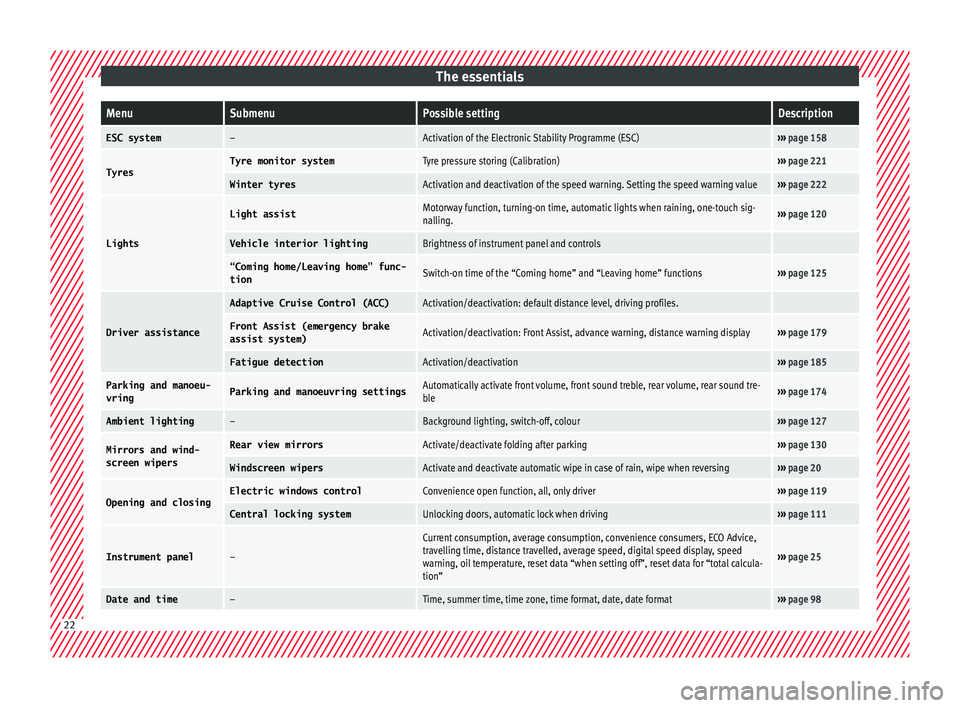
The essentialsMenuSubmenuPossible settingDescription
ESC system–Activation of the Electronic Stability Programme (ESC)›››
page 158
TyresTyre monitor systemTyre pressure storing (Calibration)››› page 221
Winter tyresActivation and deactivation of the speed warning. Setting the speed warning value››› page 222
Lights
Light assistMotorway function, turning-on time, automatic lights when raining, one-touch sig-
nalling.››› page 120
Vehicle interior lightingBrightness of instrument panel and controls
“Coming home/Leaving home” func-
tionSwitch-on time of the “Coming home” and “Leaving home” functions››› page 125
Driver assistance
Adaptive Cruise Control (ACC)Activation/deactivation: default distance level, driving profiles.
Front Assist (emergency brake
assist system)Activation/deactivation: Front Assist, advance warning, distance warning display››› page 179
Fatigue detectionActivation/deactivation››› page 185
Parking and manoeu-
vringParking and manoeuvring settingsAutomatically activate front volume, front sound treble, rear volume, rear sound tre-
ble››› page 174
Ambient lighting–Background lighting, switch-off, colour››› page 127
Mirrors and wind-
screen wipersRear view mirrorsActivate/deactivate folding after parking››› page 130
Windscreen wipersActivate and deactivate automatic wipe in case of rain, wipe when reversing››› page 20
Opening and closingElectric windows controlConvenience open function, all, only driver››› page 119
Central locking systemUnlocking doors, automatic lock when driving››› page 111
Instrument panel–
Current consumption, average consumption, convenience consumers, ECO Advice,
travelling time, distance travelled, average speed, digital speed display, speed
warning, oil temperature, reset data “when setting off”, reset data for “total calcula-
tion”
››› page 25
Date and time–Time, summer time, time zone, time format, date, date format››› page 98 22
Page 32 of 248

The essentials
Additional consumers ●
Operation with the windscreen wiper lever*:
Pre s
s the rocker switch ››› Fig. 35 2 until the
main menu ap pe
ars. Enter into the section
Driving data . With the rocker switch,
move to the display Convenience con-
sumers .
● Operation with the multi-function steering
wheel*:
move with the buttons
or
to Driving data
and enter with
OK. Turn
the right thumbwheel until the Conven-
ience consumers display appears.
In addition, a scale will inform you of the cur-
rent sum of all the additional appliances.
Saving tips Tips on how to save fuel will be displayed in
c
ondition
s
that increase fuel consumption.
Follow them to reduce consumption. The indi-
cations appear automatically only with the ef-
ficiency programme. After a time, the tips will
disappear automatically.
If you wish to hide a saving tip immediately
after it appears, press any button on the
windscreen wiper lever*/multifunction steer-
ing wheel*. Note
● If y
ou hide a saving tip, it will reappear af-
ter you switch the ignition on again.
● The saving tips do not appear in all situa-
tions, but
rather with a large separation of
time. Speed warning device
The speed warning device warns the driver
when they h
av
e exceeded the pre-set speed
limit by 3 km/h (2 mph). An audible warning
signal sounds, and the warning lamp and
the driver message Speed limit excee-
ded! will be displayed simultaneously on the
instrument panel. The warning lamp
switches off after reducing speed below the
stored maximum limit.
Speed warning programming is recommen-
ded if you wish to be reminded of a maxi-
mum speed, such as when travelling in a
country with different speed limits or for a
maximum speed for winter tyres.
Setting speed limit warning
You can use the radio or the Easy Connect* to
set, alter or cancel the speed limit warning.
● Vehicles with radio : pres
s the SETUP button
> c ontr
o
l button Driver Assistant >
Speed warning . ●
Vehicles
with Easy Connect : press the button and the function button SETTINGS >
Driver assistance > Speed warning .
The w arnin
g limit
can be set from 30 to
240 km/h (20 to 149 mph). The adjustment
is made at 10 km/h (5 mph) intervals. Note
● Ple a
se bear in mind that, even with the
speed warning function, it is still important
to keep an eye on the vehicle speed with the
speedometer and to observe the legal speed
limits.
● The speed limit warning function in the ver-
sion for some c
ountries warns you at a speed
of 120 km/h (75 mph). This is a factory-set
speed limit. 30
Page 53 of 248
The essentials
In winter road conditions, snow chains not
on ly
help t
o improve grip but also improve
the braking capacity.
For technical reasons snow chains may only
be used on tyres with the following wheel
rim/tyre combinations.
Rim sizeRim offsetTyre size
5J x 14 a)35 mm175/70
6J x 15b)38 mm185/60
6J x 15b)38 mm195/55
a)
Only use snow chains with fine-pitch links and lock no greater
than 9 mm.
b) Only use snow chains with fine-pitch links and lock no greater
than 13 mm.
Remove the wheel trims before fitting snow
chains. CAUTION
Chains must be removed when roads are free
of s no
w. Otherwise they will impair handling,
damage the tyres and wear out very quickly. Emergency towing of the vehi-
c
l
e
T
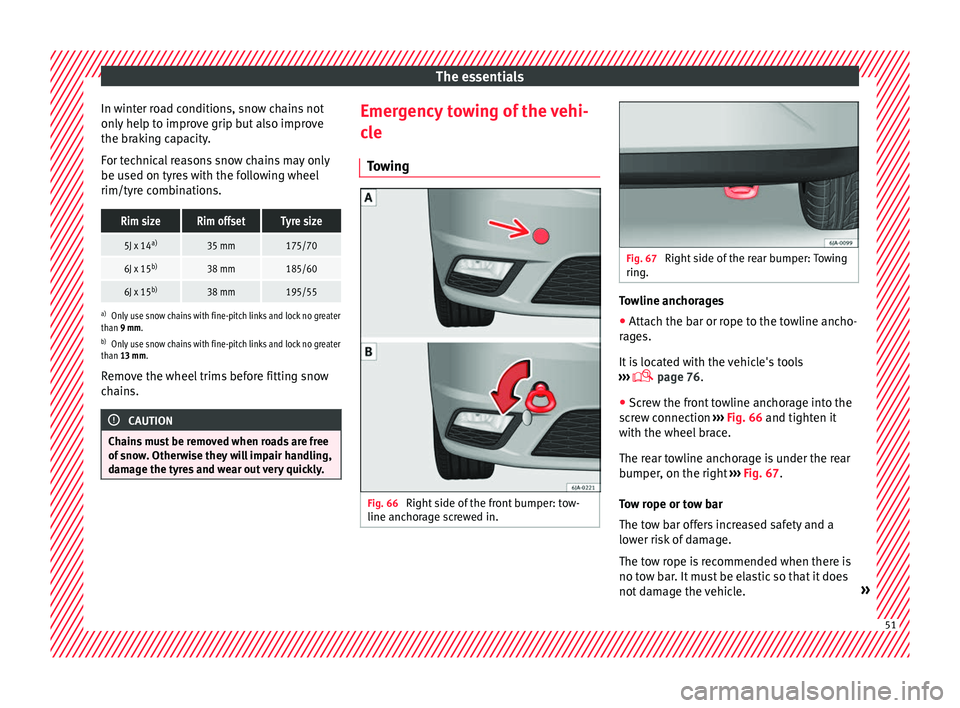
owing Fig. 66
Right side of the front bumper: tow-
line anc hor
ag
e screwed in. Fig. 67
Right side of the rear bumper: Towing
ring. Towline anchorages
● Attach the bar or rope to the towline ancho-
r ag
e
s.
It is located with the vehicle's tools
››› page 76.
● Screw the front towline anchorage into the
scr
ew connection ››› Fig. 66 and tighten it
with the wheel brace.
The rear towline anchorage is under the rear
bumper, on the right ››› Fig. 67.
Tow rope or tow bar
The tow bar offers increased safety and a
lower risk of damage.
The tow rope is recommended when there is
no tow bar. It must be elastic so that it does
not damage the vehicle. » 51
Page 79 of 248

Self-help
distance. Observe applicable local legal regu-
lation
s.
This is for your own safety and that of
other drivers.
● If you have a flat tyre, stop the vehicle as
far aw
ay as possible from moving traffic. Stop
on flat, solid ground.
● If you have to change the tyre on a gradi-
ent, block
the wheel opposite the wheel be-
ing changed by placing a stone or similar ob-
ject under it to prevent the vehicle from roll-
ing away unexpectedly.
● If the vehicle has been fitted with tyres or
allo
ys that are different to those fitted in
manufacture, the instructions ››› page 219,
New tyres or wheels must be followed.
● Always raise the vehicle with the doors
closed.
● Nev
er place parts of your body, e.g. arms
and leg
s, underneath the vehicle when it is
supported only by the jack.
● Secure the base of the jack with suitable
suppor
ts so that it cannot slip. The jack could
slide if the ground below it is soft and slip-
pery and the vehicle could slip off it. There-
fore, place the jack on a firm surface or use a
large, stable base. On a slippery surface, e.g.
tile, use a non-slip base such as a rubber
mat.
● Never start the engine when the vehicle is
jack
ed. Risk of injury.
● The jack should only be used in the correct
jack
ing points. CAUTION
● The pre s
cribed tightening torque for wheel
bolts on steel and alloy wheels is 120 Nm.
● If the anti-theft wheel bolt is overly tight-
ened, this c
ould damage the bolt and the
adapter. Note
● The set of anti-thef
t wheel bolts or the
adapter are available from authorised SEAT
dealers.
● Please observe the relevant local legal reg-
ulation
s when changing the wheel. Wheel bolts
The wheel
bolts
ar
e m
atched to the rims.
When installing different wheels, e.g. to fit
light alloy wheels or wheels with winter tyres,
it is important to use the correct wheel bolts
with the right length and correctly shaped
bolt heads. This is essential for a secure fit of
the wheels and for proper operation of the
brake system. Note
● Never gr e
ase or oil the wheel bolts!
● If the wheel bolt is very tight, it may be
poss
ible to loosen it by pushing down the
end of the box spanner carefully with your foot. Hold on to the vehicle for support and
tak
e c
are not to slip.
● If you notice that the wheel bolts are rusty
and difficult
to turn when changing a wheel,
they must be replaced before having the
tightening torque checked. Tyre repairs
TMS Anti-p
uncture kit (Tyre Mobility
System)* Read the additional information carefully
› ›
›
page 46
The Tyre Mobility System is stored in a box
under the carpet in the boot.
Using the Tyre Mobility System you can relia-
bly seal tyres damaged by foreign bodies,
provided that cuts or punctures are no larger
than approx. 4 mm in diameter. Do not re-
move the foreign bodies, e.g. bolts or nails,
from the tyre!
The tyre must be repaired immediately.
The repair made using the Tyre Mobility Sys-
tem under no circumstances replaces perma-
nent tyre repair and should only be used to
drive to the nearest official service. »
77
Technical data
Advice
Operation
Emergencies
Safety
Page 100 of 248
Operation
Time
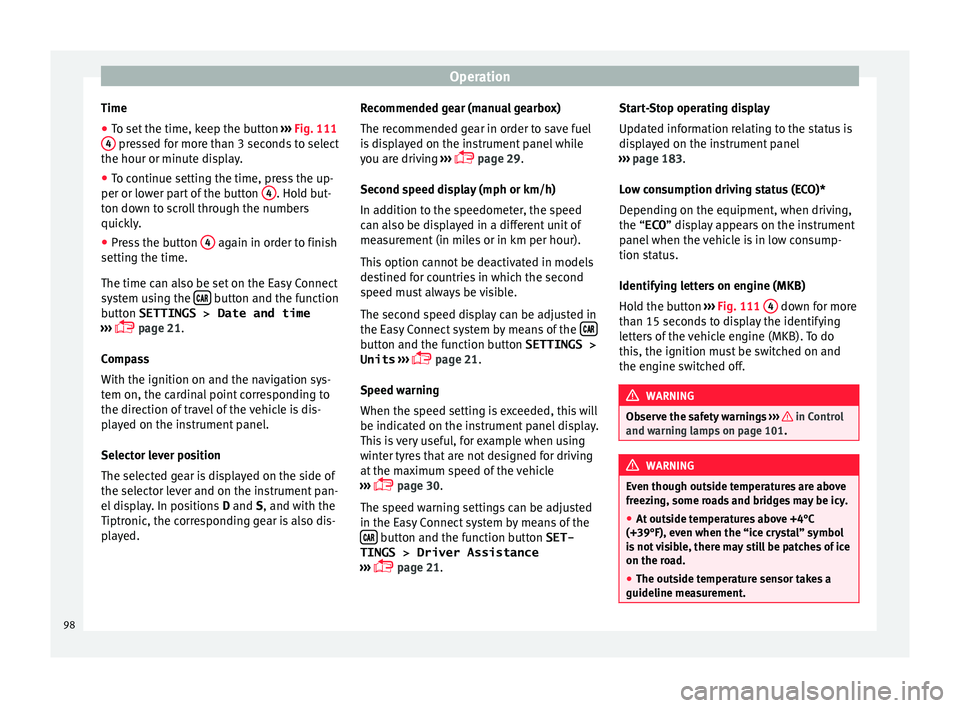
● To set the time, keep the button ››
› Fig. 111
4 pressed for more than 3 seconds to select
the hour or minut e di
s
play.
● To continue setting the time, press the up-
per or lower p
art of the button 4 . Hold but-
t on do
wn t
o scroll through the numbers
quickly.
● Press the button 4 again in order to finish
settin g the time.
The time c an al
so be set on the Easy Connect
system using the button and the function
b utt
on
SETTINGS > Date and time
››› page 21.
Compass
With the ignition on and the navigation sys-
tem on, the cardinal point corresponding to
the direction of travel of the vehicle is dis-
played on the instrument panel.
Selector lever position
The selected gear is displayed on the side of
the selector lever and on the instrument pan-
el display. In positions D and S, and with the
Tiptronic, the corresponding gear is also dis-
played. Recommended gear (manual gearbox)
The r
ecommended g
ear in order to save fuel
is displayed on the instrument panel while
you are driving ›››
page 29.
Second speed display (mph or km/h)
In addition to the speedometer, the speed
can also be displayed in a different unit of
measurement (in miles or in km per hour).
This option cannot be deactivated in models
destined for countries in which the second
speed must always be visible.
The second speed display can be adjusted in
the Easy Connect system by means of the button and the function button SETTINGS >
Units › ›
›
page 21.
Speed warning
When the speed setting is exceeded, this will
be indicated on the instrument panel display.
This is very useful, for example when using
winter tyres that are not designed for driving
at the maximum speed of the vehicle
››› page 30.
The speed warning settings can be adjusted
in the Easy Connect system by means of the button and the function button SET-
TINGS > Driver Assistance
› ›
›
page 21. Start-Stop operating display
Updat
ed information relating to the status is
displayed on the instrument panel
››› page 183.
Low consumption driving status (ECO)*
Depending on the equipment, when driving,
the “ECO ” display appears on the instrument
panel when the vehicle is in low consump-
tion status.
Identifying letters on engine (MKB)
Hold the button ››› Fig. 111 4 down for more
th an 15 sec
ond
s to display the identifying
letters of the vehicle engine (MKB). To do
this, the ignition must be switched on and
the engine switched off. WARNING
Observe the safety warnings ›››
in Control
and warnin g l
amps on page 101. WARNING
Even though outside temperatures are above
freez in
g, some roads and bridges may be icy.
● At outside temperatures above +4°C
(+39°F), even when the “ice c
rystal” symbol
is not visible, there may still be patches of ice
on the road.
● The outside temperature sensor takes a
guideline meas
urement.98
Page 169 of 248
Driving
Periodic maintenance
P eriodic
m
aintenance work guarantees that,
before beginning a journey, you will not con-
sume more than the required amount of fuel.
A well-serviced engine gives you the benefit
of improved fuel efficiency as well as maxi-
mum reliability and an enhanced resale val-
ue.
A badly serviced engine can consume up to
10% more fuel than necessary.
Avoid short journeys
To reduce the consumption and emission of
polluting exhaust gases, the engine and the
exhaust gas filtration systems should reach
the optimum operating temperature.
With the engine cold, fuel consumption is
proportionally higher. The engine does not
warm up and fuel consumption does not nor-
malise until having driven approximately four
kilometres (2.5 miles). This is why we recom-
mend avoiding short trips whenever possi-
ble.
Maintain the correct tyre pressures
Bear in mind that keeping the tyres at an ad-
equate pressure saves fuel. If the tyre pres-
sure is just one bar (14.5 psi/100 kPa) too
low, fuel consumption can increase by as
much as 5%. Due to the greater rolling resist-
ance, under-inflation also increases tyre wear
wear and impairs handling. The tyre pressures should always be checked
when the tyre
s are cold.
Do not use winter tyres all year round as they
increase fuel consumption by up to 10%.
Avoid unnecessary weight
Given that every kilo of extra weight will in-
crease the fuel consumption, it is advisable
to always check the luggage compartment to
make sure that no unnecessary loads are be-
ing transported.
A roof rack is often left in place for the sake
of convenience, even when it is no longer
needed. At a speed of 100 km/h (62 mph)
and 120 km/h (75 mph) your vehicle will use
about 12% more fuel as a result of the extra
wind resistance caused by the roof rack even
when it is not in use.
Save electricity
The engine activates the alternator, which
produces electricity. With the need for elec-
tricity, fuel consumption also increases. Be-
cause of this, always turn off electrical devi-
ces when you do not need them. Examples of
devices that use a lot of electricity are: the
fan at high speeds, the rear window heating
and the seat heaters*. Note
● If y
ou vehicle has Start-Stop, it is not rec-
ommended to switch this function off. ●
It i s
recommended that you close the win-
dows when driving at more than 60 km/h
(37 mph).
● Do not drive with your foot resting on the
clutc
h pedal,, as the pressure can make the
plate spin, more fuel will be used and it can
burn the clutch plate lining, causing a serious
fault.
● Do not hold the vehicle on a hill with the
clutc
h, use the foot brake or hand brake, us-
ing the latter to start. The fuel consumption
will be lower and you will prevent the clutch
plate from being damaged.
● On descents, use the engine brake, chang-
ing to the g
ear that is more suitable for the
slope. Fuel consumption will be “zero” and
the brakes will not suffer. Engine management and emis-
s
ion c
ontr
ol system
Introduction WARNING
● Bec au
se of the high temperatures which
can occur in the exhaust purification system
(catalytic converter or diesel particulate fil-
ter), do not park the vehicle where the ex-
haust can come into contact with flammable
materials under the car (e.g. on grass or at
the forest edge). Fire hazard! » 167
Technical data
Advice
Operation
Emergencies
Safety
Page 197 of 248
Care and maintenance
●
The modification of the s
uspension of the
vehicle wheels, including the use of non-per-
mitted combinations of tyres and rims can al-
ter the operation of the airbag system and in-
crease the risk of serious or fatal injuries in
an accident.
● During all jobs on the airbag system, in ad-
dition to the remo
val and fitting of parts of
the system in the course of other repair jobs,
parts of the airbag system can be damaged.
Therefore in the event of an accident, this
may cause the airbags to activate incorrectly
or not activate at all. Radio and aerial reception
In vehicles factory-fitted with an audio or
n
av
ig
ation system, the aerial may be instal-
led in different places:
● inside the rear window next to the heating
elements,
● on the roof
of the vehicle.
Care and cleaning Introduction Regular and suitable care helps to
m
aint ain
the u
seful life of your vehicle. This may also
be one of the requirements for upholding any warranty claims in the event of corrosion or
paint def
ects.
We recommend you use cleaning products
from the SEAT Original Accessories pro-
gramme available in SEAT dealers. Please fol-
low the instructions for use on the packag-
ing. WARNING
● Cle
aning products and other materials used
for car care can damage the health if mis-
used.
● Always keep car care materials in a safe
plac
e out of the reach of children. Risk of poi-
soning!
● When washing the car during the winter
season: Moi
sture and ice on the brakes may
affect braking efficiency. Risk of accident!
● The ignition must always be switched off
when the car is
washed. Risk of accident!
● Do not clean the underside of the car or in-
side the wheel ar
ches without protecting your
hands and arms. You may cut yourself on
sharp metal parts!
● Perfumes and air fresheners inside the ve-
hicle m
ay be harmful to health at high tem-
peratures in the interior. CAUTION
● Check the c
olour-fastness of your clothing
to avoid damaging or visibly staining the fab-
ric (leather), upholstery and fabric trim. ●
Cle
aning products containing solvents may
damage the material being cleaned.
● Do not wash the vehicle in direct sunlight.
Risk of
damage to paintwork.
● If washing the vehicle with a hose in win-
ter, do not
direct the jet of water directly at
the locks or at the door seals or bonnet. Risk
of freezing.
● Do not use sponges for removing insects or
abras
ive household sponges, etc. on painted
surfaces. Risk of damage to the painted sur-
face!
● Do not put stickers on the inner side of the
rear w
indow in areas where heating elements
or the aerial are located. This could cause
damage and, in the case of the aerial, radio
and navigation system reception faults.
● Do not clean the inside of the window with
sharp ob
jects or corrosive or acidic cleaning
products. Risk of damaging the heating ele-
ments or the aerial.
● Do not attach any fragrance or air freshener
to the da
sh panel. Risk of damage to the
dash panel!
● To avoid damaging the parking aid system
sensors, s
pray them only briefly at a mini-
mum distance of 10 cm when cleaning the ve-
hicle with a high-pressure or steam cleaner.
● Do not clean the roof panel with a brush.
Risk of
damage to the panel surface! » 195
Technical data
Advice
Operation
Emergencies
Safety
Page 219 of 248
Wheels and tyres
Wheels and tyres
T y
r
es
Introduction WARNING
● Durin g the fir
st 500 km, new tyres do not
give maximum grip, therefore you should
drive carefully. Risk of accident!
● Never drive with damaged tyres. Risk of ac-
cident!
● Only
use wheels and tyres that been au-
thorised by
SEAT or your vehicle model. Fail-
ure to do so could impair road safety. Risk of
accident!
● Never exceed the maximum speed permit-
ted for
your tyres. Risk of accident due to tyre
damage and loss of vehicle control!
● Under-inflated tyres are submitted to great-
er rol
ling resistance. This means that they
can overheat at high speeds. This can cause
tread separation and even tyre blow-out.
● For driving safety, tyres should be replaced
at le
ast in pairs according to the axle and not
individually. The tyres with the deepest tread
should always be used on the front wheels.
● Never fit used tyres of an unknown age or
prior use.
● Ty
res must be immediately changed at the
very
latest when they have worn down to the
tread wear indicators. ●
Worn ty r
es reduce the necessary grip at
high speeds on damp surfaces. This could
lead to “aquaplaning” (uncontrolled vehicle
movement –“skidding” on damp surfaces).
● Damaged wheels and tyres must be re-
plac
ed immediately.
● Do not use summer or winter tyres that are
more than 6 or 4
years old respectively.
● Wheel bolts should be clean and screw
eas
ily. However, they must never be treated
with grease or oil.
● If the tightening torque of the wheel bolts
is t
oo low, they could loosen while the vehi-
cle is moving. Risk of accident! If the tighten-
ing torque of the wheel bolts is too high, the
bolts and threads could be damaged, leading
to the permanent deforming of the rim sup-
port surfaces.
● Incorrectly handled wheel bolts could lead
to a wheel c
oming loose while the vehicle is
moving. Risk of accident!
● Observe the national legal requirements re-
gardin
g the use of snow tyres and chains. CAUTION
● Where a s p
are wheel that is not compatible
with the wheels fitted is used, follow the in-
structions ››› page 220.
● The prescribed tightening torque for wheel
bolts
on steel and alloy wheels is 120 Nm.
● Protect your tyres from coming into contact
with oil, gr
ease and fuel.
● Replace any lost valve caps immediately. For the sake of the environment
Under-inflated tyres increases fuel consump-
tion. Note
● We r ec
ommend having all work on tyres
and wheels carried out by an authorised SEAT
dealer.
● We recommend using wheels, tyres, hub
caps
and snow chains from the SEAT Original
Accessories programme. 217
Technical data
Advice
Operation
Emergencies
Safety
Page 220 of 248
Advice
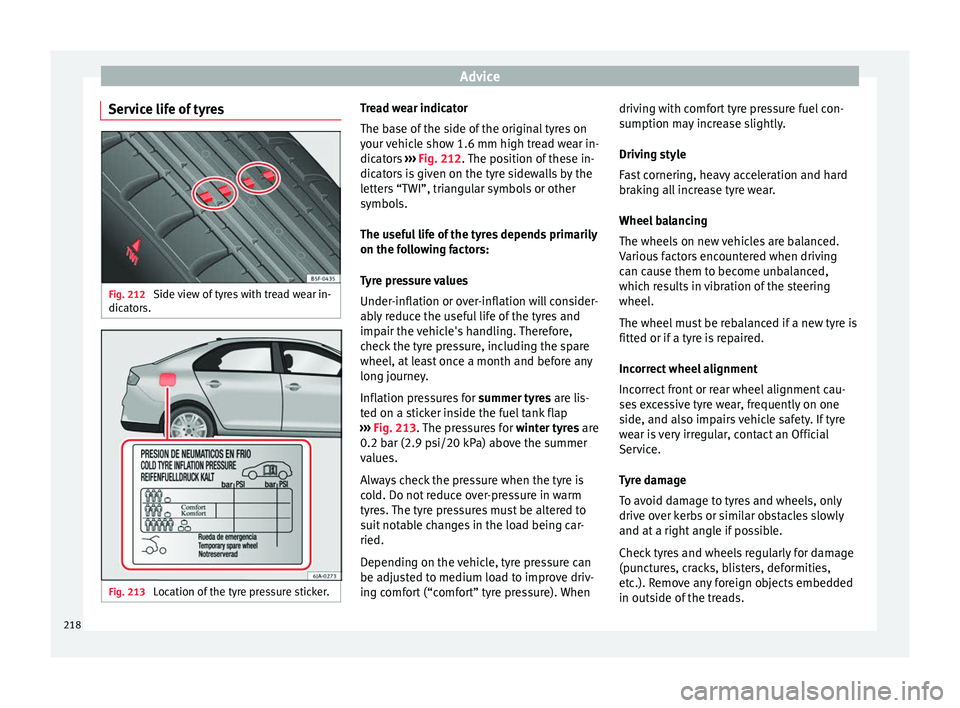
Service life of tyres Fig. 212
Side view of tyres with tread wear in-
dic at
or
s. Fig. 213
Location of the tyre pressure sticker. Tread wear indicator
The b
ase of
the side of the original tyres on
your vehicle show 1.6 mm high tread wear in-
dicators ››› Fig. 212. The position of these in-
dicators is given on the tyre sidewalls by the
letters “TWI”, triangular symbols or other
symbols.
The useful life of the tyres depends primarily
on the following factors:
Tyre pressure values
Under-inflation or over-inflation will consider-
ably reduce the useful life of the tyres and
impair the vehicle's handling. Therefore,
check the tyre pressure, including the spare
wheel, at least once a month and before any
long journey.
Inflation pressures for summer tyres are lis-
ted on a sticker inside the fuel tank flap
››› Fig. 213. The pressures for winter tyres are
0.2 bar (2.9 psi/20 kPa) above the summer
values.
Always check the pressure when the tyre is
cold. Do not reduce over-pressure in warm
tyres. The tyre pressures must be altered to
suit notable changes in the load being car-
ried.
Depending on the vehicle, tyre pressure can
be adjusted to medium load to improve driv-
ing comfort (“comfort” tyre pressure). When driving with comfort tyre pressure fuel con-
sumption ma
y increase slightly.
Driving style
Fast cornering, heavy acceleration and hard
braking all increase tyre wear.
Wheel balancing
The wheels on new vehicles are balanced.
Various factors encountered when driving
can cause them to become unbalanced,
which results in vibration of the steering
wheel.
The wheel must be rebalanced if a new tyre is
fitted or if a tyre is repaired.
Incorrect wheel alignment
Incorrect front or rear wheel alignment cau-
ses excessive tyre wear, frequently on one
side, and also impairs vehicle safety. If tyre
wear is very irregular, contact an Official
Service.
Tyre damage
To avoid damage to tyres and wheels, only
drive over kerbs or similar obstacles slowly
and at a right angle if possible.
Check tyres and wheels regularly for damage
(punctures, cracks, blisters, deformities,
etc.). Remove any foreign objects embedded
in outside of the treads.
218