ECU SKODA CITIGO 2013 1.G Owner's Manual
[x] Cancel search | Manufacturer: SKODA, Model Year: 2013, Model line: CITIGO, Model: SKODA CITIGO 2013 1.GPages: 176, PDF Size: 10.54 MB
Page 9 of 176
Mobility warranty and ŠKODA extendedwarranty.
Mobility warranty
Mobility warranty provides a sense of security when travelling in your vehicle.
Should your car break down when you're on the move one day as a result of an
unexpected fault, you will be eligible for services to ensure your continued mobili-
ty as part of the mobility warranty, which includes the following: Breakdown serv- ice at the breakdown location and towing off to the ŠKODA service partner, tech-
nical assistance by phone or on-site operation.
If your vehicle is not repaired on the same day, the ŠKODA service partner may
provide further services as required, such as replacement transportation (bus,
train, etc.), a courtesy vehicle, etc.
You can obtain more information regarding terms and conditions for the provision
of mobility warranty for your vehicle from your ŠKODA partner. Here you will also
be given detailed terms and conditions for the mobility warranty with respect to
your vehicle. In the event that there is no mobility warranty coverage available for
your vehicle, you should check with any ŠKODA service partner about the possibil-
ity of a subsequent agreement.
Note
The mobility guarantee is only available for some countries.
Optional ŠKODA extended warranty
If you received an extended ŠKODA warranty when purchasing your new car, the
two-year ŠKODA warranty for damages to your ŠKODA vehicle will be extended
by the time you chose or until the chosen mileage limit has been reached, which-
ever occurs first.
The previously mentioned paint warranty and the warranty against rust perfora-
tion stay unaffected by the extended warranty.
Detailed conditions for the extended warranty are included in the extended war- ranty terms and conditions, which your ŠKODA partner will have given to you
upon purchasing your new vehicle.
NoteThe mobility guarantee and optional ŠKODA extended warranty are only available
for some countries.
6Mobility warranty and ŠKODA extended warranty.
Page 28 of 176
Emergency locking of the doorsFig. 13
Emergency locking of the door
First read and observe the introductory information given on page 22.
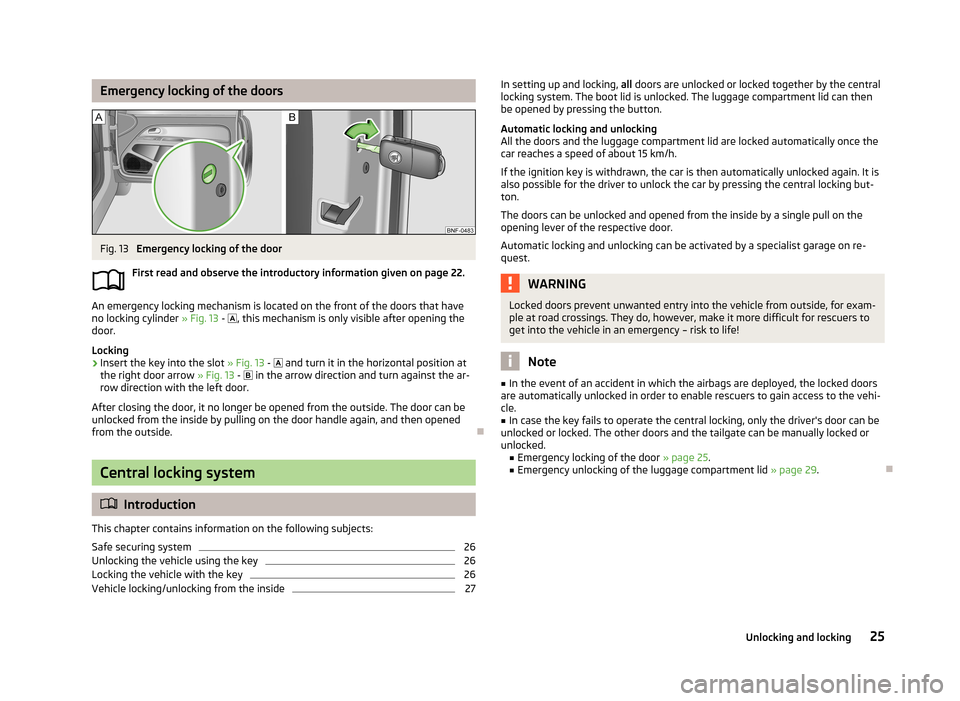
An emergency locking mechanism is located on the front of the doors that have
no locking cylinder » Fig. 13 -
, this mechanism is only visible after opening the
door.
Locking
›
Insert the key into the slot » Fig. 13 -
and turn it in the horizontal position at
the right door arrow » Fig. 13 -
in the arrow direction and turn against the ar-
row direction with the left door.
After closing the door, it no longer be opened from the outside. The door can be unlocked from the inside by pulling on the door handle again, and then opened
from the outside.
Central locking system
Introduction
This chapter contains information on the following subjects:
Safe securing system
26
Unlocking the vehicle using the key
26
Locking the vehicle with the key
26
Vehicle locking/unlocking from the inside
27In setting up and locking, all doors are unlocked or locked together by the central
locking system. The boot lid is unlocked. The luggage compartment lid can then
be opened by pressing the button.
Automatic locking and unlocking
All the doors and the luggage compartment lid are locked automatically once the car reaches a speed of about 15 km/h.
If the ignition key is withdrawn, the car is then automatically unlocked again. It is
also possible for the driver to unlock the car by pressing the central locking but-
ton.
The doors can be unlocked and opened from the inside by a single pull on the
opening lever of the respective door.
Automatic locking and unlocking can be activated by a specialist garage on re-
quest.WARNINGLocked doors prevent unwanted entry into the vehicle from outside, for exam-
ple at road crossings. They do, however, make it more difficult for rescuers to
get into the vehicle in an emergency – risk to life!
Note
■ In the event of an accident in which the airbags are deployed, the locked doors
are automatically unlocked in order to enable rescuers to gain access to the vehi- cle.■
In case the key fails to operate the central locking, only the driver's door can be
unlocked or locked. The other doors and the tailgate can be manually locked or
unlocked. ■ Emergency locking of the door » page 25.
■ Emergency unlocking of the luggage compartment lid » page 29.
25Unlocking and locking
Page 29 of 176
Safe securing systemFirst read and observe the introductory information and safety warn-
ings
on page 25.
The central locking system is equipped with a safe securing system. The door
locks are blocked automatically if the vehicle is locked from the outside. The warning light flashes for around 2 seconds in quick succession, afterwards it be-gins to flash evenly at longer intervals. It is not possible to open the doors withthe door handle either from the inside or from the outside. This acts as an effec-
tive deterrent against attempts to break into your vehicle.
The safe securing system can be deactivated within 2 seconds by double locking
the vehicle.
If the safe securing system is not operating, the warning light in the driver door flashes for about 2 seconds fast, goes out and starts to flash evenly at longer in-
tervals after about 30 seconds.
The safe securing system is activated again the next time the vehicle is unlocked and locked.
If the vehicle is locked and the safe securing system is deactivated, the door can
be opened from the inside by a single pull on opening lever of the respective
door.
WARNINGIf the vehicle is locked from the outside and the safe securing system is acti-
vated, there must not be any person in the vehicle as it is then no longer pos-
sible to open either a door or a window from the inside. The locked doors
make it more difficult for rescuers to get into the vehicle in an emergency – risk to life!
Note
You will be informed that the safe securing system has been activated after the
vehicle has been locked by means of the message on the instrument clus-
ter display.
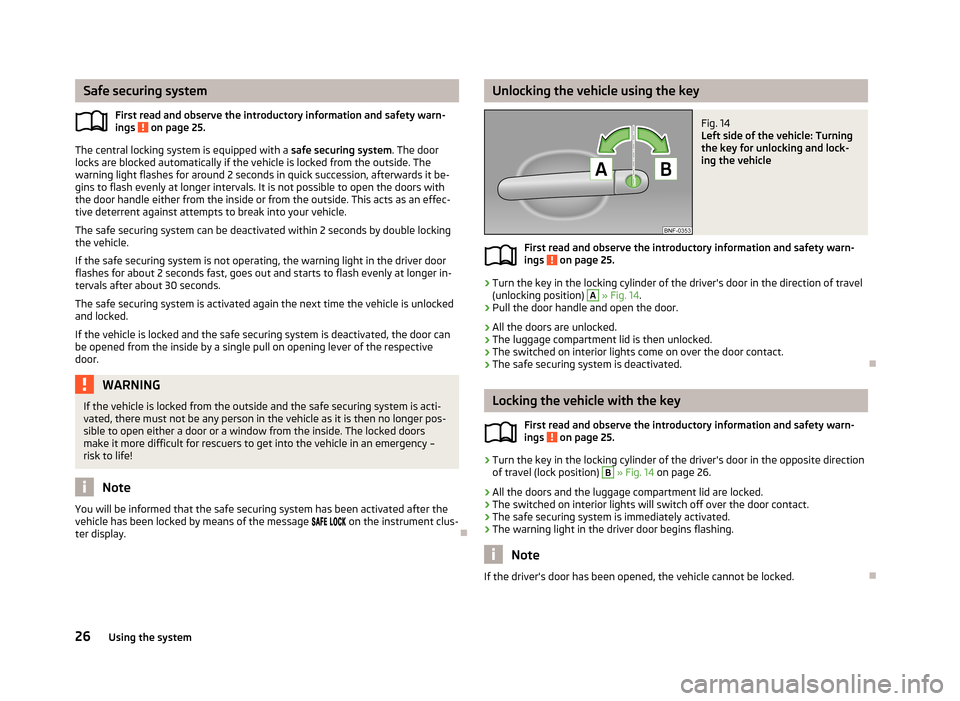
Unlocking the vehicle using the keyFig. 14
Left side of the vehicle: Turning
the key for unlocking and lock-
ing the vehicle
First read and observe the introductory information and safety warn- ings on page 25.
›
Turn the key in the locking cylinder of the driver's door in the direction of travel
(unlocking position)
A
» Fig. 14 .
›
Pull the door handle and open the door.
› All the doors are unlocked.
› The luggage compartment lid is then unlocked.
› The switched on interior lights come on over the door contact.
› The safe securing system is deactivated.
Locking the vehicle with the key
First read and observe the introductory information and safety warn-
ings
on page 25.
›
Turn the key in the locking cylinder of the driver's door in the opposite direction
of travel (lock position)
B
» Fig. 14 on page 26.
› All the doors and the luggage compartment lid are locked.
› The switched on interior lights will switch off over the door contact.
› The safe securing system is immediately activated.
› The warning light in the driver door begins flashing.
Note
If the driver's door has been opened, the vehicle cannot be locked.
26Using the system
Page 30 of 176
Vehicle locking/unlocking from the insideFig. 15
Central locking button
First read and observe the introductory information and safety warn-ings on page 25.
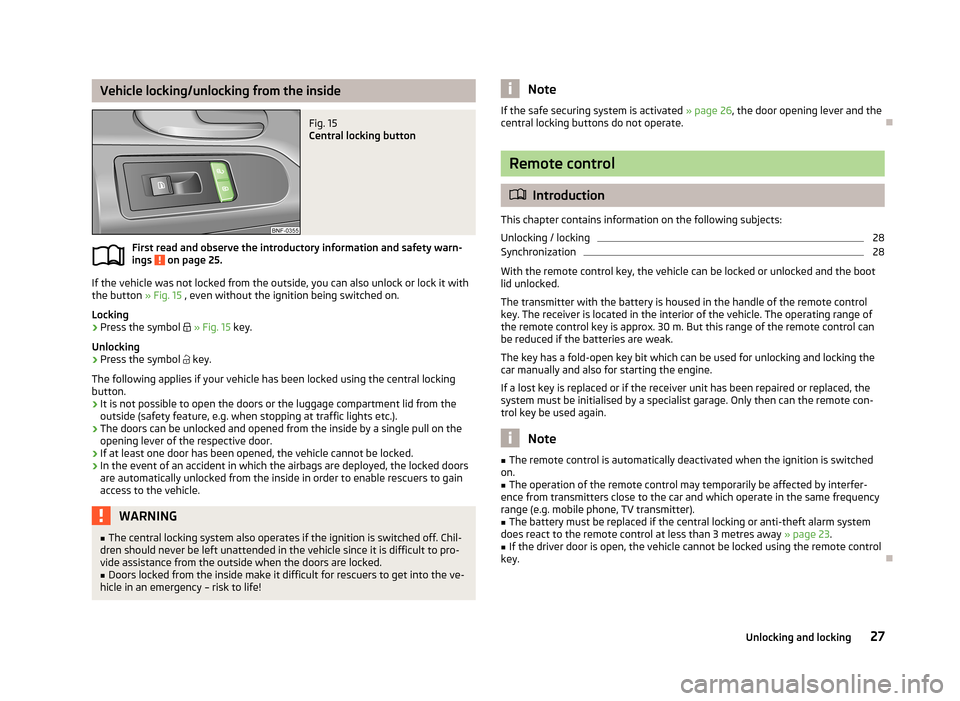
If the vehicle was not locked from the outside, you can also unlock or lock it with
the button » Fig. 15 , even without the ignition being switched on.
Locking
›
Press the symbol
» Fig. 15 key.
Unlocking
›
Press the symbol
key.
The following applies if your vehicle has been locked using the central locking button.
› It is not possible to open the doors or the luggage compartment lid from the
outside (safety feature, e.g. when stopping at traffic lights etc.).
› The doors can be unlocked and opened from the inside by a single pull on the
opening lever of the respective door.
› If at least one door has been opened, the vehicle cannot be locked.
› In the event of an accident in which the airbags are deployed, the locked doors
are automatically unlocked from the inside in order to enable rescuers to gain
access to the vehicle.
WARNING■ The central locking system also operates if the ignition is switched off. Chil-
dren should never be left unattended in the vehicle since it is difficult to pro-
vide assistance from the outside when the doors are locked.■
Doors locked from the inside make it difficult for rescuers to get into the ve-
hicle in an emergency – risk to life!
NoteIf the safe securing system is activated » page 26, the door opening lever and the
central locking buttons do not operate.
Remote control
Introduction
This chapter contains information on the following subjects:
Unlocking / locking
28
Synchronization
28
With the remote control key, the vehicle can be locked or unlocked and the boot
lid unlocked.
The transmitter with the battery is housed in the handle of the remote control
key. The receiver is located in the interior of the vehicle. The operating range of
the remote control key is approx. 30 m. But this range of the remote control can
be reduced if the batteries are weak.
The key has a fold-open key bit which can be used for unlocking and locking the
car manually and also for starting the engine.
If a lost key is replaced or if the receiver unit has been repaired or replaced, thesystem must be initialised by a specialist garage. Only then can the remote con-
trol key be used again.
Note
■ The remote control is automatically deactivated when the ignition is switched
on.■
The operation of the remote control may temporarily be affected by interfer-
ence from transmitters close to the car and which operate in the same frequency
range (e.g. mobile phone, TV transmitter).
■
The battery must be replaced if the central locking or anti-theft alarm system
does react to the remote control at less than 3 metres away » page 23.
■
If the driver door is open, the vehicle cannot be locked using the remote control
key.
27Unlocking and locking
Page 31 of 176
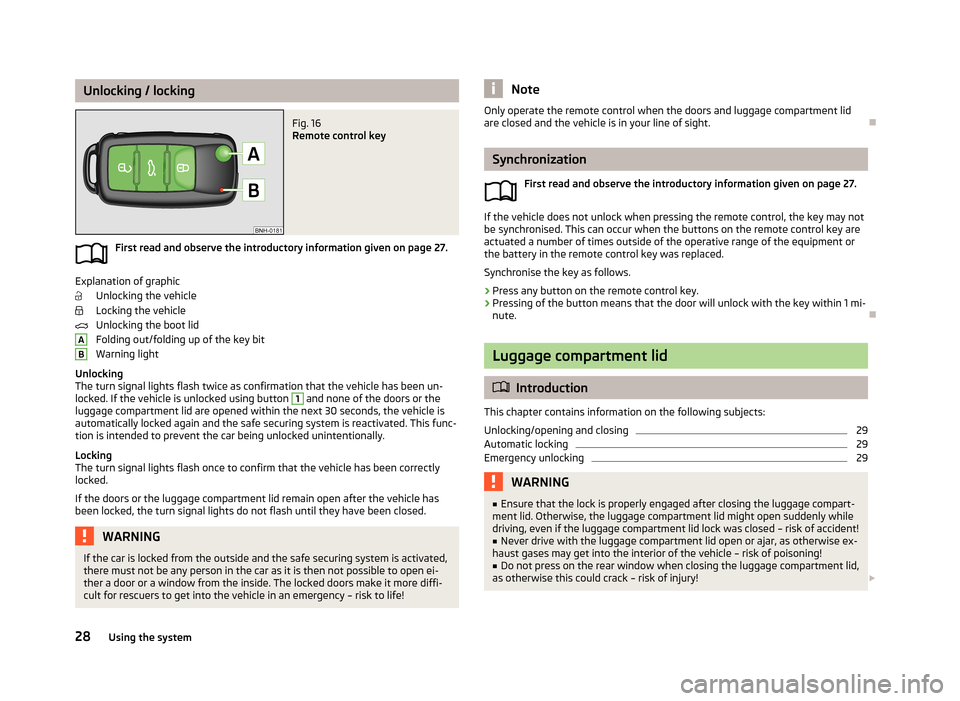
Unlocking / lockingFig. 16
Remote control key
First read and observe the introductory information given on page 27.
Explanation of graphicUnlocking the vehicle
Locking the vehicle
Unlocking the boot lid
Folding out/folding up of the key bit
Warning light
Unlocking
The turn signal lights flash twice as confirmation that the vehicle has been un-
locked. If the vehicle is unlocked using button
1
and none of the doors or the
luggage compartment lid are opened within the next 30 seconds, the vehicle is
automatically locked again and the safe securing system is reactivated. This func-
tion is intended to prevent the car being unlocked unintentionally.
Locking
The turn signal lights flash once to confirm that the vehicle has been correctly
locked.
If the doors or the luggage compartment lid remain open after the vehicle has
been locked, the turn signal lights do not flash until they have been closed.
WARNINGIf the car is locked from the outside and the safe securing system is activated,
there must not be any person in the car as it is then not possible to open ei-
ther a door or a window from the inside. The locked doors make it more diffi-
cult for rescuers to get into the vehicle in an emergency – risk to life!ABNoteOnly operate the remote control when the doors and luggage compartment lid
are closed and the vehicle is in your line of sight.
Synchronization
First read and observe the introductory information given on page 27.
If the vehicle does not unlock when pressing the remote control, the key may notbe synchronised. This can occur when the buttons on the remote control key are
actuated a number of times outside of the operative range of the equipment or
the battery in the remote control key was replaced.
Synchronise the key as follows.
›
Press any button on the remote control key.
›
Pressing of the button means that the door will unlock with the key within 1 mi-
nute.
Luggage compartment lid
Introduction
This chapter contains information on the following subjects:
Unlocking/opening and closing
29
Automatic locking
29
Emergency unlocking
29WARNING■ Ensure that the lock is properly engaged after closing the luggage compart-
ment lid. Otherwise, the luggage compartment lid might open suddenly while
driving, even if the luggage compartment lid lock was closed – risk of accident!■
Never drive with the luggage compartment lid open or ajar, as otherwise ex-
haust gases may get into the interior of the vehicle – risk of poisoning!
■
Do not press on the rear window when closing the luggage compartment lid,
as otherwise this could crack – risk of injury!
28Using the system
Page 47 of 176
WARNING■The front passenger airbag should be switched off when transporting ob-
jects on the seat backrest that has been folded forwards » page 102.■
Only adjust the seat backrest when the vehicle is stationary.
■
When moving the seat backrest, make sure that the seat backrest has been
properly secured – check by pulling on the seat backrest.
■
If the seat backrest is folded, passengers may only be transported on the
outer seat behind the driver.
■
When moving the seat backrest, keep limbs out of the area between the
seat and seat backrest – risk of injury!
■
The seat backrest that has been folded forwards must never be used to
transport objects that: ■could restrict the driver's view;
■ can make it impossible for the driver to operate the vehicle, e.g. if they
could fall under the pedals or protrude into the driver's area; ■ could injure passengers when the driver accelerates sharply, changes di-
rection or brakes.
Front seat heating
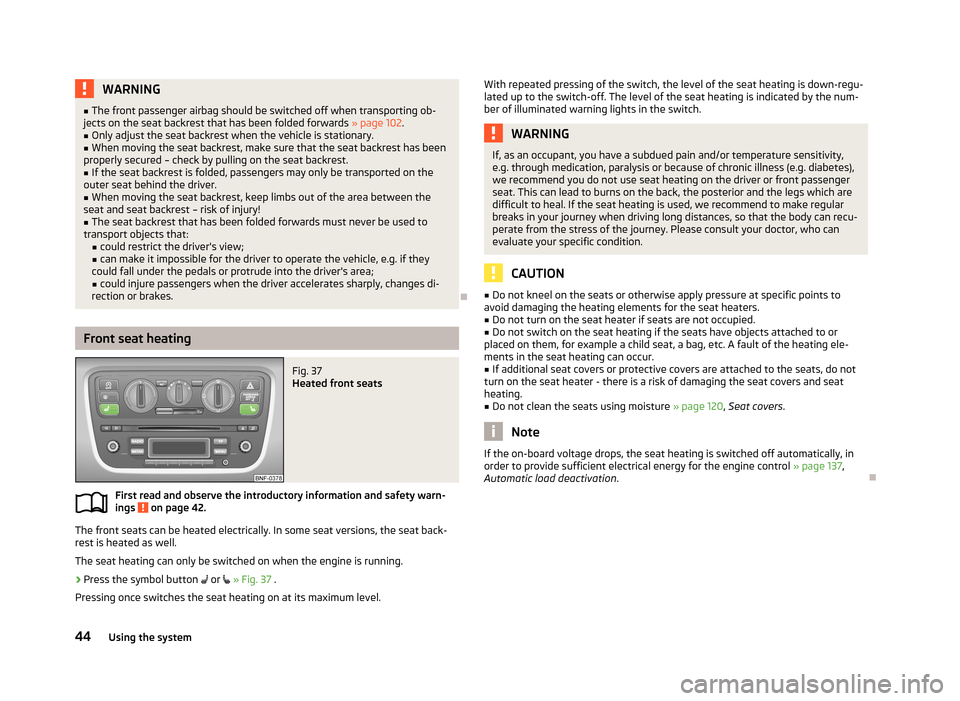
Fig. 37
Heated front seats
First read and observe the introductory information and safety warn- ings on page 42.
The front seats can be heated electrically. In some seat versions, the seat back-
rest is heated as well.
The seat heating can only be switched on when the engine is running.
›
Press the symbol button
or
» Fig. 37 .
Pressing once switches the seat heating on at its maximum level.
With repeated pressing of the switch, the level of the seat heating is down-regu-
lated up to the switch-off. The level of the seat heating is indicated by the num-
ber of illuminated warning lights in the switch.WARNINGIf, as an occupant, you have a subdued pain and/or temperature sensitivity,
e.g. through medication, paralysis or because of chronic illness (e.g. diabetes),
we recommend you do not use seat heating on the driver or front passenger
seat. This can lead to burns on the back, the posterior and the legs which are difficult to heal. If the seat heating is used, we recommend to make regular
breaks in your journey when driving long distances, so that the body can recu-
perate from the stress of the journey. Please consult your doctor, who can evaluate your specific condition.
CAUTION
■ Do not kneel on the seats or otherwise apply pressure at specific points to
avoid damaging the heating elements for the seat heaters.■
Do not turn on the seat heater if seats are not occupied.
■
Do not switch on the seat heating if the seats have objects attached to or
placed on them, for example a child seat, a bag, etc. A fault of the heating ele- ments in the seat heating can occur.
■
If additional seat covers or protective covers are attached to the seats, do not
turn on the seat heater - there is a risk of damaging the seat covers and seat
heating.
■
Do not clean the seats using moisture » page 120, Seat covers .
Note
If the on-board voltage drops, the seat heating is switched off automatically, in
order to provide sufficient electrical energy for the engine control » page 137,
Automatic load deactivation .
44Using the system
Page 48 of 176
Rear seats
Introduction
This chapter contains information on the following subjects:
Folding the rear seats forward
45
Head restraints
45
Folding the rear seats forward
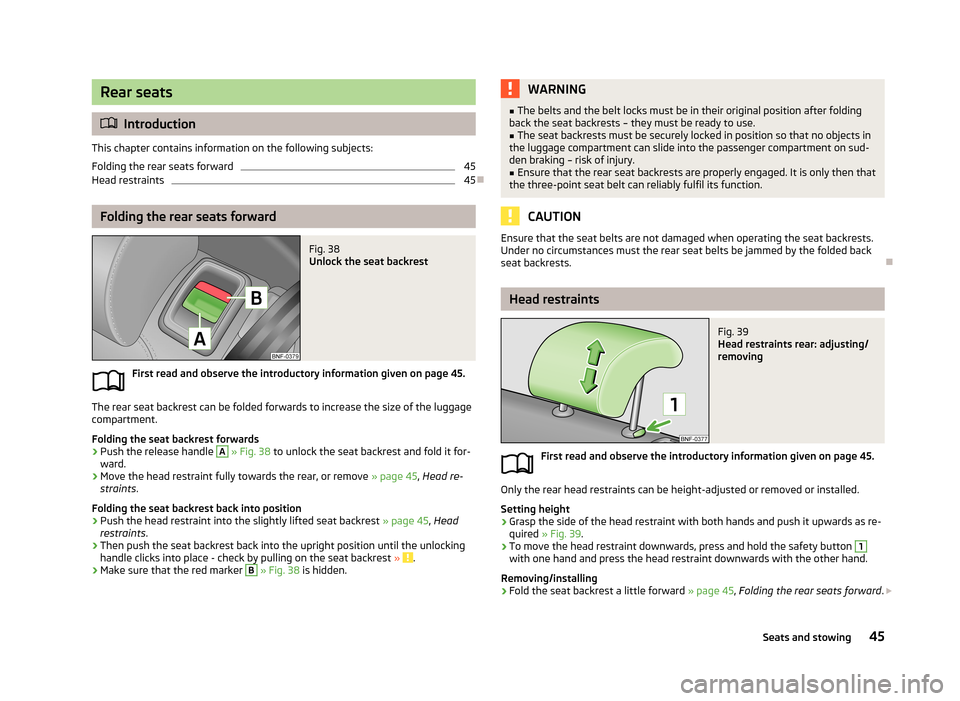
Fig. 38
Unlock the seat backrest
First read and observe the introductory information given on page 45.
The rear seat backrest can be folded forwards to increase the size of the luggage
compartment.
Folding the seat backrest forwards
›
Push the release handle
A
» Fig. 38 to unlock the seat backrest and fold it for-
ward.
›
Move the head restraint fully towards the rear, or remove » page 45, Head re-
straints .
Folding the seat backrest back into position
›
Push the head restraint into the slightly lifted seat backrest » page 45, Head
restraints .
›
Then push the seat backrest back into the upright position until the unlocking
handle clicks into place - check by pulling on the seat backrest » .
›
Make sure that the red marker
B
» Fig. 38 is hidden.
WARNING■
The belts and the belt locks must be in their original position after folding
back the seat backrests – they must be ready to use.■
The seat backrests must be securely locked in position so that no objects in
the luggage compartment can slide into the passenger compartment on sud-
den braking – risk of injury.
■
Ensure that the rear seat backrests are properly engaged. It is only then that
the three-point seat belt can reliably fulfil its function.
CAUTION
Ensure that the seat belts are not damaged when operating the seat backrests. Under no circumstances must the rear seat belts be jammed by the folded back
seat backrests.
Head restraints
Fig. 39
Head restraints rear: adjusting/
removing
First read and observe the introductory information given on page 45.
Only the rear head restraints can be height-adjusted or removed or installed.
Setting height
›
Grasp the side of the head restraint with both hands and push it upwards as re-
quired » Fig. 39 .
›
To move the head restraint downwards, press and hold the safety button
1
with one hand and press the head restraint downwards with the other hand.
Removing/installing
›
Fold the seat backrest a little forward » page 45, Folding the rear seats forward .
45Seats and stowing
Page 50 of 176
WARNING (Continued)■Under no circumstances should the permissible axle loads and the permissi-
ble total vehicle weight be exceeded – risk of accident!■
Never transport people in the luggage compartment!
CAUTION
Please ensure that the heating elements for the rear window heater are not dam-
aged as a result of abrasive objects.
Note
The tyre pressure must be adjusted to the load .
Class N1 vehicles
First read and observe the introductory information and safety warn-
ings
on page 46.
For safe vehicle operation, the proper functioning of the electrical installation is
essential. It is important to ensure that it is not damaged in adaptation as well as
the loading and unloading of the cargo space.
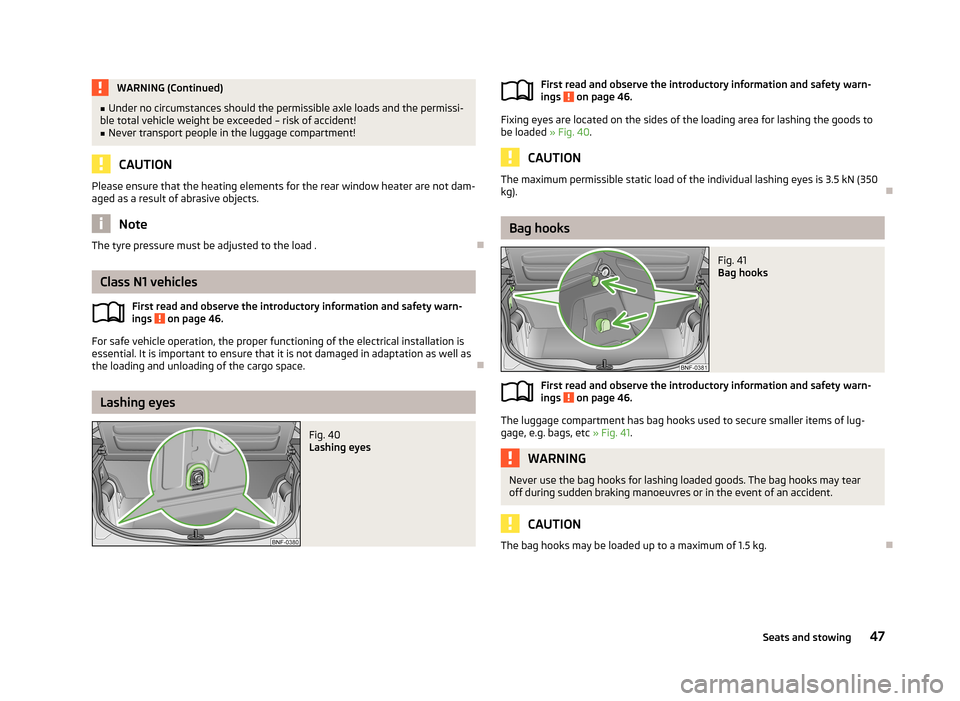
Lashing eyes
Fig. 40
Lashing eyesFirst read and observe the introductory information and safety warn- ings on page 46.
Fixing eyes are located on the sides of the loading area for lashing the goods to
be loaded » Fig. 40.
CAUTION
The maximum permissible static load of the individual lashing eyes is 3.5 kN (350
kg).
Bag hooks
Fig. 41
Bag hooks
First read and observe the introductory information and safety warn-
ings on page 46.
The luggage compartment has bag hooks used to secure smaller items of lug-
gage, e.g. bags, etc » Fig. 41.
WARNINGNever use the bag hooks for lashing loaded goods. The bag hooks may tear
off during sudden braking manoeuvres or in the event of an accident.
CAUTION
The bag hooks may be loaded up to a maximum of 1.5 kg.
47Seats and stowing
Page 52 of 176
CAUTIONMake sure that the luggage compartment cover is correctly engaged in the sideholders 2 » Fig. 44 - risk of damage to luggage compartment cover/luggage
compartment.
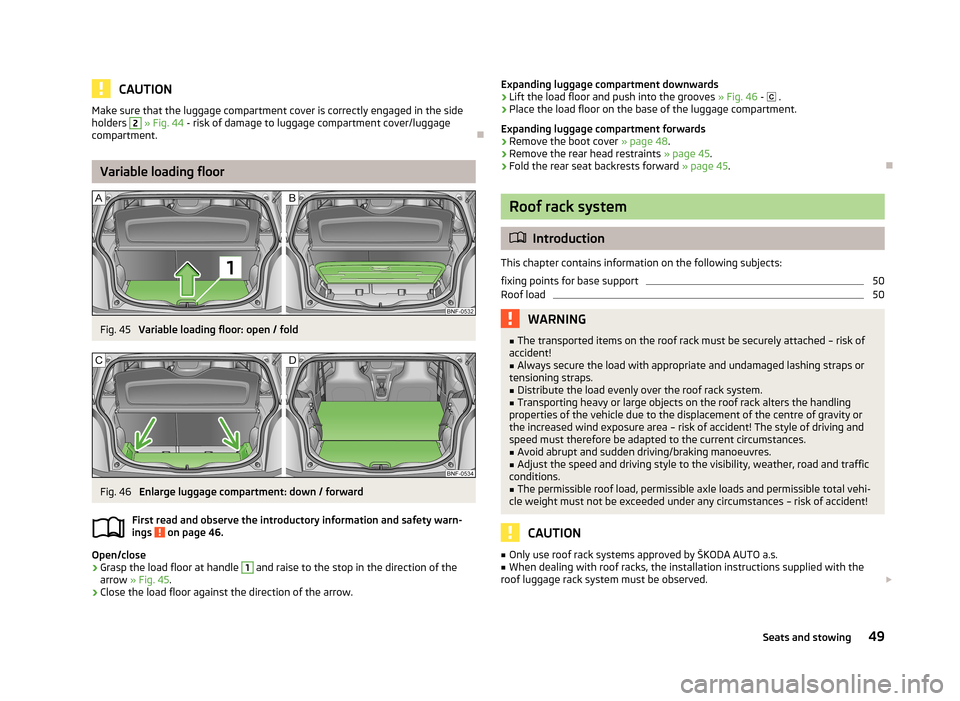
Variable loading floor
Fig. 45
Variable loading floor: open / fold
Fig. 46
Enlarge luggage compartment: down / forward
First read and observe the introductory information and safety warn-
ings
on page 46.
Open/close
›
Grasp the load floor at handle
1
and raise to the stop in the direction of the
arrow » Fig. 45 .
›
Close the load floor against the direction of the arrow.
Expanding luggage compartment downwards›Lift the load floor and push into the grooves » Fig. 46 - .›
Place the load floor on the base of the luggage compartment.
Expanding luggage compartment forwards
›
Remove the boot cover » page 48.
›
Remove the rear head restraints » page 45.
›
Fold the rear seat backrests forward » page 45.
Roof rack system
Introduction
This chapter contains information on the following subjects:
fixing points for base support
50
Roof load
50WARNING■ The transported items on the roof rack must be securely attached – risk of
accident!■
Always secure the load with appropriate and undamaged lashing straps or
tensioning straps.
■
Distribute the load evenly over the roof rack system.
■
Transporting heavy or large objects on the roof rack alters the handling
properties of the vehicle due to the displacement of the centre of gravity or
the increased wind exposure area – risk of accident! The style of driving and
speed must therefore be adapted to the current circumstances.
■
Avoid abrupt and sudden driving/braking manoeuvres.
■
Adjust the speed and driving style to the visibility, weather, road and traffic
conditions.
■
The permissible roof load, permissible axle loads and permissible total vehi-
cle weight must not be exceeded under any circumstances – risk of accident!
CAUTION
■ Only use roof rack systems approved by ŠKODA AUTO a.s.■When dealing with roof racks, the installation instructions supplied with the
roof luggage rack system must be observed. 49Seats and stowing
Page 53 of 176
■On vehicles with a panoramic sliding roof, make sure that the tilted panoramic
sliding roof not strike any items which are transported.■
Ensure that the luggage compartment lid does not hit the roof load when
opened.
■
The height of the vehicle changes after mounting a roof luggage rack system
and the load that is secured to it. Compare the vehicle height with available clear-
ances, such as underpasses and garage doors.
■
Always remove the roof luggage rack system before entering an automated car
wash.
■
Ensure the roof aerial is not impaired by the secured load.
For the sake of the environment
The increased aerodynamic drag results in a higher fuel consumption.
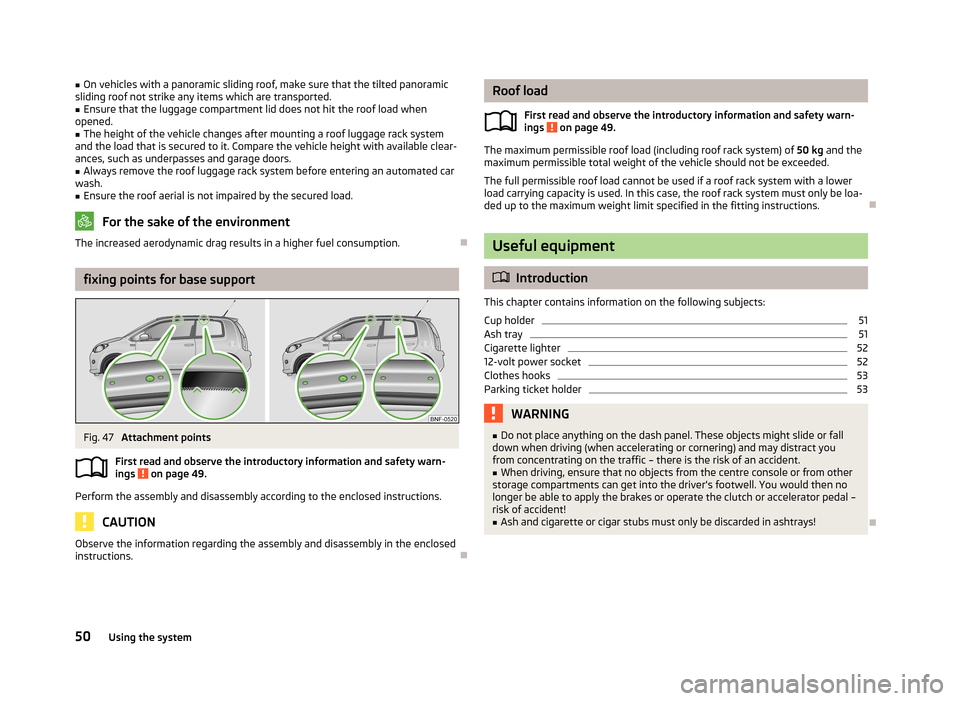
fixing points for base support
Fig. 47
Attachment points
First read and observe the introductory information and safety warn- ings
on page 49.
Perform the assembly and disassembly according to the enclosed instructions.
CAUTION
Observe the information regarding the assembly and disassembly in the enclosed
instructions.
Roof load
First read and observe the introductory information and safety warn-
ings
on page 49.
The maximum permissible roof load (including roof rack system) of 50 kg and the
maximum permissible total weight of the vehicle should not be exceeded.
The full permissible roof load cannot be used if a roof rack system with a lower
load carrying capacity is used. In this case, the roof rack system must only be loa-
ded up to the maximum weight limit specified in the fitting instructions.
Useful equipment
Introduction
This chapter contains information on the following subjects:
Cup holder
51
Ash tray
51
Cigarette lighter
52
12-volt power socket
52
Clothes hooks
53
Parking ticket holder
53WARNING■ Do not place anything on the dash panel. These objects might slide or fall
down when driving (when accelerating or cornering) and may distract you
from concentrating on the traffic – there is the risk of an accident.■
When driving, ensure that no objects from the centre console or from other
storage compartments can get into the driver's footwell. You would then no
longer be able to apply the brakes or operate the clutch or accelerator pedal –
risk of accident!
■
Ash and cigarette or cigar stubs must only be discarded in ashtrays!
50Using the system