engine overheat SKODA CITIGO 2013 1.G Owner's Manual
[x] Cancel search | Manufacturer: SKODA, Model Year: 2013, Model line: CITIGO, Model: SKODA CITIGO 2013 1.GPages: 176, PDF Size: 10.54 MB
Page 23 of 176
Airbag systemFirst read and observe the introductory information and safety warn-ings
on page 16.
Monitoring the airbag system
The warning light comes on for a few seconds when the ignition is switched
on.
There is a fault in the system if the warning light does not go out or flashes while
driving »
. This also applies if the warning light does not come on when the ig-
nition is switched on.
The operational capability of the airbag system is monitored electronically, includ-
ing when one of the airbags is switched off.
The following situation applies if the front or side airbag or belt tensioner have
been switched off using the vehicle system tester:
› The warning light
lights up for around 4 seconds after switching on the igni-
tion and then flashes approximately another 12 seconds in 2 second intervals.
The following situation applies if the airbag has been switched off using the key switch for the airbag in the front passenger storage compartment:
› The warning light
comes on for a few seconds when the ignition is switched
on;
› The deactivated airbag is indicated by the illumination of the warning light
in the middle of the dash panel » page 102, Deactivating
the front passenger airbag .
WARNINGIf there is a fault, have the airbag system checked immediately by a specialist
garage. Otherwise, there is a risk that the airbag will not be deployed in the event of an accident.
Automated transmission
First read and observe the introductory information and safety warn-
ings
on page 16.
Warning light
Do not continue your journey if the warning light
lights up and an acoustic sig-
nal sounds. Switch off the engine and seek assistance from a specialist garage.
Warning light
If the warning light lights up and no gear can be selected, switch the ignition
on and off. If the warning light lights up after you switch on the ignition, seek as- sistance from a specialist garage.
If the warning light or warning light lights up and an acoustic signal sounds,
this means that the automatic gearbox has overheated. Stop and allow the trans-
mission to cool down or drive more quickly than 20 km/h (12 mph).
If the warning light lights up again, switch off the vehicle, shut off the engine
and allow the gearbox to cool down.
Warning light
If the warning light lights up, operate the brake pedal.
Warning light
If the warning light lights up, operate the handbrake.
Further information » page 71, Automated transmission .WARNINGIf you have to stop for technical reasons, then park the vehicle at a safe dis-
tance from the traffic, switch off the engine and activate the hazard warning
lights » page 36 .
Turn signal system
First read and observe the introductory information and safety warn-ings
on page 16.
Either the left
or right
warning light flashes depending on the position of the
turn signal lever.
If a turn signal light fails, the warning light flashes at twice its normal rate.
Switching off the hazard warning light system is switched on will cause all of the turn signal lights as well as both warning lights to flash.
Further information » page 34, Turn signal and main beam .
20Using the system
Page 72 of 176
WARNING■Greater physical effort is required for braking when the engine is switched
off – risk of accident!■
The clutch pedal must be actuated when braking on a vehicle with manual
transmission, when the vehicle is in gear and at low revs. Otherwise, the func-
tion of the brake booster may be impaired – risk of accident!
■
In the event of damage occurring to the standard fitted front spoiler or the
retrofitting of another front spoiler, wheel hubs etc. » page 110, Modifica-
tions, adjustments and technical alterations , It must be ensured that the air
supply to the front brake is not impaired. The front brakes may overheat,
which can have a negative impact on the functioning of the braking system –
risk of accident!
■
Never leave children unattended in the vehicle. The children might, for ex-
ample, release the handbrake or take the vehicle out of gear. The vehicle could then start to move – risk of accident!
CAUTION
■ Observe the recommendations on the new brake pads » page 74.■Never let the brakes slip with light pressure on the pedal if braking is not neces-
sary. This causes the brakes to overheat and can also result in a longer braking distance and excessive wear.
Information on braking
First read and observe the introductory information and safety warn-
ings
on page 68.
If the brakes are applied in full and the control unit for the braking system consid-
ers the situation to be dangerous for the following traffic, the brake light flashes
automatically.
After the speed was reduced below around 10 km/h or the vehicle was stopped,
the brake light stops flashing and the hazard warning light system switches on.
The hazard warning light system is switched off automatically after accelerating
or driving off again.
Before travelling a long distance at a steep gradient, reduce speed and shift into
the next lowest gear. As a result, the braking effect of the engine will be used,
reducing the load on the brakes. Any additional braking should be completed in-
termittently, not continuously.
Wear-and-tear
The wear of the brake pads is dependent on the operating conditions and driving
style.
The brake pads wear more quickly if a lot of journeys are completed in towns and over short distances or if a very sporty style of driving is adopted.
Under these severe conditions , the thickness of the brake pads must also be
checked by a specialist garage between service intervals.
Wet roads or road salt
The performance of the brakes can be delayed as the brake discs and brake pads
may be moist or have a coating of ice or layer of salt on them in winter. The
brakes are cleaned and dried by applying the brakes several times.
Corrosion
Corrosion on the brake discs and dirt on the bake pads occur if the vehicle has
been parked for a long period and if you do not make much use of the braking
system. The brakes are cleaned and dried by applying the brakes several times.
Faults in the brake surface
If it is found that the braking distance has suddenly become longer and that the
brake pedal can be depressed further, the brake system may be faulty.
Visit a specialist garage immediately and adjust your style of driving appropriatelyas you will not know the exact extent of the damage.
Low brake fluid level
An insufficient level of brake fluid may result in problems in the brake system. The
level of the brake fluid is monitored electronically » page 16,
Braking system .
Brake booster The brake booster increases the pressure generated with the brake pedal. The brake booster only operates when the engine is running.
69Starting-off and Driving
Page 76 of 176
When the accelerator pedal is fully depressed, the Kick-down function is activated
in any forward driving mode.
The gearbox shifts down one or more gears depending on the vehicle speed and engine speed, and the vehicle accelerates.
The gearbox does not shift up into the highest gear until the engine has reached
its maximum revolutions for this gear range.WARNINGRapid acceleration, particularly on slippery roads, can lead to loss of vehicle
control – risk of accident!
Operational faults
First read and observe the introductory information and safety warn-
ings
on page 71.
In the event of a fault in the automatic gearbox, warning lights may light up in the instrument panel » page 20,
Automated transmission
.
Emergency programme
The transmission switches to the emergency programme, if there is a fault in the
automatic transmission.
Indications of an activated emergency programme include the following.
› Only certain gears are selected.
› The reverse gear
R cannot be used.
Gearbox overheating
The gearbox may become too hot due to frequent repeated starting or stop-and-
go traffic, for example.
The vehicle does not start off after engaging the selector lever position
If the vehicle does not start off, the problem may be that the selector lever is not
completely in the selected position. In such an instance, press the brake pedal
and put the selector lever into the required position.
Running in
Introduction
This chapter contains information on the following subjects:
New engine
73
New tyres
74
New brake pads
74
New engine
First read and observe the introductory information given on page 73.
The engine has to be run in during the first 1 500 kilometres.
Up to 1 000 kilometres
›
Do not drive faster than 3/4 of the maximum speed of the gear in use, i.e. 3/4 of
the maximum permissible engine speed.
›
No full throttle.
›
Avoid high engine speeds.
›
Do not tow a trailer.
From 1 000 up to 1 500 kilometres
Gradually increase the power output of the engine up to the full speed of the
gear engaged, i.e. up to the maximum permissible engine speed.
The red scale of the rev counter indicates the range in which the system beginsto limit the engine speed.
During the first operating hours the engine has higher internal friction than later until all of the moving parts have harmonized. The driving style which you adopt
during the first approx.1 500 kilometres plays a decisive part in the success of running in your car.
Never drive at unnecessarily high engine speeds even after the running-in period.
On vehicles fitted with a manual gearbox, at the very latest shift up into the next
gear when the red area is reached. Observe the recommended gear » page 12,
Recommended gear . Very high engine speeds when accelerating (accelerator) are
automatically restricted »
.
73Starting-off and Driving
Page 128 of 176
In the following situation, it is possible that the tank cannot be fully filled with
natural gas.
› At very high ambient temperatures. The natural gas refuelling systems have
overheating protection. When the ambient temperature reaches a predefined value, the refuelling system automatically switches off.
› If the refuelling system has been in operation for a longer period, the filling
pressure of the natural gas refuelling system slightly drops.WARNING■ Stop the engine before refuelling.■Always switch off your mobile phone, do not smoke and do not use open
flames when refuelling with natural gas – risk of explosion!■
When refuelling, never get into the vehicle. If you have to get into your vehi-
cle in exceptional cases, close the door and touch a metal surface before you
touch the filling coupling again. This will avoid electrostatic discharges, which
may generate sparks. Sparks can cause a fire during refuelling.
■
Natural gas is highly explosive and flammable. Incorrect refuelling or improp-
er handling of natural gas can cause a fire, an explosion and injuries.
Note
■ The natural gas system of your vehicle is suitable both for fuelling from small
compressors (slow fuelling) and for fuelling from natural gas stations with large
compressors (quick fuelling).■
Noises that occur during refuelling represent no risk.
■
If the vehicle is parked for a longer period of time immediately after refuelling,
the situation may arise in which the pointer of the fuel tank gauge does not indi- cate exactly the same level as was the case immediately after refuelling when theengine is restarted. This is not due to any system leakages but a drop in pressurein the natural gas fuel tank due to technical reasons after a cooling phase directly
after refuelling.
■
For frequent short-haul traffic, especially at low outside temperatures, the vehi-
cle is driven more frequently in petrol mode than in natural gas mode. This is why the petrol tank runs empty faster than the natural gas tank.
■
The capacity of the natural gas tank is about 11 kg, of which about 1.5 kg are a
reserve.
■
The capacity of the petrol tank is about 10 l, of which about 5 l are a reserve.
Automatic switching from CNG to petrol mode
First read and observe the introductory information and safety warn-
ings
on page 123.
The vehicle automatically switches over from CNG mode to petrol mode when the following conditions are met:
› when starting the engine, if the coolant temperature is below 15 °C,
› when the natural gas tank is empty,
› after refuelling with natural gas.
Natural gas as fuel
First read and observe the introductory information and safety warn-ings
on page 123.
Natural gas is an alternative fuel for motor vehicles. Its main component is meth-
ane (CH 4). The rest is carbon dioxide and lower hydrocarbons.
The strict legal requirements for exhaust emissions of motor vehicles are decisive for the current significance of natural gas. In direct comparison to all other fossil
fuels, natural gas is one of the fuels which cause the lowest emissions.
Natural gas is odourless and lighter than air. For safety reasons, it is saturated
with odorous substances, so that is perceived even in very small amounts.
Regular gas system checks
First read and observe the introductory information and safety warn-ings
on page 123.
Every two years, the following inspections must be carried out:
› Check the condition of the fuel filler cap, filler neck and sealing ring, and clean
sealing ring if necessary.
› Check gas system for leaks.
The following checks must be carried out every four years: › Check gas tank mounting for secure attachment and possible damage.
The gas tank must be filled prior to the regular gas system check.
125Inspecting and replenishing
Page 135 of 176
Coolant
Introduction
This chapter contains information on the following subjects:
Capacity
132
Checking the coolant level
132
Replenishing
133
The coolant consists of water with coolant additive. This mixture guarantees anti- freeze protection, protects the cooling/heater system against corrosion and pre-
vents lime formation.
Vehicles exported to countries with a mild climate are already factory-filled with
a coolant which offers antifreeze protection down to about -25 ℃. In these coun-
tries, the concentration of coolant additive should be at least 40%.
Vehicles exported to countries with a cold climate are already factory-filled with a
coolant which offers antifreeze protection down to about -35 °C. In these coun-
tries, the concentration of coolant additive should be at least 50%.
If a higher concentration of antifreeze is required for climatic reasons, the con-centration of coolant additive can be increased up to a maximum of 60% (anti-
freeze protection down to approx. -40 °C).
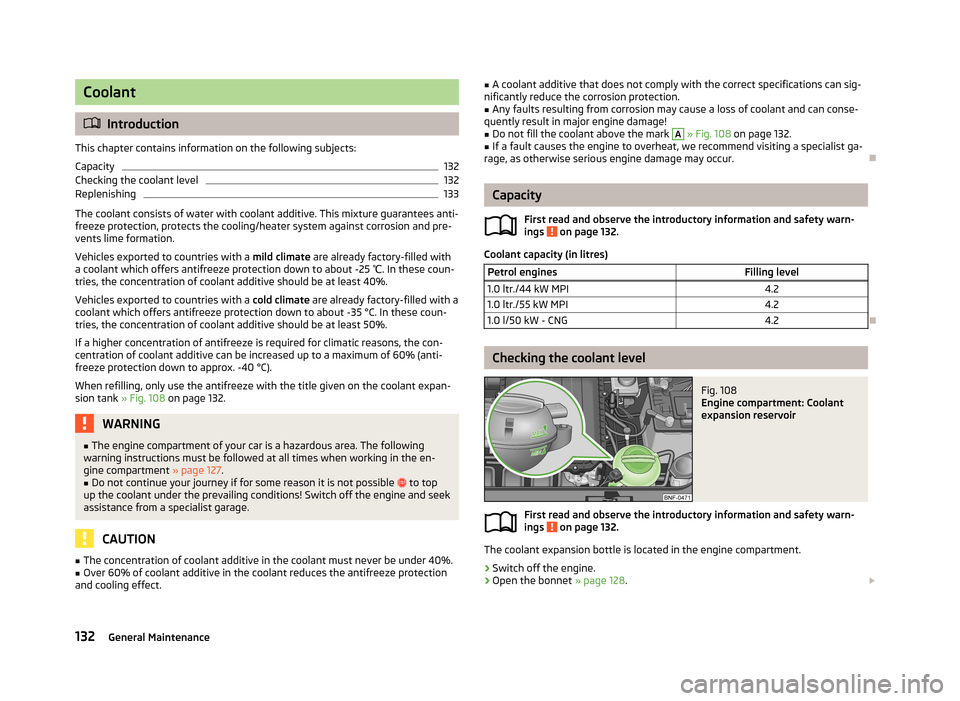
When refilling, only use the antifreeze with the title given on the coolant expan-
sion tank » Fig. 108 on page 132.
WARNING■
The engine compartment of your car is a hazardous area. The following
warning instructions must be followed at all times when working in the en-
gine compartment » page 127.■
Do not continue your journey if for some reason it is not possible to top
up the coolant under the prevailing conditions! Switch off the engine and seek
assistance from a specialist garage.
CAUTION
■ The concentration of coolant additive in the coolant must never be under 40%.■Over 60% of coolant additive in the coolant reduces the antifreeze protection
and cooling effect.■ A coolant additive that does not comply with the correct specifications can sig-
nificantly reduce the corrosion protection.■
Any faults resulting from corrosion may cause a loss of coolant and can conse-
quently result in major engine damage!
■
Do not fill the coolant above the mark
A
» Fig. 108 on page 132.
■
If a fault causes the engine to overheat, we recommend visiting a specialist ga-
rage, as otherwise serious engine damage may occur.
Capacity
First read and observe the introductory information and safety warn-
ings
on page 132.
Coolant capacity (in litres)
Petrol enginesFilling level1.0 ltr./44 kW MPI4.21.0 ltr./55 kW MPI4.21.0 l/50 kW - CNG4.2
Checking the coolant level
Fig. 108
Engine compartment: Coolant
expansion reservoir
First read and observe the introductory information and safety warn-
ings on page 132.
The coolant expansion bottle is located in the engine compartment.
›
Switch off the engine.
›
Open the bonnet » page 128.
132General Maintenance
Page 153 of 176
›Firmly screw the inflation hose 3 onto the tyre inflator bottle 10 clockwise.
The film on the cap is pierced automatically.›
Remove the plug from the inflation hose
3
and plug the open end fully onto
the tyre valve.
›
Hold the bottle
10
with the bottom facing upwards and fill all of the sealing
agent from the tyre inflator bottle into the tyre.
›
Remove the empty tyre inflator bottle from the valve.
›
Screw the valve core back into the tyre valve using the valve remover
1
.
Inflating
›
Screw the tyre inflation hose
5
» Fig. 120 on page 149 of the air compressor
firmly onto the tyre valve.
›
Check that the air release valve
7
is closed.
›
Start the engine and run it in idle.
›
Plug the connector
9
into 12 Volt socket » page 52, 12-volt power socket .
›
Switch on the air compressor with the ON and OFF switch
8
.
›
Allow the air compressor to run until a pressure of 2.0 - 2.5 bar is achieved. Max-
imum run time of 8 minutes » !
›
Switch off the air compressor.
›
If you cannot reach an air pressure of 2.0 – 2.5 bar, unscrew the tyre inflation
hose
5
from the tyre valve.
›
Drive the vehicle 10 metres forwards or backwards to allow the sealing agent to
“distribute” in the tyre.
›
Firmly screw the tyre inflation hose
5
back onto the tyre valve and repeat the
inflation process.
›
If you cannot reach the required tyre inflation pressure here either, this means
the tyre has sustained too much damage. You cannot seal with tyre with the
breakdown kit »
.
›
Switch off the air compressor.
›
Remove the tyre inflation hose
5
from the tyre valve.
Once a tyre inflation pressure of 2.0 – 2.5 bar is achieved, continue the journey at
a maximum speed of 80 km/h (50 mph).
Check the tyre inflation pressure after driving for 10 minutes » page 150.
WARNING■
The tyre inflation hose and air compressor may get hot as the tyre is being
inflated – there is a risk of injury.■
Do not place the hot tyre inflation hose or hot air compressor on flammable
materials – there is a risk of fire.
■
If you cannot inflate the tyre to at least 2.0 bar, this means the damage sus-
tained was too serious. The sealing agent cannot be used to seal the tyre.
Do not drive the vehicle. Seek help from a specialist garage.
CAUTION
Switch off the air compressor after running 8 minutes at the latest – there is a
risk of overheating. Allow the air compressor to cool a few minutes before switch- ing it on again.
Check after 10 minutes' driving
First read and observe the introductory information and safety warn-ings
on page 148.
Check the tyre inflation pressure after driving for 10 minutes!
If the tyre pressure is 1.3 bar or less
›
Do not drive the vehicle! You cannot properly seal with tyre with the break-
down kit.
If the tyre pressure is 1.3 bar or more
›
Adjust the tyre inflation pressure to the correct value (see inside of fuel filler cap).
›
Continue driving carefully to the nearest specialist garage at a maximum speed
of 80 km/h (50 mph).
Jump-starting
Introduction
This chapter contains information on the following subjects:
Jump-starting using the battery from another vehicle
151
Jump-starting in vehicles with the START-STOP system
152
150Do-it-yourself