engine SKODA CITIGO 2015 1.G User Guide
[x] Cancel search | Manufacturer: SKODA, Model Year: 2015, Model line: CITIGO, Model: SKODA CITIGO 2015 1.GPages: 160, PDF Size: 23.1 MB
Page 37 of 160
At a speed of more than approximately 20 km/h the warning light flashes
and an audible warning sounds at a time.
The warning signal is switched of and the
indicator light is permanently lit if
the driver and front passenger have not fastened their seat belts within the
next 90 seconds.
Alternator
Read and observe
on page 34 first.
illuminates - the battery is not being charged whilst the engine is running.
Seek help from a specialist garage.
CAUTION
If in addition to the symbol the symbol » page 35 illuminates while driv-
ing, stop driving - risk of engine damage! Switch off the engine and seek as-
sistance from a specialist garage.
Engine oil pressure too low
Read and observe
on page 34 first.
lights up or flashes - the engine oil pressure is too low.
An audible signal sounds as a warning.
›
Stop the vehicle, switch off the engine, and check the engine oil level
» page 109 , Checking the oil level .
If the warning light illuminates or flashes, do not drive any further, even if
the oil level is correct! Switch off the engine and seek assistance from a spe-
cialist garage.
CAUTION
■ The oil pressure light is not an oil level indicator! One should therefore
check the oil level at regular intervals, preferably after every refuelling stop.■
If for some reason, it is not possible to top up the engine oil under the cur-
rent circumstances,
do not continue driving! Switch off the engine and seek
assistance from a specialist garage.
Coolant
Read and observe
on page 34 first.
lights up or flashes - the coolant temperature is too high or the coolant lev-
el is too low.
An audible signal sounds as a warning tone.
›
Stop the vehicle, switch off the engine, and allow the engine to cool down.
›
Check the coolant level, if necessary top up the coolant.
If the coolant is within the specified range, the cooling fan may be malfunc-
tioning.
›
Switch off the ignition.
›
Check the fuse for the cooling fan, replace if necessary.
If the coolant level and fan fuse are both OK but the warning light is still
illuminated ,
do not drive any further!
Seek help from a specialist garage.
Automated transmission
Read and observe
on page 34 first.
fault
lights up - there is a fault in the automatic transmission.
An audible signal sounds as a warning tone.
Do not continue to drive! Switch off the engine and seek assistance from a
specialist garage.
Functional impairment
lights up and gear change is not possible - for technical reasons there may
be an impairment of the automatic transmission.
›
Stop the car, turn the ignition off and on again.
If the warning light lights up after you again switch on the ignition, seek as-
sistance from a specialist garage.
Gearbox overheating
and is possibly also
illuminated - the automatic transmission is overheat-
ing.
An audible signal sounds as a warning tone.
35Instruments and control lights
Page 38 of 160
›Stop and allow the transmission to cool down or drive more quickly than
20 km/h (12 mph).
If the warning light
lights up again, switch off the vehicle, shut off the en-
gine and allow the gearbox to cool down.
Further information » page 81, Automated transmission .
Power steering
Read and observe
on page 34 first.
lights up - this indicates a complete failure of the power steering and the
steering assist has failed (significantly higher steering forces).
lights up - this indicates a partial failure of the power steering and the
steering forces can be greater.
›
Stop the car, turn the ignition off and on again.
If the indicator light does not illuminate after the engine has been turned on
again, the power steering is fully operational again.
If the warning light illuminates again, then obtain assistance from an author-
ised dealer.
Disconnecting the vehicle battery
If the vehicle's battery has been disconnected and reconnected, the warning
light comes on after switching on the ignition.
The warning light should go out after driving a short distance.
If, after the motor is restarted and a short drive, the indicator light does not go
out, there is a system error.
Seek help from a specialist garage.
Stability Control (ESC) / traction control (ASR)
Read and observe
on page 34 first.
flashes - the ESC or TCS is currently being accessed.
lights up - there is an ESC or TCS fault.
Seek help from a specialist garage.
As the ESC operates in conjunction with the ABS, the ESC warning light will al-
so come on if the ABS system fails.
If the warning light comes on straight after starting the engine, the TCS may
be switched off for technical reasons.›
Switch the ignition off and on again.
If the warning light
does not illuminate after you switch the engine back on,
the ASR is fully functional again.
Disconnecting the vehicle battery
If the vehicle's battery has been disconnected and reconnected, the warning
light comes on after switching on the
ignition.
The warning light should go out after driving a short distance.
If, after a short drive, the indicator light does not go out, there is a system er- ror.
Seek help from a specialist garage.
More information about the ESC system » page 85, Stability Control (ESC) or
TCS system » page 85, Traction control (TCS) .
Antilock brake system (ABS)
Read and observe
on page 34 first.
lights up - there is an ABS fault.
The vehicle will only be braked by the normal brake system without the ABS.
Seek help from a specialist garage.
In the event of an ABS fault, the other braking and stabilization systems are
turned off » page 85, Braking and stabilisation systems .
WARNING■
A fault to the ABS system or the braking system can increase the vehi-
cle's braking distance – risk of accident!■
If the ABS warning light
together with the indicator light
» page 34
lights,
do not continue to drive! Seek help from a specialist garage.
Tyre pressure
Read and observe
on page 34 first.
Change of tyre pressure values
lights up - there was a pressure change in one of the tyres.
36Using the system
Page 39 of 160
An audible signal sounds as a warning.›
Immediately reduce speed and avoid sudden steering and braking manoeu-
vres.
›
Stop the vehicle, turn the ignition off and check the tyres and their inflation
pressures » page 117.
›
Correct the tyre pressure if necessary or replace the affected wheel
» page 123 or use the repair kit » page 127.
›
Save the tyre pressure values in the system » page 91.
System fault
flashes for approximately 1 minute and remains lit - there may be a fault in
the tyre pressure monitoring system.
›
Stop the vehicle, turn the ignition off and start the engine again.
If the warning light flashes again after the engine has started, there is a
system error.
Seek help from a specialist garage.
Disconnecting the vehicle battery
If the vehicle's battery has been disconnected and reconnected, the warning
light comes on after switching on the ignition.
The warning light should go out after driving a short distance.
If, after a short drive, the indicator light does not go out, there is a system er-
ror.
Seek help from a specialist garage.
Other incidents
The following reasons can explain the warning light being illuminated.
▶ The vehicle is loaded on one side. Distribute loads as evenly as possible.
▶ The wheels of one axle are loaded more heavily (e.g. when towing a trailer or
when driving uphill or downhill).
▶ Snow chains are mounted.
▶ A wheel has been changed.
CAUTION
Under certain circumstances (e.g. sporty style of driving, wintry or unpaved
roads) the warning light in the instrument cluster can be delayed or does
not light up at all. Rear fog light
Read and observe
on page 34 first.
lights up - the rear fog light is switched on.
Exhaust inspection system
Read and observe
on page 34 first.
lights up - there is a fault in the emission control system. The system allows
the vehicle to run in emergency mode.
Seek help from a specialist garage.
Checking the engine electronics
Read and observe
on page 34 first.
lights up - there is a fault in the electronic engine management system. The
system allows the vehicle to run in emergency mode.
Seek help from a specialist garage.
Airbag system
Read and observe
on page 34 first.
System fault
lights up - there is a fault in the airbag system.
This also applies if the warning light does not come on when the ignition is
switched on.
The functionality of the airbag system is monitored automatically even if one
of the airbags is switched off.
One of the airbags or a belt tensioner has been disabled by the diagnostic
tool
lights up for approximately 4 seconds after the ignition is switched on and
then flashes for approximately 12 seconds.
The front passenger airbag has been disabled with the key switch
lights up for a few seconds when the ignition is switched on.
37Instruments and control lights
Page 41 of 160
Unlocking and opening
Unlocking and locking
Introduction
This chapter contains information on the following subjects:
Unlock / lock using key and lock
40
Unlocking / locking with the remote control key
40
Locking / unlocking the vehicle with the central locking button
40
Safe securing system
41
Opening/closing a door
41
Door opening lever
42
Child safety lock
42
Malfunctions
42
Your car is equipped with a central locking system.
The central locking system allows you to lock and unlock all doors and the lug-
gage compartment lid at the same time.
Depending on the equipment configuration, the following applies after un-
locking.
▶ The turn signal lights flash twice as confirmation that the vehicle has been
unlocked.
▶ All the doors and the boot lid are unlocked.
▶ The interior light comes on.
▶ The Safelock system is switched off.
▶ The indicator light in the driver door stops flashing.
Depending on the equipment configuration, the following applies after lock-
ing.
▶ The turn signal lights flash once as confirmation that the vehicle has been
locked.
▶ All the doors and the luggage compartment lid are locked.
▶ The interior lamp goes out.
▶ The Safelock system is switched on.
▶ The warning light in the driver door begins flashing.
If the doors or the luggage compartment lid remain open after the vehicle has
been locked, the turn signal lights do not flash until they have been closed.
Protection against unintended vehicle unlocking
If you unlock the vehicle and do not open a door or the boot lid within the next
30 seconds, the vehicle will lock again automatically and the Safelock system
will be switched on.
Automatic locking/unlocking
All the doors and the luggage compartment lid are locked automatically once
the car reaches a speed of about 15 km/h.
If the ignition key is withdrawn, the car is then automatically unlocked again. It
is also possible for the driver to unlock the car by pressing the central locking
button.
The vehicle doors can be unlocked and opened at any time by pulling once on
the door opening lever.WARNING■ Never leave the key in the vehicle when you exit the vehicle. Unauthor-
ized persons, such as children, for example, could lock the car, turn on the
ignition or start the engine - there is a danger of injury and accidents!■
When leaving the vehicle, never leave persons who are not completely in-
dependent, such as children, unattended in the vehicle. These individuals
might not be able to exit the vehicle by themselves or to help themselves.
Can be fatal at very high or very low temperatures!
CAUTION
■ Each key contains electronic components; therefore it must be protected
against moisture and severe shocks.■
Keep the groove of the keys absolutely clean. Impurities (textile fibres, dust,
etc.) have a negative effect on the functionality of the locking cylinder and ig-
nition lock.
■
If the driver's door has been opened, the vehicle cannot be locked.
39Unlocking and opening
Page 53 of 160
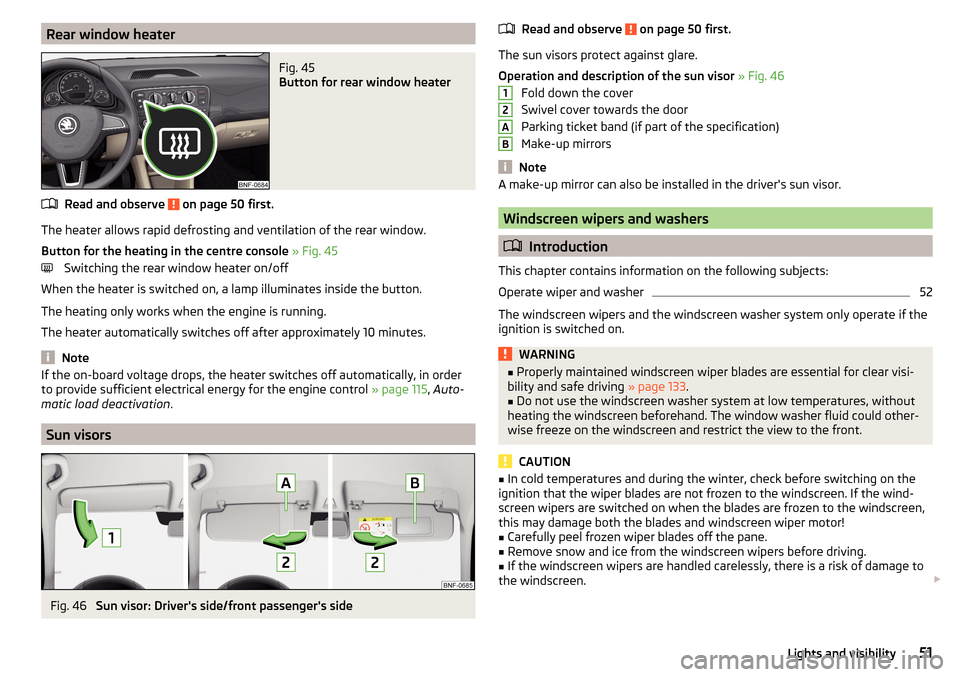
Rear window heaterFig. 45
Button for rear window heater
Read and observe on page 50 first.
The heater allows rapid defrosting and ventilation of the rear window.
Button for the heating in the centre console » Fig. 45
Switching the rear window heater on/off
When the heater is switched on, a lamp illuminates inside the button.
The heating only works when the engine is running.
The heater automatically switches off after approximately 10 minutes.
Note
If the on-board voltage drops, the heater switches off automatically, in order
to provide sufficient electrical energy for the engine control » page 115, Auto-
matic load deactivation .
Sun visors
Fig. 46
Sun visor: Driver's side/front passenger's side
Read and observe on page 50 first.
The sun visors protect against glare.
Operation and description of the sun visor » Fig. 46
Fold down the cover
Swivel cover towards the door
Parking ticket band (if part of the specification)
Make-up mirrors
Note
A make-up mirror can also be installed in the driver's sun visor.
Windscreen wipers and washers
Introduction
This chapter contains information on the following subjects:
Operate wiper and washer
52
The windscreen wipers and the windscreen washer system only operate if the
ignition is switched on.
WARNING■ Properly maintained windscreen wiper blades are essential for clear visi-
bility and safe driving » page 133.■
Do not use the windscreen washer system at low temperatures, without
heating the windscreen beforehand. The window washer fluid could other-
wise freeze on the windscreen and restrict the view to the front.
CAUTION
■ In cold temperatures and during the winter, check before switching on the
ignition that the wiper blades are not frozen to the windscreen. If the wind-
screen wipers are switched on when the blades are frozen to the windscreen,
this may damage both the blades and windscreen wiper motor!■
Carefully peel frozen wiper blades off the pane.
■
Remove snow and ice from the windscreen wipers before driving.
■
If the windscreen wipers are handled carelessly, there is a risk of damage to
the windscreen.
12AB51Lights and visibility
Page 55 of 160
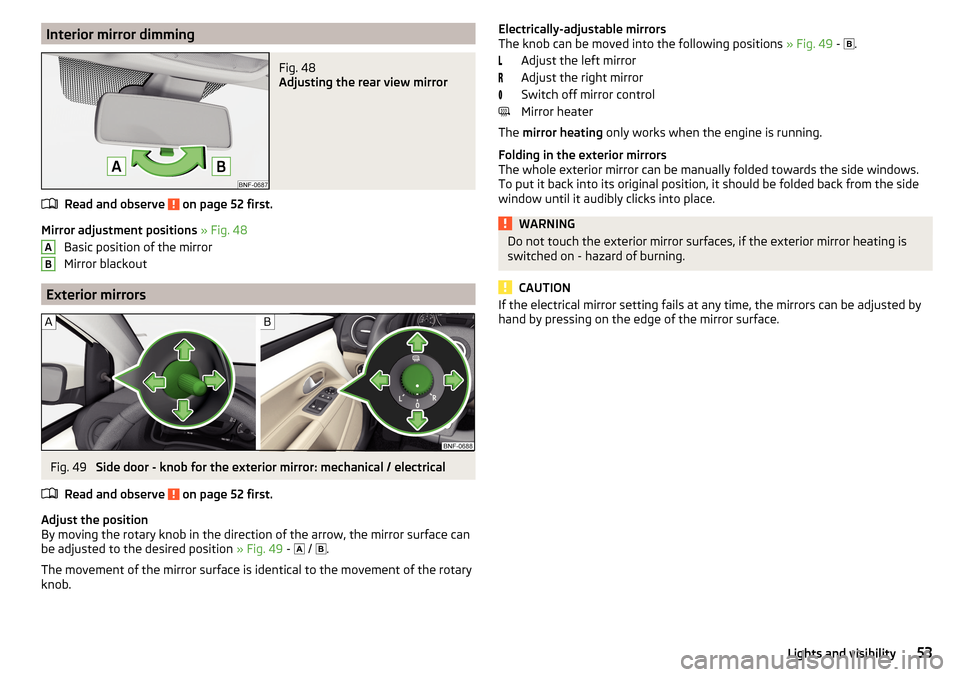
Interior mirror dimmingFig. 48
Adjusting the rear view mirror
Read and observe on page 52 first.
Mirror adjustment positions » Fig. 48
Basic position of the mirror
Mirror blackout
Exterior mirrors
Fig. 49
Side door - knob for the exterior mirror: mechanical / electrical
Read and observe
on page 52 first.
Adjust the position
By moving the rotary knob in the direction of the arrow, the mirror surface can
be adjusted to the desired position » Fig. 49 -
/
.
The movement of the mirror surface is identical to the movement of the rotary
knob.
ABElectrically-adjustable mirrors
The knob can be moved into the following positions » Fig. 49 - .
Adjust the left mirror
Adjust the right mirror
Switch off mirror control
Mirror heater
The mirror heating only works when the engine is running.
Folding in the exterior mirrors
The whole exterior mirror can be manually folded towards the side windows.
To put it back into its original position, it should be folded back from the side
window until it audibly clicks into place.WARNINGDo not touch the exterior mirror surfaces, if the exterior mirror heating is
switched on - hazard of burning.
CAUTION
If the electrical mirror setting fails at any time, the mirrors can be adjusted by
hand by pressing on the edge of the mirror surface.53Lights and visibility
Page 57 of 160
WARNINGPlease note the following points about the head restraint settings
» page 8 , Correct and safe seated position .
Note
The front headrests are integrated into the seat backrests and cannot be ad-
justed in height.
Headrests - removing and installing
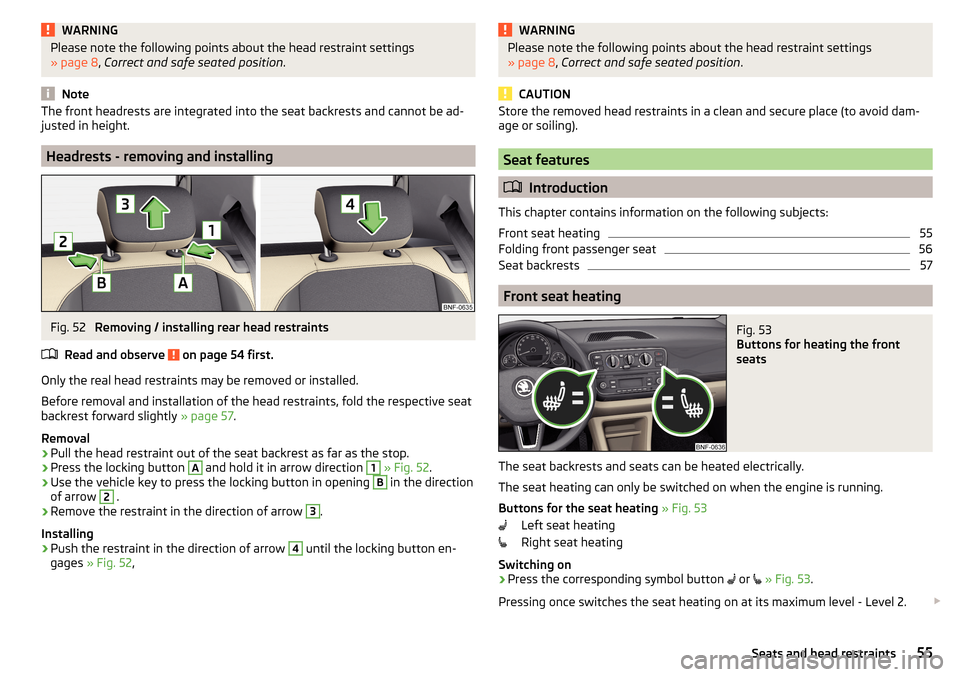
Fig. 52
Removing / installing rear head restraints
Read and observe
on page 54 first.
Only the real head restraints may be removed or installed.
Before removal and installation of the head restraints, fold the respective seat
backrest forward slightly » page 57.
Removal
›
Pull the head restraint out of the seat backrest as far as the stop.
›
Press the locking button
A
and hold it in arrow direction
1
» Fig. 52 .
›
Use the vehicle key to press the locking button in opening
B
in the direction
of arrow
2
.
›
Remove the restraint in the direction of arrow
3
.
Installing
›
Push the restraint in the direction of arrow
4
until the locking button en-
gages » Fig. 52 ,
WARNINGPlease note the following points about the head restraint settings
» page 8 , Correct and safe seated position .
CAUTION
Store the removed head restraints in a clean and secure place (to avoid dam-
age or soiling).
Seat features
Introduction
This chapter contains information on the following subjects:
Front seat heating
55
Folding front passenger seat
56
Seat backrests
57
Front seat heating
Fig. 53
Buttons for heating the front
seats
The seat backrests and seats can be heated electrically.
The seat heating can only be switched on when the engine is running.
Buttons for the seat heating » Fig. 53
Left seat heating
Right seat heating
Switching on
›
Press the corresponding symbol button
or
» Fig. 53 .
Pressing once switches the seat heating on at its maximum level - Level 2.
55Seats and head restraints
Page 63 of 160
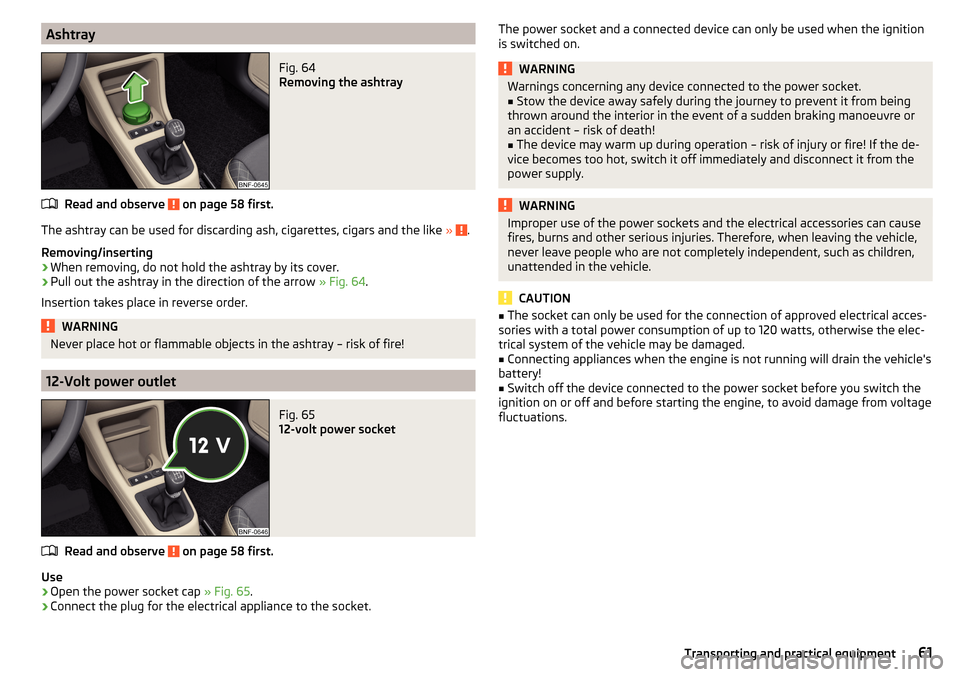
AshtrayFig. 64
Removing the ashtray
Read and observe on page 58 first.
The ashtray can be used for discarding ash, cigarettes, cigars and the like » .
Removing/inserting
›
When removing, do not hold the ashtray by its cover.
›
Pull out the ashtray in the direction of the arrow » Fig. 64.
Insertion takes place in reverse order.
WARNINGNever place hot or flammable objects in the ashtray – risk of fire!
12-Volt power outlet
Fig. 65
12-volt power socket
Read and observe on page 58 first.
Use
›
Open the power socket cap » Fig. 65.
›
Connect the plug for the electrical appliance to the socket.
The power socket and a connected device can only be used when the ignition
is switched on.WARNINGWarnings concerning any device connected to the power socket.■Stow the device away safely during the journey to prevent it from being
thrown around the interior in the event of a sudden braking manoeuvre or
an accident – risk of death!■
The device may warm up during operation – risk of injury or fire! If the de-
vice becomes too hot, switch it off immediately and disconnect it from the
power supply.
WARNINGImproper use of the power sockets and the electrical accessories can cause
fires, burns and other serious injuries. Therefore, when leaving the vehicle,
never leave people who are not completely independent, such as children,
unattended in the vehicle.
CAUTION
■ The socket can only be used for the connection of approved electrical acces-
sories with a total power consumption of up to 120 watts, otherwise the elec-
trical system of the vehicle may be damaged.■
Connecting appliances when the engine is not running will drain the vehicle's
battery!
■
Switch off the device connected to the power socket before you switch the
ignition on or off and before starting the engine, to avoid damage from voltage
fluctuations.
61Transporting and practical equipment
Page 71 of 160
Heating and ventilation
Heating, manual air conditioning system
Introduction
This chapter contains information on the following subjects:
Controls
69
recirculation
70
Air outlet vents
71
The heating and air conditioning ventilate and heat the vehicle interior. The air
conditioning system also cools and dehumidifies the vehicle interior.
The heating effect is dependent upon the coolant temperature, thus full heat
output only occurs when the engine has reached its operating temperature.
The cooling system only operates if the following conditions are met. The cooling system is switched on.
The engine is running.
The outside temperature is above approx. +2 °C.
The blower is switched on.
If the cooling system is switched on, the temperature and air humidity drops in the vehicle. The cooling system prevents the windows from misting up during
winter months.
It is possible to briefly activate recirculated air mode to enhance the cooling
effect » page 70 .
Health protection
To reduce health risks (e.g. common colds), the following instructions for the
use of the cooling system are to be observed. ▶ The difference between the indoor temperature and the outdoor air temper-
ature should not be greater than about 5 ° C.
▶ The cooling system is to be turned off about 10 minutes before the end of
the journey.
▶ Once a year, a disinfection of the air conditioner is to be carried out by a spe-
cialist company.
WARNING■ For your own safety and that of other road users, ensure that all the win-
dows are free of ice, snow and misting. The blower should always be on to
prevent the windows from misting up.■
Under certain circumstances, air at a temperature of about 5 °C can flow
out of the vents when the cooling system is switched on.
CAUTION
■ The air inlet in front of the windscreen must be free from ice, snow or leaves,
for example, to ensure that the heating and cooling system works properly.■
After switching on the cooling Condensation from the evaporator of the air
conditioning may drip down and form a puddle below the vehicle. This is not a
leak!
■
If the coolant temperature is too high, the cooling system is switched off to
ensure that the engine cools down.
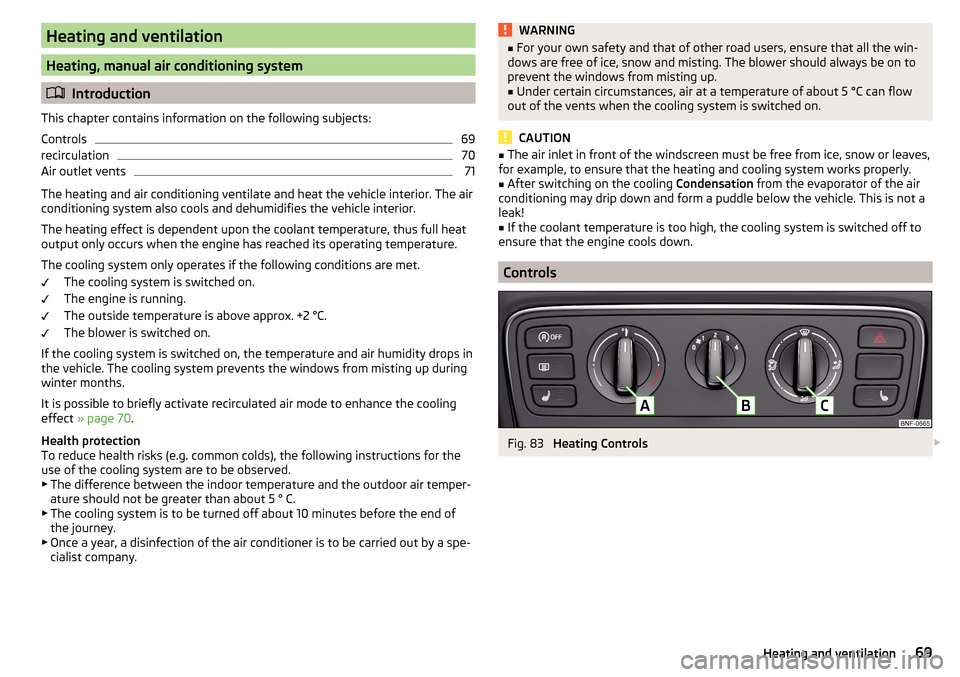
Controls
Fig. 83
Heating Controls
69Heating and ventilation
Page 72 of 160
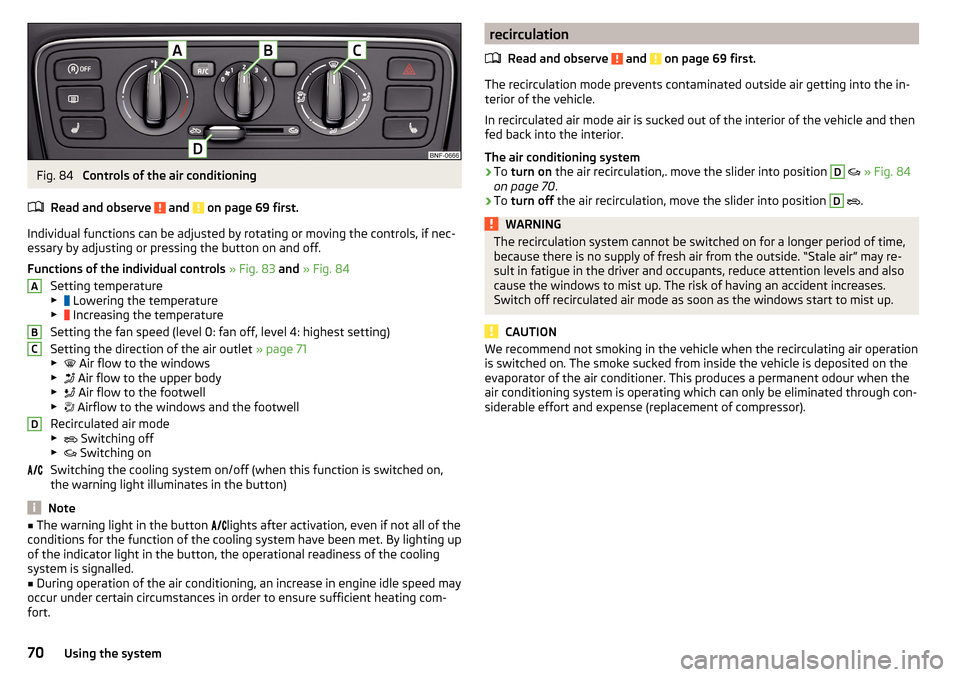
Fig. 84
Controls of the air conditioning
Read and observe
and on page 69 first.
Individual functions can be adjusted by rotating or moving the controls, if nec-
essary by adjusting or pressing the button on and off.
Functions of the individual controls » Fig. 83 and » Fig. 84
Setting temperature
▶ Lowering the temperature
▶ Increasing the temperature
Setting the fan speed (level 0: fan off, level 4: highest setting)
Setting the direction of the air outlet » page 71
▶ Air flow to the windows
▶ Air flow to the upper body
▶ Air flow to the footwell
▶ Airflow to the windows and the footwell
Recirculated air mode
▶ Switching off
▶ Switching on
Switching the cooling system on/off (when this function is switched on,
the warning light illuminates in the button)
Note
■ The warning light in the button lights after activation, even if not all of the
conditions for the function of the cooling system have been met. By lighting up
of the indicator light in the button, the operational readiness of the cooling
system is signalled.■
During operation of the air conditioning, an increase in engine idle speed may
occur under certain circumstances in order to ensure sufficient heating com-
fort.
ABCDrecirculation
Read and observe
and on page 69 first.
The recirculation mode prevents contaminated outside air getting into the in-
terior of the vehicle.
In recirculated air mode air is sucked out of the interior of the vehicle and then
fed back into the interior.
The air conditioning system
›
To turn on the air recirculation,. move the slider into position
D
» Fig. 84
on page 70 .
›
To turn off the air recirculation, move the slider into position
D
.
WARNINGThe recirculation system cannot be switched on for a longer period of time,
because there is no supply of fresh air from the outside. “Stale air” may re-
sult in fatigue in the driver and occupants, reduce attention levels and also
cause the windows to mist up. The risk of having an accident increases.
Switch off recirculated air mode as soon as the windows start to mist up.
CAUTION
We recommend not smoking in the vehicle when the recirculating air operation
is switched on. The smoke sucked from inside the vehicle is deposited on the
evaporator of the air conditioner. This produces a permanent odour when the
air conditioning system is operating which can only be eliminated through con-
siderable effort and expense (replacement of compressor).70Using the system