buttons SKODA FABIA 2000 1.G / 6Y Workshop Manual
[x] Cancel search | Manufacturer: SKODA, Model Year: 2000, Model line: FABIA, Model: SKODA FABIA 2000 1.G / 6YPages: 86, PDF Size: 3.58 MB
Page 6 of 86

Downloaded from www.Manualslib.com manuals search engine FABIA 2000➤Inspection and Maintenance
Table of ContentsEdition 09.04
S00.5301.14.20II
- Changing brake fluid (every 2 years)...............................................................
- Inspecting the brake fluid level ......................................................................
- Track rod ends: Inspect play, correct attachment and joint boots .............................
- Inspecting tyres (including spare wheel) ...........................................................
- Inspecting the tyre tread depth (including spare wheel) and entering ........................
- Tightening wheel bolts to specific torque ..........................................................
- Inspecting the tyre inflation pressure (including spare wheel) and correcting the tyre
inflation pressure if necessary .......................................................................
Electrical System.......................................................................................
- Power windows: Inspecting positioning ............................................................
- Electrical components: Check for proper operation ..............................................
- Battery: Testing no-load voltage ....................................................................
- Battery: Inspecting electrolyte level, topping up with distilled water if necessary ...........
- Radio: Check for proper operation..................................................................
- Setting clock ............................................................................................
- Connect vehicle system tester and interrogate fault memory..................................
- Resetting service interval display (SID) QG0 .....................................................
- Resetting service interval display (SID) QG1 and QG2 .........................................
- Changing the code of the service intervals ........................................................
- Inspecting headlight beam setting and adjusting if necessary .................................
- Setting the headlight beam ..........................................................................
- Replace emergency battery for alarm system ...................................................
Body.......................................................................................................
- Airbag units: Visual inspection ......................................................................
- Inspect key switch for deactivation of front passenger airbag ..................................
- Check underbody protection and body paintwork for damage .................................
- Inspecting plenum chamber and water drain openings for dirt, cleaning if necessary .....
- Windscreen wiper/washer system: Check for proper operation ................................
- Sun roof: Cleaning and greasing runners .........................................................
- Door locks, locking buttons, child safety locks: Check for proper operation .................
- Replacing the dust and odour filter element ......................................................
- Sticking the vehicle data sticker .....................................................................
- ................................................................................. Inspect trailer coupling
Exhaust-emission Analysis..........................................................................
- Exhaust-Emission Analysis on Models with Fuel Engines ......................................
- Test Values for Exhaust-Emission Analysis on Models with Fuel Engines..................
- Exhaust-Emission Analysis on Models with Diesel Engines ....................................
- Test Values for Exhaust-Emission Analysis on Diesel Engines................................
Miscellaneous...........................................................................................
- Tow starting/Towing ..................................................................................
- Perform a test drive ...................................................................................
- Raising the vehicle ....................................................................................02-5page 2
02-5page 4
02-5page 5
02-5page 5
02-5page 6
02-5page 6
02-5page 6
02-6page 1
02-6page 1
02-6page 1
02-6page 1
02-6page 2
02-6page 2
02-6page 2
02-6page 3
02-6page 4
02-6page 7
02-6page 9
02-6page 10
02-6page 12
02-6page 13
02-7page 1
02-7page 1
02-7page 2
02-7page 2
02-7page 3
02-7page 3
02-7page 4
02-7page 4
02-7page 5
02-7page 6
02-7page 6
02-8page 1
02-8page 1
02-8page 2
02-8page 5
02-8page 6
02-9page 1
02-9page 1
02-9page 2
02-9page 2
Page 13 of 86

Downloaded from www.Manualslib.com manuals search engine FABIA 2000➤Inspection and Maintenance
InspectionEdition 09.04
S00.5301.14.2002-2 page 3 02
Delivery Inspection (Export)
–Proper operation of seat belts, seat belt height adjuster, power windows and sun roof
–Inspect upholstery, interior trim, carpeting and footmats for cleanliness and damage
–Inspect all switches, all electrical components, gauges/indicators and controls02-6
–Radio: Inspect for proper operation, store stations, set clock, encode02-6
–Reset service interval display02-6
–Power windows: Inspecting positioning02-6
–Key switch for airbag deactivation, front passenger side: Check function „ON/OFF“ and
switch-over to the position „ON“02-7
–Fit net in luggage compartment (if available)
–Check the car tool kit, spare wheel and accessories, that they have all been supplied and
are properly secured
–Install the carpets supplied in the vehicle
–Perform a test drive
Underside of vehicle (on lift platform)
–Inspect underbody (underbody protection for damage)02-7
–Inspect for leaks and damage: Engine, gearbox, final drive, steering, brake system, axles,
joint boots. Check proper routing of the brake hoses and brake lines, fuel lines including
ventilation of the fuel system02-3, 02-5
–Inspect tyres and wheels for damage02-5
Concluding operations
–Interrogate fault memory of all systems, if necessary erase02-6
–Remove protective seat covers
–Remove recharging table (if affixed)
–Complete the service schedule, affix the vehicle data sticker in the Service Schedule to
the floor of the luggage compartment next to the spare wheel„Next Service Date“ sticker
and affix to the side of the dash panel on the driver's side, hand the card „Škoda Assist-
ance“ to the customer02-7
–Final inspection to ensure proper condition for handover to the customer
Inspections and operations to be completed Chapter
Vehicle (exterior)
–Plastic and rubber parts: Inspect for cleanliness and damage
–Inspect bodywork and paintwork for damage02-7
–Check operation of the tailgate lock and the fuel filler cap, door contact switch, operation
of the door handles, door locks and safety buttons, central locking from outside as well as
inside, child safety locks, ability to close all locks on the vehicle using all keys (including
the spare key)02-7
–Check operation of the anti-theft alarm system
–Tighten the wheel bolts to specified torque (steel and light alloy wheels 120 Nm), fit wheel
caps02-5
–Check the tyre inflation pressure (including spare wheel), if necessary correct the tyre in-
flation pressure, fit valve caps02-5
–Vehicles in stock for more than 6 months: Change brake fluid02-5
Page 72 of 86

Downloaded from www.Manualslib.com manuals search engine FABIA 2000➤Inspection and Maintenance
BodyEdition 09.04
S00.5301.14.2002-7 page 4 02
The specified tightening torque for the windscreen wiper
arms is 20 Nm.
Wiper arms of rear window: Inspecting park po-
sition, adjusting if necessary, spray nozzle of
rear window: Inspect setting and adjust if neces-
sary
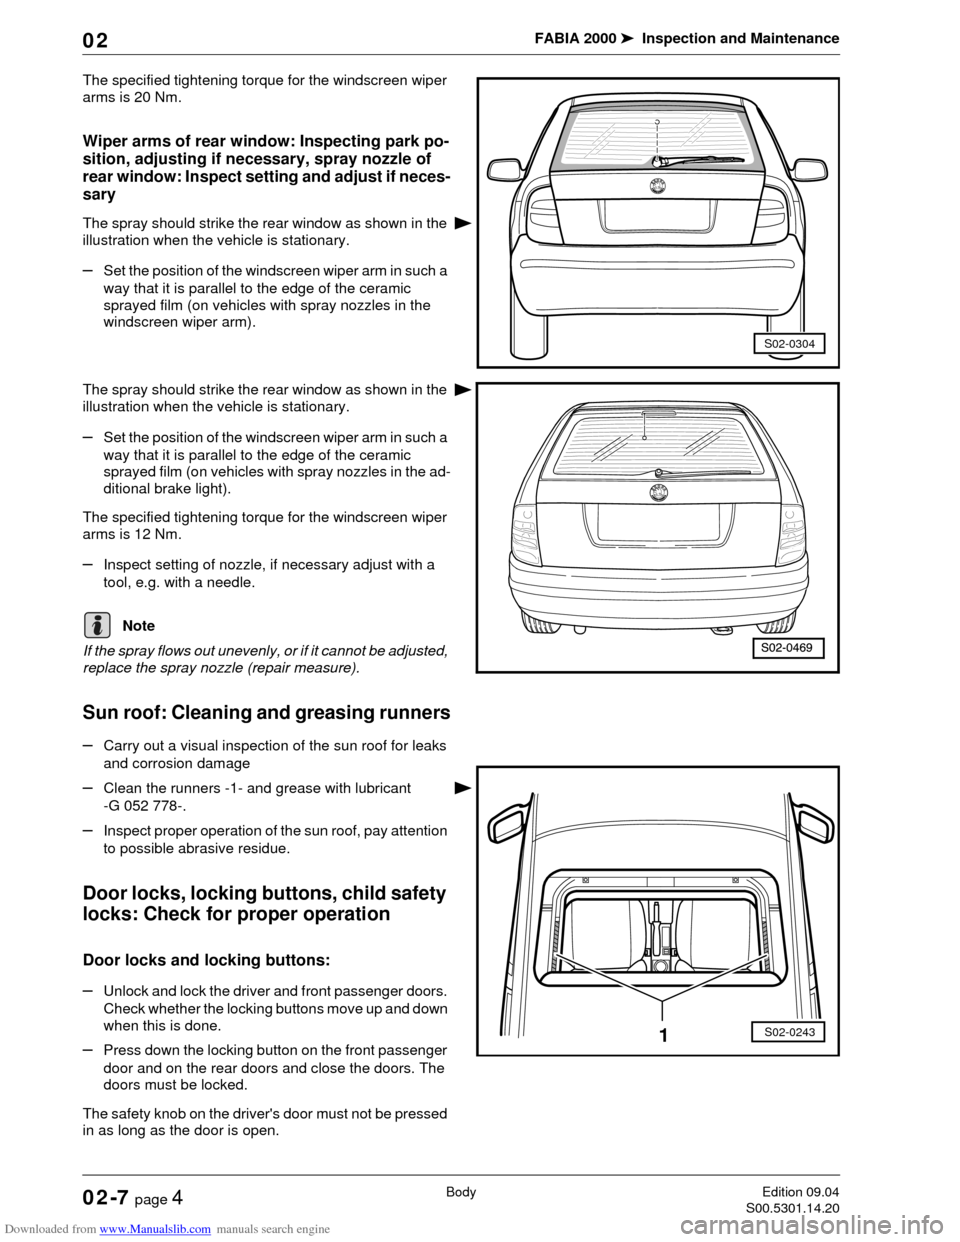
The spray should strike the rear window as shown in the
illustration when the vehicle is stationary.
–Set the position of the windscreen wiper arm in such a
way that it is parallel to the edge of the ceramic
sprayed film (on vehicles with spray nozzles in the
windscreen wiper arm).
The spray should strike the rear window as shown in the
illustration when the vehicle is stationary.
–Set the position of the windscreen wiper arm in such a
way that it is parallel to the edge of the ceramic
sprayed film (on vehicles with spray nozzles in the ad-
ditional brake light).
The specified tightening torque for the windscreen wiper
arms is 12 Nm.
–Inspect setting of nozzle, if necessary adjust with a
tool, e.g. with a needle.
If the spray flows out unevenly, or if it cannot be adjusted,
replace the spray nozzle (repair measure).
Sun roof: Cleaning and greasing runners
–Carry out a visual inspection of the sun roof for leaks
and corrosion damage
–Clean the runners -1- and grease with lubricant
-G 052 778-.
–Inspect proper operation of the sun roof, pay attention
to possible abrasive residue.
Door locks, locking buttons, child safety
locks: Check for proper operation
Door locks and locking buttons:
–Unlock and lock the driver and front passenger doors.
Check whether the locking buttons move up and down
when this is done.
–Press down the locking button on the front passenger
door and on the rear doors and close the doors. The
doors must be locked.
The safety knob on the driver's door must not be pressed
in as long as the door is open.
S02-0304
Note
S02-02431