Automatic SKODA FABIA 2003 1.G / 6Y Owner's Guide
[x] Cancel search | Manufacturer: SKODA, Model Year: 2003, Model line: FABIA, Model: SKODA FABIA 2003 1.G / 6YPages: 233, PDF Size: 32.04 MB
Page 56 of 233
Lights and Visibility55
Using the systemSafetyDriving TipsGeneral MaintenanceBreakdown assist-
anceTechnical DataFabia Praktik
– Turn signal for changing lanes - in order to only flash briefly
move the lever up or down to the pressure point and hold it
there.
Turn signal light (left)
– Push the lever downwards.
– Turn signal for changing lanes - in order to only flash briefly move the lever up or down to the pressure point and hold it
there.
Main beam
– Switch on the low beam.
– Push the lever forwards.
– Pull the lever back into the initial position in order to switch the main beam off again.
Headlight flasher
– Pull on the lever of the steering wheel (sprung position) - the main beam and warning light in the instrument cluster come
on.
Parking light
– Switch off the ignition.
– Push the lever up or down - the right-hand or left-hand parking light is switched on.
Information concerning the function of the lights.
•The turn signal system only operates when the ignition is switched
on. The corresponding indicator light or in the instrument cluster also
flashes.
•The turn signal is automatically cancelled after negotiating a curve.
•The side light and rear light on the appropriate side of the vehicle are
switched on when the parking light is selected. The parking light function
only operates if the ignition is switched off.
•An acoustic warning signal will sound when the driver's door is opened
if the lever is not in the middle position after removing the ignition key. The
acoustic warning signal will stop just as soon as the driver's door is closed.
Caution
•Use main beam or the headlight flasher only if this does not risk
dazzling other road users.
•Use only in accordance with the legal requirements the described
lighting and signal systems.
Page 57 of 233
Lights and Visibility
56
Interior lighting
Front interior lighting and storage compartment on
front passenger side
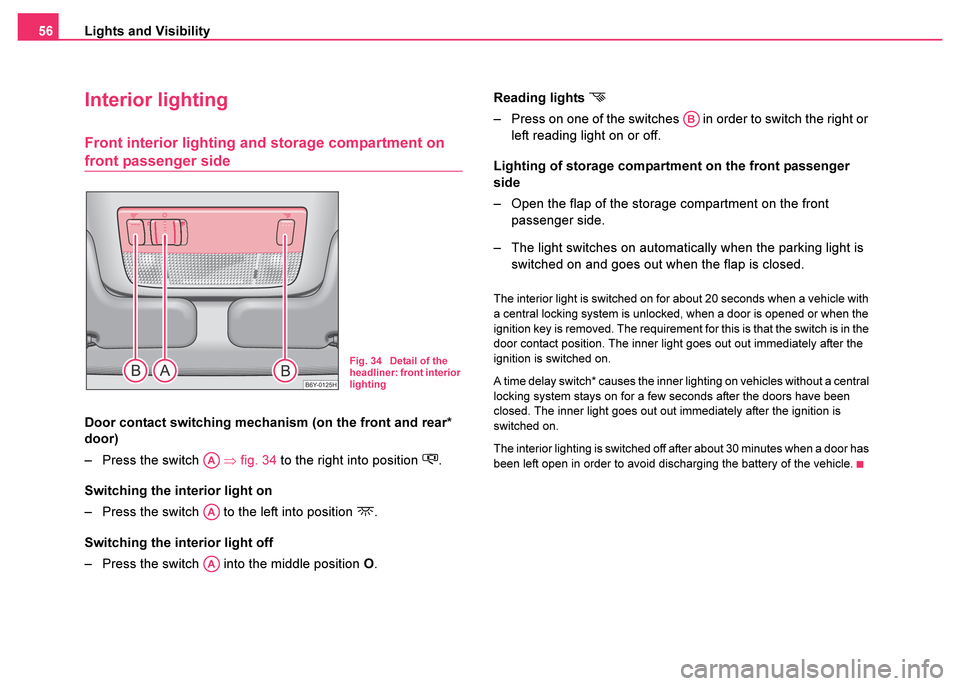
Door contact switching mechanism (on the front and rear*
door)
– Press the switch ⇒fig. 34 to the right into position
.
Switching the interior light on
– Press the switch to the left into position
.
Switching the interior light off
– Press the switch into the middle position O.Reading lights
\b
– Press on one of the switches in order to switch the right or
left reading light on or off.
Lighting of storage compartment on the front passenger
side
– Open the flap of the storage compartment on the front passenger side.
– The light switches on automatically when the parking light is switched on and goes out when the flap is closed.
The interior light is switched on for about 20 seconds when a vehicle with
a central locking system is unlocked, when a door is opened or when the
ignition key is removed. The requirement for this is that the switch is in the
door contact position. The inner light goes out out immediately after the
ignition is switched on.
A time delay switch* causes the inner lighting on vehicles without a central
locking system stays on for a few seconds after the doors have been
closed. The inner light goes out out immediately after the ignition is
switched on.
The interior lighting is switched off after about 30 minutes when a door has
been left open in order to avoid discharging the battery of the vehicle.
Fig. 34 Detail of the
headliner: front interior
lighting
AA
AA
AA
AB
Page 58 of 233
Lights and Visibility57
Using the systemSafetyDriving TipsGeneral MaintenanceBreakdown assist-
anceTechnical DataFabia Praktik
Interior lighting at the rear* (estate vehicle, sedan)
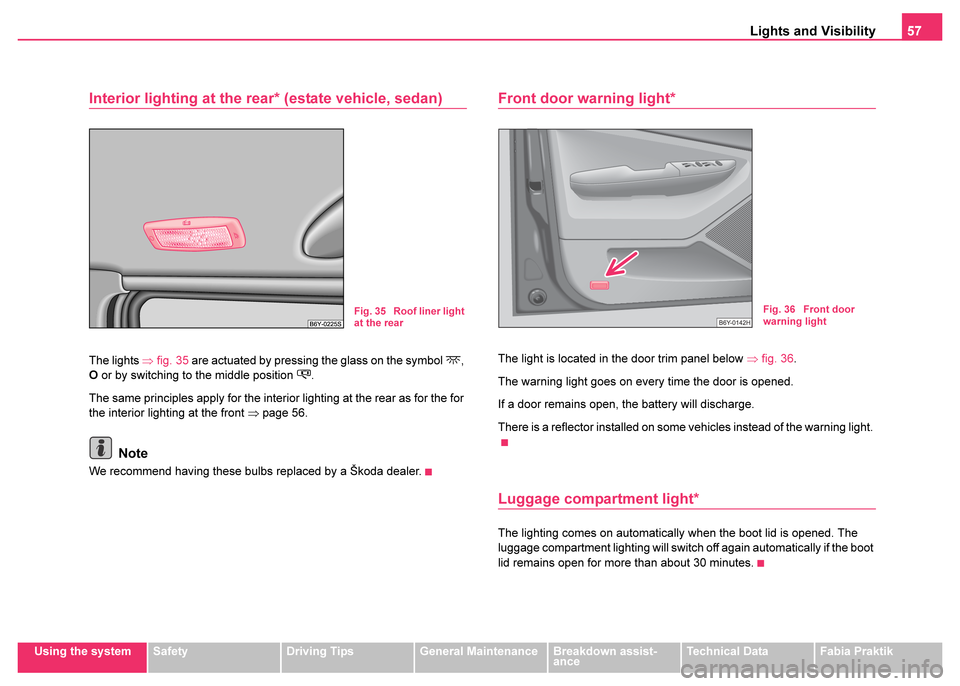
The lights ⇒fig. 35 are actuated by pressing the glass on the symbol ,
O or by switching to the middle position .
The same principles apply for the interior lighting at the rear as for the for
the interior lighting at the front ⇒page 56.
Note
We recommend having these bulbs replaced by a Škoda dealer.
Front door warning light*
The light is located in the door trim panel below ⇒fig. 36 .
The warning light goes on every time the door is opened.
If a door remains open, the battery will discharge.
There is a reflector installed on some vehicles instead of the warning light.
Luggage compartment light*
The lighting comes on automatically when the boot lid is opened. The
luggage compartment lighting will switch off again automatically if the boot
lid remains open for more than about 30 minutes.
Fig. 35 Roof liner light
at the rearFig. 36 Front door
warning light
Page 59 of 233
Lights and Visibility
58
Visibility
Rear window heater
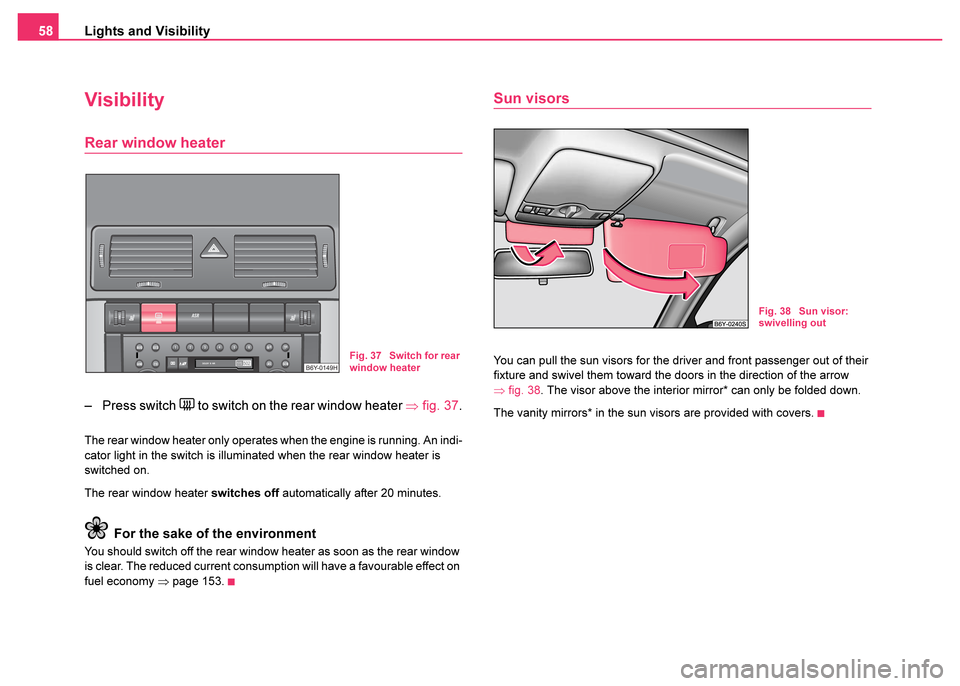
– Press switch to switch on the rear window heater ⇒fig. 37 .
The rear window heater only operates when the engine is running. An indi-
cator light in the switch is illuminated when the rear window heater is
switched on.
The rear window heater switches off automatically after 20 minutes.
For the sake of the environment
You should switch off the rear window heater as soon as the rear window
is clear. The reduced current consumption will have a favourable effect on
fuel economy ⇒ page 153.
Sun visors
You can pull the sun visors for the driver and front passenger out of their
fixture and swivel them toward the doors in the direction of the arrow
⇒fig. 38. The visor above the interior mirror* can only be folded down.
The vanity mirrors* in the sun visors are provided with covers.Fig. 37 Switch for rear
window heater
Fig. 38 Sun visor:
swivelling out
Page 60 of 233
Lights and Visibility59
Using the systemSafetyDriving TipsGeneral MaintenanceBreakdown assist-
anceTechnical DataFabia Praktik
The windscreen wiper and washing
system
Windscreen wipers
You can operate the windscreen wipers and automatic
wipe/wash using the windscreen wiper lever.
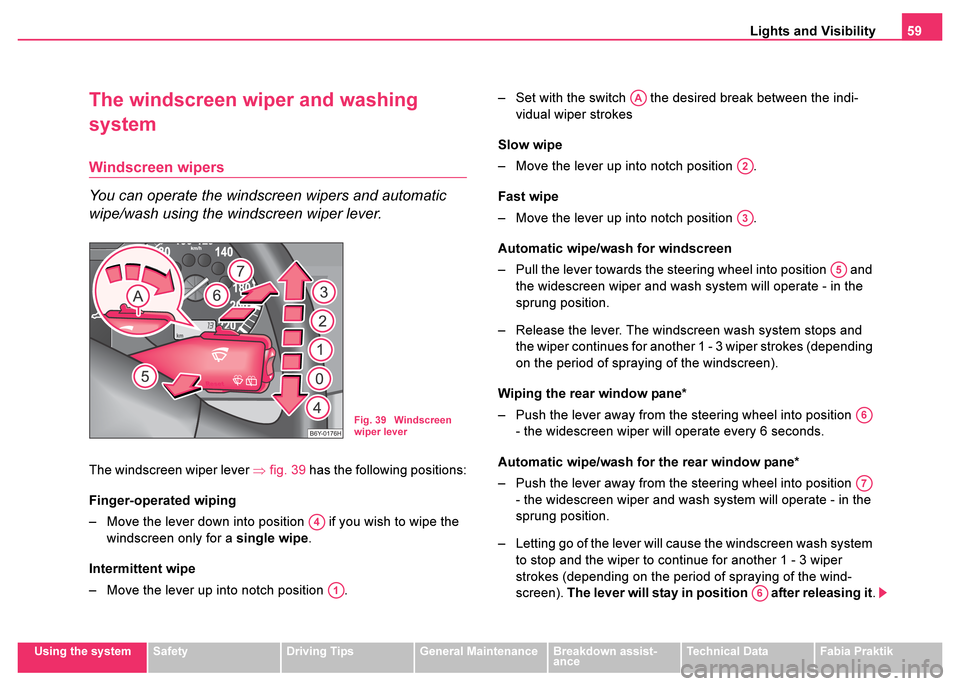
The windscreen wiper lever ⇒fig. 39 has the following positions:
Finger-operated wiping
– Move the lever down into position if you wish to wipe the windscreen only for a single wipe.
Intermittent wipe
– Move the lever up into notch position . – Set with the switch the desired break between the indi-
vidual wiper strokes
Slow wipe
– Move the lever up into notch position .
Fast wipe
– Move the lever up into notch position .
Automatic wipe/wash for windscreen
– Pull the lever towards the steering wheel into position and the widescreen wiper and wash system will operate - in the
sprung position.
– Release the lever. The windscreen wash system stops and the wiper continues for another 1 - 3 wiper strokes (depending
on the period of spraying of the windscreen).
Wiping the rear window pane*
– Push the lever away from the steering wheel into position - the widescreen wiper will operate every 6 seconds.
Automatic wipe/wash for the rear window pane*
– Push the lever away from the steering wheel into position - the widescreen wiper and wash system will operate - in the
sprung position.
– Letting go of the lever will cause the windscreen wash system to stop and the wiper to continue for another 1 - 3 wiper
strokes (depending on the period of spraying of the wind-
screen). The lever will stay in position after releasing it .
Fig. 39 Windscreen
wiper lever
A4
A1
AA
A2
A3
A5
A6
A7
A6
Page 62 of 233
Lights and Visibility61
Using the systemSafetyDriving TipsGeneral MaintenanceBreakdown assist-
anceTechnical DataFabia Praktik
Attaching a wiper blade
– Push the wiper blade over the wiper arm. The securing spring
must click into place audibly.
Windscreen wiper blades in proper condition are essential to obtain good
visibility. Wiper blades should not be allowed to become dirtied by dust,
insect remains and preserving wax.
Juddering or smearing of the wiper blades could be due to wax residues
left on the windscreen by vehicle washing in automatic vehicle wash
systems. It is therefore important to degrease the lips of the winscreen
wiper blades after every pass through an automatic vehicle wash
system .
Replacing the wiper blade on the rear window wiper
Taking off the wiper blade
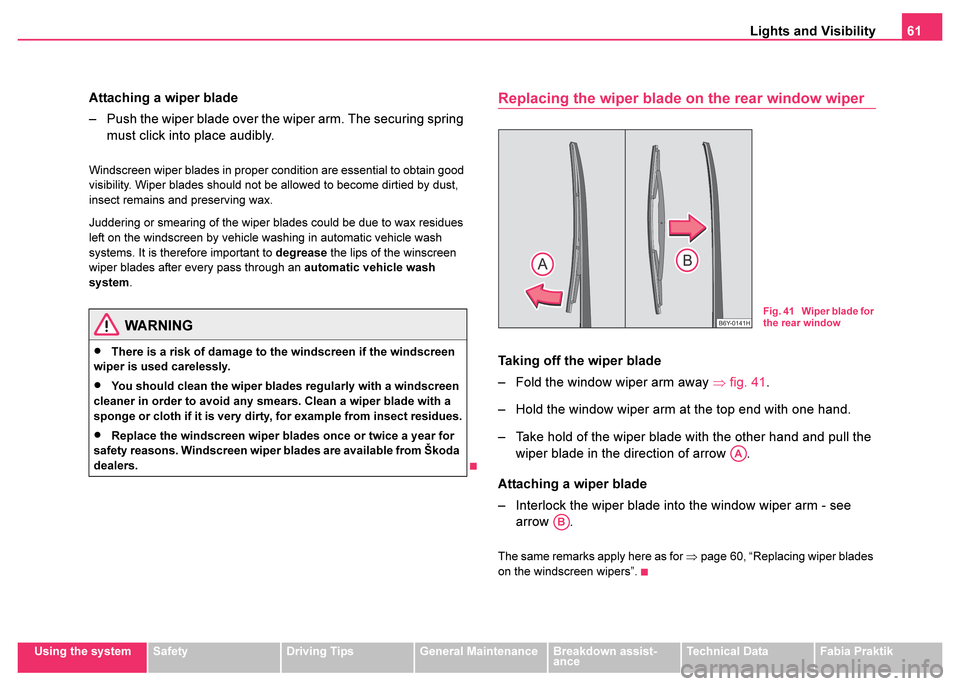
– Fold the window wiper arm away ⇒fig. 41 .
– Hold the window wiper arm at the top end with one hand.
– Take hold of the wiper blade with the other hand and pull the wiper blade in the direction of arrow .
Attaching a wiper blade
– Interlock the wiper blade into the window wiper arm - see arrow .
The same remarks apply here as for ⇒page 60, “Replacing wiper blades
on the windscreen wipers”.
WARNING
•There is a risk of damage to the windscreen if the windscreen
wiper is used carelessly.
•You should clean the wiper blades regularly with a windscreen
cleaner in order to avoid any smears. Clean a wiper blade with a
sponge or cloth if it is very dirty, for example from insect residues.
•Replace the windscreen wiper blades once or twice a year for
safety reasons. Windscreen wiper blades are available from Škoda
dealers.
Fig. 41 Wiper blade for
the rear window
AA
AB
Page 90 of 233
Heating and air conditioning system89
Using the systemSafetyDriving TipsGeneral MaintenanceBreakdown assist-
anceTechnical DataFabia Praktik
The control dial can be set to other positions as required.
Recirculated air mode
In recirculated air mode air is sucked out of the interior of
the vehicle and then fed back into the interior.
Recirculated air mode prevents po
lluted air outside the vehicle
from getting into the vehicle, for example when driving through a
tunnel or when standing in a traffic jam.
Switching recirculated air mode on
– Press button , the button symbol
lights up ⇒page 87,
fig. 78 .
Switching recirculated air mode off
– Press button again, the button symbol
goes out.
Recirculated air mode is switched off automatically if the air distribution
control is in position ⇒ page 87, fig. 78 ⇒page 87, fig. 78 .
Air outlet vents
Fig. 79 Air outlet vents
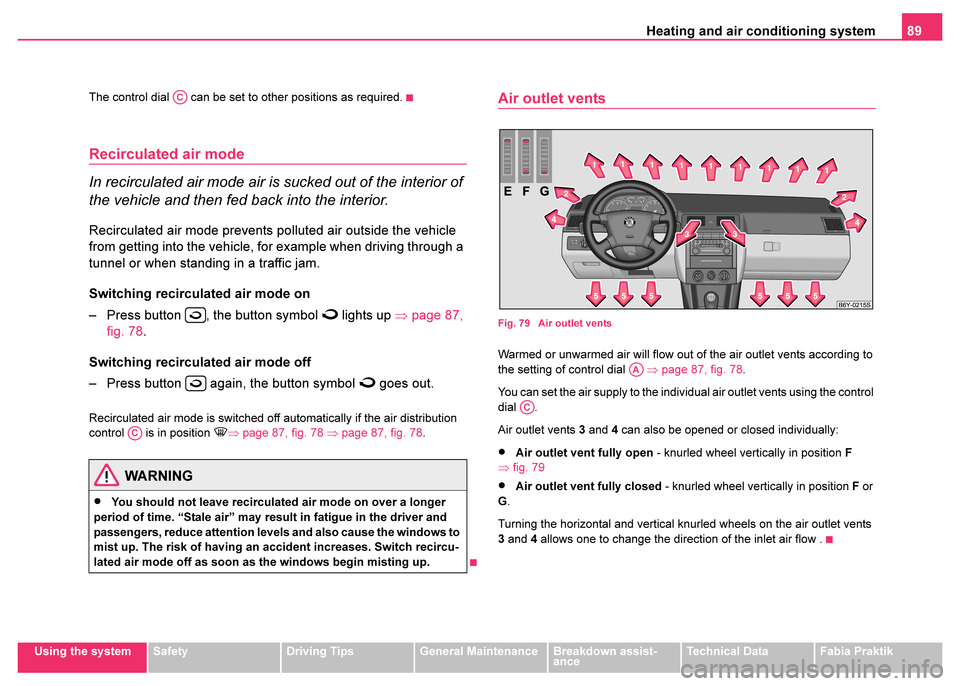
Warmed or unwarmed air will flow out of the air outlet vents according to
the setting of control dial ⇒page 87, fig. 78.
You can set the air supply to the individual air outlet vents using the control
dial .
Air outlet vents 3 and 4 can also be opened or closed individually:
•Air outlet vent fully open - knurled wheel vertically in position F
⇒ fig. 79
•Air outlet vent fully closed - knurled wheel vertically in position F or
G .
Turning the horizontal and vertical knurled wheels on the air outlet vents
3 and 4 allows one to change the direction of the inlet air flow .WARNING
•You should not leave recirculated air mode on over a longer
period of time. “Stale air” may result in fatigue in the driver and
passengers, reduce attention levels and also cause the windows to
mist up. The risk of having an accident increases. Switch recircu-
lated air mode off as soon as the windows begin misting up.
AC
AC
AA
AC
Page 92 of 233

Heating and air conditioning system91
Using the systemSafetyDriving TipsGeneral MaintenanceBreakdown assist-
anceTechnical DataFabia Praktik
Using the system
Setting temperature
– Turn the control dial ⇒fig. 80 to the right in order to
increase the temperature.
– Turn the control dial to the left in order to increase the temperature.
Controlling blower
– Turn the blower switch into one of the positions, 1 to 4, in order to switch the blower on.
– Turn the blower switch into position 0 in order to switch the blower off.
– Pressing button causes the recirculating air system ⇒page 93 to be switched on. Control for air distribution
– You can adjust the direction of the inlet air flow using air distri-
bution regulator ⇒page 93.
Switching air conditioning on/off
– Press the button . The symbol
in the button comes
on.
– When you again press the button , the air conditioning system is switched off. The symbol
in the button is no
longer illuminated.
The set temperature will be automatically maintained other than
when the control dial is on the extreme right or extreme left position:
Extreme right position - full heating
Extreme left position - full cooling
All controls apart from the control dial and buttons and can be
set to any desired intermediate position.
The blower should aways be on to prevent the windows from misting up.
Note
•The whole heat output will be needed to unfrost the windscreen and
side windows. No warm air will be fed to the footwell. This can lead to
restriction of the heating comfort.
•The used air streams out through the air removal openings in the
luggage compartment.
•If the air conditioning system has not been switched on for a lengthy
period, odours may be produced at the evaporator because of deposits.
Switch the air conditioning system on at least once a month for approxi-
mately 5 minutes at the highest blower stage - also during the cold season
Fig. 80 The air condi-
tioning system:
Controls
AA
AA
AB
AB
AD
AC
ACAE
AC
ABADAE
Page 93 of 233
Heating and air conditioning system
92
of the year - in order to remove such odours. Also open a window for a
short time.
•Please refer to the information regarding recirculated air mode
⇒ page 93.
Setting air conditioning system
Recommended settings of air conditioning controls for individual opera-
tions:
Defrosting the windscreen and side windows
•Turn control dial ⇒page 91, fig. 80 to the right up to the stop
•Control dial in the position 4
•Control dial in the position
•Open air outlet vents 4 ⇒ page 93, fig. 81 and point towards the side
window.
Warming up the inside of the vehicle as rapidly as possible
•Turn control dial to the right up to the stop
•Control dial in the position 4
•Control dial in the position
•Open the air outlet vents 4
•We recommend pressing button air recirculation mode. The
windows can steam up in this position however.
Heating the vehicle to a comfortable temperature
We recommend the following setting once the windows are no longer
misted up and the desired teperature has been reached:
•Control dial at the desired heat temperature
•Control dial in position 2 or 3
•Control dial in the position
•Open the air outlet vents 4
•Set the air distribution regulator as required between positions
and , if the windscreen gets misted up again.
Maximum cooling
•Close all windows and the sliding/tilting roof.
•Turn the control dial to the left up to the stop
•Control dial in the position 4
•Control dial in the position
•Open air outlet vents 3 and 4
•Switch on the air conditioning system by pressing button
•Switch on recirculated air mode by pressing button .
In this operating mode the air will be sucked out of the inside of the vehicle
and cooled (recirculated air mode). The recirculated air mode should only
be used for a short time since no fresh air from outside is being brought in.
Do not smoke in the vehicle when in recirculated air mode.
Optimum cooling
•Control dial at the desired heat temperature. This temperature will
be maintained automatically.
•Control dial in position 1 , 2, or 3
•Control dial in the position
•Open air outlet vents 3 and 4
•Switch on the air conditioning system by pressing button
•We recommend setting the air outlet vents 3 and 4 in such a way that
the air flows to the rear over the heads of the occupants. Do not press
button - recirculated air mode.
In this operating mode fresh air is drawn from outside and cooled.
AA
AB
AC
AA
AB
AC
AD
AA
AB
AC
AC
AA
AB
AC
AE
AD
AA
AB
AC
AE
AD
Page 94 of 233

Heating and air conditioning system93
Using the systemSafetyDriving TipsGeneral MaintenanceBreakdown assist-
anceTechnical DataFabia Praktik
Fresh air mode - ventilation
Non- pre-warmed fresh air streams through the air inlet nozzles
3 and 4
for the following settings.
•Turn the control dial ⇒page 91, fig. 80 to the left up to the stop
•Control dial into the desired position
•Control dial in the position
•Open air outlet vents 3 and 4 ⇒ fig. 81
•Switch off the recirculated air mode by pressing button .
•Switch off the cooling by pressing button
The control dial can be set to other positions as required.
Recirculated air mode
In recirculated air mode air is sucked out of the interior of
the vehicle and then fed back into the interior.
Recirculated air mode prevents po lluted air outside the vehicle
from getting into the vehicle, for example when driving through a
tunnel or when standing in a traffic jam.
Switching recirculated air mode on
– Press button ⇒page 91, fig. 80 , the button symbol
lights up.
Switching recirculated air mode off
– Press button again, the button symbol
goes out.
Recirculated air mode is switched off automatically if the air distribution
control is in position ⇒ page 91, fig. 80 . You can also switch recir- culated air mode on again from this setting by repeatedly pressing button
.
Air outlet vents
Fig. 81 Air outlet vents
Unwarmed or cooled air will flow out of the air outlet vents according to the
setting of control dial ⇒page 91, fig. 80 and the atmospheric condi-
tions.
AA
AB
AC
AD
AE
AC
AC
WARNING
You should not leave recirculated air mode on over a longer period
of time. “Stale air” may result in fatigue in the driver and passen-
gers, reduce attention levels and also cause the windows to mist
up. The risk of having an accident increases. Switch recirculated
air mode off as soon as the windows begin misting up.
AD
AA