SKODA FABIA 2004 1.G / 6Y Manual PDF
Manufacturer: SKODA, Model Year: 2004, Model line: FABIA, Model: SKODA FABIA 2004 1.G / 6YPages: 247
Page 71 of 247

Seats and Stowage
70
– The system is switched off by turning the control dial to the home position “0”.
Caution
•You should not kneel on the seats or otherwise apply pressure at
specific points in order to avoid damaging the heating elements of the seat
heaters.
•Do not clean the seats moist ⇒page 175.
Note
The seat heating should only be switched on when the engine is running.
This has a significant effect of saving on the battery capacity.
Rear seats
Folding the rear seats forwards
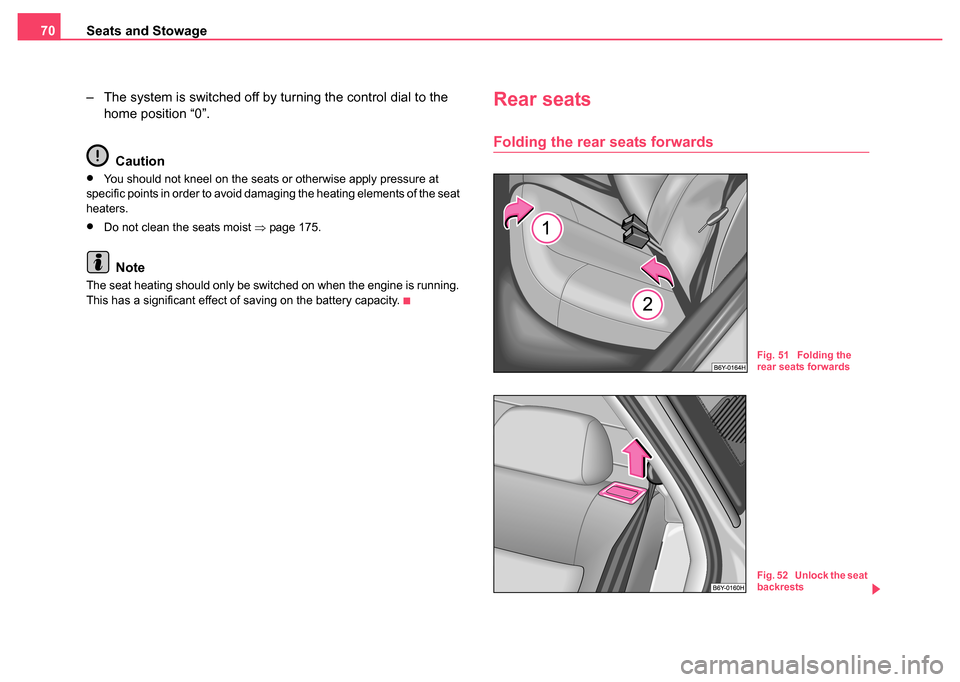
Fig. 51 Folding the
rear seats forwards
Fig. 52 Unlock the seat
backrests
Page 72 of 247

Seats and Stowage71
Using the systemSafetyDriving TipsGeneral MaintenanceBreakdown assistanceTechnical Data
The rear seats and the seat ba ckrest can be folded forwards to
increase the volume of the luggage compartment ⇒page 72.
Both parts of the bank can be folded forward individually on vehi-
cles with a divided rear seat*.
Folding the rear seat forwards
– In order to avoid causing any damage when folding the rear seat forward it is important to adjust the front seats so that no
damage can occur when this is done.
– Pull up the rear seats in the direction of arrow ⇒page 70,
fig. 51 and fold forwards in direction of arrow .
– Pull up the unlocking knob on the seat backrest and fold the seat backrest forwards ⇒page 70, fig. 52.
– Pull the head restraints out of the seat backrest.
– The head restraints can be inserted into the relevant holes of the folded forwards rear seats ⇒fig. 53 .
– Fold the seat backrest forwards completely.
Folding the rear seat back into position
– Install the head restraints in the partially lifted rear seat back- rest.
– Then push the seat backrest back into the upright position until it clicks into place - check by pulling on it.
– Fold the rear seats back into its original position. WARNING
•The belt lock and pelvic belt must be in their original position
after folding back the rear seats and seat backrest - they must be
ready to use.
•The seat backrests must be securely interlocked in position so
that no objects in the luggage compartment can slide forward if
there is sudden braking - risk of injury.
•Ensure that the seat backrest on the rear seats is securely inter-
locked in position when the vehicle is fitted with three-point safety
belts for the middle rear seat. It is only then that the three-point seat
belt can reliably fulfil its function.
Inserting a head restraint in the rear seats
– The rear head restraints can be inserted into the relevant holes of the folded forwards rear seats.
A1
A2
Fig. 53 Rear seats:
Head restraint in rear
seats
Page 73 of 247

Seats and Stowage
72
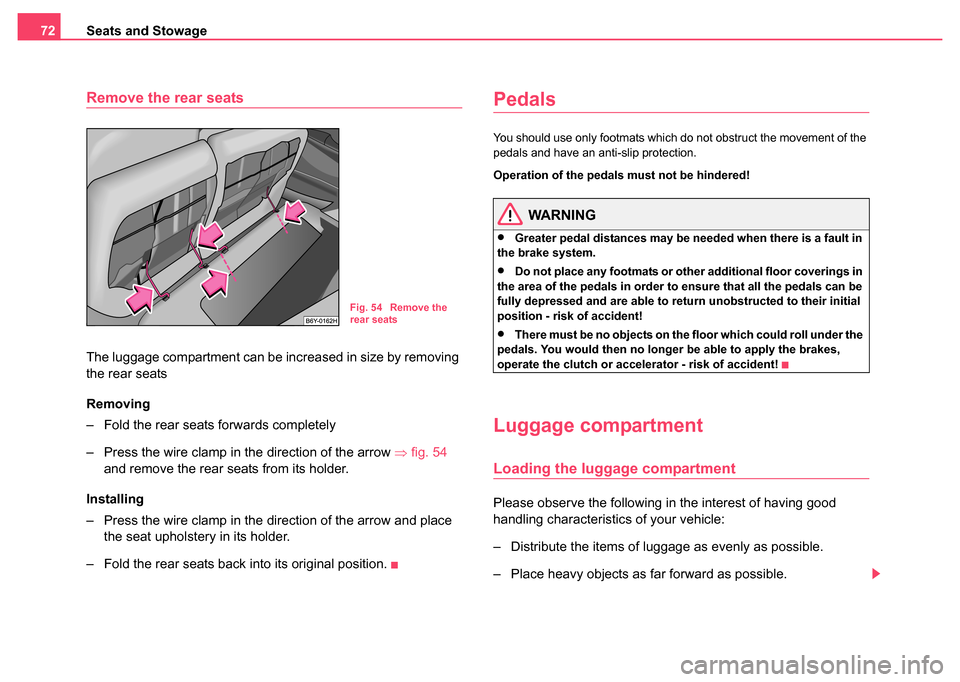
Remove the rear seats
The luggage compartment can be increased in size by removing
the rear seats
Removing
– Fold the rear seats forwards completely
– Press the wire clamp in the direction of the arrow ⇒fig. 54
and remove the rear seats from its holder.
Installing
– Press the wire clamp in the direction of the arrow and place the seat upholstery in its holder.
– Fold the rear seats back into its original position.
Pedals
You should use only footmats which do not obstruct the movement of the
pedals and have an anti-slip protection.
Operation of the pedals must not be hindered!
WARNING
•Greater pedal distances may be needed when there is a fault in
the brake system.
•Do not place any footmats or other additional floor coverings in
the area of the pedals in order to ensure that all the pedals can be
fully depressed and are able to return unobstructed to their initial
position - risk of accident!
•There must be no objects on the floor which could roll under the
pedals. You would then no longer be able to apply the brakes,
operate the clutch or accelerator - risk of accident!
Luggage compartment
Loading the luggage compartment
Please observe the following in the interest of having good
handling characteristics of your vehicle:
– Distribute the items of luggage as evenly as possible.
– Place heavy objects as far forward as possible.
Fig. 54 Remove the
rear seats
Page 74 of 247

Seats and Stowage73
Using the systemSafetyDriving TipsGeneral MaintenanceBreakdown assistanceTechnical Data
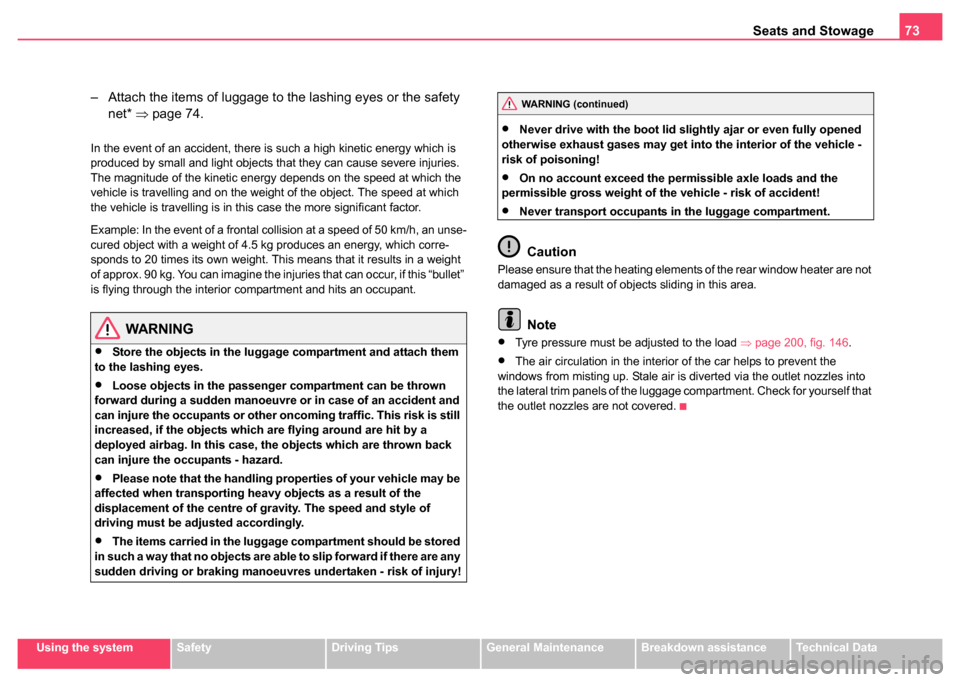
– Attach the items of luggage to the lashing eyes or the safety
net* ⇒page 74.
In the event of an accident, there is such a high kinetic energy which is
produced by small and light objects that they can cause severe injuries.
The magnitude of the kinetic energy depends on the speed at which the
vehicle is travelling and on the weight of the object. The speed at which
the vehicle is travelling is in this case the more significant factor.
Example: In the event of a frontal collision at a speed of 50 km/h, an unse-
cured object with a weight of 4.5 kg produces an energy, which corre-
sponds to 20 times its own weight. This means that it results in a weight
of approx. 90 kg. You can imagine the injuries that can occur, if this “bullet”
is flying through the interior compartment and hits an occupant.
WARNING
•Store the objects in the luggage compartment and attach them
to the lashing eyes.
•Loose objects in the passenger compartment can be thrown
forward during a sudden manoeuvre or in case of an accident and
can injure the occupants or other oncoming traffic. This risk is still
increased, if the objects which are flying around are hit by a
deployed airbag. In this case, the objects which are thrown back
can injure the occupants - hazard.
•Please note that the handling properties of your vehicle may be
affected when transporting heavy objects as a result of the
displacement of the centre of gravity. The speed and style of
driving must be adjusted accordingly.
•The items carried in the luggage compartment should be stored
in such a way that no objects are able to slip forward if there are any
sudden driving or braking manoeuvres undertaken - risk of injury!
•Never drive with the boot lid slightly ajar or even fully opened
otherwise exhaust gases may get into the interior of the vehicle -
risk of poisoning!
•On no account exceed the permissible axle loads and the
permissible gross weight of the vehicle - risk of accident!
•Never transport occupants in the luggage compartment.
Caution
Please ensure that the heating elements of the rear window heater are not
damaged as a result of objects sliding in this area.
Note
•Tyre pressure must be adjusted to the load ⇒page 200, fig. 146 .
•The air circulation in the interior of the car helps to prevent the
windows from misting up. Stale air is diverted via the outlet nozzles into
the lateral trim panels of the luggage compartment. Check for yourself that
the outlet nozzles are not covered.
WARNING (continued)
Page 75 of 247

Seats and Stowage
74
Lashing eyes
Eyes are located on the sides of the loading area for lashing the goods to
be loaded ⇒fig. 55 .
You can also attach a securing net* to these eyes for lashing small objects.
The securing net* and the fixing instruction is located in the well under the
floor covering of the lugagge compartment behind the spare wheel.
WARNING
•The load to be transported must be fixed in place in such a way
that it cannot move during the journey and when braking.
•If the items of luggage or objects are attached to the lashing
eyes with unsuitable or damaged lashing straps, injuries can occur
in the event of braking manoeuvres or accidents. In order to
prevent the items of luggage being thrown forward, always use suitable lashing straps which are firmly attached to the lashing
eyes. Never attach a child seat to the lashing eyes.
Folding double hooks*
Folding double hooks for attaching small items of luggage, such as bags
etc., are provided on both sides of the luggage compartment
⇒fig. 56 .
An item of luggage weighing up to 5 kg can be attached to each side of
the double hook.
Fig. 55 Luggage
compartment: Lashing
eyes
WARNING (continued)
Fig. 56 Luggage
compartment: Folding
double hooks
Page 76 of 247

Seats and Stowage75
Using the systemSafetyDriving TipsGeneral MaintenanceBreakdown assistanceTechnical Data
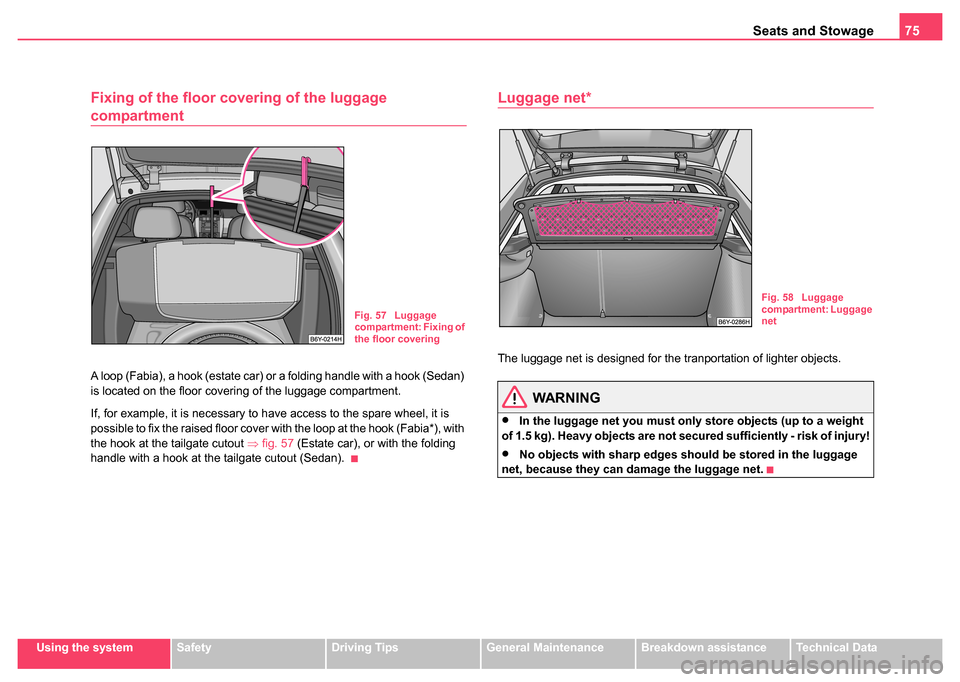
Fixing of the floor covering of the luggage
compartment
A loop (Fabia), a hook (estate car) or a folding handle with a hook (Sedan)
is located on the floor covering of the luggage compartment.
If, for example, it is necessary to have access to the spare wheel, it is
possible to fix the raised floor cover with the loop at the hook (Fabia*), with
the hook at the tailgate cutout ⇒fig. 57 (Estate car), or with the folding
handle with a hook at the tailgate cutout (Sedan).
Luggage net*
The luggage net is designed for the tranportation of lighter objects.
WARNING
•In the luggage net you must only store objects (up to a weight
of 1.5 kg). Heavy objects are not secured sufficiently - risk of injury!
•No objects with sharp edges should be stored in the luggage
net, because they can damage the luggage net.
Fig. 57 Luggage
compartment: Fixing of
the floor covering
Fig. 58 Luggage
compartment: Luggage
net
Page 77 of 247

Seats and Stowage
76
The luggage compartment cover*
You can use the luggage compartment cover behind the
head restraints for storing light and soft items.
The luggage compartment cover can be removed as required if
one must transport bulky goods.
– Unhook the support straps on the tailgate.
– Place the cover on the side supports.
– Pull the cover to the rear out of the front holders ⇒fig. 59 .
– Install again by pushing it forwards into the holders and hanging the support straps on the tailgate.
WARNING
No objects should be placed on the luggage compartment cover,
the vehicle occupants could be endangered if there is sudden
braking or the vehicle collides with something.
Caution
Please ensure that the heating elements of the rear window heater are not
damaged as a result of objects placed in this area.
Note
When opening the boot lid, lift the luggage compartment cover - risk that
objects placed in this area can slip forward!
Luggage compartment cover (Estate car)
Fig. 59 Removing the
luggage compartment
cover
Fig. 60 Luggage
compartment: The
luggage compartment
cover
Page 78 of 247

Seats and Stowage77
Using the systemSafetyDriving TipsGeneral MaintenanceBreakdown assistanceTechnical Data
– Pull the luggage compartment cover in direction of arrow
⇒page 76, fig. 60.
– Hang the luggage compartment cover in the recesses on the side of the luggage compartment.
– Have the luggage compartment cover removed to transport bulky goods. Press the slider from the side in the direction of
arrow and remove the luggage compartment cover in the
direction of arrow .
WARNING
No objects should be placed on the luggage compartment cover,
the vehicle occupants could be endangered if there is sudden
braking or the vehicle collides with something.
Caution
Please ensure that the heating elements of the rear window heater and
luggage compartment cover are not damaged as a result of objects placed
in this area.
Net partition (Estate)*
Use behind the rear seats
A1
A2
Fig. 61 Unrolling net
partition
Fig. 62 Rolling up net
partition
Page 79 of 247

Seats and Stowage
78
Unrolling
– Fold down the rear seat backrests slightly forwards ⇒page 70, which makes it possible to clear the access for
unrolling the net partition.
– Pull the net partition at the bracket out of the housing in direction of the holders ⇒page 77, fig. 61.
– Insert the cross rod into one of the mounts and push the cross rod forward.
– In the same way, fix the cross rod to the other side of the vehicle, mount .
– Then push the seat backrest back into the upright position until it clicks into place - check by pulling on it ⇒.
Rolling up
– Pull the cross rod back slightly, first on the one side then on the other side and take the cross rod out of the mount
⇒page 77, fig. 62 .
– Hold the cross rod in such a way that the net partition can roll
up slowily and without damage into housing .
If you wish to use the entire luggage compartment, you can remove the
luggage compartment cover ⇒page 76, fig. 60 .
WARNING
•Ensure that the seat backrest on the rear seats is securely inter-
locked in position when the vehicle is fitted with three-point safety
belts for the middle rear seat. It is only then that the three-point seat
belt can reliably fulfil its function.
•First check for yourself that the cross road is inserted into the
mounts in the front position!
AAAB
AC
AC
AC
AC
AB
WARNING (continued)
AC
Page 80 of 247

Seats and Stowage79
Using the systemSafetyDriving TipsGeneral MaintenanceBreakdown assistanceTechnical Data
Use behind the front seats
Unrolling
– Fold the rear seats forward ⇒page 70 – Pull the net partiton net at the plate out of the housing
⇒fig. 63 .
– Insert the cross rod into the mount first on the one side and push the cross rod forward.
– In the same way, fix the cross rod to the other side of the vehicle, mount .
Rolling up
– Pull the cross rod back slightly, first on the one side then on the other side and take the cross rod out of the mount
⇒fig. 64 .
– Hold the cross rod in such a way that the net partition can roll
up slowily and without damage into housing .
– Fold the rear seats back into its original position.
WARNING
First check for yourself that the cross road is inserted into the
mounts in the front position!
Fig. 63 Unrolling net
partition
Fig. 64 Rolling up net
partition
AAAB
AC
AC
AC
AB
AC