display SKODA FABIA 2007 1.G / 6Y DX Navigation System Manual
[x] Cancel search | Manufacturer: SKODA, Model Year: 2007, Model line: FABIA, Model: SKODA FABIA 2007 1.G / 6YPages: 66, PDF Size: 3.45 MB
Page 18 of 66
Audio17
Radio mode
Station finding
Automatic station finding
– Touch the rocker button , the station finding starts in the
selected direction, select the first station with a good reception
and play it.
Manual station finding
– Also stations with a weak reception, which are not taken into account by the automatic station finding, can be set with the
manual station finding.
Call up function
– Press the rocker button for more than 2 seconds - a signal tone sounds and “ manual” appears in the info field.
– If the rocker button is held pressed, the automatic station finding starts; this means the frequency changes quickly while
the tone switches to mute. The automatic station finding stops
if the rocker button is released. For fine tuning briefly press the
rocker button (see following point).
– Briefly press the rocker button - the displayed frequency changes in individual steps (FM: 0.1 MHz, AM: 9 kHz).
If the identification “ Manual” is no longer shown in the info field, the func-
tion is switched off again.
utomatic storing of radio stations (AS function )
The six best RDS stations can be automatically stored from the
respective service area (radio data system, which makes it
possible together with the radio program to transfer additionally
more information). They are stored on the station buttons .
This function is particularly useful on journeys.
If FM mode is set
– Press the button AS for more than two seconds - the system searches the six most powerful RDS stations and
stores them. “ Autostore” is displayed on the screen. After
ending the processs the most powerful station is set.
– You can call up the stored station with the station buttons .
Note
If there are less than six RDS stations, the stations without RDS are stored
and classified according to the field power on the remaining station
buttons. If there are less than six radio stations (TP) the remaining station
buttons are not changed.
Storing radio stations
You can store on the station buttons - three ranges -
FM (UKW), TP (Traffic Program = radio station ) and AM (MW) -
each six stations on two memory levels (e.g. memory levels FM1
and FM2)
– Set the desired station with the rocker button .
A2
A2
A2
A2
A12
A11
A12
16A12
A2
20.book Page 17 Tuesday, December 6, 2005 2:26 PM
A
Page 19 of 66
Audio
18
– While the station to be stored is being listened to, the desired station button must be held as long as possible until a short
signal tone confirms the storing.
– The program name (RDS station) or the station frequency is shown in the info field after the successful storing.
Note
•In the case of RDS stations, besides the program name also the
regional frequency is stored.
•The memory is also available after disconnecting the battery.
•The field for the selected station buttons is marked in the radio infor-
mation display.
Retrieve radio station
To retrieve the stored station only briefly press the respective
station button . The program name or the frequency belonging
to this is displayed in the info field. If the stored frequency has no
high quality reception, the unit automatically selects a suitable
alternative frequency (Best-Station-Function) of the stored
station.
Note
Only touch the button , otherwise the already displayed frequency is
stored.
Playing radio station (Scan)
Stations of a waveband (TP, FM and AM) can be played briefly
one after the other (for ten seconds).
– Select the desired waveband via “ Select source”.
– Press the button ; the function Scan and the station name (or the frequency) is indicated in the infor field.
– If you wish to select the scanned station, press again the button . Thus the scan function is ended.
Note
If you have selected no station, the scan function is repeated after a
frequency process.
Radio mode with RDS and RDS regional
How does RDS function?
The function RDS (Radio Data System) is always active on the radio navi-
gation system. The broadcasting companies emit RDS information in
addition to the program, which is received by the RDS receiver in the
coded form.
The following functions are controlled by the transmitted code.
Program Identification (PI-Code) ; The radio detects the already
received station through the PI code.
Program Service Name (PS-Code); The PS-Code transmits the RDS
station name, which is displayed in the radio information display, e.g.
radio 21. As some station companies modify the RDS station name via the
A12
A12
A12
SCANA14
SCAN
20.book Page 18 Tuesday, December 6, 2005 2:26 PM
Page 20 of 66
Audio19
PS-Code (e.g for advertisement purpose ), there is the possibility to
change the RDS station name in the menu “ Audio Settings ” (call up via
menu field “ Settings”).
Alternative frequencies (AF-Code) ; The program of a station , e.g.
radio 21 emits different frequencies based on the limited range of the ultra
short wavebands of several broadcasting stations. The AF-Code commu-
nicates to the unit all possible frequencies for the corresponding station.
RDS ensures that the best receivable frequency of the selected station is
automatically and precisely set not to be heard.
Traffic radio identification (TP-Code = Traffic Program) ; This informa-
tion communicates to the receiver that a traffic radio station is just being
received.
Traffic information identification (TA-Code = Traffic Announcement) ;
The unit detects a traffic information by the TA-Code. If the radio is set
very low or in the CD mode, the unit switches automatically to the traffic
information in the programmed volume. Simultaneously the unit switches
to mono play function.
EON (Enhanced Information Concerning Other Networks) ; EON is a
RDS function, which ensures that all traffic information of a broadcasting
company is transmitted in the TP mode. Large broadcasting companies
(e.g. NDR) emit simultaneously and frequently various stations, e.g.
NDR 1, NDR 2, NDR 3 etc.... Independent of the already set station of a
broadcasting company, traffic information of other stations of this broad-
casting company can also be transmitted.
Catastrophy announcements ; Catastrophy announcements always
take priority over all other functions. The message “ Alarm” is displayed on
the screen.
RDS regional
Certain programs of the broadcasting companies are divided into regional
programs at specific times. Examplewise NDR 1 transmits at certain times
regional programs with different content e.g. for Schleswig-Holstein and
Hamburg. First of all the unit attempts to set only alternative frequencies of the
selected station.
If the quality is however so low, that there is a risk of a “
program loss”,
the unit accepts also frequencies, which are “ related” to the station NDR
1. As these stations emit temporarily different programs and due to such
a change in frequency also the program from one of the related stations
can be heard.
Basically the station change is only intended for stations with exact PI-
Code. In case of poor reception, however an automatic switch over to a
regional “ related” station family can be performed.
In the menu “ Audio Settings ” the function RDS regional can be set via
the menu field “ RDS REG” to “auto ” or “off”. When opting for “ auto” the
change to a regional “ related” station can only be performed if there is a
risk of losing the station.
Anchoring the RDS station name
As some station companies modify the RDS station name via the PS-
Code (e.g. for advertisement purposes) there is the possibility to anchor
the RDS station name in the menu “ Audio Settings”:
•fixed - the RDS station name is anchored as fixed, i.e. the FM and TP
station stored on the station buttons are shown with their RDS station
names (e.g. radio 21).
•variable- allows the display of advertisement texts and weather reports
in the info field.
Note
•After switching on, the unit searches the highest quality receiveable
frequency for the location of the selected station. The unit can remain
mute for several seconds depending on the reception position and the
number of alternative frequencies.
•The evalutation of the RDS information can last several minutes
depending on the power of the receivable signal.
A12
20.book Page 19 Tuesday, December 6, 2005 2:26 PM
Page 21 of 66
Audio
20
•RDS evaluation is not possible if the signal is too weak. In this case it
is the frequncy which appears in the status bar or in the info field instead
of the RDS station name.
•If there are unfavourable reception conditions (e.g. in the mountains)
the unit checks very often the alternative frequencies. This can cause brief
mutings.
•If this causes mutings and tone distortions in extremely poor reception
locations, the RDS function is temporarily switched off.
Traffic radio reception
Many stations in the FM range regularly transmit the current traffic reports
within their transmitting range.
After selecting a station, check if the set station has traffic reports.
If the set station is a TP station (station with traffic radio reception), the
identification “ TP” appears in addition to the station name in the info field
of the radio basic menu. The station remains set. The functions “ traffic
information standby ” and “EON” are active.
If the set station has no traffic radio station or cannot be received, the unit
searches automatically for another traffic radio station in the reception
area (start station finding). The message “ TP SEEK” (searching traffic
radio station) appears in the radio information display.
Listening to traffic information
A traffic information is detected by the unit using the traffic information
identification. Even if the radio is set very low or in the CD mode you can
listen to a traffic information. The play function is performed in Mono. The
message “ Info” appears in the radio information display. Simultaneously
the traffic information is recorded in the traffic information memory (TIM)
⇒ page 20. Interrupting a traffic information
If a traffic information was interrupted, press the button . A new
traffic information can be emitted.
Cancel traffic information standby
The traffic information standby is cancelled in the menu “
Select source”
when switching over to FM or AM level.
Traffic information memory - Traffic Memo (TIM)
The radio navigation system has a digital voice memory with which upto
nine traffic reports with a total duration of maximum four minutes can be
automatically recorded.
If the radio is switched on each traffic report of the set station is
recorded, if the show “ TP” is present in the info field.
If the unit is switched off traffic reports are recorded for as long as they
were selected in the menu “ Audio Settings” under “TIM-Standby”
⇒ page 14. This function can also be switched off.
Replaying the traffic reports
If you press the button , the replay of the traffic reports starts with
the last recorded traffic information and continues to the oldest traffic infor-
mation. The show “ TIM Track 4 Time 14:10 TP ” appears in the info field:
TIM - Play function of a recorded traffic information
Tra ck 4 - There are four traffic information. The play function begins with
the latest information.
Time 14:10 - Recording time
TP - TP station
TIMA1
TIMA1
20.book Page 20 Tuesday, December 6, 2005 2:26 PM
Page 22 of 66
Audio21
Replaying the random traffic report
The traffic reports can also be replayed in the random order.
•replaying older traffic report - press the rocker button on the left for
two seconds.
•replaying latest traffic report - press the rocker button on the right
for two seconds.
Fast replay of the traffic reports
If the rocker button on the right is held pressed, the reports are quickly
replayed with time details ( 3 - 5 times faster).
Repeating the traffic report
A traffic report is repeated, if the rocker button on the left is pressed
again (last pressing was carried out more than two seconds ago).
Ending TIM function
The function is ended by pressing again the button and the radio
basic menu is called up.
Erasing the traffic reports
The traffic reports are automatically erased six seconds after ending the
memory standby, which is 24 hours.
Note
•Select a radio station before switching off the unit, otherwise no traffic
reports can be stored.
•The storing can be activated for 24 hours or until the next switching on
by pressing the button if the unit is switched off. In the process
and if it is necessary a radio station is automatically set.
•The oldest announcement will be overwritten if the traffic information
memory is full.
•The beginning is overwritten, if a report lasts more than four minutes.
A signal tone sounds as information that the entire report could not be
stored.
•If a traffic report is stored when the unit is switched on, this action
continues until the end. Then the last selected setting is effective.
•If no traffic reports were stored, the message “ No Messages” appears
in the radio information display after pressing the button and a
signal tone sounds.
CD mode
Switching over to CD mode
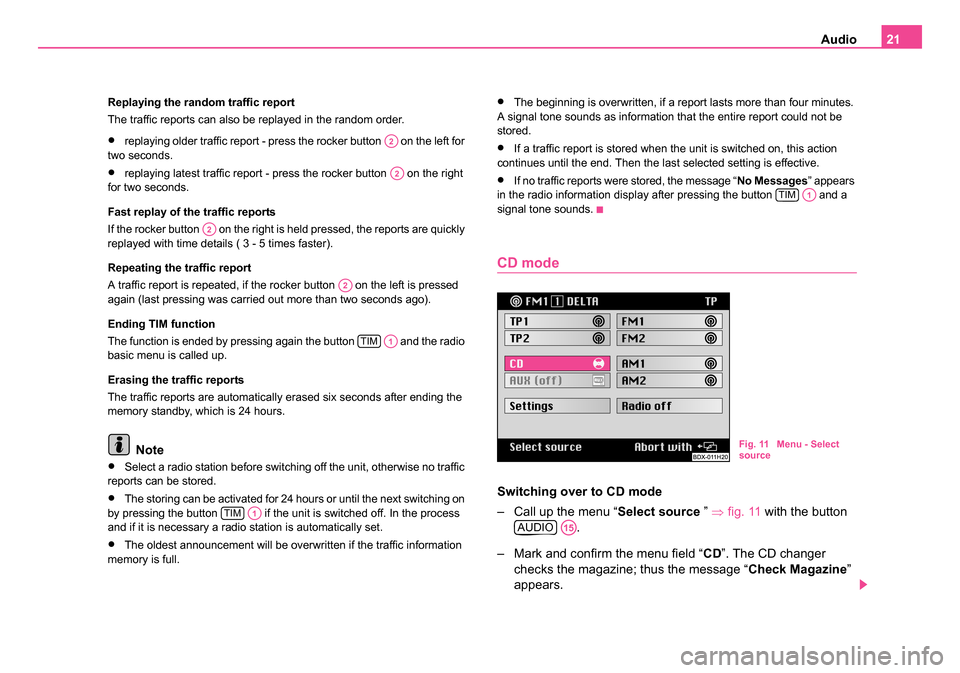
– Call up the menu “ Select source ” ⇒fig. 11 with the button
.
– Mark and confirm the menu field “ CD”. The CD changer
checks the magazine; thus the message “ Check Magazine”
appears.
A2
A2
A2
A2
TIMA1
TIMA1
TIMA1
Fig. 11 Menu - Select
source
AUDIOA15
20.book Page 21 Tuesday, December 6, 2005 2:26 PM
Page 23 of 66
Audio
22
– Afterwards the play function starts in the order of the CDs inserted in the magazine.
Interrupting the CD play function
The play function of a CD is interrupted in the event of a traffic information.
At the same time the identification “ Info” is indicated in the info field of the
CD menu.
End CD play function
The CD play function is ended when selecting another tone source in the
menu “ Select source ”. The unit changes to radio mode.
Note
•If no music CD is inserted or when driving in difficult regions ⇒page 23
the error message “ CD ERROR” or “CD1 ERROR ” appears in the info
field.
•The selected CD with the current track (“ Tr a c k”) is displayed in the CD
information display. The menu fields besides the station buttons indi-
cate the assignment of the magazine with CDs.
•The message “ CD1 Track1 Play ” appears in the status bar if the
navigation is active.
CD functions
Select CD
– Select the desired CD using the corresponding station button . Select track
– Press the rocker button to se
lect the track. If the rocker
button on the right is pressed, the play function of the following
track starts. The current track starts from the beginning by
pressing the rocker button on the left. Press the rocker button
on the left briefly in succession, in order to reach the previous
track.
Scan
– Press the button for a brief playing of the tracks (ten seconds) of one CD. Press this button once again in order to
abort this function.
Playing track in random sequence
– Press the button in order to play the track of a CD in the random sequence. Press this button once again in order
to abort this function.
CD MIX
– This function makes it possible to play in the random sequence not only the track of a CD but also the CDs inserted
in the CD changer. For this step mark and confirm the menu
field “ CD Shuffle ” in the menu “ Audio Settings ”. Switch back
and forth between the options “ Disc” and “ Magazine ” by
pressing the menu knob .
A12
1
A12
A2
SCANA14
CD MIXA11
A18
20.book Page 22 Tuesday, December 6, 2005 2:26 PM
Page 25 of 66
Navigation
24
Navigation
Overview of navigation basic menu
Call up navigation basic menu
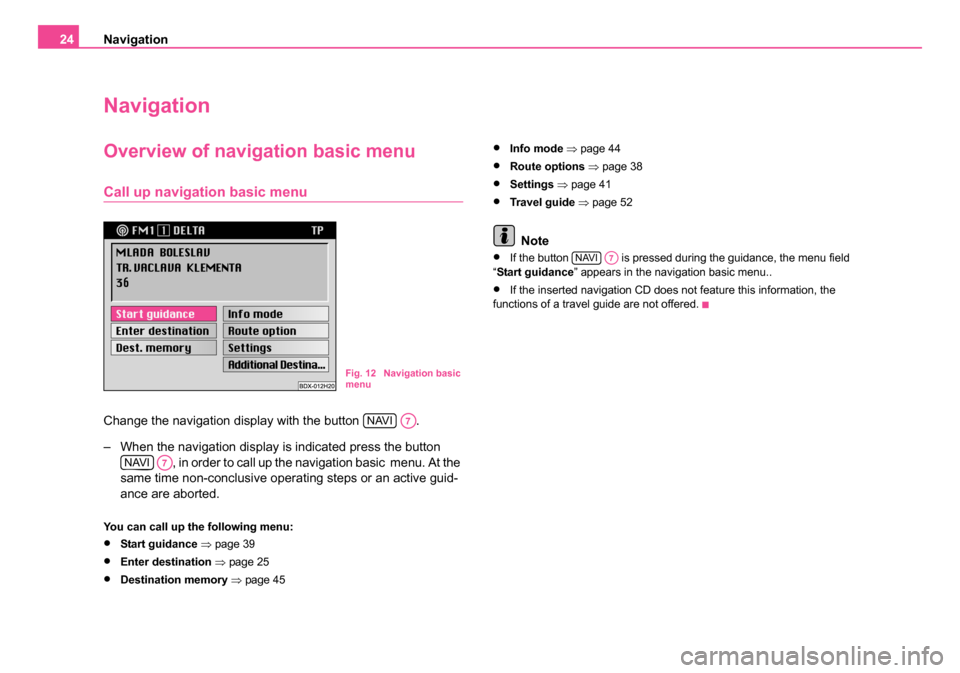
Change the navigation display with the button .
– When the navigation display is indicated press the button
, in order to call up the navigation basic menu. At the
same time non-conclusive operating steps or an active guid-
ance are aborted.
You can call up the following menu:
•Start guidance ⇒ page 39
•Enter destination ⇒ page 25
•Destination memory ⇒ page 45
•Info mode ⇒ page 44
•Route options ⇒page 38
•Settings ⇒ page 41
•Travel guide ⇒ page 52
Note
•If the button is pressed during the guidance, the menu field
“ Start guidance ” appears in the navigation basic menu..
•If the inserted navigation CD does not feature this information, the
functions of a travel guide are not offered.
Fig. 12 Navigation basic
menu
NAVIA7
NAVIA7
NAVIA7
20.book Page 24 Tuesday, December 6, 2005 2:26 PM
Page 26 of 66
Navigation25
Enter destination
Overview
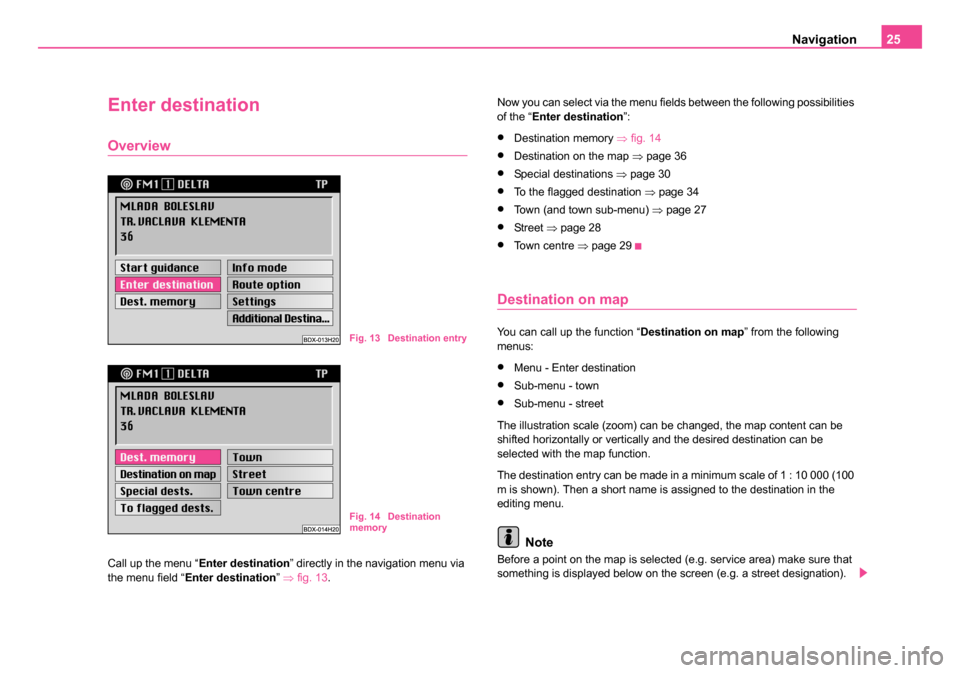
Call up the menu “ Enter destination ” directly in the navigation menu via
the menu field “ Enter destination ” ⇒ fig. 13 . Now you can select via the menu fields between the following possibilities
of the “
Enter destination ”:
•Destination memory ⇒fig. 14
•Destination on the map ⇒page 36
•Special destinations ⇒page 30
•To the flagged destination ⇒page 34
•Town (and town sub-menu) ⇒page 27
•St re et ⇒page 28
•To w n c e n t r e ⇒page 29
Destination on map
You can call up the function “ Destination on map” from the following
menus:
•Menu - Enter destination
•Sub-menu - town
•Sub-menu - street
The illustration scale (zoom) can be changed, the map content can be
shifted horizontally or vertically and the desired destination can be
selected with the map function.
The destination entry can be made in a minimum scale of 1 : 10 000 (100
m is shown). Then a short name is assigned to the destination in the
editing menu.
Note
Before a point on the map is selected (e.g. service area) make sure that
something is displayed below on the screen (e.g. a street designation).
Fig. 13 Destination entry
Fig. 14 Destination
memory
20.book Page 25 Tuesday, December 6, 2005 2:26 PM
Page 31 of 66
Navigation
30
– Select a list.
– Mark and confirm the desired town centre in the list. Then the navigation basic menu is called up.
– The guidance can begin ⇒page 39.
Note
•For large towns also parts of the town are displayed in the list.
•If the selected town name (or name for part of the town) exists several
times, then a sub-menu is called up, from which the desired entry can be
selected.
Enter destination - Special destination
Enter special destinations
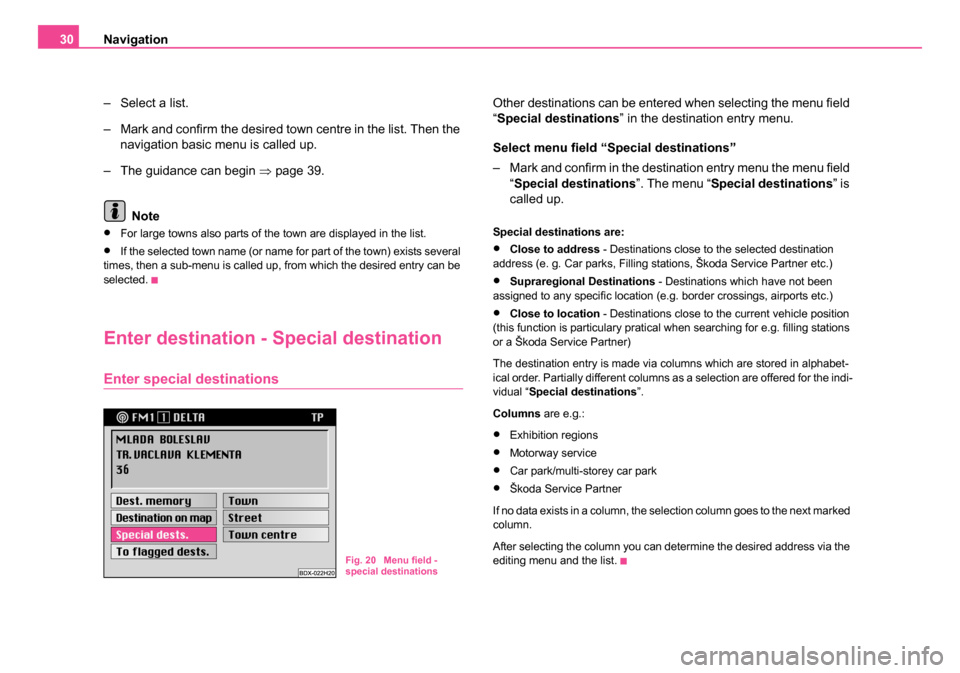
Other destinations can be entered when selecting the menu field
“Special destinations ” in the destination entry menu.
Select menu field “Special destinations”
– Mark and confirm in the destination entry menu the menu field “Special destinations ”. The menu “Special destinations ” is
called up.
Special destinations are:
•Close to address - Destinations close to the selected destination
address (e. g. Car parks, Filling stations, Škoda Service Partner etc.)
•Supraregional Destinations - Destinations which have not been
assigned to any specific location (e.g. border crossings, airports etc.)
•Close to location - Destinations close to the current vehicle position
(this function is particulary pratical when searching for e.g. filling stations
or a Škoda Service Partner)
The destination entry is made via columns which are stored in alphabet-
ical order. Partially different columns as a selection are offered for the indi-
vidual “ Special destinations ”.
Columns are e.g.:
•Exhibition regions
•Motorway service
•Car park/multi-storey car park
•Škoda Service Partner
If no data exists in a column, the selection column goes to the next marked
column.
After selecting the column you can determine the desired address via the
editing menu and the list.
Fig. 20 Menu field -
special destinations
20.book Page 30 Tuesday, December 6, 2005 2:26 PM
Page 33 of 66
Navigation
32
– Mark and confirm the menu field “ Supraregional destina-
tions ” ⇒ page 31, fig. 22 . The column list is called up.
– Mark and confirm the desired entry in the column list. The navigation basic menu is called up and the selected destina-
tion is in the destination field.
– The guidance can begin ⇒page 39.
Note
In case of more than 14 entries for one column, first of all the editing menu
is called up. Enter here the desired name or its initial letter and then call
up the list.
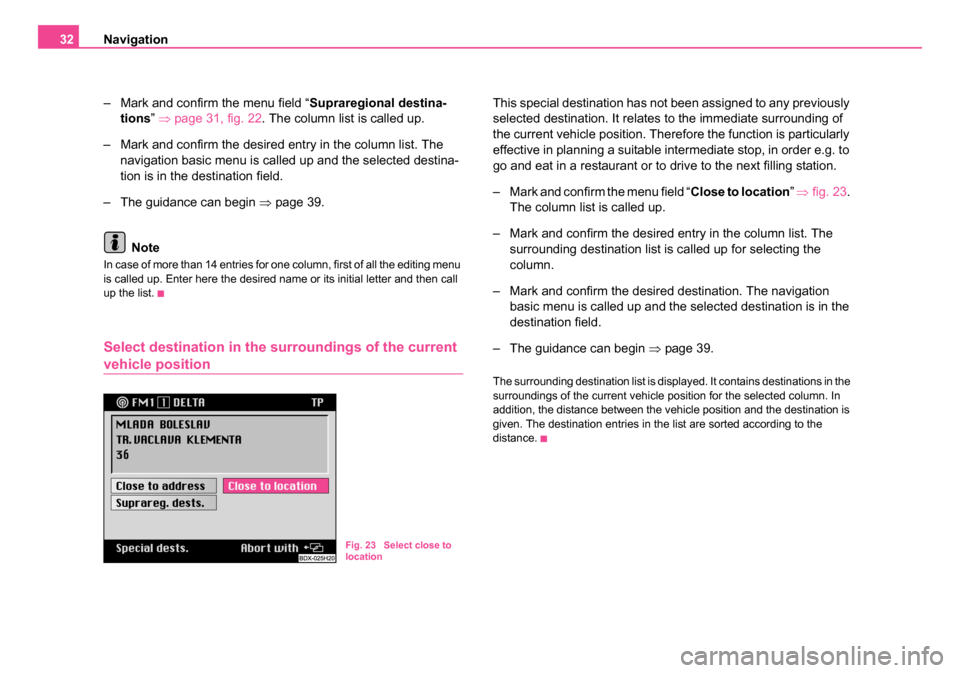
Select destination in the surroundings of the current
vehicle position
This special destination has not been assigned to any previously
selected destination. It relates to the immediate surrounding of
the current vehicle position. Therefore the function is particularly
effective in planning a suitable intermediate stop, in order e.g. to
go and eat in a restaurant or to drive to the next filling station.
– Mark and confirm the menu field “ Close to location” ⇒ fig. 23.
The column list is called up.
– Mark and confirm the desired entry in the column list. The surrounding destination list is called up for selecting the
column.
– Mark and confirm the desired destination. The navigation basic menu is called up and the selected destination is in the
destination field.
– The guidance can begin ⇒page 39.
The surrounding destination list is displayed. It contains destinations in the
surroundings of the current vehicle position for the selected column. In
addition, the distance between the vehicle position and the destination is
given. The destination entries in the list are sorted according to the
distance.
Fig. 23 Select close to
location
20.book Page 32 Tuesday, December 6, 2005 2:26 PM