lock SKODA FABIA 2007 2.G / 5J Owner's Guide
[x] Cancel search | Manufacturer: SKODA, Model Year: 2007, Model line: FABIA, Model: SKODA FABIA 2007 2.G / 5JPages: 242, PDF Size: 48.29 MB
Page 44 of 242

Unlocking and locking43
Using the systemSafetyDriving TipsGeneral MaintenanceBreakdown assistanceTechnical Data
Electric sliding/tilting roof*
Description
The sliding/tilting roof is operated by means of the control dial ⇒fig. 30 and only functions when the ignition is switched on . The control dial has a number of fixed positions.
After switching the ignition off, it is still possible to open or close the sliding/tilting roof for a further 10 minutes. It is no long er possible to operate the sliding/tilting roof after opening or closing on e of the front doors, however.
Note
•If the battery has been disconnected and reconnected, it is possible that the sliding/tilting roof does not close fully. He re you have to set the control dial to the switch position and press it forward for about 10 seconds.
•It is necessary afte r each emergency operation (using Allen key) to move the sliding/tilting roof into the basic position . Here you have to set the control dial to the switch position and press it forward for about 10 seconds.
Opening and tilting
Comfort position
– Turn the switch to position ⇒fig. 30.
Opening roof fully
– Turn the switch to position and hold it in this position (spring-
tensioned position).
Tilting roof
– Turn the switch to position .
The wind noise in the comfort position is less than when the roof is fully opened.
The sun screen is also opened automatica lly when the roof slides open. You can slide the sun screen into the opened or closed position by hand when the sliding/tilting roof is closed.
Caution
It may be necessary during winter to remo ve any ice and snow in the area of the sliding/tilting roof before opening it in order to prevent damaging the opening mechanism and the seal.
Closing
Sliding closed/closing the sliding/tilting roof
– Turn the switch to position ⇒fig. 30.
Safety closing
The sliding/tilting roof is equipped wi th an overload protection system. The sliding/tilting roof stops and moves back several centimetres when it cannot be closed because there is something in the way (e.g. ice). You can close the sliding/tilting roof completely without overlo ad protection by pressing the switch to
Fig. 30 Control dial for the power sliding/tilting roof
AA
AA
AC
AB
AD
AA
NKO A05F 20 MR08.book Page 43 Thursday, April 19, 2007 11:34 AM
Page 45 of 242

Unlocking and locking44
the position ⇒fig. 30 at the front or rear for as long as it takes for the sliding/tilting roof to shut completely ⇒.
WARNING
Close the sliding/tilting roof carefully - risk of injury!
Convenience operation
You can also close an open sliding/tilting roof from the outside.
– Turn the key in the lock of the driver door into the closing position and
hold until the sliding/tilting roof is closed ⇒.
The closing process stops when one releases the key.
WARNING
Close the sliding/tilting roof carefully - risk of injury! The overload protec- tion system does not function with the convenience closing.
Emergency operation
You can close and/or open the sliding/tilting roof by hand if the system is
defect.
– Position the flat blade of a screwdriver carefully against the rear edge
of the cover of the electrical drive ⇒fig. 31.
– Pull the cover down.
– Insert an Allen key, Group 4, up to the stop into the opening and close
and/or open the sliding/tilting roof.
– Press on the cover again by first of all inserting the plastic lugs and
then pushing the cover up.
– Have the fault rectified by a specialist workshop.
Note
It is necessary after each emergency op eration (using Allen key) to move the sliding/tilting roof into the basic position . Here you have to press the control dial forward to switch position ⇒page 43, fig. 30 for about 10 seconds.
AA
Fig. 31 Detail of the headliner: point for posi-tioning screwdriver
Fig. 32 Detail of the headliner: Emergency operation
AA
NKO A05F 20 MR08.book Page 44 Thursday, April 19, 2007 11:34 AM
Page 51 of 242

Lights and Visibility50
Lighting of storage compartme nt on the front passenger side
– When opening the flap of the st orage compartment on the front
passenger side the lighting in the storage compartment comes on.
– The light switches on automatically when the parking light is switched
on and goes out when the flap is closed.
The interior light is switched on for about 20 seconds when a vehicle with a central locking system is unlocked, when a door is opened or when the ignition key is removed. The requirement for this is that th e switch is in the door contact position. The inner light goes out out immediatel y after the ignition is switched on.
A time delay switch* causes the inner lighting on vehicles without a central locking system stays on for a few seconds after the doors have been closed. The inner light goes out out immediately after the ignition is switched on.
The interior lighting is switched off after about 30 minutes when a door has been left open in order to avoid discharging the battery of the vehicle.
Rear interior lighting* - type 1
The rear interior lighting ⇒fig. 40 is actuated by moving the switch to the symbol , O or to the middle position .
The same principles apply for the interior li ghting at the rear as for the for the inte- rior lighting at the front ⇒page 49.
Note
We recommend having the bulb replaced by a specialist garage.
Rear interior lighting* - type 2
The rear interior lighting is operated by pressing the button ⇒fig. 41.
The button has two positions for the interior li ghting at the rear. In the first position, the interior lighting is switched on pe rmanently, in the second position (after pressing) it is switched via the door contacts.
Note
We recommend having the bulb replaced by a specialist garage.
Luggage compartment light
The lighting comes on automatically when the boot lid is opened. The luggage compartment lighting will switch off agai n automatically if the boot lid remains open for more than about 30 minutes.
Fig. 40 Roof liner light at the rear
Fig. 41 Roof liner light at the rear
NKO A05F 20 MR08.book Page 50 Thursday, April 19, 2007 11:34 AM
Page 54 of 242

Lights and Visibility53
Using the systemSafetyDriving TipsGeneral MaintenanceBreakdown assistanceTechnical Data
Top up with wash liquid ⇒page 185.
WARNING
•Properly maintained windscreen wiper blades are essential for clear visi- bility and safe driving ⇒page 53.
•Do not use the windscreen washer system at low temperatures, without heating the windscreen beforehand. Otherwise the window cleaner could freeze on the windscreen and re strict the view to the front.
•In the event of a freezing up of the windscreen, first of all eliminate the ice ⇒ page 164 and then operate the windscreen wiper otherwise the wind- screen wiper blades could be damaged.
Caution
In frosty weather, please first of all check whether the windscreen wiper blades are not frozen to the windscreen before swit ching them on. Switching on windscreen wipers when the blades are frozen to the windscreen may result in damage both to the blades and the motor of the windscreen wipers!
Headlight cleaning system*
The headlights are being cleaned after the windscreen washer system has been operated for the fifth time, the low beam or main beam are switched on as well as the windscreen wiper lever is held in the position ⇒page 52, fig. 44 for about 1 second.
You should remove stubborn dirt (such as insect residues) from the headlight lenses at regular intervals, for example when refuelling. Please refer to the following guidelines ⇒page 164, “The headlight lenses”.
You should remove any snow from the fixt ures of the washer nozzles and clear ice in winter with a de-icing spray in order to ensure proper operation of the cleaning system.
Replacing wiper blades for the windscreen wipers
Taking off the wiper blade
– Fold windscreen wiper arm away from the windscreen.
– Press the locking button, in order to unlock the wiper blade and pull
off in the direction of arrow.
Attaching a wiper blade
– Push the wiper blade until it locks up to the stop.
– Check whether the wiper blade is correctly attached.
– Fold the windscreen wiper arm back onto the windscreen.
Wiper blades in proper condition are esse ntial to obtain good visibility. Wiper blades should not be allowed to become dirtied by dust, insect remains and preserving wax.
Juddering or smearing of the wiper blades could then be due to wax residues left on the windscreen by vehicle washing in automatic vehicle wash systems. It is therefore important to degrease the lips of the wiper blades after every pass through an automatic vehicle wash system.
A5
Fig. 45 Wiper blade for the windscreen wiper
NKO A05F 20 MR08.book Page 53 Thursday, April 19, 2007 11:34 AM
Page 55 of 242

Lights and Visibility54
WARNING
•If the windscreen wipers are handled carelessly, there is a risk of damage to the windscreen.
•You should clean the wiper blades regularly with a windscreen cleaner in order to avoid any smears. Clean a wiper bl ade with a sponge or cloth if it is very dirty, for example from insect residues.
•Replace the wiper blades once or twice a year for safety reasons. The wiper blades are available from Škoda Service Partners.
Replacing the wiper blade on the rear window wiper
Taking off the wiper blade
– Fold windscreen wiper arm out from the windscreen and position the
wiper blade at right angles to the wiper arm ⇒fig. 46.
– Hold the window wiper arm at the top end with one hand.
– With the other hand unlock the locking button in the direction of
arrow and remove the wiper blade.
Attaching a wiper blade
– Position the wiper blade onto the wiper arm and lock the locking
button .
– Check whether the wiper blade is correctly attached.
The same remarks apply here as for ⇒page 53.
Rear mirror
You can adjust the exterior mirrors electrically*.
Adjust the rear mirror before commencing to drive so that there is a clear
view to the rear.
Dimming the interior mirror
– Pull the lever on the bottom edge of the mirror toward rear (the lever
on the interior mirror must point forwards in it home position).
Heating of the external mirror*
– Turn the rotary knob to position ⇒fig. 47.
Fig. 46 Wiper blade for rear window
AA
AA
Fig. 47 Inner part of door: Rotary knob
NKO A05F 20 MR08.book Page 54 Thursday, April 19, 2007 11:34 AM
Page 57 of 242

Seats and Stowage56
Seats and Stowage
Front seats
Basic information
The front seats have a wide range of different settings and can thus be matched to the physical characteristics of the driver and front passenger. Correct adjustment of the seats is particularly important for
•safely and quickly reaching the controls,
•a relaxed, fatigue-free body position,
•achieving the maximum protection offere d by the seat belts and the airbag system.
The chapters which follow describe the procedure which you should adopt for adjusting the seats.
WARNING
•Never transport more occupants than the maximum seating in the vehicle.
•Each occupant must correctly fasten the seat belt belonging to the seat. Children must be fastened ⇒page 134, “Transporting children safely” with a suitable restraint system.
•The front seats and the head restraints must always be adjusted to match the body size of the seat occupant as well as the seat belts must always be correctly fastened in order to provide an optimal protection for you and your occupants.
•Always keep your feet in the footwell when the car is being driven - never place your feet on the instrument panel, out of the window or on the surfaces of the seats. This is particularly important for the front seat passenger. You will be exposed to increased risk of injury if it becomes necessary to apply the brake or in the event of an accident. If an airbag is deployed, you may suffer fatal injuries when adopting an incorrect seated position!
•It is important for the driver and front passenger to maintain a distance of at least 25 cm from th e steering wheel or dash panel. Not maintaining this minimum distance will mean that the airbag system will not be able to prop- erly protect you - hazard! The front seats and the head restraints must always also be correctly adjusted to match the body size of the occupant.
•Ensure that there are no objects in the footwell as any objects may get behind the pedals during a driving or braking manoeuvre. You would then no longer be able to operate the clutch, to brake or accelerate.
Adjusting the front seats
Adjusting a seat in a forward/back direction
– Pull the lever ⇒fig. 48 up and push the seat into the desired posi-
tion.
– Release the lever and push the seat further until the lock is heard
to engage.
WARNING (continued)
Fig. 48 Controls at seat
A1
A1
NKO A05F 20 MR08.book Page 56 Thursday, April 19, 2007 11:34 AM
Page 59 of 242

Seats and Stowage58
– Move the head restraint downwards if required by pressing the locking
button ⇒fig. 50 and by pressing with the other hand the head
restraint downwards.
Removing and installing a head restraint
– Pull the head restraint out of the backrest of the seat as far as the stop.
– Press the locking button in the direction of arrow ⇒fig. 50 and pull
the head restraint out.
– To re-insert the head restraint, push it down into the backrest of the
seat far enough until you hear the locking button engage.
The position of the front, rear outer head restraints and the rear middle head restraint* is adjustable for height.
The head restraints must be adjusted to match the size of the seat occupant. Correctly adjusted head restraints togeth er with the seat belts offer effective protection for the occupants ⇒page 115.
WARNING
•The head restraints must be correctly adjusted in order to offer effective protection for the occupants in the event of an accident.
•Do not drive under any circumstance with removed head restraints - risk of injury!
Heating the front seats*
The seating and leaning surfaces of the driver and front passenger seat
can be heated when the ignition is switched on.
Front seats
– By pressing the rocker switch in the position or switch on the
front seat heating to 25 % or 100 % of its power output ⇒fig. 51.
– To switch off the heating shift the rocker switch into the horizontal
position.
WARNING
If you have a subdued pain and/or temperature sensitivity, e.g. through medication, paralysis or because of ch ronic illness (e.g. diabetes), we recommend not to use the seat heating of the driver or front passenger seat. This can lead to burns on the back, th e posterior and the legs which are diffi- cult to heal. If the seat heating is used, we recommend to make regular breaks in your journey when driving long distances, so that the body can recuperate from the stress of the journey. Please consult your doctor, who can evaluate your specific condition.
Fig. 51 Rocker switch: Front seat heating
A1A2
NKO A05F 20 MR08.book Page 58 Thursday, April 19, 2007 11:34 AM
Page 60 of 242

Seats and Stowage59
Using the systemSafetyDriving TipsGeneral MaintenanceBreakdown assistanceTechnical Data
Caution
•You should not kneel on the seats or otherwise apply pressure at specific points in order to avoid damaging the heating elements of the seat heaters.
•Do not clean the seats moist ⇒page 166.
Note
The seat heating should only be switched on when the engine is running. This has a significant effect of saving on the battery capacity.
Rear seats
Folding the rear seats forwards
To enlarge the luggage compartment, the rear seats can be folded
forwards or the rear seats can be removed ⇒page 60. The rear seats can
be folded forward individually on vehicles with divided rear seats*.
Folding the rear seats forwards
– Before folding the rear seats forward adjust the front seats in such a
way that they are not damaged when folding forward the rear seats.
– Pull up the rear seat in the direction of arrow ⇒fig. 52 and fold
forwards in direction of arrow .
– Unlock the rear seat backrest by pulling the securing knob and fold
it forward ⇒fig. 53.
– Pull the head restraints out of the seat backrest.
– The head restraints can be inserted into the relevant holes of the
folded forwards rear seats ⇒page 60, fig. 54.
– Fold the seat backrests forwards completely.
Folding the rear seats back into position
– Install the head restraint in the slightly lifted rear seat backrest.
Fig. 52 Folding the rear seat forwards
Fig. 53 Unlock the seat backrest
A1
A2
AA
NKO A05F 20 MR08.book Page 59 Thursday, April 19, 2007 11:34 AM
Page 61 of 242

Seats and Stowage60
– Then push the seat backrest back into the upright position until the
securing knob clicks into place - check by pulling on the rear seat
backrest.
– Make sure that the red surface of the securing knob is not visible
⇒ fig. 53.
– Fold the rear seat back into its original position.
WARNING
•Ensure that the seat belts are not damaged when operating the rear seat backrests. Under no circumstances must the rear seat belts be jammed by the folded back rear seat backrest.
•The belts and the belt locks must be in their original position after folding back the rear seats and seat backre sts - they must be ready to use.
•Pay attention that the rear seat backrest is correctly interlocked. It is only then that the three-point seat belt can reliably fulfil its function.
•The seat backrests must be securely interlocked in position so that no objects in the luggage compartment ca n slide into the passenger compart- ment if there is sudden braking - risk of injury!
Inserting head restraints in the rear seats
– The rear head restraints can be inserted into the relevant holes of the
folded forwards rear seats.
Remove the rear seat
The luggage compartment can be increased in size by removing the rear
seat.
Removing
– Fold the rear seat forwards.
– Press the wire clamps in the direction of the arrow ⇒fig. 55 and
remove the rear seat from its holder.
Installing
– Press the wire clamp in the direct ion of the arrow and place the seat
upholstery in its holder.
– Fold the rear seat back into its original position.
AA
Fig. 54 Rear seats: Head restraints in rear seats
Fig. 55 Remove the rear seats
NKO A05F 20 MR08.book Page 60 Thursday, April 19, 2007 11:34 AM
Page 70 of 242
Seats and Stowage69
Using the systemSafetyDriving TipsGeneral MaintenanceBreakdown assistanceTechnical Data
Opening and closing the storage compartments on the front
passenger side
– Pull or press the handle of the lid in the direction of arrow ⇒page 68,
fig. 68 and fold open the lid.
– Raise the lid until it is heard to engage.
A pin holder is located inside the lid.
WARNING
The storage compartment must always be closed when driving for safety reasons.
Cooling of storage compartment on front passenger side*
The storage compartment can be fitted for vehicles with an air-
conditioning system with a closable inlet for cooled air.
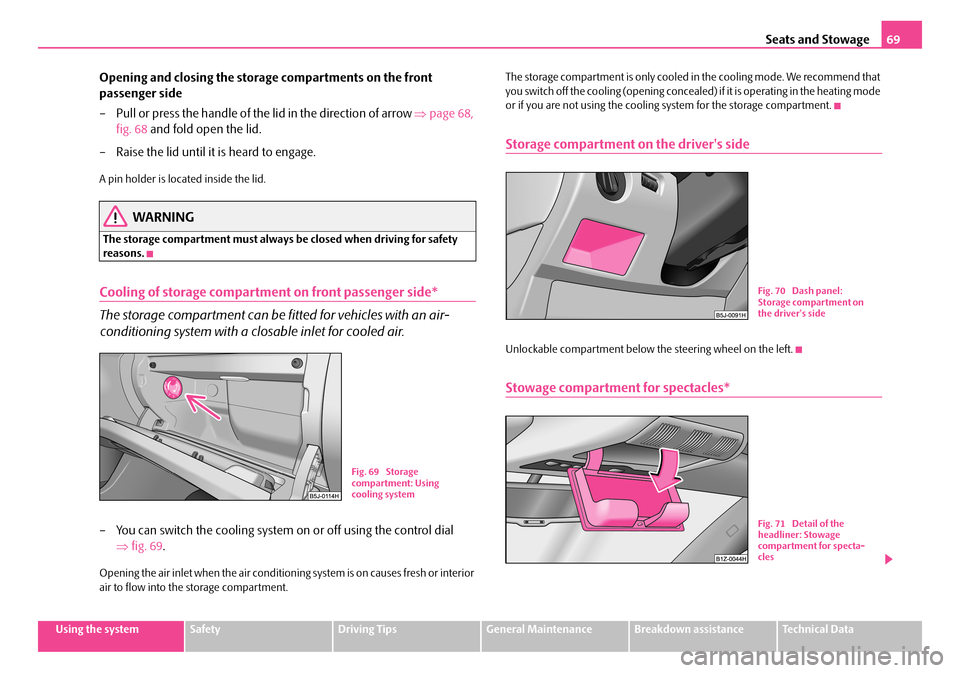
– You can switch the cooling system on or off using the control dial
⇒ fig. 69.
Opening the air inlet when the air conditioning system is on causes fresh or interior air to flow into the storage compartment.
The storage compartment is only cooled in the cooling mode. We recommend that you switch off the cooling (opening concealed) if it is operating in the heating mode or if you are not using the cooling system for the storage compartment.
Storage compartment on the driver's side
Unlockable compartment below the steering wheel on the left.
Stowage compartment for spectacles*
Fig. 69 Storage compartment: Using cooling system
Fig. 70 Dash panel: Storage compartment on the driver's side
Fig. 71 Detail of the headliner: Stowage compartment for specta-cles
NKO A05F 20 MR08.book Page 69 Thursday, April 19, 2007 11:34 AM