door lock SKODA FABIA 2008 2.G / 5J User Guide
[x] Cancel search | Manufacturer: SKODA, Model Year: 2008, Model line: FABIA, Model: SKODA FABIA 2008 2.G / 5JPages: 252, PDF Size: 40.88 MB
Page 42 of 252
Unlocking and locking41
Using the systemSafetyDriving TipsGeneral MaintenanceBreakdown assistanceTechnical Data
The power windows operate only when ignition is switched on.
Opening a window
– A window is opened by pres sing lightly on the respective butto n in the
door. The process stops when one releases the button.
– Additionally you can open the window automatically (fully opened) by
pressing the button up to the stop. Renewed pressing of the button
causes the window to stop immediately.
Closing a window
– A window is closed through pulling lightly on the respective button in
the door. The closing process stops when one releases the button.
– Additionally you can close the window automatically (fully closed) by
pulling the button up to the stop. Renewed pulling of the button
causes the window to stop immediately.
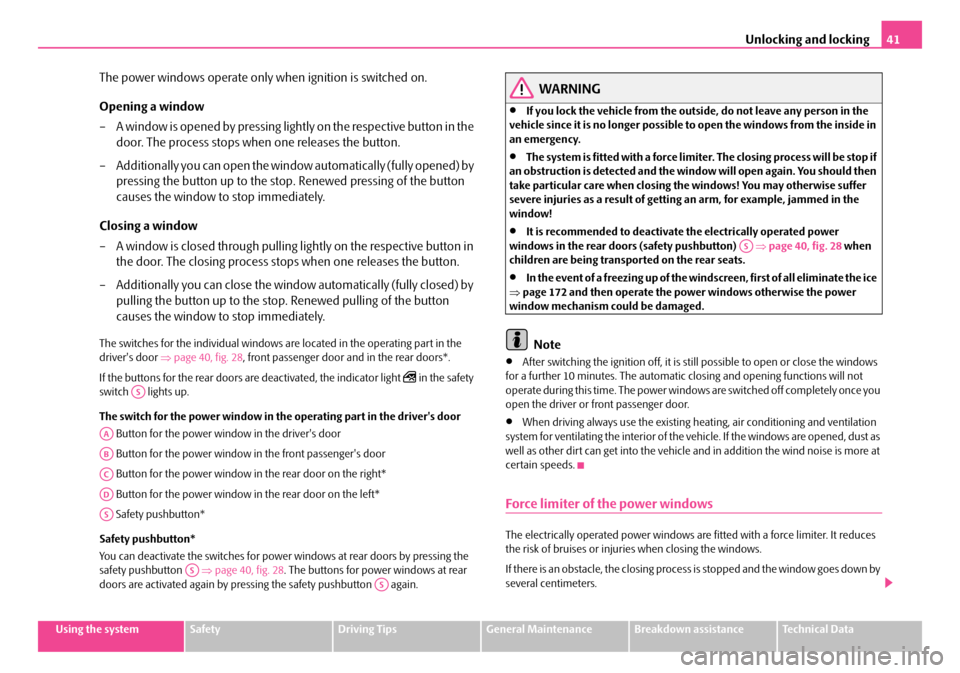
The switches for the individual windows are located in the operating part in the driver's door ⇒page 40, fig. 28, front passenger door and in the rear doors*.
If the buttons for the rear doors are deactivated, the indicator light in the safety switch lights up.
The switch for the power window in the operating part in the driver's door
Button for the power window in the driver's door
Button for the power window in the front passenger's door
Button for the power window in the rear door on the right*
Button for the power window in the rear door on the left*
Safety pushbutton*
Safety pushbutton*
You can deactivate the switches for power windows at rear doors by pressing the safety pushbutton ⇒page 40, fig. 28. The buttons for power windows at rear doors are activated again by pressing the safety pushbutton again.
WARNING
•If you lock the vehicle from the outside, do not leave any person in the vehicle since it is no longer possible to open the windows from the inside in an emergency.
•The system is fitted with a force limiter. The closing process will be stop if an obstruction is detected and the window will open again. You should then take particular care when closing the windows! You may otherwise suffer severe injuries as a result of getting an arm, for example, jammed in the window!
•It is recommended to deactivate the electrically operated power windows in the rear doors (safety pushbutton) ⇒page 40, fig. 28 when children are being transported on the rear seats.
•In the event of a freezing up of the windscreen, first of all eliminate the ice ⇒page 172 and then operate the power windows otherwise the power window mechanism could be damaged.
Note
•After switching the ignition off, it is still possible to open or close the windows for a further 10 minutes. The automatic closing and opening functions will not operate during this time. The power windows are switched off completely once you open the driver or front passenger door.
•When driving always use the existing heating, air conditioning and ventilation system for ventilating the interior of the vehicle. If the windows are opened, dust as well as other dirt can get into the vehicle and in addition the wind noise is more at certain speeds.
Force limiter of the power windows
The electrically operated power windows are fitted with a force limiter. It reduces the risk of bruises or injuries when closing the windows.
If there is an obstacle, the closing process is stopped and the window goes down by several centimeters.
AS
AA
AB
AC
AD
AS
ASAS
AS
NKO A05F 20.book Page 41 Wednesday, April 2, 2008 1:02 PM
Page 43 of 252
Unlocking and locking42
You must try to close the window again within 10 seconds, even if the obstacle was not yet removed, the closing process is stopped. During this time it is not possible to automatically close the window. The force limiter is still switched on.
The force limiter is only switched off, if you attempt to close the window within the next 10 seconds - the window closes now with full strength!
If you wait longer than 10 seconds, the force limiter is switched on again.
WARNING
You should take particular care when closing the windows! You may other-wis e su ffe r s ev e re inj uri e s a s a re sul t o f g e t tin g an a rm , fo r e xa m pl e, j am m e d in the window!
Window convenience operation
You can open and close the window with power windows as follows
when unlocking and locking the vehicle.
Opening windows with the key
– Turn the key in the lock of the driver door into the opening position
and hold it until all the windows are open.
Closing windows with the key
– Turn the key in the lock of the driver door into the closing position and
hold it there until all of the windows are closed.
You can interrupt the opening or closing operation of the windows immediately by releasing the key.
WARNING
•Obstruction protection is not active during the convenience operating feature ⇒ in “Switch for power windows” on page 40.
•You should take particular care when closing the windows! You may otherwise suffer severe injuries as a result of getting an arm, for example, jammed in the window!
Operational faults
Electrically operated power windows do not operate
If the battery of the car has been disconnected and then reconnected, the electri-cally operated power windows do not operate. The system must be activated. Proceed as follows in order to re-establish the function:
•turn the key in the lock of the driver door into the closing position and hold it there until all of the windows are closed,
•release the key,
•Once again insert the key and turn it into the closing position for about 3 seconds.
Operation in winter
Ice accumulating on the surface of the windows during the winter may result in a greater resistance when closing the windows and the window may stop and move back several centimetres
Proceed as follows to close the window fully:
•turn the key in the lock of the driver door into the closing position and hold it there until all of the windows are closed,
•repeat this operation until the window stops.
WARNING
•Obstruction protection is not active during the closing of the windows ⇒ in “Switch for power windows” on page 40.
•You should take particular care when closing the windows! You may otherwise suffer severe injuries as a result of getting an arm, for example, jammed in the window!
WARNING (continued)
NKO A05F 20.book Page 42 Wednesday, April 2, 2008 1:02 PM
Page 44 of 252
Unlocking and locking43
Using the systemSafetyDriving TipsGeneral MaintenanceBreakdown assistanceTechnical Data
Electric sliding/tilting roof*
Description
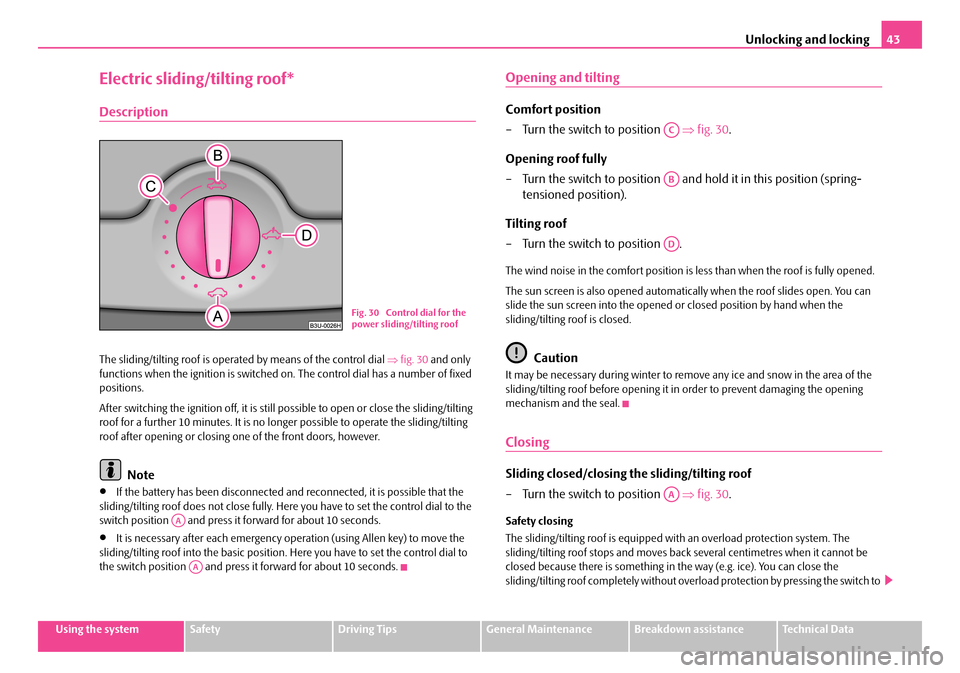
The sliding/tilting roof is operated by means of the control dial ⇒fig. 30 and only functions when the ignition is switched on. The control dial has a number of fixed positions.
After switching the ignition off, it is still possible to open or close the sliding/tilting roof for a further 10 minutes. It is no longer possible to operate the sliding/tilting roof after opening or closing one of the front doors, however.
Note
•If the battery has been disconnected and reconnected, it is possible that the sliding/tilting roof does not close fully. Here you have to set the control dial to the switch position and press it forward for about 10 seconds.
•It is necessary after each emergency operation (using Allen key) to move the sliding/tilting roof into the basic position. Here you have to set the control dial to the switch position and press it forward for about 10 seconds.
Opening and tilting
Comfort position
– Turn the switch to position ⇒fig. 30.
Opening roof fully
– Turn the switch to position and hold it in this position (spring-
tensioned position).
Tilting roof
– Turn the switch to position .
The wind noise in the comfort position is less than when the roof is fully opened.
The sun screen is also opened automatically when the roof slides open. You can slide the sun screen into the opened or closed position by hand when the sliding/tilting roof is closed.
Caution
It may be necessary during winter to remove any ice and snow in the area of the sliding/tilting roof before opening it in order to prevent damaging the opening mechanism and the seal.
Closing
Sliding closed/closing the sliding/tilting roof
– Turn the switch to position ⇒fig. 30.
Safety closing
The sliding/tilting roof is equipped with an overload protection system. The sliding/tilting roof stops and moves back several centimetres when it cannot be closed because there is something in the way (e.g. ice). You can close the sliding/tilting roof completely without overload protection by pressing the switch to
Fig. 30 Control dial for the power sliding/tilting roof
AA
AA
AC
AB
AD
AA
NKO A05F 20.book Page 43 Wednesday, April 2, 2008 1:02 PM
Page 45 of 252
Unlocking and locking44
the position ⇒fig. 30 at the front or rear for as long as it takes for the sliding/tilting roof to shut completely ⇒.
WARNING
Close the sliding/tilting roof carefully - risk of injury!
Convenience operation
You can also close an open sliding/tilting roof from the outside.
– Turn the key in the lock of the driver door into the closing position and
hold until the sliding/tilting roof is closed ⇒.
The closing process stops when one releases the key.
WARNING
Close the sliding/tilting roof carefully - risk of injury! The overload protec-tion system does not function with the convenience closing.
Emergency operation
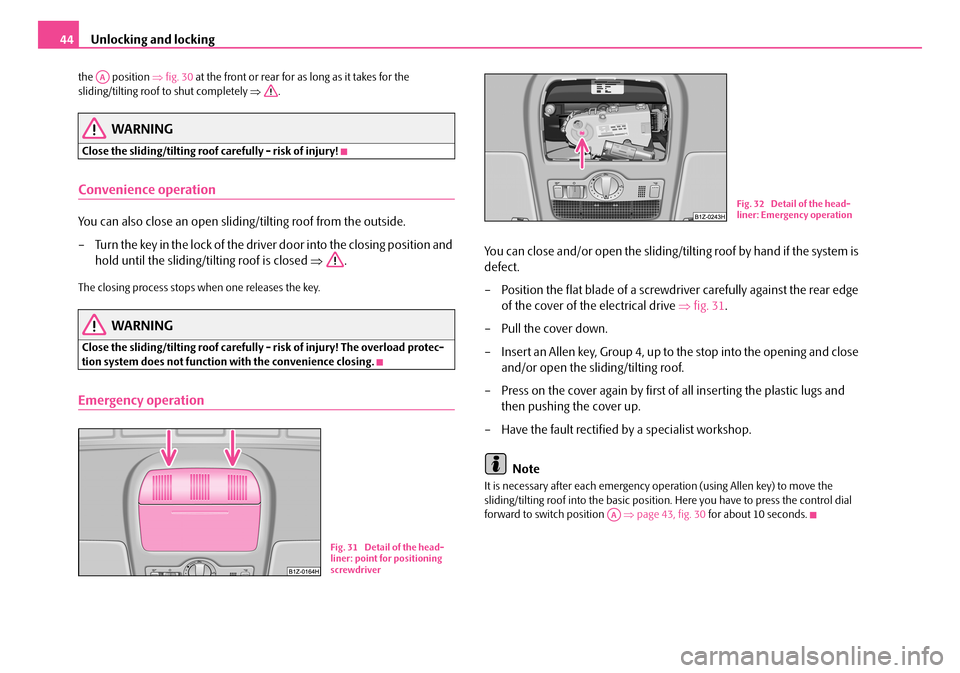
You can close and/or open the sliding/tilting roof by hand if the system is
defect.
– Position the flat blade of a screwdriver carefully against the rear edge
of the cover of the electrical drive ⇒fig. 31.
– Pull the cover down.
– Insert an Allen key, Group 4, up to the stop into the opening and close
and/or open the sliding/tilting roof.
– Press on the cover again by first of all inserting the plastic lugs and
then pushing the cover up.
– Have the fault rectified by a specialist workshop.
Note
It is necessary after each emergency operation (using Allen key) to move the sliding/tilting roof into the basic position. Here you have to press the control dial forward to switch position ⇒page 43, fig. 30 for about 10 seconds.
AA
Fig. 31 Detail of the head-liner: point for positioning screwdriver
Fig. 32 Detail of the head-liner: Emergency operation
AA
NKO A05F 20.book Page 44 Wednesday, April 2, 2008 1:02 PM
Page 51 of 252
Lights and Visibility50
The interior light is switched on for about 20 seconds when a vehicle with a central locking system is unlocked, when a door is opened or when the ignition key is removed. The requirement for this is that the switch is in the door contact position. The inner light goes out out immediately after the ignition is switched on.
A time delay switch* causes the inner lighting on vehicles without a central locking system stays on for a few seconds after the doors have been closed. The inner light goes out out immediately after the ignition is switched on.
The interior lighting is switched off after about 30 minutes when a door has been left open in order to avoid discharging the battery of the vehicle.
Rear interior lighting* - type 1
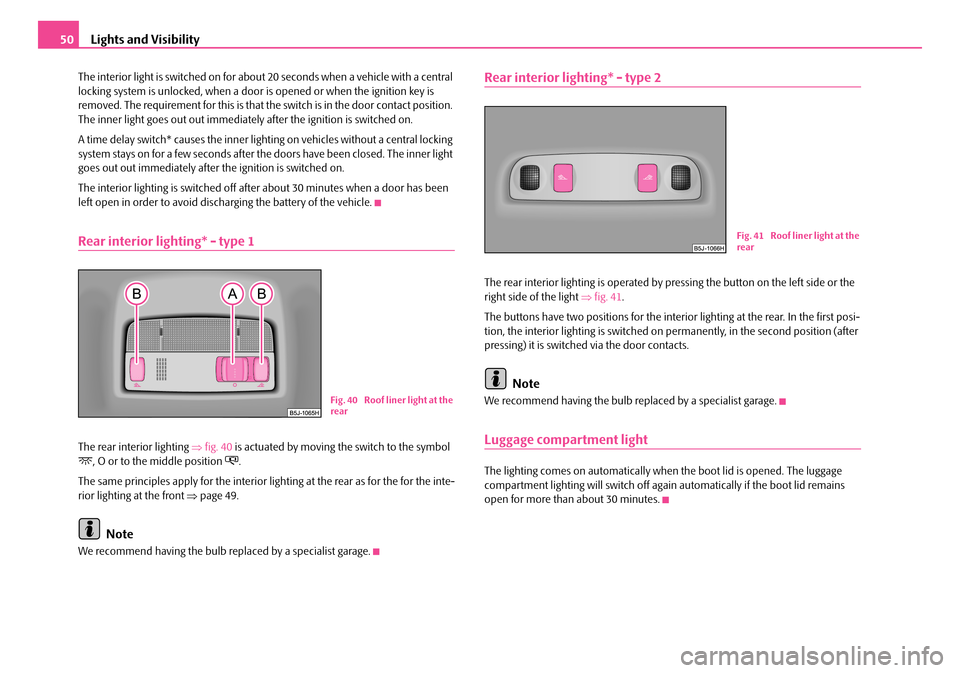
The rear interior lighting ⇒fig. 40 is actuated by moving the switch to the symbol , O or to the middle position .
The same principles apply for the interior lighting at the rear as for the for the inte-rior lighting at the front ⇒page 49.
Note
We recommend having the bulb replaced by a specialist garage.
Rear interior lighting* - type 2
The rear interior lighting is operated by pressing the button on the left side or the right side of the light ⇒fig. 41.
The buttons have two positions for the interior lighting at the rear. In the first posi-tion, the interior lighting is switched on permanently, in the second position (after pressing) it is switched via the door contacts.
Note
We recommend having the bulb replaced by a specialist garage.
Luggage compartment light
The lighting comes on automatically when the boot lid is opened. The luggage compartment lighting will switch off again automatically if the boot lid remains open for more than about 30 minutes.
Fig. 40 Roof liner light at the rear
Fig. 41 Roof liner light at the rear
NKO A05F 20.book Page 50 Wednesday, April 2, 2008 1:02 PM
Page 55 of 252
Lights and Visibility54
therefore important to degrease the lips of the wiper blades after every pass through an automatic vehicle wash system.
WARNING
•If the windscreen wipers are handled carelessly, there is a risk of damage to the windscreen.
•You should clean the wiper blades regularly with a windscreen cleaner in order to avoid any smears. Clean a wiper blade with a sponge or cloth if it is very dirty, for example from insect residues.
•Replace the wiper blades once or twice a year for safety reasons. The wiper blades are available from Škoda Service Partners.
Replacing the wiper blade on the rear window wiper
Taking off the wiper blade
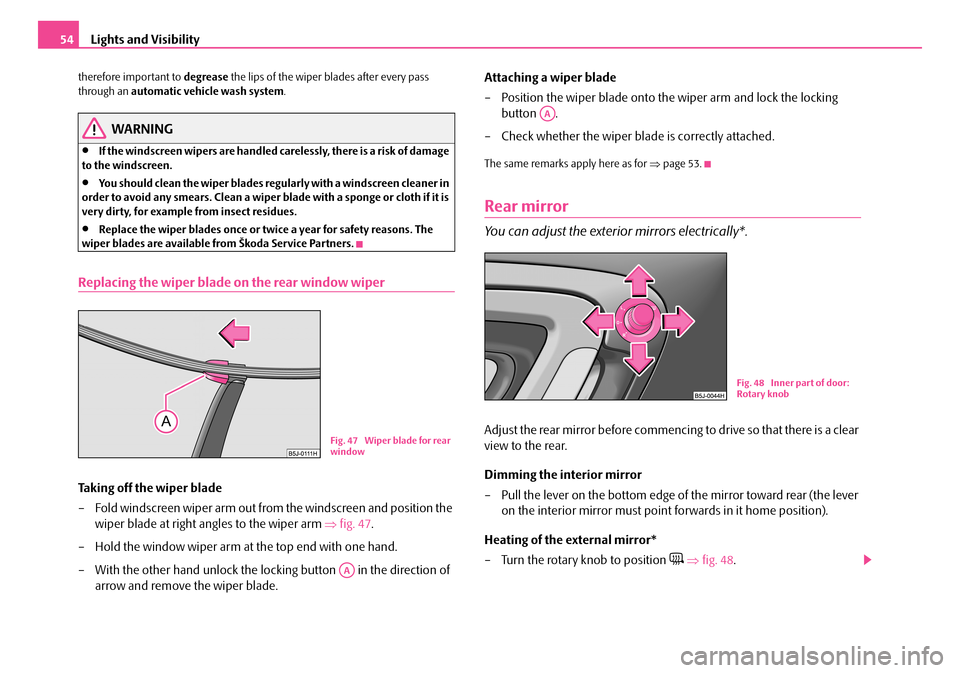
– Fold windscreen wiper arm out from the windscreen and position the
wiper blade at right angles to the wiper arm ⇒fig. 47.
– Hold the window wiper arm at the top end with one hand.
– With the other hand unlock the locking button in the direction of
arrow and remove the wiper blade.
Attaching a wiper blade
– Position the wiper blade onto the wiper arm and lock the locking
button .
– Check whether the wiper blade is correctly attached.
The same remarks apply here as for ⇒page 53.
Rear mirror
You can adjust the exterior mirrors electrically*.
Adjust the rear mirror before commencing to drive so that there is a clear
view to the rear.
Dimming the interior mirror
– Pull the lever on the bottom edge of the mirror toward rear (the lever
on the interior mirror must point forwards in it home position).
Heating of the external mirror*
– Turn the rotary knob to position ⇒fig. 48.
Fig. 47 Wiper blade for rear window
AA
AA
Fig. 48 Inner part of door: Rotary knob
NKO A05F 20.book Page 54 Wednesday, April 2, 2008 1:02 PM
Page 70 of 252
Seats and Stowage69
Using the systemSafetyDriving TipsGeneral MaintenanceBreakdown assistanceTechnical Data
– Insert the cross rod into one of the mounts .
– Insert the other end of the cross rod by pressing into the second
mount.
– Press both ends of the cross rod forward into the function position.
– Then push the seat backrest back into the upright position until the
locking button clicks into place - check by pulling on the rear seat
backrest ⇒.
Rolling up
– Pull the cross rod back slightly, first on the one side then on the other
side and take the cross rod out of the mount ⇒fig. 74.
–Hold the cross rod in such a way that the net partition can roll up
slowily and without damage into housing .
If you wish to use the entire luggage compartment, you can remove the luggage compartment cover ⇒page 65.
WARNING
•Ensure that the seat backrest on the rear seats is securely interlocked in position when the vehicle is fitted with three-point safety belts for the middle rear seat. It is only then that the three-point seat belt can reliably fulfil its function.
•First check for yourself that the cross road is inserted into the mounts in the front position!
•If the net partition is located behind the rear seats, then always make sure that the rear seat backrest is correctly interlocked.
Use behind the front seats
Unrolling
– Open the right rear door.
– Fold the surfaces of the seats and seat backrests of the rear seats
forward.
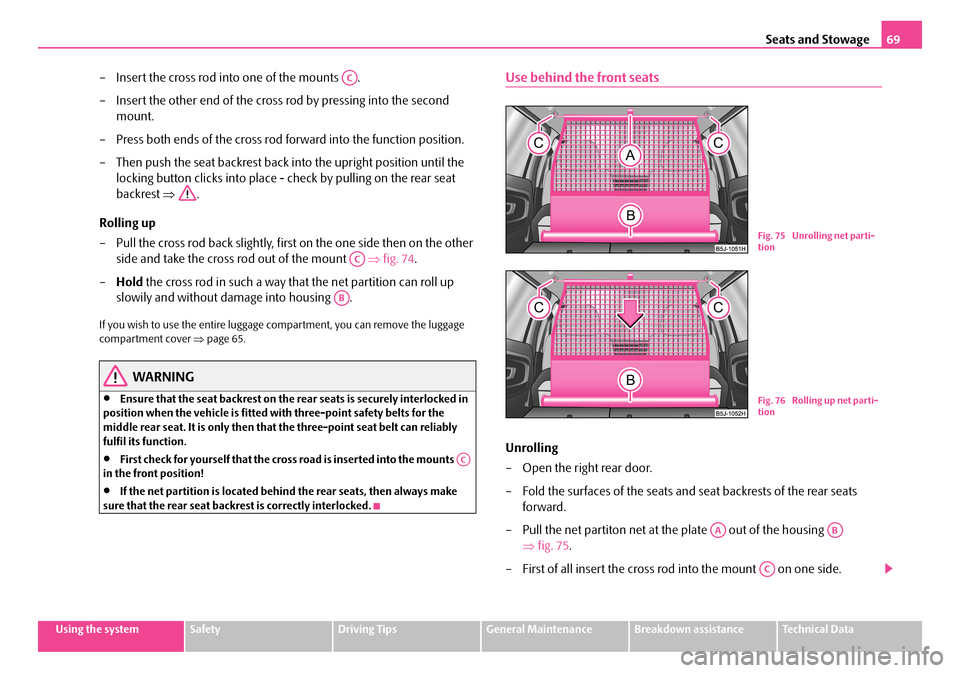
– Pull the net partiton net at the plate out of the housing
⇒fig. 75.
– First of all insert the cross rod into the mount on one side.
AC
AC
AB
AC
Fig. 75 Unrolling net parti-tion
Fig. 76 Rolling up net parti-tion
AAAB
AC
NKO A05F 20.book Page 69 Wednesday, April 2, 2008 1:02 PM
Page 81 of 252
Seats and Stowage80
The storage compartment is foreseen for storing small objects of up to 1
kg. in weight.
– Tilt the lock to open the flap and pull out the flap ⇒fig. 98.
– Tilt the lock to close the flap and press flap close.
Front seat armrest with storage compartment*
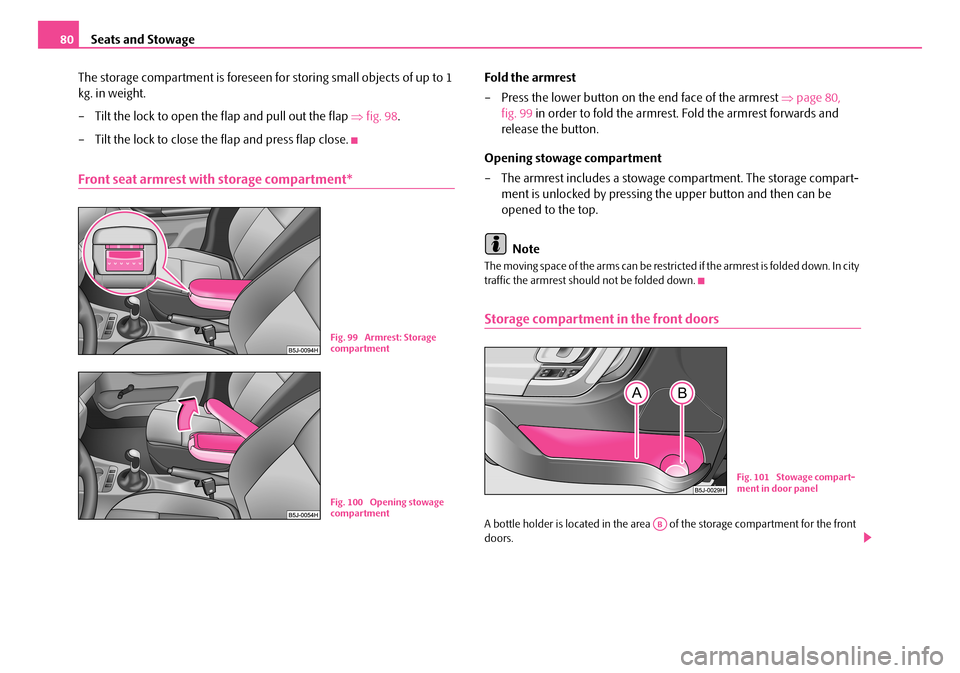
Fold the armrest
– Press the lower button on the end face of the armrest ⇒page 80,
fig. 99 in order to fold the armrest. Fold the armrest forwards and
release the button.
Opening stowage compartment
– The armrest includes a stowage compartment. The storage compart-
ment is unlocked by pressing the upper button and then can be
opened to the top.
Note
The moving space of the arms can be restricted if the armrest is folded down. In city traffic the armrest should not be folded down.
Storage compartment in the front doors
A bottle holder is located in the area of the storage compartment for the front doors.
Fig. 99 Armrest: Storage compartment
Fig. 100 Opening stowage compartment
Fig. 101 Stowage compart-ment in door panel
AB
NKO A05F 20.book Page 80 Wednesday, April 2, 2008 1:02 PM
Page 134 of 252
Airbag system133
Using the systemSafetyDriving TipsGeneral MaintenanceBreakdown assistanceTechnical Data
When are the airbags deployed?
The airbag system is designed in such a way that the driver and the front passenger airbag* are deployed in the event of a frontal collision of major severity.
In the case of a violent side crash, the side airbag* in the front seat and the head airbag* on the side of the car at which the collision occurs are deployed.
It is also possible under certain special accident situations that the front as well as the side airbags and head airbags* are deployed.
The airbags are not deployed in the case of minor frontal and side collisions, in the case of rear-end collisions and vehicle rollover.
Deployment factors
It is not possible to state globally which deployment conditions apply to the airbag system in every situation as the circumstances which exist in the case of accidents vary greatly. An important role in this case, for example, is played by factors such as the type of object against which the vehicle impacts (hard, soft), the angle of impact, the vehicle speed etc.
A decisive factor for the deployment of the airbags is the deceleration which occurs during a collision. The control unit analyses the nature of the collision and activates the relevant restraint system. If the vehicle deceleration which occurs and is meas-ured during the collision remains below the prescribed reference values specified in the control unit, the airbags are not deployed although the vehicle may well suffer severe damage to the bodywork as a consequence of the accident.
The airbags are not deployed if:
•ignition off,
•a minor frontal collision,
•a minor side collision,
•a rear-end collision,
•rollover.
Caution
The dash panel must be replaced after the front passenger airbag has been deployed.
Note
•A grey white or red, non harmful gas is released when airbag is inflated. This is perfectly normal and is not an indication of a fire in the vehicle.
•In the event of an accident in which the airbags are deployed:
−The interior lighting comes on (if the switch for the interior light is in the door contact position),
−The hazard warning light is switched on,
−All the doors are unlocked.
Front airbags
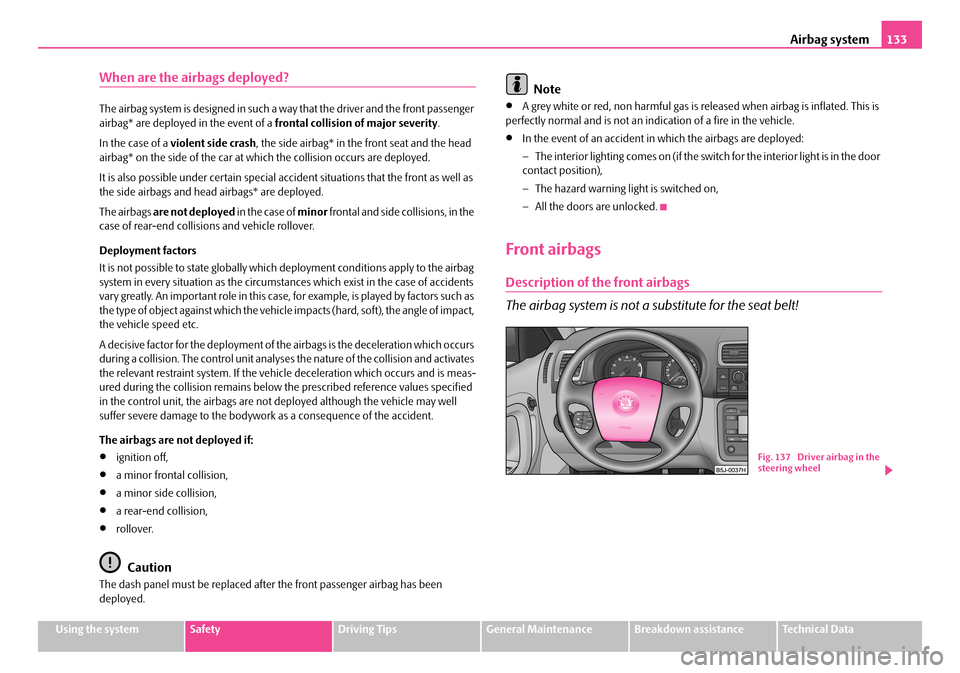
Description of the front airbags
The airbag system is not a substitute for the seat belt!
Fig. 137 Driver airbag in the steering wheel
NKO A05F 20.book Page 133 Wednesday, April 2, 2008 1:02 PM
Page 171 of 252
Taking care of your vehicle and cleaning the vehicle170
Automatic vehicle wash systems
The paintwork of the vehicle is sufficiently resistant that the vehicle can be washed normally in automatic vehicle wash plants without any problem. The actual stress to which the paintwork is subjected, however, depends primarily on the design of the vehicle wash system, the filtering of the water and the type of washing and care products used. If the paintwork of your vehicle appears mat after being washed or even has scratches, point this out to the operator of the vehicle wash plant. Use a different vehicle wash plant, if necessary.
There are no particular points to note before washing your vehicle in such a plant other than the usual precautionary measures (closing windows, moving any factory-fitted aerials down flat against the bodywork, etc.).
If you have any particular attach e d p a r t s f i t te d t o y o u r c a r - s u ch a s s p o i l e r, ro o f ra ck system, two-way radio aerial - it is best to first of all consult the operator of the car wash plant.
It is important to degrease the lips of the windscreen wiper rubbers after passing through the automatic vehicle wash system.
Caution
Do not screw the swivelling down roof aerial tight before washing the vehicle in an automatic vehicle wash system - risk of damage!
Washing vehicle by hand
It is important to first soften the dirt with plenty of water and rinse it off as thor-oughly as possible before washing your vehicle by hand.
One should then clean the vehicle using a soft washing sponge, washing glove or a washing brush and only slight pressure. Work from the top to the bottom - beginning with the roof. Only place slight pressure on the vehicle paintwork during cleaning Only use a car shampoo for stubborn dirt.
Wash out the sponge or washing glove thoroughly at short intervals.
Clean wheels, door sills and similar parts last. Use a second sponge for such areas.
Rinse off the vehicle well after giving it a wash and dry it off using a chamois leather.
WARNING
•The ignition should always be switched off when you wash your vehicle - risk of accident!
•Protect your hands and arms from sharp-edged metal parts when you are cleaning the underfloor, the inside of the wheel housings or the wheel trims - risk of cuts.
Caution
•Do not wash your vehicle in bright sunlight - risk of paint damage.
•Ensure that the jet of water is not aimed directly at the locks or at the door and panel joints if you spray your vehicle in winter down with a hose - risk of freezing.
•Do not use any insect sponges, rough kitchen sponges or similar cleaning prod-ucts - risk of damage to the surface of paintwork.
For the sake of the environment
Only wash your vehicle at washing bays specifically reserved for this purpose. This ensures that no water which may be contaminated by oil flows into the sewage system. It is not even permitted to wash your vehicle in certain areas except at such specific washing bays.
Washing with a high-pressure cleaner
When you wash your vehicle with a high-pressure cleaner, it is essential to comply with the instructions for use of the cleaning equipment. This applies in particular to the pressure used and to the spraying distance. Maintain a sufficiently large distance to soft materials such as rubber hoses or insulation material.
On no account use circular spray nozzles or so-called dirt cutters!
NKO A05F 20.book Page 170 Wednesday, April 2, 2008 1:02 PM