lock SKODA FABIA 2008 2.G / 5J Workshop Manual
[x] Cancel search | Manufacturer: SKODA, Model Year: 2008, Model line: FABIA, Model: SKODA FABIA 2008 2.G / 5JPages: 252, PDF Size: 40.88 MB
Page 153 of 252
Intelligent Technology152
•when driving with snow chains,
•when driving in deep snow or on a loose surface,
•when it is necessary to rock a car free when it has become stuck.
then you should switch on the ESP again.
WARNING
It is also not possible for the ESP to overcome the physical limits of the vehicle. Even if a vehicle fitted with ESP you should still always adapt your style of driving to the condition of the road surface and the traffic situation. This particularly applies when driving on slippery and wet roads. The increased safety offered must not tempt you to take greater risks than other-wise - risk of an accident!
Note
•All four wheels must be fitted with the same tyres in order to achieve problem-free operation of the ESP. Differing rolling circumferences of the tyres can lead to an undesirable reduction in the engine output.
•Changes to vehicle (e.g. on engine, on the brakes, on chassis or other assign-ment of tyres and wheels) can influence the function of the ESP ⇒page 200, “Accessories, changes and replacement of parts”.
Traction control system (TCS)*
The traction control system prevents the driven wheels from spinning
when accelerating.
General
The TCS makes it much easier, and sometimes at all possible, to start off, accelerate and climb a steep hill when the conditions of the road surface are unfavourable.
Operating principle
The TCS switches on automatically when the engine is started and then conducts a self-test. The system monitors the speeds of the driven wheels with the aid of the ABS sensors. If the wheels are spinning, the force transmitted to the road surface is automatically adapted by reducing the engine speed. This occurs at all speeds.
The TCS operates in combination with the ABS ⇒page 155, “Antilock brake system (ABS)*”. The TCS will not function if a fault exists in the ABS system.
The TCS warning light ⇒page 26 lights up in the instrument cluster when there is a fault on the TCS.
Switching off
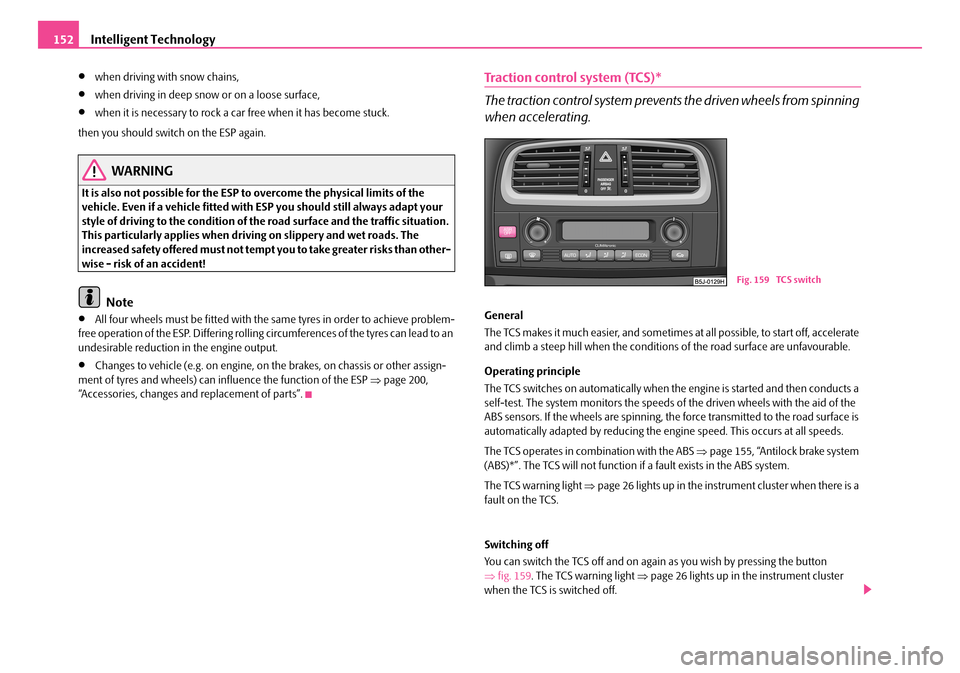
You can switch the TCS off and on again as you wish by pressing the button ⇒fig. 159. The TCS warning light ⇒page 26 lights up in the instrument cluster when the TCS is switched off.
Fig. 159 TCS switch
NKO A05F 20.book Page 152 Wednesday, April 2, 2008 1:02 PM
Page 154 of 252
Intelligent Technology153
Using the systemSafetyDriving TipsGeneral MaintenanceBreakdown assistanceTechnical Data
The TCS should normally always be switched on. It may be good practice in certain exceptional cases, such as when you wish to have wheel slip, to switch off the system.
Examples:
•when driving with snow chains,
•when driving in deep snow or on a loose surface,
•when it is necessary to rock a car free when it has become stuck.
then you should switch on the TCS again.
WARNING
You should always adjust your style of driving to the conditions of the road surface and the traffic situation. The increased safety offered must not tempt you to take greater risks than otherwise - risk of an accident!
Note
•All four wheels must be fitted with the same tyres in order to achieve problem-free operation of the TCS. Differing rolling circumferences of the tyres can lead to an undesirable reduction in the engine output.
•Changes to vehicle (e.g. on engine, on the brakes, on chassis or other assign-ment of tyres and wheels) can influence the function of the TCS ⇒page 200, “Accessories, changes and replacement of parts”.
Electronic Differential Lock (EDL)*
The electronic differential lock prevents an individual wheel from
slipping.
Models fitted with ESP are equipped with electronic differential lock (EDL).
General
The EDL makes it much easier, and sometimes at all possible, to start off, accelerate and climb a steep hill when the conditions of the road surface are unfavourable.
Operating principle
The EDL is activated automatically, that is without any action on the part of the driver. It monitors the speeds of the driven wheels with the aid of the ABS sensors. Should only one drive wheel begin spinning on a slippery surface there will be an appreciable difference in the speed of the driven wheels. The EDL function brakes the slipping wheel and the differential transmits a greater driving force to the other driven wheel. This control process is also accompanied by noises.
Overheating of the brakes
The EDL switches off automatically if unusually severe stresses exist in order to avoid excessive heat generation in the disc brake on the wheel which is being braked. The vehicle can continue to be driven and has the same characteristics as a vehicle not fitted with EDL.
The EDL switches on again automatically as soon as the brake has cooled down.
WARNING
•Depress the accelerator carefully when accelerating on uniformly slip-pery road surfaces, such as ice and snow. The driven wheels might still spin despite the EDL and affect the stability of the vehicle - risk of an accident!
•You should always adapt your style of driving to the condition of road surface and to the traffic situation even when your vehicle is fitted with EDL. The increased safety offered must not tempt you to take greater risks than otherwise - risk of an accident!
Note
•If the ABS or TCS or ESP warning light comes on, this may also indicate a fault in the EDL. Please have the car inspected as soon as possible by a specialist garage.
•Changes to vehicle (e.g. on engine, on the brakes, on chassis or other assign-ment of tyres and wheels) can influence the function of the EDL ⇒page 200, “Accessories, changes and replacement of parts”.
NKO A05F 20.book Page 153 Wednesday, April 2, 2008 1:02 PM
Page 156 of 252
Intelligent Technology155
Using the systemSafetyDriving TipsGeneral MaintenanceBreakdown assistanceTechnical Data
WARNING
•Never switch off the engine before the vehicle is stationary.
•The brake booster only operates when the engine is running. Greater physical effort for braking is required when engine is switched off. Because if you do not stop as normal, this can cause an accident and severe injuries.
Antilock brake system (ABS)*
ABS prevents the wheels locking when braking.
General
The ABS contributes significantly to enhancing the active safety of your vehicle. Compared to a car not fitted with the ABS brake system, you are able to retain optimal steering ability even during a full brake application on a slippery road surface because the wheels do not lock up.
You must not expect, however, that the braking distance will be shorter under all circumstances as a result of the ABS. The braking distance for example on gravel and fresh snow, when you should anyway be driving slowly and cautiously, will be longer.
Operating principle
As soon as the vehicle speed has increased to about 20 km/hour an automatic test procedure is conducted during which you will be able to hear a pumping noise for about 1 second.
The brake pressure will be reduced on a wheel which is rotating at a speed which is too low for the speed of the vehicle and tending to lock. This control cycle is notice-able from a pulsating movement of the brake pedal which is accompanied by noises. This is consciously intended to provide the driver with the information that the wheels are tending to lock (ABS control range). You must always keep the brake pedal depressed to enable the ABS to optimally control the brake application in this braking range. Never interrupt the application of the brakes!
WARNING
•The ABS can also not overcome the physical limits of your vehicle. Please do not forget this, particularly when driving on icy or wet road surfaces. If the ABS is operating within the control range, adapt your speed immediately to the conditions of the road surface and the traffic situation. The increased safety offered by the ABS must not tempt you to take greater risks than otherwise - risk of an accident!
•The normal braking system is still fully functional if there is an ABS fault. Visit a specialist garage as quickly as possible and adjust your style of driving to take account of the ABS fault in the meantime since you will not know how great the damage is.
Note
•A warning light comes on if a fault occurs in the ABS system ⇒page 27.
•Changes to vehicle (e.g. on engine, on the brakes, on chassis or other assign-ment of tyres and wheels) can influence the function of the ABS ⇒page 200, “Accessories, changes and replacement of parts”.
Brake Assist*
During a severe brake application (e.g. if a hazard exists), the Brake Assist increases the braking force and thus makes it possible to rapidly produce the pressure required in the brake system.
The majority of drivers do apply the brakes in good time in dangerous situations, but do not depress the brake pedal with sufficient pressure. Consequently, it is not possible for the car to achieve its maximum deceleration and the car covers a greater distance than necessary.
The Brake Assist is activated by the very quick operation of the brake pedal. In such cases, a much greater braking pressure exists than during a normal brake applica-tion. This makes it possible, even with a relatively low resistance of the brake pedal, to produce an adequate pressure in the brake system in the shortest possible time, which is required for maximum deceleration of the car. You must apply the brake
NKO A05F 20.book Page 155 Wednesday, April 2, 2008 1:02 PM
Page 157 of 252
Intelligent Technology156
pedal firmly and hold it in this position in order to achieve the shortest possible braking distance.
The Brake Assist is able to help you achieve a shorter braking distance in emergency situations by rapidly producing the pressure required in the brake system. It fully exploits the attributes of the ABS. After you release the brake pedal, the function of the Brake Assist is automatically switched off and the brakes operate in the normal way.
The Brake Assist is part of the ESP system. If a fault occurs in the ESP, the Brake Assist function is also not available. Further information on the ESP ⇒page 151.
WARNING
•The Brake Assist is also not able to overcome the physical limits of your car in terms of the braking distance required.
•Adapt your speed to the conditions of the road surface and to the traffic situation.
•The increased safety offered by the Brake Assist must not tempt you to take a greater safety risk than otherwise.
Electrohydraulic power steering
The power steering enables you to steer the vehicle with less physical force.
The steering characteristics can be changed by a specialist garage.
You will place great stresses on the power steering system if the steering is turned to full lock when the vehicle is stationary. Turning the steering to full lock in such a situation will be accompanied by noises.
It is still possible to fully steer the vehicle if the power steering fails or if the engine is not running (vehicle being towed in). The only difference is that greater physical effort is required.
It is possible that the hydraulic pump of the power steering will not run due to the low vehicle network voltage if the battery has gone flat and the engine must started with the help off jump leads. This condition will be indicated by lighting up of the warning light.
The power steering operates again if the battery is charged to a specific range when engine is running. It also operates again, if the engine can be started with its own battery.
Caution
Do not leave the steering at full lock for more than 15 seconds when the engine is running - risk of damaging the power steering!
Note
Have the steering inspected as soon as possible by a specialist garage if there is a leak or fault in the system.
Tyre inflation pressure-control system*
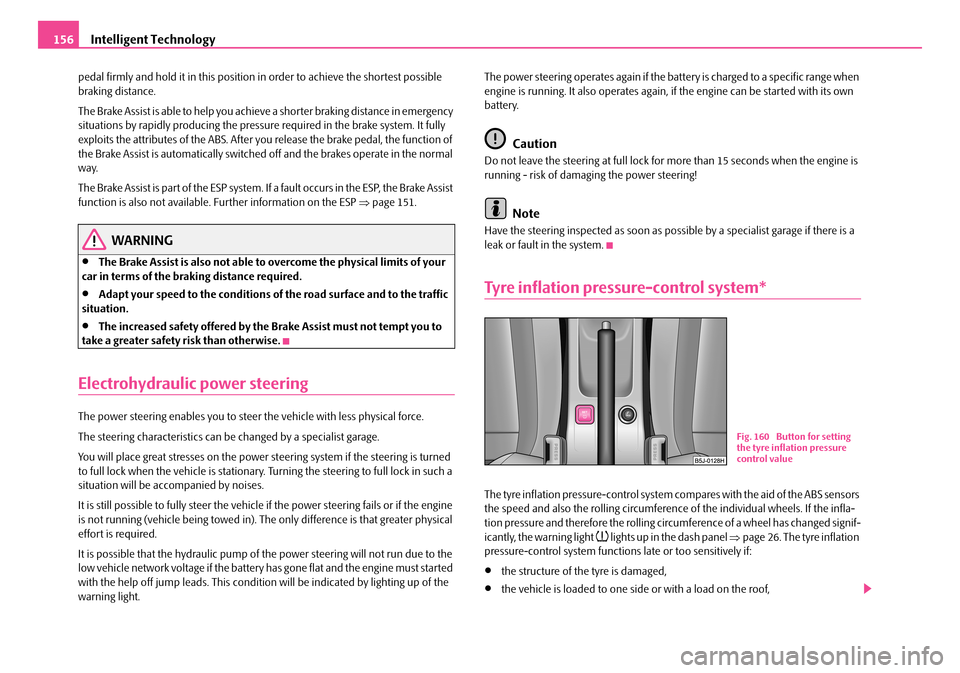
The tyre inflation pressure-control system compares with the aid of the ABS sensors the speed and also the rolling circumference of the individual wheels. If the infla-tion pressure and therefore the rolling circumference of a wheel has changed signif-icantly, the warning light lights up in the dash panel ⇒page 26. The tyre inflation pressure-control system functions late or too sensitively if:
•the structure of the tyre is damaged,
•the vehicle is loaded to one side or with a load on the roof,
Fig. 160 Button for setting the tyre inflation pressure control value
NKO A05F 20.book Page 156 Wednesday, April 2, 2008 1:02 PM
Page 168 of 252
Towing a trailer167
Using the systemSafetyDriving TipsGeneral MaintenanceBreakdown assistanceTechnical Data
should be attached to folding arms. Adjust the mirrors so that they provide you with an adequate field of view to the rear.
Headlights
Before starting off with a hitched trailer, also check the setting of the headlights. Alter the setting as necessary with the aid of the headlight beam adjuster ⇒page 47.
Detachable ball head
The ball rod is detachable on vehicles with towing device and suppliable from Škoda original accessories. It is stowed together with separate fitting instructions in the spare wheel well in the luggage compartment of the vehicle.
Note
•We recommend that you also have your vehicle inspected between service intervals if you tow a trailer frequently.
•The handbrake on the towing vehicle must be put on when coupling and decoupling the trailer.
•Keep the mechanism of the ball head of the towing device clean and take proper care of it with a suitable preservative.
Driving Tips
Particular caution is required when towing a trailer.
– Do not, as far as possible, drive with your vehicle unladen and the
trailer laden.
– Do not make full use of the legal maximum speeds. This applies in
particular to downhill sections.
– Apply the brakes in good time.
– Keep a check on the coolant temperature gauge if the outside temper-
ature is high.
Distribution of weight
The distribution of the weight is very poor if your vehicle is unladen and the trailer is laden. Maintain a particularly low speed if you cannot avoid driving with this combination.
Driving speed
Do not drive faster than 80 km/hour for safety reasons. This also applies for coun-tries in which higher speeds are allowed.
The fact that the driving stability of the vehicle + trailer combination reduces with increasing speed means that the legally allowed speed should not be used when there are unfavourable road, weather or wind conditions, particularly near accident black spots.
You must always reduce your speed immediately as soon as you detect even just the slightest swaying of the trailer. On no account attempt to stop the trailer from “swaying” by accelerating.
Apply the brakes in good time! If the trailer is fitted with a trailer brake, apply the brakes gently at first and then brake firmly. This will avoid brake jolts resulting from the trailer wheels locking. Shift down gears in good time before negotiating a down-hill section to allow the engine to also act as a brake.
Engine overheating
Please keep a check on the coolant temperature gauge if you have to negotiate a lengthy slope in a low gear at a high engine speed when the outside temperature is very high ⇒page 10.
If the needle of the coolant temperature gauge moves into the right-hand area or even the red area of the scale, reduce your speed immediately. Stop and switch off the engine if the warning light in the instrument cluster begins flashing. Wait a few minutes and check the level of coolant in the coolant expansion bottle ⇒page 186, “Inspecting the coolant level”.
Please refer to the following guidelines ⇒page 24, “Coolant temperature/coolant level ”.
The coolant temperature can be reduced by switching on the heating.
Any increase in the cooling effect of the coolant fan through shifting down a gear and increasing the engine speed is not possible since the fan speed is independent
NKO A05F 20.book Page 167 Wednesday, April 2, 2008 1:02 PM
Page 171 of 252
Taking care of your vehicle and cleaning the vehicle170
Automatic vehicle wash systems
The paintwork of the vehicle is sufficiently resistant that the vehicle can be washed normally in automatic vehicle wash plants without any problem. The actual stress to which the paintwork is subjected, however, depends primarily on the design of the vehicle wash system, the filtering of the water and the type of washing and care products used. If the paintwork of your vehicle appears mat after being washed or even has scratches, point this out to the operator of the vehicle wash plant. Use a different vehicle wash plant, if necessary.
There are no particular points to note before washing your vehicle in such a plant other than the usual precautionary measures (closing windows, moving any factory-fitted aerials down flat against the bodywork, etc.).
If you have any particular attach e d p a r t s f i t te d t o y o u r c a r - s u ch a s s p o i l e r, ro o f ra ck system, two-way radio aerial - it is best to first of all consult the operator of the car wash plant.
It is important to degrease the lips of the windscreen wiper rubbers after passing through the automatic vehicle wash system.
Caution
Do not screw the swivelling down roof aerial tight before washing the vehicle in an automatic vehicle wash system - risk of damage!
Washing vehicle by hand
It is important to first soften the dirt with plenty of water and rinse it off as thor-oughly as possible before washing your vehicle by hand.
One should then clean the vehicle using a soft washing sponge, washing glove or a washing brush and only slight pressure. Work from the top to the bottom - beginning with the roof. Only place slight pressure on the vehicle paintwork during cleaning Only use a car shampoo for stubborn dirt.
Wash out the sponge or washing glove thoroughly at short intervals.
Clean wheels, door sills and similar parts last. Use a second sponge for such areas.
Rinse off the vehicle well after giving it a wash and dry it off using a chamois leather.
WARNING
•The ignition should always be switched off when you wash your vehicle - risk of accident!
•Protect your hands and arms from sharp-edged metal parts when you are cleaning the underfloor, the inside of the wheel housings or the wheel trims - risk of cuts.
Caution
•Do not wash your vehicle in bright sunlight - risk of paint damage.
•Ensure that the jet of water is not aimed directly at the locks or at the door and panel joints if you spray your vehicle in winter down with a hose - risk of freezing.
•Do not use any insect sponges, rough kitchen sponges or similar cleaning prod-ucts - risk of damage to the surface of paintwork.
For the sake of the environment
Only wash your vehicle at washing bays specifically reserved for this purpose. This ensures that no water which may be contaminated by oil flows into the sewage system. It is not even permitted to wash your vehicle in certain areas except at such specific washing bays.
Washing with a high-pressure cleaner
When you wash your vehicle with a high-pressure cleaner, it is essential to comply with the instructions for use of the cleaning equipment. This applies in particular to the pressure used and to the spraying distance. Maintain a sufficiently large distance to soft materials such as rubber hoses or insulation material.
On no account use circular spray nozzles or so-called dirt cutters!
NKO A05F 20.book Page 170 Wednesday, April 2, 2008 1:02 PM
Page 173 of 252
Taking care of your vehicle and cleaning the vehicle172
Plastic parts
External plastic parts are cleaned by normal washing. Plastic parts and synthetic leather can also be treated with special solvent-free plastic cleaning agents if a damp cloth is not sufficient. Paint care products are not suitable for plastic parts.
Caution
Solvent-free cleaners attack the material and can damage it.
Windows
Only use a plastic ice scraper for removing snow and ice from the windows and mirrors. You should not move the ice scraper forward and backward but in one direction on the window which you are cleaning in order to avoid any damage to the surface of the glass.
You can best remove residues of rubber, oil, grease, wax or silicone by using a special window cleaner or a special silicone remover.
You should also clean the windows regularly from the inside.
Do not use window leathers which you have used to polish the vehicle body to dry off the windows. Residues of preservatives in the window leather can dirty the window and reduce visibility.
Do not affix any stickers over the inside of the rear window to avoid damage to the heating elements of the rear window heater.
We recommend using a preservative from Škoda genuine accessories offered by your Škoda dealer.
Caution
•Never remove snow or ice from the glass parts with warm or hot water - risk of formation of cracks in the glass!
•When removing snow or ice from the windows and mirror lenses make sure not to damage the paintwork of the vehicle.
The headlight lenses
Please do not use any aggressive cleaning or chemical solvent products - risk of damage to the plastic lenses Please use soap and clean warm water.
Caution
Never wipe the headlights dry and do not use any sharp objects for cleaning the plastic lenses, this may result in damage to the protective paintwork and conse-quently in formation of cracks on the headlight lenses, e.g through effect of chem-ical products.
Door and window seals
The rubber seals on the doors, boot lid, bonnet and windows remain supple and last longer if you treat them from time to time with a rubber care product (e.g. with a spray with silicone-free oil). You also avoid premature wear of the seals and prevent leakages in this way. It is also easier to open the doors. Rubber seals which are well cared for also do not stick together in cold winter weather.
Locks
We recommend that you use the spray from Škoda original accessories with regreasing and anticorrosive effect for de-icing locks.
Note
When washing your vehicle, ensure that as little water as possible gets into the locks.
NKO A05F 20.book Page 172 Wednesday, April 2, 2008 1:02 PM
Page 176 of 252

Taking care of your vehicle and cleaning the vehicle175
Using the systemSafetyDriving TipsGeneral MaintenanceBreakdown assistanceTechnical Data
– Ensure that the leather is not soaked through at any point and that no
water gets into the stitching of the seams.
– Dry off the leather with a soft, dry cloth.
Removing stains
– Remove fresh stains which are water-based (e.g. coffee, tea, juices,
blood etc.) with an absorbent cloth or household paper or use the
cleaner from the care set for a stain which has already dried in.
– Remove fresh stains on a fat base (e.g. butter, mayonnaise, chocolate
etc.) with an absorbent cloth or household cleaning paper or with the
cleaner from the care set if the stain has not yet penetrated into the
surface.
– Use a grease dissolver for grease stains which have dried in.
–Eliminate special stains (e.g. ball-point pens, felt pen, nail varnish,
dispersion paint, shoe cream etc.) with a special stain remover suit-
able for leather.
Leather care
– Treat the leather every six months with the leather care product avail-
able from Škoda Service Partners.
– Apply only a small amount of the care product.
– Dry the leather off with a soft cloth
We recommend that you consult your Škoda Service Partner, if you have any ques-tions regarding cleaning and care of the leather interior.
We recommend using a cleaning product from Škoda genuine accessories offered by your Škoda dealer.
Caution
•You must on no account treat the leather with solvents (e.g. gasoline, turpen-tine), floor wax, shoe cream or such like.
•Avoid leaving your vehicle for lengthy periods in bright sunlight in order to avoid bleaching the leather. If you leave your vehicle parked in the open for lengthy periods, protect the leather from the direct rays of the sun by covering it over.
•Sharp-edged objects on items of clothing such as zip fasteners, rivets, sharp-edged belts may leave permanent scratches or signs of rubbing on the surface.
Note
•Use a care cream with light blocker and impregnation effect regularly and each time after cleaning the leather. The cream nourishes the leather, allows it to breathe and keeps it supple and also provides moisture. It also creates surface protection.
•Clean the leather every 2 to 3 months, remove fresh soiling each time this occurs.
•Remove fresh stains such as those from ball-point pens, ink, lipstick, shoe cream etc., as quickly as possible.
•Care also for the leather dye. Refreshen areas which have lost their colour with a special coloured leather cream as required.
•The leather is a natural material with specific properties. During the use of the vehicle, minor optical changes can occur on the leather parts of the covers (e. g wrinkles or creases as a result of the stress of the covers).
Seat belts
– Keep the seat belts clean!
– Wash seat belts which have become soiled using a mild soapy solu-
tion.
– Inspect the seat belts regularly to ensure they are in good condition.
Belt webbing which has become severely soiled may prevent the inertia reel from reeling up the belt properly.
NKO A05F 20.book Page 175 Wednesday, April 2, 2008 1:02 PM
Page 177 of 252
Taking care of your vehicle and cleaning the vehicle176
WARNING
•The seat belts must not be removed for cleaning.
•Never clean the seat belts chemically as dry cleaning may destroy the fabric. The seat belts must also not be allowed to come into contact with corrosive liquids (such as acids etc.).
•Seat belts which have damage to the webbing, the connections, the inertia reel or the lock should be replaced by a Škoda Service Partner.
•Inertia reel belts must be completely dried before being reeled up.
NKO A05F 20.book Page 176 Wednesday, April 2, 2008 1:02 PM
Page 179 of 252
Fuel178
Operation in winter
Winter-grade diesel fuel
A different grade of diesel fuel is available at filling stations in winter than during the summer. Using “summer-grade diesel fuel” at temperatures below 0°C can result in operational problems because the diesel becomes viscous as a result of paraffin separation.
It is therefore the case that EN 590 prescribes diesel fuel class for certain periods of the year which can also be purchased at the corresponding time during the year. “Winter-grade diesel fuel” will still operate properly even at a temperature of -20°C.
It is often the case in countries with different climatic conditions that diesel fuels available have a different temperature characteristic. Škoda Service Partners and filling stations in the country concerned will be able to provide you with informa-tion regarding the diesel fuels available.
Prewarming fuel
The vehicle is fitted with a fuel filter prewarming system. This secures operation of a vehicle using diesel fuel down to an environmental temperature of -25°C.
Caution
It is not permitted to add the various fuel additives on the market, including petrol, to diesel fuel in order to improve its flow properties.
Refuelling
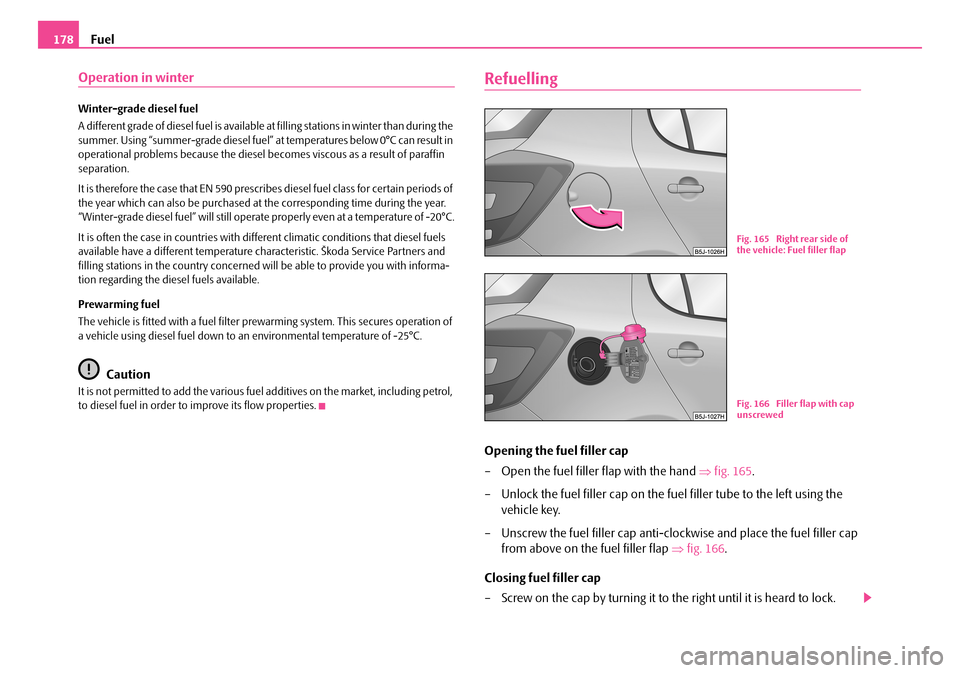
Opening the fuel filler cap
– Open the fuel filler flap with the hand ⇒fig. 165.
– Unlock the fuel filler cap on the fuel filler tube to the left using the
vehicle key.
– Unscrew the fuel filler cap anti-clockwise and place the fuel filler cap
from above on the fuel filler flap ⇒fig. 166.
Closing fuel filler cap
– Screw on the cap by turning it to the right until it is heard to lock.
Fig. 165 Right rear side of the vehicle: Fuel filler flap
Fig. 166 Filler flap with cap unscrewed
NKO A05F 20.book Page 178 Wednesday, April 2, 2008 1:02 PM