Door SKODA FABIA 2009 2.G / 5J Owner's Manual
[x] Cancel search | Manufacturer: SKODA, Model Year: 2009, Model line: FABIA, Model: SKODA FABIA 2009 2.G / 5JPages: 259, PDF Size: 31.99 MB
Page 12 of 259
The brief instruction11
Using the system
Safety
Driving Tips
General Maintenance
Breakdown assistance
Technical Data
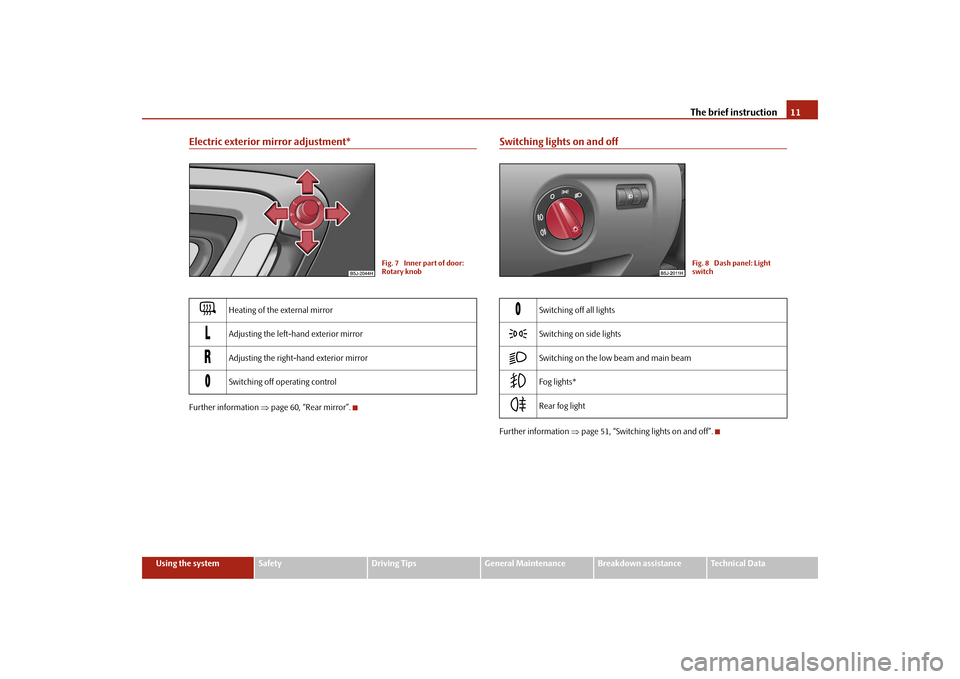
Electric exterior mirror adjustment*Further information ⇒page 60, “Rear mirror”.
Switching lights on and offFurther information ⇒page 51, “Switching lights on and off”.
Heating of the external mirror
Adjusting the left-hand exterior mirror
Adjusting the right-hand exterior mirror
Switching off operating control
Fig. 7 Inner part of door:
Rotary knob
Switching off all lights
Switching on side lights
Switching on the low beam and main beam
Fog lights*
Rear fog light
Fig. 8 Dash panel: Light
switch
s3f4.1.book Page 11 Thursday, June 18, 2009 11:07 AM
Page 13 of 259
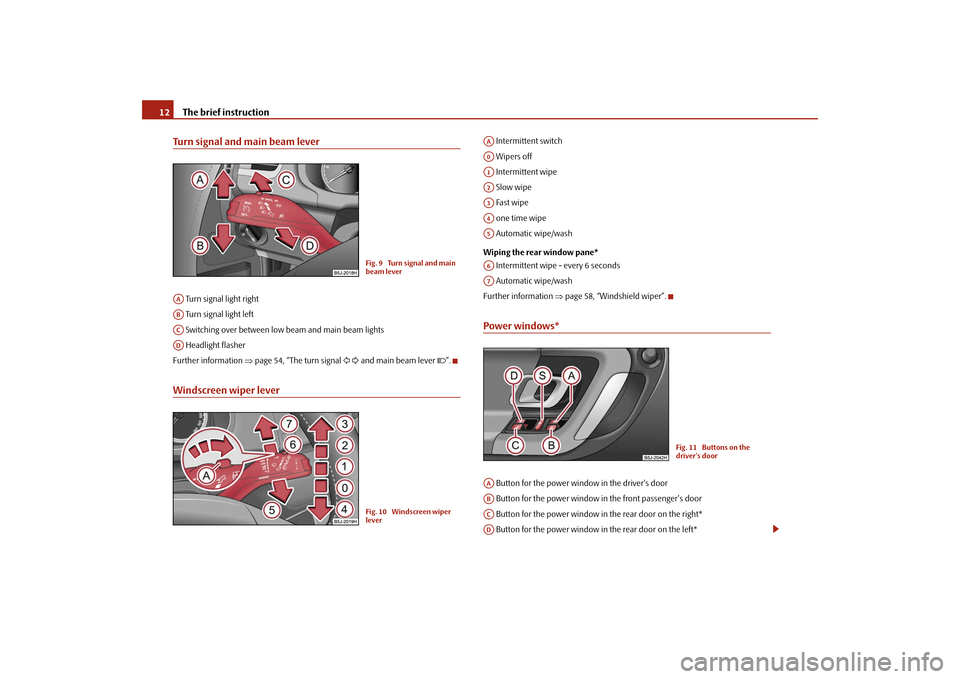
The brief instruction 12Turn signal and main beam lever Turn signal light right
Turn signal light left
Switching over between low beam and main beam lights
Headlight flasher
Further information ⇒page 54, “The turn signal and main beam lever ”.Windscreen wiper lever
Intermittent switch
Wipers off
Intermittent wipe
Slow wipe
Fast wipe
one time wipe
Automatic wipe/wash
Wiping the rear window pane*
Intermittent wipe - every 6 seconds
Automatic wipe/wash
Further information ⇒page 58, “Windshield wiper”.Power windows* Button for the power window in the driver's door
Button for the power window in the front passenger's door
Button for the power window in the rear door on the right*
Button for the power window in the rear door on the left*
Fig. 9 Turn signal and main
beam lever
AAABACAD
Fig. 10 Windscreen wiper
lever
AAA0A1A2A3A4A5A6A7
Fig. 11 Buttons on the
driver's door
AAABACAD
s3f4.1.book Page 12 Thursday, June 18, 2009 11:07 AM
Page 24 of 259
Instruments and Indicator/Warning Lights23
Using the system
Safety
Driving Tips
General Maintenance
Breakdown assistance
Technical Data
Menu
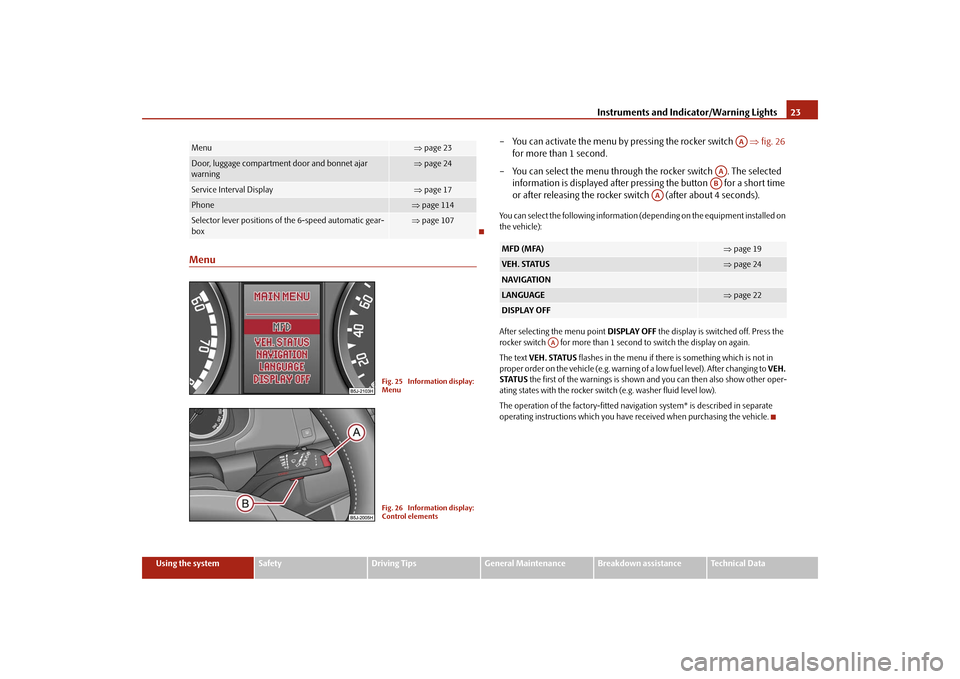
– You can activate the menu by pressing the rocker switch ⇒fig. 26
for more than 1 second.
– You can select the menu through the rocker switch . The selected
information is displayed after pressing the button for a short time
or after releasing the rocker switch (after about 4 seconds).You can select the following information (depending on the equipment installed on
the vehicle):
After selecting the menu point DISPLAY OFF the display is switched off. Press the
rocker switch for more than 1 second to switch the display on again.
The text VEH. STATUS flashes in the menu if there is something which is not in
proper order on the vehicle (e.g. warning of a low fuel level). After changing to VEH.
STATUS the first of the warnings is shown and you can then also show other oper-
ating states with the rocker switch (e.g. washer fluid level low).
The operation of the factory-fitted navigation system* is described in separate
operating instructions which you have received when purchasing the vehicle.
Menu
⇒page 23
Door, luggage compartment door and bonnet ajar
warning
⇒page 24
Service Interval Display
⇒page 17
Phone
⇒page 114
Selector lever positions of the 6-speed automatic gear-
box
⇒page 107
Fig. 25 Information display:
MenuFig. 26 Information display:
Control elements
MFD (MFA)
⇒page 19
VEH. STATUS
⇒page 24
NAVIGATIONLANGUAGE
⇒page 22
DISPLAY OFF
AA
AAAB
AA
AA
s3f4.1.book Page 23 Thursday, June 18, 2009 11:07 AM
Page 25 of 259
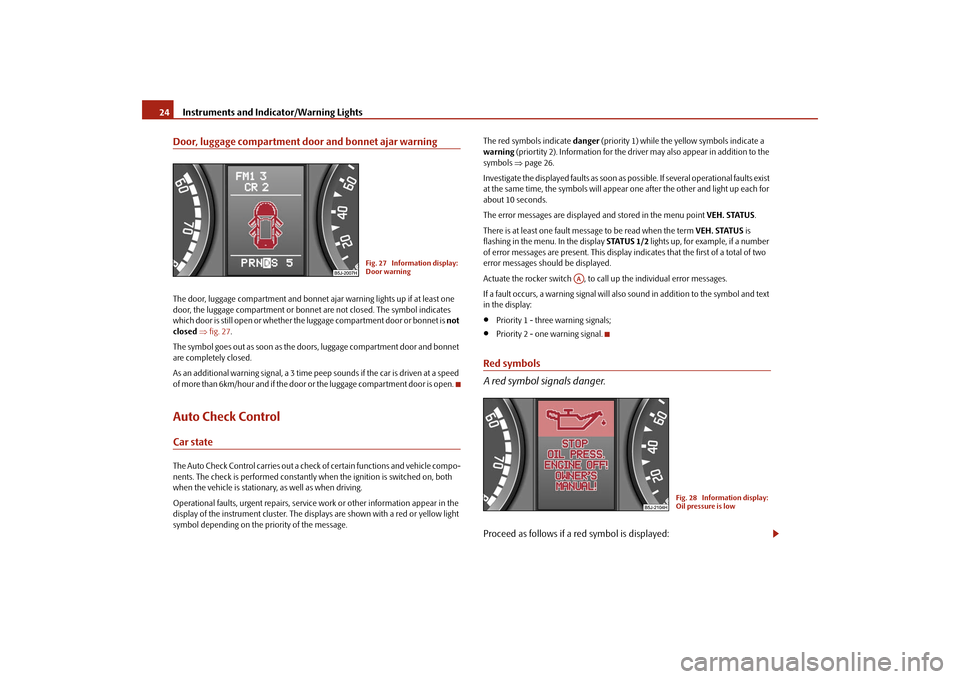
Instruments and Indicator/Warning Lights 24Door, luggage compartment door and bonnet ajar warningThe door, luggage compartment and bonnet ajar warning lights up if at least one
door, the luggage compartment or bonnet are not closed. The symbol indicates
which door is still open or whether the luggage compartment door or bonnet is not
closed ⇒fig. 27.
The symbol goes out as soon as the doors, luggage compartment door and bonnet
are completely closed.
As an additional warning signal, a 3 time peep sounds if the car is driven at a speed
o f m o re t h a n 6 k m /h o u r a n d i f t h e d o o r o r t h e l u g g a g e c o m p a r tm e n t d o o r i s o p e n .Auto Check ControlCar stateThe Auto Check Control carries out a check of certain functions and vehicle compo-
nents. The check is performed constantly when the ignition is switched on, both
when the vehicle is stationary, as well as when driving.
Operational faults, urgent repairs, service work or other information appear in the
display of the instrument cluster. The displays are shown with a red or yellow light
symbol depending on the priority of the message.The red symbols indicate danger (priority 1) while the yellow symbols indicate a
warning (priortity 2). Information for the driver may also appear in addition to the
symbols ⇒page 26.
Investigate the displayed faults as soon as possible. If several operational faults exist
at the same time, the symbols will appear one after the other and light up each for
about 10 seconds.
The error messages are displayed and stored in the menu point VEH. STATUS.
There is at least one fault message to be read when the term VEH. STATUS is
flashing in the menu. In the display STATUS 1/2 lights up, for example, if a number
of error messages are present. This display indicates that the first of a total of two
error messages should be displayed.
Actuate the rocker switch , to call up the individual error messages.
If a fault occurs, a warning signal will also sound in addition to the symbol and text
in the display:
•
Priority 1 - three warning signals;
•
Priority 2 - one warning signal.
Red symbols
A red symbol signals danger.Proceed as follows if a red symbol is displayed:
Fig. 27 Information display:
Door warning
AA
Fig. 28 Information display:
Oil pressure is low
s3f4.1.book Page 24 Thursday, June 18, 2009 11:07 AM
Page 28 of 259
Instruments and Indicator/Warning Lights27
Using the system
Safety
Driving Tips
General Maintenance
Breakdown assistance
Technical Data
WARNING
•
If you do not pay attention to the warning lights coming on and the corre-
sponding descriptions and warning notes, this may result in severe body
injuries or major vehicle damage.
•
The engine compartment of your car is a hazardous area. There is a risk
of injuries, scalding, accidents and fire when working in the engine
compartment, e.g. inspecting and replenishing oil and other fluids. It is also
essential to observe all warnings ⇒page 185.Note
•
Arrangement of the indicator lights depends on the model and model version.
The symbols shown in the following functional description are to be found as indi-
cator lights in the instrument cluster.
•
Operational faults are shown in the instrument cluster as red symbols (priority
1 - danger) or yellow symbols (priority 2 - warning).
Turn signal system
Either the left
or right
indicator light flashes depending on the position of the
turn signal lever.
The indicator light flashes at twice its normal rate if a turn signal light fails. This does
not apply when towing a trailer.
Switching off the hazard warning light system is switched on will cause all of the
turn signal lights as well as both indicator lights to flash.
Further information about the turn signal system ⇒page 54.
Main beam
The indicator light
comes on when the main beam is selected or also when the
headlight flasher is operated.
Further information about the main beam ⇒page 54.
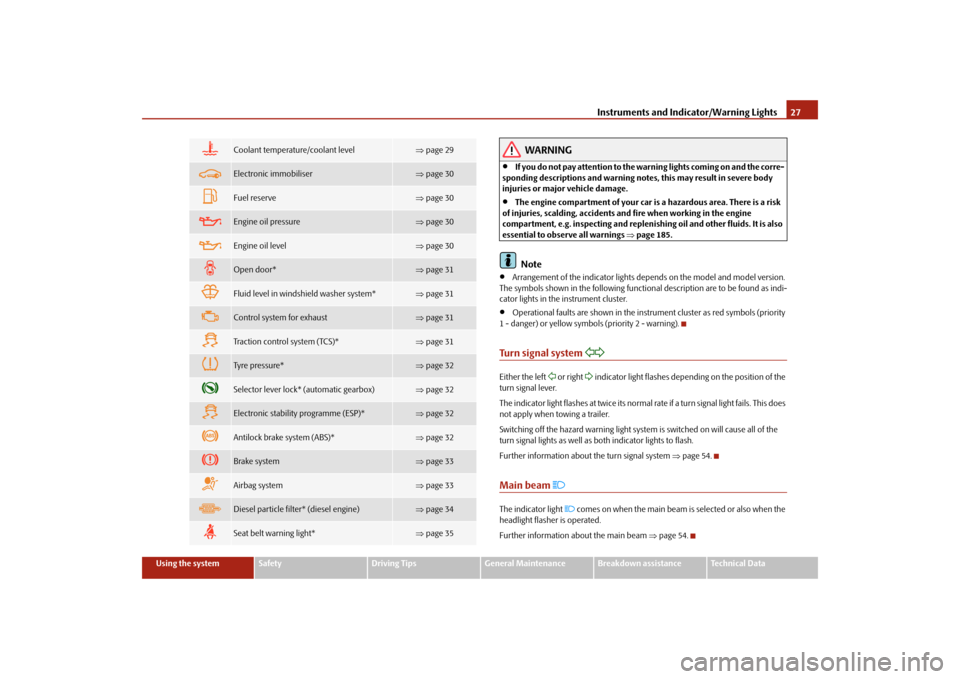
Coolant temperature/coolant level
⇒page 29
Electronic immobiliser
⇒page 30
Fuel reserve
⇒page 30
Engine oil pressure
⇒page 30
Engine oil level
⇒page 30
Open door*
⇒page 31
Fluid level in windshield washer system*
⇒page 31
Control system for exhaust
⇒page 31
Traction control system (TCS)*
⇒page 31
Tyre pressure*
⇒page 32
Selector lever lock* (automatic gearbox)
⇒page 32
Electronic stability programme (ESP)*
⇒page 32
Antilock brake system (ABS)*
⇒page 32
Brake system
⇒page 33
Airbag system
⇒page 33
Diesel particle filter* (diesel engine)
⇒page 34
Seat belt warning light*
⇒page 35
s3f4.1.book Page 27 Thursday, June 18, 2009 11:07 AM
Page 32 of 259
Instruments and Indicator/Warning Lights31
Using the system
Safety
Driving Tips
General Maintenance
Breakdown assistance
Technical Data The warning light
flashes yellow* (engine oil level sensor faulty)
A fault on the engine oil level sensor is indicated additionally by an audible signal
and the warning light coming on several times after the ignition has been switched
on.
In this case have the engine inspected without delay by a specialist garage.
The following text will be displayed in the information display*:
OIL SENSOR WORKSHOP!
WARNING
•
If you must stop for technical reasons, then park the vehicle at a safe
distance from the traffic and switch off the engine and switch on the hazard
warning light system ⇒page 54.
•
The red oil pressure light
is not an oil level indicator! One should
therefore check the oil level at regular intervals, preferably after every refu-
eling stop.
•
Pay attention to the following instructions ⇒page 185, “Working in the
engine compartment” before checking the coolant fluid level and opening
the bonnet.
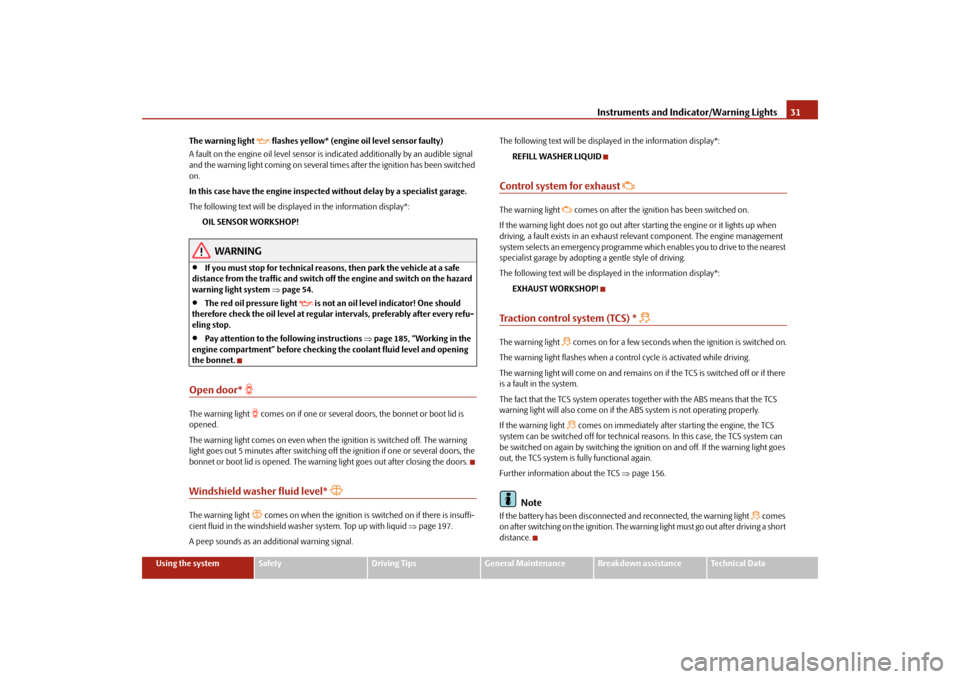
Open door*
The warning light
comes on if one or several doors, the bonnet or boot lid is
opened.
The warning light comes on even when the ignition is switched off. The warning
light goes out 5 minutes after switching off the ignition if one or several doors, the
bonnet or boot lid is opened. The warning light goes out after closing the doors.
Windshield washer fluid level*
The warning light
comes on when the ignition is switched on if there is insuffi-
cient fluid in the windshield washer system. Top up with liquid ⇒page 197.
A peep sounds as an additional warning signal.The following text will be displayed in the information display*:
REFILL WASHER LIQUID
Control system for exhaust
The warning light
comes on after the ignition has been switched on.
If the warning light does not go out after starting the engine or it lights up when
driving, a fault exists in an exhaust relevant component. The engine management
system selects an emergency programme which enables you to drive to the nearest
specialist garage by adopting a gentle style of driving.
The following text will be displayed in the information display*:
EXHAUST WORKSHOP!
Traction control system (TCS) *
The warning light
comes on for a few seconds when the ignition is switched on.
The warning light flashes when a control cycle is activated while driving.
The warning light will come on and remains on if the TCS is switched off or if there
is a fault in the system.
The fact that the TCS system operates together with the ABS means that the TCS
warning light will also come on if the ABS system is not operating properly.
If the warning light comes on immediately after starting the engine, the TCS
system can be switched off for technical reasons. In this case, the TCS system can
be switched on again by switching the ignition on and off. If the warning light goes
out, the TCS system is fully functional again.
Further information about the TCS ⇒page 156.
Note
If the battery has been disconnected and reconnected, the warning light
comes
on after switching on the ignition. The warning light must go out after driving a short
distance.
s3f4.1.book Page 31 Thursday, June 18, 2009 11:07 AM
Page 39 of 259
Unlocking and locking 38LockingValid for vehicles without a central locking system:
Locking from outside
The securing knob will move upwards or downwards in the door when unlocking
or locking.
Locking from inside
All closed vehicle doors are locked by pressing in the securing knobs from the
inside. The doors cannot be opened from the outside when the securing knobs
have been pressed in. The vehicle doors can be opened from the inside as follows:•
the door is unlocked by actuating the door-opening lever;
•
The door opens upon actuating the door-opening lever again.Note
•
The opened door cannot be locked with the securing knob. This prevents the
possibility of forgetting the key in the locked vehicle.
•
The opened side doors at the rear and the front passenger door are locked by
pressing in the securing knob and slamming the door closed.
•
Please refer to the safety guidelines ⇒ in “Description” on page 39.
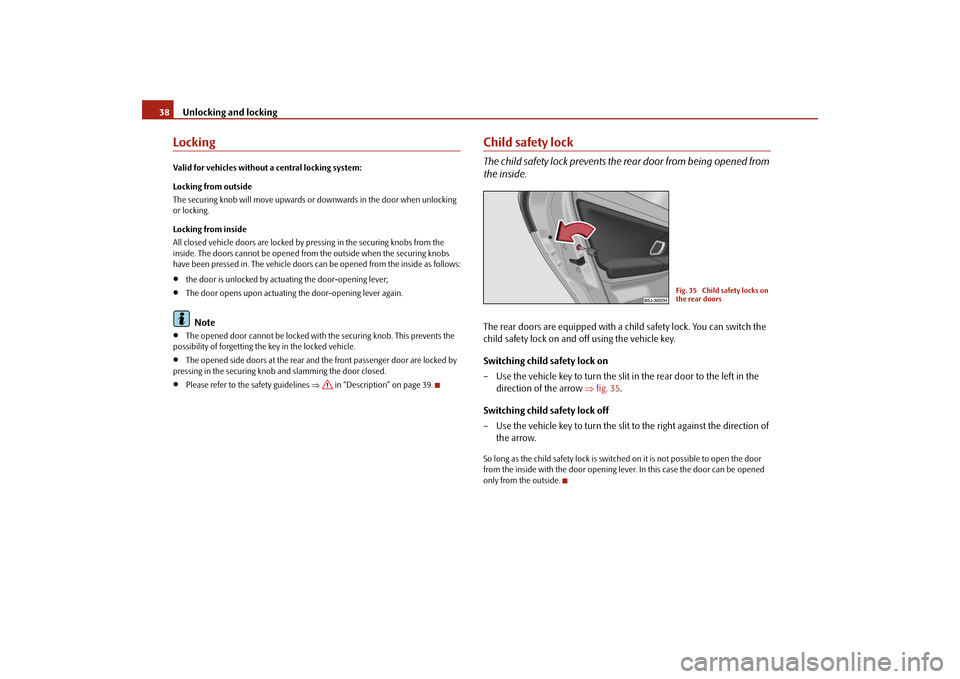
Child safety lockThe child safety lock prevents the rear door from being opened from
the inside.The rear doors are equipped with a child safety lock. You can switch the
child safety lock on and off using the vehicle key.
Switching child safety lock on
– Use the vehicle key to turn the slit in the rear door to the left in the
direction of the arrow ⇒fig. 35.
Switching child safety lock off
– Use the vehicle key to turn the slit to the right against the direction of
the arrow.So long as the child safety lock is switched on it is not possible to open the door
from the inside with the door opening lever. In this case the door can be opened
only from the outside.
Fig. 35 Child safety locks on
the rear doors
s3f4.1.book Page 38 Thursday, June 18, 2009 11:07 AM
Page 40 of 259
Unlocking and locking39
Using the system
Safety
Driving Tips
General Maintenance
Breakdown assistance
Technical Data
Central locking system*DescriptionUnlocking or locking the vehicle causes all doors to be unlocked or locked at the
same time by the central locking system. The boot lid is unlocked when opening. It
can be opened by pressing the hand grip above the licence plate.
Operation of the central locking system is possible:•
from the outside using the vehicle key ⇒page 40;
•
using the buttons for the central locking system ⇒page 41;
•
by using the remote control ⇒page 43.
Indicator light in the driver's door on vehicles without anti-theft alarm system
After the car is locked, the indicator light flashes after 2 seconds.
After the car is locked with the deactivated safe securing system, the indicator light
flashes only after 30 seconds.
Indicator light in the driver's door on vehicles with anti-theft alarm system
After locking the vehicle the indicator light flashes for 2 seconds fast, then more
slowly.
If the vehicle is locked and the safe securing system ⇒page 40 is not operating, the
indicator light in the driver door flashes for about 2 seconds fast, goes out and starts
to flash slowly after about 30 seconds.
If the indicator light first of all flashes fast for about 2 seconds, afterwards lights up
for about 30 seconds and then flashes slowly, there is a fault in the system of the
central locking or the interior monitor* ⇒page 46. Visit a specialist garage to
obtain assistance.
Convenience operation of windows
One can open and close the electrically powered windows when unlocking and
locking the vehicle ⇒page 48.Opening a single door*
This function makes it possible to only unlock the driver's door. The other doors
remain locked and are only unlocked when the command is repeated. The single
door opening function can be first activated by recoding the control unit of the
central locking system. This work is undertaken by a specialist garage which can
give you more information.
Automatic locking*
All the doors and the boot lid are locked automatically once the car reaches a speed
of about 15 km/h.
If the ignition key is withdrawn, the car is then automatically unlocked again. In
addition, it is possible for the driver to unlock the car by pressing the central locking
button
or by pulling the door opening lever.
If you wish, your Škoda Dealer can activate the function of the automatic locking
mode.WARNING
•
Locking the doors prevents involuntary opening in an exceptional situa-
tion (an accident). Locked doors prevent unwanted entry into the vehicle
from outside, for example at road crossings. Locked doors do, however,
make it more difficult for rescuers to get into the vehicle in an emergency -
danger to life!Note
•
In the event of an accident in which the airbags are deployed, the locked doors
are automatically unlocked in order to enable rescuers to gain access to the vehicle.
•
Only the front doors which are fitted with a locking cylinder can be unlocked
and locked using the key if the central locking system fails. You can operate the rear
doors manually.
−Emergency locking of the door ⇒page 42.
s3f4.1.book Page 39 Thursday, June 18, 2009 11:07 AM
Page 41 of 259
Unlocking and locking 40Safe securingThe central locking system is equipped with a safe securing
3) system. Locking the
vehicle from the outside causes the door locks to be automatically blocked. The
indicator light in the driver's door flashes. It is not possible to open the doors with
the door handle either from the inside or from the outside. This acts as an effective
deterrent for attempts to break into your vehicle.
You can deactivate the safe securing system. This is done by locking the vehicle with
the key or remote control key twice within 2 seconds.
The safe securing system is again activated the next time the vehicle is unlocked and
locked again.
The doors can be opened from the inside if the vehicle is locked and the safe
securing system is deactivated:
•
the door is unlocked by actuating the door-opening lever;
•
The door opens upon actuating the door-opening lever again.
WARNING
If the vehicle is locked from the outside and the safe securing system is acti-
vated, there must not be any person and animals in the vehicle as it is then
not possible to open either a door or a window from the inside. The locked
doors make it more difficult for rescuers to get into the vehicle in an emer-
gency - hazard!
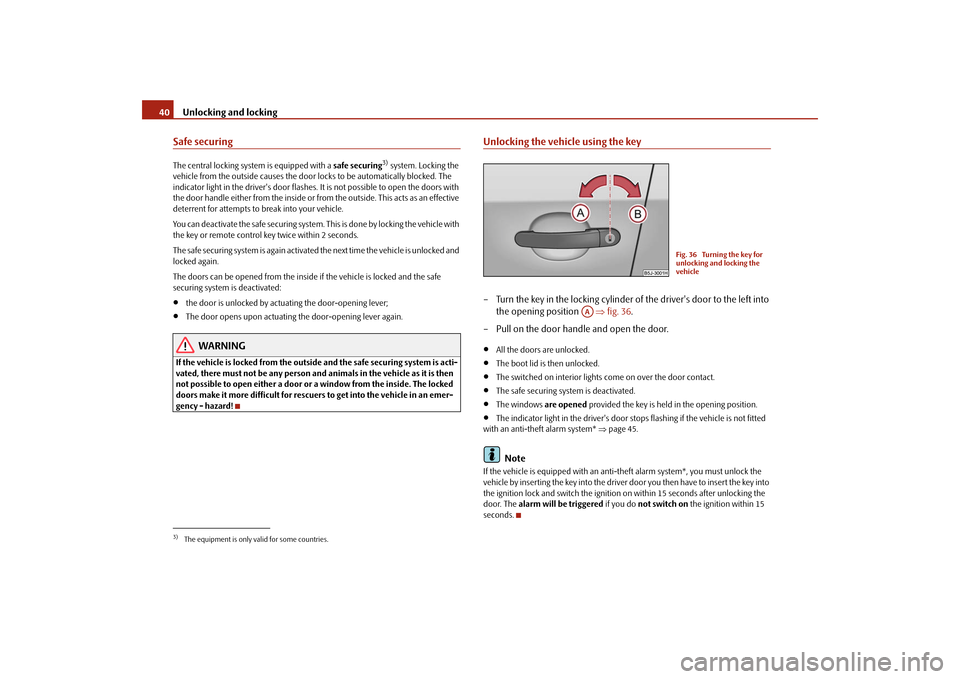
Unlocking the vehicle using the key– Turn the key in the locking cylinder of the driver's door to the left into
the opening position ⇒fig. 36.
– Pull on the door handle and open the door.•
All the doors are unlocked.
•
The boot lid is then unlocked.
•
The switched on interior lights come on over the door contact.
•
The safe securing system is deactivated.
•
The windows are opened provided the key is held in the opening position.
•
The indicator light in the driver's door stops flashing if the vehicle is not fitted
with an anti-theft alarm system* ⇒page 45.Note
If the vehicle is equipped with an anti-theft alarm system*, you must unlock the
vehicle by inserting the key into the driver door you then have to insert the key into
the ignition lock and switch the ignition on within 15 seconds after unlocking the
door. The alarm will be triggered if you do not switch on the ignition within 15
seconds.
3)The equipment is only valid for some countries.
Fig. 36 Turning the key for
unlocking and locking the
vehicle
AA
s3f4.1.book Page 40 Thursday, June 18, 2009 11:07 AM
Page 42 of 259
Unlocking and locking41
Using the system
Safety
Driving Tips
General Maintenance
Breakdown assistance
Technical Data
Locking the vehicle with the key– Turn the key in the locking cylinder of the driver's door to the right into
the closing position ⇒page 40, fig. 36.•
All the doors and the boot lid are locked.
•
The switched on interior lights go out over the door contact.
•
The windows and the electric sliding/tilting roof* are closed provided the key is
held in the lock position.
•
The safe securing system is activated immediately.
•
The indicator light in the driver door begins flashing.Note
The opened front doors cannot be unlocked. It must be locked separately after
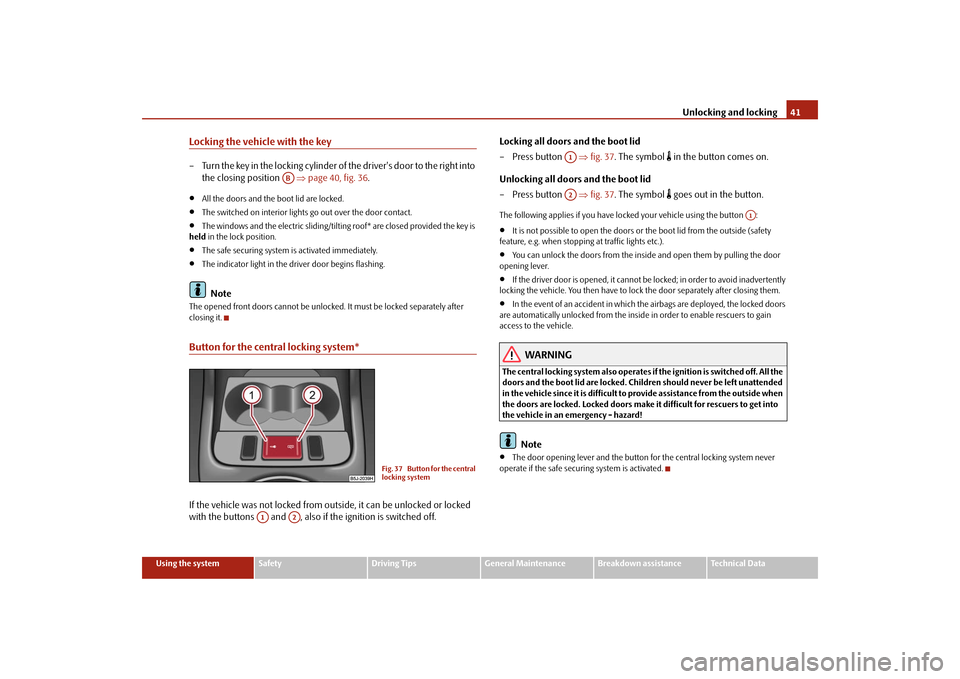
closing it.Button for the central locking system*If the vehicle was not locked from outside, it can be unlocked or locked
with the buttons and , also if the ignition is switched off.Locking all doors and the boot lid
–Press button ⇒fig. 37. The symbol
in the button comes on.
Unlocking all doors and the boot lid
–Press button ⇒fig. 37. The symbol goes out in the button.
The following applies if you have locked your vehicle using the button :•
It is not possible to open the doors or the boot lid from the outside (safety
feature, e.g. when stopping at traffic lights etc.).
•
You can unlock the doors from the inside and open them by pulling the door
opening lever.
•
If the driver door is opened, it cannot be locked; in order to avoid inadvertently
locking the vehicle. You then have to lock the door separately after closing them.
•
In the event of an accident in which the airbags are deployed, the locked doors
are automatically unlocked from the inside in order to enable rescuers to gain
access to the vehicle.
WARNING
The central locking system also operates if the ignition is switched off. All the
doors and the boot lid are locked. Children should never be left unattended
in the vehicle since it is difficult to provide assistance from the outside when
the doors are locked. Locked doors make it difficult for rescuers to get into
the vehicle in an emergency - hazard!
Note
•
The door opening lever and the button for the central locking system never
operate if the safe securing system is activated.
AB
Fig. 37 Button for the central
locking system
A1
A2
A1A2
A1
s3f4.1.book Page 41 Thursday, June 18, 2009 11:07 AM