airbag off SKODA FABIA 2009 2.G / 5J Owner's Manual
[x] Cancel search | Manufacturer: SKODA, Model Year: 2009, Model line: FABIA, Model: SKODA FABIA 2009 2.G / 5JPages: 259, PDF Size: 31.99 MB
Page 9 of 259
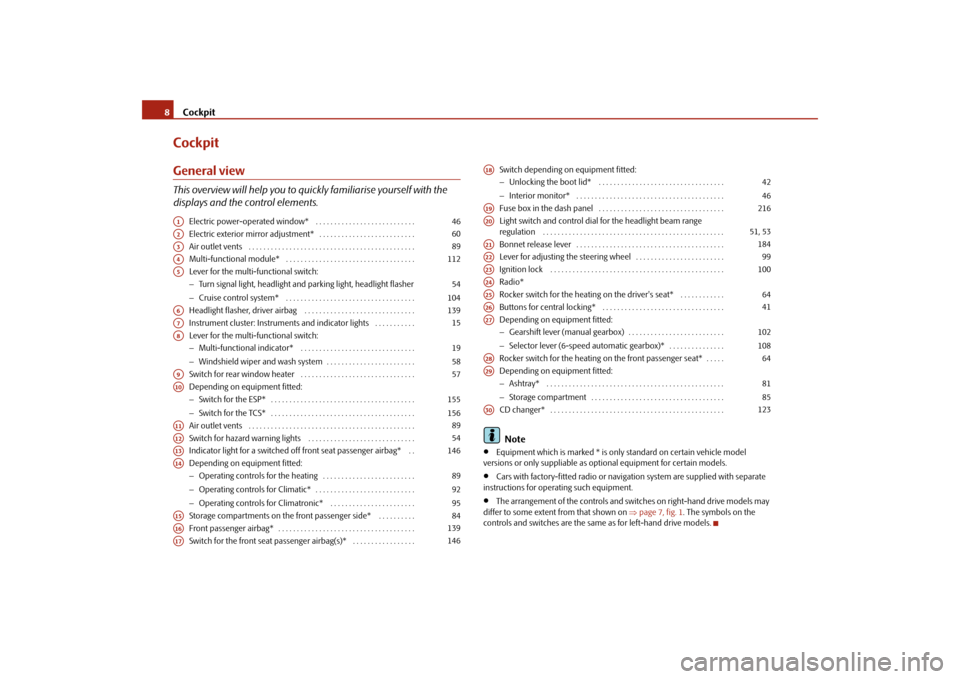
Cockpit 8CockpitGeneral viewThis overview will help you to quickly familiarise yourself with the
displays and the control elements.
Electric power-operated window* . . . . . . . . . . . . . . . . . . . . . . . . . . .
Electric exterior mirror adjustment* . . . . . . . . . . . . . . . . . . . . . . . . . .
Air outlet vents . . . . . . . . . . . . . . . . . . . . . . . . . . . . . . . . . . . . . . . . . . . . .
Multi-functional module* . . . . . . . . . . . . . . . . . . . . . . . . . . . . . . . . . . .
Lever for the multi-functional switch:
−Turn signal light, headlight and parking light, headlight flasher
−Cruise control system* . . . . . . . . . . . . . . . . . . . . . . . . . . . . . . . . . . .
Headlight flasher, driver airbag . . . . . . . . . . . . . . . . . . . . . . . . . . . . . .
Instrument cluster: Instruments and indicator lights . . . . . . . . . . .
Lever for the multi-functional switch:
−Multi-functional indicator* . . . . . . . . . . . . . . . . . . . . . . . . . . . . . . .
−Windshield wiper and wash system . . . . . . . . . . . . . . . . . . . . . . . .
Switch for rear window heater . . . . . . . . . . . . . . . . . . . . . . . . . . . . . . .
Depending on equipment fitted:
−Switch for the ESP* . . . . . . . . . . . . . . . . . . . . . . . . . . . . . . . . . . . . . . .
−Switch for the TCS* . . . . . . . . . . . . . . . . . . . . . . . . . . . . . . . . . . . . . . .
Air outlet vents . . . . . . . . . . . . . . . . . . . . . . . . . . . . . . . . . . . . . . . . . . . . .
Switch for hazard warning lights . . . . . . . . . . . . . . . . . . . . . . . . . . . . .
Indicator light for a switched off front seat passenger airbag* . .
Depending on equipment fitted:
−Operating controls for the heating . . . . . . . . . . . . . . . . . . . . . . . . .
−Operating controls for Climatic* . . . . . . . . . . . . . . . . . . . . . . . . . . .
−Operating controls for Climatronic* . . . . . . . . . . . . . . . . . . . . . . .
Storage compartments on the front passenger side* . . . . . . . . . .
Front passenger airbag* . . . . . . . . . . . . . . . . . . . . . . . . . . . . . . . . . . . . .
Switch for the front seat passenger airbag(s)* . . . . . . . . . . . . . . . . .Switch depending on equipment fitted:
−Unlocking the boot lid* . . . . . . . . . . . . . . . . . . . . . . . . . . . . . . . . . .
−Interior monitor* . . . . . . . . . . . . . . . . . . . . . . . . . . . . . . . . . . . . . . . .
Fuse box in the dash panel . . . . . . . . . . . . . . . . . . . . . . . . . . . . . . . . . .
Light switch and control dial for the headlight beam range
regulation . . . . . . . . . . . . . . . . . . . . . . . . . . . . . . . . . . . . . . . . . . . . . . . . .
Bonnet release lever . . . . . . . . . . . . . . . . . . . . . . . . . . . . . . . . . . . . . . . .
Lever for adjusting the steering wheel . . . . . . . . . . . . . . . . . . . . . . . .
Ignition lock . . . . . . . . . . . . . . . . . . . . . . . . . . . . . . . . . . . . . . . . . . . . . . .
Radio*
Rocker switch for the heating on the driver's seat* . . . . . . . . . . . .
Buttons for central locking* . . . . . . . . . . . . . . . . . . . . . . . . . . . . . . . . .
Depending on equipment fitted:
−Gearshift lever (manual gearbox) . . . . . . . . . . . . . . . . . . . . . . . . . .
−Selector lever (6-speed automatic gearbox)* . . . . . . . . . . . . . . .
Rocker switch for the heating on the front passenger seat* . . . . .
Depending on equipment fitted:
−Ashtray* . . . . . . . . . . . . . . . . . . . . . . . . . . . . . . . . . . . . . . . . . . . . . . . .
−Storage compartment . . . . . . . . . . . . . . . . . . . . . . . . . . . . . . . . . . . .
CD changer* . . . . . . . . . . . . . . . . . . . . . . . . . . . . . . . . . . . . . . . . . . . . . . .
Note
•
Equipment which is marked * is only standard on certain vehicle model
versions or only suppliable as optional equipment for certain models.
•
Cars with factory-fitted radio or navigation system are supplied with separate
instructions for operating such equipment.
•
The arrangement of the controls and switches on right-hand drive models may
differ to some extent from that shown on ⇒page 7, fig. 1. The symbols on the
controls and switches are the same as for left-hand drive models.
A1
46
A2
60
A3
89
A4
112
A5
54
104
A6
139
A7
15
A8
19
58
A9
57
A10
155
156
A11
89
A12
54
A13
146
A14
89
92
95
A15
84
A16
139
A17
146
A18
42
46
A19
216
A20
51, 53
A21
184
A22
99
A23
100
A24A25
64
A26
41
A27
102
108
A28
64
A29
81
85
A30
123
s3f4.1.book Page 8 Thursday, June 18, 2009 11:07 AM
Page 28 of 259
Instruments and Indicator/Warning Lights27
Using the system
Safety
Driving Tips
General Maintenance
Breakdown assistance
Technical Data
WARNING
•
If you do not pay attention to the warning lights coming on and the corre-
sponding descriptions and warning notes, this may result in severe body
injuries or major vehicle damage.
•
The engine compartment of your car is a hazardous area. There is a risk
of injuries, scalding, accidents and fire when working in the engine
compartment, e.g. inspecting and replenishing oil and other fluids. It is also
essential to observe all warnings ⇒page 185.Note
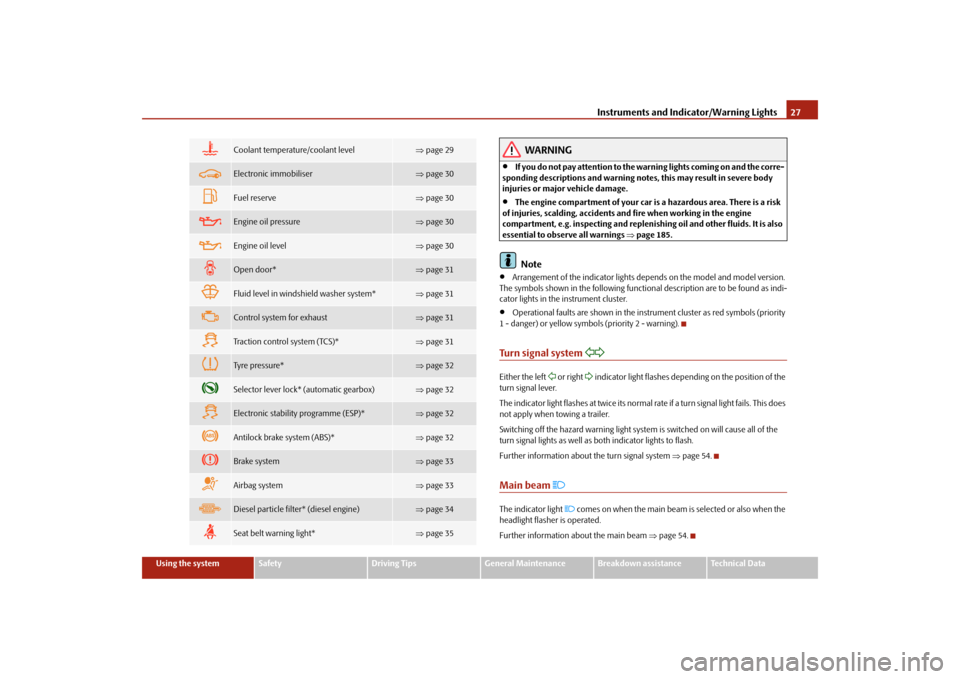
•
Arrangement of the indicator lights depends on the model and model version.
The symbols shown in the following functional description are to be found as indi-
cator lights in the instrument cluster.
•
Operational faults are shown in the instrument cluster as red symbols (priority
1 - danger) or yellow symbols (priority 2 - warning).
Turn signal system
Either the left
or right
indicator light flashes depending on the position of the
turn signal lever.
The indicator light flashes at twice its normal rate if a turn signal light fails. This does
not apply when towing a trailer.
Switching off the hazard warning light system is switched on will cause all of the
turn signal lights as well as both indicator lights to flash.
Further information about the turn signal system ⇒page 54.
Main beam
The indicator light
comes on when the main beam is selected or also when the
headlight flasher is operated.
Further information about the main beam ⇒page 54.
Coolant temperature/coolant level
⇒page 29
Electronic immobiliser
⇒page 30
Fuel reserve
⇒page 30
Engine oil pressure
⇒page 30
Engine oil level
⇒page 30
Open door*
⇒page 31
Fluid level in windshield washer system*
⇒page 31
Control system for exhaust
⇒page 31
Traction control system (TCS)*
⇒page 31
Tyre pressure*
⇒page 32
Selector lever lock* (automatic gearbox)
⇒page 32
Electronic stability programme (ESP)*
⇒page 32
Antilock brake system (ABS)*
⇒page 32
Brake system
⇒page 33
Airbag system
⇒page 33
Diesel particle filter* (diesel engine)
⇒page 34
Seat belt warning light*
⇒page 35
s3f4.1.book Page 27 Thursday, June 18, 2009 11:07 AM
Page 35 of 259
Instruments and Indicator/Warning Lights 34There is a fault in the system if the warning light does not go out or comes on or
flashes while driving ⇒. This also applies if the warning light does not come on
after the ignition is switched on.
The following text will be displayed in the information display*:
AIRBAG FAULT
The functionality of the airbag system is also monitored electronically when one
airbag has been switched off.
The passenger front airbag and also possibly the passenger side airbag which
have been switched off using the diagnostic equipment:•
The warning light
lights up for 3 seconds after switching on the ignition and
then flashes for 12 seconds afterwards in 2 second intervals.
The passenger front airbag and also possibly the passenger side airbag which
have been switched off using the switch (for switching off airbags)* in the end
face of the dash panel on the front passenger side:
•
the warning light
comes on for 3 seconds after the ignition has been
switched on;
•
switching off the airbag is indicated in the middle of the dash panel by the
lighting up of the indicator light
(airbag switched off) ⇒page 146.
WARNING
Have the airbag system checked immediately by a specialist garage if a fault
exists. Otherwise, there is a risk of the airbag not being activated in the event
of an accident.
Note
Further information about switching off airbags ⇒page 145, “Deactivating
airbags”.
Diesel particle filter*
(diesel engine)
If the warning light
comes on, this means that soot has accumulated in the
diesel particle filter because of the frequent short distances.
In order to clean the diesel particle filter, the vehicle should be driven at an even
speed of at least 60 km/h at engine speeds of 1 800 - 2 500 rpm for 15 minutes with
the 4th or 5th gear engaged (automatic gearbox: position S) when the traffic situa-
tion permits it.
Always pay attention to the valid speed limits ⇒.
The warning light
goes out after the successful cleaning of the diesel particle
filter.
If the filter is not properly cleaned, the warning light
does not go out and the
warning light
begins to flash. Im In the information display* is shown ENGINE
FAULT WORKSHOP!. Afterwards the engine control unit shifts the engine into the
emergency mode, which only has a reduced power output. After switching the igni-
tion off and on again the warning light
comes on.
Have the vehicle inspected without delay by your specialist garage.
WARNING
•
If you do not pay attention to the warning light coming on and the corre-
sponding descriptions and warning notes, this may result in injuries or
major vehicle damage.
•
Always adjust your speed to suit weather, road, region and traffic condi-
tions. The route indicated by the warning light must not tempt you to disre-
gard the national regulations for road traffic.Caution
•
As long as the warning light
lights up, one must take into account an
increased fuel consumption and in certain circumstances a power reduction of the
engine.
s3f4.1.book Page 34 Thursday, June 18, 2009 11:07 AM
Page 42 of 259
Unlocking and locking41
Using the system
Safety
Driving Tips
General Maintenance
Breakdown assistance
Technical Data
Locking the vehicle with the key– Turn the key in the locking cylinder of the driver's door to the right into
the closing position ⇒page 40, fig. 36.•
All the doors and the boot lid are locked.
•
The switched on interior lights go out over the door contact.
•
The windows and the electric sliding/tilting roof* are closed provided the key is
held in the lock position.
•
The safe securing system is activated immediately.
•
The indicator light in the driver door begins flashing.Note
The opened front doors cannot be unlocked. It must be locked separately after
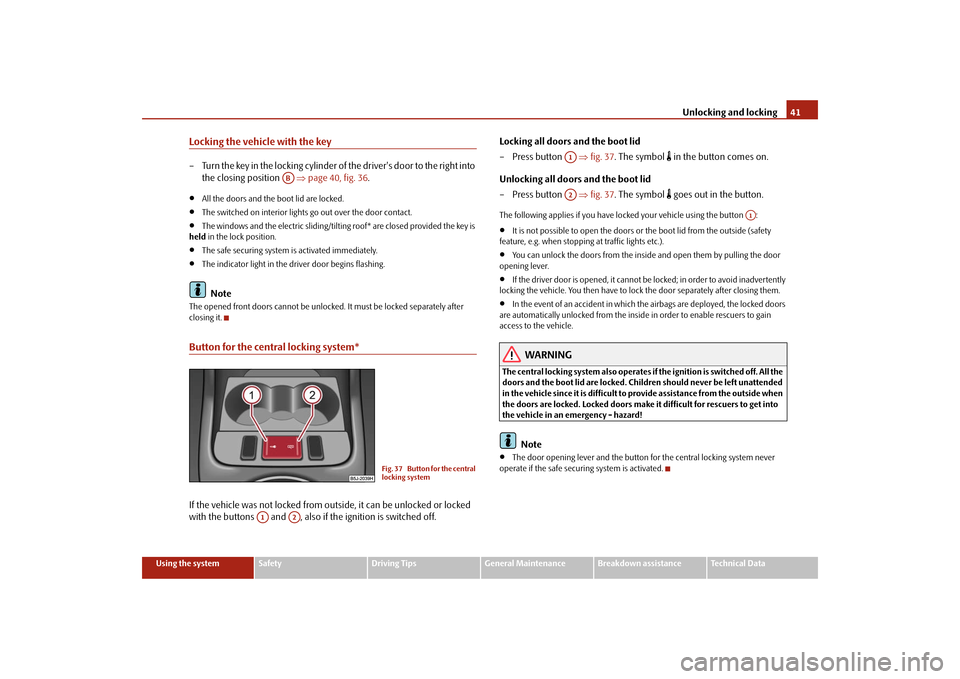
closing it.Button for the central locking system*If the vehicle was not locked from outside, it can be unlocked or locked
with the buttons and , also if the ignition is switched off.Locking all doors and the boot lid
–Press button ⇒fig. 37. The symbol
in the button comes on.
Unlocking all doors and the boot lid
–Press button ⇒fig. 37. The symbol goes out in the button.
The following applies if you have locked your vehicle using the button :•
It is not possible to open the doors or the boot lid from the outside (safety
feature, e.g. when stopping at traffic lights etc.).
•
You can unlock the doors from the inside and open them by pulling the door
opening lever.
•
If the driver door is opened, it cannot be locked; in order to avoid inadvertently
locking the vehicle. You then have to lock the door separately after closing them.
•
In the event of an accident in which the airbags are deployed, the locked doors
are automatically unlocked from the inside in order to enable rescuers to gain
access to the vehicle.
WARNING
The central locking system also operates if the ignition is switched off. All the
doors and the boot lid are locked. Children should never be left unattended
in the vehicle since it is difficult to provide assistance from the outside when
the doors are locked. Locked doors make it difficult for rescuers to get into
the vehicle in an emergency - hazard!
Note
•
The door opening lever and the button for the central locking system never
operate if the safe securing system is activated.
AB
Fig. 37 Button for the central
locking system
A1
A2
A1A2
A1
s3f4.1.book Page 41 Thursday, June 18, 2009 11:07 AM
Page 59 of 259
Lights and Visibility 58
WARNING
The sun visors must not be swivelled to the side windows into the deploy-
ment area of the head airbags if any objects, such as ball-point pens etc. are
attached to them. This might result in injuries to the occupants if the head
airbag is deployed.Windshield wiper and wash systemWindshield wiper
You can operate the windscreen wipers and automatic wipe/wash
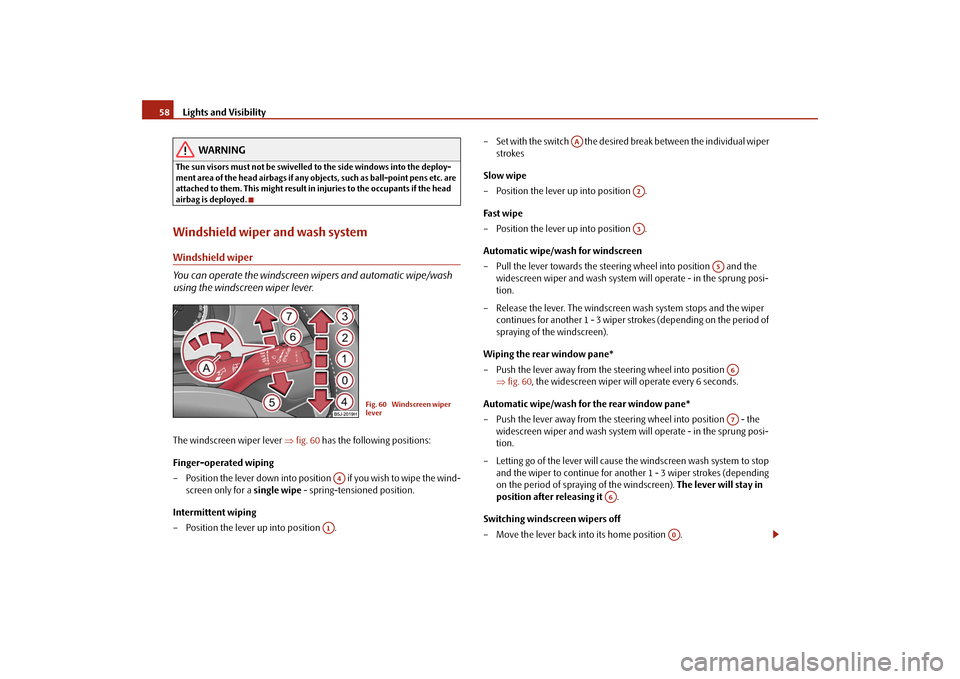
using the windscreen wiper lever.The windscreen wiper lever ⇒fig. 60 has the following positions:
Finger-operated wiping
– Position the lever down into position if you wish to wipe the wind-
screen only for a single wipe - spring-tensioned position.
Intermittent wiping
– Position the lever up into position .– Set with the switch the desired break between the individual wiper
strokes
Slow wipe
– Position the lever up into position .
Fast wipe
– Position the lever up into position .
Automatic wipe/wash for windscreen
– Pull the lever towards the steering wheel into position and the
widescreen wiper and wash system will operate - in the sprung posi-
tion.
– Release the lever. The windscreen wash system stops and the wiper
continues for another 1 - 3 wiper strokes (depending on the period of
spraying of the windscreen).
Wiping the rear window pane*
– Push the lever away from the steering wheel into position
⇒fig. 60, the widescreen wiper will operate every 6 seconds.
Automatic wipe/wash for the rear window pane*
– Push the lever away from the steering wheel into position - the
widescreen wiper and wash system will operate - in the sprung posi-
tion.
– Letting go of the lever will cause the windscreen wash system to stop
and the wiper to continue for another 1 - 3 wiper strokes (depending
on the period of spraying of the windscreen). The lever will stay in
position after releasing it .
Switching windscreen wipers off
– Move the lever back into its home position .
Fig. 60 Windscreen wiper
lever
A4
A1
AA
A2A3
A5A6A7
A6
A0
s3f4.1.book Page 58 Thursday, June 18, 2009 11:07 AM
Page 63 of 259
Seats and Storage 62Seats and StorageFront seatsBasic informationThe front seats have a wide range of different settings and can thus be matched to
the physical characteristics of the driver and front passenger. Correct adjustment of
the seats is particularly important for:•
safely and quickly reaching the controls;
•
a relaxed, fatigue-free body position;
•
achieving the maximum protection offered by the seat belts and the airbag
system.
The chapters which follow describe the procedure which you should adopt for
adjusting the seats.
WARNING
•
Never transport more occupants than the maximum seating in the
vehicle.
•
Each occupant must correctly fasten the seat belt belonging to the seat.
Children must be fastened ⇒page 147, “Transporting children safely” with
a suitable restraint system.
•
The front seats and the head restraints must always be adjusted to match
the body size of the seat occupant as well as the seat belts must always be
correctly fastened in order to provide an optimal protection for you and your
occupants.
•
Always keep your feet in the footwell when the vehicle is being driven -
never place your feet on the instrument panel, out of the window or on the
surfaces of the seats. This is particularly important for the front seat
passenger. You will be exposed to increased risk of injury if it becomes
necessary to apply the brake or in the event of an accident. If an airbag is
deployed, you may suffer fatal injuries when adopting an incorrect seated
position!
•
It is important for the driver and front passenger to maintain a distance
of at least 25 cm from the steering wheel or dash panel. Not maintaining this
minimum distance will mean that the airbag system will not be able to prop-
erly protect you - hazard! The front seats and the head restraints must
always also be correctly adjusted to match the body size of the occupant.
•
Ensure that there are no objects in the footwell as any objects may get
behind the pedals during a driving or braking manoeuvre. You would then
no longer be able to operate the clutch, to brake or accelerate.
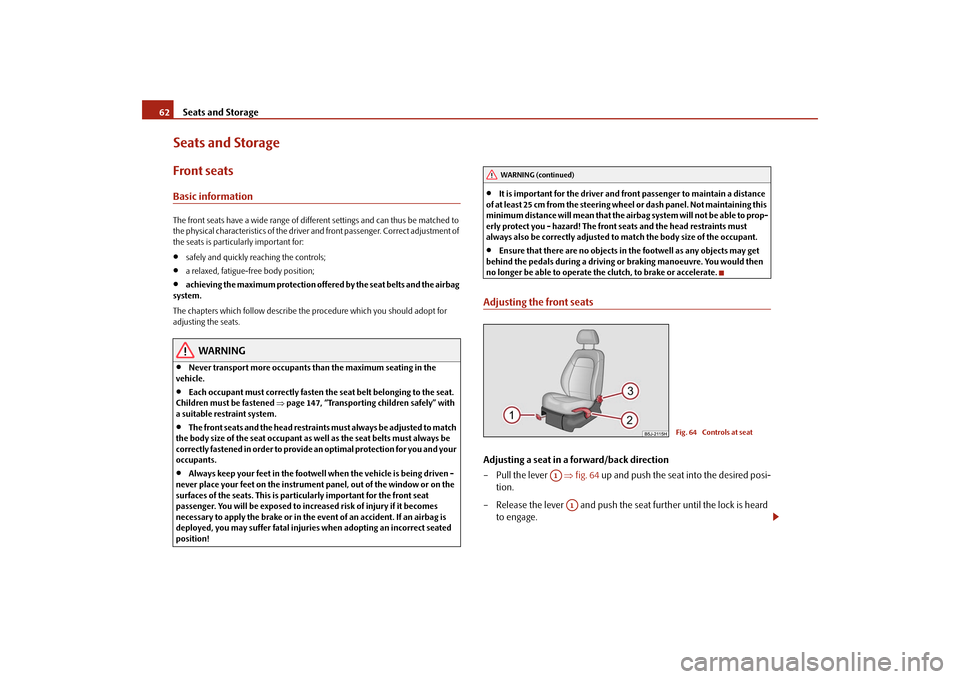
Adjusting the front seatsAdjusting a seat in a forward/back direction
– Pull the lever ⇒fig. 64 up and push the seat into the desired posi-
tion.
– Release the lever and push the seat further until the lock is heard
to engage.
WARNING (continued)
Fig. 64 Controls at seat
A1
A1
s3f4.1.book Page 62 Thursday, June 18, 2009 11:07 AM
Page 68 of 259
Seats and Storage67
Using the system
Safety
Driving Tips
General Maintenance
Breakdown assistance
Technical Data
PedalsYou should use only footmats which do not obstruct the movement of the pedals
and have an anti-slip protection.
We recommend only to use footmats from Škoda genuine accessories offered by
your Škoda dealer.
Operation of the pedals must not be hindered!
WARNING
•
Greater pedal distances may be needed when there is a fault in the brake
system.
•
Do not place any footmats or other additional floor coverings in the area
of the pedals in order to ensure that all the pedals can be fully depressed and
are able to return unobstructed to their initial position - risk of accident!
•
There must be no objects on the floor which could roll under the pedals.
You would then no longer be able to apply the brakes, operate the clutch or
accelerator - risk of accident!
luggage compartmentLoading the luggage compartmentPlease observe the following in the interest of having good handling char-
acteristics of your vehicle:
– Distribute the items of luggage as evenly as possible.
– Place heavy objects as far forward as possible.
– Attach the items of luggage to the lashing eyes or the fixing net*
⇒page 68.In the event of an accident, there is such a high kinetic energy which is produced by
small and light objects that they can cause severe injuries. The magnitude of the kinetic energy depends on the speed at which the vehicle is travelling and on the
weight of the object. The speed at which the vehicle is travelling is in this case the
more significant factor.
Example: In the event of a frontal collision at a speed of 50 km/h, an unsecured
object with a weight of 4.5 kg produces an energy, which corresponds to 20 times
its own weight. This means that it results in a weight of approx. 90 kg. You can
imagine the injuries that can occur, if this “bullet” is flying through the interior
compartment and hits an occupant.
WARNING
•
Store the objects in the luggage compartment and attach them to the
lashing eyes.
•
Loose objects in the passenger compartment can be thrown forward
during a sudden manoeuvre or in case of an accident and can injure the
occupants or other oncoming traffic. This risk is still increased, if the objects
which are flying around are hit by a deployed airbag. In this case, the objects
which are thrown back can injure the occupants - hazard.
•
Please note that the handling properties of your vehicle may be affected
when transporting heavy objects as a result of the displacement of the
centre of gravity. The speed and style of driving must be adjusted accord-
ingly.
•
The items carried in the luggage compartment should be stored in such
a way that no objects are able to slip forward if there are any sudden driving
or braking manoeuvres undertaken - risk of injury!
•
When transporting fastened objects which are sharp and dangerous in
the luggage compartment enlarged by folding the rear seats forward or
removing the rear seats, ensure the safety of the passengers transported on
the other rear seats ⇒page 130, “Correct seated position for the occupants
on the rear seats”.
•
If the rear seats next to the folded forward seat are occupied, ensure
maximum safety, e.g. by placing the goods to be transported in such a way
that a folding back of the seat is prevented in case of a rear collision.
•
Never drive with the boot lid fully opened or slightly ajar otherwise
exhaust gases may get into the interior of the vehicle - risk of poisoning!
s3f4.1.book Page 67 Thursday, June 18, 2009 11:07 AM
Page 89 of 259
Seats and Storage 88Clothes hooks*The clothes hooks are located on the handle of the headliner above each of the rear
doors.
WARNING
•
Ensure that any clothes hanging from the hooks do not impair your
vision to the rear.
•
Use the hooks for hanging only light items of clothing and ensure that
there are no heavy or sharp-edged objects in the pockets.
•
The maximum permissable load of the hooks is 2 kg.
•
Do not use clothes hangers for hanging up items of clothing otherwise
this will interfere with the protection offered by the head airbag*.
s3f4.1.book Page 88 Thursday, June 18, 2009 11:07 AM
Page 100 of 259

Starting-off and Driving99
Using the system
Safety
Driving Tips
General Maintenance
Breakdown assistance
Technical Data
Starting-off and DrivingSetting steering wheel position*You can set the height and the forward/back position of the steering
wheel to the desired position.
– Adjust the driver seat ⇒page 62.
– Pull the lever below the steering column ⇒fig. 122 down ⇒.
– Set the steering wheel to the desired position (concerning height and
forward/back position).– Then push the lever up against the steering column until it locks into
place.
WARNING
•
You must not adjust the steering wheel when the vehicle is moving!
•
The driver must maintain a distance of at least 25 cm to the steering
wheel ⇒fig. 123. Not maintaining this minimum distance will mean that the
airbag system will not be able to properly protect you - hazard!
•
For s a fe t y re a s ons the le v e r m ust a lwa y s b e fi rm l y pus he d up t o a vo id the
steering wheel altering its position unintentionally when driving - risk of
accident!
•
If you adjust the steering wheel further towards the head, you will reduce
the protection offered by the driver airbag in the event of an accident. Check
that the steering wheel is aligned to the chest.
•
When driving, hold the steering wheel with both hands firmly on the
outer edge in the 9 o'clock and 3 o'clock position. Never hold the steering
wheel firmly in the 12 o'clock position or in another way (e.g. in the middle
of the steering wheel or at the inner steering wheel edge). In such cases,
injuries to the arms, the hands and the head can occur when the driver
airbag is deployed.
Fig. 122 Adjustable steering
wheel: Lever below steering
columnFig. 123 Safe distance to
steering wheel
s3f4.1.book Page 99 Thursday, June 18, 2009 11:07 AM
Page 130 of 259
Passive Safety129
Using the system
Safety
Driving Tips
General Maintenance
Breakdown assistance
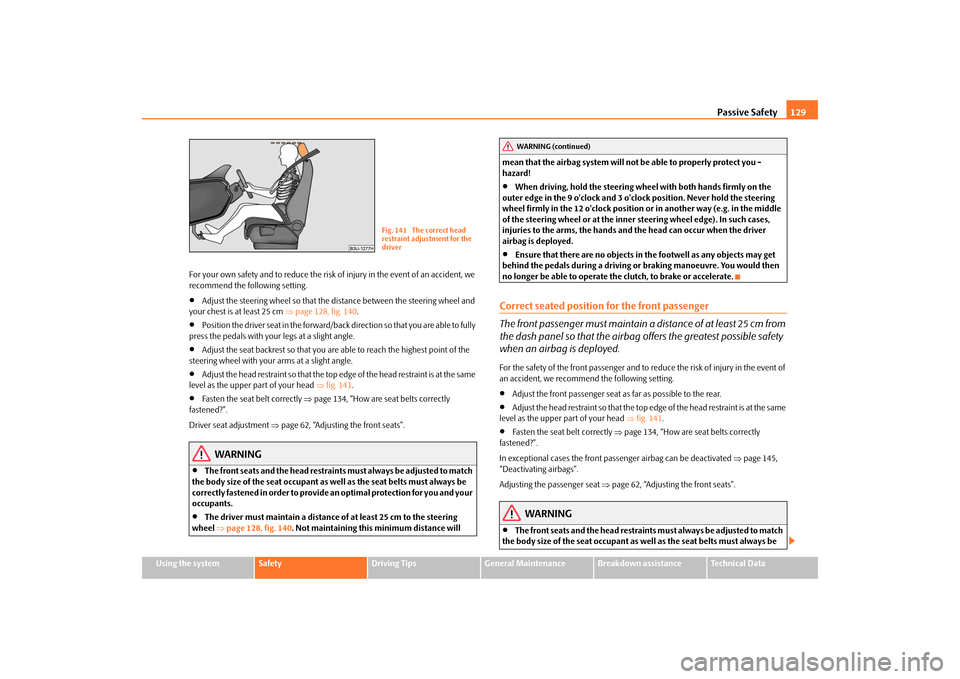
Technical Data For your own safety and to reduce the risk of injury in the event of an accident, we
recommend the following setting.
•
Adjust the steering wheel so that the distance between the steering wheel and
your chest is at least 25 cm ⇒page 128, fig. 140.
•
Position the driver seat in the forward/back direction so that you are able to fully
press the pedals with your legs at a slight angle.
•
Adjust the seat backrest so that you are able to reach the highest point of the
steering wheel with your arms at a slight angle.
•
Adjust the head restraint so that the top edge of the head restraint is at the same
level as the upper part of your head ⇒fig. 141.
•
Fasten the seat belt correctly ⇒page 134, “How are seat belts correctly
fastened?”.
Driver seat adjustment ⇒page 62, “Adjusting the front seats”.
WARNING
•
The front seats and the head restraints must always be adjusted to match
the body size of the seat occupant as well as the seat belts must always be
correctly fastened in order to provide an optimal protection for you and your
occupants.
•
The driver must maintain a distance of at least 25 cm to the steering
wheel ⇒page 128, fig. 140. Not maintaining this minimum distance will mean that the airbag system will not be able to properly protect you -
hazard!
•
When driving, hold the steering wheel with both hands firmly on the
outer edge in the 9 o'clock and 3 o'clock position. Never hold the steering
wheel firmly in the 12 o'clock position or in another way (e.g. in the middle
of the steering wheel or at the inner steering wheel edge). In such cases,
injuries to the arms, the hands and the head can occur when the driver
airbag is deployed.
•
Ensure that there are no objects in the footwell as any objects may get
behind the pedals during a driving or braking manoeuvre. You would then
no longer be able to operate the clutch, to brake or accelerate.
Correct seated position for the front passenger
The front passenger must maintain a distance of at least 25 cm from
the dash panel so that the airbag offers the greatest possible safety
when an airbag is deployed.For the safety of the front passenger and to reduce the risk of injury in the event of
an accident, we recommend the following setting.•
Adjust the front passenger seat as far as possible to the rear.
•
Adjust the head restraint so that the top edge of the head restraint is at the same
level as the upper part of your head ⇒fig. 141.
•
Fasten the seat belt correctly ⇒page 134, “How are seat belts correctly
fastened?”.
In exceptional cases the front passenger airbag can be deactivated ⇒page 145,
“Deactivating airbags”.
Adjusting the passenger seat ⇒page 62, “Adjusting the front seats”.
WARNING
•
The front seats and the head restraints must always be adjusted to match
the body size of the seat occupant as well as the seat belts must always be
Fig. 141 The correct head
restraint adjustment for the
driver
WARNING (continued)
s3f4.1.book Page 129 Thursday, June 18, 2009 11:07 AM