wheels SKODA FABIA 2009 2.G / 5J Owner's Manual
[x] Cancel search | Manufacturer: SKODA, Model Year: 2009, Model line: FABIA, Model: SKODA FABIA 2009 2.G / 5JPages: 259, PDF Size: 31.99 MB
Page 5 of 259
Contents 4Important safety information regarding the use of seat
belts . . . . . . . . . . . . . . . . . . . . . . . . . . . . . . . . . . . . . . . . .
How are seat belts correctly fastened? . . . . . . . . . .
Belt tensioner . . . . . . . . . . . . . . . . . . . . . . . . . . . . . . . . Airbag system
. . . . . . . . . . . . . . . . . . . . . . . . . . . . . . . . .
Description of the airbag system . . . . . . . . . . . . . . .
Front airbags . . . . . . . . . . . . . . . . . . . . . . . . . . . . . . . . .
Side airbags* . . . . . . . . . . . . . . . . . . . . . . . . . . . . . . . . .
Head airbags* . . . . . . . . . . . . . . . . . . . . . . . . . . . . . . . .
Deactivating airbags . . . . . . . . . . . . . . . . . . . . . . . . . .
Transporting children safely
. . . . . . . . . . . . . . . . . .
What you should know about transporting children!
Child seat . . . . . . . . . . . . . . . . . . . . . . . . . . . . . . . . . . . .
Attaching a child seat using the “ISOFIX” system*
Attaching child seat using the “Top Tether” system
Driving Tips
. . . . . . . . . . . . . . . . . . . . . . . . . . . . . .
Intelligent Technology
. . . . . . . . . . . . . . . . . . . . . . . .
Electronic stability programme (ESP)* . . . . . . . . . .
Brakes . . . . . . . . . . . . . . . . . . . . . . . . . . . . . . . . . . . . . . .
Brake booster . . . . . . . . . . . . . . . . . . . . . . . . . . . . . . . .
Antilock brake system (ABS)* . . . . . . . . . . . . . . . . . .
Brake Assist* . . . . . . . . . . . . . . . . . . . . . . . . . . . . . . . . .
Electrohydraulic power steering . . . . . . . . . . . . . . .
Tyre inflation pressure-control system* . . . . . . . . .
Diesel particle filter* (diesel engine) . . . . . . . . . . . .
Driving and the Environment
. . . . . . . . . . . . . . . . .
The first 1 500 kilometres and then afterwards . .
Catalytic converter . . . . . . . . . . . . . . . . . . . . . . . . . . . .
Driving in an economical and environmentally
conscious manner . . . . . . . . . . . . . . . . . . . . . . . . . . . .
Environmental compatibility . . . . . . . . . . . . . . . . . . .
Motoring abroad . . . . . . . . . . . . . . . . . . . . . . . . . . . . .
Avoiding damage to your vehicle . . . . . . . . . . . . . .
To w i n g a t r a i l e r
. . . . . . . . . . . . . . . . . . . . . . . . . . . . . . . .
Towing a trailer . . . . . . . . . . . . . . . . . . . . . . . . . . . . . . .
General Maintenance
. . . . . . . . . . . . . . .
Taking care of your vehicle and cleaning the
vehicle
. . . . . . . . . . . . . . . . . . . . . . . . . . . . . . . . . . . . . . . . .
General . . . . . . . . . . . . . . . . . . . . . . . . . . . . . . . . . . . . . .
Care of the exterior of vehicle . . . . . . . . . . . . . . . . . .
Care of the interior of vehicle . . . . . . . . . . . . . . . . . .
Fuel
. . . . . . . . . . . . . . . . . . . . . . . . . . . . . . . . . . . . . . . . . . . .
Petrol . . . . . . . . . . . . . . . . . . . . . . . . . . . . . . . . . . . . . . . .
Diesel . . . . . . . . . . . . . . . . . . . . . . . . . . . . . . . . . . . . . . . .
Refuelling . . . . . . . . . . . . . . . . . . . . . . . . . . . . . . . . . . . .
Inspecting and replenishing
. . . . . . . . . . . . . . . . . .
Engine compartment . . . . . . . . . . . . . . . . . . . . . . . . .
Engine oil . . . . . . . . . . . . . . . . . . . . . . . . . . . . . . . . . . . .
Cooling system . . . . . . . . . . . . . . . . . . . . . . . . . . . . . . .
Brake fluid . . . . . . . . . . . . . . . . . . . . . . . . . . . . . . . . . . .
Battery . . . . . . . . . . . . . . . . . . . . . . . . . . . . . . . . . . . . . . .
Windshield washer system . . . . . . . . . . . . . . . . . . . .
Wheels and Tyres
. . . . . . . . . . . . . . . . . . . . . . . . . . . . . .
Wheels . . . . . . . . . . . . . . . . . . . . . . . . . . . . . . . . . . . . . .
Accessories, changes and replacement of partsAccessories and replacement parts . . . . . . . . . . . . .
Technical changes . . . . . . . . . . . . . . . . . . . . . . . . . . . .
Vehicles of the group N1 . . . . . . . . . . . . . . . . . . . . . .Breakdown assistance
. . . . . . . . . . . . . .
Breakdown assistance
. . . . . . . . . . . . . . . . . . . . . . . .
First-aid box* and Warning triangle* . . . . . . . . . . .
Fire extinguisher* . . . . . . . . . . . . . . . . . . . . . . . . . . . . .
Vehicle tool kit . . . . . . . . . . . . . . . . . . . . . . . . . . . . . . . .
Tyre repair kit* . . . . . . . . . . . . . . . . . . . . . . . . . . . . . . . .
Spare wheel* . . . . . . . . . . . . . . . . . . . . . . . . . . . . . . . . .
Changing a wheel . . . . . . . . . . . . . . . . . . . . . . . . . . . . .
Jump-starting . . . . . . . . . . . . . . . . . . . . . . . . . . . . . . . .
Tow-starting and towing vehicle . . . . . . . . . . . . . . .
Fuses and light bulbs
. . . . . . . . . . . . . . . . . . . . . . . . . .
Electric fuses . . . . . . . . . . . . . . . . . . . . . . . . . . . . . . . . .
Bulbs . . . . . . . . . . . . . . . . . . . . . . . . . . . . . . . . . . . . . . . .
Technical Data
. . . . . . . . . . . . . . . . . . . . . . . . . .
Technical Data
. . . . . . . . . . . . . . . . . . . . . . . . . . . . . . . . .
General information . . . . . . . . . . . . . . . . . . . . . . . . . . .
Used abbreviations . . . . . . . . . . . . . . . . . . . . . . . . . . .
Performances . . . . . . . . . . . . . . . . . . . . . . . . . . . . . . . . .
Weight . . . . . . . . . . . . . . . . . . . . . . . . . . . . . . . . . . . . . . .
Identification details . . . . . . . . . . . . . . . . . . . . . . . . . .
Fuel consumption according to the regulations
(99/100/EU) . . . . . . . . . . . . . . . . . . . . . . . . . . . . . . . . . .
Dimensions . . . . . . . . . . . . . . . . . . . . . . . . . . . . . . . . . .
Engine oil specifications . . . . . . . . . . . . . . . . . . . . . . .
1.2 ltr./44 kW - EU 4/EU 2DDK . . . . . . . . . . . . . . . . .
1.2 ltr./51 kW - EU 4/EU 2DDK . . . . . . . . . . . . . . . . .
1.4 ltr./63 kW - EU 4/EU 2DDK . . . . . . . . . . . . . . . . .
1.6 ltr./77 kW - EU 4/EU 2DDK . . . . . . . . . . . . . . . . .
1.4 ltr./51 kW TDI PD - EU 4 . . . . . . . . . . . . . . . . . . . .
1.4 ltr./59 kW TDI PD - EU 4 . . . . . . . . . . . . . . . . . . . .
1.9 ltr./77 kW TDI°PD - EU°4 . . . . . . . . . . . . . . . . . . .
Fabia - Vehicles of the group N1 . . . . . . . . . . . . . . . .
Fabia Combi - Vehicles of the group N1 . . . . . . . . .
Index
. . . . . . . . . . . . . . . . . . . . . . . . . . . . . . . . . . . . . . . . 133
134
136
138
138
139
142
143
145
147
147
150
153
154
155
155
155
158
158
159
159
160
160
162
163
163
164
164
167
168
169
170
170173
173
173
173
178
181
181
181
182
184
184
187
189
191
192
197
198
198
204
204
204
204
205
205
205
205
206
206
206
207
211
213216
216
221
227
227
227
227
227
227
227
228
229
230
231
233
235
237
239
241
243
245
246
247
s3f4.1.book Page 4 Thursday, June 18, 2009 11:07 AM
Page 34 of 259
Instruments and Indicator/Warning Lights33
Using the system
Safety
Driving Tips
General Maintenance
Breakdown assistance
Technical Data Further information about ABS ⇒page 159, “Antilock brake system (ABS)*”.
A fault in the entire brake system
If the ABS warning light
comes on together with the brake system warning light
(handbrake must be released), there is a fault not only in the ABS but also in
another part of the brake system ⇒.
The following text will be displayed in the information display*:
STOP BRAKE FAULT OWNER'S MANUAL!
WARNING
•
If the brake system warning light
comes on together with the ABS
warning light
stop the vehicle immediately and check the brake fluid
level in the reservoir ⇒page 191, “Brake fluid”. If the fluid level has dropped
below the MIN marking, do not drive any further - risk of accident! Obtain
professional assistance.
•
Pay attention to the following instructions before checking the brake
fluid level and opening the bonnet ⇒page 185, “Working in the engine
compartment”.
•
If the brake fluid is at the correct level, the ABS control function has
failed. The rear wheels may then block very rapidly when braking. In certain
circumstances, this can result in the rear end of the car breaking away - risk
of skidding! Drive carefully to the nearest specialist garage and have the
fault rectified.
Brake system
The warning light
flashes or comes on if the brake fluid level is too low, if there
is a fault in the ABS or if the handbrake is applied.
If the warning light flashes (handbrake is not applied), stop and check the brake
fluid level ⇒.
The following text will be displayed in the information display*:
STOP BRAKE FLUID SERVICE MANUALIf there is a fault in the ABS which also influences the function of the normal brake
system (e.g. distribution of brake pressure), the ABS warning light
comes on
together with the brake system warning light
. Be aware that not only the ABS but
also another part of th brake system is defective ⇒.
3 peeps sound as an additional warning signal.
One should get used to high pedal forces, an extended free play of the brake pedal
and long braking distances when carefully driving to the specialist garage.
The following text will be displayed in the information display*:
STOP BRAKE FAULT OWNER'S MANUAL!
For further information on the brake system ⇒page 158, “Brakes”.
Handbrake applied
The warning light
also comes on if the handbrake is applied. An audible warning
is also given if you drive the vehicle for at least 3 seconds at a speed of more than 6
km/h.
The following text will be displayed in the information display*:
HANDBRAKE ON
WARNING
•
Pay attention to the following instructions before checking the brake
fluid level and opening the bonnet ⇒page 185, “Working in the engine
compartment”.
•
If the brake system warning light
does not go out a few seconds after
switching on the ignition or comes on when driving, stop immediately and
check the brake fluid in the reservoir ⇒page 191, “Brake fluid”. If the fluid
level has dropped below the MIN marking, do not drive any further - risk of
accident! Obtain professional assistance.
Airbag system
Monitoring the airbag system
The warning light
comes on for a few seconds when the ignition is switched on.
s3f4.1.book Page 33 Thursday, June 18, 2009 11:07 AM
Page 109 of 259
Automatic gearbox 108•
When the engine is running and the vehicle is stationary, it is necessary
to hold the car with the brake pedal in all the positions of the selector lever
(except P and N) since the power transmission is never completely inter-
rupted, also not when the engine is idling - the vehicle creeps.
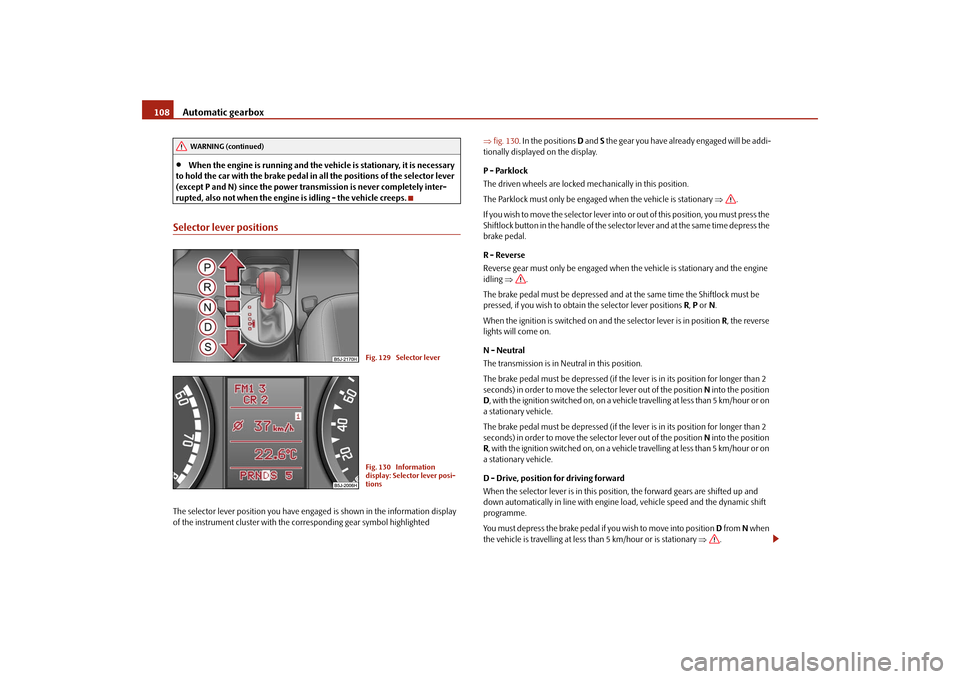
Selector lever positionsThe selector lever position you have engaged is shown in the information display
of the instrument cluster with the corresponding gear symbol highlighted ⇒fig. 130. In the positions D and S the gear you have already engaged will be addi-
tionally displayed on the display.
P - Parklock
The driven wheels are locked mechanically in this position.
The Parklock must only be engaged when the vehicle is stationary ⇒.
I f y o u w i s h t o m o v e t h e s e l e c t o r l e v e r i n to or out of this position, you must press the
Shiftlock button in the handle of the selector lever and at the same time depress the
brake pedal.
R - Reverse
Reverse gear must only be engaged when the vehicle is stationary and the engine
idling ⇒.
The brake pedal must be depressed and at the same time the Shiftlock must be
pressed, if you wish to obtain the selector lever positions R, P or N.
When the ignition is switched on and the selector lever is in position R, the reverse
lights will come on.
N - Neutral
The transmission is in Neutral in this position.
The brake pedal must be depressed (if the lever is in its position for longer than 2
seconds) in order to move the selector lever out of the position N into the position
D, with the ignition switched on, on a vehicle travelling at less than 5 km/hour or on
a stationary vehicle.
The brake pedal must be depressed (if the lever is in its position for longer than 2
seconds) in order to move the selector lever out of the position N into the position
R, with the ignition switched on, on a vehicle travelling at less than 5 km/hour or on
a stationary vehicle.
D - Drive, position for driving forward
When the selector lever is in this position, the forward gears are shifted up and
down automatically in line with engine load, vehicle speed and the dynamic shift
programme.
You must depress the brake pedal if you wish to move into position D from N when
the vehicle is travelling at less than 5 km/hour or is stationary ⇒.
WARNING (continued)
Fig. 129 Selector leverFig. 130 Information
display: Selector lever posi-
tions
s3f4.1.book Page 108 Thursday, June 18, 2009 11:07 AM
Page 111 of 259
Automatic gearbox 110current selector lever position (D, S or Tiptronic). The gearbox shifts down to one
or several gears in line with the driving state and the vehicle accelerates. The
gearbox does not shift up into the highest gear until the engine has reached its
maximum revolutions for this gear range.
WARNING
Please note that using the kickdown function can result in the driven wheels
spinning on a smooth or slippery road surface - risk of skidding!Dynamic shift programmeThe automatic gearbox of your vehicle is controlled electronically. Shifting up and
down through the gears is performed automatically on the basis of pre-defined
driving programmes.
Adopting a moderate style of driving will cause the gearbox to select the most
economical driving programme. Shifting up into a higher gear as soon as possible
and shifting down as late as possible will have a favourable effect on your fuel
consumption.
Adopting a sporty style of driving with rapid movements of the accelerator pedal
combined with sharp acceleration and frequent changes in speed, exploiting the
top speed of the car or depressing the accelerator pedal (kickdown function), will
cause the gearbox to switch over to this style of driving and shift down earlier with
frequent changes in gears in comparison to the moderate style of driving.
Selecting the most appropriate driving programme for the particular style of driving
is a continuous process. Irrespective of this it is, however, possible to switch or shift
down into a dynamic shift programme by depressing the accelerator rapidly. The
gearbox shifts down into a lower gear matching the speed of the car and this allows
you to accelerate rapidly (e.g. when overtaking) without having to depress the
accelerator pedal fully into the kickdown range. The original programme will be
reactivated to match your particular style of driving once the gearbox has shifted up
again.
When driving in hilly regions, the gears are selected to match uphill and downhill
sections. This avoids the gearbox frequently shifting up and down when negotiating an uphill stretch. When driving downhill, it is possible to shift down into the
Tiptronic position, in order to exploit the engine brake torque.
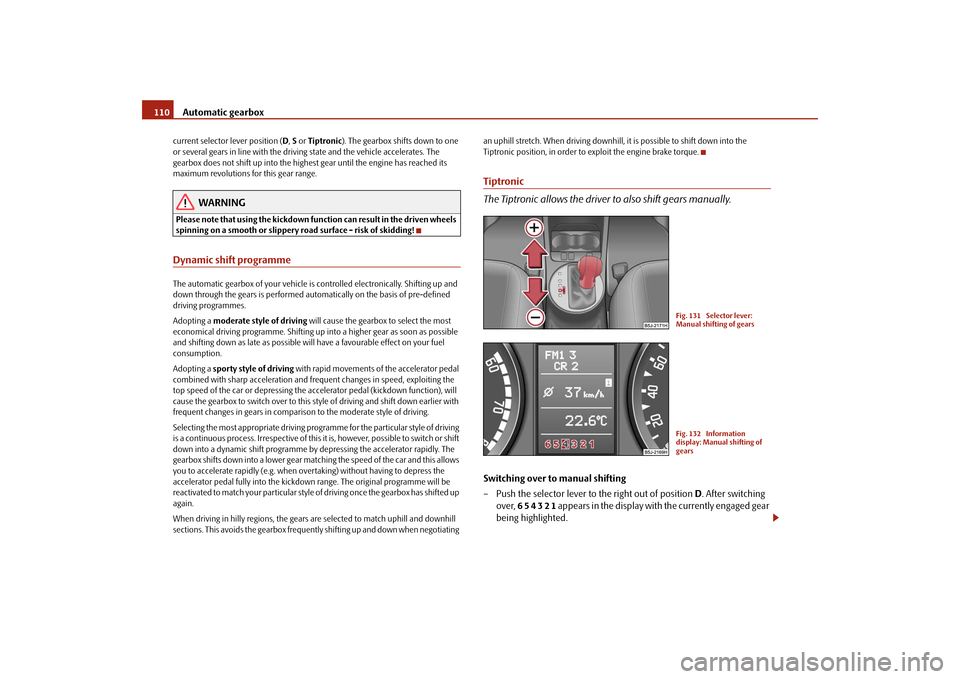
Tiptronic
The Tiptronic allows the driver to also shift gears manually.Switching over to manual shifting
– Push the selector lever to the right out of position D. After switching
over, 6 5 4 3 2 1 appears in the display with the currently engaged gear
being highlighted.
Fig. 131 Selector lever:
Manual shifting of gearsFig. 132 Information
display: Manual shifting of
gears
s3f4.1.book Page 110 Thursday, June 18, 2009 11:07 AM
Page 157 of 259
Intelligent Technology 156•
when driving with snow chains;
•
when driving in deep snow or on a loose surface;
•
when it is necessary to rock a vehicle when it has become stuck.
then you should switch on the ESP again.
WARNING
It is also not possible for the ESP to overcome the physical limits of the
vehicle. Even if a vehicle fitted with ESP you should still always adapt your
style of driving to the condition of the road surface and the traffic situation.
This particularly applies when driving on slippery and wet roads. The
increased safety offered must not tempt you to take greater risks than other-
wise - risk of an accident!
Note
•
All four wheels must be fitted with the same tyres in order to achieve problem-
free operation of the ESP. Differing rolling circumferences of the tyres can lead to an
undesirable reduction in the engine output.
•
Changes to vehicle (e.g. on engine, on the brakes, on chassis or another combi-
nation of tyres and wheels) can influence the function of the ESP ⇒page 204,
“Accessories, changes and replacement of parts”.
Traction control system (TCS)*
The traction control system prevents the driven wheels from spinning
when accelerating.General
The TCS makes it much easier, and sometimes at all possible, to start off, accelerate
and climb a steep hill when the conditions of the road surface are unfavourable.
Operating principle
The TCS switches on automatically when the engine is started and then conducts a
self-test. The system monitors the speeds of the driven wheels with the aid of the
ABS sensors. If the wheels are spinning, the force transmitted to the road surface is
automatically adapted by reducing the engine speed. This occurs at all speeds.
The TCS operates in combination with the ABS ⇒page 159, “Antilock brake system
(ABS)*”. The TCS will not function if a fault exists in the ABS system.
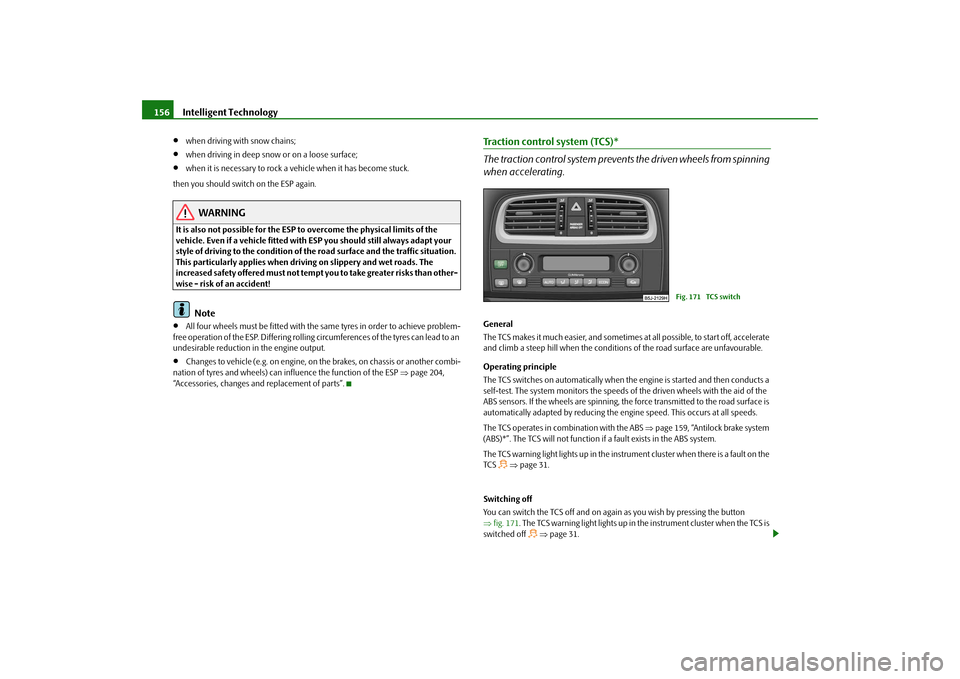
The TCS warning light lights up in the instrument cluster when there is a fault on the
TCS
⇒page 31.
Switching off
You can switch the TCS off and on again as you wish by pressing the button
⇒fig. 171. The TCS warning light lights up in the instrument cluster when the TCS is
switched off
⇒page 31.
Fig. 171 TCS switch
s3f4.1.book Page 156 Thursday, June 18, 2009 11:07 AM
Page 158 of 259
Intelligent Technology157
Using the system
Safety
Driving Tips
General Maintenance
Breakdown assistance
Technical Data The TCS should normally always be switched on. It may be good practice in certain
exceptional cases, such as when you wish to have wheel slip, to switch off the
system.
Examples:
•
when driving with snow chains;
•
when driving in deep snow or on a loose surface;
•
when it is necessary to rock a vehicle when it has become stuck.
then you should switch on the TCS again.
WARNING
You should always adjust your style of driving to the conditions of the road
surface and the traffic situation. The increased safety offered must not tempt
you to take greater risks than otherwise - risk of an accident!
Note
•
All four wheels must be fitted with the same tyres in order to achieve problem-
free operation of the TCS. Differing rolling circumferences of the tyres can lead to
an undesirable reduction in the engine output.
•
Changes to vehicle (e.g. on engine, on the brakes, on chassis or another combi-
nation of tyres and wheels) can influence the function of the TCS ⇒page 204,
“Accessories, changes and replacement of parts”.
Electronic Differential Lock (EDL)*
The electronic differential lock prevents an individual wheel from
slipping.Models fitted with ESP are equipped with electronic differential lock (EDL).
General
The EDL makes it much easier, and sometimes at all possible, to start off, accelerate
and climb a steep hill when the conditions of the road surface are unfavourable.Operating principle
The EDL is activated automatically, that is without any action on the part of the
driver. It monitors the speeds of the driven wheels with the aid of the ABS sensors.
Should only one drive wheel begin spinning on a slippery surface there will be an
appreciable difference in the speed of the driven wheels. The EDL function brakes
the slipping wheel and the differential transmits a greater driving force to the other
driven wheel. This control process is also accompanied by noises.
Overheating of the brakes
The EDL switches off automatically if unusually severe stresses exist in order to
avoid excessive heat generation in the disc brake on the wheel which is being
braked. The vehicle can continue to be driven and has the same characteristics as a
vehicle not fitted with EDL.
The EDL switches on again automatically as soon as the brake has cooled down.
WARNING
•
Carefully depress the accelerator when accelerating on uniformly slip-
pery road surfaces, such as ice and snow. The driven wheels might still spin
despite the EDL and affect the stability of the vehicle - risk of an accident!
•
You should always adapt your style of driving to the condition of road
surface and to the traffic situation even when your vehicle is fitted with EDL.
The increased safety offered must not tempt you to take greater risks than
otherwise - risk of an accident!Note
•
If the ABS or TCS or ESP warning light comes on, this may also indicate a fault in
the EDL. Please have the vehicle inspected as soon as possible by a specialist
garage.
•
Changes to vehicle (e.g. on engine, on the brakes, on chassis or another combi-
nation of tyres and wheels) can influence the function of the EDL ⇒page 204,
“Accessories, changes and replacement of parts”.
s3f4.1.book Page 157 Thursday, June 18, 2009 11:07 AM
Page 160 of 259
Intelligent Technology159
Using the system
Safety
Driving Tips
General Maintenance
Breakdown assistance
Technical Data
WARNING
•
Never switch off the engine before the vehicle is stationary.
•
The brake booster only operates when the engine is running. Greater
physical effort for braking is required when engine is switched off. Because
if you do not stop as normal, this can cause an accident and severe injuries.
Antilock brake system (ABS)*ABS prevents the wheels locking when braking.General
The ABS contributes significantly to enhancing the active safety of your vehicle.
Compared to a vehicle not fitted with the ABS brake system, you are able to retain
optimal steering ability even during a full brake application on a slippery road
surface because the wheels do not lock up.
You must not expect, however, that the braking distance will be shorter under all
circumstances as a result of the ABS. The braking distance for example on gravel
and fresh snow, when you should anyway be driving slowly and cautiously, will be
longer.
Operating principle
As soon as the vehicle speed has increased to about 20 km/hour an automatic test
procedure is conducted during which you will be able to hear a pumping noise for
about 1 second.
The brake pressure will be reduced on a wheel which is rotating at a speed which is
too low for the speed of the vehicle and tending to lock. This control cycle is notice-
able from a pulsating movement of the brake pedal which is accompanied by
noises. This is consciously intended to provide the driver with the information that
the wheels are tending to lock (ABS control range). You must always keep the brake
pedal depressed to enable the ABS to optimally control the brake application in this
braking range. Never interrupt the application of the brakes!
WARNING
•
The ABS can also not overcome the physical limits of your vehicle. Please
do not forget this, particularly when driving on icy or wet road surfaces. If the
ABS is operating within the control range, adapt your speed immediately to
the conditions of the road surface and the traffic situation. The increased
safety offered by the ABS must not tempt you to take greater risks than
otherwise - risk of an accident!
•
The normal braking system is still fully functional if there is an ABS fault.
Visit a specialist garage as quickly as possible and adjust your style of driving
to take account of the ABS fault in the meantime since you will not know the
extent of the fault and in how far the braking efficiency is affected.Note
•
A warning light comes on if a fault occurs in the ABS system
⇒page 32.
•
Changes to vehicle (e.g. on engine, on the brakes, on chassis or another combi-
nation of tyres and wheels) can influence the function of the ABS ⇒page 204,
“Accessories, changes and replacement of parts”.
Brake Assist*During a severe brake application (e.g. if a hazard exists), the Brake Assist increases
the braking force and thus makes it possible to rapidly produce the pressure
required in the brake system.
The majority of drivers do apply the brakes in good time in dangerous situations,
but do not depress the brake pedal with sufficient pressure. Consequently, it is not
possible for the vehicle to achieve its maximum deceleration and the vehicle covers
a greater distance than necessary.
The Brake Assist is activated by the very quick operation of the brake pedal. In such
cases, a much greater braking pressure exists than during a normal brake applica-
tion. This makes it possible, even with a relatively low resistance of the brake pedal,
to produce an adequate pressure in the brake system in the shortest possible time,
which is required for maximum deceleration of the vehicle. You must apply the
s3f4.1.book Page 159 Thursday, June 18, 2009 11:07 AM
Page 161 of 259
Intelligent Technology 160brake pedal firmly and hold it in this position in order to achieve the shortest
possible braking distance.
The Brake Assist is able to help you achieve a shorter braking distance in emergency
situations by rapidly producing the pressure required in the brake system. It fully
exploits the attributes of the ABS. After you release the brake pedal, the function of
the Brake Assist is automatically switched off and the brakes operate in the normal
way.
The Brake Assist is part of the ESP system. If a fault occurs in the ESP, the Brake Assist
function is also not available. Further information on the ESP ⇒page 155.
WARNING
•
The Brake Assist is also not able to overcome the physical limits of your
vehicle in terms of the braking distance required.
•
Adapt your speed to the conditions of the road surface and to the traffic
situation.
•
The increased safety offered by the Brake Assist must not tempt you to
take a greater safety risk than otherwise.
Electrohydraulic power steeringThe power steering enables you to steer the vehicle with less physical force.
The steering characteristics can be changed by a specialist garage.
You will place great stresses on the power steering system if the steering is turned
to full lock when the vehicle is stationary. Turning the steering to full lock in such a
situation will be accompanied by noises.
It is still possible to fully steer the vehicle if the power steering fails or if the engine
is not running (vehicle being towed in). The only difference is that greater physical
effort is required.
It is possible that the hydraulic pump of the power steering will not run due to the
low vehicle network voltage if the battery has gone flat and the engine must started
with the help off jump leads. This condition will be indicated by lighting up of the
warning light.The power steering operates again if the battery is charged to a specific range when
engine is running. It also operates again, if the engine can be started with its own
battery.
If there is a fault in the power steering, the warning light lights up in the instrument
cluster
⇒page 26.
Caution
Do not leave the steering at full lock for more than 15 seconds when the engine is
running - risk of damaging the power steering!
Note
Have the steering inspected as soon as possible by a specialist garage if there is a
leak or fault in the system.Tyre inflation pressure-control system*The tyre inflation pressure-control system compares with the aid of the ABS sensors
the speed and also the rolling circumference of the individual wheels. If the tyre
inflation pressure is significantly changed and thus the rolling circumference of a
wheel, the warning light
lights up in the instrument cluster ⇒page 32. The tyre
inflation pressure-control system functions late or too sensitively if:
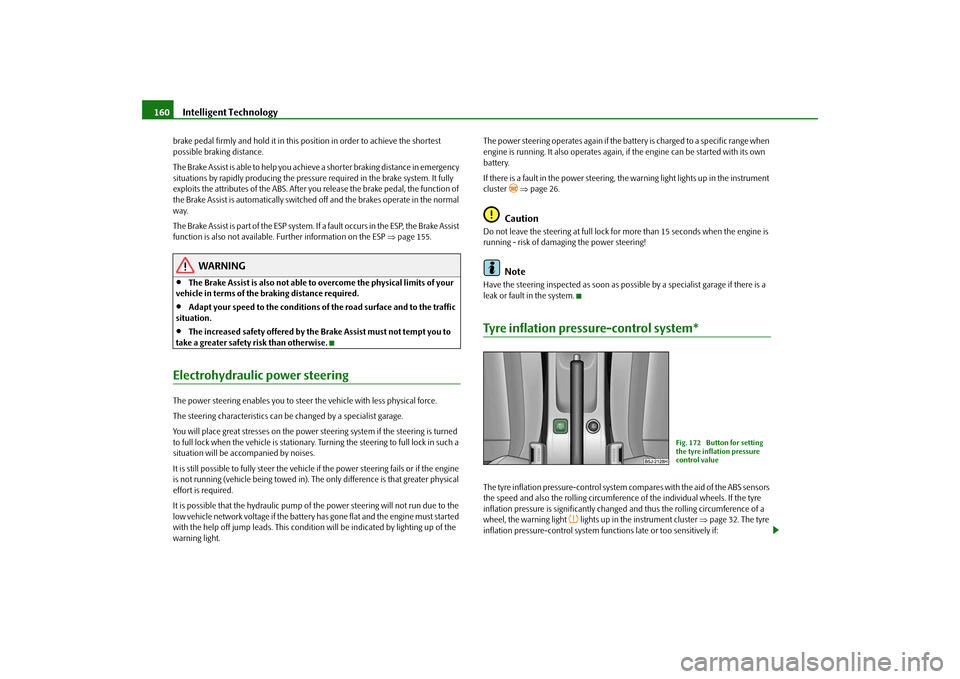
Fig. 172 Button for setting
the tyre inflation pressure
control value
s3f4.1.book Page 160 Thursday, June 18, 2009 11:07 AM
Page 162 of 259
Intelligent Technology161
Using the system
Safety
Driving Tips
General Maintenance
Breakdown assistance
Technical Data
•
the structure of the tyre is damaged,
•
the vehicle is loaded to one side or with a load on the roof,
•
the wheels of an axle are loaded heavily (e.g. when towing a trailer or when
driving uphill or downhill),
•
the vehicle is operated in unfavourable winter conditions or on an unfirm
ground,
•
Snow chains or emergency wheel* are mounted,
•
the driver has a sporty style of driving (with sharp acceleration and high speed
when cornering).
Basic setting of tyre inflation pressure-control system
After changing the tyre inflation pressures or after changing one or several wheels,
a basic setting of the system must be carried out as follows.
•
Inflate all tyres to the specified inflation pressure ⇒page 198.
•
Switch on the ignition.
•
Press button
⇒page 160, fig. 172 for more than 2 seconds. While
pressing the button, the warning light
lights up. At the same time the basic
values are stored, which is confirmed with an acoustic sound and then the warning
light
goes out.
•
If the warning light
does not go out after the basic setting, there is a fault in
the system. Have the vehicle inspected by your nearest specialist garage.
Function description
After the basic setting of the system the “adaptation” of the tyre inflation pressures
and then the tyre pressure control in the individual tyres are performed.
Warning light
lights up
If the tyre inflation pressure of at least one wheel is insufficiently inflated in compar-
ison to the stored basic value, the warning light
⇒ lights up. Inflate all tyres
to the specified inflation pressure ⇒page 198, “Tyre life” and then perform a basic
setting of the system.
Warning light
flashes
If the warning light flashes, there is a system fault. Have the vehicle inspected by
your nearest specialist garage.
WARNING
•
When the warning light
lights up, immediately reduce the speed and
avoid sudden steering and brake manoeuvres. Please stop the vehicle
without delay at the nearest possible stop and inspect the tyres and their
inflation pressures.
•
The driver is responsible for the correct tyre inflation pressures. For this
reason, the tyre inflation pressures must be checked regularly.
•
Under certain circumstances (e.g. sporty style of driving, wintry or
unpaved roads) the warning light
can be delayed or does not light up at
all.
•
The tyre inflation pressure-control system does not take away the
responsability from the driver for the correct tyre inflation pressure.Note
The tyre inflation pressure-control system:•
does not replace the regular tyre inflation pressure control, because the system
cannot detect an even pressure loss;
•
cannot warn in case of very rapid tyre inflation pressure loss, e.g. in case of
sudden tyre damage. In this case carefully bring the vehicle to a standstill without
sudden steering movements and without sharp braking.
s3f4.1.book Page 161 Thursday, June 18, 2009 11:07 AM
Page 172 of 259
Towing a trailer171
Using the system
Safety
Driving Tips
General Maintenance
Breakdown assistance
Technical Data should be attached to folding arms. Adjust the mirrors so that they provide you with
an adequate field of view to the rear.
Headlights
Before starting off with a hitched trailer, also check the setting of the headlights.
Alter the setting as necessary with the aid of the headlight beam adjuster
⇒page 53.
Detachable ball head
The ball rod is detachable on vehicles with towing device and suppliable from
Škoda original accessories. It is stowed together with separate fitting instructions in
the spare wheel well in the luggage compartment of the vehicle.
Note
•
We recommend that you also have your vehicle inspected between service
intervals if you tow a trailer frequently.
•
The handbrake on the towing vehicle must be put on when coupling and
decoupling the trailer.
•
Keep the mechanism of the ball head of the towing device clean and take
proper care of it with a suitable preservative.
Driving Tips
Particular caution is required when towing a trailer.– Do not, as far as possible, drive with your vehicle unladen and the
trailer laden.
– Do not make full use of the legal maximum speeds. This applies in
particular to downhill sections.
– Apply the brakes in good time.
– Keep a check on the coolant temperature gauge if the outside temper-
ature is high.
Distribution of weight
The distribution of the weight is very poor if your vehicle is unladen and the trailer
is laden. Maintain a particularly low speed if you cannot avoid driving with this
combination.
Driving speed
Do not drive faster than 80 km/h for safety reasons. This also applies for countries
in which higher speeds are allowed.
The fact that the driving stability of the vehicle + trailer combination reduces with
increasing speed means that the legally allowed speed should not be used when
there are unfavourable road, weather or wind conditions, particularly near accident
black spots.
You must always reduce your speed immediately as soon as you detect even just
the slightest swaying of the trailer. On no account attempt to stop the trailer from
“swaying” by accelerating.
Apply the brakes in good time! If the trailer is fitted with a trailer brake, apply the
brakes gently at first and then brake firmly. This will avoid brake jolts resulting from
the trailer wheels locking. Shift down gears in good time before negotiating a down-
hill section to allow the engine to also act as a brake.
Engine overheating
Please keep a check on the coolant temperature gauge if you have to negotiate a
lengthy slope in a low gear at a high engine speed when the outside temperature is
very high ⇒page 16.
If the needle of the coolant temperature gauge moves into the right-hand area or
even the red area of the scale, reduce your speed immediately. Stop and switch off
the engine if the warning light
in the instrument cluster begins flashing. Wait a
few minutes and check the level of coolant in the coolant expansion bottle
⇒page 189, “Inspecting the coolant level”.
Please refer to the following guidelines ⇒page 29, “Coolant temperature/coolant
level ”.
The coolant temperature can be reduced by switching on the heating.
Any increase in the cooling effect of the coolant fan through shifting down a gear
and increasing the engine speed is not possible since the fan speed is independent
s3f4.1.book Page 171 Thursday, June 18, 2009 11:07 AM