battery SKODA FABIA 2010 2.G / 5J User Guide
[x] Cancel search | Manufacturer: SKODA, Model Year: 2010, Model line: FABIA, Model: SKODA FABIA 2010 2.G / 5JPages: 244, PDF Size: 29.53 MB
Page 42 of 244
Unlocking and locking
41
Using the system
Safety
Driving Tips
General Maintenance
Breakdown assistance
Technical Data
– Fold one of the outer rear seats forwards. – Move the operating lever with the aid of a
narrow object, e.g. a screwdriver, up to
the stop in the direction of arrow
page 40, fig. 30
and then unlock in the
direction of arrow .
– Open the boot lid from the outside.Remote control*DescriptionYou can use the remote control:
to unlock and lock the vehicle;
unlocking boot lid.
The transmitter with the battery is incorporat
ed in the handle of the master key. The
receiver is located in the interior of the car. The operating range of the remote control key is approx. 10 m. But this range can be reduced if the batteries are weak. The master key has a fold-open key bit which can be used for unlocking and locking the car manually and also for starting the engine. If a lost key is replaced or if the receiver unit has been repaired or a new unit installed, it is then necessary for a specialist garage to adapt the system. Only after this is it possible to again use the remote control.
Note
The remote control is automatically deactivated when the ignition is switched on.
The operation of the remote control may temporarily be affected by interference
from transmitters close to th
e car and which operate in the same frequency range (e.g.
mobile phone, TV transmitter).
The battery must be replaced if the centra
l locking or anti-theft alarm system does
not react to the remote control at less th
an 3 metres away. We recommend having the
battery replaced by
a specialist garage.
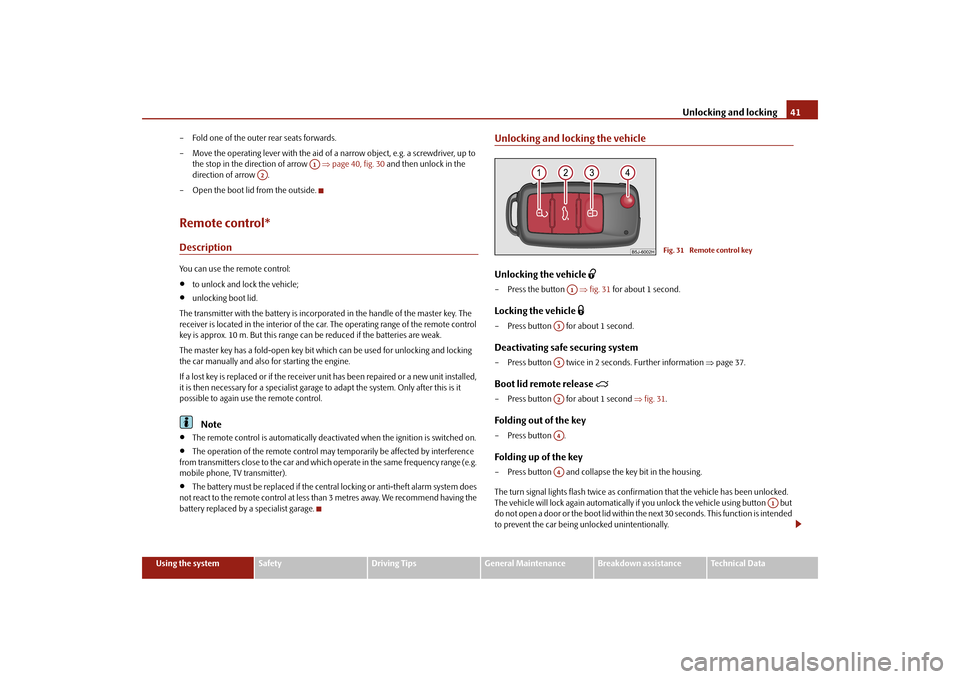
Unlocking and locking the vehicleUnlocking the vehicle
– Press the button
fig. 31
for about 1 second.
Locking the vehicle
– Press button for about 1 second.Deactivating safe securing system– Press button twice in 2 seconds. Further information
page 37.
Boot lid remote release
– Press button for about 1 second
fig. 31
.
Folding out of the key– Press button .Folding up of the key– Press button and collapse the key bit in the housing. The turn signal lights flash twice as confir
mation that the vehicl
e has been unlocked.
The vehicle will lock again automatically if
you unlock the vehicle using button but
do not open a door or the boot lid within th
e next 30 seconds. This
function is intended
to prevent the car being unlocked unintentionally.
A1
A2
Fig. 31 Remote control key
A1
A3A3A2A4A4
A1
s3j8.a.book Page 41 Tuesday, April 20, 2010 1:10 PM
Page 43 of 244
Unlocking and locking
42The safe securing system along with the anti-theft alarm system* are, however, deac- tivated during these 30 seconds. When the vehicle is unlocked or locked, the interior lights in the door contact are auto- matically switched on or off. Display of the locking The turn signal lights flash once to confir
m that the vehicle has been correctly locked.
If the vehicle is locked by pr
essing the button and some doors or the boot lid are
not closed, the turn signal lights flash only after closing.
WARNING
If the vehicle is locked from the outside and the safe securing system is acti-vated, there must not be any person in the vehicle as it is then not possible to open either a door or a window from the inside. The locked doors make it more difficult for rescuers to get into th
e vehicle in an emergency - hazard!
Note
Operate the radio remote control only when
the doors and boot lid are closed and
you have visual contact with the vehicle.
Once in the vehicle, you must not press the lock button
of the master key before
inserting the key into the ignition lock in
order to avoid the vehicle being inadvertently
locked and the anti-theft alarm system* being switched on. Should this happen, press the unlock button
of the master key.
Syncronisation of the remote controlIf the vehicle cannot be unlocked by actuatin
g the remote control system then it is
possible that the code in the key and the co
ntrol unit in the vehicle are no longer
synchronised. This can occur when the buttons on the radio-operated key are actuated a number of times outside of the operative
range of the equipment or the battery on
the remote control was replaced. This means it is necessary to
synchronise the code as follows:
press any button on the remote control;
pressing of the button means that the door will unlock with the key within 1
minute.Anti-theft alarm system*DescriptionThe anti-theft alarm system increases the level of protection against people seeking to break into the vehicle. The system triggers audible and visual warning signals if an attempt is made to break into the vehicle. How is the alarm
system activated?
The anti-theft alarm system is activated au
tomatically when the
unlocked vehicle is
locked with the key inserted in the driver's
door or with the remote control key. It is
activated 30 seconds after locking the door. How is the alarm system deactivated? The anti-theft alarm system is deactivated if
the vehicle is unlocked by only using the
radio remote control. The anti-theft alarm system is reactivated if the vehicle is not opened within 30 seconds after transmitting the radio signal. Once you unlock the vehicle by inserting the ke
y into the driver door you then have to
insert the key into the ignition lock and sw
itch the ignition on within 15 seconds after
opening the door in order to deactivate the anti-theft alarm system. The
alarm will be
triggered
if you do
not switch on
the ignition within 15 seconds.
When is the alarm triggered? The following security areas of
the locked vehicle are monitored:
bonnet;
boot lid;
doors;
ignition lock;
vehicle interior*
page 43;
Angle of the vehicle*
page 43;
Decoupling of the attached trailer;
A3
s3j8.a.book Page 42 Tuesday, April 20, 2010 1:10 PM
Page 44 of 244
Unlocking and locking
43
Using the system
Safety
Driving Tips
General Maintenance
Breakdown assistance
Technical Data
A drop in voltage of the on-board power supply.
An alarm is immediately triggered if either of the two battery terminals is disconnected while the anti-theft alarm system is activated. How is the alarm switched off? You switch the alarm off if you unlock the vehi
cle with the radio remote control or if you
switch the ignition on.
Note
The working life of the alarm siren is 5 years. More detailed information is available
by a specialist garage.
Before leaving the car, check that all the doors, windows and the electric
sliding/tilting roof* are properly closed in order to ensure that the anti-theft alarm system is fully operational.
Coding of the radio remote control and th
e receiver unit precludes the use of the
radio remote control from other vehicles.Interior monitor* and Towi
ng protection monitoring*
The interior monitor and the towing protection monitoring detect movements inside the vehicle interior and then trigger the alarm.The interior monitor and the towing protec
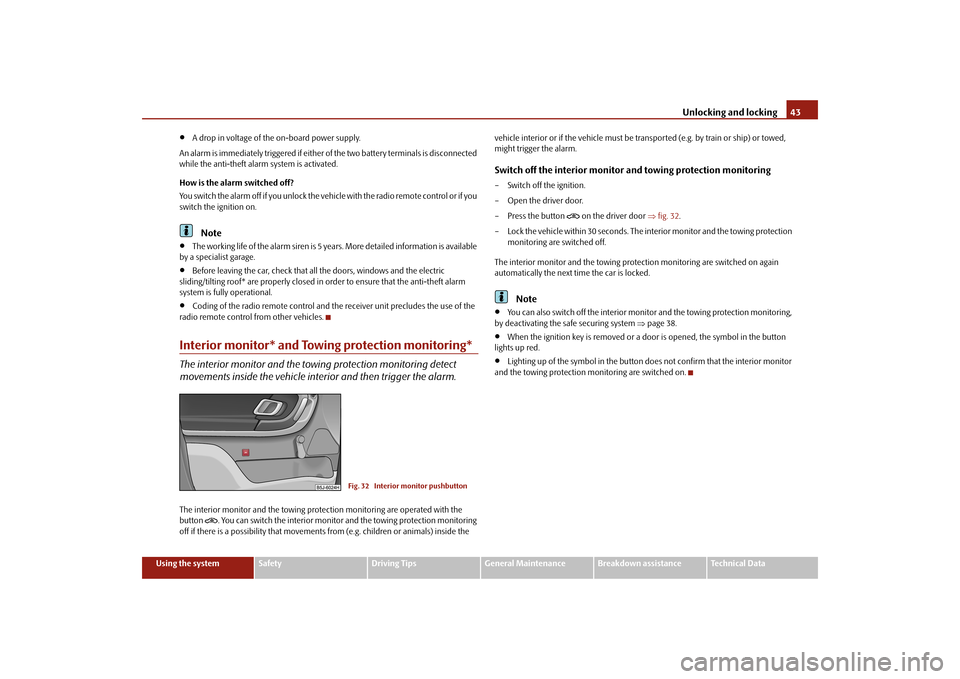
tion monitoring are operated with the
button
. You can switch the interior monitor
and the towing protection monitoring
off if there is a possibility that movements from (e.g. children or animals) inside the
vehicle interior or if the vehi
cle must be transported (e.g. by train or ship) or towed,
might trigger the alarm.Switch off the interior monitor and towing protection monitoring– Switch off the ignition. – Open the driver door.– Press the button
on the driver door
fig. 32
.
– Lock the vehicle within 30 seconds. The in
terior monitor and the towing protection
monitoring are switched off.
The interior monitor and the towing protec
tion monitoring are switched on again
automatically the next ti
me the car is locked.
Note
You can also switch off the interior moni
tor and the towing protection monitoring,
by deactivating the sa
fe securing system
page 38.
When the ignition key is removed or a door is opened, the symbol in the button
lights up red.
Lighting up of the symbol in the button
does not confirm that the interior monitor
and the towing protection mo
nitoring are switched on.
Fig. 32 Interior monitor pushbutton
s3j8.a.book Page 43 Tuesday, April 20, 2010 1:10 PM
Page 46 of 244
Unlocking and locking
45
Using the system
Safety
Driving Tips
General Maintenance
Breakdown assistance
Technical Data
After switching the ignition off, it is still possible to open or close the windows for a
further 10 minutes. The power windows are
switched off completely once you open
the driver or front passenger door.
When driving always use the existing he
ating, air conditioning and ventilation
system for ventilating the interior of the vehicle. If the windows are opened, dust as well as other dirt can get into the vehicle
and in addition the wind noise is more at
certain speeds.Force limiter of the power windowsThe electrically operated power windows are fitted with a force limiter. It reduces the risk of bruises or injuries when closing the windows. If there is an obstacle, the closing process is stopped and the window goes down by several centimeters. If the obstacle prevents the window from being closed during the next 10 seconds, the closing process is interrupted once agai
n and the window goes down by several
centimeters. You must try to close the window once agai
n within 10 seconds after the window has
gone down twice, even if the obstacle was not yet removed, the closing process is stopped. During this time it is not poss
ible to automatically
close the window. The
force limiter is still switched on. The force limiter is only switched off, if yo
u attempt to close the window within the next
10 seconds -
the window closes now with full strength!
If you wait longer than 10 seconds, the force limiter is switched on again.
WARNING
You should take particular care when closing the windows! You may otherwise suffer severe injuries as a result of getting an arm, for example, jammed in the window!Window convenience operationYou can open and close the electrically po
wered windows as follows when unlocking
and locking the vehicle (only close the sliding/tilting roof):
Opening a window– Hold the key in the locking cylinder of the
driver's door in the
unlock position or
press the unlock button of the radio re
mote control until all the windows are
opened.
Closing a window– Hold the key in the locking cylinder of the driver's door in the lock position or press
the lock button of the radio remote co
ntrol until all the windows are closed.
You can interrupt the opening or closing
operation of the windows immediately by
releasing the key or the lock button.
WARNING
The system is fitted with a force limiter
page 45. If there is an obstacle, the
closing process is stopped and the window goes down by several centimeters. You should then take particular care when closing the windows! You may otherwise suffer severe injuries as a re
sult of getting an arm, for example,
jammed in the window!Operational faultsElectrically operated powe
r windows do not operate
If the battery of the car has been disconnect
ed and then reconnected, the electrically
operated power windows do not operate. Th
e system must be activated. Proceed as
follows in order to re-establish the function:
Switch on the ignition,
slightly pull on the upper edge of the rele
vant button and hold it until the window
is closed,
release the switch,
you must pull the respective switch again in upward direction for approx. 3
seconds.
s3j8.a.book Page 45 Tuesday, April 20, 2010 1:10 PM
Page 47 of 244
Unlocking and locking
46Operation in winter Ice accumulating on the surface of the wi
ndows during the winter may result in a
greater resistance when closing the windows and the window may stop and go down several centimetres Proceed as follows to close the window fully:
Switch on the ignition,
slightly pull on the upper edge of the rele
vant button and hold it until the window
is closed,
if the window goes down/stops, repeat th
e cycle (it is necessary to put the force
limiter out of operation
page 45 - now the window closes with full force!).
WARNING
The system is fitted with a force limiter
page 45. If there is an obstacle, the
closing process is stopped and the window
goes down by several centimeters.
You should then take particular care when closing the windows! You may otherwise suffer severe injuries as a re
sult of getting an arm, for example,
jammed in the window!Electric sliding/tilting roof*Description
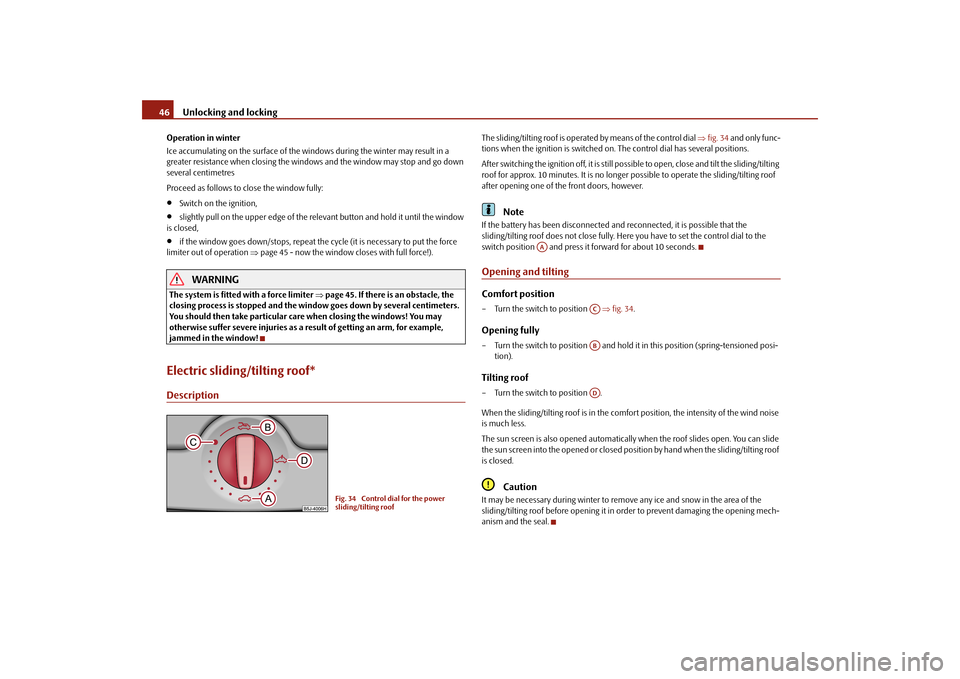
The sliding/tilting roof is operated by means of the control dial
fig. 34
and only func-
tions when the ignition is switched on. The control dial has several positions. After switching the ignition off, it is still poss
ible to open, close and
tilt the sliding/tilting
roof for approx. 10 minutes. It is no longer possible to operate the sliding/tilting roof after opening one of the front doors, however.
Note
If the battery has been disc
onnected and reconnected, it is possible that the
sliding/tilting roof does not close fully. He
re you have to set the control dial to the
switch position and press it forward for about 10 seconds.Opening and tiltingComfort position– Turn the switch to position
fig. 34
.
Opening fully– Turn the switch to position and hold it
in this position (spring-tensioned posi-
tion).
Tilting roof– Turn the switch to position . When the sliding/tilting roof is in the comfort position, the intensity of the wind noise is much less. The sun screen is also opened automatically when the roof slides open. You can slide the sun screen into the opened or closed position by hand when the sliding/tilting roof is closed.
Caution
It may be necessary during winter to remove any ice and snow in the area of the sliding/tilting roof before opening it in
order to prevent damaging the opening mech-
anism and the seal.
Fig. 34 Control dial for the power sliding/tilting roof
AA
ACABAD
s3j8.a.book Page 46 Tuesday, April 20, 2010 1:10 PM
Page 54 of 244
Lights and Visibility
53
Using the system
Safety
Driving Tips
General Maintenance
Breakdown assistance
Technical Data
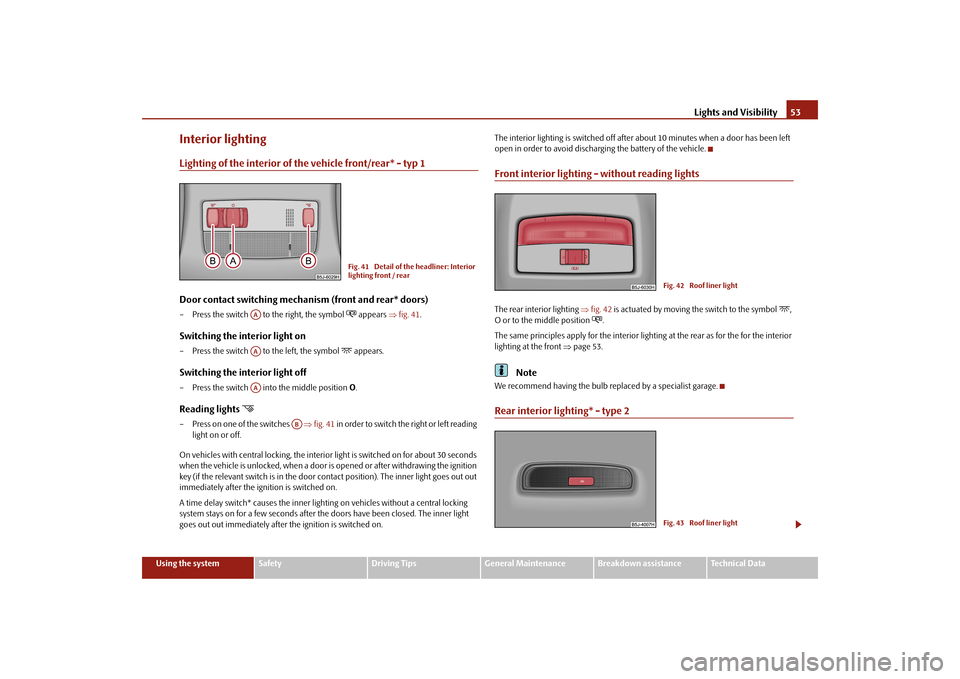
Interior lightingLighting of the interior of the vehicle front/rear* - typ 1Door contact switching mechanism (front and rear* doors)– Press the switch to the right, the symbol
appears
fig. 41
.
Switching the interior light on– Press the switch to the left, the symbol
appears.
Switching the interior light off– Press the switch into
the middle position
O.
Reading lights
– Press on one of the switches
fig. 41
in order to switch the right or left reading
light on or off.
On vehicles with central locking, the interi
or light is switched on for about 30 seconds
when the vehicle is unlocked, when a door is
opened or after withdrawing the ignition
key (if the relevant switch is in the door co
ntact position). The inner light goes out out
immediately after the ignition is switched on. A time delay switch* causes
the inner lighting on vehicl
es without a central locking
system stays on for a few seconds after the doors have been closed. The inner light goes out out immediately after the ignition is switched on.
The interior lighting is switched off after
about 10 minutes when a door has been left
open in order to avoid discharg
ing the battery of the vehicle.
Front interior lighting - without reading lightsThe rear interior lighting
fig. 42
is actuated by moving the switch to the symbol
,
O or to the middle position
.
The same principles apply for th
e interior lighting at the rear as for the for the interior
lighting at the front
page 53.
Note
We recommend having the bulb re
placed by a specialist garage.
Rear interior lighting* - type 2
Fig. 41 Detail of the headliner: Interior lighting front / rear
AAAAAA
AB
Fig. 42 Roof liner lightFig. 43 Roof liner light
s3j8.a.book Page 53 Tuesday, April 20, 2010 1:10 PM
Page 62 of 244
Seats and Storage
61
Using the system
Safety
Driving Tips
General Maintenance
Breakdown assistance
Technical Data
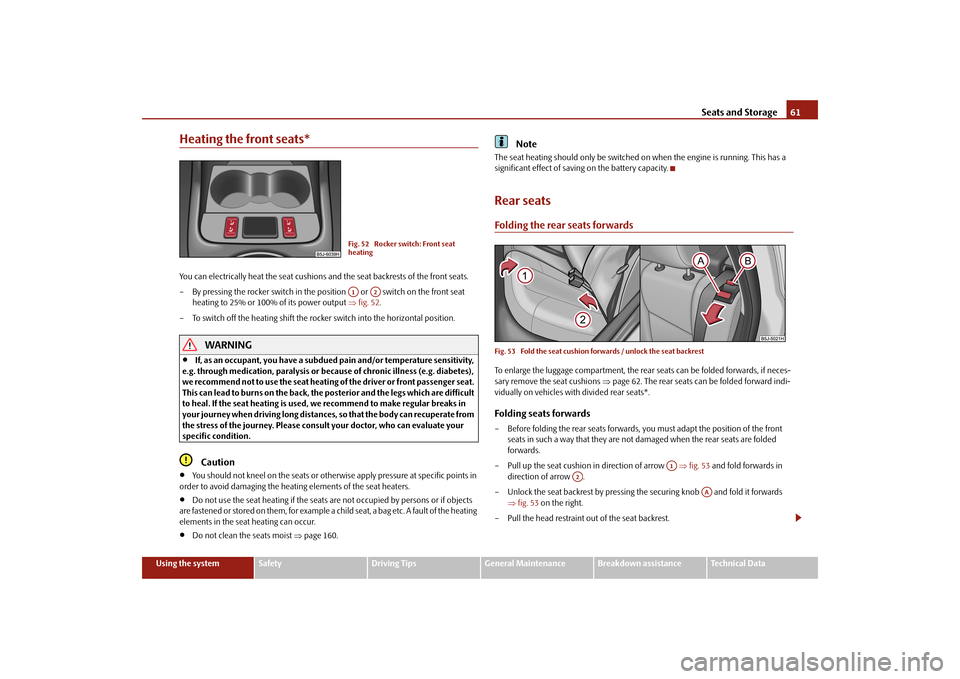
Heating the front seats*You can electrically heat the seat cushions and the seat backrests of the front seats. – By pressing the rocker switch in the posi
tion or switch on the front seat
heating to 25% or 100% of its power output
fig. 52
.
– To switch off the heating shift the rocker switch into the horizontal position.
WARNING
If, as an occupant, you have a subdued
pain and/or temperature sensitivity,
e.g. through medication, paralysis or beca
use of chronic illness (e.g. diabetes),
we recommend not to use the seat heating of the driver or front passenger seat. This can lead to burns on the back, the
posterior and the legs
which are difficult
to heal. If the seat heating is used, we
recommend to make regular breaks in
your journey when driving long distances,
so that the body can recuperate from
the stress of the journey. Please consult your doctor, who can evaluate your specific condition.
Caution
You should not kneel on the seats or otherwise apply pressure at specific points in
order to avoid damaging the heating elements of the seat heaters.
Do not use the seat heating if the seats are not occupied by persons or if objects
are fastened or stored on them, for example a child seat, a bag etc. A fault of the heating elements in the seat heating can occur.
Do not clean the seats moist
page 160.
Note
The seat heating should only be switched
on when the engine is running. This has a
significant effect of saving
on the battery capacity.
Rear seatsFolding the rear seats forwardsFig. 53 Fold the seat cushion forwards / unlock the seat backrestTo enlarge the luggage compartment, the rear
seats can be folded forwards, if neces-
sary remove the seat cushions
page 62. The rear seats can be folded forward indi-
vidually on vehicles with divided rear seats*.Folding seats forwards– Before folding the rear seats forwards, yo
u must adapt the position of the front
seats in such a way that they are not damaged when the rear seats are folded forwards.
– Pull up the seat cushion in direction of arrow
fig. 53
and fold forwards in
direction of arrow .
– Unlock the seat backrest by pressing th
e securing knob and fold it forwards
fig. 53
on the right.
– Pull the head restraint out of the seat backrest.
Fig. 52 Rocker switch: Front seat heatingA1
A2
A1
A2
AA
s3j8.a.book Page 61 Tuesday, April 20, 2010 1:10 PM
Page 76 of 244
Seats and Storage
75
Using the system
Safety
Driving Tips
General Maintenance
Breakdown assistance
Technical Data
WARNING
Take care when using the cigarette ligh
ter! Not paying proper attention or
incorrect use the cigarette lighter in
an uncontrolled manner may result in
burns.
The cigarette lighter and the power socket
also operates when the ignition is
switched off or the ignition key withdrawn. This is why you should never leave children unattended in the vehicle!
Caution
Always use matching
plugs to avoid damagi
ng the power socket.
Note
Connecting electrical components when
the engine is not running will drain
the battery of the vehicle - risk of battery draining!
Further information
page 184.
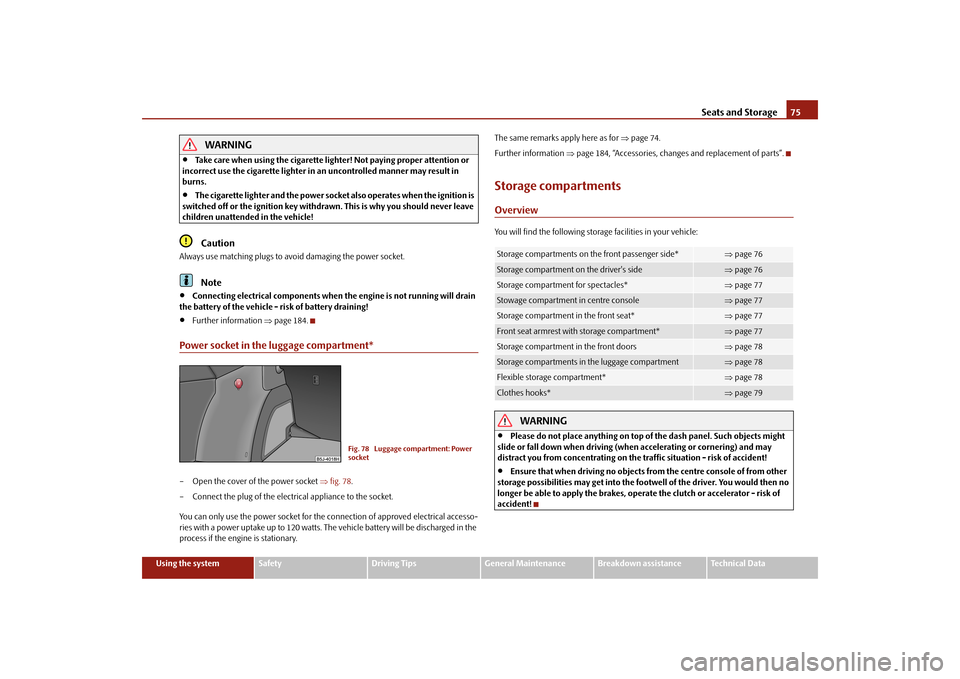
Power socket in the luggage compartment*– Open the cover of the power socket
fig. 78
.
– Connect the plug of the electr
ical appliance to the socket.
You can only use the power socket for the connection of approved electrical accesso- ries with a power uptake up to 120 watts. The vehicle battery will be discharged in the process if the engine is stationary.
The same remarks apply here as for
page 74.
Further information
page 184, “Accessories, changes and replacement of parts”.
Storage compartmentsOverviewYou will find the following storag
e facilities in your vehicle:
WARNING
Please do not place anything on top of the dash panel. Such objects might
slide or fall down when driving (whe
n accelerating or cornering) and may
distract you from concentrating on the traffic situation - risk of accident!
Ensure that when driving no objects from the centre console of from other
storage possibilities may get into the fo
otwell of the driver. You would then no
longer be able to apply the brakes, oper
ate the clutch or accelerator - risk of
accident!
Fig. 78 Luggage compartment: Power socket
Storage compartments on the front passenger side*
page 76
Storage compartment on the driver's side
page 76
Storage compartment for spectacles*
page 77
Stowage compartment in centre console
page 77
Storage compartment in the front seat*
page 77
Front seat armrest with storage compartment*
page 77
Storage compartment in the front doors
page 78
Storage compartments in the luggage compartment
page 78
Flexible storage compartment*
page 78
Clothes hooks*
page 79
s3j8.a.book Page 75 Tuesday, April 20, 2010 1:10 PM
Page 91 of 244
Starting-off and Driving
90
You should not switch on any major elec
trical components during the heating
period otherwise
the vehicle battery will
be drained unnecessarily.
- start engine Applies to all models: Position
To lock the steering
, with the ignition key withdrawn, turn the steering wheel until the
steering locking pin is heard to
engage. You should always lock the steering as a general
rule if you leave your vehicle. This acts as
a deterrent against possible theft of your
vehicle
.
Position
Move the steering wheel back and forward a little if the ignition key cannot, or cannot easily be turned into this position, in order to release the steering lock. Position
The engine is started in this position. At th
e same time switched on low beam or main
beam or other electrical components wi
th major power consumption are briefly
switched off. The ignition key moves back into position when one releases the key. The ignition key must be turned back into
position each time before starting the
engine again. The starter repeat lock in th
e ignition lock prevents the starter being
engaged when the engine is r
unning and thus getting damaged.
WARNING
When driving, the ignition key must always be in the position (ignition
switched on) without the engine running. This position is indicated by the warning lights coming on. If this is not the case, it could result in unexpected locking of the steering wh
eel - risk of accident!
Do not withdraw the ignition key from the lock until the vehicle has come to
a stop. The steering lock can engage
immediately - risk of accident!
Always withdraw the ignition key if you are going to leave the vehicle, even
for a short time. This is particularly important if children are left in the vehicle. The children might otherwise start the en
gine or operate electrical equipment
(e.g. power windows) - risk of injury!
Starting the engineGeneral You can only start the engine only using an original ignition key.
Place the gearshift lever into neutral (or
place the selector lever to the position
P or
N in the case of an automatic gearbox) and put on the handbrake firmly before starting the engine.
The clutch pedal should be fully depressed when starting the engine - the starter
then only has to crank the engine.
Let go of the key as soon as the engine starts otherwise there may be damage to
the starter. The engine running noises may louder at first be louder for a short time after starting the cold engine until oil pressure can be
built up in the hydraulic valve clearance
compensation. This is quite normal and is not an operating problem. If the engine does not start ... You can use the battery of anothe
r vehicle as a jump-start aid
page 190.
It is only possible to tow-start vehicles fi
tted with a manual gearbox. The tow-starting
distance must not be more than 50 metres
page 193.
WARNING
Never run the engine in non ventilated
or enclosed areas. The exhaust gases
of the engine contain besides the odorless and colourless carbon monoxide a poisonous gas - hazard! Carbon mono
xide can cause unconsciousness and
death.
Never leave your vehicle unattended with the engine running.Caution
The starter may only be operated (ignitio
n key position ), if the engine is not
running. If the starter is imme
diately operated after switchin
g off the engine, the starter
or the engine can be damaged.
A3
A1A2A3
A2
A1
A2
A3
s3j8.a.book Page 90 Tuesday, April 20, 2010 1:10 PM
Page 92 of 244

Starting-off and Driving
91
Using the system
Safety
Driving Tips
General Maintenance
Breakdown assistance
Technical Data
Avoid high engine revolutions, full throttle and high engine loads as long as the
engine has not yet reached its normal oper
ating temperature - risk of damaging the
engine!
Vehicles which are fitted with an exhaust gas catalytic converter should not be tow-
started over a distance of more than 50 metres.
For the sake of the environment
Never warm up the engine when the vehicle is standing. Drive off right away. When driving the engine reaches its operating te
mperature more rapidly and the pollutant
emissions are lower.Petrol enginesThese engines are fitted with a starter system which selects the correct fuel-air mixture for every external air temperature.
Do not operate accelerator before and when starting engine.
Interrupt the attempt at starting after 10
seconds if the engine does not start right
awayand wait for about 30 seconds before repeating the attempt.
It is possible that the fuse on the electric
al fuel pump is defect if the engine still
does not start. Check the fuse and replace it if necessary
page 195.
If the engine does not start, contact the nearest specialist garage to obtain profes-
sional assistance. It may be necessary, if the engine is
very hot
, to slightly depress the accelerator after
the engine has started.Diesel enginesGlow plug system Diesel engines are equipped with a glow
plug system, the preglow period being
controlled automatically in line with the coolant temperature and outside tempera- ture. The preglow indicator light
comes on after the ignition has been switched on.
You should not switch on any major electrical components during the heating period otherwise the vehicle battery will be drained unnecessarily.
You should start the engine immediately after the glow plug warning light
has
gone out.
The glow plug warning light will come on for about one second if the engine is at a
normal operating temperature or if the outside temperature is above +5°C. This means that you can start the engine
right away
.
Interrupt the attempt at starting after 10 seconds if the engine does not start right
awayand wait for about 30 seconds before repeating the attempt.
It is possible that the fuse
on the diesel preglow system is defect if the engine still
does not start. Check the fuse and replace it if necessary
page 195.
Contact the nearest specialist garage to obtain professional assistance.
Starting the engine after fuel tank has run dry It may take longer than normal to start the
engine after refuelling if the fuel tank has
run completely dry - up to one minute. This is
because the fuel system must first of all
be filled while the attempting to start the engine.Switching off the engine– The engine can be switched off by turnin
g the ignition key from position into
page 89, fig. 94
.
WARNING
Never switch off the engine before the ve
hicle is stationary - risk of accident!
The brake booster only operates when the engine is running. Greater phys-
ical effort for braking is required when en
gine is switched off.
Because if you do
not stop as normal, this can cause an accident and severe injuries.
Caution
you should not switch the engine off right away at the end of your journey after the engine has been operated for a lengthy period
at high loads but should be allowed it
to run at idling speed for about 2 minutes.
This prevents any accumulation of heat
when the engine is switched off.
A1
s3j8.a.book Page 91 Tuesday, April 20, 2010 1:10 PM