service SKODA FABIA 2010 2.G / 5J Owner's Manual
[x] Cancel search | Manufacturer: SKODA, Model Year: 2010, Model line: FABIA, Model: SKODA FABIA 2010 2.G / 5JPages: 244, PDF Size: 29.53 MB
Page 3 of 244
Introduction 2
On-board literature
The on-board literature for your vehicle consists of this “Owner's Manual”
as well as a “Service schedule” and a “Help on the road”. There can also be
a variety of other additional operating manuals and instructions on-board
(e.g. an operating manual for the radio) depending on the vehicle model and
equipment.
If one of the publications listed above is missing, please contact a specialist
garage immediately, where one will be glad to assist you in such matters.
One should note that the details given in the vehicle's papers always
take precedence over those in the Owner's Manual.
Owner's Manual
This Owner's Manual describes the current scope of equipment. Certain
items of equipment listed are only installed later on and only envisaged for
particular markets. The illustrations can differ in minor details from your
vehicle; they are only intended for general information.
In addition to information regarding all the controls and equipment, the
Owner's Manual also contains important information regarding care and
operation for your safety and also to retain the value of your vehicle. To
provide you with valuable tips and aids. You will learn how you can operate
your vehicle safely, economically and in an environmentally conscious
way.
For safety reasons, please also pay attention to the information on
accessories, modifications and replacement of parts page 184.
The other chapters of the Owner's Manual are also important, however, for
proper treatment of your car - in addition to regular care and maintenance -
helps to retain its value and in many cases is also one of the conditions for
possible warranty claims.
The Service schedule
contains:
Vehicle data;
Service intervals;
Overview of the service work;
Service proof;
Confirmation of mobility warranty (only valid in certain countries);
important information on the warranty.
The confirmations of the carried out service work are one of the conditions
for possible warranty claims.
Please always present the Service schedule when you take your car to a
specialist garage.
If the Service schedule is missing or worn, please contact the specialist
garage where your car is serviced regularly. You will receive a duplicate, in
which the previously carried out service work are confirmed.
Help on the road
Contains the most important telephone numbers in individual countries as
well as the addresses and telephone numbers of Škoda importers.
s3j8.a.book Page 2 Tuesday, April 20, 2010 1:10 PM
Page 4 of 244
Contents3
Using the system
Safety
Driving Tips
General Maintenance
Breakdown assistance
Technical Data
ContentsLayout of this Owner's Manual
(explanations)
. . . . . . . . . . . . . . . . . . . . . . . . . .
Using the system
. . . . . . . . . . . . . . . . . . . . . .
Cockpit
. . . . . . . . . . . . . . . . . . . . . . . . . . . . . . . . . . . . . . . .
General view . . . . . . . . . . . . . . . . . . . . . . . . . . . . . . . . .
Quick Reference Guide
. . . . . . . . . . . . . . . . . . . . . . .
Basic functions and important information . . . . .
Instruments and warning lights
. . . . . . . . . . . . . . .
Overview of the instrument cluster . . . . . . . . . . . . .
Engine revolutions counter . . . . . . . . . . . . . . . . . . . .
Speedometer . . . . . . . . . . . . . . . . . . . . . . . . . . . . . . . .
Coolant temperature gauge* . . . . . . . . . . . . . . . . . .
Fuel gauge* . . . . . . . . . . . . . . . . . . . . . . . . . . . . . . . . . .
Counter for distance driven . . . . . . . . . . . . . . . . . . .
Service Interval Display . . . . . . . . . . . . . . . . . . . . . . .
Digital clock . . . . . . . . . . . . . . . . . . . . . . . . . . . . . . . . . .
Shift recommendation for changing gears* . . . . .
Multi-functional indicator (onboard computer)*
MAXI DOT display (information display)* . . . . . . .
Auto Check Control . . . . . . . . . . . . . . . . . . . . . . . . . . .
Warning lights . . . . . . . . . . . . . . . . . . . . . . . . . . . . . . . .
Unlocking and locking
. . . . . . . . . . . . . . . . . . . . . . . .
Key . . . . . . . . . . . . . . . . . . . . . . . . . . . . . . . . . . . . . . . . . .
Locking / Unlocking . . . . . . . . . . . . . . . . . . . . . . . . . . .
Child safety lock . . . . . . . . . . . . . . . . . . . . . . . . . . . . . .
Central locking system* . . . . . . . . . . . . . . . . . . . . . . .
Remote control* . . . . . . . . . . . . . . . . . . . . . . . . . . . . . .
Anti-theft alarm system* . . . . . . . . . . . . . . . . . . . . . .
Interior monitor* and Towing protection monitoring*
Electrical power windows* . . . . . . . . . . . . . . . . . . . .
Electric sliding/tilting roof* . . . . . . . . . . . . . . . . . . . .
Lights and Visibility
. . . . . . . . . . . . . . . . . . . . . . . . . . . .
Lights . . . . . . . . . . . . . . . . . . . . . . . . . . . . . . . . . . . . . . . .
Interior lighting . . . . . . . . . . . . . . . . . . . . . . . . . . . . . . .
Visibility . . . . . . . . . . . . . . . . . . . . . . . . . . . . . . . . . . . . . .
Windshield wiper and wash system . . . . . . . . . . . . .
Rear mirror . . . . . . . . . . . . . . . . . . . . . . . . . . . . . . . . . . .
Seats and Storage
. . . . . . . . . . . . . . . . . . . . . . . . . . . . . .
Front seats . . . . . . . . . . . . . . . . . . . . . . . . . . . . . . . . . . . .
Head restraints . . . . . . . . . . . . . . . . . . . . . . . . . . . . . . . .
Heating the front seats* . . . . . . . . . . . . . . . . . . . . . . .
Rear seats . . . . . . . . . . . . . . . . . . . . . . . . . . . . . . . . . . . .
Pedals . . . . . . . . . . . . . . . . . . . . . . . . . . . . . . . . . . . . . . . .
luggage compartment . . . . . . . . . . . . . . . . . . . . . . . . .
Variable loading floor in the luggage compartment*
(Combi) . . . . . . . . . . . . . . . . . . . . . . . . . . . . . . . . . . . . . .
Net partition* (Combi) . . . . . . . . . . . . . . . . . . . . . . . .
Bicycle holder in the luggage compartment* . . . .
The roof rack* . . . . . . . . . . . . . . . . . . . . . . . . . . . . . . . .
Front cup holder . . . . . . . . . . . . . . . . . . . . . . . . . . . . . .
Rear cup holder* . . . . . . . . . . . . . . . . . . . . . . . . . . . . . .
Parking ticket holder . . . . . . . . . . . . . . . . . . . . . . . . . . .
Ashtray* . . . . . . . . . . . . . . . . . . . . . . . . . . . . . . . . . . . . . .
Cigarette lighter* and power sockets* . . . . . . . . . .
Storage compartments . . . . . . . . . . . . . . . . . . . . . . . .
Heating and air conditioning system
. . . . . . . . . .
Air outlet vents . . . . . . . . . . . . . . . . . . . . . . . . . . . . . . . .
Recirculated air mode . . . . . . . . . . . . . . . . . . . . . . . . .
Heating . . . . . . . . . . . . . . . . . . . . . . . . . . . . . . . . . . . . . .
Climatic (semi-automatic air conditioning system)*
Climatronic* (automatic air conditioning) . . . . . . .
Starting-off and Driving
. . . . . . . . . . . . . . . . . . . . . . .
Setting steering wheel position . . . . . . . . . . . . . . . . .
Ignition lock . . . . . . . . . . . . . . . . . . . . . . . . . . . . . . . . . .
Starting the engine . . . . . . . . . . . . . . . . . . . . . . . . . . . .
Switching off the engine . . . . . . . . . . . . . . . . . . . . . . .Shifting (manual gearbox) . . . . . . . . . . . . . . . . . . . . .
Handbrake . . . . . . . . . . . . . . . . . . . . . . . . . . . . . . . . . . .
Parking aid* . . . . . . . . . . . . . . . . . . . . . . . . . . . . . . . . . .
Cruise control system (CCS)* . . . . . . . . . . . . . . . . . .
“START-STOP”* . . . . . . . . . . . . . . . . . . . . . . . . . . . . . . .
Automatic gearbox
. . . . . . . . . . . . . . . . . . . . . . . . . . . .
Automatic gearbox* . . . . . . . . . . . . . . . . . . . . . . . . . .
Communication
. . . . . . . . . . . . . . . . . . . . . . . . . . . . . . .
Multifunction steering wheel* . . . . . . . . . . . . . . . . .
Universal telephone preinstallation GSM II* . . . . .
Voice control . . . . . . . . . . . . . . . . . . . . . . . . . . . . . . . . .
Music playback via Bluetooth® . . . . . . . . . . . . . . . .
Inputs AUX-IN* and MDI* . . . . . . . . . . . . . . . . . . . . .
Safety
. . . . . . . . . . . . . . . . . . . . . . . . . . . . . . . . . . . . . . .
Passive Safety
. . . . . . . . . . . . . . . . . . . . . . . . . . . . . . . . .
Basic information . . . . . . . . . . . . . . . . . . . . . . . . . . . . .
Correct seated position . . . . . . . . . . . . . . . . . . . . . . .
Seat belts
. . . . . . . . . . . . . . . . . . . . . . . . . . . . . . . . . . . . . .
Why seat belts? . . . . . . . . . . . . . . . . . . . . . . . . . . . . . . .
The physical principle of a frontal collision . . . . . .
Important safety information regarding the use of seat
belts . . . . . . . . . . . . . . . . . . . . . . . . . . . . . . . . . . . . . . . . .
How are seat belts correctly fastened? . . . . . . . . . .
Belt tensioner . . . . . . . . . . . . . . . . . . . . . . . . . . . . . . . .
Airbag system
. . . . . . . . . . . . . . . . . . . . . . . . . . . . . . . . .
Description of the airbag system . . . . . . . . . . . . . . .
Front airbags . . . . . . . . . . . . . . . . . . . . . . . . . . . . . . . . .
Side airbags* . . . . . . . . . . . . . . . . . . . . . . . . . . . . . . . . .
Head airbags* . . . . . . . . . . . . . . . . . . . . . . . . . . . . . . . .
Deactivating airbags . . . . . . . . . . . . . . . . . . . . . . . . . .
67991010151515161616171718181922232635353636374142434446
48485354555759596061616363676870727373747474758080808183868989899091
92929394959898104104105110111111113113113114117117117118119120122122123125127128
s3j8.a.book Page 3 Tuesday, April 20, 2010 1:10 PM
Page 16 of 244
Instruments and warning lights
15
Using the system
Safety
Driving Tips
General Maintenance
Breakdown assistance
Technical Data
Instruments and warning lightsOverview of the instrument cluster
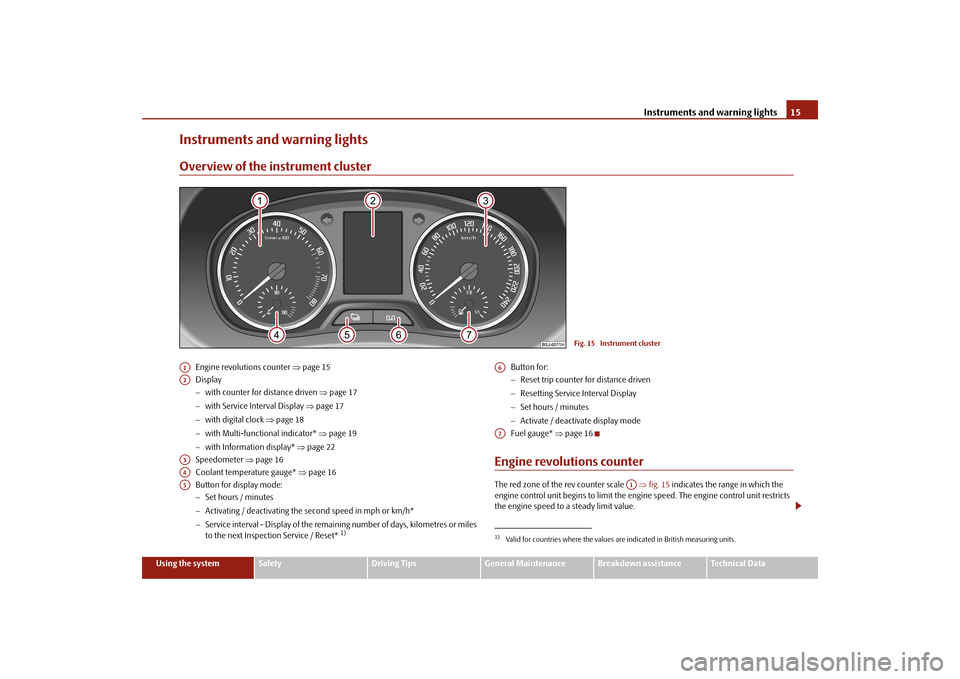
Engine revolutions counter
page 15
Display with counter for distance driven
page 17
with Service Interval Display
page 17
with digital clock
page 18
with Multi-functional indicator*
page 19
with Information display*
page 22
Speedometer
page 16
Coolant temperature gauge*
page 16
Button for display mode: Set hours / minutes Activating / deactivating the second speed in mph or km/h* Service interval - Display of the remaining number of days, kilometres or miles to the next Inspection Service / Reset*
1)
Button for: Reset trip counter for distance driven Resetting Service
Interval Display
Set hours / minutes Activate / deactivate display mode Fuel gauge*
page 16
Engine revolutions counterThe red zone of the rev counter scale
fig. 15
indicates the range in which the
engine control unit begins to limit the engi
ne speed. The engine
control unit restricts
the engine speed to a steady limit value.
Fig. 15 Instrument cluster
A1A2A3A4A5
1)Valid for countries where the values ar
e indicated in British measuring units.
A6A7
A1
s3j8.a.book Page 15 Tuesday, April 20, 2010 1:10 PM
Page 18 of 244
Instruments and warning lights
17
Using the system
Safety
Driving Tips
General Maintenance
Breakdown assistance
Technical Data
Caution
Never run the fuel tank completely empty!
The irregular supply of the fuel system can
lead to irregular runni
ng of the engine. Unburnt fuel may get into the exhaust system
and damage the catalytic converter.Counter for distance drivenThe counter for the distance driven is loca
ted in the bottom area of the display. The
distance which you have driven
with your vehicle is shown
in kilometres (km). In some
countries the measuring
unit “mile”
is used.
Reset button If you hold the reset button
page 15, fig. 15
pressed for about 1 second, the trip
counter is set back to zero. Trip counter for distance driven The trip counter indicates the distance which
you have driven since it was last reset -
in steps of 100 metres or 1/10 of a mile. Counter for distance driven The counter for distance driven indicates th
e total distance in kilometers or miles
which the vehicle has been driven. Fa u l t d i s p l a y If there is a fault in the instru
ment cluster, the constant text
Error
appears in the display.
Have the fault rectified as soon as
possible by a specialist workshop.
WARNING
Never seek to adjust the trip counter for
distance driven while driving for safety
reasons!
Note
If vehicles which are fitted with the inform
ation display* the display of the second
speed is activated in mph or km/h, this driving speed is indicated instead of the counter for the total distance driven.
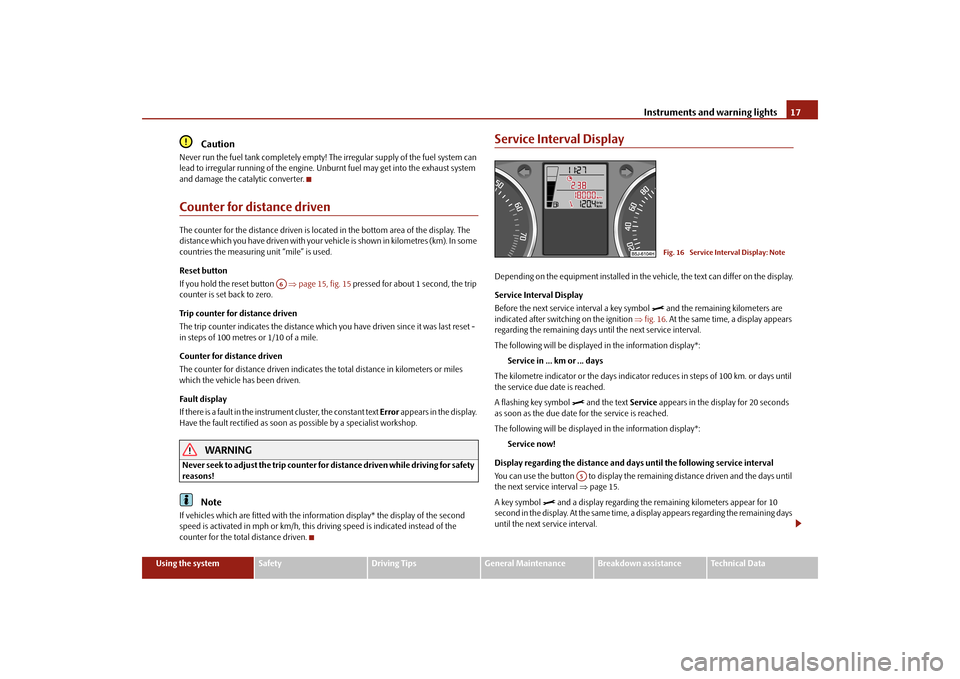
Service Interval DisplayDepending on the equipment installed in the vehicle, the text can differ on the display. Service Interval Display Before the next service interval a key symbol
and the remaining kilometers are
indicated after switching on the ignition
fig. 16
. At the same time, a display appears
regarding the remaining days until the next service interval. The following will be displayed in the information display*:
Service in ... km or ... days
The kilometre indicator or the days indicator reduces in steps of 100 km. or days until the service due date is reached. A flashing key symbol
and the text
Service
appears in the display for 20 seconds
as soon as the due date for the service is reached. The following will be displayed in the information display*:
Service now!
Display regarding the distance and days
until the following service interval
You can use the button to display the rema
ining distance driven and the days until
the next service interval
page 15.
A key symbol
and a display regarding the remaining kilometers appear for 10
second in the display. At the same time, a display appears regarding the remaining days until the next service interval.
A6
Fig. 16 Service Interval Display: Note
A5
s3j8.a.book Page 17 Tuesday, April 20, 2010 1:10 PM
Page 19 of 244
Instruments and warning lights
18On vehicles which are equipped with inform
ation display*, you ca
n call up this infor-
mation in the menu
SETUP
page 23.
The following will be displayed in the information display* for 10 seconds:
Service in ... km or ... days
Resetting Service Interval Display It is only possible to reset the Service Interval Display, if a service message or at least a pre-warning is shown on the display of the instrument cluster. We recommend having this resetting performed by a specialist garage.The specialist garage:
resets the memory of the display after the appropriate inspection;
makes an entry in the Service schedule;
affix the sticker with the entry of the following service interval to the side of the
dash panel on the driver's side. Reset the service interval displays by using the reset button
page 15 on the trip
counter. On vehicles which are equipped with inform
ation display*, you ca
n call up this infor-
mation in the menu
SETUP
page 23.
Caution
We recommend that you do not reset the Se
rvice Interval Display
yourself otherwise
this can result in the service interval display being incorrectly set, which may also result in problems with operation of your vehicle.
Note
Never reset the display between service intervals otherwise this may result in
incorrect readouts.
information is retained in the Service Interval Display also after the battery of the
vehicle is disconnected.
If the instrument cluster is exchanged af
ter a repair, the correct values must be
entered in the counter for the Service Interval Display. This work is carried out by a specialist garage.
The data displayed is the same after resetting the display with flexible service inter-
vals (QG1) using the reset button as that for a vehicle with fixed service intervals (QG2). We therefore recommend having the Service In
terval Display reset
only by an author-
ised Škoda Service Partner who is familiar with the procedure for resetting the display with a vehicle system tester.
Please refer to the brochure Service schedule for extensive information about the
service intervals.Digital clockThe time is set with the buttons and
page 15, fig. 15
.
Select the display which you wish to ch
ange with the button and carry out the
change with the button . On vehicles which are fitted out with the information display*, it is possible to set the time in the menu
Time
page 24.
WARNING
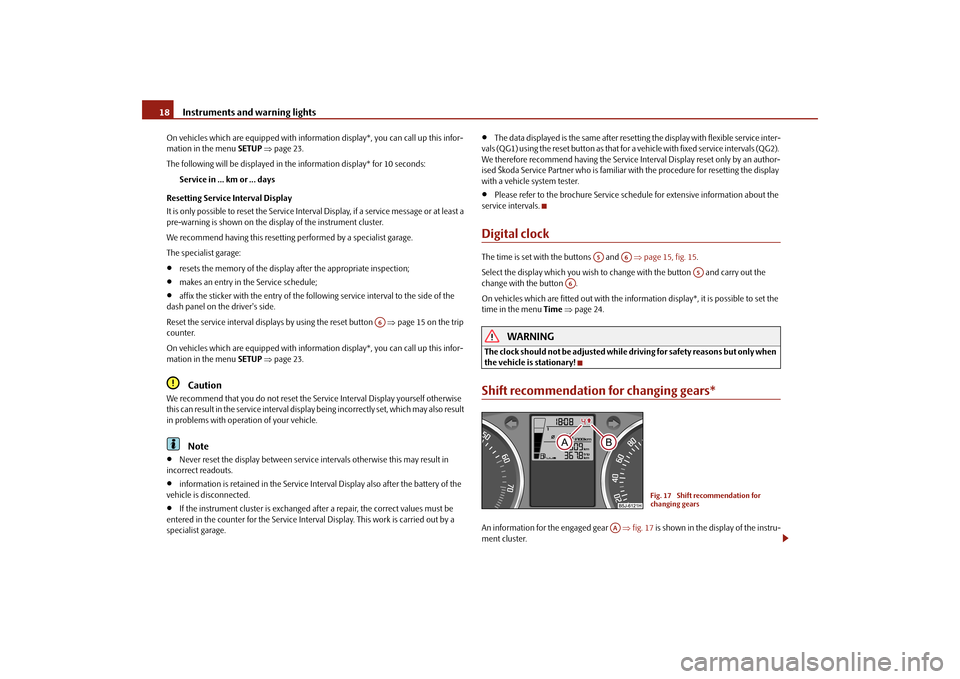
The clock should not be adjusted while driving for safety reasons but only when the vehicle is stationary!Shift recommendation for changing gears*An information for the engaged gear
fig. 17
is shown in the display of the instru-
ment cluster.
A6
A5
A6
A5
A6
Fig. 17 Shift recommendation for changing gears
AA
s3j8.a.book Page 18 Tuesday, April 20, 2010 1:10 PM
Page 23 of 244
Instruments and warning lights
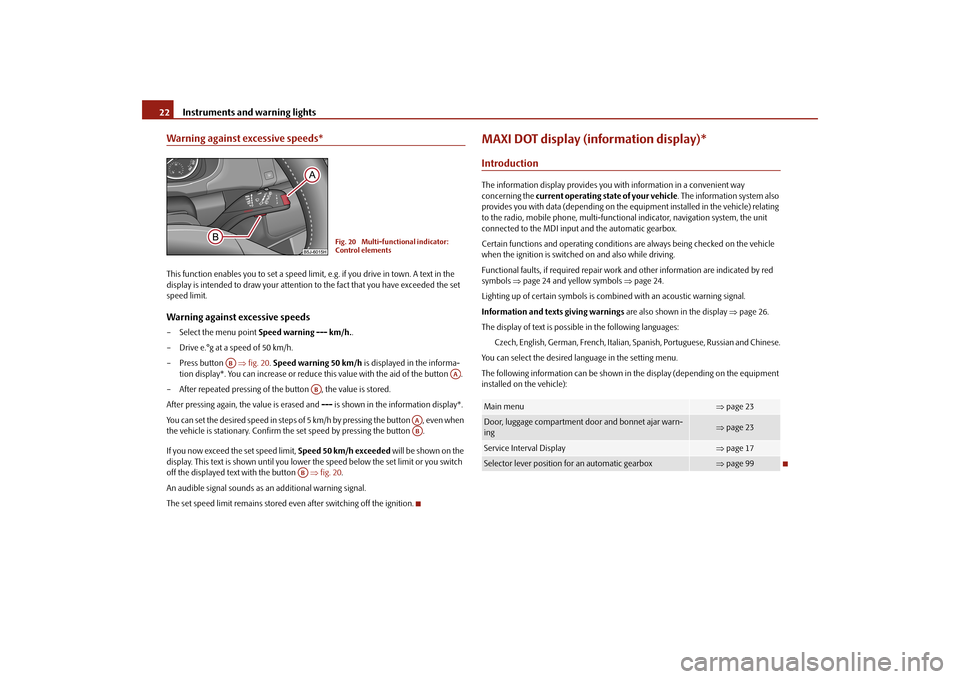
22Warning against excessive speeds*This function enables you to set a speed limit, e.g. if you drive in town. A text in the display is intended to draw your attention
to the fact that you have exceeded the set
speed limit.Warning against excessive speeds– Select the menu point
Speed warning --- km/h.
.
– Drive e.°g at a speed of 50 km/h.– Press button
fig. 20
. Speed warning 50 km/h
is displayed in the informa-
tion display*. You can increase or reduce
this value with the aid of the button .
– After repeated pressing of the button , the value is stored.After pressing again, the value is erased and
--- is shown in the information display*.
You can set the desired speed in steps of 5 km/h by pressing the button , even when the vehicle is stationary. Confirm the
set speed by pressing the button .
If you now exceed the set speed limit,
Speed 50 km/h exceeded
will be shown on the
display. This text is shown until you lower the speed below the set limit or you switch off the displayed text with the button
fig. 20
.
An audible signal sounds as an additional warning signal.The set speed limit remains stored even after switching off the ignition.
MAXI DOT display (information display)*IntroductionThe information display provides you with information in a convenient way concerning the
current operating state of your vehicle
. The information system also
provides you with data (depending on the equipment installed in the vehicle) relating to the radio, mobile phone,
multi-functional indicator, navigation system, the unit
connected to the MDI input and the automatic gearbox. Certain functions and operatin
g conditions are always being checked on the vehicle
when the ignition is switched on and also while driving. Functional faults, if required repair work
and other information are indicated by red
symbols
page 24 and yellow symbols
page 24.
Lighting up of certain symbols is comb
ined with an acoustic warning signal.
Information and text
s giving warnings
are also shown in the display
page 26.
The display of text is possible in the following languages:
Czech, English, German, French, Italian,
Spanish, Portuguese, Russian and Chinese.
You can select the desired language in the setting menu.The following information can be shown in
the display (depending on the equipment
installed on the vehicle):
Fig. 20 Multi-functional indicator: Control elements
AB
AA
AB
AAAB
AB
Main menu
page 23
Door, luggage compartment door and bonnet ajar warn- ing
page 23
Service Interval Display
page 17
Selector lever position for an automatic gearbox
page 99
s3j8.a.book Page 22 Tuesday, April 20, 2010 1:10 PM
Page 25 of 244
Instruments and warning lights
24Shown in the menu
Vehicle status
, if there is at least one error message. After selecting
this menu the first of the error messages is displayed. Several error messages are shown on the display under the message e.g.
1/3
. This indicates that the first of a total
of three error messages is displayed. The respective messages are displayed one after the other in an interval of 5 seconds. Chec
k as soon as possible the displayed error
messages. As long as the operational faults are not
rectified, the symbols are always indicated
again. After the first display, the symbol
s are indicated without information for the
driver. If a fault occurs, a warning signal will also
sound in addition to the symbol and text in
the display:
Priority 1 - three warning signals
Priority 2 - one warning signal
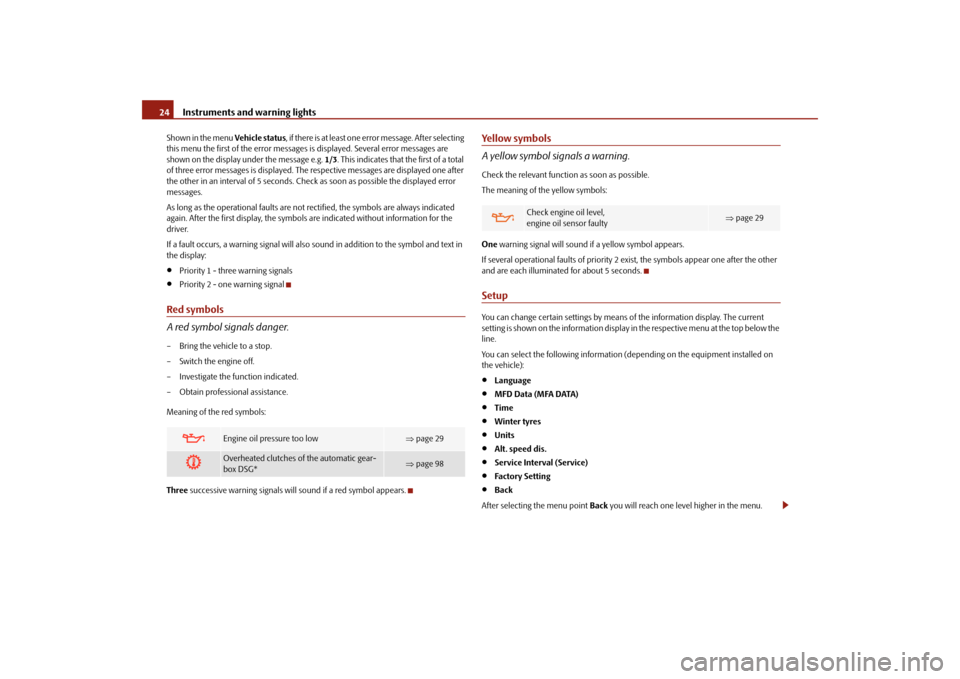
Red symbols A red symbol signals danger.– Bring the vehicle to a stop. – Switch the engine off.– Investigate the function indicated.– Obtain professional assistance. Meaning of the red symbols: Three
successive warning signals will sound if a red symbol appears.
Yellow symbols A yellow symbol signals a warning.Check the relevant function as soon as possible. The meaning of the yellow symbols: One
warning signal will sound if a yellow symbol appears.
If several operational faults of priority 2
exist, the symbols appear one after the other
and are each illuminated for about 5 seconds.SetupYou can change certain settings by means
of the information display. The current
setting is shown on the information display
in the respective menu at the top below the
line. You can select the following information (d
epending on the equipment installed on
the vehicle):
Language
MFD Data (MFA DATA)
Time
Winter tyres
Units
Alt. speed dis.
Service Interval (Service)
Factory Setting
Back
After selecting the menu point
Back
you will reach one level higher in the menu.
Engine oil pressure too low
page 29
Overheated clutches of the automatic gear- box DSG*
page 98
Check engine oil level, engine oil sensor faulty
page 29
s3j8.a.book Page 24 Tuesday, April 20, 2010 1:10 PM
Page 26 of 244
Instruments and warning lights
25
Using the system
Safety
Driving Tips
General Maintenance
Breakdown assistance
Technical Data
Language Here you can set in which language the
warning and information texts should be
displayed. Displays of the MFA Here you can switch off or on certain di
splays of the multi-
functional indicator.
Time Here you can set the time, the time format (12 or 24 hour indicator) and the time change summer/winter time. Winter tyres Here you can set at which speed a warning si
gnal should sound. This function is used
for e.g winter tyres with the permissibl
e maximum speed less than the maximum
speed of the vehicle. When exceeding the speed, the following is
displayed on the information display*:
Winter tyres max. speed ... km/h (Winter tyres maximum ... km/h)
Measures Here you can set the units for temperat
ure, consumption and distance driven.
Second speed Here you can switch on the display of
the second speed in mph or in km/h
2).
Service Here you can have the kilometers still to
be driven and the days until the following
service interval shown and the Service Interval Display reset. Factory Setting After selecting the menu point
Factory Setting
the factory setting of the information
display is established again.2)Valid for countries where the values are indicated in British measuring units.
s3j8.a.book Page 25 Tuesday, April 20, 2010 1:10 PM
Page 107 of 244
Communication
106
To ensure an optimum signal transmission, always leave the telephone with the adapter* in the telephone mount. Furthermore the volume can be changed indivi
dually during the call at any time with
the button for setting the radio* or navigation system* or with the buttons on the multifunction steering wheel*.
WARNING
Pay attention primarily to the traffic situation! As the driver you are fully responsible for road safety. Use the teleph
one system only to such an extent, so
that you are in full control of your vehicle at any time.
Note
Please refer to the following guidelines
page 105.
Should you have any questions, please
contact an authorised Škoda Service
Par tner.Phone PhonebookA phone phonebook is part of the mobile ph
one preinstallation with voice control. In
the phone phonebook there are 2 500 free memory locations available. This phone phonebook can be used in line
with the mobile telephone.
After the first connection of the telephone, the system begins to load the phone book from the phone and the SIM card into the memory of the control unit. Each time the telephone has establishe
d a new connection with the hands-free
system, an update of the relevant phone b
ook is performed. The updating can take a
few minutes. During this time the phone book, which was stored after the last update was completed, is available. Newly stored telephone numbers are only shown after the updating has ended. If the number of contacts loaded exceed
s 2 500, the phone book is not complete.
If a telephone event (e.g. incoming or outgoing call, dialogue of the voice control) occurs during the updating pr
ocedure, the updating is interrupted. After the telephone
event has ended, the updating starts anew.
Connection of the mobile phone with the hands-free systemIn order to connect a mobile phone with th
e hands-free system, it is necessary to
connect the telephone to the hands-free sy
stem. Detailed information on this is
provided in the operating instructions of your mobile phone. The following steps must be carried out for the connection: – Activate the Bluetooth
® in your telephone and the visibility of the mobile phone.
– Switch on the ignition.– Select the menu
Phone
- Phone search
in the information display and wait until
the control unit has ended the search.
– Select your mobile phone in the menu of the units found.–Confirm the PIN (as standard
1234
).
– If the hands-free system
announces (as standard
Skoda UHV
) on the display of the
mobile phone, enter the PIN (as standard
1234
) within 30 seconds and wait until
the connection is established.
10)
– After ending the connection, confirm in the information display that a new user
profile was created.
If no more free space is available for creating a new user profile, delete an existing user profile. If you have not managed to
connect your mobile phone with the hands-free system
within 3 minutes after switching on the ignition, switch the ignition off and then again on. The visibility of the hands-free system is established again for 3 minutes. The visi- bility of the Bluetooth
® device is automatically switched
off if the vehicle starts off or
if the mobile phone connects to the device. During the connecting procedure, no other
mobile phone may be connected with the
hands-free system. Up to four mobile phones ca
n be paired to the hands-fr
ee system, whereby only one
mobile phone can communicate
with the hands-free system.
10)Some mobile phones have a menu, in which the authorization for establishing a Bluetooth
®
connection is performed via the input of a code. If the input for the authorization is necessary, it must always be performed when re-e
stablishing the Bluetooth connection.
s3j8.a.book Page 106 Tuesday, April 20, 2010 1:10 PM
Page 108 of 244
Communication
107
Using the system
Safety
Driving Tips
General Maintenance
Breakdown assistance
Technical Data
Connection with an already paired mobile phone After switching on the ignition, the connect
ion is automatically established for the
already paired mobile phone
10). Check on the mobile unit if the automatic connection
was established. Disconnecting the connection
By withdrawing the ignition key.
By disconnecting the device in the information display.
By disconnecting the device in the mobile phone.
Solving connection problems If the system announces
No paired phone found
, check the operating state of the
telephone:
Is the telephone switched on?
Is the PIN code entered?
Is Bluetooth
® active?
Is the visibility of the mobile phone active?
Was the telephone already paired with the hands-free system?
WARNING
In the event of air transport, the Bluetooth
® function of the hands-free system
must be switched off by a specialist garage!
Note
Not valid for all mobile phones which enable a communication via Bluetooth
®.
You can ask at an authorised Škoda Service Partner if your telephone is compatible with the universal telephone preinstallation GSM II.
Please operate your mobile phone exclusiv
ely with a suitable adapter in order to
keep a low radiation in the vehicle.
Inserting the mobile phone into the adapter ensures an optimal sending and
receiving power and offers at the same ti
me the advantage of the battery charging.
The range of the Bluetooth
® connection to the hands-free system is restricted to
the vehicle interior. The range is dependent on local factors, e.g. obstacles between the
devices and mutual interferences with other de
vices. If your mobile phone is e.g. in a
jacket pocket, this can lead to diffic
ulties when establishing the Bluetooth
® connection
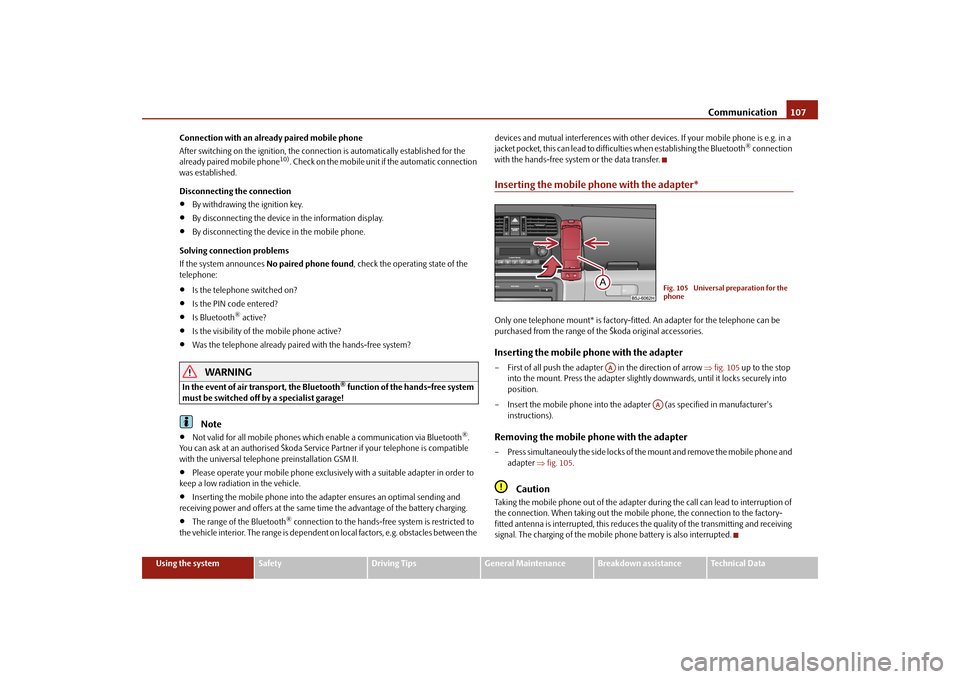
with the hands-free system or the data transfer.Inserting the mobile phone with the adapter*Only one telephone mount* is factory-fitted. An adapter for the telephone can be purchased from the range of the Škoda original accessories.Inserting the mobile phone with the adapter– First of all push the adapter in the direction of arrow
fig. 105
up to the stop
into the mount. Press the adapter slightly downwards, until it locks securely into position.
– Insert the mobile phone into the adap
ter (as specified in manufacturer's
instructions).
Removing the mobile phone with the adapter– Press simultaneouly the side locks of the mount and remove the mobile phone and
adapter
fig. 105
.
Caution
Taking the mobile phone out of the adapter du
ring the call can lead to interruption of
the connection. When taking out the mobi
le phone, the connection to the factory-
fitted antenna is interrupted, this reduces the quality of the transmitting and receiving signal. The charging of the mobile
phone battery is also interrupted.
Fig. 105 Universal preparation for the phone
AA
AA
s3j8.a.book Page 107 Tuesday, April 20, 2010 1:10 PM