locking SKODA FABIA 2012 2.G / 5J Owner's Guide
[x] Cancel search | Manufacturer: SKODA, Model Year: 2012, Model line: FABIA, Model: SKODA FABIA 2012 2.G / 5JPages: 196, PDF Size: 4.83 MB
Page 83 of 196
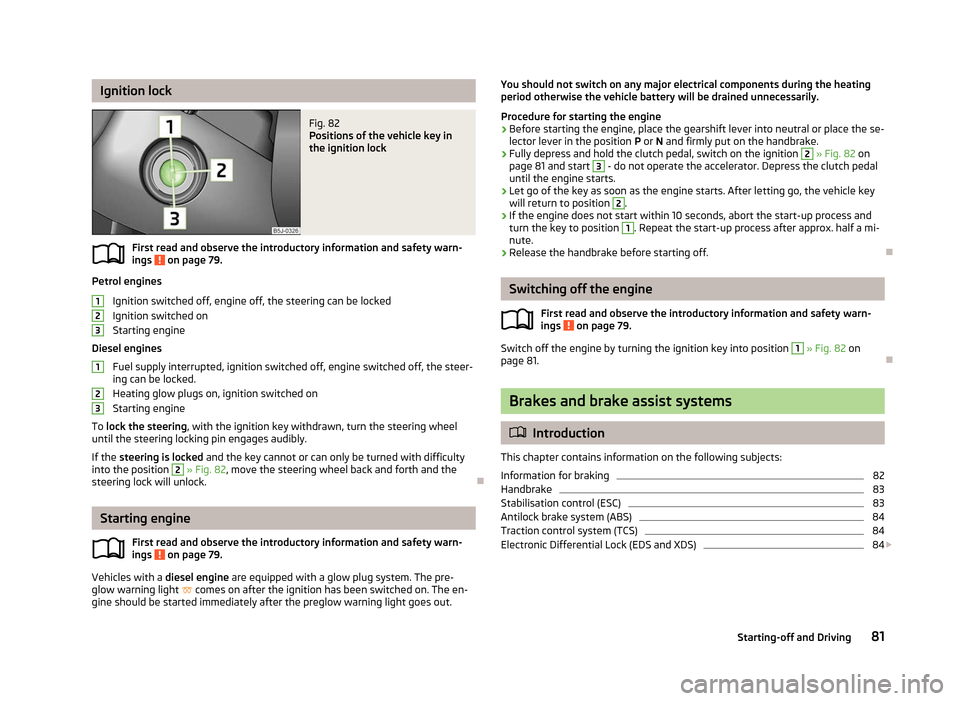
Ignition lock
Fig. 82
Positions of the vehicle key in
the ignition lock
First read and observe the introductory information and safety warn-
ings on page 79.
Petrol engines
Ignition switched off, engine off, the steering can be locked
Ignition switched on
Starting engine
Diesel engines Fuel supply interrupted, ignition switched off, engine switched off, the steer-
ing can be locked.
Heating glow plugs on, ignition switched on
Starting engine
To lock the steering , with the ignition key withdrawn, turn the steering wheel
until the steering locking pin engages audibly.
If the steering is locked and the key cannot or can only be turned with difficulty
into the position 2
» Fig. 82, move the steering wheel back and forth and the
steering lock will unlock. ÐStarting engine
First read and observe the introductory information and safety warn-
ings on page 79.
Vehicles with a diesel engine are equipped with a glow plug system. The pre-
glow warning light comes on after the ignition has been switched on. The en-
gine should be started immediately after the preglow warning light goes out.
ä 1
2
3
1
2
3
ä You should not switch on any major electrical components during the heating
period otherwise the vehicle battery will be drained unnecessarily.
Procedure for starting the engine
› Before starting the engine, place the gearshift lever into neutral or place the se-
lector lever in the position P or N and firmly put on the handbrake.
› Fully depress and hold the clutch pedal, switch on the ignition 2
» Fig. 82 on
page 81 and start 3
- do not operate the accelerator. Depress the clutch pedal
until the engine starts.
› Let go of the key as soon as the engine starts. After letting go, the vehicle key
will return to position 2
.
› If the engine does not start within 10
seconds, abort the start-up process and
turn the key to position 1
. Repeat the start-up process after approx. half a mi-
nute.
› Release the handbrake before starting off. Ð Switching off the engine
First read and observe the introductory information and safety warn-
ings on page 79.
Switch off the engine by turning the ignition key into position 1
» Fig. 82
on
page 81. Ð Brakes and brake assist systems
ä
Introduction
This chapter contains information on the following subjects:
Information for braking 82
Handbrake 83
Stabilisation control (ESC) 83
Antilock brake system (ABS) 84
Traction control system (TCS) 84
Electronic Differential Lock (EDS and XDS) 84
£
ä
81
Starting-off and Driving
Page 85 of 196
Faults in the brake surface
If it is found that the braking distance has suddenly become longer and that the
brake pedal can be depressed further, the brake system may be faulty. Visit a
ŠKODA specialist garage immediately and adjust your style of driving appropriate-
ly as you will not know how great the damage is.
Low brake fluid level
An insufficient level of brake fluid may result in problems in the brake system. The
level of the brake fluid is monitored electronically
» page 18, Brake system .
Brake booster
The brake booster increases the pressure generated with the brake pedal. The
brake booster only operates when the engine is running. ÐHandbrake
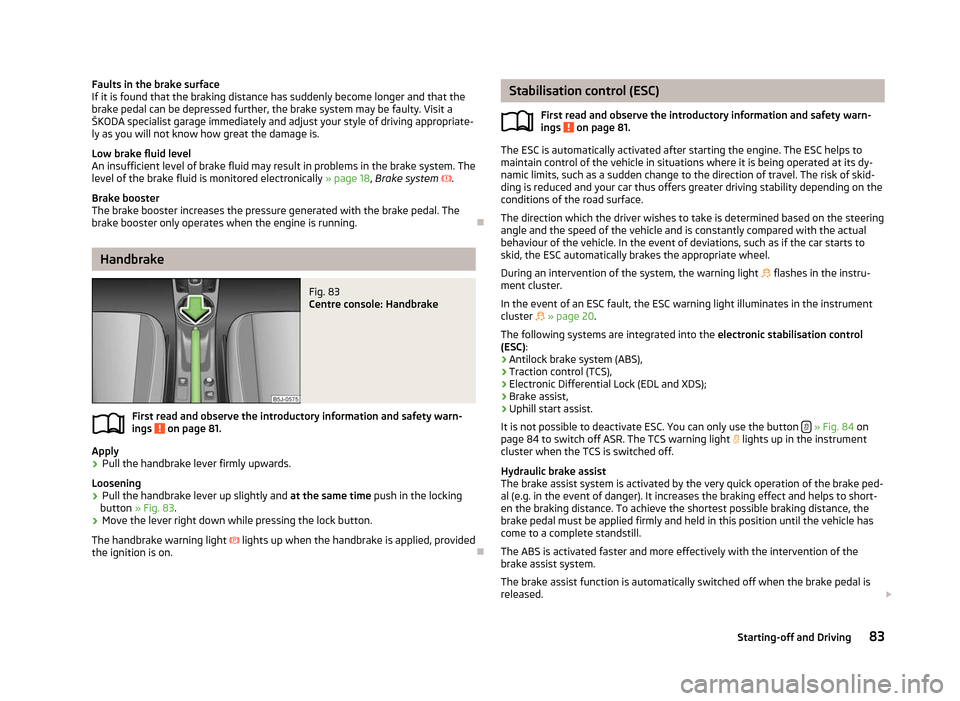
Fig. 83
Centre console: Handbrake
First read and observe the introductory information and safety warn-
ings on page 81.
Apply
›
Pull the handbrake lever firmly upwards.
Loosening
› Pull the handbrake lever up slightly and
at the same time push in the locking
button » Fig. 83 .
› Move the lever right down while pressing the lock button.
The handbrake warning light lights up when the handbrake is applied, provided
the ignition is on. Ð
ä Stabilisation control (ESC)
First read and observe the introductory information and safety warn-
ings on page 81.
The ESC is automatically activated after starting the engine. The ESC helps to
maintain control of the vehicle in situations where it is being operated at its dy-
namic limits, such as a sudden change to the direction of travel. The risk of skid-
ding is reduced and your car thus offers greater driving stability depending on the
conditions of the road surface.
The direction which the driver wishes to take is determined based on the steering
angle and the speed of the vehicle and is constantly compared with the actual
behaviour of the vehicle. In the event of deviations, such as if the car starts to
skid, the ESC automatically brakes the appropriate wheel.
During an intervention of the system, the warning light flashes in the instru-
ment cluster.
In the event of an ESC fault, the ESC warning light illuminates in the instrument
cluster » page 20.
The following systems are integrated into the electronic stabilisation control
(ESC):
› Antilock brake system (ABS),
› Traction control (TCS),
› Electronic Differential Lock (EDL and XDS);
› Brake assist,
› Uphill start assist.
It is not possible to deactivate ESC. You can only use the button » Fig. 84
on
page 84 to switch off ASR. The TCS warning light lights up in the instrument
cluster when the TCS is switched off.
Hydraulic brake assist
The brake assist system is activated by the very quick operation of the brake ped-
al (e.g. in the event of danger). It increases the braking effect and helps to short-
en the braking distance. To achieve the shortest possible braking distance, the
brake pedal must be applied firmly and held in this position until the vehicle has
come to a complete standstill.
The ABS is activated faster and more effectively with the intervention of the
brake assist system.
The brake assist function is automatically switched off when the brake pedal is
released. £
ä
83
Starting-off and Driving
Page 86 of 196
Uphill start assist
The uphill start assist makes it easier to start off on steep hills. The system holds
the brake pressure produced by the activation of the brake pedal for approx.
2 seconds after the brake pedal is released. The driver can therefore move his
foot from the brake pedal to the accelerator pedal and start off on the slope,
without having to actuate the handbrake. The brake pressure drops gradually the
more you operate the accelerator pedal. If the vehicle does not start off within 2
seconds, it starts to roll back.
The uphill start assist is active as of a 5
% slope, if the driver door is closed. It is
always active on slopes when in forward or reverse start off. When driving down-
hill, it is inactive. ÐAntilock brake system (ABS)
First read and observe the introductory information and safety warn-
ings on page 81.
ABS prevents the wheels locking when braking. Thus helping the driver to main-
tain control of the vehicle.
The intervention of the ABS is noticeable from the
pulsating movements of the
brake pedal which is accompanied by noises.
Do not reduce the pressure on the brake pedal during the intervention of the
ABS. The ABS deactivates if the brake pedal is released. Never interrupt the appli-
cation of the brakes during the intervention of the ABS! ÐTraction control system (TCS)
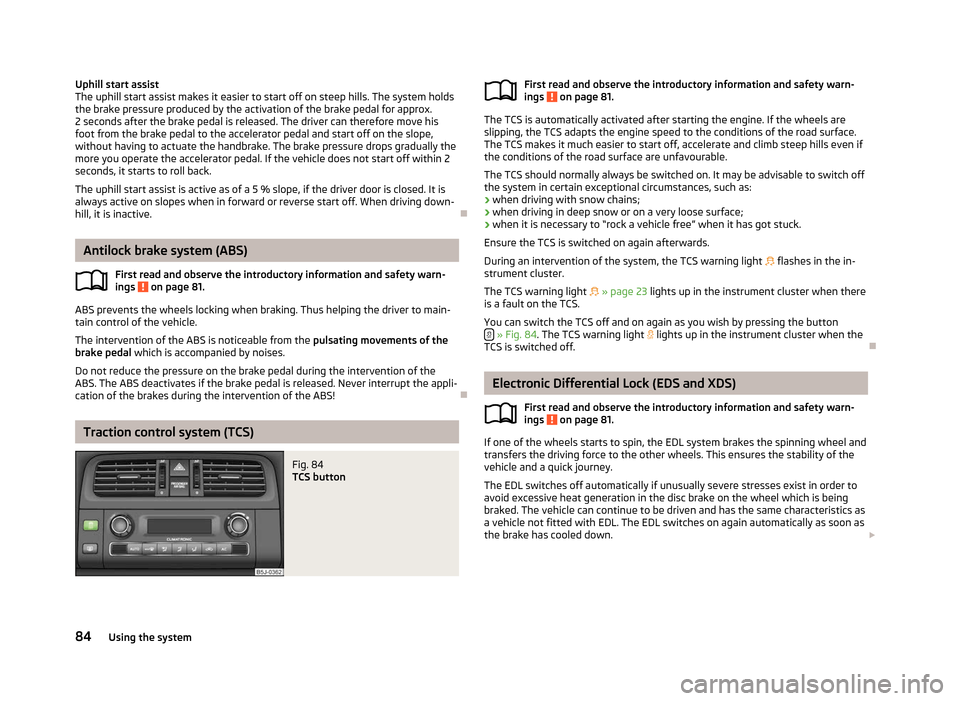
Fig. 84
TCS button
ä First read and observe the introductory information and safety warn-
ings on page 81.
The TCS is automatically activated after starting the engine. If the wheels are
slipping, the TCS adapts the engine speed to the conditions of the road surface.
The TCS makes it much easier to start off, accelerate and climb steep hills even if
the conditions of the road surface are unfavourable.
The TCS should normally always be switched on. It may be advisable to switch off
the system in certain exceptional circumstances, such as:
› when driving with snow chains;
› when driving in deep snow or on a very loose surface;
› when it is necessary to
“rock a vehicle free” when it has got stuck.
Ensure the TCS is switched on again afterwards.
During an intervention of the system, the TCS warning light flashes in the in-
strument cluster.
The TCS warning light » page 23 lights up in the instrument cluster when there
is a fault on the TCS.
You can switch the TCS off and on again as you wish by pressing the button » Fig. 84
. The TCS warning light lights up in the instrument cluster when the
TCS is switched off. Ð Electronic Differential Lock (EDS and XDS)
First read and observe the introductory information and safety warn-
ings on page 81.
If one of the wheels starts to spin, the EDL system brakes the spinning wheel and
transfers the driving force to the other wheels. This ensures the stability of the
vehicle and a quick journey.
The EDL switches off automatically if unusually severe stresses exist in order to
avoid excessive heat generation in the disc brake on the wheel which is being
braked. The vehicle can continue to be driven and has the same characteristics as
a vehicle not fitted with EDL. The EDL switches on again automatically as soon as
the brake has cooled down. £
ä
ä
84 Using the system
Page 92 of 196
Automatic gearbox
Automatic gearbox
ä
Introduction
This chapter contains information on the following subjects:
Introductory information 90
Starting-off and driving 91
Selector lever positions 91
Manual shifting of gears (Tiptronic) 92
Selector lever lock 93
Kickdown function 93
Dynamic shift programme 93
Emergency programme 94
Selector lever-emergency unlocking 94
WARNING
■ Do not depress the accelerator if changing the position of the selector lever
when the vehicle is stationary and the engine is running - risk of accident!
■ Never move the selector lever into position R or P when driving - risk of an
accident!
■ When the engine is running and the vehicle is stationary, it is necessary to
hold the car with the brake pedal in all the positions of the selector lever (ex-
cept P and N) since the power transmission is never completely interrupted,
also not when the engine is idling - the vehicle creeps.
■ The selector lever must be placed into position P and the handbrake firmly
applied before the bonnet can be opened and work on the running engine can
be completed - risk of accident! The safety guidelines must always be ob-
served » page 138, Engine compartment . WARNING (Continued)
■ If stopping on a hill (downhill gradient), never try to maintain the vehicle sta-
tionary with the gear engaged by means of the
“accelerator pedal”, i.e. by let-
ting the clutch slip. This can lead to overheating of the clutch. If there is a risk
of overheating of the clutch due to overload, the clutch is opened automati-
cally and the vehicle rolls backward - risk of accident!
■ If you have to stop on a slope, depress and hold the brake pedal to prevent
the vehicle from rolling back.
■ On a smooth or slippery road surface using the kickdown function can cause
the driven wheels to spin - risk of skidding! CAUTION
■ The double clutch on the automatic gearbox DSG is equipped with an overload
protection. If the uphill function is used when the vehicle is stationary or driving
slowly uphill, the thermal stress on the clutches is increased. ■ If the clutch system overheats, the symbol is shown in the information dis-
play along with the message Gearbox overheated. Stop! Owner's man.! appears.
An audible signal sounds as a warning signal. Stop the vehicle, switch off the en-
gine, and wait until the symbol disappears - risk of gearbox damage! You can
continue your journey as soon as the symbol disappears. Ð Introductory information
First read and observe the introductory information and safety warn-
ings on page 90.
Shifting up and down through the gears is performed automatically. The gearbox
can also be switched to
Tiptronic mode. This mode makes it possible for you to
also shift gears manually » page 92.
The engine can only be started when the selector lever is in position P or N . If
the selector lever is not in the P or N positions when locking the steering, switch-
ing the ignition on or off or when leaving the engine on, the following message
will appear in the Information display Move selector lever to position P/N! or, in
the instrument cluster display: P/N
.
At temperatures below -10 °C the engine can only be started in the selector lever
position P 1)
. £
ä
1)
Applies to DSG.
90 Using the system
Page 96 of 196
Emergency programme
First read and observe the introductory information and safety warn-
ings on page 90.
An emergency programme exists in the event of a fault in the system.
The gearbox operates in a corresponding emergency programme if there are
functional faults in the gearbox electronics. All of the display elements illuminate
or go out.
A functional fault can have the following effect:
› The gearbox only shifts into certain gears;
› The reverse gear
R cannot be used,
› The manual shift programme is switched off in emergency mode. Note
If the gearbox has switched to emergency mode, drive to a ŠKODA specialist ga-
rage to have the fault rectified. ÐSelector lever-emergency unlocking
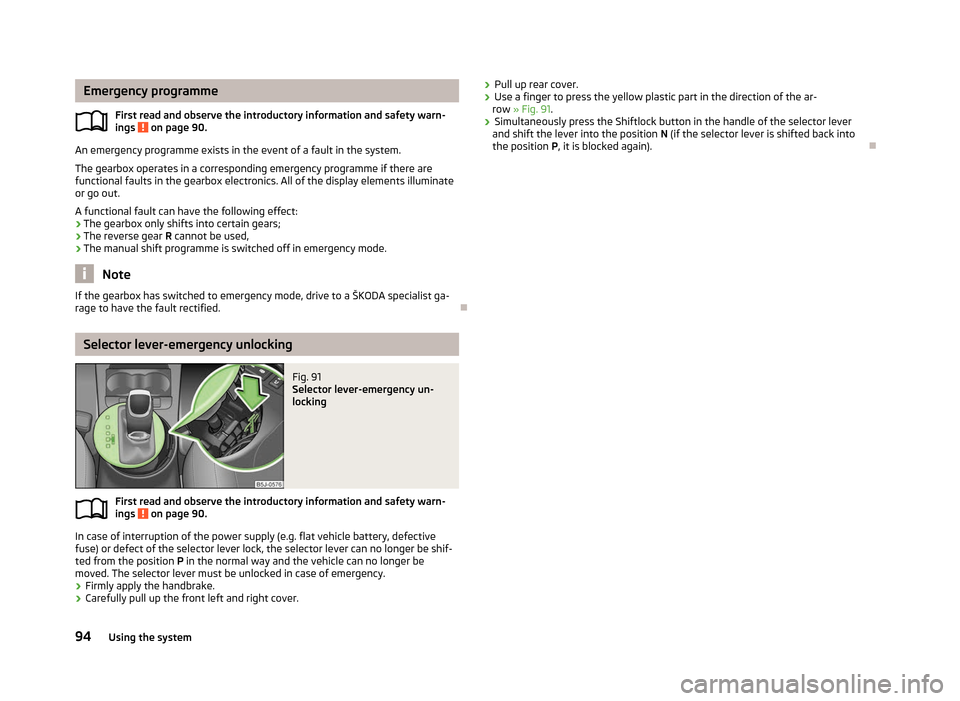
Fig. 91
Selector lever-emergency un-
locking
First read and observe the introductory information and safety warn-
ings on page 90.
In case of interruption of the power supply (e.g. flat vehicle battery, defective
fuse) or defect of the selector lever lock, the selector lever can no longer be shif-
ted from the position
P in the normal way and the vehicle can no longer be
moved. The selector lever must be unlocked in case of emergency.
› Firmly apply the handbrake.
› Carefully pull up the front left and right cover.
ä
ä
›
Pull up rear cover.
› Use a finger to press the yellow plastic part in the direction of the ar-
row » Fig. 91.
› Simultaneously press the Shiftlock button in the handle of the selector lever
and shift the lever into the position N (if the selector lever is shifted back into
the position P , it is blocked again). Ð94
Using the system
Page 121 of 196
Group
Weight of the child Approximate age
1 9-18 kg up to 4 years
2 15-25 kg up to 7 years
3 22-36 kg over 7 years Ð
Suitability of child seats
First read and observe the introductory information and safety warn-
ings on page 117.
Overview of the suitability of child seats according to the standard ECE-R
44
Seat Child seat
type
Front passenger seat U
Rear seat outside U
+
T
Rear seat middle U
Universal category – a child seat with the word UNIVERSAL, which is de-
signed for fastening on the seat with the seat belt.
ISOFIX
– a child seat which is designed for fastening on the seat with eyelets
for the ISOFIX system is provided » page 119.
TOP TETHER – a child seat which is designed for fastening on the seat with
an eyelet for the TOP TETHER system is provided » page 119.ÐChild seats with the ISOFIX system
Fig. 109
Rear seat: ISOFIX
ä U
+
T First read and observe the introductory information and safety warn-
ings
on page 117.
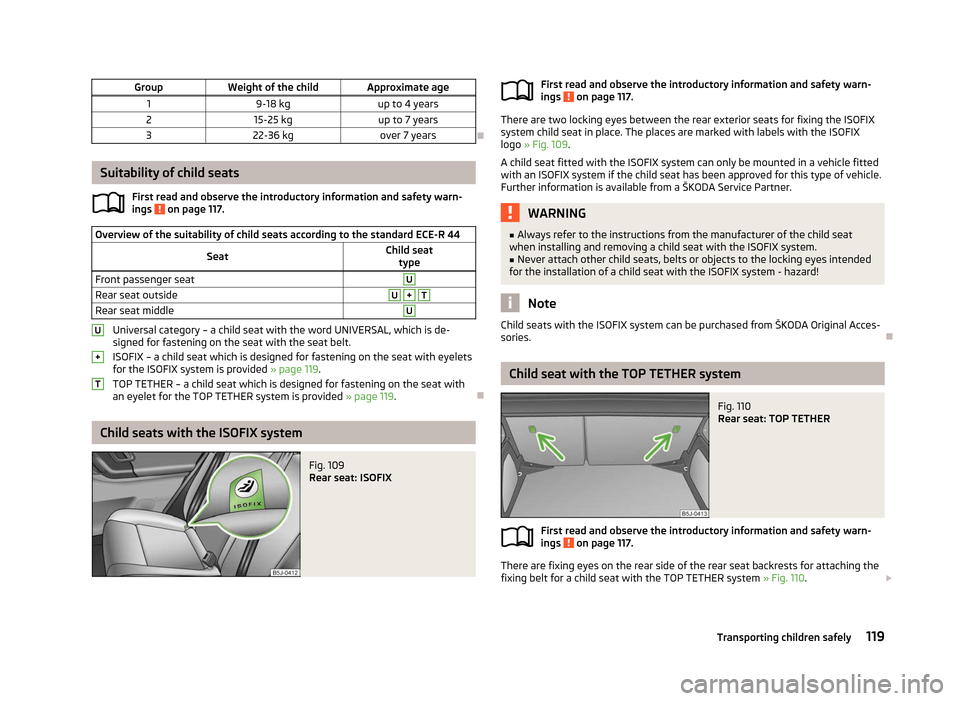
There are two locking eyes between the rear exterior seats for fixing the
ISOFIX
system child seat in place. The places are marked with labels with the
ISOFIX
logo » Fig. 109.
A child seat fitted with the ISOFIX system can only be mounted in a vehicle fitted
with an ISOFIX system if the child seat has been approved for this type of vehicle.
Further information is available from a ŠKODA Service Partner. WARNING
■ Always refer to the instructions from the manufacturer of the child seat
when installing and removing a child seat with the
ISOFIX system.
■ Never attach other child seats, belts or objects to the locking eyes intended
for the installation of a child seat with the
ISOFIX system - hazard! Note
Child seats with the ISOFIX system can be purchased from ŠKODA Original Acces-
sories. Ð Child seat with the TOP TETHER system
Fig. 110
Rear seat: TOP TETHER
First read and observe the introductory information and safety warn-
ings on page 117.
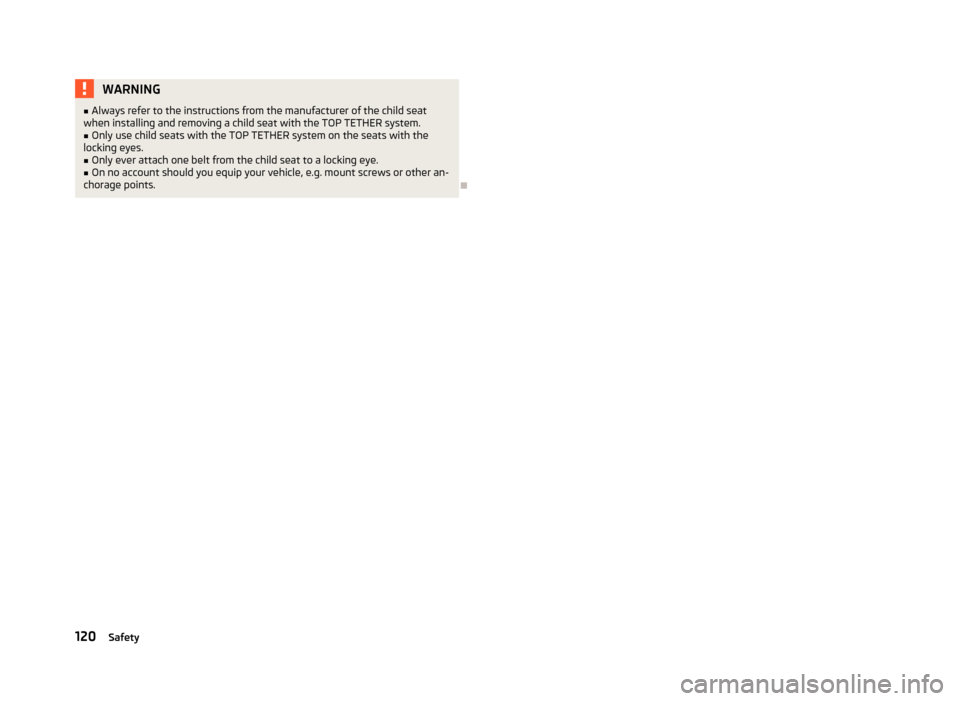
There are fixing eyes on the rear side of the rear seat backrests for attaching the
fixing belt for a child seat with the
TOP TETHER system » Fig. 110. £
ä
ä 119
Transporting children safely
Page 122 of 196
WARNING
■ Always refer to the instructions from the manufacturer of the child seat
when installing and removing a child seat with the
TOP TETHER system.
■ Only use child seats with the TOP TETHER system on the seats with the
locking eyes. ■ Only ever attach one belt from the child seat to a locking eye.
■ On no account should you equip your vehicle, e.g. mount screws or other an-
chorage points. Ð
120 Safety
Page 130 of 196
Immediately reduce your speed as soon as even the slightest swaying of the trail-
er is detected. Never attempt to stop the trailer from “swaying” by accelerating.
Brakes
Apply the brakes in good time! If the trailer is fitted with a trailer brake, apply the
brakes gently at first, then brake firmly. This will avoid brake jolts resulting from
the trailer wheels locking. On downhill sections shift down a gear in good time to
also use the engine as a brake.
Trailer is connected to the anti-theft alarm system.
› If the vehicle is factory-fitted with an anti-theft alarm system and a towing de-
vice.
› If the trailer is electrically connected to the towing vehicle by means of the trail-
er socket.
› If the electrical system of the vehicle and trailer is fully functional.
› If the vehicle is locked with the car key and the anti-theft alarm system is acti-
vated.
When the vehicle is locked, the alarm is activated as soon as the electrical con-
nection to the trailer is interrupted.
Always deactivate the anti-theft alarm system before a trailer is connected/dis-
connected. Otherwise, the anti-theft alarm system could accidentally be trig-
gered » page 31 , Anti-theft alarm system .
Engine overheating
If the needle for the coolant temperature gauge moves into the right-hand area
or the red area of the scale, the speed must be reduced immediately. Stop and
switch off the engine if the warning light in the instrument cluster starts to
flash. Wait a few minutes and check the level of coolant in the coolant expansion
bottle » page 143, Checking the coolant level .
The following guidelines must be observed » page 19, Coolant temperature/cool-
ant level .
The coolant temperature can be reduced by switching on the heating. WARNING
■ Adapt your speed to the conditions of the road surface and to the traffic sit-
uation.
■ Improper or incorrectly connected electric cables can energise the trailer and
cause functional faults to the vehicle's entire electrical system as well as acci-
dents and severe injuries.
■ Any work on the electrical system must be carried out only by ŠKODA spe-
cialist garages.
■ Never directly connect the trailer's electrical system with the electrical con-
nections for the tail lights or other current sources. CAUTION
■ Avoid abrupt and sudden driving/braking manoeuvres.
■ When the ball rod is removed, the mounting shaft must be sealed with an ap-
propriate cover. This prevents foreign matter from penetrating into the mounting
shaft. See the fitting instructions for the towing device. Note
■ We recommend that you also have your vehicle inspected between service in-
tervals if you tow a trailer frequently. ■ The handbrake on the towing vehicle must be put on when coupling and decou-
pling the trailer.
■ For technical reasons, trailers with rear LED lights cannot be connected to the
anti-theft alarm system. Ð
128 Driving Tips
Page 131 of 196
General Maintenance
Taking care of and cleaning the vehicle
Taking care of your vehicle
ä
Introduction
This chapter contains information on the following subjects:
Washing the vehicle 130
Automatic car wash systems 130
Washing by hand 130
Washing with a high-pressure cleaner 130
Preserving and polishing the vehicle paintwork 131
Chrome parts 131
Paint damage 131
Plastic parts 131
De-icing windows and exterior mirrors 132
Radio reception and aerial 132
Headlight lenses 132
Rubber seals 132
Door lock cylinders 132
Wheels 133
Underbody protection 133
Protection of hollow spaces 133
Artificial leather and materials 134
Fabric covers on electrically heated seats 134
Natural leather 134
Seat belts 135
Regular and proper care help to retain the efficiency and value of your vehicle. It
may also be one of the requirements for the acceptance of warranty claims relat-
ing to corrosion damage and paint defects on the bodywork.
We recommend using care products from
ŠKODA Original Accessories that are
available from ŠKODA Service Partners. The instructions for use on the package
must be observed. WARNING
■ Care products may be harmful to your health if not used according to the in-
structions.
■ Always store care products in a safe place, out of the reach of children - risk
of poisoning! ■ When washing your vehicle in the winter: Water and ice in the brake system
can affect the braking efficiency - risk of accident! ■ Only wash the vehicle when the ignition is switched off - risk of accident!
■ Protect your hands and arms from sharp-edged metal parts when cleaning
the underfloor, the inside of the wheel housings or the wheel trims - risk of
cuts!
■ Air fresheners and scents can be hazardous to heath when the temperature
inside the vehicle is high. CAUTION
■ Be sure to check clothing for colourfastness to avoid any damage or visible
stains on the material (leather), panels and textiles.
■ Cleaners containing solvents can damage the material being cleaned.
■ Do not wash your vehicle in bright sunlight - risk of paint damage.
■ If washing the vehicle in the winter using a hose or high-pressure cleaner, en-
sure that the jet of water is not aimed directly at the locking cylinders or the
door/panel joints - risk of freezing!
■ Do not use any insect sponges, rough kitchen sponges or similar cleaning prod-
ucts - risk of damaging the surface of paintwork.
■ Do not stick any stickers on the inside of the rear windows, the rear side win-
dows and in the vicinity of the heating elements on the windscreen or near the
window aerial. These may get damaged. With regard to the antenna, they may in-
terfere with the radio or navigation system.
■ Do not clean the inside of the windows with sharp-edged objects or corrosive
and acidic cleaning agents - risk of damaging the heating elements or window
aerial.
■ Do not attach scents and air fresheners to the dashboard - risk of damage to
the dashboard.
■ To avoid damaging the parking aid sensors while cleaning with high-pressure
cleaners or steam jets, the sensors must only be directly sprayed for short periods
while a minimum distance of 10
cm must be observed.
■ Do not clean the roof trim with a brush - risk of damage to the trim surface. £
129
Taking care of and cleaning the vehicle
Page 141 of 196
WARNING (Continued)
■ If you notice that the lock is not properly engaged while driving, stop the ve-
hicle immediately and close the bonnet - risk of an accident!
■ Keep children clear of the engine compartment.
■ Do not touch any hot engine parts - risk of burns!
■ Never spill fluids on the hot engine. Such fluids (e.g. the antifreeze con-
tained in the coolant) may ignite!
■ Avoid short circuits in the electrical system - particularly on the vehicle's
battery.
■ Never touch the radiator fan while the engine is still warm. The fan might
suddenly start running! ■ Never open the end cover of the coolant expansion reservoir while the en-
gine is still warm. The cooling system is pressurized!
■ When opening the end cover of the coolant expansion reservoir, cover it
with a cloth to protect your face, hands and arms from hot steam or hot cool-
ant.
■ Do not leave any items such as cloths or tools in the engine compartment.
■ If you wish to work under the vehicle, you must secure the vehicle from roll-
ing away and support it with suitable supporting blocks: the car jack is not
sufficient for this - risk of injury!
■ If any inspection work has to be carried out when the engine is running,
there is an additional risk from rotating parts (e.g. V-belt, alternator, radiator
fan) and the high-voltage ignition system. The following must also be ob-
served: ■Never touch the electric wiring on the ignition system.
■ Always make sure that no jewellery, loose clothing or long hair can get
caught in rotating engine parts - hazard! Always remove any jewellery, tie
back long hair and wear tight fitting clothing before completing any work.
■ Additionally, the following warning instructions must be observed if work
has to be carried out on the fuel or electrical system. ■Always disconnect the vehicle battery from the electrical system.
■ Do not smoke.
■ Never work near open flames.
■ Always have a functioning fire extinguisher nearby. CAUTION
■ Always top up using the correct specification of fluids. This may result in major
operating problems and also vehicle damage!
■ Never open the bonnet using the locking lever - danger of causing damage. For the sake of the environment
In view of the environmentally friendly disposal of fluids, the specials tools and
knowledge required for such work, we recommend that fluids are changed by a
Škoda
Service Partner as part of the inspection service. Note
■ If you have any questions regarding the fluids, visit a
ŠKODA Service Partner.
■ Fluids with the correct specifications can be purchased from ŠKODA Original Ac-
cessories. Ð
139
Inspecting and replenishing