display SKODA FABIA 2013 2.G / 5J Owner's Manual
[x] Cancel search | Manufacturer: SKODA, Model Year: 2013, Model line: FABIA, Model: SKODA FABIA 2013 2.G / 5JPages: 223, PDF Size: 12.77 MB
Page 2 of 223
Layout of this Owner's Manual
(explanations)
This Owner's Manual has been systematically designed to make it easy for you to
search for and obtain the information you require.
Chapters, table of contents and subject index
The text of the Owner's manual is divided into relatively short sections which are
combined into easy-to-read chapters. The chapter you are reading at any particular
moment is always specified on the bottom right of the page.
The Table of contents is arranged according to the chapters and the detailed Sub-
ject index at the end of the Owner's Manual helps you to rapidly find the informa-
tion you are looking for.
Direction indications
All direction indications such as “left”, “right”, “front”, “rear” relate to the direction of
travel of the vehicle.
Units of measurement
All values are expressed in metric units.
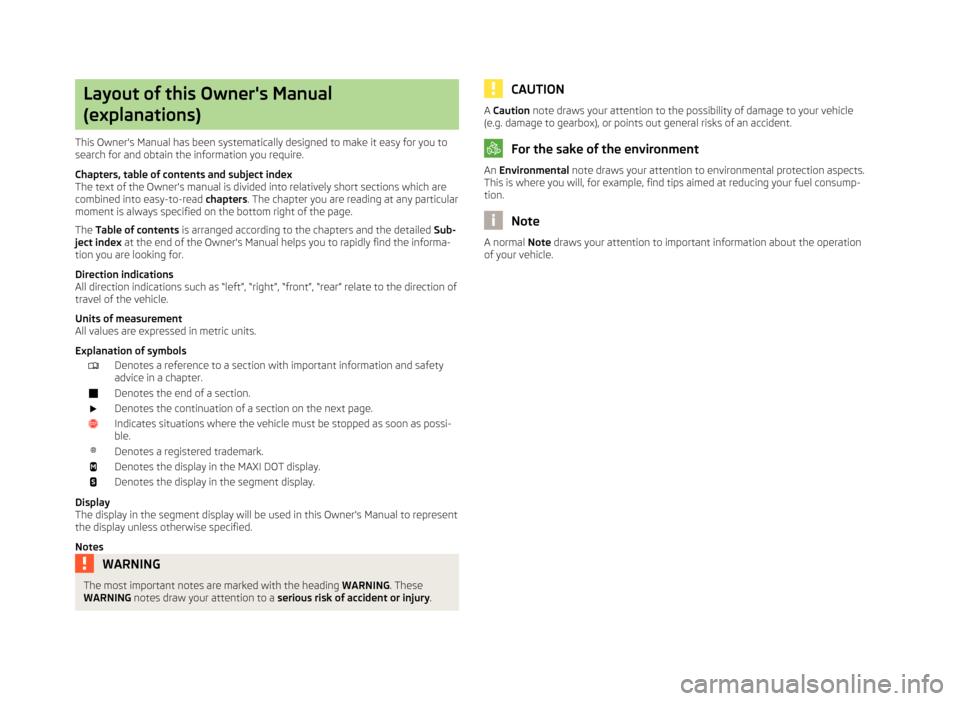
Explanation of symbolsDenotes a reference to a section with important information and safety
advice in a chapter.Denotes the end of a section.Denotes the continuation of a section on the next page.Indicates situations where the vehicle must be stopped as soon as possi-
ble.®Denotes a registered trademark.Denotes the display in the MAXI DOT display.Denotes the display in the segment display.
Display
The display in the segment display will be used in this Owner's Manual to represent the display unless otherwise specified.
Notes
WARNINGThe most important notes are marked with the heading WARNING. These
WARNING notes draw your attention to a serious risk of accident or injury .CAUTIONA Caution note draws your attention to the possibility of damage to your vehicle
(e.g. damage to gearbox), or points out general risks of an accident.
For the sake of the environment
An Environmental note draws your attention to environmental protection aspects.
This is where you will, for example, find tips aimed at reducing your fuel consump-
tion.
Note
A normal Note draws your attention to important information about the operation
of your vehicle.
Page 6 of 223
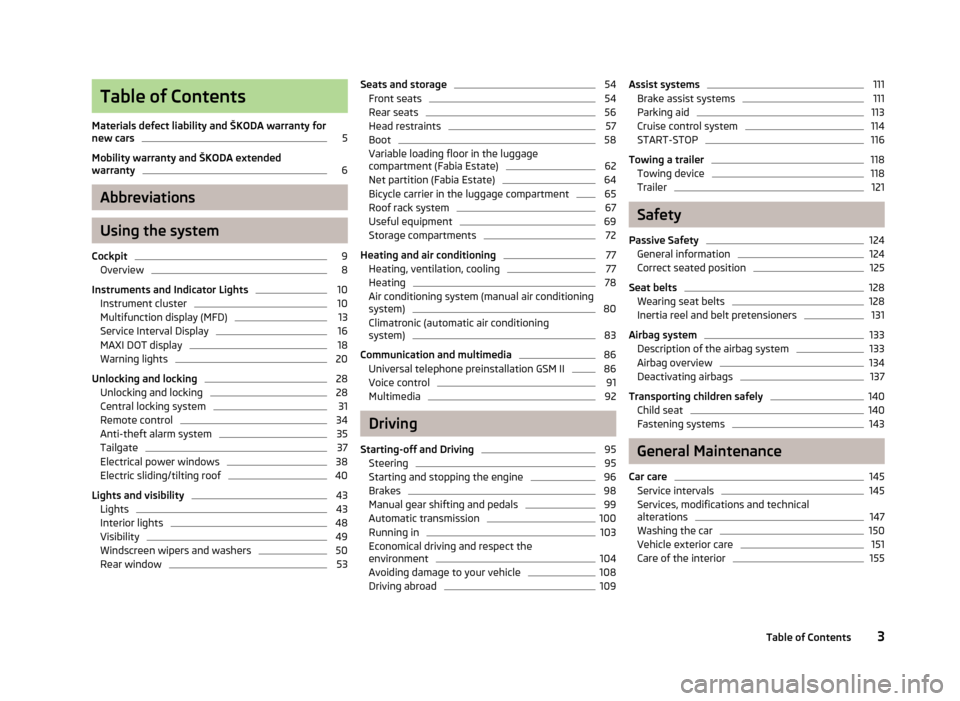
Table of Contents
Materials defect liability and ŠKODA warranty for
new cars5
Mobility warranty and ŠKODA extended
warranty
6
Abbreviations
Using the system
Cockpit
9
Overview
8
Instruments and Indicator Lights
10
Instrument cluster
10
Multifunction display (MFD)
13
Service Interval Display
16
MAXI DOT display
18
Warning lights
20
Unlocking and locking
28
Unlocking and locking
28
Central locking system
31
Remote control
34
Anti-theft alarm system
35
Tailgate
37
Electrical power windows
38
Electric sliding/tilting roof
40
Lights and visibility
43
Lights
43
Interior lights
48
Visibility
49
Windscreen wipers and washers
50
Rear window
53Seats and storage54Front seats54
Rear seats
56
Head restraints
57
Boot
58
Variable loading floor in the luggage
compartment (Fabia Estate)
62
Net partition (Fabia Estate)
64
Bicycle carrier in the luggage compartment
65
Roof rack system
67
Useful equipment
69
Storage compartments
72
Heating and air conditioning
77
Heating, ventilation, cooling
77
Heating
78
Air conditioning system (manual air conditioning
system)
80
Climatronic (automatic air conditioningsystem)
83
Communication and multimedia
86
Universal telephone preinstallation GSM II
86
Voice control
91
Multimedia
92
Driving
Starting-off and Driving
95
Steering
95
Starting and stopping the engine
96
Brakes
98
Manual gear shifting and pedals
99
Automatic transmission
100
Running in
103
Economical driving and respect the
environment
104
Avoiding damage to your vehicle
108
Driving abroad
109Assist systems111Brake assist systems111
Parking aid
113
Cruise control system
114
START-STOP
116
Towing a trailer
118
Towing device
118
Trailer
121
Safety
Passive Safety
124
General information
124
Correct seated position
125
Seat belts
128
Wearing seat belts
128
Inertia reel and belt pretensioners
131
Airbag system
133
Description of the airbag system
133
Airbag overview
134
Deactivating airbags
137
Transporting children safely
140
Child seat
140
Fastening systems
143
General Maintenance
Car care
145
Service intervals
145
Services, modifications and technical
alterations
147
Washing the car
150
Vehicle exterior care
151
Care of the interior
1553Table of Contents
Page 10 of 223
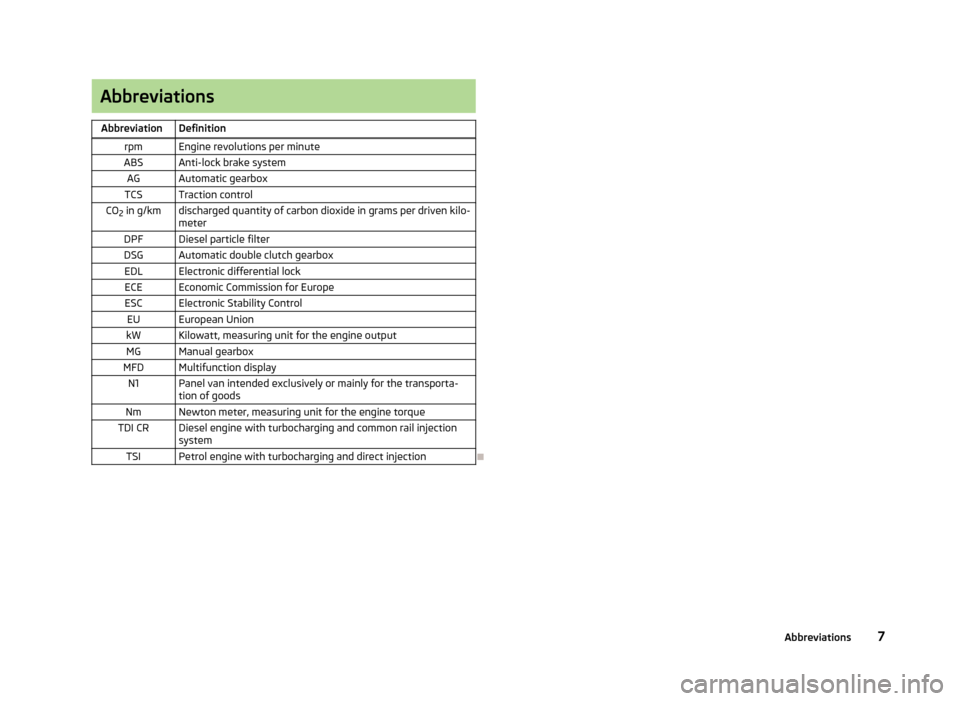
AbbreviationsAbbreviationDefinitionrpmEngine revolutions per minuteABSAnti-lock brake systemAGAutomatic gearboxTCSTraction controlCO2 in g/kmdischarged quantity of carbon dioxide in grams per driven kilo-
meterDPFDiesel particle filterDSGAutomatic double clutch gearboxEDLElectronic differential lockECEEconomic Commission for EuropeESCElectronic Stability ControlEUEuropean UnionkWKilowatt, measuring unit for the engine outputMGManual gearboxMFDMultifunction displayN1Panel van intended exclusively or mainly for the transporta-
tion of goodsNmNewton meter, measuring unit for the engine torqueTDI CRDiesel engine with turbocharging and common rail injection systemTSIPetrol engine with turbocharging and direct injection
7Abbreviations
Page 12 of 223
Using the system
Cockpit
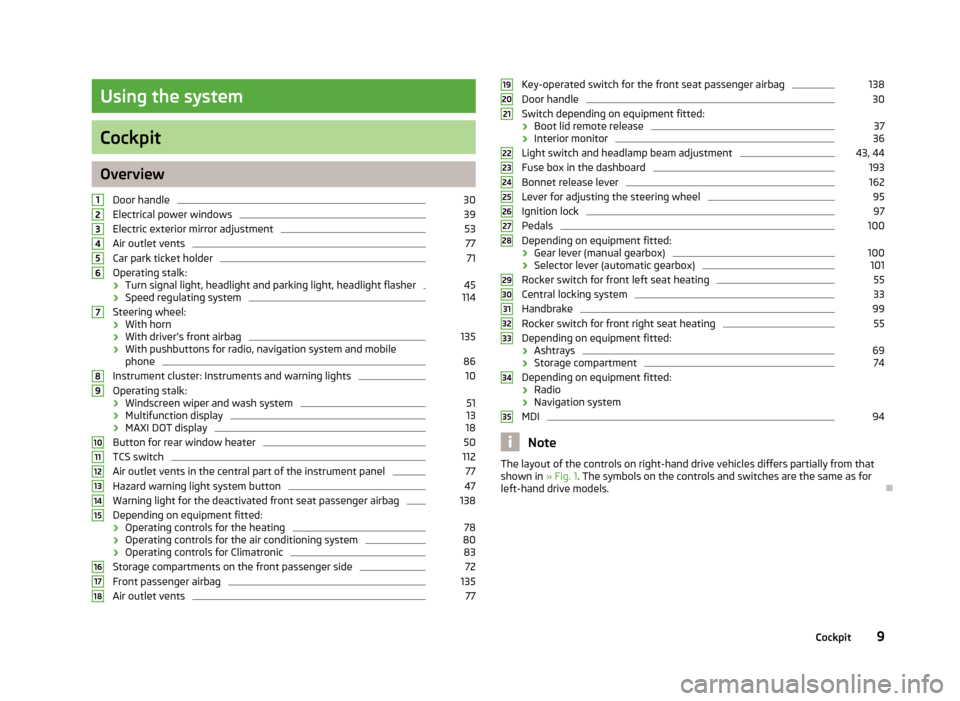
OverviewDoor handle
30
Electrical power windows
39
Electric exterior mirror adjustment
53
Air outlet vents
77
Car park ticket holder
71
Operating stalk:
› Turn signal light, headlight and parking light, headlight flasher
45
›
Speed regulating system
114
Steering wheel:
› With horn
› With driver’s front airbag
135
›With pushbuttons for radio, navigation system and mobile
phone
86
Instrument cluster: Instruments and warning lights
10
Operating stalk:
› Windscreen wiper and wash system
51
›Multifunction display
13
›
MAXI DOT display
18
Button for rear window heater
50
TCS switch
112
Air outlet vents in the central part of the instrument panel
77
Hazard warning light system button
47
Warning light for the deactivated front seat passenger airbag
138
Depending on equipment fitted:
› Operating controls for the heating
78
›Operating controls for the air conditioning system
80
›Operating controls for Climatronic
83
Storage compartments on the front passenger side
72
Front passenger airbag
135
Air outlet vents
77123456789101112131415161718Key-operated switch for the front seat passenger airbag138Door handle30
Switch depending on equipment fitted:
› Boot lid remote release
37
›Interior monitor
36
Light switch and headlamp beam adjustment
43, 44
Fuse box in the dashboard
193
Bonnet release lever
162
Lever for adjusting the steering wheel
95
Ignition lock
97
Pedals
100
Depending on equipment fitted:
› Gear lever (manual gearbox)
100
›Selector lever (automatic gearbox)
101
Rocker switch for front left seat heating
55
Central locking system
33
Handbrake
99
Rocker switch for front right seat heating
55
Depending on equipment fitted:
› Ashtrays
69
›Storage compartment
74
Depending on equipment fitted:
› Radio
› Navigation system
MDI
94
Note
The layout of the controls on right-hand drive vehicles differs partially from that
shown in » Fig. 1. The symbols on the controls and switches are the same as for
left-hand drive models.19202122232425262728293031323334359Cockpit
Page 13 of 223
Instruments and Indicator Lights
Instrument cluster
Introduction
This chapter contains information on the following subjects:
Overview
10
Engine revolutions counter
11
Speedometer
11
Coolant temperature gauge display
11
Fuel gauge
11
Counter for distance driven
12
Digital clock
12
Display of the second speed
12
Recommended gear
13
Fault display
The Error message will appear in the display if there is a fault in the instrument
cluster. Ensure that the fault is rectified as soon as possible by a specialist work-
shop.
WARNING■ Concentrate fully at all times on your driving! As the driver you are fully re-
sponsible for road safety.■
Never operate the controls in the instrument cluster while driving, only
when the vehicle is stationary!
OverviewFig. 2
Instrument cluster
First read and observe the introductory information and safety warn-
ings
on page 10.
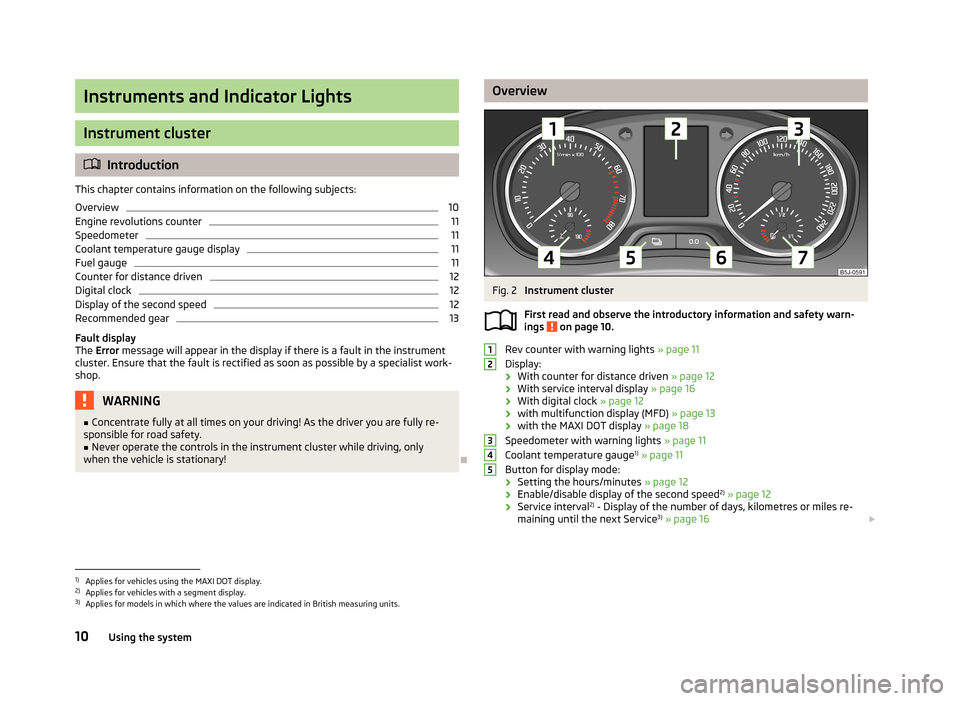
Rev counter with warning lights » page 11
Display:
› With counter for distance driven
» page 12
› With service interval display
» page 16
› With digital clock
» page 12
› with multifunction display (MFD)
» page 13
› with the MAXI DOT display
» page 18
Speedometer with warning lights » page 11
Coolant temperature gauge 1)
» page 11
Button for display mode:
› Setting the hours/minutes
» page 12
› Enable/disable display of the second speed 2)
» page 12
› Service interval 2)
- Display of the number of days, kilometres or miles re-
maining until the next Service 3)
» page 16
123451)
Applies for vehicles using the MAXI DOT display.
2)
Applies for vehicles with a segment display.
3)
Applies for models in which where the values are indicated in British measuring units.
10Using the system
Page 14 of 223
Button for:
› Reset trip meter
» page 12
› Set hours/minutes
› Enable/disable the mode selected by means of button 5
Fuel gauge 1)
» page 11
Engine revolutions counter
First read and observe the introductory information and safety warn-ings
on page 10.
The red scale of the rev counter
1
» Fig. 2 on page 10 indicates the range in
which the engine control unit begins to limit the engine speed. The engine con-
trol unit restricts the engine speed to a steady limit.
You should shift into the next higher gear before the red scale of the revolutioncounter is reached, or move the selector lever into position D if your car is fitted with an automatic gearbox.
To maintain the optimum motor speed, observe the gearshift indica-
tor » page 13 .
For the sake of the environment
Shifting up in good time has the following benefits.■It helps to reduce fuel consumption.■
It reduces engine noise.
■
It protects the environment.
■
It benefits the service life and reliability of the engine.
Speedometer
First read and observe the introductory information and safety warn-
ings
on page 10.
Warning against speeding
An audible warning signal will sound when the vehicle speed exceeds 120 km/h 2)
.
The audible warning is switched off once the vehicle speed falls below 120 km/h.
67Coolant temperature gauge display
First read and observe the introductory information and safety warn-
ings
on page 10.
The coolant temperature gauge
4
» Fig. 2 on page 10 operates only when the
ignition is switched on.
In vehicles with a segment display, the coolant temperature is indicated only by
one of the warning lights » page 22, Coolant coming on or going off.
Cold range
The pointer in the left of the scale indicates that the engine has not yet reached
its operating temperature. Avoid high speeds, full throttle and high engine loads.
This prevents possible damage to the engine.
The operating range
The engine has reached its operating temperature as soon as the pointer moves into the middle of the scale. At very high ambient temperatures or under heavy
engine loads, the pointer may move even further to the right.
High temperature range
The coolant temperature is too high if the pointer reaches the red area of the
scale. Further information » page 22.
CAUTION
Additional headlights and other components mounted in front of the air inlet im-
pair the cooling efficiency of the coolant.
Fuel gauge
First read and observe the introductory information and safety warn-
ings
on page 10.
The fuel gauge
7
» Fig. 2 on page 10 only works when the ignition is switched
on.
The fuel remaining is displayed in the segment display on vehicles with the seg-
ment display.
1)
Applies for vehicles using the MAXI DOT display.
2)
This function is only enabled in certain countries.
11Instruments and Indicator Lights
Page 15 of 223
The fuel tank has a capacity of about 45 litres. The warning light lights up when
the fuel level reaches the reserve range » page 25 .
CAUTION
Never drive until the fuel tank is completely empty! The irregular supply of fuel
can cause misfiring. This can result in considerable damage to parts of the engine
and the exhaust system.
Counter for distance driven
First read and observe the introductory information and safety warn-
ings
on page 10.
The distance which you have driven with your vehicle is shown in km. In some countries the measuring unit “mile” is used.
Daily trip counter (trip)
The trip counter indicates the distance you have driven since it was last reset - in
steps of 100 metres or 1/10 of a mile.
Reset trip meter
The meter can be reset by pressing and holding button
6
» Fig. 2 on page 10.
Odometer
The odometer indicates the total distance in kilometres or miles which the vehicle
has been driven.
Note
If the second speed display is enabled on vehicles with a segment display, this
speed will be shown instead of the odometer.
Digital clock
First read and observe the introductory information and safety warn-ings
on page 10.
The clock is set with buttons
5
and
6
» Fig. 2 on page 10.
Select the display that you wish to change with the button 5 and carry out the
change with the button 6.
In vehicles equipped with the MAXI DOT display, it is also possible to set the clock
in the Time menu » page 18.
Display of the second speed
First read and observe the introductory information and safety warn-
ings
on page 10.
The display can show the current speed in mph 1)
.
This feature is provided for driving in countries with different units for speed.
MAXI DOT display
The display of the second speed can be set in the Settings menu item » page 18,
Settings .
Segment display
›
Press the
5
» Fig. 2 on page 10key repeatedly, until the odometer display flash-
es » page 12 .
›
Press the
6
key while the display is flashing.
The second speed is displayed instead of the odometer.
Display of the second speed can be disabled in the same way.
1)
On models on which the speedometer indicates mph, the second speed is displayed in km/h.
12Using the system
Page 16 of 223
Recommended gearFig. 3
Recommended gear
First read and observe the introductory information and safety warn-
ings on page 10.
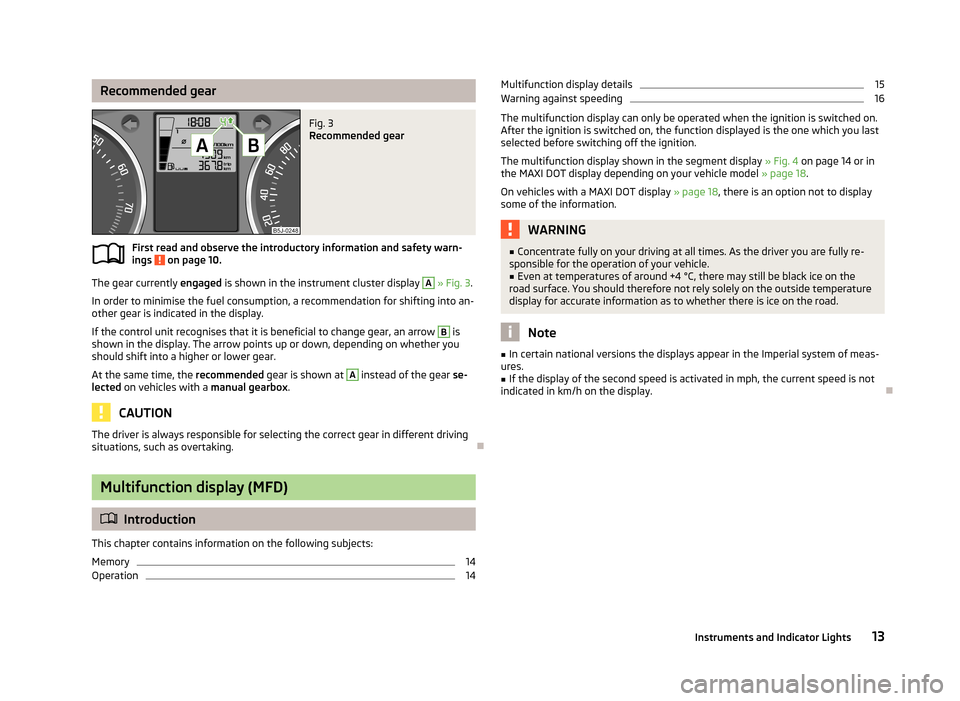
The gear currently engaged is shown in the instrument cluster display
A
» Fig. 3 .
In order to minimise the fuel consumption, a recommendation for shifting into an-
other gear is indicated in the display.
If the control unit recognises that it is beneficial to change gear, an arrow
B
is
shown in the display. The arrow points up or down, depending on whether you
should shift into a higher or lower gear.
At the same time, the recommended gear is shown at
A
instead of the gear se-
lected on vehicles with a manual gearbox.
CAUTION
The driver is always responsible for selecting the correct gear in different driving
situations, such as overtaking.
Multifunction display (MFD)
Introduction
This chapter contains information on the following subjects:
Memory
14
Operation
14Multifunction display details15Warning against speeding16
The multifunction display can only be operated when the ignition is switched on.
After the ignition is switched on, the function displayed is the one which you last
selected before switching off the ignition.
The multifunction display shown in the segment display » Fig. 4 on page 14 or in
the MAXI DOT display depending on your vehicle model » page 18.
On vehicles with a MAXI DOT display » page 18, there is an option not to display
some of the information.
WARNING■ Concentrate fully on your driving at all times. As the driver you are fully re-
sponsible for the operation of your vehicle.■
Even at temperatures of around +4 °C, there may still be black ice on the
road surface. You should therefore not rely solely on the outside temperature
display for accurate information as to whether there is ice on the road.
Note
■ In certain national versions the displays appear in the Imperial system of meas-
ures.■
If the display of the second speed is activated in mph, the current speed is not
indicated in km/h on the display.
13Instruments and Indicator Lights
Page 17 of 223
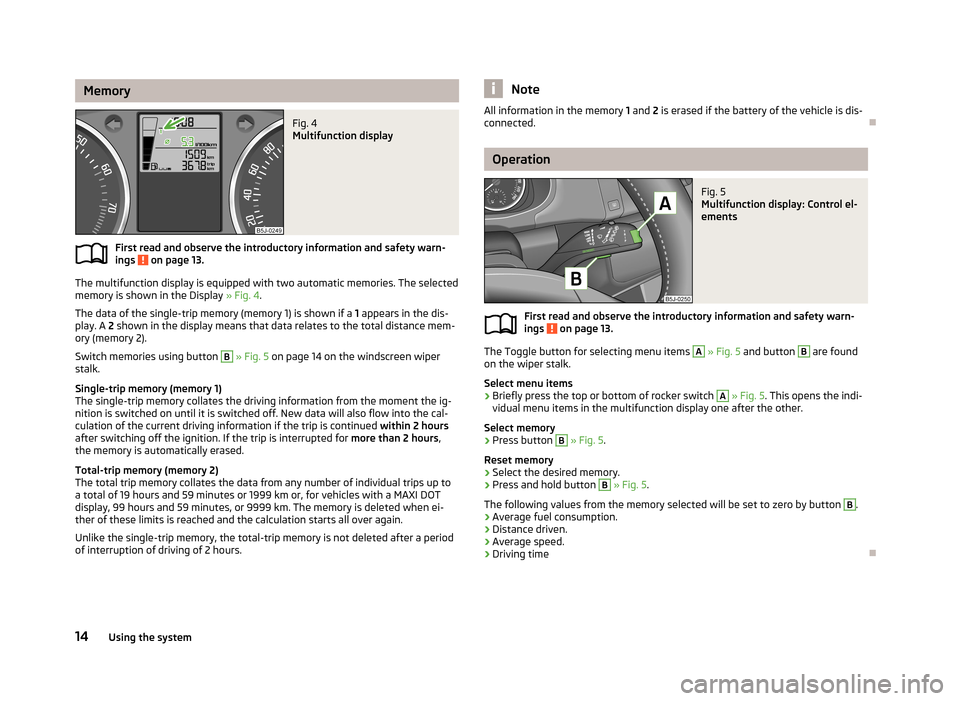
MemoryFig. 4
Multifunction display
First read and observe the introductory information and safety warn-
ings on page 13.
The multifunction display is equipped with two automatic memories. The selected
memory is shown in the Display » Fig. 4.
The data of the single-trip memory (memory 1) is shown if a 1 appears in the dis-
play. A 2 shown in the display means that data relates to the total distance mem-
ory (memory 2).
Switch memories using button
B
» Fig. 5 on page 14 on the windscreen wiper
stalk.
Single-trip memory (memory 1)
The single-trip memory collates the driving information from the moment the ig-
nition is switched on until it is switched off. New data will also flow into the cal-
culation of the current driving information if the trip is continued within 2 hours
after switching off the ignition. If the trip is interrupted for more than 2 hours,
the memory is automatically erased.
Total-trip memory (memory 2)
The total trip memory collates the data from any number of individual trips up to
a total of 19 hours and 59 minutes or 1999 km or, for vehicles with a MAXI DOT
display, 99 hours and 59 minutes, or 9999 km. The memory is deleted when ei-
ther of these limits is reached and the calculation starts all over again.
Unlike the single-trip memory, the total-trip memory is not deleted after a period of interruption of driving of 2 hours.
NoteAll information in the memory 1 and 2 is erased if the battery of the vehicle is dis-
connected.
Operation
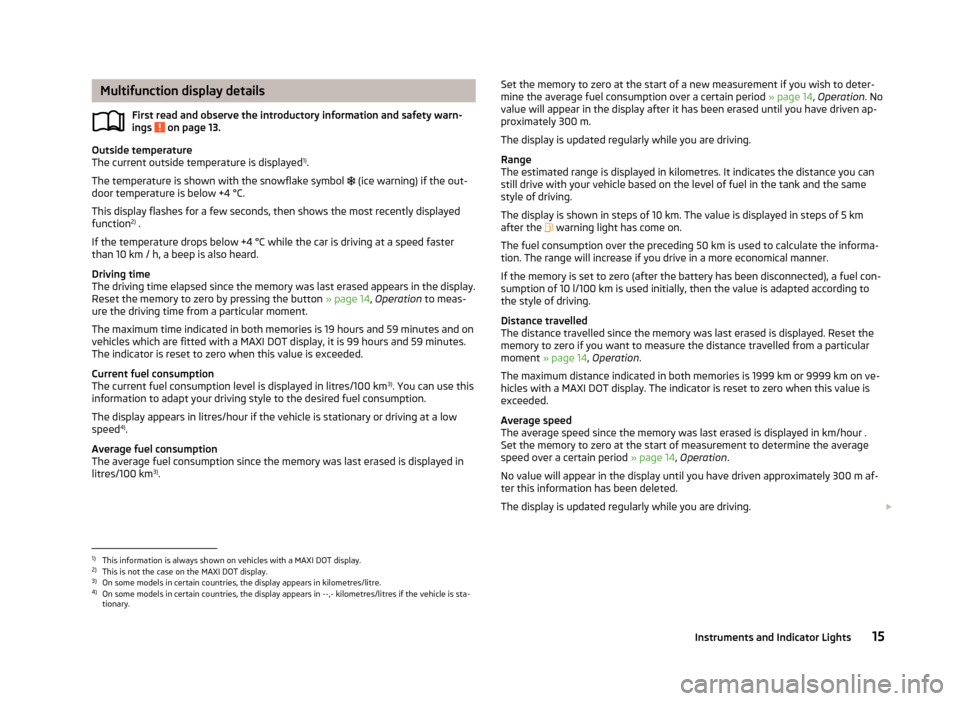
Fig. 5
Multifunction display: Control el-
ements
First read and observe the introductory information and safety warn- ings on page 13.
The Toggle button for selecting menu items
A
» Fig. 5 and button
B
are found
on the wiper stalk.
Select menu items
›
Briefly press the top or bottom of rocker switch
A
» Fig. 5 . This opens the indi-
vidual menu items in the multifunction display one after the other.
Select memory
›
Press button
B
» Fig. 5 .
Reset memory
›
Select the desired memory.
›
Press and hold button
B
» Fig. 5 .
The following values from the memory selected will be set to zero by button
B
.
› Average fuel consumption.
› Distance driven.
› Average speed.
› Driving time
14Using the system
Page 18 of 223
Multifunction display detailsFirst read and observe the introductory information and safety warn-
ings
on page 13.
Outside temperature
The current outside temperature is displayed 1)
.
The temperature is shown with the snowflake symbol (ice warning) if the out-
door temperature is below +4 °C.
This display flashes for a few seconds, then shows the most recently displayed
function 2)
.
If the temperature drops below +4 °C while the car is driving at a speed faster than 10 km / h, a beep is also heard.
Driving time
The driving time elapsed since the memory was last erased appears in the display.
Reset the memory to zero by pressing the button » page 14, Operation to meas-
ure the driving time from a particular moment.
The maximum time indicated in both memories is 19 hours and 59 minutes and on
vehicles which are fitted with a MAXI DOT display, it is 99 hours and 59 minutes.
The indicator is reset to zero when this value is exceeded.
Current fuel consumption
The current fuel consumption level is displayed in litres/100 km 3)
. You can use this
information to adapt your driving style to the desired fuel consumption.
The display appears in litres/hour if the vehicle is stationary or driving at a low speed 4)
.
Average fuel consumption
The average fuel consumption since the memory was last erased is displayed in litres/100 km 3)
.
Set the memory to zero at the start of a new measurement if you wish to deter-
mine the average fuel consumption over a certain period » page 14, Operation . No
value will appear in the display after it has been erased until you have driven ap-
proximately 300 m.
The display is updated regularly while you are driving.
Range
The estimated range is displayed in kilometres. It indicates the distance you can
still drive with your vehicle based on the level of fuel in the tank and the same
style of driving.
The display is shown in steps of 10 km. The value is displayed in steps of 5 km
after the warning light has come on.
The fuel consumption over the preceding 50 km is used to calculate the informa-
tion. The range will increase if you drive in a more economical manner.
If the memory is set to zero (after the battery has been disconnected), a fuel con- sumption of 10 l/100 km is used initially, then the value is adapted according to
the style of driving.
Distance travelled
The distance travelled since the memory was last erased is displayed. Reset the
memory to zero if you want to measure the distance travelled from a particular
moment » page 14 , Operation .
The maximum distance indicated in both memories is 1999 km or 9999 km on ve- hicles with a MAXI DOT display. The indicator is reset to zero when this value is
exceeded.
Average speed
The average speed since the memory was last erased is displayed in km/hour .
Set the memory to zero at the start of measurement to determine the average
speed over a certain period » page 14, Operation .
No value will appear in the display until you have driven approximately 300 m af- ter this information has been deleted.
The display is updated regularly while you are driving. 1)
This information is always shown on vehicles with a MAXI DOT display.
2)
This is not the case on the MAXI DOT display.
3)
On some models in certain countries, the display appears in kilometres/litre.
4)
On some models in certain countries, the display appears in --,- kilometres/litres if the vehicle is sta-
tionary.
15Instruments and Indicator Lights