seats SKODA FABIA 2013 2.G / 5J Owner's Manual
[x] Cancel search | Manufacturer: SKODA, Model Year: 2013, Model line: FABIA, Model: SKODA FABIA 2013 2.G / 5JPages: 223, PDF Size: 12.77 MB
Page 6 of 223
Table of Contents
Materials defect liability and ŠKODA warranty for
new cars5
Mobility warranty and ŠKODA extended
warranty
6
Abbreviations
Using the system
Cockpit
9
Overview
8
Instruments and Indicator Lights
10
Instrument cluster
10
Multifunction display (MFD)
13
Service Interval Display
16
MAXI DOT display
18
Warning lights
20
Unlocking and locking
28
Unlocking and locking
28
Central locking system
31
Remote control
34
Anti-theft alarm system
35
Tailgate
37
Electrical power windows
38
Electric sliding/tilting roof
40
Lights and visibility
43
Lights
43
Interior lights
48
Visibility
49
Windscreen wipers and washers
50
Rear window
53Seats and storage54Front seats54
Rear seats
56
Head restraints
57
Boot
58
Variable loading floor in the luggage
compartment (Fabia Estate)
62
Net partition (Fabia Estate)
64
Bicycle carrier in the luggage compartment
65
Roof rack system
67
Useful equipment
69
Storage compartments
72
Heating and air conditioning
77
Heating, ventilation, cooling
77
Heating
78
Air conditioning system (manual air conditioning
system)
80
Climatronic (automatic air conditioningsystem)
83
Communication and multimedia
86
Universal telephone preinstallation GSM II
86
Voice control
91
Multimedia
92
Driving
Starting-off and Driving
95
Steering
95
Starting and stopping the engine
96
Brakes
98
Manual gear shifting and pedals
99
Automatic transmission
100
Running in
103
Economical driving and respect the
environment
104
Avoiding damage to your vehicle
108
Driving abroad
109Assist systems111Brake assist systems111
Parking aid
113
Cruise control system
114
START-STOP
116
Towing a trailer
118
Towing device
118
Trailer
121
Safety
Passive Safety
124
General information
124
Correct seated position
125
Seat belts
128
Wearing seat belts
128
Inertia reel and belt pretensioners
131
Airbag system
133
Description of the airbag system
133
Airbag overview
134
Deactivating airbags
137
Transporting children safely
140
Child seat
140
Fastening systems
143
General Maintenance
Car care
145
Service intervals
145
Services, modifications and technical
alterations
147
Washing the car
150
Vehicle exterior care
151
Care of the interior
1553Table of Contents
Page 38 of 223
Folding in the key bit›Press the button 4 » Fig. 16 and fold in the key bit.
Unlocking
The turn signal lights flash twice as confirmation that the vehicle has been un-
locked. If the vehicle is unlocked using button 1
» Fig. 16 and none of the doors
or the tailgate are opened within the next 30 seconds, the vehicle is automatical-
ly locked again and the safe securing system or anti-theft alarm system is reacti- vated. This function is intended to prevent the car being unlocked unintentional-ly.
In addition, when the car is unlocked, the electrically adjustable seats and exteri-
or mirrors move into the position assigned to this key. The stored setting of driver
seat and exterior mirrors is retrieved.
Locking
The turn signal lights flash once to confirm that the vehicle has been correctly
locked.
If the doors or the boot lid remain open after the vehicle has been locked, the
turn signal lights do not flash until they have been closed.
WARNINGIf the car is locked from the outside and the safe securing system is activated,
there must not be any person in the car as it is then not possible to open ei-
ther a door or a window from the inside. The locked doors make it more diffi-
cult for rescuers to get into the vehicle in an emergency – risk of death.
Note
■ Only operate the remote control when the doors and boot lid are closed and the
vehicle is in your line of sight.■
A ŠKODA partner can also activate/deactivate the acoustic signals on vehicles
with an anti-theft alarm system.
Synchronization
First read and observe the introductory information given on page 34.
If the vehicle does not unlock when the remote control is pressed, the key may
not be synchronised. This can occur when the buttons on the remote control key are pressed several times outside the operating range of the equipment or if the
battery in the remote control key has been replaced.
Synchronise the key as follows.
›
Press any button on the remote control key.
›
Unlock the door with the key within 1 minute of pressing the button.
Anti-theft alarm system
Introduction
This chapter contains information on the following subjects:
Operation
36
Interior monitor and towing protection
36
The anti-theft alarm system increases the level of protection against people
seeking to break into the vehicle. The system triggers audible and visual warning
signals if an attempt is made to break into the vehicle.
Note
■ The working life of the alarm siren is 5 years.■Before leaving the car, it must be checked that all of the windows, doors and
the electric sliding/tilting roof are properly closed to ensure the full functionality
of the anti-theft alarm system.■
Coding of the radio remote control and the receiver unit precludes the use of
the radio remote control from other vehicles.
35Unlocking and locking
Page 41 of 223
The period after which the tailgate locks automatically can be extended by a spe-
cialist garage.
Delayed locking
If the tailgate was opened with the button on the remote control key, then it
is possible to open the lid within a limited period of it being closed.
There is a risk of unwanted entry into the vehicle before the boot lid is locked au-tomatically. Therefore always lock the vehicle with the button on the remote
control.
Delayed locking can be disabled by a specialist garage at any time.
Note
More detailed information is available from a ŠKODA Partner.
Emergency unlocking
Fig. 19
Emergency unlocking of the boot
lid
First read and observe the introductory information and safety warn-
ings on page 37.
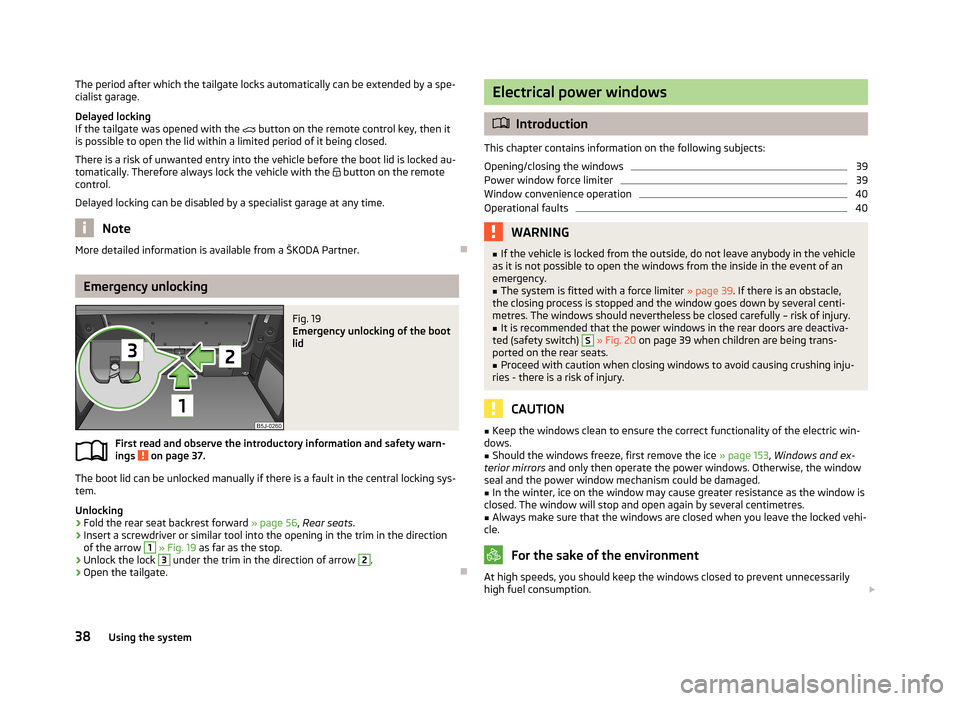
The boot lid can be unlocked manually if there is a fault in the central locking sys-
tem.
Unlocking
›
Fold the rear seat backrest forward » page 56, Rear seats .
›
Insert a screwdriver or similar tool into the opening in the trim in the direction
of the arrow
1
» Fig. 19 as far as the stop.
›
Unlock the lock
3
under the trim in the direction of arrow
2
.
›
Open the tailgate.
Electrical power windows
Introduction
This chapter contains information on the following subjects:
Opening/closing the windows
39
Power window force limiter
39
Window convenience operation
40
Operational faults
40WARNING■ If the vehicle is locked from the outside, do not leave anybody in the vehicle
as it is not possible to open the windows from the inside in the event of an
emergency.■
The system is fitted with a force limiter » page 39. If there is an obstacle,
the closing process is stopped and the window goes down by several centi-
metres. The windows should nevertheless be closed carefully – risk of injury.
■
It is recommended that the power windows in the rear doors are deactiva-
ted (safety switch)
S
» Fig. 20 on page 39 when children are being trans-
ported on the rear seats.
■
Proceed with caution when closing windows to avoid causing crushing inju-
ries - there is a risk of injury.
CAUTION
■ Keep the windows clean to ensure the correct functionality of the electric win-
dows.■
Should the windows freeze, first remove the ice » page 153, Windows and ex-
terior mirrors and only then operate the power windows. Otherwise, the window
seal and the power window mechanism could be damaged.
■
In the winter, ice on the window may cause greater resistance as the window is
closed. The window will stop and open again by several centimetres.
■
Always make sure that the windows are closed when you leave the locked vehi-
cle.
For the sake of the environment
At high speeds, you should keep the windows closed to prevent unnecessarily
high fuel consumption. 38Using the system
Page 47 of 223
Headlight beam adjustmentFig. 24
Dash panel: Lights and visibility
First read and observe the introductory information and safety warn-
ings on page 43.
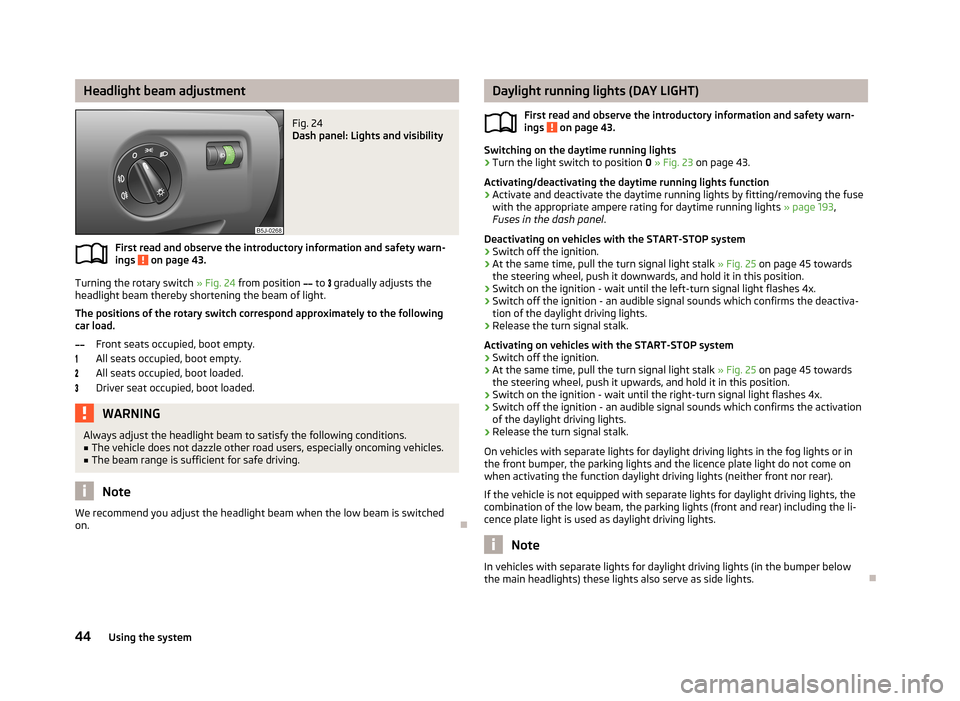
Turning the rotary switch » Fig. 24 from position
to
gradually adjusts the
headlight beam thereby shortening the beam of light.
The positions of the rotary switch correspond approximately to the following
car load.
Front seats occupied, boot empty.
All seats occupied, boot empty.
All seats occupied, boot loaded.
Driver seat occupied, boot loaded.
WARNINGAlways adjust the headlight beam to satisfy the following conditions.■The vehicle does not dazzle other road users, especially oncoming vehicles.■
The beam range is sufficient for safe driving.
Note
We recommend you adjust the headlight beam when the low beam is switched
on.
Daylight running lights (DAY LIGHT)
First read and observe the introductory information and safety warn-
ings
on page 43.
Switching on the daytime running lights
›
Turn the light switch to position 0 » Fig. 23 on page 43.
Activating/deactivating the daytime running lights function
›
Activate and deactivate the daytime running lights by fitting/removing the fuse
with the appropriate ampere rating for daytime running lights » page 193,
Fuses in the dash panel .
Deactivating on vehicles with the START-STOP system
›
Switch off the ignition.
›
At the same time, pull the turn signal light stalk » Fig. 25 on page 45 towards
the steering wheel, push it downwards, and hold it in this position.
›
Switch on the ignition - wait until the left-turn signal light flashes 4x.
›
Switch off the ignition - an audible signal sounds which confirms the deactiva- tion of the daylight driving lights.
›
Release the turn signal stalk.
Activating on vehicles with the START-STOP system
›
Switch off the ignition.
›
At the same time, pull the turn signal light stalk » Fig. 25 on page 45 towards
the steering wheel, push it upwards, and hold it in this position.
›
Switch on the ignition - wait until the right-turn signal light flashes 4x.
›
Switch off the ignition - an audible signal sounds which confirms the activation
of the daylight driving lights.
›
Release the turn signal stalk.
On vehicles with separate lights for daylight driving lights in the fog lights or in
the front bumper, the parking lights and the licence plate light do not come on
when activating the function daylight driving lights (neither front nor rear).
If the vehicle is not equipped with separate lights for daylight driving lights, the
combination of the low beam, the parking lights (front and rear) including the li-
cence plate light is used as daylight driving lights.
Note
In vehicles with separate lights for daylight driving lights (in the bumper below
the main headlights) these lights also serve as side lights.
44Using the system
Page 57 of 223
Seats and storage
Front seats
Introduction
This chapter contains information on the following subjects:
Adjusting the front seats - Version 1
55
Adjusting the front seats - Variant 2
55
Front seat heating
55
The driver's seat should be adjusted in such a way that the pedals can be fully
pressed to the floor with slightly bent legs.
The seat backrest on the driver's seat should be adjusted in such a way that the
upper point of the steering wheel can be easily reached with slightly bent arms.
Correct adjustment of the seats is particularly important:
› for reaching the controls safely and quickly;
› for a relaxed, fatigue-free body position;
› for achieving maximum protection from the seat belts and the airbag system.
WARNINGGeneral information■Caution when adjusting the seat! You may suffer injuries or bruises as a re-
sult of adjusting the seat without paying proper attention.■
The seat backrests must not be reclined too far when driving otherwise this
will affect proper operation of the seat belts and of the airbag system – risk of
injury.
■
Never carry more people than the number of seats in the vehicle.
■
Each occupant must correctly fasten the seat belt belonging to the seat.
Children must be fastened » page 140, Transporting children safely with a
suitable restraint system.
■
The front seats and head restraints must be adjusted to match the body
size at all times and the seat belt must always be fastened properly to provide the most effective levels of protection to the passengers.
■
Do not transport any objects on the front passenger seat other than objects
(e.g. child safety seat) intended for this purpose – there is the risk of an acci-
dent.
WARNINGInformation for the driver■Only adjust the driver's seat when the vehicle is stationary – there is the risk
of an accident.■
Keep a distance of at least 25 cm from the steering wheel. Not keeping to
this minimum distance will mean that the airbag system will not be able to
properly protect you – risk of death.
■
Ensure that there are no objects in the driver's footwell as they may get
caught behind the pedals while you are driving or under braking. You would
then no longer be able to operate the clutch, brake or accelerate.
WARNINGInformation for the front seat passenger■Maintain a distance of at least 25 cm from the dash panel. Not maintaining
this minimum distance will mean that the airbag system will not be able to
properly protect you - there is a risk that you could be killed.■
Always keep your feet in the footwell when the car is being driven - never
place your feet on the instrument panel, out of the window or on the seats.
You will be exposed to increased risk of injury if it becomes necessary to apply
the brakes or in the event of an accident. You may suffer fatal injuries when
an airbag is deployed if you have adopted an incorrect seating position.
Note
After a certain time, play can develop within the adjustment mechanism of the
backrest angle.
54Using the system
Page 58 of 223
Adjusting the front seats - Version 1Fig. 37
Control elements on the seat
First read and observe the introductory information and safety warn-
ings on page 54.
Adjusting a seat fore and aft
›
Pull lever
1
» Fig. 37 up and push the seat into the desired position.
›
Release the lever
1
and push the seat until the lock clicks into place.
Adjusting height of seat
›
To lift the seat, pull or pump lever
2
» Fig. 37 upwards.
›
To lower the seat, push or pump the lever
2
downwards.
Adjusting the angle of the seat backrest
›
To adjust the angle of the backrest, relieve any pressure from the seat backrest
(do not lean on it) and turn handwheel
3
» Fig. 37 .
Adjusting the front seats - Variant 2
Fig. 38
Control elements on the seatFirst read and observe the introductory information and safety warn-
ings on page 54.
Adjusting a seat fore and aft
›
Pull the lever (in the middle)
1
» Fig. 38 up and push the seat to the desired
position.
›
Release the lever
1
and push the seat until the lock clicks into place.
Adjusting height of seat
›
To lift the seat, pull or pump lever
2
» Fig. 38 upwards.
›
To lower the seat, push or pump the lever
2
downwards.
Adjusting the angle of the seat backrest
›
Relieve the load on the seat backrest (do not lean on it), pull the lever
3
» Fig. 38 towards the rear and set the desired angle of the seat backrest
with the back.
›
After releasing the lever
3
, the seat backrest will remain in the set position.
Front seat heating
Fig. 39
Rocker switch for front seat
heating
First read and observe the introductory information and safety warn-
ings on page 54.
The seat backrests and seats can be heated electrically.
›
Switch the front seat heating to 25 % or 100 % power by pressing rocker switch
at position 1 or 2 » Fig. 39 .
›
To switch off the heating shift the rocker switch into the horizontal position.
55Seats and storage
Page 59 of 223
WARNINGIf, as an occupant, you have a subdued pain and/or temperature sensitivity,
e.g. through medication, paralysis or because of chronic illness (e.g. diabetes),
we recommend not to use the seat heating. This can lead to burns on the
back, the posterior and the legs which are difficult to heal. If the seat heating
is used, we recommend to make regular breaks in your journey when driving
long distances, so that the body can recuperate from the stress of the jour- ney. Please consult your doctor, who can evaluate your specific condition.
CAUTION
■ Do not kneel on the seats or otherwise apply pressure at specific points to
avoid damaging the heating elements for the seat heaters.■
Do not turn on the seat heater if seats are not occupied.
■
Do not switch on the seat heating if the seats have objects attached to or
placed on them, for example a child seat, a bag, etc. A fault of the heating ele- ments in the seat heating can occur.
■
If additional seat covers or protective covers are attached to the seats, do not
turn on the seat heater - there is a risk of damaging the seat covers and seat
heating.
■
Do not clean the seats using moisture » page 157.
Note
■
The seat heating should only be switched on when the engine is running. This
has a significant effect of saving on the battery capacity.■
If the on-board voltage drops, the seat heating is switched off automatically, in
order to provide sufficient electrical energy for the engine control » page 172,
Automatic load deactivation .
Rear seats
Introduction
This chapter contains information on the following subjects:
Folding the seat backrest forwards
56
Folding the seat cushions forwards, removing
57
Folding the seat backrest forwardsFig. 40
Unlock the seat backrest
First read and observe the introductory information given on page 56.
The luggage compartment can be increased in size by folding the seat backrests
forward. The seat backrests can be folded forward individually on vehicles with
divided rear seats.
Folding forward
›
Before folding the rear seats forwards, adapt the position of the front seats in such a way that they are not damaged by the folded rear seats.
›
Unlock the seat backrest by pressing the securing knob
A
» Fig. 40 and fold it
forwards.
›
Pull the head restraint out of the seat backrest.
›
Fold the seat backrest completely forwards.
Folding backwards
›
Push the head restraint into the slightly lifted seat backrest.
›
Then push the seat backrest back into the upright position until the securing knob clicks into place - check by pulling on the seat backrest » .
›
Make sure that the red pin
B
is hidden.
WARNING■
The belts and the belt locks must be in their original position after folding
back the seat backrests - they must be ready to use.■
The seat backrests must be securely latched in position so that no objects
from the luggage compartment can slip into the passenger compartment un-
der sudden braking – there is a risk of injury.
■
Ensure that the rear seat backrests are properly engaged. It is only then that
the three-point seat belt for the middle seat can reliably fulfil its function.
56Using the system
Page 60 of 223
CAUTIONEnsure that the seat belts are not damaged when operating the seat backrests.Under no circumstances must the rear seat belts be jammed by the folded back
seat backrests.
Note
On vehicles with an installed net partition housing, first fold back the left seat
rest followed by the right one.
Folding the seat cushions forwards, removing
Fig. 41
Folding the seat cushions forwards and removing
First read and observe the introductory information given on page 56.
The luggage compartment can be increased in size by folding the seat backrests
forward or by removing the rear seats.
Folding forward
›
Pull up the seat squab in the direction of the arrow
1
» Fig. 41 and fold for-
wards in the direction of the arrow
2
.
Removing
›
Fold the seat cushion forward.
›
Press the wire loops in the direction of the arrow » Fig. 41 -
and remove the
seat squab from its bracket.
Fitting›Press the wire loop in the direction of the arrow » Fig. 41 - and fit it into the
bracket.›
Fold the seat cushion back into its original position.
Head restraints
Introduction
This chapter contains information on the following subjects:
Adjusting the head restraints
57
Storing the head restraints in the seat squabs
58
Adjusting the head restraints
Fig. 42
Head restraint: adjusting/removing
First read and observe the introductory information given on page 57.
Setting the height
›
Grasp the side of the head restraint with both hands and push it upwards as re-
quired » Fig. 42 -
.
›
To move the head restraint downwards, press and hold the safety but-
ton » Fig. 42 -
with one hand and push the head restraint down with the oth-
er hand.
Removing/installing
›
Pull the head restraint out of the seat backrest as far as the stop.
57Seats and storage
Page 61 of 223
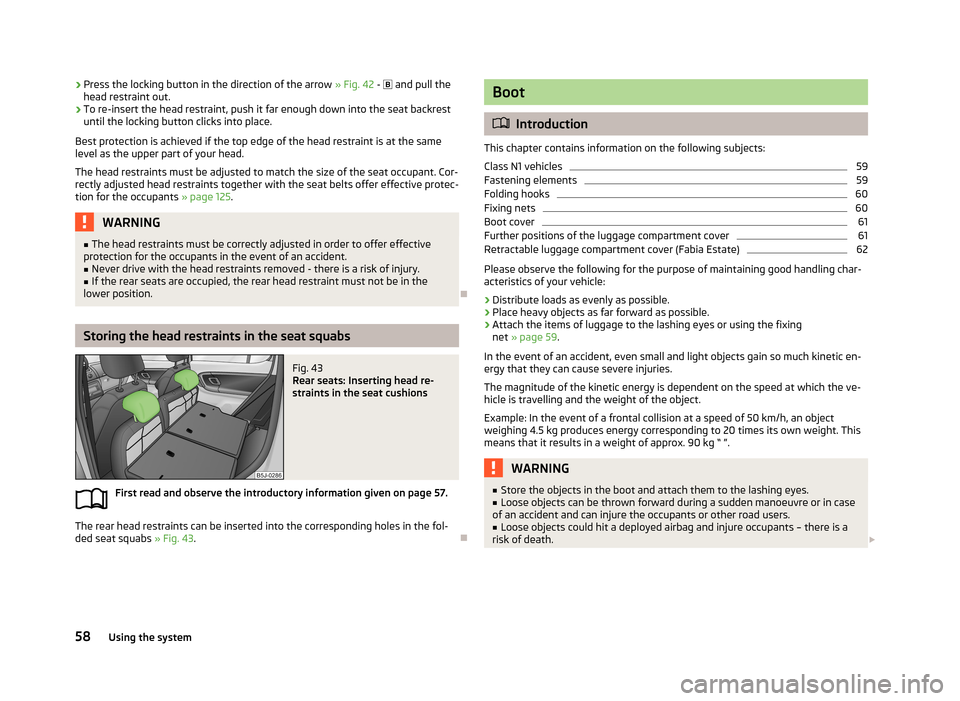
›Press the locking button in the direction of the arrow
» Fig. 42 - and pull the
head restraint out.›
To re-insert the head restraint, push it far enough down into the seat backrest until the locking button clicks into place.
Best protection is achieved if the top edge of the head restraint is at the same
level as the upper part of your head.
The head restraints must be adjusted to match the size of the seat occupant. Cor-rectly adjusted head restraints together with the seat belts offer effective protec-
tion for the occupants » page 125.
WARNING■
The head restraints must be correctly adjusted in order to offer effective
protection for the occupants in the event of an accident.■
Never drive with the head restraints removed - there is a risk of injury.
■
If the rear seats are occupied, the rear head restraint must not be in the
lower position.
Storing the head restraints in the seat squabs
Fig. 43
Rear seats: Inserting head re-
straints in the seat cushions
First read and observe the introductory information given on page 57.
The rear head restraints can be inserted into the corresponding holes in the fol-
ded seat squabs » Fig. 43.
Boot
Introduction
This chapter contains information on the following subjects:
Class N1 vehicles
59
Fastening elements
59
Folding hooks
60
Fixing nets
60
Boot cover
61
Further positions of the luggage compartment cover
61
Retractable luggage compartment cover (Fabia Estate)
62
Please observe the following for the purpose of maintaining good handling char-
acteristics of your vehicle:
›
Distribute loads as evenly as possible.
›
Place heavy objects as far forward as possible.
›
Attach the items of luggage to the lashing eyes or using the fixing net » page 59 .
In the event of an accident, even small and light objects gain so much kinetic en-
ergy that they can cause severe injuries.
The magnitude of the kinetic energy is dependent on the speed at which the ve-
hicle is travelling and the weight of the object.
Example: In the event of a frontal collision at a speed of 50 km/h, an object
weighing 4.5 kg produces energy corresponding to 20 times its own weight. This
means that it results in a weight of approx. 90 kg “ ”.
WARNING■ Store the objects in the boot and attach them to the lashing eyes.■Loose objects can be thrown forward during a sudden manoeuvre or in case
of an accident and can injure the occupants or other road users.■
Loose objects could hit a deployed airbag and injure occupants – there is a
risk of death.
58Using the system
Page 62 of 223
WARNING (Continued)■Please note that the handling properties of the vehicle may be affected
when transporting heavy objects as the centre of gravity can be shifted –
there is a risk of an accident. The speed and style of driving must be adjusted
accordingly.■
If the items of luggage or objects are attached to the lashing eyes with un-
suitable or damaged lashing straps, injuries can occur in the event of braking
manoeuvres or accidents. To prevent items of luggage from being thrown for-
ward, always use suitable lashing straps which must be firmly attached to the lashing eyes.
■
Items carried in the luggage compartment must be stowed in such a way
that no objects are able to slip forward under sudden driving manoeuvres or
braking – there is a risk of injury.
■
When transporting fastened objects which are sharp and dangerous in the
boot that has been enlarged by folding the rear seats forward, ensure the safety of the passengers transported on the other rear seats » page 126, Cor-
rect seated position of the rear seat passengers .
■
If the rear seat next to the folded forward seat is occupied, ensure maxi-
mum safety, e.g. by placing the goods to be transported in such a way that the
seat is prevented from folding back in case of a rear collision.
■
Never drive with the tailgate fully opened or slightly ajar otherwise exhaust
gases may get into the interior of the vehicle – risk of poisoning.
■
Under no circumstances, should the permissible axle loads and permissible
gross weight of the vehicle be exceeded – there is the risk of an accident.
■
Never transport people in the boot!
CAUTION
Please ensure that the heating elements for the rear window heater are not dam-
aged as a result of abrasive objects.
Note
Tyre pressure must be adjusted to the load » page 174
, Tyre service life .
Class N1 vehicles
First read and observe the introductory information and safety warn-
ings
on page 58.
On class N1 vehicles, which are not fitted with a protective grille, a lashing set which complies with the standard EN 12195 (1 - 4) must be used for fastening the
load.
The proper functioning of the electrical system is essential for the safe operation
of the vehicle. It is important to ensure that it is not damaged during modifica-
tions or when loading or unloading the luggage compartment.
Fastening elements
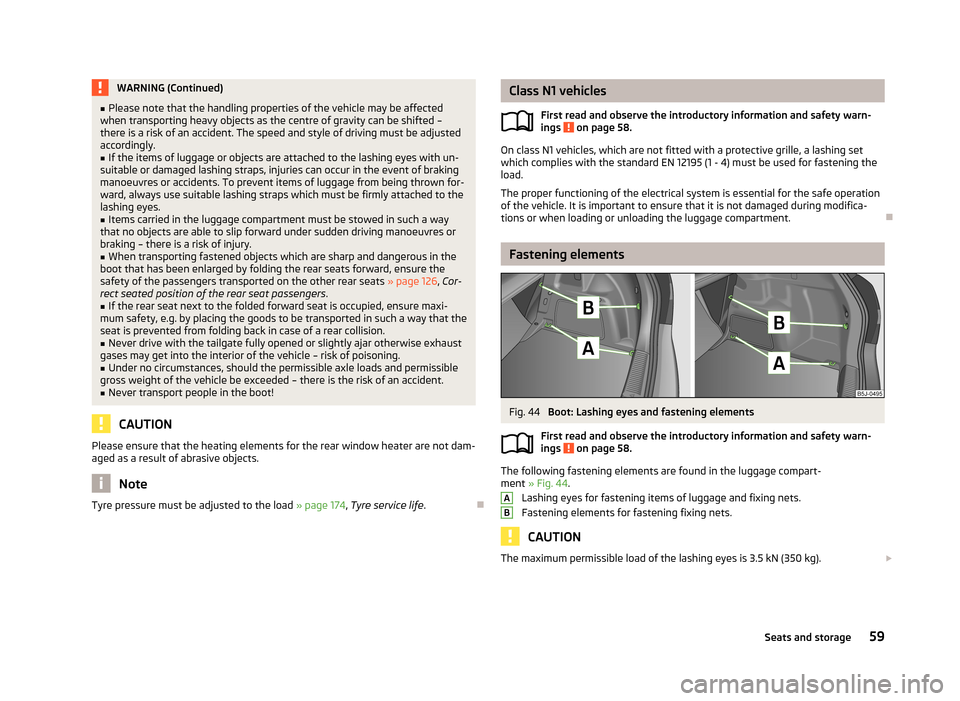
Fig. 44
Boot: Lashing eyes and fastening elements
First read and observe the introductory information and safety warn- ings
on page 58.
The following fastening elements are found in the luggage compart-ment » Fig. 44 .
Lashing eyes for fastening items of luggage and fixing nets.
Fastening elements for fastening fixing nets.
CAUTION
The maximum permissible load of the lashing eyes is 3.5 kN (350 kg). AB59Seats and storage