airbag SKODA FABIA 2013 2.G / 5J User Guide
[x] Cancel search | Manufacturer: SKODA, Model Year: 2013, Model line: FABIA, Model: SKODA FABIA 2013 2.G / 5JPages: 223, PDF Size: 12.77 MB
Page 74 of 223
WARNING■Improper use of the 12-volt power socket and the electrical accessories can
cause fires, burns and other serious injuries.■
Never leave children unattended in the vehicle. The 12-volt power socket
and any connected appliances can also be operated when the ignition is switched off or the ignition key is withdrawn.
■
If the connected electric device becomes too hot, switch it off and discon-
nect it from the power supply immediately.
CAUTION
■ The 12-volt power socket can only be used for connecting approved electrical
accessories with a total power uptake of up to 120 watt.■
Never exceed the maximum power consumption, otherwise the vehicle's elec-
trical system can be damaged.
■
Connecting electrical components when the engine is not running will drain the
battery of the vehicle – there is a risk of the battery discharging.
■
Only use matching plugs to avoid damaging the 12-volt power socket.
■
Only use accessories that have been tested for electromagnetic compatibility in
accordance with the applicable directives.
■
Before turning the ignition on or off, and before starting the car, switch off the
device connected to the 12-volt power socket to prevent any damage caused by
voltage fluctuations.
■
Observe the operating instructions for the connected devices!
Clothes hook
First read and observe the introductory information and safety warn-ings
on page 69.
The clothes hooks are located on the handle of the headliner above each of the
rear doors.
WARNING■ Ensure that any clothes hanging from the hooks do not impair your vision to
the rear.■
Only use the hooks for hanging light items of clothing and ensure that there
are no heavy or sharp-edged objects in the pockets.
■
Do not use clothes hangers for hanging up items of clothing otherwise this
may reduce the effectiveness of head airbags.
CAUTION
The maximum permissible load of the hooks is 2 kg.
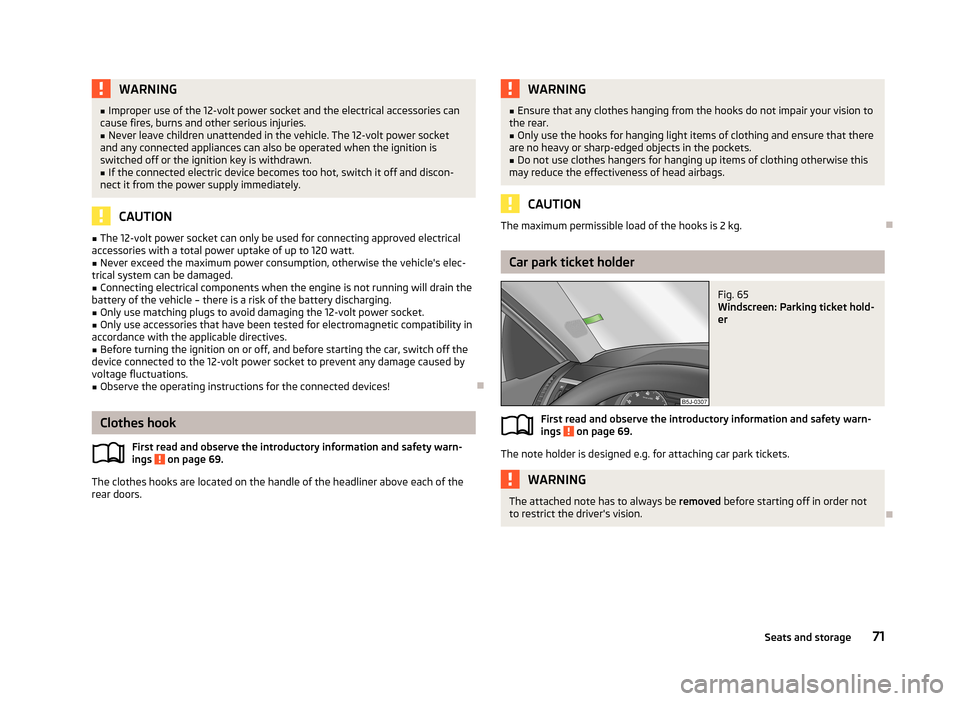
Car park ticket holder
Fig. 65
Windscreen: Parking ticket hold-
er
First read and observe the introductory information and safety warn-
ings on page 69.
The note holder is designed e.g. for attaching car park tickets.
WARNINGThe attached note has to always be removed before starting off in order not
to restrict the driver's vision.
71Seats and storage
Page 78 of 223
CAUTIONThe storage compartment is designed for storing small objects of up to 1 kg. in
weight.
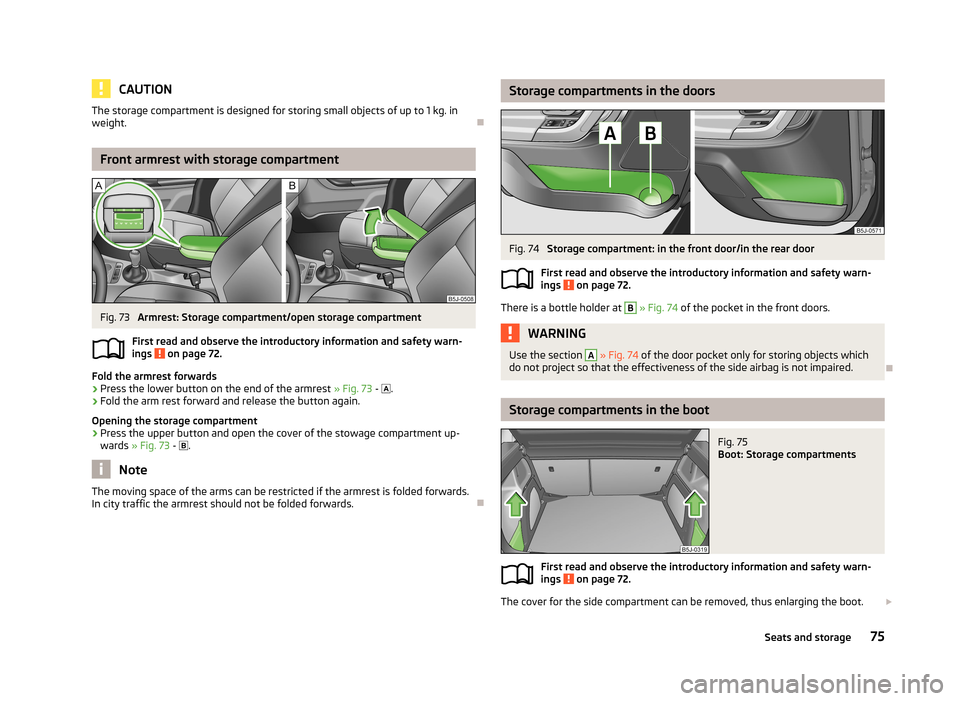
Front armrest with storage compartment
Fig. 73
Armrest: Storage compartment/open storage compartment
First read and observe the introductory information and safety warn- ings
on page 72.
Fold the armrest forwards
›
Press the lower button on the end of the armrest » Fig. 73 -
.
›
Fold the arm rest forward and release the button again.
Opening the storage compartment
›
Press the upper button and open the cover of the stowage compartment up- wards » Fig. 73 -
.
Note
The moving space of the arms can be restricted if the armrest is folded forwards.
In city traffic the armrest should not be folded forwards.
Storage compartments in the doorsFig. 74
Storage compartment: in the front door/in the rear door
First read and observe the introductory information and safety warn- ings
on page 72.
There is a bottle holder at
B
» Fig. 74 of the pocket in the front doors.
WARNINGUse the section A » Fig. 74 of the door pocket only for storing objects which
do not project so that the effectiveness of the side airbag is not impaired.
Storage compartments in the boot
Fig. 75
Boot: Storage compartments
First read and observe the introductory information and safety warn-
ings on page 72.
The cover for the side compartment can be removed, thus enlarging the boot.
75Seats and storage
Page 89 of 223
Communication and multimedia
Universal telephone preinstallation GSM II
Introduction
This chapter contains information on the following subjects:
Mobile phones and two-way radio systems
86
Introductory information
86
Phone Phonebook
87
Operating the phone on the multifunction steering wheel
87
Inserting the mobile phone and adapter
88
Managing telephone calls with the help of the adapter
89
Connecting the mobile phone to the hands-free system
89
Symbols in the MAXI DOT display
90
Telephone operation in the MAXI DOT display
90
Mobile phones and two-way radio systems
First read and observe the introductory information given on page 86.
ŠKODA permits the operation of mobile phones and two-way radio systems with
a professionally installed external aerial and a maximum transmission power of
up to 10 watts.
Please consult a ŠKODA Partner for information about the possibility of installing
and operating mobile phones and two-way radio systems with a transmission
power of more than 10 W.
Operating mobile phones or two-way radio systems may interfere with the func-tionality of the electronic systems in your vehicle.
The possible reasons for this are. › no external aerial.
› external aerial incorrectly installed.
› transmission power greater than 10 watts.
WARNING■
Concentrate fully at all times on your driving! As the driver you are fully re-
sponsible for road safety. Use the telephone system only to such an extent that you are in full control of your vehicle at any time.■
The national regulations for using a mobile phone in a vehicle must be ob-
served.
■
If a mobile phone or a two-way radio system is operated in a vehicle without
an external aerial or an external aerial which has been installed incorrectly,
this can increase the strength of the electromagnetic field inside the vehicle.
■
Two-way radio systems, mobile phones or mounts must not be installed on
airbag covers or within the immediate deployment range of the airbags.
■
Never leave a mobile phone on a seat, on the dash panel or in another area,
from which it can be thrown during a sudden braking manoeuvre, an accident
or a collision - risk of injury.
■
The Bluetooth ®
function must be switched off by a specialist workshop be-
fore the vehicle is transported by air.
Note
■ We recommend that mobile phones and two-way radio systems be installed in
the a vehicle by a specialist workshop.■
Not all mobile phones that enable Bluetooth ®
communication are compatible
with the universal telephone preinstallation GSM II. You can ask a ŠKODA Partner
whether your telephone is compatible with the GSM II universal telephone fitting.
■
The range of the Bluetooth ®
connection to the hands-free system is restricted
to the vehicle interior. The range is dependent on local factors, e.g. obstacles be-
tween the devices and mutual interferences with other devices. If your mobile
phone is in a jacket pocket, for example, this can lead to difficulties when estab-
lishing a connection with the hands-free-system or transferring data.
Introductory information
First read and observe the introductory information given on page 86.
The universal telephone preinstallation GSM II (hands-free system) includes a
convenience mode for the mobile phone via voice control, the multifunction
steering wheel, the adapter, radio or the navigation system.
86Using the system
Page 98 of 223
Driving
Starting-off and Driving
Steering
Introduction
This chapter contains information on the following subjects:
Adjusting the steering wheel position
95
Power steering
95WARNING■ When driving, hold the steering wheel with both hands firmly on the outer
edge in the 9 o'clock and 3 o'clock position. Never hold the steering wheel in
the 12 o'clock position or in any other way (e.g. in the middle or inner edge of
the steering wheel). In such cases, you could severely injure your arms, hands
and head when the driver airbag is deployed.■
Never adjust the steering wheel when the vehicle is moving only when the
vehicle is stationary!
■
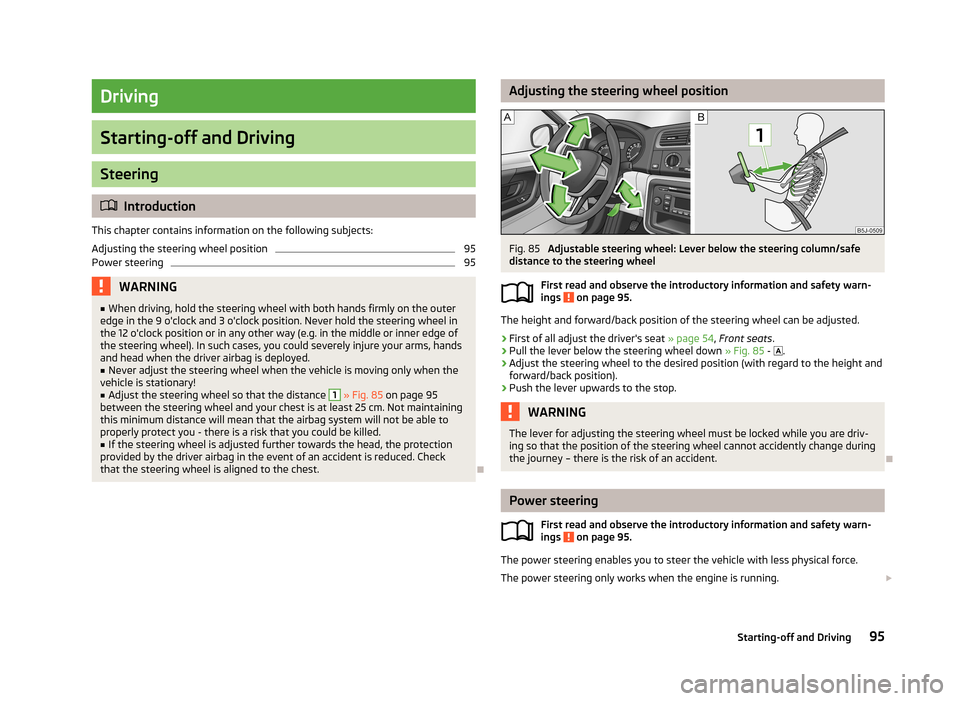
Adjust the steering wheel so that the distance
1
» Fig. 85 on page 95
between the steering wheel and your chest is at least 25 cm. Not maintaining
this minimum distance will mean that the airbag system will not be able to
properly protect you - there is a risk that you could be killed.
■
If the steering wheel is adjusted further towards the head, the protection
provided by the driver airbag in the event of an accident is reduced. Check
that the steering wheel is aligned to the chest.
Adjusting the steering wheel positionFig. 85
Adjustable steering wheel: Lever below the steering column/safe
distance to the steering wheel
First read and observe the introductory information and safety warn-
ings
on page 95.
The height and forward/back position of the steering wheel can be adjusted.
›
First of all adjust the driver's seat » page 54, Front seats .
›
Pull the lever below the steering wheel down » Fig. 85 -
.
›
Adjust the steering wheel to the desired position (with regard to the height and
forward/back position).
›
Push the lever upwards to the stop.
WARNINGThe lever for adjusting the steering wheel must be locked while you are driv- ing so that the position of the steering wheel cannot accidently change duringthe journey – there is the risk of an accident.
Power steering
First read and observe the introductory information and safety warn-ings
on page 95.
The power steering enables you to steer the vehicle with less physical force.
The power steering only works when the engine is running.
95Starting-off and Driving
Page 127 of 223
Safety
Passive Safety
General information
Introduction
This chapter contains information on the following subjects:
Safety equipment
124
Before every journey
124
What influences driving safety?
125
In this section you will find important information, tips and notes on the subject
of passive safety in your vehicle.
We have combined everything here which you should be familiar with, for exam- ple, regarding seat belts, airbags, child seats and safety of children.
WARNING■ This chapter contains important information on how to use the vehicle for
the driver and his occupants.■
You will find further information on safety, which concerns you and those
travelling with you, in the following chapters of this Owner's Manual.
■
The complete on-board literature should always be in the vehicle. This ap-
plies in particular, if you rent out or sell the vehicle.
Safety equipment
First read and observe the introductory information and safety warn-ings
on page 124.
The following list contains only part of the safety equipment in your vehicle.
› Three-point seat belts for all the seats.
› Belt force limiters for the front seats.
› Belt tensioners for the front seats.
› Seat belt height adjusters for the front seats.
›
Front airbag for the driver and the front passenger.
› Side airbags.
› Head airbags.
› Anchoring points for child seats using the ISOFIX system.
› Anchoring points for child seats using the TOP TETHER system.
› Head restraints adjustable for height.
› Adjustable steering column.
The specified safety equipment works together, in order to optimally protect you
and those travelling with you in accident situations.
The safety equipment does not protect you or the people travelling with you, if
you or your occupants adopt an incorrect seated position or the equipment is not
correctly adjusted or used.
If the seat belt is not fastened properly, this may result in injuries during an acci-
dent caused by the deployed airbag.
Before every journey
First read and observe the introductory information and safety warn-ings
on page 124.
For your own safety and the safety of the people travelling with you, please pay
attention to the following points before setting off.
› Ensure that the lighting and the turn signal system are functioning properly.
› Check the tyre inflation pressure.
› Ensure that all of the windows offer good visibility to the outside.
› Secure all items of luggage
» page 58.
› Ensure that no objects can obstruct the pedals.
› Adjust the mirrors, the front seat and head restraint to your body size.
› Advise your passengers to adjust the head restraints to their body size.
› Protect children in suitable child seats with correctly fastened seat
belts » page 140 , Transporting children safely .
› Adopt the correct seated position
» page 125. Tell your passengers to assume
the correct seated position.
› Correctly fasten the seat belt. Also instruct your passengers to fasten their seat
belt correctly » page 128, Wearing seat belts .
124Safety
Page 128 of 223
What influences driving safety?First read and observe the introductory information and safety warn-
ings
on page 124.
The driver is fully responsible for himself and his occupants. If your driving safety is effected, you place yourself and the oncoming traffic at risk.
The following guidelines must therefore be observed. › Do not get distracted from concentrating on the traffic situation, e.g. by your
passengers or mobile phone calls.
› Never drive when your driving ability is impaired, e.g. through medication, alco-
hol or drugs.
› Keep to the traffic regulations and the permissible speed limit.
› Always adjust the driving speed to the road, traffic and weather conditions.
› Take regular breaks on long journeys – at least every two hours.
Correct seated position
Introduction
This chapter contains information on the following subjects:
Correct seated position of the driver
126
Correct seated position of the front passenger
126
Correct seated position of the rear seat passengers
126
Examples of incorrect seated positions
126WARNINGGeneral information■The front seats and head restraints must be adjusted to match the body
size at all times and the seat belt must always be fastened properly to provide the most effective levels of protection to the passengers.■
If the occupant adopts an incorrect seated position, he is exposed to life-
threatening injuries, in case he is hit by a deployed airbag.
■
If the occupants on the rear seats are not sitting upright, the risk of injury is
increased due to incorrect routing of the seat belt.
■
The seat backrests must not be reclined too far when driving otherwise this
will affect proper operation of the seat belts and of the airbag system – risk of
injury.
WARNINGInformation for the driver■Always assume the correct seated position before setting off and do not
change this position while driving. Also advise your passengers to adopt the
correct seated position and not to change this position while the car is mov-
ing.■
Keep a distance of at least 25 cm from the steering wheel. Not keeping to
this minimum distance will mean that the airbag system will not be able to
properly protect you – risk of death.
■
When driving, hold the steering wheel with both hands firmly on the outer
edge in the 9 o'clock and 3 o'clock position. Never hold the steering wheel in
the 12 o'clock position or in any other way (e.g. in the middle or inner edge of
the steering wheel). In such cases, you could severely injure your arms, hands
and head when the driver airbag is deployed.
■
Ensure that there are no objects in the driver's footwell as they may get
caught behind the pedals while you are driving or under braking. You would
then no longer be able to operate the clutch, brake or accelerate.
WARNINGInformation for the front seat passenger■Maintain a distance of at least 25 cm from the dash panel. Not maintaining
this minimum distance will mean that the airbag system will not be able to
properly protect you - there is a risk that you could be killed.■
Always keep your feet in the footwell when the car is being driven - never
place your feet on the instrument panel, out of the window or on the seats.
You will be exposed to increased risk of injury if it becomes necessary to apply
the brakes or in the event of an accident. You may suffer fatal injuries when
an airbag is deployed if you have adopted an incorrect seating position.
125Passive Safety
Page 129 of 223
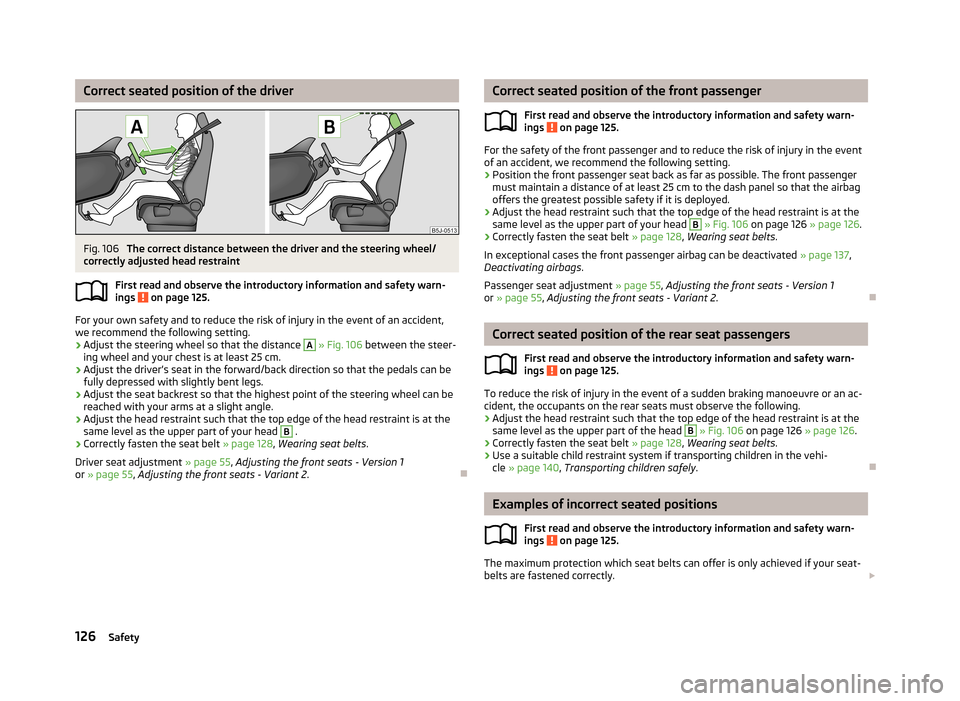
Correct seated position of the driverFig. 106
The correct distance between the driver and the steering wheel/
correctly adjusted head restraint
First read and observe the introductory information and safety warn-ings
on page 125.
For your own safety and to reduce the risk of injury in the event of an accident,
we recommend the following setting.
› Adjust the steering wheel so that the distance
A
» Fig. 106 between the steer-
ing wheel and your chest is at least 25 cm.
› Adjust the driver’s seat in the forward/back direction so that the pedals can be
fully depressed with slightly bent legs.
› Adjust the seat backrest so that the highest point of the steering wheel can be
reached with your arms at a slight angle.
› Adjust the head restraint such that the top edge of the head restraint is at the
same level as the upper part of your head
B
.
› Correctly fasten the seat belt
» page 128, Wearing seat belts .
Driver seat adjustment » page 55, Adjusting the front seats - Version 1
or » page 55 , Adjusting the front seats - Variant 2 .
Correct seated position of the front passenger
First read and observe the introductory information and safety warn-ings
on page 125.
For the safety of the front passenger and to reduce the risk of injury in the event
of an accident, we recommend the following setting.
› Position the front passenger seat back as far as possible. The front passenger
must maintain a distance of at least 25 cm to the dash panel so that the airbag
offers the greatest possible safety if it is deployed.
› Adjust the head restraint such that the top edge of the head restraint is at the
same level as the upper part of your head
B
» Fig. 106 on page 126 » page 126.
› Correctly fasten the seat belt
» page 128, Wearing seat belts .
In exceptional cases the front passenger airbag can be deactivated » page 137,
Deactivating airbags .
Passenger seat adjustment » page 55, Adjusting the front seats - Version 1
or » page 55 , Adjusting the front seats - Variant 2 .
Correct seated position of the rear seat passengers
First read and observe the introductory information and safety warn-ings
on page 125.
To reduce the risk of injury in the event of a sudden braking manoeuvre or an ac-
cident, the occupants on the rear seats must observe the following.
› Adjust the head restraint such that the top edge of the head restraint is at the
same level as the upper part of the head
B
» Fig. 106 on page 126 » page 126.
› Correctly fasten the seat belt
» page 128, Wearing seat belts .
› Use a suitable child restraint system if transporting children in the vehi-
cle » page 140 , Transporting children safely .
Examples of incorrect seated positions
First read and observe the introductory information and safety warn-
ings
on page 125.
The maximum protection which seat belts can offer is only achieved if your seat-
belts are fastened correctly.
126Safety
Page 131 of 223
Seat belts
Wearing seat belts
Introduction
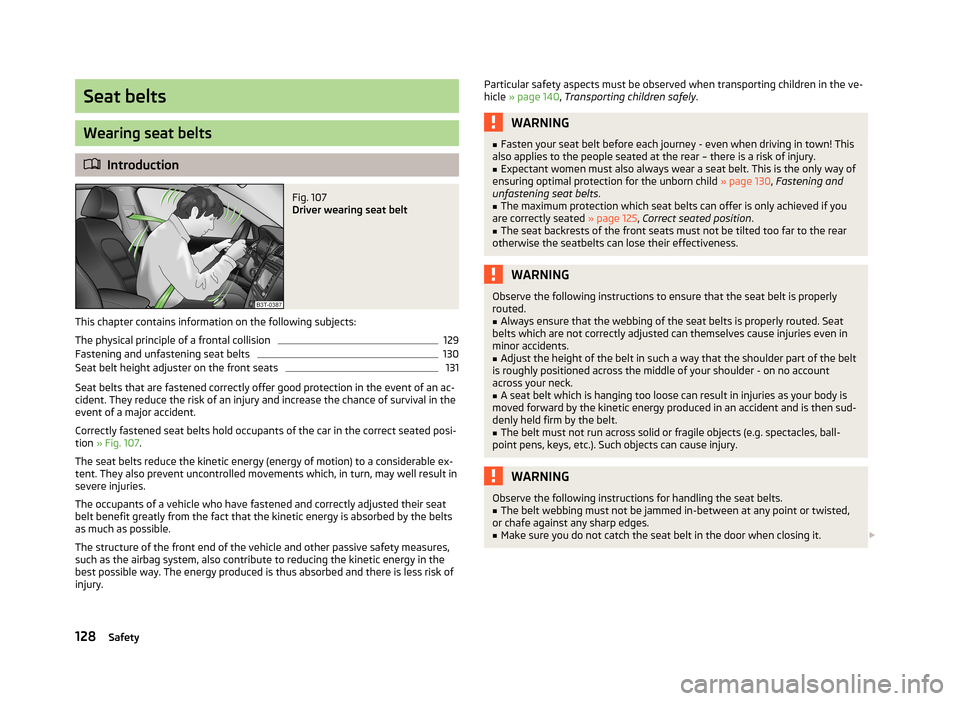
Fig. 107
Driver wearing seat belt
This chapter contains information on the following subjects:
The physical principle of a frontal collision
129
Fastening and unfastening seat belts
130
Seat belt height adjuster on the front seats
131
Seat belts that are fastened correctly offer good protection in the event of an ac-
cident. They reduce the risk of an injury and increase the chance of survival in the
event of a major accident.
Correctly fastened seat belts hold occupants of the car in the correct seated posi-
tion » Fig. 107 .
The seat belts reduce the kinetic energy (energy of motion) to a considerable ex-
tent. They also prevent uncontrolled movements which, in turn, may well result in
severe injuries.
The occupants of a vehicle who have fastened and correctly adjusted their seat belt benefit greatly from the fact that the kinetic energy is absorbed by the belts
as much as possible.
The structure of the front end of the vehicle and other passive safety measures,
such as the airbag system, also contribute to reducing the kinetic energy in the
best possible way. The energy produced is thus absorbed and there is less risk of injury.
Particular safety aspects must be observed when transporting children in the ve-
hicle » page 140 , Transporting children safely .WARNING■
Fasten your seat belt before each journey - even when driving in town! This
also applies to the people seated at the rear – there is a risk of injury.■
Expectant women must also always wear a seat belt. This is the only way of
ensuring optimal protection for the unborn child » page 130, Fastening and
unfastening seat belts .
■
The maximum protection which seat belts can offer is only achieved if you
are correctly seated » page 125, Correct seated position .
■
The seat backrests of the front seats must not be tilted too far to the rear
otherwise the seatbelts can lose their effectiveness.
WARNINGObserve the following instructions to ensure that the seat belt is properly
routed.■
Always ensure that the webbing of the seat belts is properly routed. Seat
belts which are not correctly adjusted can themselves cause injuries even in minor accidents.
■
Adjust the height of the belt in such a way that the shoulder part of the belt
is roughly positioned across the middle of your shoulder - on no account across your neck.
■
A seat belt which is hanging too loose can result in injuries as your body is
moved forward by the kinetic energy produced in an accident and is then sud-
denly held firm by the belt.
■
The belt must not run across solid or fragile objects (e.g. spectacles, ball-
point pens, keys, etc.). Such objects can cause injury.
WARNINGObserve the following instructions for handling the seat belts.■The belt webbing must not be jammed in-between at any point or twisted,
or chafe against any sharp edges.■
Make sure you do not catch the seat belt in the door when closing it.
128Safety
Page 136 of 223
Airbag system
Description of the airbag system
Introduction
This chapter contains information on the following subjects:
System description
133
Airbag deployment
133WARNING■ An airbag can only offer you optimal protection in combination with a fas-
tened seat belt.■
The airbag is not a substitute for the seat belt, but instead forms part of the
complete passive vehicle safety concept.
■
To ensure passengers are protected with the greatest possible effect when
the airbag is deployed, the front seats must be correctly adjusted to match
the body size » page 125, Correct seated position .
■
If you do not fasten the seat belts when driving, lean too far forward or
adopt an incorrect seated position, you are exposing yourself to increased risk of injury in the event of an accident.
WARNINGObserve the following instructions for the airbag system.■If there is a fault, the airbag system must be checked by a specialist garage
immediately. Otherwise, there is a risk of the airbag not being activated in the
event of an accident.■
No modifications of any kind must be made to parts of the airbag system.
■
Any work on the airbag system including the installation and removal of sys-
tem components due to other repair work (e.g. removal of the steering wheel) must only be carried out by a specialist garage.
■
Never make any changes to the front bumper or bodywork.
■
It is prohibited to tamper with individual parts of the airbag system as this
might result in the airbag being deployed.
■
The protective function of the airbag system is sufficient for only one acci-
dent. The airbag system must then be replaced if the airbag has been de-
ployed.
System description
First read and observe the introductory information and safety warn-ings
on page 133.
The functional status of the airbag system is indicated by the indicator light in
the instrument cluster » page 26.
When the airbags are deployed they fill with gas and inflate.
A grey white or red, non-harmful gas is released when the airbag is inflated. This
is perfectly normal and is not an indication of a fire in the vehicle.
The airbag system consists – depending on the vehicle equipment – of thefollowing modules.
› Electronic control unit.
› Front airbag for the driver and the front passenger
» page 135.
› Side airbags
» page 136.
› Head airbags
» page 137.
› Airbag indicator light in the instrument cluster
» page 26.
› Key switch for the front passenger airbag
» page 138.
› Warning light for front passenger airbag deactivation in dash panel cen-
tre » page 138 .
Note
■
The airbag system needs no maintenance during its working life.■If you sell your vehicle, provide the complete vehicle documentation to the new
owner. Please note that the information relating to the possibility of deactivating
the front passenger airbag must be included!■
When disposing of vehicle or parts of the airbag system, it is important to com-
ply with the national legal requirements.
Airbag deployment
First read and observe the introductory information and safety warn-
ings
on page 133.
The airbags inflate in fractions of a second and at a high speed in order to be able
to offer that additional protection in the event of an accident.
The airbag system is only functional when the ignition is switched on.
133Airbag system
Page 137 of 223
In certain accident situations, the several airbags may be deployed simultaneous-
ly.
The airbags are not deployed in the case of minor frontal and side collisions, rear-
end collisions, tilting of the vehicle and vehicle rollover.
Deployment factors
It is not possible to generally determine which deployment conditions apply to the airbag system in every situation. An important role is played by factors such as the type of object that the vehicle hits (hard/soft), the impact angle, vehicle
speed, etc.
A decisive factor for the deployment of the airbags is the deceleration which oc- curs. The control unit analyses the nature of the collision and activates the rele-
vant restraint system.
If the vehicle deceleration which occurs and is measured during the collision re-
mains below the prescribed reference values specified in the control unit, the air-
bags are not deployed although the vehicle may well suffer severe damage to thebodywork as a consequence of the accident.
The following airbags will be deployed in the event of a severe frontal collision.
› Driver’s front airbag.
› Front passenger airbag.
The following airbags will be deployed in the event of a severe side collision.
› Front side airbag on the side of the accident.
› Head airbags on the side of the accident.
In the event of an accident in which the airbags are deployed:
› the interior lighting comes on (if the switch for the interior light is in the door
contact position),
› the hazard warning light is switched on;
› all the doors are unlocked;
› the fuel supply to the engine is interrupted.
Airbag overview
Introduction
This chapter contains information on the following subjects:
Front airbags
135
Side airbags
136
Head airbags
137
134Safety