heating SKODA FABIA 2013 2.G / 5J Owner's Guide
[x] Cancel search | Manufacturer: SKODA, Model Year: 2013, Model line: FABIA, Model: SKODA FABIA 2013 2.G / 5JPages: 223, PDF Size: 12.77 MB
Page 88 of 223
NoteIf recirculated air mode is switched on for around 15 minutes, the symbol will
begin to flash in the display as a sign that the recirculated air mode is switched on long-term. If the recirculated air mode is not switched off, the symbol flashes for
around 5 minutes.
Controlling the blower
First read and observe the introductory information given on page 83.
The Climatronic system controls the blower stages automatically in line with the
interior temperature. However, the blower level can be manually adjusted to suit your particular needs.
›
Turn control dial
10
» Fig. 80 on page 83 to the left or to the right to increase or
decrease the blower speed.
If the blower is switched off, the Climatronic system is switched off.
The blower speed set is indicated by displaying the corresponding number of seg- ments in icon
9
» Fig. 80 on page 83 in the display.
WARNING■
“Stale air” may result in fatigue in the driver and occupants, reduce attention
levels and also cause the windows to mist up. The risk of having an accident
increases.■
Do not switch off the Climatronic system for longer than necessary.
■
Switch on the Climatronic system as soon as the windows mist up.
Defrosting windscreen
First read and observe the introductory information given on page 83.
Switching on
›
Press the
button » Fig. 80 on page 83.
Switching off
›
Press the
button » Fig. 80 on page 83 again or press the
button.
More air flows out of the air outlet vents 1 and 2 » Fig. 77 on page 77. The temper-
ature control is controlled automatically.
85Heating and air conditioning
Page 100 of 223
For the sake of the environmentDo not warm up the engine while the vehicle is stationary. If possible, start your
journey as soon as the engine has started. Through this the engine reaches its operating temperature more rapidly and the pollutant emissions are lower.
Note
The radiator fan can intermittently continue to run for approximately 10 minutes
after the ignition has been switched off.
Electronic immobilizer
First read and observe the introductory information and safety warn-ings
on page 96.
An electronic chip is integrated in the head of the key. The immobiliser is deacti-
vated with the aid of this chip when the key is inserted in the ignition lock. The
electronic immobiliser is automatically activated when the ignition key is with-
drawn from the lock.
The engine will not start if a non-authorized ignition key is used. The MAXI DOT display shows the following:
Immobilizer active.
Ignition lock
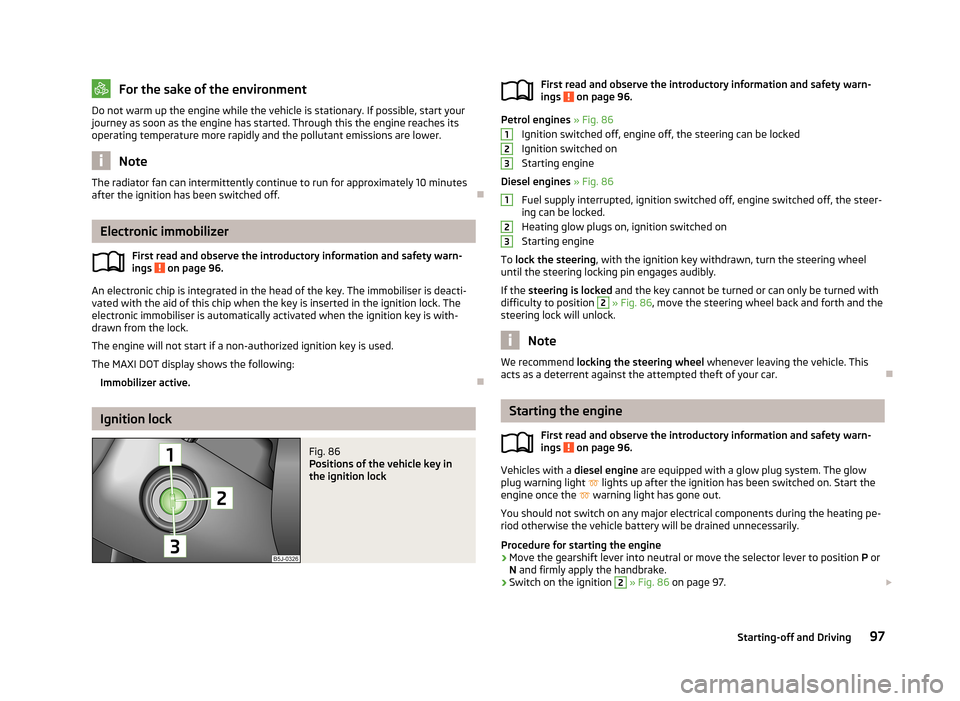
Fig. 86
Positions of the vehicle key in
the ignition lockFirst read and observe the introductory information and safety warn-
ings on page 96.
Petrol engines » Fig. 86
Ignition switched off, engine off, the steering can be locked
Ignition switched on
Starting engine
Diesel engines » Fig. 86
Fuel supply interrupted, ignition switched off, engine switched off, the steer-
ing can be locked.
Heating glow plugs on, ignition switched on
Starting engine
To lock the steering , with the ignition key withdrawn, turn the steering wheel
until the steering locking pin engages audibly.
If the steering is locked and the key cannot be turned or can only be turned with
difficulty to position
2
» Fig. 86 , move the steering wheel back and forth and the
steering lock will unlock.
Note
We recommend locking the steering wheel whenever leaving the vehicle. This
acts as a deterrent against the attempted theft of your car.
Starting the engine
First read and observe the introductory information and safety warn-
ings
on page 96.
Vehicles with a diesel engine are equipped with a glow plug system. The glow
plug warning light
lights up after the ignition has been switched on. Start the
engine once the
warning light has gone out.
You should not switch on any major electrical components during the heating pe- riod otherwise the vehicle battery will be drained unnecessarily.
Procedure for starting the engine
›
Move the gearshift lever into neutral or move the selector lever to position P or
N and firmly apply the handbrake.
›
Switch on the ignition
2
» Fig. 86 on page 97.
12312397Starting-off and Driving
Page 102 of 223
Under these severe conditions , the thickness of the brake pads must also be
checked by a specialist garage between services.
Wet roads or road salt
The performance of the brakes can be delayed as the brake discs and brake pads may be moist or have a coating of ice or layer of salt on them in winter. The
brakes are cleaned and dried by applying the brakes several times.
Corrosion
Corrosion on the brake discs and dirt on the bake pads occur if the vehicle has
been parked for a long period and if you do not make much use of the braking
system. The brakes are cleaned and dried by applying the brakes several times.
Faults in the brake surface
If it is found that the braking distance has suddenly become longer and that the brake pedal can be depressed further, the brake system may be faulty.
Visit a specialist garage immediately and adjust your style of driving appropriately as you will not know how great the damage is.
Low brake fluid level
An insufficient level of brake fluid may result in problems in the brake system. The level of the brake fluid is monitored electronically » page 20,
Brake system .
Brake booster
The brake booster increases the pressure generated with the brake pedal. The
brake booster only operates when the engine is running.
Handbrake
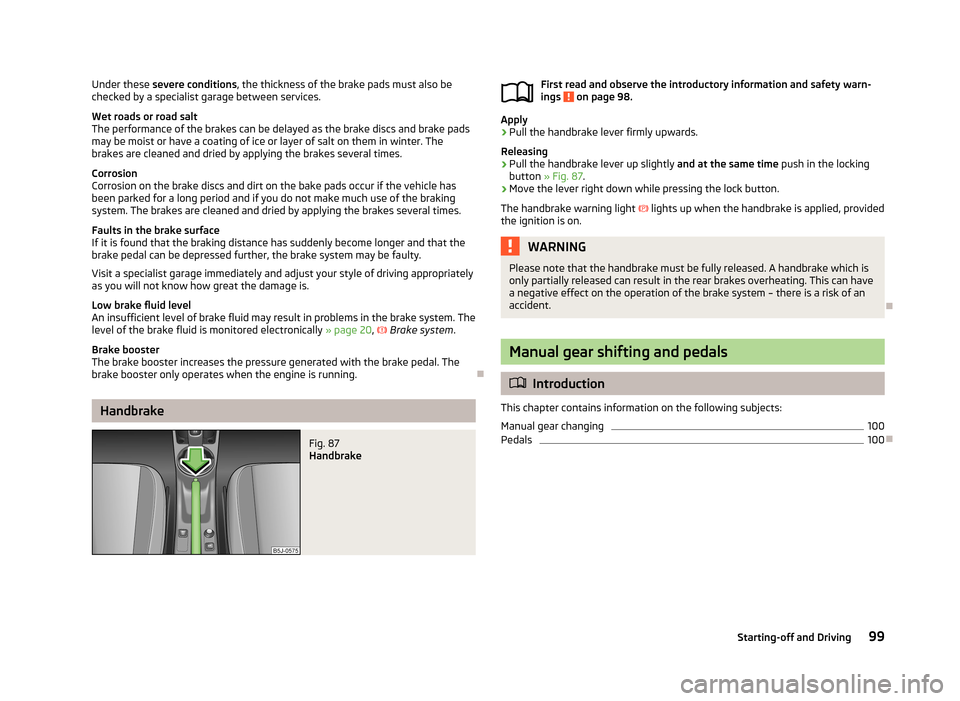
Fig. 87
Handbrake
First read and observe the introductory information and safety warn-
ings on page 98.
Apply
›
Pull the handbrake lever firmly upwards.
Releasing
›
Pull the handbrake lever up slightly and at the same time push in the locking
button » Fig. 87 .
›
Move the lever right down while pressing the lock button.
The handbrake warning light lights up when the handbrake is applied, provided
the ignition is on.
WARNINGPlease note that the handbrake must be fully released. A handbrake which is only partially released can result in the rear brakes overheating. This can have
a negative effect on the operation of the brake system – there is a risk of an
accident.
Manual gear shifting and pedals
Introduction
This chapter contains information on the following subjects:
Manual gear changing
100
Pedals
100
99Starting-off and Driving
Page 106 of 223
The gearbox shifts down one or more gears depending on the vehicle speed andengine speed, and the vehicle accelerates.
The gearbox does not shift up into the highest gear until the engine has reached
its maximum revolutions for this gear range.WARNINGRapid acceleration, particularly on slippery roads, can lead to loss of control of
the vehicle – there is a risk of an accident.
Malfunction
First read and observe the introductory information and safety warn-
ings
on page 100.
Emergency programme
The transmission switches to the emergency programme if there is a fault in the
automatic gearbox system.
Indications of an activated emergency programme include the following:
› Only certain gears are selected.
› Reverse gear
R cannot be used.
› Shifting gears in Tiptronic mode is not possible.
Gearbox overheating
The gearbox may, for example, become too hot due to frequent repeated starting
or stop-and-go traffic. Overheating is indicated by the warning light » page 19,
Clutches in the automatic gearbox are too hot .
Note
Visit a specialist workshop if the gearbox has switched to the emergency pro-
gramme.
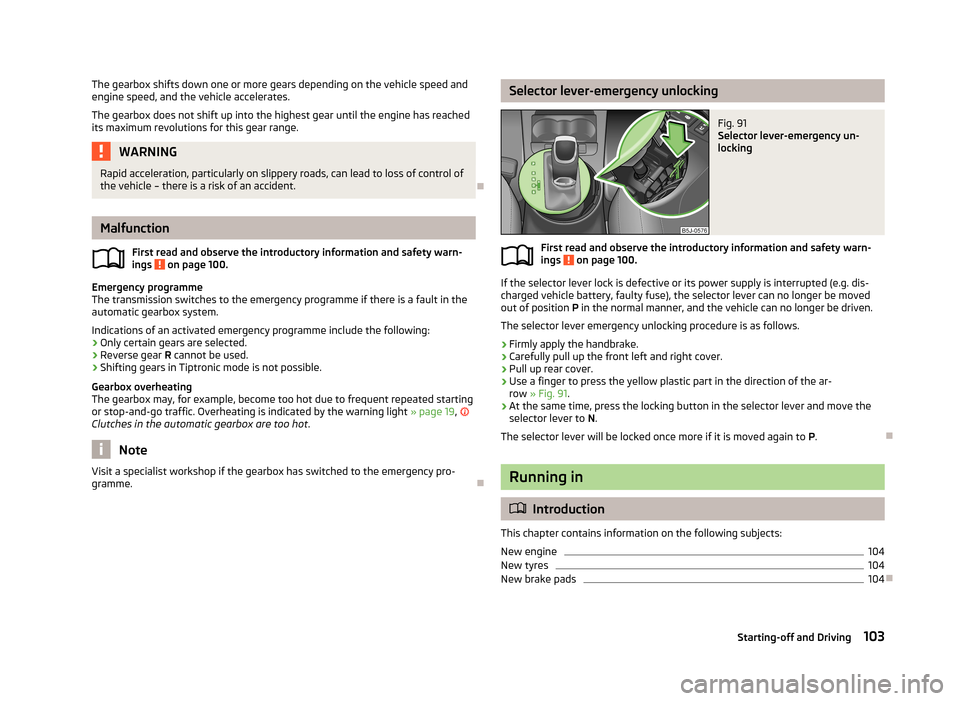
Selector lever-emergency unlockingFig. 91
Selector lever-emergency un-
locking
First read and observe the introductory information and safety warn-
ings on page 100.
If the selector lever lock is defective or its power supply is interrupted (e.g. dis-
charged vehicle battery, faulty fuse), the selector lever can no longer be moved
out of position P in the normal manner, and the vehicle can no longer be driven.
The selector lever emergency unlocking procedure is as follows.
›
Firmly apply the handbrake.
›
Carefully pull up the front left and right cover.
›
Pull up rear cover.
›
Use a finger to press the yellow plastic part in the direction of the ar- row » Fig. 91 .
›
At the same time, press the locking button in the selector lever and move the
selector lever to N.
The selector lever will be locked once more if it is moved again to P.
Running in
Introduction
This chapter contains information on the following subjects:
New engine
104
New tyres
104
New brake pads
104
103Starting-off and Driving
Page 120 of 223
›The engine has not yet reached the minimum temperature for the START STOP
mode.
› The temperature inside the vehicle has not reached the desired temperature
set in the air-conditioning system/heating.
› The external temperature is very low/high.
› Intensive windscreen deicing (Climatronic) or windscreen deicing/ventilation is
switched on at the maximum air temperature setting (manual air conditioning
system).
› The parking aid is activated.
› The charge state of the vehicle battery is too low.
› The stationary vehicle is on a steep hill or a steep slope.
› The idling speed is too high.
› The steering angle is too great (manoeuvring).
The
warning symbol appears in the instrument cluster display.
The automatic start procedure runs again During the STOP phase, the engine fires up without any active driver intervention,
e.g. in the following situations.
› The vehicle has begun to roll, e.g. on a slope.
› The difference between the temperature setting of the air-conditioning sys-
tem/heating and the temperature of the interior is too great.
› Intensive windscreen deicing (Climatronic) or windscreen deicing/ventilation is
switched on at the maximum air temperature setting (manual air conditioning
system).
› The brake pedal was pressed several times (the pressure in the braking system
is too low).
› The charge state of the vehicle battery is too low.
› The current consumption is too high.
Manually activating/deactivating the system
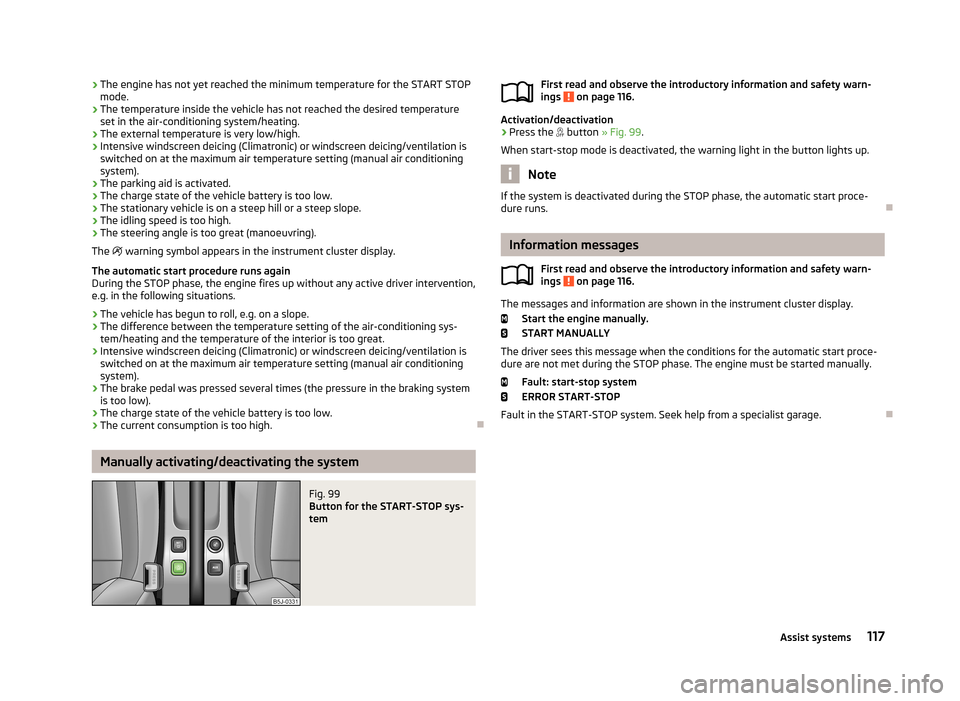
Fig. 99
Button for the START-STOP sys-
tem
First read and observe the introductory information and safety warn-
ings on page 116.
Activation/deactivation
›
Press the button » Fig. 99 .
When start-stop mode is deactivated, the warning light in the button lights up.
Note
If the system is deactivated during the STOP phase, the automatic start proce-
dure runs.
Information messages
First read and observe the introductory information and safety warn-
ings
on page 116.
The messages and information are shown in the instrument cluster display.
Start the engine manually.START MANUALLY
The driver sees this message when the conditions for the automatic start proce- dure are not met during the STOP phase. The engine must be started manually.
Fault: start-stop system
ERROR START-STOP
Fault in the START-STOP system. Seek help from a specialist garage.
117Assist systems
Page 125 of 223
The distribution of the weight is very poor if your vehicle is unladen and the trail-
er is laden. Maintain a particularly low speed if you cannot avoid driving with this
combination.
Tyre pressure
Correct the tyre inflation pressure on your vehicle for a “full load” » page 174,
Tyre service life .
Trailer load
The permissible trailer load must not be exceeded under any circumstan- ces » page 201 , Technical data .
The trailer loads specified apply only to altitudes up to 1 000 metres above mean
sea level.
The engine output falls as altitude increases, as does the ability to climb. There-
fore, for every additional 1000 m in height (or part), the maximum permissible
towed weight must be reduced by 10 %.
The towed weight comprises the actual weights of the (loaded) towing vehicleand the (loaded) trailer.
The trailer and drawbar load information on the type plate of the towing equip- ment are merely test data for the towing equipment. The vehicle-specific values
are detailed in the vehicle documents.WARNING■ Do not exceed the maximum permissible axle and drawbar load and the
maximum permissible total or towed weight of the vehicle and the trailer –
there is the risk of an accident and serious injury.■
Slipping loads can significantly affect the stability and safety of the vehicle/
trailer combination – there is the risk of an accident and serious injury.
Towing a trailer
First read and observe the introductory information and safety warn-
ings
on page 121.
Exterior mirrors
You have to have additional exterior mirrors fitted if you are not able to see the
traffic behind the trailer with the standard rear-view mirrors. National legal re-
quirements must be observed.
Headlights
The front of the vehicle can be lifted when a trailer is being towed and the head-
lights can dazzle other road users.
Adjust the headlight setting on the headlight range control » page 44, Headlight
beam adjustment .
Driving speed
For safety reasons, do not drive faster than 80 km/h when towing a trailer.
Immediately reduce your speed as soon as even the slightest swaying of the trail- er is detected. Never attempt to stop the trailer from “swaying” by accelerating.
Brakes
Apply the brakes in good time! If the trailer is fitted with a trailer brake, apply the
brakes gently at first, then brake firmly. This will avoid brake jolts resulting from
the trailer wheels locking.
On downhill sections shift down a gear in good time to also use the engine as a
brake.
Engine overheating
The speed must be reduced immediately if the needle for the coolant tempera- ture gauge moves into the right-hand area or the red area of the scale.
Stop and switch off the engine if the warning light
in the instrument cluster
starts to flash. Wait a few minutes and check the level of coolant » page 167,
Checking the coolant level .
The following guidelines must be observed » page 22,
Coolant .
The coolant temperature can be reduced by switching on the heating.WARNING■ Adapt your speed to the conditions of the road surface and to the traffic sit-
uation.■
Improper or incorrectly connected electric cables can energise the trailer and
cause functional faults to the vehicle's entire electrical system as well as acci-
dents and severe injuries.
■
Work on the electrical system must only be carried out by specialist garages.
■
Never directly connect the trailer's electrical system with the electrical con-
nections for the tail lights or other current sources.
122Driving
Page 157 of 223
■When removing snow or ice from windows and mirror lenses ensure that the
paintwork of the vehicle is not to damage.■
Do not clean the inside of the windows with sharp-edged objects or corrosive
and acidic cleaning agents – there is a risk of damaging the heating elements or
window aerial.
Headlight lenses
First read and observe the introductory information and safety warn-ings
on page 151.
Clean the plastic headlight lenses with clean, warm water and soap.
CAUTION
■ Never wipe the headlights dry.■Do not use any sharp objects to clean the plastic lenses, this may damage the
protective lacquer and consequently cause the cracking on the headlight lenses.■
Do not use any aggressive cleaning or chemical solvent products to clean the
headlights – there is a risk of damaging the headlight lenses.
Door lock cylinders
First read and observe the introductory information and safety warn-
ings
on page 151.
Specific products must be used for de-icing door lock cylinders.
CAUTION
When washing your vehicle, ensure as little water as possible gets into the lock-
ing cylinders.
Underbody waxing
First read and observe the introductory information and safety warn-
ings
on page 151.
All the cavities of your vehicle which are at risk from corrosion are protected for life by a layer of protective wax applied in the factory.
Wax protection does not require to be inspected or re-treated.
If any small amount of wax flow out of the cavities at high temperatures, these must be removed with a plastic scraper and the stains cleaned using a petroleum cleaner.WARNINGSafety regulations should be observed when using petroleum cleaner to re-
move wax – there is a risk of fire.
Wheels
First read and observe the introductory information and safety warn-
ings
on page 151.
Wheel rims
Also thoroughly wash the wheel rims when washing the vehicle on a regular ba- sis.
Regularly remove salt and brake dust otherwise the rim material will be attacked.
Damage to the paint layer on the wheel rims must be touched up immediately.
Light alloy wheels
After washing thoroughly and treat the wheel rims with a protective product for
light alloy wheels. Products which cause abrasion must not be used to treat the
wheel rims.
CAUTION
Severe layers of dirt on the wheels can also result in wheel imbalance. This may
show itself in the form of a wheel vibration which is transmitted to the steering
wheel which, in certain circumstances, can cause premature wear of the steering.
This means it is necessary to remove the dirt.
Underbody protection
First read and observe the introductory information and safety warn-ings
on page 151.
The underside of your vehicle is protected for life against chemical and mechani-
cal influences.
154General Maintenance
Page 158 of 223

Damage to the protective coating cannot be excluded when the vehicle is driven.
We recommend that you have the protective coating under the body and on the chassis inspected - preferably before the beginning and at the end of the cold
season.WARNINGNever use additional underbody protection or anti-corrosion agents for ex-
haust pipes, catalytic converters, diesel particle filters or heat shields. These
substances could ignite when the engine reaches its operating temperature -
there is a risk of fire.
Care of the interior
Introduction
This chapter contains information on the following subjects:
Natural leather
155
Synthetic leather, fabrics and Alcantara ®
156
Seat covers
157
Seat belts
157
Regular and proper care help to retain the efficiency and
value of your vehicle.
We recommend using care products from ŠKODA Original Accessories that are
available from ŠKODA Partners. The instructions for use on the package must be
observed.
WARNING■ Care products may be harmful to your health if not used according to the in-
structions.■
Always store vehicle care products in a safe place, out of the reach of chil-
dren – there is a risk of poisoning.
CAUTION■ Be sure to check clothing for colourfastness to avoid any damage or visible
stains on the material (leather), panels and textiles.■
Remove fresh stains such as those from ball-point pens, ink, lipstick, shoe pol-
ish, etc., from the material (leather), panels and textiles as quickly as possible.
■
Air fresheners and scents can be hazardous to heath when the temperature in-
side the vehicle is high.
■
Do not attach scents and air fresheners to the dashboard – risk of damage to
the dash panel.
■
Do not stick any stickers on the inside of the rear windows, the rear side win-
dows and in the vicinity of the heating elements on the windscreen or near the
window aerial. These may get damaged.
■
Do not clean the headlining with a brush – risk of damage to the lining surface.
■
Cleaners containing solvents can damage the material being cleaned.
■
Apply only a small amount of the cleaning and care product.
For the sake of the environment
Used cans of vehicle care product represent hazardous waste that is harmful to
the environment. These must be disposed of in accordance with national legisla-
tion.
Note
Because of the special tools and knowledge required, and to avoid any potential
problems with the cleaning and care of the interior of your vehicle, we recom-
mend that cleaning and care of the interior of your vehicle be carried out by a
ŠKODA Service Partner.
Natural leather
First read and observe the introductory information and safety warn-
ings
on page 155.
Leather is a natural material with specific properties and requires regular cleaning
and maintenance.
The leather should be cleaned on a regular basis depending on the amount of
wear-and-tear.
Dust and dirt in pores and creases act as abrasives. This leads to severe abrasion
and the premature embrittlement of the leather surface.
155Car care
Page 160 of 223
Seat coversFirst read and observe the introductory information and safety warn-
ings
on page 155.
Electrically heated seats
Do not wet clean the seat covers as this can damage the seat heating system.
Use a specific cleaning agent such as dry foam or similar to clean the covers.
Seats without seat heating
Thoroughly vacuum the seat covers with a vacuum cleaner before cleaning.
Clean the seat covers with a damp cloth or cleaning agents particularly formula-
ted for them.
Compressed areas created on the fabrics by everyday use can be removed by brushing against the nap with a lightly moistened brush.
Always treat all parts of the upholstery so that no visible boundaries are created.
Then leave the seat to dry completely.
CAUTION
■ Regularly vacuum dust from the seat covers using a vacuum cleaner.■Electrically heated seats must not be dried after cleaning by switching on the
heater.■
Do not sit on wet seats - there is a risk of stretching the upholstery.
■
Always clean the seats “from seam to seam”.
Seat belts
First read and observe the introductory information and safety warn-
ings
on page 155.
The belt must always be kept clean.
Wash dirty seat belts with a mild, soapy solution.
Remove dirt with a soft brush.
Soiled belts may impair proper operation of the inertia reels.
WARNING■ The seat belts must not be removed for cleaning.■Never clean the seat belts chemically as chemical cleaning products could
destroy the fabric.■
The seat belts must not be allowed to come into contact with corrosive liq-
uids (such as acids etc.).
■
Check the condition of all the seat belts on a regular basis. If any damage is
found in the belt fabric, seat belt connections, inertia reel or the buckle, the relevant seat belt must be replaced by a specialist garage.
■
Inertia reel belts must be completely dried before being rolled up.
157Car care
Page 161 of 223
Inspecting and replenishing
Fuel
Introduction
This chapter contains information on the following subjects:
Refuelling
158
Unleaded petrol
159
Diesel fuel
160
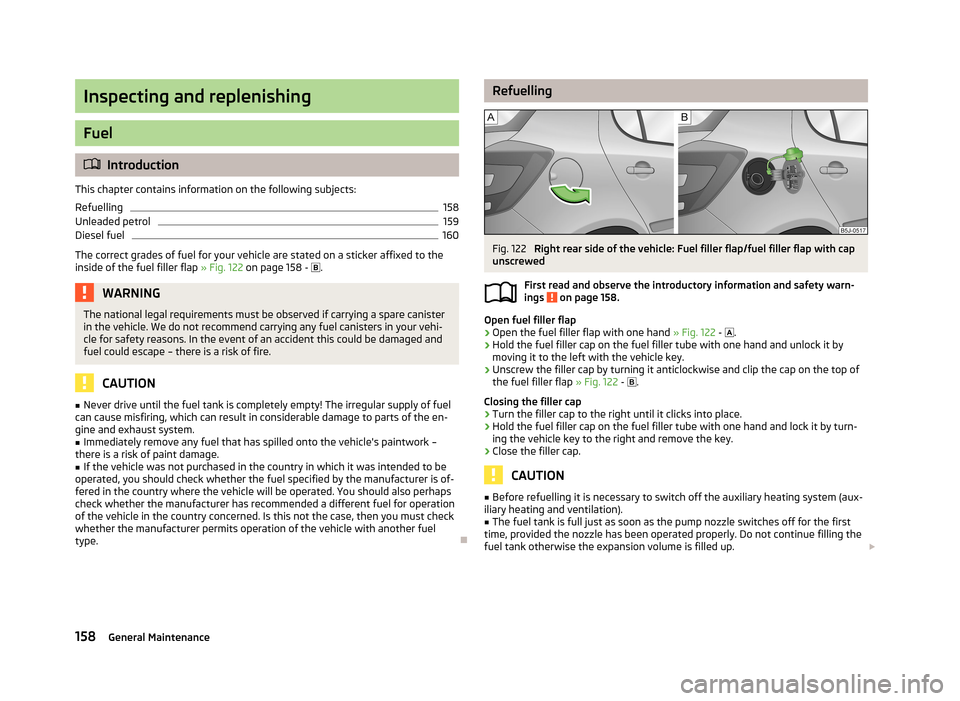
The correct grades of fuel for your vehicle are stated on a sticker affixed to the
inside of the fuel filler flap » Fig. 122 on page 158 -
.
WARNINGThe national legal requirements must be observed if carrying a spare canister
in the vehicle. We do not recommend carrying any fuel canisters in your vehi-
cle for safety reasons. In the event of an accident this could be damaged and
fuel could escape – there is a risk of fire.
CAUTION
■ Never drive until the fuel tank is completely empty! The irregular supply of fuel
can cause misfiring, which can result in considerable damage to parts of the en-
gine and exhaust system.■
Immediately remove any fuel that has spilled onto the vehicle's paintwork –
there is a risk of paint damage.
■
If the vehicle was not purchased in the country in which it was intended to be
operated, you should check whether the fuel specified by the manufacturer is of-
fered in the country where the vehicle will be operated. You should also perhaps
check whether the manufacturer has recommended a different fuel for operation
of the vehicle in the country concerned. Is this not the case, then you must check
whether the manufacturer permits operation of the vehicle with another fuel
type.
RefuellingFig. 122
Right rear side of the vehicle: Fuel filler flap/fuel filler flap with cap
unscrewed
First read and observe the introductory information and safety warn-
ings
on page 158.
Open fuel filler flap
›
Open the fuel filler flap with one hand » Fig. 122 -
.
›
Hold the fuel filler cap on the fuel filler tube with one hand and unlock it by
moving it to the left with the vehicle key.
›
Unscrew the filler cap by turning it anticlockwise and clip the cap on the top ofthe fuel filler flap » Fig. 122 -
.
Closing the filler cap
›
Turn the filler cap to the right until it clicks into place.
›
Hold the fuel filler cap on the fuel filler tube with one hand and lock it by turn- ing the vehicle key to the right and remove the key.
›
Close the filler cap.
CAUTION
■ Before refuelling it is necessary to switch off the auxiliary heating system (aux-
iliary heating and ventilation).■
The fuel tank is full just as soon as the pump nozzle switches off for the first
time, provided the nozzle has been operated properly. Do not continue filling the fuel tank otherwise the expansion volume is filled up. 158General Maintenance