height SKODA FABIA 2013 2.G / 5J Owner's Manual
[x] Cancel search | Manufacturer: SKODA, Model Year: 2013, Model line: FABIA, Model: SKODA FABIA 2013 2.G / 5JPages: 223, PDF Size: 12.77 MB
Page 58 of 223
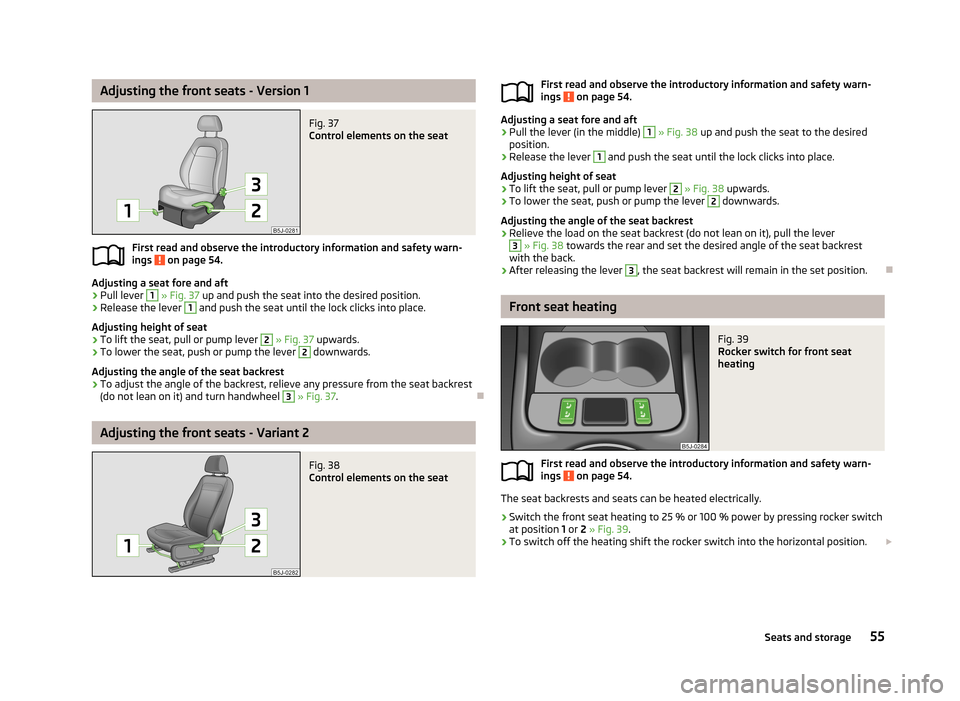
Adjusting the front seats - Version 1Fig. 37
Control elements on the seat
First read and observe the introductory information and safety warn-
ings on page 54.
Adjusting a seat fore and aft
›
Pull lever
1
» Fig. 37 up and push the seat into the desired position.
›
Release the lever
1
and push the seat until the lock clicks into place.
Adjusting height of seat
›
To lift the seat, pull or pump lever
2
» Fig. 37 upwards.
›
To lower the seat, push or pump the lever
2
downwards.
Adjusting the angle of the seat backrest
›
To adjust the angle of the backrest, relieve any pressure from the seat backrest
(do not lean on it) and turn handwheel
3
» Fig. 37 .
Adjusting the front seats - Variant 2
Fig. 38
Control elements on the seatFirst read and observe the introductory information and safety warn-
ings on page 54.
Adjusting a seat fore and aft
›
Pull the lever (in the middle)
1
» Fig. 38 up and push the seat to the desired
position.
›
Release the lever
1
and push the seat until the lock clicks into place.
Adjusting height of seat
›
To lift the seat, pull or pump lever
2
» Fig. 38 upwards.
›
To lower the seat, push or pump the lever
2
downwards.
Adjusting the angle of the seat backrest
›
Relieve the load on the seat backrest (do not lean on it), pull the lever
3
» Fig. 38 towards the rear and set the desired angle of the seat backrest
with the back.
›
After releasing the lever
3
, the seat backrest will remain in the set position.
Front seat heating
Fig. 39
Rocker switch for front seat
heating
First read and observe the introductory information and safety warn-
ings on page 54.
The seat backrests and seats can be heated electrically.
›
Switch the front seat heating to 25 % or 100 % power by pressing rocker switch
at position 1 or 2 » Fig. 39 .
›
To switch off the heating shift the rocker switch into the horizontal position.
55Seats and storage
Page 60 of 223
CAUTIONEnsure that the seat belts are not damaged when operating the seat backrests.Under no circumstances must the rear seat belts be jammed by the folded back
seat backrests.
Note
On vehicles with an installed net partition housing, first fold back the left seat
rest followed by the right one.
Folding the seat cushions forwards, removing
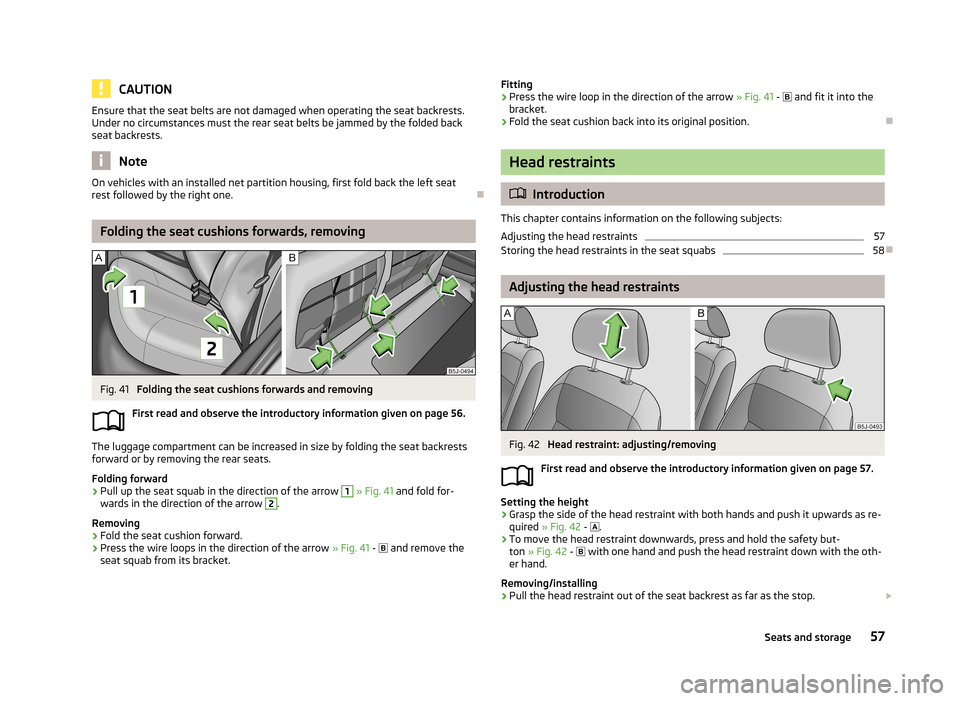
Fig. 41
Folding the seat cushions forwards and removing
First read and observe the introductory information given on page 56.
The luggage compartment can be increased in size by folding the seat backrests
forward or by removing the rear seats.
Folding forward
›
Pull up the seat squab in the direction of the arrow
1
» Fig. 41 and fold for-
wards in the direction of the arrow
2
.
Removing
›
Fold the seat cushion forward.
›
Press the wire loops in the direction of the arrow » Fig. 41 -
and remove the
seat squab from its bracket.
Fitting›Press the wire loop in the direction of the arrow » Fig. 41 - and fit it into the
bracket.›
Fold the seat cushion back into its original position.
Head restraints
Introduction
This chapter contains information on the following subjects:
Adjusting the head restraints
57
Storing the head restraints in the seat squabs
58
Adjusting the head restraints
Fig. 42
Head restraint: adjusting/removing
First read and observe the introductory information given on page 57.
Setting the height
›
Grasp the side of the head restraint with both hands and push it upwards as re-
quired » Fig. 42 -
.
›
To move the head restraint downwards, press and hold the safety but-
ton » Fig. 42 -
with one hand and push the head restraint down with the oth-
er hand.
Removing/installing
›
Pull the head restraint out of the seat backrest as far as the stop.
57Seats and storage
Page 64 of 223
Boot coverFig. 47
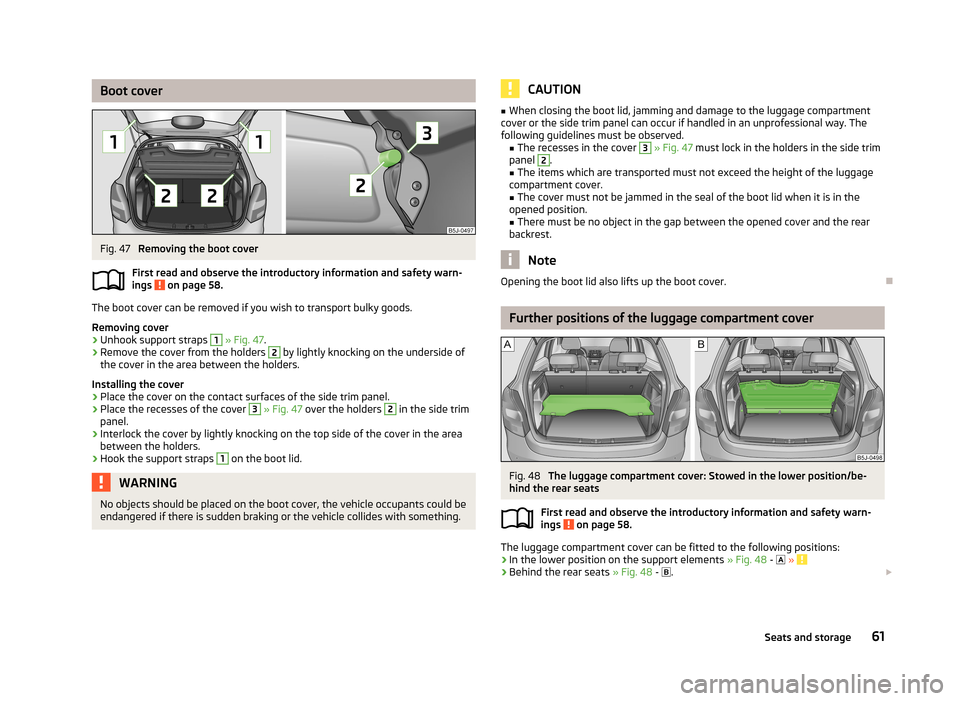
Removing the boot cover
First read and observe the introductory information and safety warn-
ings
on page 58.
The boot cover can be removed if you wish to transport bulky goods.
Removing cover
›
Unhook support straps
1
» Fig. 47 .
›
Remove the cover from the holders
2
by lightly knocking on the underside of
the cover in the area between the holders.
Installing the cover
›
Place the cover on the contact surfaces of the side trim panel.
›
Place the recesses of the cover
3
» Fig. 47 over the holders
2
in the side trim
panel.
›
Interlock the cover by lightly knocking on the top side of the cover in the area
between the holders.
›
Hook the support straps
1
on the boot lid.
WARNINGNo objects should be placed on the boot cover, the vehicle occupants could beendangered if there is sudden braking or the vehicle collides with something.CAUTION■ When closing the boot lid, jamming and damage to the luggage compartment
cover or the side trim panel can occur if handled in an unprofessional way. The
following guidelines must be observed. ■The recesses in the cover 3
» Fig. 47 must lock in the holders in the side trim
panel
2
.
■ The items which are transported must not exceed the height of the luggage
compartment cover. ■ The cover must not be jammed in the seal of the boot lid when it is in the
opened position. ■ There must be no object in the gap between the opened cover and the rear
backrest.
Note
Opening the boot lid also lifts up the boot cover.
Further positions of the luggage compartment cover
Fig. 48
The luggage compartment cover: Stowed in the lower position/be-
hind the rear seats
First read and observe the introductory information and safety warn-
ings
on page 58.
The luggage compartment cover can be fitted to the following positions:
› In the lower position on the support elements
» Fig. 48 -
»
› Behind the rear seats
» Fig. 48 -
.
61Seats and storage
Page 71 of 223
WARNING■The items being transported on the roof rack must be reliably attached –
there is the risk of an accident.■
Always secure the load with appropriate and undamaged lashing straps or
tensioning straps.
■
Distribute the load evenly over the roof rack system.
■
The handling properties of your vehicle change when you transport heavy or
bulky items on the roof rack system as a result of the centre of gravity being
shifted and the greater area exposed to the wind – there is the risk of an acci-
dent. The style of driving and speed must therefore be adapted to the current
circumstances.
■
Avoid abrupt and sudden driving/braking manoeuvres.
■
Adjust the speed and driving style to the visibility, weather, road and traffic
conditions.
■
The permissible roof load, permissible axle loads and gross permissible
weight of the vehicle must not be exceeded under any circumstances – there is the risk of an accident.
CAUTION
■ Only use roof rack systems approved by ŠKODA AUTO a.s.■The fitting instructions supplied with the roof luggage rack system must be ob-
served when handling roof racks.■
On models fitted with a power sliding/tilting roof, ensure that the opened slid-
ing/tilting roof does not strike any items of luggage transported on the roof.
■
Ensure that the boot lid does not hit the roof load when opened.
■
The height of the vehicle changes after mounting a roof luggage rack system
and the load that is secured to it. Compare the vehicle height with available clear-
ances, such as underpasses and garage doors.
■
Always remove the roof luggage rack system before entering an automated car
wash.
■
Ensure the roof aerial is not impaired by the secured load.
For the sake of the environment
The increased aerodynamic drag results in a higher fuel consumption.
Note
If the vehicle is not factory-equipped with a roof rack, it can be purchased from
the ŠKODA Original Accessories.
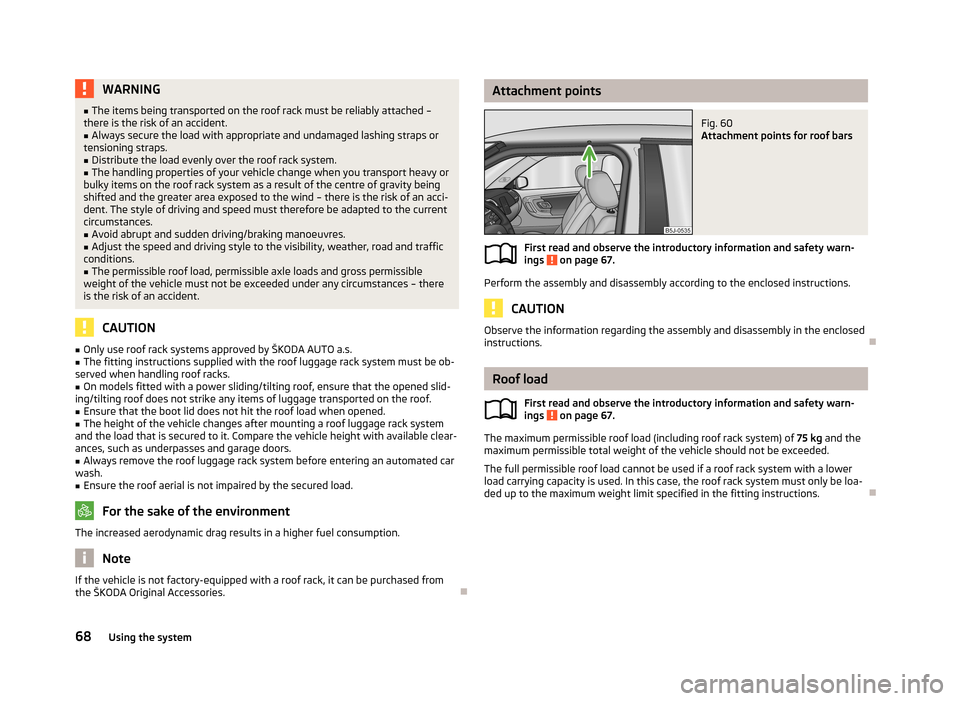
Attachment pointsFig. 60
Attachment points for roof bars
First read and observe the introductory information and safety warn-
ings on page 67.
Perform the assembly and disassembly according to the enclosed instructions.
CAUTION
Observe the information regarding the assembly and disassembly in the enclosed
instructions.
Roof load
First read and observe the introductory information and safety warn-
ings
on page 67.
The maximum permissible roof load (including roof rack system) of 75 kg and the
maximum permissible total weight of the vehicle should not be exceeded.
The full permissible roof load cannot be used if a roof rack system with a lower
load carrying capacity is used. In this case, the roof rack system must only be loa-
ded up to the maximum weight limit specified in the fitting instructions.
68Using the system
Page 98 of 223
Driving
Starting-off and Driving
Steering
Introduction
This chapter contains information on the following subjects:
Adjusting the steering wheel position
95
Power steering
95WARNING■ When driving, hold the steering wheel with both hands firmly on the outer
edge in the 9 o'clock and 3 o'clock position. Never hold the steering wheel in
the 12 o'clock position or in any other way (e.g. in the middle or inner edge of
the steering wheel). In such cases, you could severely injure your arms, hands
and head when the driver airbag is deployed.■
Never adjust the steering wheel when the vehicle is moving only when the
vehicle is stationary!
■
Adjust the steering wheel so that the distance
1
» Fig. 85 on page 95
between the steering wheel and your chest is at least 25 cm. Not maintaining
this minimum distance will mean that the airbag system will not be able to
properly protect you - there is a risk that you could be killed.
■
If the steering wheel is adjusted further towards the head, the protection
provided by the driver airbag in the event of an accident is reduced. Check
that the steering wheel is aligned to the chest.
Adjusting the steering wheel positionFig. 85
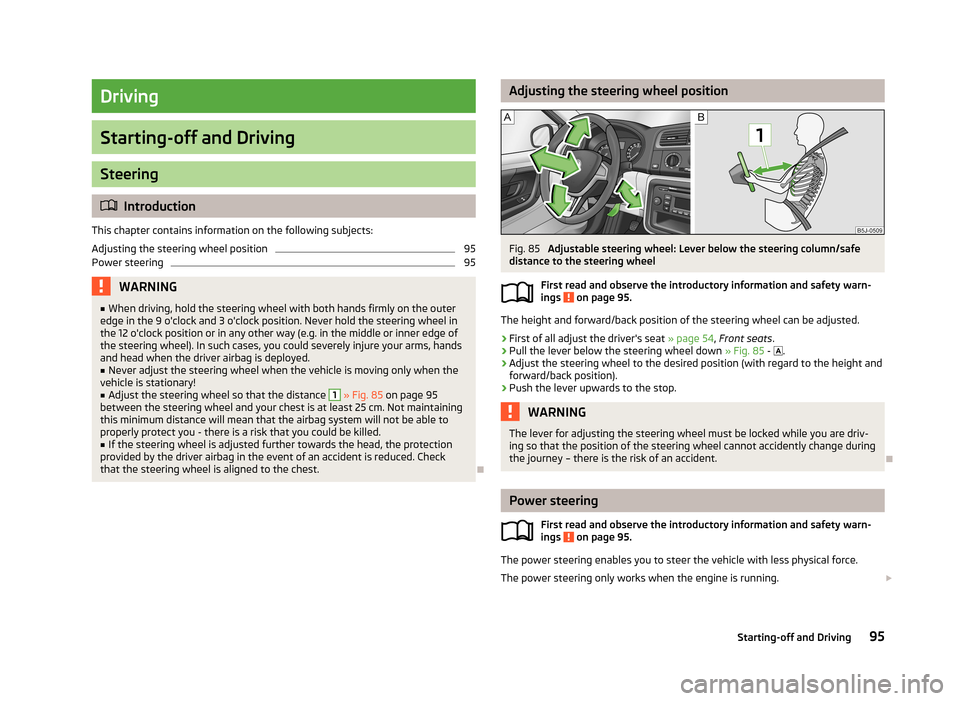
Adjustable steering wheel: Lever below the steering column/safe
distance to the steering wheel
First read and observe the introductory information and safety warn-
ings
on page 95.
The height and forward/back position of the steering wheel can be adjusted.
›
First of all adjust the driver's seat » page 54, Front seats .
›
Pull the lever below the steering wheel down » Fig. 85 -
.
›
Adjust the steering wheel to the desired position (with regard to the height and
forward/back position).
›
Push the lever upwards to the stop.
WARNINGThe lever for adjusting the steering wheel must be locked while you are driv- ing so that the position of the steering wheel cannot accidently change duringthe journey – there is the risk of an accident.
Power steering
First read and observe the introductory information and safety warn-ings
on page 95.
The power steering enables you to steer the vehicle with less physical force.
The power steering only works when the engine is running.
95Starting-off and Driving
Page 125 of 223
The distribution of the weight is very poor if your vehicle is unladen and the trail-
er is laden. Maintain a particularly low speed if you cannot avoid driving with this
combination.
Tyre pressure
Correct the tyre inflation pressure on your vehicle for a “full load” » page 174,
Tyre service life .
Trailer load
The permissible trailer load must not be exceeded under any circumstan- ces » page 201 , Technical data .
The trailer loads specified apply only to altitudes up to 1 000 metres above mean
sea level.
The engine output falls as altitude increases, as does the ability to climb. There-
fore, for every additional 1000 m in height (or part), the maximum permissible
towed weight must be reduced by 10 %.
The towed weight comprises the actual weights of the (loaded) towing vehicleand the (loaded) trailer.
The trailer and drawbar load information on the type plate of the towing equip- ment are merely test data for the towing equipment. The vehicle-specific values
are detailed in the vehicle documents.WARNING■ Do not exceed the maximum permissible axle and drawbar load and the
maximum permissible total or towed weight of the vehicle and the trailer –
there is the risk of an accident and serious injury.■
Slipping loads can significantly affect the stability and safety of the vehicle/
trailer combination – there is the risk of an accident and serious injury.
Towing a trailer
First read and observe the introductory information and safety warn-
ings
on page 121.
Exterior mirrors
You have to have additional exterior mirrors fitted if you are not able to see the
traffic behind the trailer with the standard rear-view mirrors. National legal re-
quirements must be observed.
Headlights
The front of the vehicle can be lifted when a trailer is being towed and the head-
lights can dazzle other road users.
Adjust the headlight setting on the headlight range control » page 44, Headlight
beam adjustment .
Driving speed
For safety reasons, do not drive faster than 80 km/h when towing a trailer.
Immediately reduce your speed as soon as even the slightest swaying of the trail- er is detected. Never attempt to stop the trailer from “swaying” by accelerating.
Brakes
Apply the brakes in good time! If the trailer is fitted with a trailer brake, apply the
brakes gently at first, then brake firmly. This will avoid brake jolts resulting from
the trailer wheels locking.
On downhill sections shift down a gear in good time to also use the engine as a
brake.
Engine overheating
The speed must be reduced immediately if the needle for the coolant tempera- ture gauge moves into the right-hand area or the red area of the scale.
Stop and switch off the engine if the warning light
in the instrument cluster
starts to flash. Wait a few minutes and check the level of coolant » page 167,
Checking the coolant level .
The following guidelines must be observed » page 22,
Coolant .
The coolant temperature can be reduced by switching on the heating.WARNING■ Adapt your speed to the conditions of the road surface and to the traffic sit-
uation.■
Improper or incorrectly connected electric cables can energise the trailer and
cause functional faults to the vehicle's entire electrical system as well as acci-
dents and severe injuries.
■
Work on the electrical system must only be carried out by specialist garages.
■
Never directly connect the trailer's electrical system with the electrical con-
nections for the tail lights or other current sources.
122Driving
Page 127 of 223
Safety
Passive Safety
General information
Introduction
This chapter contains information on the following subjects:
Safety equipment
124
Before every journey
124
What influences driving safety?
125
In this section you will find important information, tips and notes on the subject
of passive safety in your vehicle.
We have combined everything here which you should be familiar with, for exam- ple, regarding seat belts, airbags, child seats and safety of children.
WARNING■ This chapter contains important information on how to use the vehicle for
the driver and his occupants.■
You will find further information on safety, which concerns you and those
travelling with you, in the following chapters of this Owner's Manual.
■
The complete on-board literature should always be in the vehicle. This ap-
plies in particular, if you rent out or sell the vehicle.
Safety equipment
First read and observe the introductory information and safety warn-ings
on page 124.
The following list contains only part of the safety equipment in your vehicle.
› Three-point seat belts for all the seats.
› Belt force limiters for the front seats.
› Belt tensioners for the front seats.
› Seat belt height adjusters for the front seats.
›
Front airbag for the driver and the front passenger.
› Side airbags.
› Head airbags.
› Anchoring points for child seats using the ISOFIX system.
› Anchoring points for child seats using the TOP TETHER system.
› Head restraints adjustable for height.
› Adjustable steering column.
The specified safety equipment works together, in order to optimally protect you
and those travelling with you in accident situations.
The safety equipment does not protect you or the people travelling with you, if
you or your occupants adopt an incorrect seated position or the equipment is not
correctly adjusted or used.
If the seat belt is not fastened properly, this may result in injuries during an acci-
dent caused by the deployed airbag.
Before every journey
First read and observe the introductory information and safety warn-ings
on page 124.
For your own safety and the safety of the people travelling with you, please pay
attention to the following points before setting off.
› Ensure that the lighting and the turn signal system are functioning properly.
› Check the tyre inflation pressure.
› Ensure that all of the windows offer good visibility to the outside.
› Secure all items of luggage
» page 58.
› Ensure that no objects can obstruct the pedals.
› Adjust the mirrors, the front seat and head restraint to your body size.
› Advise your passengers to adjust the head restraints to their body size.
› Protect children in suitable child seats with correctly fastened seat
belts » page 140 , Transporting children safely .
› Adopt the correct seated position
» page 125. Tell your passengers to assume
the correct seated position.
› Correctly fasten the seat belt. Also instruct your passengers to fasten their seat
belt correctly » page 128, Wearing seat belts .
124Safety
Page 131 of 223
Seat belts
Wearing seat belts
Introduction
Fig. 107
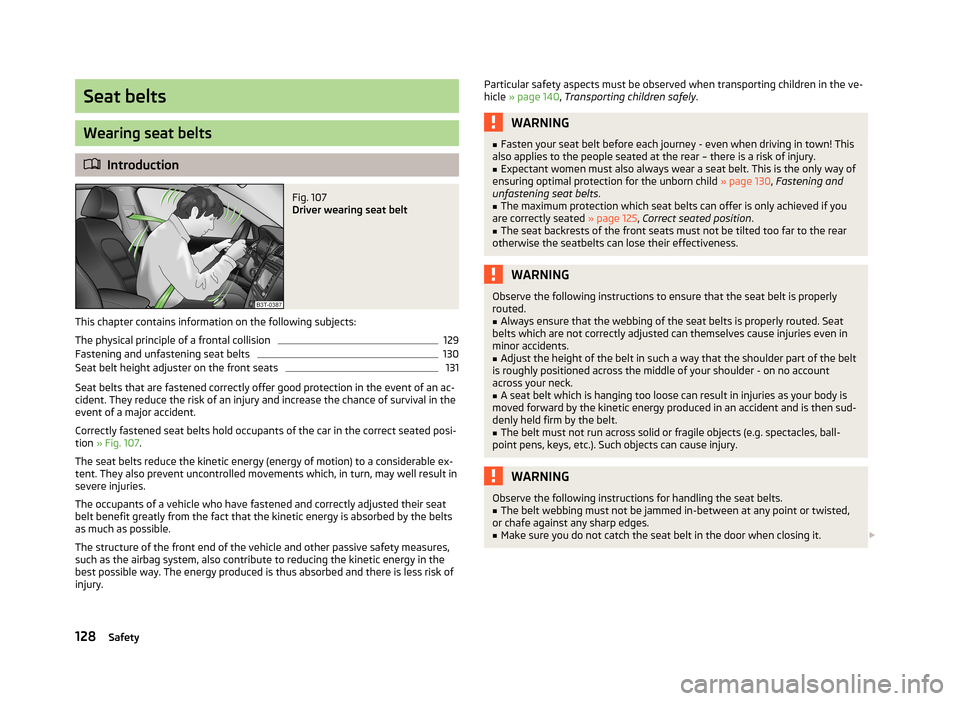
Driver wearing seat belt
This chapter contains information on the following subjects:
The physical principle of a frontal collision
129
Fastening and unfastening seat belts
130
Seat belt height adjuster on the front seats
131
Seat belts that are fastened correctly offer good protection in the event of an ac-
cident. They reduce the risk of an injury and increase the chance of survival in the
event of a major accident.
Correctly fastened seat belts hold occupants of the car in the correct seated posi-
tion » Fig. 107 .
The seat belts reduce the kinetic energy (energy of motion) to a considerable ex-
tent. They also prevent uncontrolled movements which, in turn, may well result in
severe injuries.
The occupants of a vehicle who have fastened and correctly adjusted their seat belt benefit greatly from the fact that the kinetic energy is absorbed by the belts
as much as possible.
The structure of the front end of the vehicle and other passive safety measures,
such as the airbag system, also contribute to reducing the kinetic energy in the
best possible way. The energy produced is thus absorbed and there is less risk of injury.
Particular safety aspects must be observed when transporting children in the ve-
hicle » page 140 , Transporting children safely .WARNING■
Fasten your seat belt before each journey - even when driving in town! This
also applies to the people seated at the rear – there is a risk of injury.■
Expectant women must also always wear a seat belt. This is the only way of
ensuring optimal protection for the unborn child » page 130, Fastening and
unfastening seat belts .
■
The maximum protection which seat belts can offer is only achieved if you
are correctly seated » page 125, Correct seated position .
■
The seat backrests of the front seats must not be tilted too far to the rear
otherwise the seatbelts can lose their effectiveness.
WARNINGObserve the following instructions to ensure that the seat belt is properly
routed.■
Always ensure that the webbing of the seat belts is properly routed. Seat
belts which are not correctly adjusted can themselves cause injuries even in minor accidents.
■
Adjust the height of the belt in such a way that the shoulder part of the belt
is roughly positioned across the middle of your shoulder - on no account across your neck.
■
A seat belt which is hanging too loose can result in injuries as your body is
moved forward by the kinetic energy produced in an accident and is then sud-
denly held firm by the belt.
■
The belt must not run across solid or fragile objects (e.g. spectacles, ball-
point pens, keys, etc.). Such objects can cause injury.
WARNINGObserve the following instructions for handling the seat belts.■The belt webbing must not be jammed in-between at any point or twisted,
or chafe against any sharp edges.■
Make sure you do not catch the seat belt in the door when closing it.
128Safety
Page 134 of 223
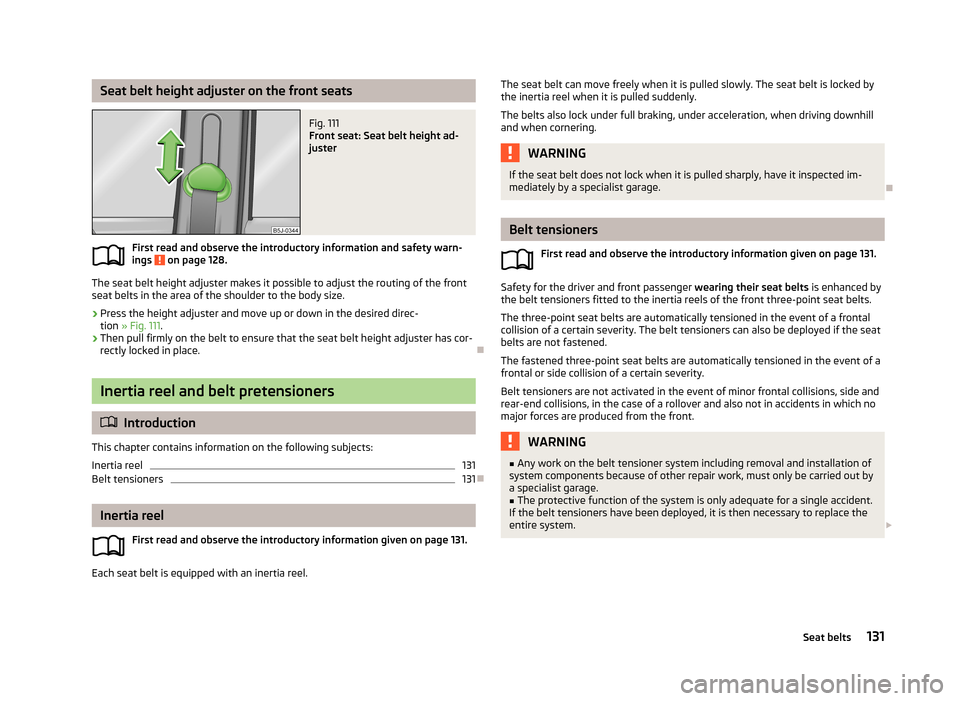
Seat belt height adjuster on the front seatsFig. 111
Front seat: Seat belt height ad-
juster
First read and observe the introductory information and safety warn-
ings on page 128.
The seat belt height adjuster makes it possible to adjust the routing of the front
seat belts in the area of the shoulder to the body size.
›
Press the height adjuster and move up or down in the desired direc- tion » Fig. 111 .
›
Then pull firmly on the belt to ensure that the seat belt height adjuster has cor-
rectly locked in place.
Inertia reel and belt pretensioners
Introduction
This chapter contains information on the following subjects:
Inertia reel
131
Belt tensioners
131
Inertia reel
First read and observe the introductory information given on page 131.
Each seat belt is equipped with an inertia reel.
The seat belt can move freely when it is pulled slowly. The seat belt is locked by
the inertia reel when it is pulled suddenly.
The belts also lock under full braking, under acceleration, when driving downhill
and when cornering.WARNINGIf the seat belt does not lock when it is pulled sharply, have it inspected im- mediately by a specialist garage.
Belt tensioners
First read and observe the introductory information given on page 131.
Safety for the driver and front passenger wearing their seat belts is enhanced by
the belt tensioners fitted to the inertia reels of the front three-point seat belts.
The three-point seat belts are automatically tensioned in the event of a frontal
collision of a certain severity. The belt tensioners can also be deployed if the seat
belts are not fastened.
The fastened three-point seat belts are automatically tensioned in the event of a frontal or side collision of a certain severity.
Belt tensioners are not activated in the event of minor frontal collisions, side andrear-end collisions, in the case of a rollover and also not in accidents in which no
major forces are produced from the front.
WARNING■ Any work on the belt tensioner system including removal and installation of
system components because of other repair work, must only be carried out by
a specialist garage.■
The protective function of the system is only adequate for a single accident.
If the belt tensioners have been deployed, it is then necessary to replace the
entire system.
131Seat belts
Page 144 of 223
Use of a child seat on the front passenger seat
Never use a rearward-facing child restraint system on a seat which is protected by an active airbag installed in front of it. This could cause serious injury to the child, even death.Fig. 117
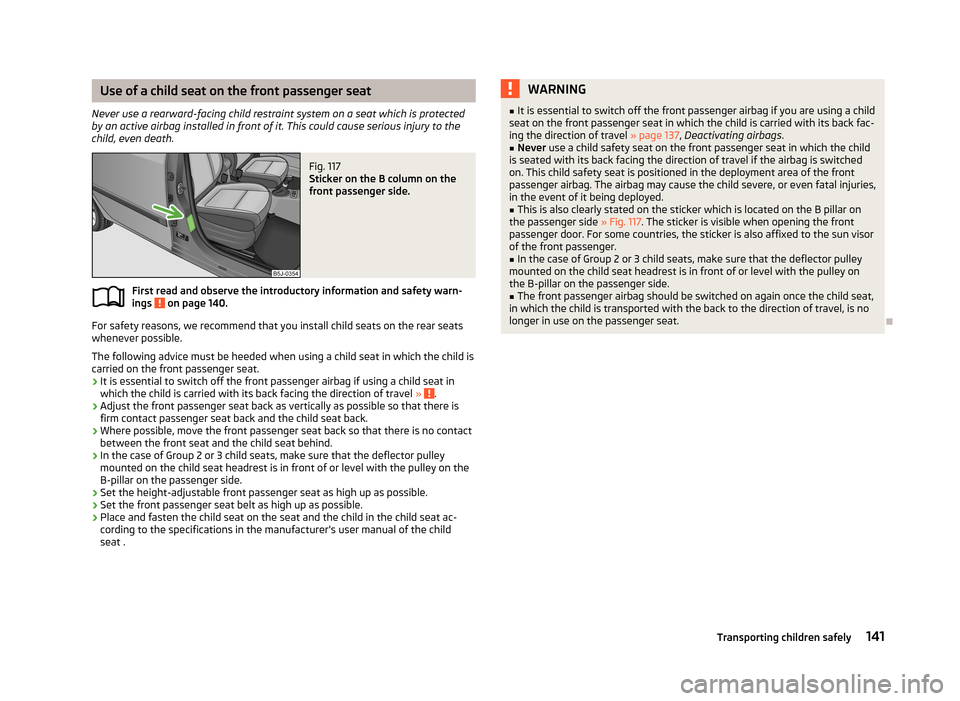
Sticker on the B column on the
front passenger side.
First read and observe the introductory information and safety warn-
ings on page 140.
For safety reasons, we recommend that you install child seats on the rear seats
whenever possible.
The following advice must be heeded when using a child seat in which the child is
carried on the front passenger seat.
› It is essential to switch off the front passenger airbag if using a child seat in
which the child is carried with its back facing the direction of travel »
.
› Adjust the front passenger seat back as vertically as possible so that there is
firm contact passenger seat back and the child seat back.
› Where possible, move the front passenger seat back so that there is no contact
between the front seat and the child seat behind.
› In the case of Group 2 or 3 child seats, make sure that the deflector pulley
mounted on the child seat headrest is in front of or level with the pulley on the
B-pillar on the passenger side.
› Set the height-adjustable front passenger seat as high up as possible.
› Set the front passenger seat belt as high up as possible.
› Place and fasten the child seat on the seat and the child in the child seat ac-
cording to the specifications in the manufacturer's user manual of the child
seat .
WARNING■ It is essential to switch off the front passenger airbag if you are using a child
seat on the front passenger seat in which the child is carried with its back fac-
ing the direction of travel » page 137, Deactivating airbags .■
Never use a child safety seat on the front passenger seat in which the child
is seated with its back facing the direction of travel if the airbag is switched
on. This child safety seat is positioned in the deployment area of the front
passenger airbag. The airbag may cause the child severe, or even fatal injuries,
in the event of it being deployed.
■
This is also clearly stated on the sticker which is located on the B pillar on
the passenger side » Fig. 117. The sticker is visible when opening the front
passenger door. For some countries, the sticker is also affixed to the sun visor
of the front passenger.
■
In the case of Group 2 or 3 child seats, make sure that the deflector pulley
mounted on the child seat headrest is in front of or level with the pulley on
the B-pillar on the passenger side.
■
The front passenger airbag should be switched on again once the child seat,
in which the child is transported with the back to the direction of travel, is no
longer in use on the passenger seat.
141Transporting children safely