radio SKODA FABIA 2014 2.G / 5J Owner's Manual
[x] Cancel search | Manufacturer: SKODA, Model Year: 2014, Model line: FABIA, Model: SKODA FABIA 2014 2.G / 5JPages: 197, PDF Size: 13.56 MB
Page 20 of 197

Deactivating airbags
Deactivating an airbag should be considered only in the following cases, for
example.
› When using a child seat on the front passenger seat, in which the child has
its back to the vehicle's direction of travel (in some countries this must be in
the direction of travel due to different legal regulations applying) » page 19,
Transporting children safely .
› If it is not possible to maintain a distance of at least 25 cm between the mid-
dle of the steering wheel and chest, despite the driver's seat being correctly
adjusted.
› If special attachments are required in the area of the steering wheel because
of a physical disability.
› If other seats have been installed (e.g. orthopaedic seats without side air-
bags).
The front passenger airbag can be switched off with the key-operated
switch » page 18 .
We recommend that you ask a ŠKODA Service Partner to switch off any other
airbags.
Monitoring the airbag system
The functionality of the airbag system is monitored electronically even if one
of the airbags is switched off.
Airbag was switched off using diagnostic equipment
› The
warning light lights up for approximately 3 seconds after the ignition
is switched on and then flashes again for approximately 12 seconds.
Front passenger airbag switched off with the key switch in the storage com-
partment
› The
warning light comes on for about 3 seconds after the ignition has
been switched on.
› The
3
» Fig. 12 on page 18 warning light comes on when the ignition
is switched on.
Note
■ The national regulations for switching off airbags must be observed.■A ŠKODA Service Partner will be able to inform you which airbags in your ve-
hicle can/must be deactivated.Switching off the front passenger airbagFig. 12
Key-operated switch for the front passenger airbag/warning light
for front seat passenger airbag deactivation
Only the front passenger airbag is deactivated with the key switch.
Switching off
›
Switch off the ignition.
›
Open the passenger door.
›
Fold the key bit out completely for the radio key » .
›
Carefully insert the key into the key slot in the key switch as far as the stop.
›
Use the key to turn the slot of the key switch into position
2
» Fig. 12 OFF .
›
Pull the key out of the slot in the key switch » .
›
Close the passenger door.
›
Check whether the
3
1)
warning light in the
mes-
sage in the centre of the dash panel lights up after the ignition has been
switched on.
Switching on
›
Switch off the ignition.
›
Open the passenger door.
›
Fold the key bit out completely for the radio key » .
›
Carefully insert the key into the key slot in the key switch as far as the stop.
›
Use the key to turn the slot of the key switch into position
1
» Fig. 12 ON .
›
Pull the key out of the slot in the key switch » .
›
Close the passenger door.
1)
The
airbag warning light comes on for a few seconds after the ignition is switched on, goes out for
about 1 second and then comes on again.
18Safety
Page 27 of 197
Using the system
Cockpit
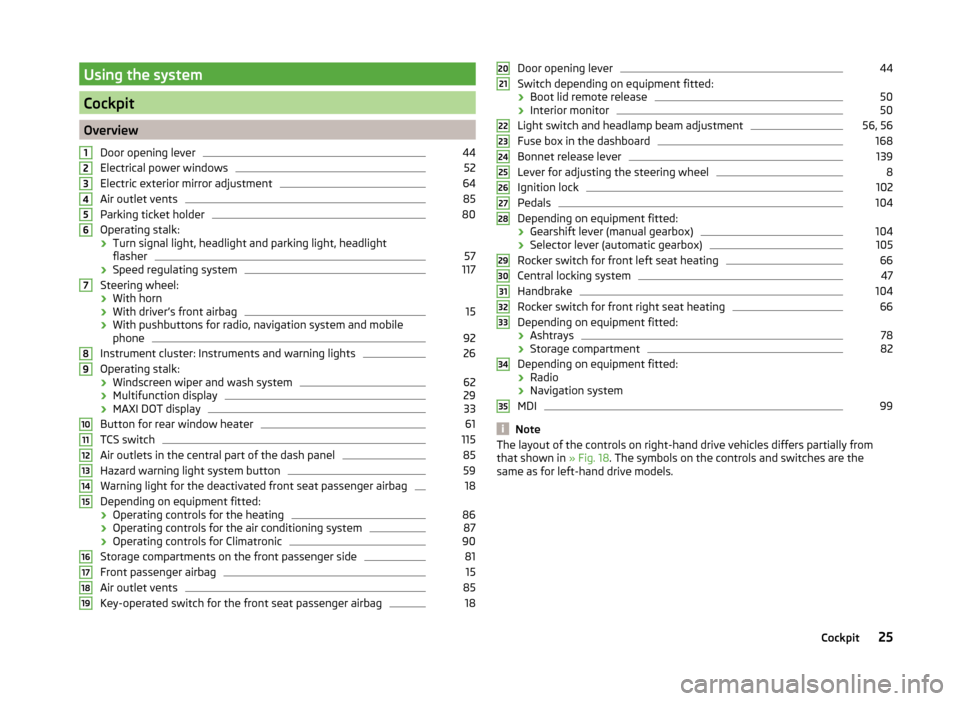
OverviewDoor opening lever
44
Electrical power windows
52
Electric exterior mirror adjustment
64
Air outlet vents
85
Parking ticket holder
80
Operating stalk:
› Turn signal light, headlight and parking light, headlight
flasher
57
› Speed regulating system
117
Steering wheel:
› With horn
› With driver’s front airbag
15
›With pushbuttons for radio, navigation system and mobile
phone
92
Instrument cluster: Instruments and warning lights
26
Operating stalk:
› Windscreen wiper and wash system
62
›Multifunction display
29
›MAXI DOT display
33
Button for rear window heater
61
TCS switch
115
Air outlets in the central part of the dash panel
85
Hazard warning light system button
59
Warning light for the deactivated front seat passenger airbag
18
Depending on equipment fitted:
› Operating controls for the heating
86
›Operating controls for the air conditioning system
87
›Operating controls for Climatronic
90
Storage compartments on the front passenger side
81
Front passenger airbag
15
Air outlet vents
85
Key-operated switch for the front seat passenger airbag
1812345678910111213141516171819Door opening lever44
Switch depending on equipment fitted:
› Boot lid remote release
50
›Interior monitor
50
Light switch and headlamp beam adjustment
56, 56
Fuse box in the dashboard
168
Bonnet release lever
139
Lever for adjusting the steering wheel
8
Ignition lock
102
Pedals
104
Depending on equipment fitted:
› Gearshift lever (manual gearbox)
104
›Selector lever (automatic gearbox)
105
Rocker switch for front left seat heating
66
Central locking system
47
Handbrake
104
Rocker switch for front right seat heating
66
Depending on equipment fitted:
› Ashtrays
78
›Storage compartment
82
Depending on equipment fitted:
› Radio
› Navigation system
MDI
99
Note
The layout of the controls on right-hand drive vehicles differs partially from
that shown in » Fig. 18. The symbols on the controls and switches are the
same as for left-hand drive models.2021222324252627282930313233343525Cockpit
Page 35 of 197
NoteThe kilometres remaining until the next service are displayed instead of the
odometer.
Display in the MAXI DOT display
Oil change service
If an oil change service is due, the message Oil change in ... km or .... days.
As soon as the service date has arrived, the message Oil change now! appears
after the ignition is switched on.
Inspection
If an inspection is due, the message Inspection in ... km or ... days.
As soon as the service interval date has arrived, the message Inspection now!
appears after the ignition is switched on.
Displaying the distance and days until the next service interval
You can display the remaining distance and days until the next service in the
Settings menu whenever the ignition is switched on » page 34.
The following message is displayed for 10 seconds. Oil change ... km / ... days
Inspection ... km / ... days
MAXI DOT display
Introduction
This chapter contains information on the following subjects:
Main menu
33
Settings
34
Door, boot lid and bonnet warning
34
Auto Check Control
34
The MAXI DOT display provides you with information about the current operat-
ing state of your vehicle . The information system also provides you with data
(depending on the vehicle equipment) relating to the radio, mobile phone, mul-
ti-functional display, navigation system, the device connected to the MDI input
and the automatic gearbox » page 105.
Lighting up of certain symbols is combined with an acoustic warning signal.
WARNINGConcentrate fully on your driving at all times. As the driver you are fully re-
sponsible for the operation of your vehicle.
Main menu
Fig. 24
Operating stalk: MAXI DOT dis-
play controls
Read and observe on page 33 first.
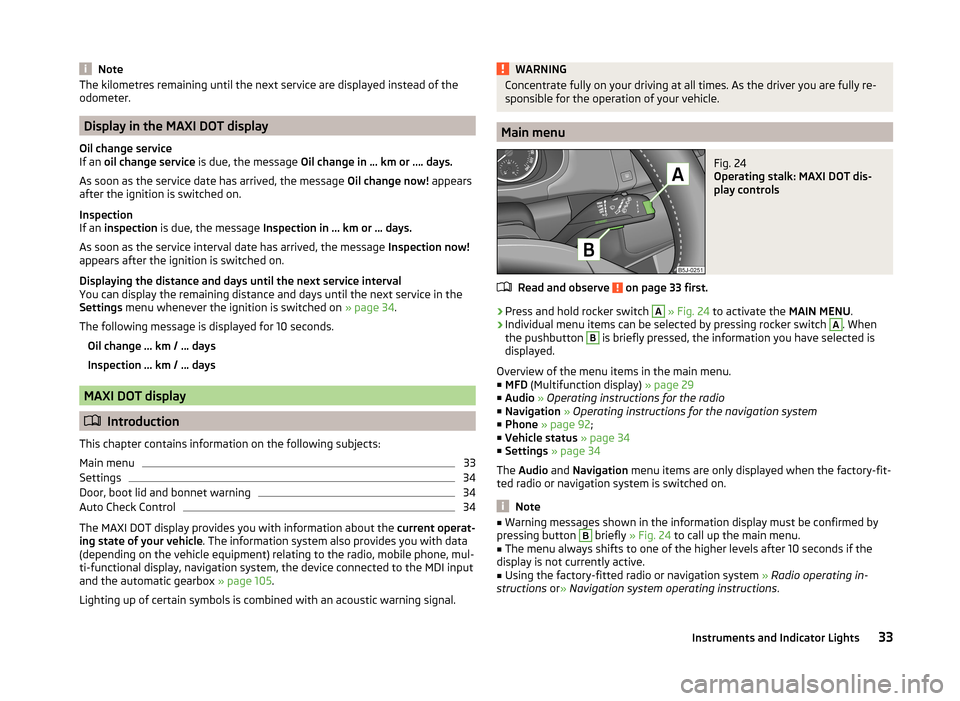
›
Press and hold rocker switch
A
» Fig. 24 to activate the MAIN MENU.
›
Individual menu items can be selected by pressing rocker switch
A
. When
the pushbutton
B
is briefly pressed, the information you have selected is
displayed.
Overview of the menu items in the main menu.
■ MFD (Multifunction display) » page 29
■ Audio » Operating instructions for the radio
■ Navigation » Operating instructions for the navigation system
■ Phone » page 92 ;
■ Vehicle status » page 34
■ Settings » page 34
The Audio and Navigation menu items are only displayed when the factory-fit-
ted radio or navigation system is switched on.
Note
■ Warning messages shown in the information display must be confirmed by
pressing button B briefly » Fig. 24 to call up the main menu.■
The menu always shifts to one of the higher levels after 10 seconds if the
display is not currently active.
■
Using the factory-fitted radio or navigation system » Radio operating in-
structions or» Navigation system operating instructions .
33Instruments and Indicator Lights
Page 44 of 197
Selector lever lockRead and observe
on page 35 first.
If the warning light
lights up, operate the brake pedal. This is necessary to
be able to move the selector lever from position P or N » page 106 .
Main beam
Read and observe
on page 35 first.
The warning light
comes on when the main beam or headlight flasher are
selected » page 57 .
Unlocking and locking
Unlocking and locking
Introduction
This chapter contains information on the following subjects:
Vehicle key
42
Replacing the battery in the remote control key
43
Child safety lock
44
Opening/closing the door
44
Locking/unlocking the vehicle without central locking
45
Emergency locking of the doors
45
Vehicle key
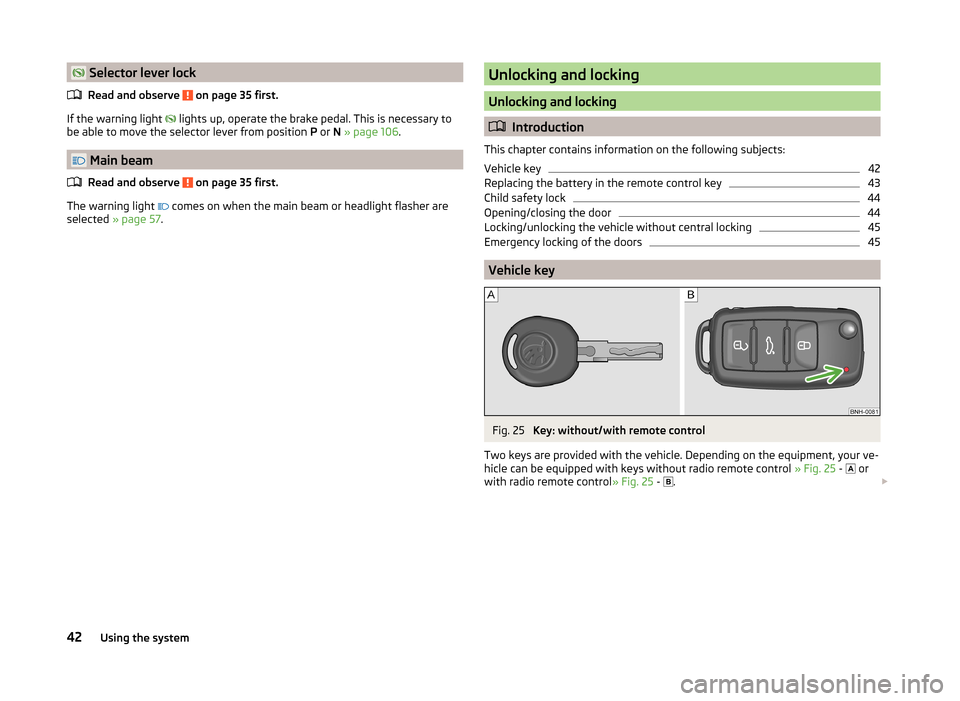
Fig. 25
Key: without/with remote control
Two keys are provided with the vehicle. Depending on the equipment, your ve-
hicle can be equipped with keys without radio remote control » Fig. 25 -
or
with radio remote control » Fig. 25 -
.
42Using the system
Page 51 of 197
In addition, when the car is unlocked, the electrically adjustable seats and ex-
terior mirrors move into the position assigned to this key. The stored setting of
driver seat and exterior mirrors is retrieved.
Locking
The turn signal lights flash once to confirm that the vehicle has been correctly
locked.
If the doors or the boot lid remain open after the vehicle has been locked, the
turn signal lights do not flash until they have been closed.
Note
■ Only operate the remote control when the doors and boot lid are closed and
the vehicle is in your line of sight.■
A ŠKODA partner can also activate/deactivate the acoustic signals on vehi-
cles with an anti-theft alarm system.
Synchronization
If the vehicle does not unlock when the remote control is pressed, the key may
not be synchronised. This can occur when the buttons on the remote control
key are pressed several times outside the operating range of the equipment or
if the battery in the remote control key has been replaced.
Synchronise the key as follows.
›
Press any button on the remote control key.
›
Unlock the door with the key within 1 minute of pressing the button.
Anti-theft alarm system
Introduction
This chapter contains information on the following subjects:
Operation
49
Interior monitor and towing protection
50
The anti-theft alarm system increases the level of protection against people
seeking to break into the vehicle. The system triggers audible and visual warn-
ing signals if an attempt is made to break into the vehicle.
Note■ The working life of the alarm siren is 5 years.■Before leaving the car, it must be checked that all of the windows, doors and
the electric sliding/tilting roof are properly closed to ensure the full functional-
ity of the anti-theft alarm system.■
Coding of the radio remote control and the receiver unit precludes the use of
the radio remote control from other vehicles.
Operation
How is the alarm system activated?
The anti-theft alarm system is activated when the vehicle is locked with the
radio remote control or the key in the driver's door . It is activated 30 seconds
after locking the door.
How is the alarm system deactivated?
The alarm system is deactivated by pressing the button on the remote con-
trol. The anti-theft alarm system is reactivated if the vehicle is not opened
within 30 seconds after transmitting the radio signal.
Triggering the alarm
The alarm is triggered when the following unauthorized actions are carried out
on the locked vehicle.
› Opening the bonnet.
› Opening the boot lid.
› Opening the doors.
› Manipulation of the ignition lock.
› Towing the vehicle
» page 50;
› Movement in the vehicle
» page 50.
› Sudden and significant voltage drop of the electrical system.
› Uncoupling the trailer
» page 125.
If the driver's door of a vehicle with a remote control is unlocked and opened
by the lock cylinder, then the alarm is triggered.
Switching off the alarm
The alarm is turned off by pressing the button on the radio remote control
key or switching on the ignition.
CAUTION
Before leaving the vehicle, it must be checked that all of the windows, doors
and the sliding/tilting roof are locked in order to ensure the full functionality of
the anti-theft alarm system.49Unlocking and locking
Page 94 of 197
The blower speed set is indicated by displaying the corresponding number of
segments in icon 9 » Fig. 97 on page 90 in the display.WARNING■
“Stale air” may result in fatigue in the driver and occupants, reduce atten-
tion levels and also cause the windows to mist up. The risk of having an ac-
cident increases.■
Do not switch off the Climatronic system for longer than necessary.
■
Switch on the Climatronic system as soon as the windows mist up.
Defrosting windscreen
Switching on
›
Press the button
» Fig. 97 on page 90 .
Switching off
›
Press the button
» Fig. 97 on page 90 again or press the
button.
More air flows out of the air outlet vents 1 and 2 » Fig. 94 on page 85 . The
temperature control is controlled automatically.
Communication and multimedia
Universal telephone preinstallation GSM II
Introduction
This chapter contains information on the following subjects:
Mobile phones and two-way radio systems
92
Introductory information
93
Phone Phonebook
93
Operating the phone on the multifunction steering wheel
94
Inserting the mobile phone and adapter
94
Managing telephone calls with the help of the adapter
95
Connecting the mobile phone to the hands-free system
95
Symbols in the MAXI DOT display
96
Telephone operation in the MAXI DOT display
96
Mobile phones and two-way radio systems
ŠKODA permits the operation of mobile phones and two-way radio systems
with a professionally installed external aerial and a maximum transmission
power of up to 10 watts.
Please consult a ŠKODA Partner for information about the possibility of instal- ling and operating mobile phones and two-way radio systems with a transmis-
sion power of more than 10 W.
Operating mobile phones or two-way radio systems may interfere with the
functionality of the electronic systems in your vehicle.
The possible reasons for this are.
› no external aerial.
› external aerial incorrectly installed.
› transmission power greater than 10 watts.
WARNING■
Concentrate fully at all times on your driving! As the driver, you are fully
responsible for the operation of your vehicle.■
Only use the device in a way that you are in full control of your vehicle in
every traffic situation – there is the risk of accidents!
92Using the system
Page 95 of 197
WARNING (Continued)■The national regulations for using a mobile phone in a vehicle must be
observed.■
If a mobile phone or a two-way radio system is operated in a vehicle with-
out an external aerial or an external aerial which has been installed incor-
rectly, this can increase the strength of the electromagnetic field inside the
vehicle.
■
Two-way radio systems, mobile phones or mounts must not be installed
on airbag covers or within the immediate deployment range of the airbags.
■
Never leave a mobile phone on a seat, on the dash panel or in another
area, from which it can be thrown during a sudden braking manoeuvre, an
accident or a collision - risk of injury.
■
The Bluetooth ®
function must be switched off by a specialist workshop
before the vehicle is transported by air.
Note
■ We recommend that mobile phones and two-way radio systems be installed
in the a vehicle by a specialist workshop.■
Not all mobile phones that enable Bluetooth ®
communication are compatible
with the universal telephone preinstallation GSM II. You can ask a ŠKODA Part-
ner whether your telephone is compatible with the GSM II universal telephone
fitting.
■
The range of the Bluetooth ®
connection to the hands-free system is restric-
ted to the vehicle interior. The range is dependent on local factors, e.g. obsta-
cles between the devices and mutual interferences with other devices. If your
mobile phone is in a jacket pocket, for example, this can lead to difficulties
when establishing a connection with the hands-free-system or transferring
data.
Introductory information
The universal telephone preinstallation GSM II (hands-free system) includes a
convenience mode for the mobile phone via voice control, the multifunction
steering wheel, the adapter, radio or the navigation system.
The universal telephone preinstallation GSM II comprises the following func-
tions.
› Phone Phonebook
» page 93.
› Convenience operation of the telephone via the multifunction steering
wheel » page 94 .
›Managing telephone calls via the adapter
» page 95.
› Telephone operation in the MAXI DOT display
» page 96.
› Voice control of the telephone
» page 97.
› Music playback from the telephone or other multimedia units
» page 98.
All communication between a mobile phone and your vehicle's hands-free sys-
tem is established with the help of Bluetooth ®
technology. The adapter serves
only for charging the telephone and for transmitting the signal to the vehicle's
external aerial.
Note
The following guidelines must be observed » page 92, Mobile phones and two-
way radio systems .
Phone Phonebook
A phone phonebook is part of the hands-free system. This phone phonebook
can be used depending on the type of mobile phone.
After the first connection of the telephone, the system begins to load the
phone book from the phone and the SIM card into the memory of the control
unit.
Each time the telephone has established a new connection with the hands-
free system, an update of the relevant phone book is performed. The updating
can take a few minutes. During this time the phone book, which was stored af-
ter the last update was completed, is available. Newly stored telephone num-
bers are only shown after the updating has ended.
The update is interrupted if a telephone event (e.g. incoming or outgoing call,
voice control dialogue) occurs during the updating procedure. After the tele-
phone event has ended, the updating starts anew.
The internal phonebook provides 2 500 free memory locations. Each contact can contain up to 4 numbers.
If the number of contacts loaded exceeds 2 500, the phone book is not com-
plete.
93Communication and multimedia
Page 100 of 197
Note■The dialogue of an incoming call is immediately interrupted.■The voice control is only possible in vehicles fitted with a multifunction
steering wheel with telephone control or a phone mount and adapter.
Voice commands
Basic voice commands
Voice commandActionHELPAfter this command the system repeats all possible
commands.CALL XYZThis command calls up the contact from the phone
book.PHONE BOOKAfter this command, for example, the phone book
can be repeated back to you, a voice entry for the
contact can be updated or deleted, etc.CALL REGISTERLists of dialled numbers, missed calls, etc.DIAL NUMBERAfter this command, a telephone number can be
entered to establish a connection with the reques-
ted party.REDIALAfter this command the system calls the last dial-
led number.MUSIC a)Play music from the mobile phone or another
paired device.FURTHER OPTIONSAfter this command the system offers additional
context-dependent commands.SETTINGSSelection for setting Bluetooth ®
, dialogue etc.CANCELThe dialogue is ended.a)
On vehicles fitted with the Amundsen+ navigation system, this function can be accessed via the naviga-
tion system menu; refer to the » Operating instructions for the Amundsen+ navigation system .
If a voice command is not detected, the system answers with “ Sorry?”, and a
new attempt can be made. After the 2nd error the system repeats the aid. Af-
ter the 3rd attempt the answer “ Cancelled” is given and the dialogue is ended.
Store voice recording of a contact
If automatic name recognition does not work reliably for some contacts, you
can choose to save your own voice tag for the contact in the Phone book -
Voice tag - Record menu item.
Your own voice tag can also be saved using the voice control in the FURTHER
OPTIONS menu.
Multimedia
Introduction
This chapter contains information on the following subjects:
Music playback via Bluetooth ®
98
Operating the radio and navigation system on the multifunction steering
wheel
99
AUX and MDI inputs
99
Music playback via Bluetooth ®
The universal telephone preinstallation GSM II makes it possible to play back
music via Bluetooth ®
from the devices such as MP3 player, mobile phone or
notebook.
To ensure the music can be played back via Bluetooth ®
, you must first pair the
device with the hands-free system in the Phone - Bluetooth - Media player
menu.
The music playback process is performed on the connected device.
The universal telephone preinstallation GSM II ensures that the music played
back via the hands-free system can be controlled with the remote con-
trol » page 98 , Voice commands .
Note
The device being connected must support the Bluetooth ®
A2DP profile; refer
to the operating instructions for the relevant device being connected.98Using the system
Page 101 of 197
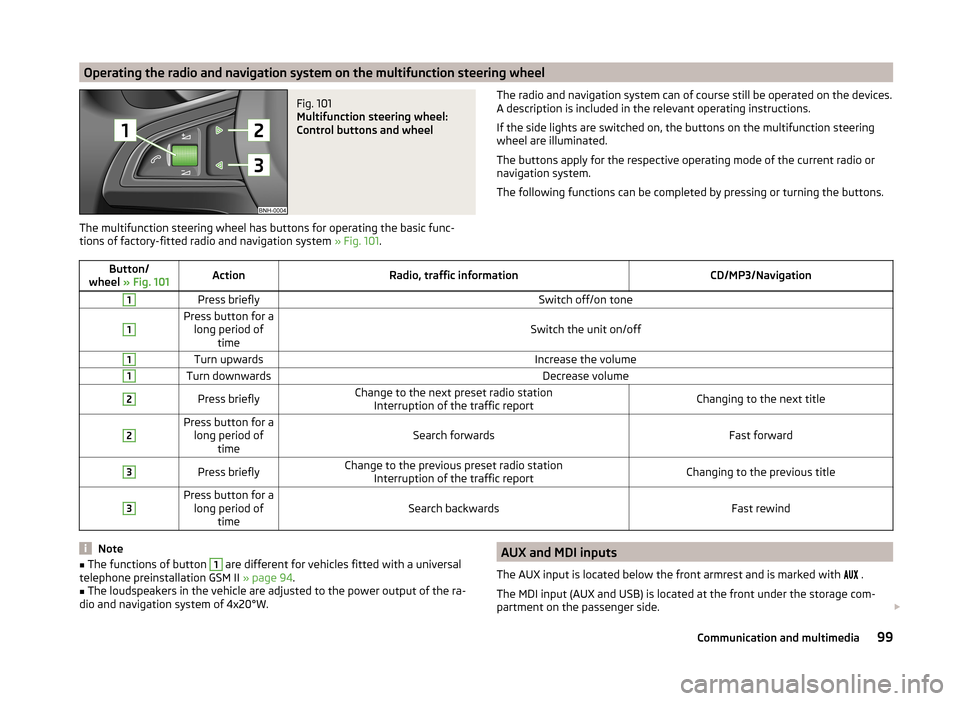
Operating the radio and navigation system on the multifunction steering wheelFig. 101
Multifunction steering wheel:
Control buttons and wheel
The multifunction steering wheel has buttons for operating the basic func-
tions of factory-fitted radio and navigation system » Fig. 101.
The radio and navigation system can of course still be operated on the devices.
A description is included in the relevant operating instructions.
If the side lights are switched on, the buttons on the multifunction steering wheel are illuminated.
The buttons apply for the respective operating mode of the current radio or
navigation system.
The following functions can be completed by pressing or turning the buttons.Button/
wheel » Fig. 101ActionRadio, traffic informationCD/MP3/Navigation1Press brieflySwitch off/on tone1Press button for a
long period of timeSwitch the unit on/off
1Turn upwardsIncrease the volume1Turn downwardsDecrease volume2Press brieflyChange to the next preset radio stationInterruption of the traffic reportChanging to the next title2Press button for along period of timeSearch forwardsFast forward
3Press brieflyChange to the previous preset radio station Interruption of the traffic reportChanging to the previous title3Press button for along period of timeSearch backwardsFast rewindNote■The functions of button 1 are different for vehicles fitted with a universal
telephone preinstallation GSM II » page 94.■
The loudspeakers in the vehicle are adjusted to the power output of the ra-
dio and navigation system of 4x20°W.
AUX and MDI inputs
The AUX input is located below the front armrest and is marked with
.
The MDI input (AUX and USB) is located at the front under the storage com-
partment on the passenger side. 99Communication and multimedia
Page 102 of 197
The AUX- and MDI inputs are used to connect external audio sources (e.g. iPod
or MP3 player) and to play back music from these devices via the factory-fitted
radio or navigation system.
For a description of use, refer to the relevant operating instructions for the ra-
dio or navigation system.100Using the system