airbag off SKODA FABIA 2014 3.G / NJ Operating Instruction Manual
[x] Cancel search | Manufacturer: SKODA, Model Year: 2014, Model line: FABIA, Model: SKODA FABIA 2014 3.G / NJPages: 216, PDF Size: 30.9 MB
Page 29 of 216
Downloaded from www.Manualslib.com manuals search engine Operation
Cockpit
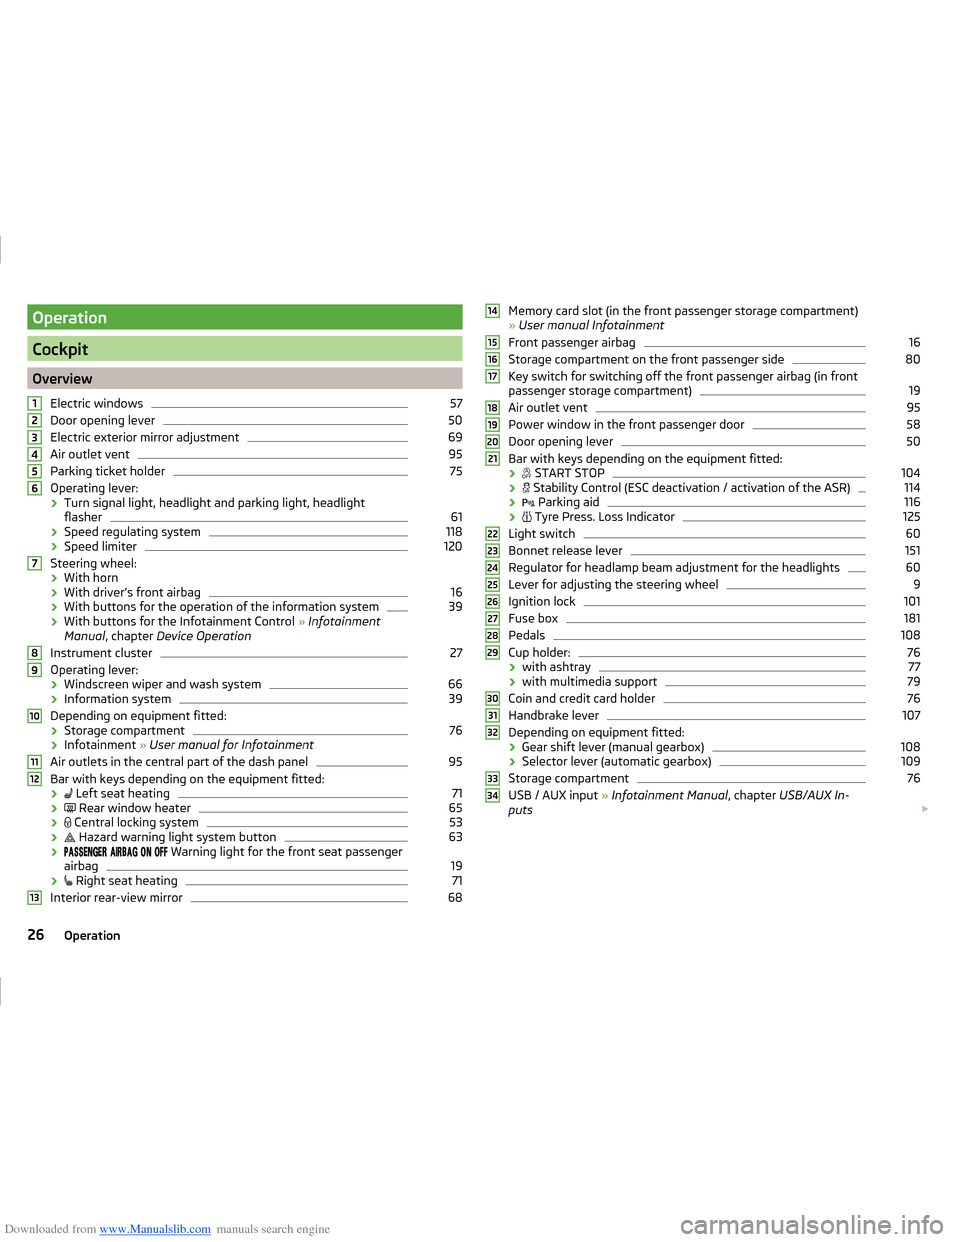
OverviewElectric windows
57
Door opening lever
50
Electric exterior mirror adjustment
69
Air outlet vent
95
Parking ticket holder
75
Operating lever:
› Turn signal light, headlight and parking light, headlight
flasher
61
› Speed regulating system
118
›Speed limiter
120
Steering wheel:
› With horn
› With driver’s front airbag
16
›With buttons for the operation of the information system
39
›With buttons for the Infotainment Control
» Infotainment
Manual , chapter Device Operation
Instrument cluster
27
Operating lever: › Windscreen wiper and wash system
66
›Information system
39
Depending on equipment fitted:
› Storage compartment
76
›Infotainment
» User manual for Infotainment
Air outlets in the central part of the dash panel
95
Bar with keys depending on the equipment fitted: ›
Left seat heating
71
›
Rear window heater
65
›
Central locking system
53
›
Hazard warning light system button
63
›
Warning light for the front seat passenger
airbag
19
›
Right seat heating
71
Interior rear-view mirror
6812345678910111213Memory card slot (in the front passenger storage compartment)
» User manual Infotainment
Front passenger airbag16
Storage compartment on the front passenger side
80
Key switch for switching off the front passenger airbag (in front
passenger storage compartment)
19
Air outlet vent
95
Power window in the front passenger door
58
Door opening lever
50
Bar with keys depending on the equipment fitted:
›
START STOP
104
›
Stability Control (ESC deactivation / activation of the ASR)
114
›
Parking aid
116
›
Tyre Press. Loss Indicator
125
Light switch
60
Bonnet release lever
151
Regulator for headlamp beam adjustment for the headlights
60
Lever for adjusting the steering wheel
9
Ignition lock
101
Fuse box
181
Pedals
108
Cup holder:
76
› with ashtray
77
›with multimedia support
79
Coin and credit card holder
76
Handbrake lever
107
Depending on equipment fitted:
› Gear shift lever (manual gearbox)
108
›Selector lever (automatic gearbox)
109
Storage compartment
76
USB / AUX input
» Infotainment Manual , chapter USB/AUX In-
puts
14151617181920212223242526272829303132333426Operation
Page 37 of 216
Downloaded from www.Manualslib.com manuals search engine Seek help from a specialist garage.
Glow plug system (diesel engine)Read and observe
on page 32 first.
flashes - there is a fault in the engine management system. The system
makes possible operation emergency mode - there may be a noticeable reduc-
tion in engine performance.
There is a fault in the glow plug system if the warning light
does not come
on or illuminates continuously.
Seek help from a specialist garage.
Engine performance check (petrol engine)
Read and observe
on page 32 first.
illuminates - there is a fault in the engine management system. The system
makes possible operation emergency mode - there may be a noticeable reduc-
tion in engine performance.
Seek help from a specialist garage.
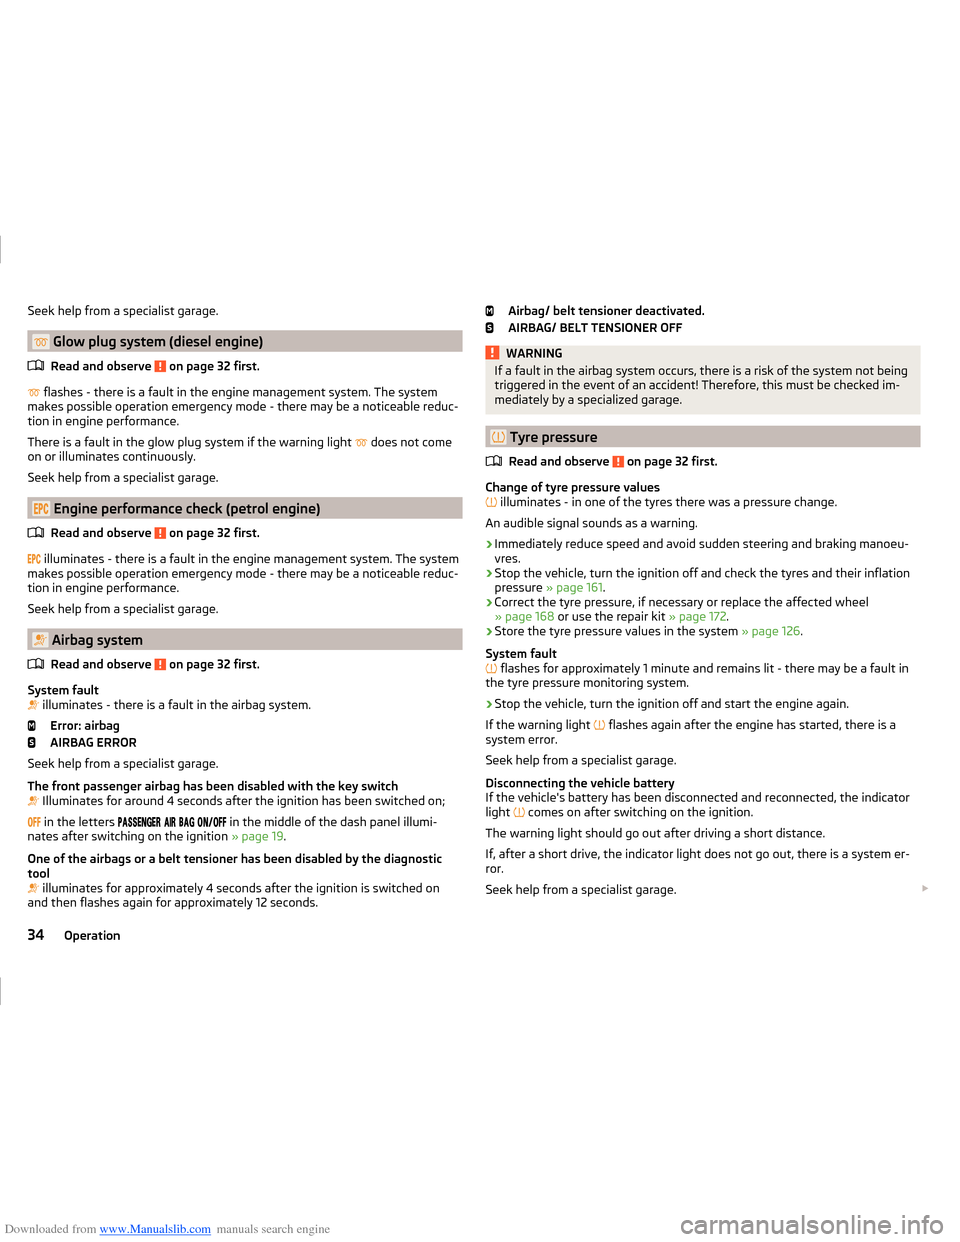
Airbag system
Read and observe
on page 32 first.
System fault
illuminates - there is a fault in the airbag system.
Error: airbag
AIRBAG ERROR
Seek help from a specialist garage.
The front passenger airbag has been disabled with the key switch
Illuminates for around 4 seconds after the ignition has been switched on;
in the letters
in the middle of the dash panel illumi-
nates after switching on the ignition » page 19.
One of the airbags or a belt tensioner has been disabled by the diagnostic
tool
illuminates for approximately 4 seconds after the ignition is switched on
and then flashes again for approximately 12 seconds.
Airbag/ belt tensioner deactivated.
AIRBAG/ BELT TENSIONER OFFWARNINGIf a fault in the airbag system occurs, there is a risk of the system not being
triggered in the event of an accident! Therefore, this must be checked im-
mediately by a specialized garage.
Tyre pressure
Read and observe
on page 32 first.
Change of tyre pressure values
illuminates - in one of the tyres there was a pressure change.
An audible signal sounds as a warning.
›
Immediately reduce speed and avoid sudden steering and braking manoeu-
vres.
›
Stop the vehicle, turn the ignition off and check the tyres and their inflation
pressure » page 161 .
›
Correct the tyre pressure, if necessary or replace the affected wheel
» page 168 or use the repair kit » page 172.
›
Store the tyre pressure values in the system » page 126.
System fault
flashes for approximately 1 minute and remains lit - there may be a fault in
the tyre pressure monitoring system.
›
Stop the vehicle, turn the ignition off and start the engine again.
If the warning light flashes again after the engine has started, there is a
system error.
Seek help from a specialist garage.
Disconnecting the vehicle battery
If the vehicle's battery has been disconnected and reconnected, the indicator
light comes on after switching on the ignition.
The warning light should go out after driving a short distance.
If, after a short drive, the indicator light does not go out, there is a system er-
ror.
Seek help from a specialist garage.
34Operation
Page 50 of 216
Downloaded from www.Manualslib.com manuals search engine SmartGate
Introduction
This chapter contains information on the following subjects:
Connection to SmartGate using Wi-Fi
47
Connection using Wi-Fi direct to SmartGate
48
SmartGate web interface
48
SmartGate constitutes a system, which transmit certain driving data (such as
fuel consumption, speed or similar) via Wi-Fi and Wi-Fi Direct.
The ŠKODA compatible communications device (e.g. phone, tablet, notebook)
offer the possibility to further transmit the received data.
More information on available applications, a list of compatible communication
devices and on SmartGate, can be found on the ŠKODA Internet pages.
Use the Service App application to update the SmartGate software. You can
fine information on this application on the ŠKODA Internet pages.
WARNING■ The national legal regulations for using mobile communication devices in
a vehicle must be observed.■
Do not fit the equipment or mounts to be connected onto airbag covers
or within the immediate deployment range of the airbags.
■
Never leave a connected device in the deployment area of an airbag, on a
seat, on the dash panel or any another area, from which it can be thrown
during a sudden braking manoeuvre, an accident or a collision - there is a
risk of injury.
CAUTION
ŠKODA accepts no responsibility for any problems caused by incompatibility or
improper functioning of the communication equipment and the applications.Note■ The ŠKODA applications, support communications devices with the Android
operating system version 4.x.x and later and iOS 7.x.x and higher.■
With SmartGate, a device can be connected to two ongoing ŠKODA applica-
tions, possibly two devices, each with a respective current ŠKODA application.
■
If you have forgotten your password for the connection to SmartGate, Smart-
Gate must be reset to factory settings in a specialised workshop.
Connection to SmartGate using Wi-Fi
Read and observe
and on page 47 first.
For a successful connection the following conditions must be met. Wi-Fi is turned on in the device to be connected.
The ignition is switched on.
Connection set-up
›
Can enable the connected device to search for available Wi-Fi networks (see
operating instructions for the connected device).
›
In the menu of the detected networks select “SmartGate_...” 1)
or “DIRECT
SmartGate_...” 1)
.
›
Enter the password (the password is preset at the factory to the complete
Vehicle Identification Number - enter capital letters).
Disconnection
The connection can be switched off in one of the following ways.
› By disconnecting the connected device from SmartGate.
› By turning off the Wi-Fi in the connected device.
› By switching off the ignition for more than 5 s (for vehicles with starter but-
ton - by turning off the engine and opening the driver's door).
Automatic connection
If the communication device once had a connection with SmartGate, then the
connection is automatically restored under the following conditions.
Wi-Fi is turned on in the device to be connected.
The ignition is switched on.
The device to be connected stores the password required for the connec-
tion check.
1)
The last six symbols of the VIN vehicle identification number of your vehicle are displayed at position ....
47Information system
Page 52 of 216
Downloaded from www.Manualslib.com manuals search engine Unlocking and opening
Unlocking and locking
Introduction
This chapter contains information on the following subjects:
Locking/unlocking using the key via the lock cylinder
50
Unlocking/locking with the remote control key
50
Opening/closing the door
50
Unlocking / locking - KESSY
51
SafeLock
52
Individual settings
52
Locking/unlocking the vehicle with the central locking button
53
Child safety lock
53
Malfunctions
53
Your car is equipped with a central locking system.
The central locking system allows you to lock and unlock all doors, the fuel fill-
er flap and boot lid at the same time.
Depending on the equipment configuration, the following is true after
unlocking
› The turn signal lights flash twice as confirmation that the vehicle has been
unlocked.
› The doors, the boot lid and the fuel filler flap are unlocked.
› The interior light, which is switched by the door contact, comes on.
› The SafeLock system is switched off.
› The warning icon in the driver door stops flashing.
› The anti-theft alarm system is deactivated.
If you unlock the vehicle and do not open a door or the boot lid within the next
45 seconds, the vehicle will lock again automatically and the SafeLock system
or anti-theft alarm system will be switched on. This function is intended to
prevent the car being unlocked unintentionally.
Depending on the equipment configuration, the following is true after
locking
› The turn signal lights flash once as confirmation that the vehicle has been
locked.
› The doors, the boot lid and the fuel filler flap are locked.
›The interior light switched by the door contact goes off.
› The SafeLock system is switched on.
› The warning light in the driver door begins flashing.
› The anti-theft alarm system is activated.
If the doors or the boot lid remain open after the vehicle doors have been
locked, the turn signal lights do not flash until they have been closed.WARNING■ Never leave the key in the vehicle when you exit the vehicle. Unauthor-
ized persons, such as children, for example, could lock the car, turn on the
ignition or start the engine - danger of injury and accidents!■
When leaving the vehicle, never leave people who are not completely in-
dependent, such as children, unattended in the vehicle. The children might,
for example, release the handbrake or take the vehicle out of gear. The ve-
hicle could then start to move – risk of accident! These individuals would
possibly not be able to leave the vehicle on their own or to help them-
selves. At very high or very low temperatures can be fatal!
CAUTION
■ Each key contains electronic components; therefore it must be protected
against moisture and severe shocks.■
Keep the groove of the keys absolutely clean. Impurities (textile fibres, dust,
etc.) impair the function of the locking cylinder and ignition lock.
■
The battery must be replaced if the central locking or anti-theft alarm system
does react to the remote control at less than approx. 3 metres away
» page 177 .
■
Always check that the vehicle is locked before leaving it.
■
If the driver's door has been opened, the vehicle cannot be locked.
Note
In the event of an accident in which the airbags are deployed, the locked doors
are automatically unlocked in order to enable rescuers to gain access to the
vehicle.49Unlocking and opening
Page 56 of 216
Downloaded from www.Manualslib.com manuals search engine Automatic locking/unlocking
All doors are locked from a speed of around 15 km/h. The button in the handle
of the boot lid is deactivated.
If the ignition key is withdrawn, the car is then automatically unlocked again. It
is also possible to unlock the vehicle by pressing the central locking button
.
Locking/unlocking the vehicle with the central locking button
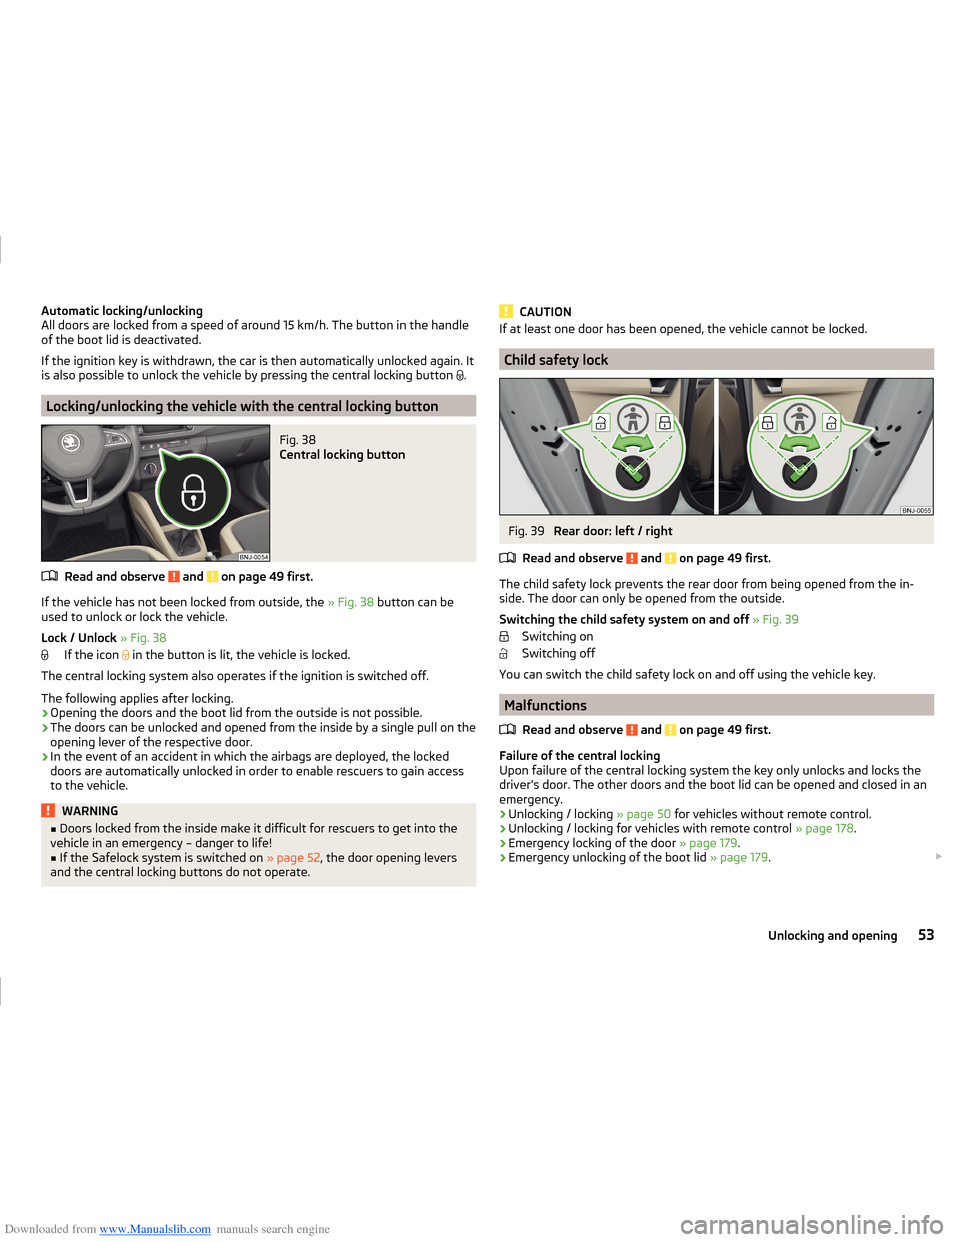
Fig. 38
Central locking button
Read and observe and on page 49 first.
If the vehicle has not been locked from outside, the » Fig. 38 button can be
used to unlock or lock the vehicle.
Lock / Unlock » Fig. 38
If the icon in the button is lit, the vehicle is locked.
The central locking system also operates if the ignition is switched off.
The following applies after locking.
› Opening the doors and the boot lid from the outside is not possible.
› The doors can be unlocked and opened from the inside by a single pull on the
opening lever of the respective door.
› In the event of an accident in which the airbags are deployed, the locked
doors are automatically unlocked in order to enable rescuers to gain access
to the vehicle.
WARNING■ Doors locked from the inside make it difficult for rescuers to get into the
vehicle in an emergency – danger to life!■
If the Safelock system is switched on » page 52, the door opening levers
and the central locking buttons do not operate.
CAUTIONIf at least one door has been opened, the vehicle cannot be locked.
Child safety lock
Fig. 39
Rear door: left / right
Read and observe
and on page 49 first.
The child safety lock prevents the rear door from being opened from the in- side. The door can only be opened from the outside.
Switching the child safety system on and off » Fig. 39
Switching on
Switching off
You can switch the child safety lock on and off using the vehicle key.
Malfunctions
Read and observe
and on page 49 first.
Failure of the central locking
Upon failure of the central locking system the key only unlocks and locks the
driver's door. The other doors and the boot lid can be opened and closed in an
emergency.
› Unlocking / locking
» page 50 for vehicles without remote control.
› Unlocking / locking for vehicles with remote control
» page 178.
› Emergency locking of the door
» page 179.
› Emergency unlocking of the boot lid
» page 179.
53Unlocking and opening
Page 69 of 216
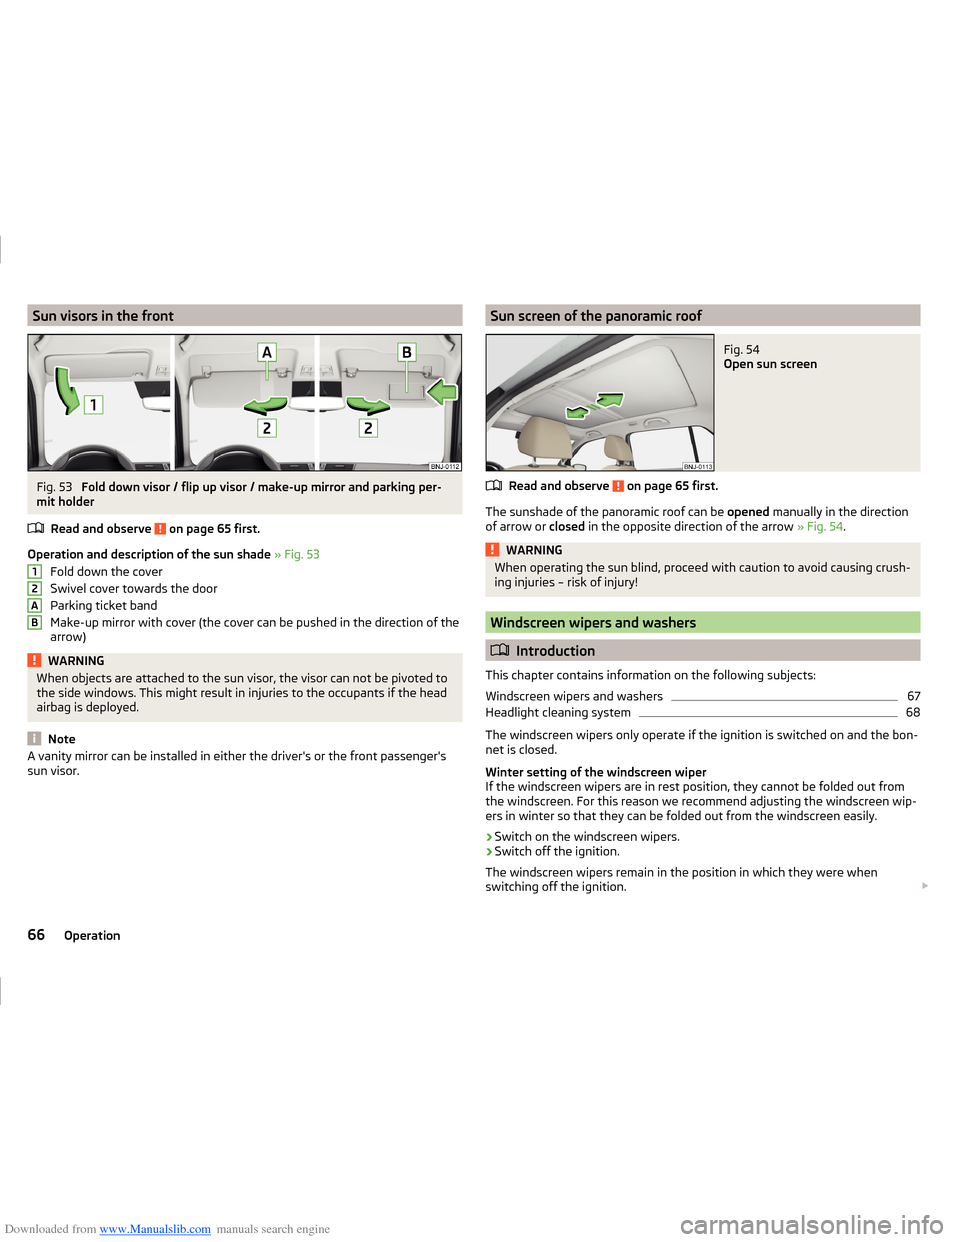
Downloaded from www.Manualslib.com manuals search engine Sun visors in the frontFig. 53
Fold down visor / flip up visor / make-up mirror and parking per-
mit holder
Read and observe
on page 65 first.
Operation and description of the sun shade » Fig. 53
Fold down the cover
Swivel cover towards the door
Parking ticket band
Make-up mirror with cover (the cover can be pushed in the direction of the
arrow)
WARNINGWhen objects are attached to the sun visor, the visor can not be pivoted to
the side windows. This might result in injuries to the occupants if the head
airbag is deployed.
Note
A vanity mirror can be installed in either the driver's or the front passenger's
sun visor.12ABSun screen of the panoramic roofFig. 54
Open sun screen
Read and observe on page 65 first.
The sunshade of the panoramic roof can be opened manually in the direction
of arrow or closed in the opposite direction of the arrow » Fig. 54.
WARNINGWhen operating the sun blind, proceed with caution to avoid causing crush-
ing injuries – risk of injury!
Windscreen wipers and washers
Introduction
This chapter contains information on the following subjects:
Windscreen wipers and washers
67
Headlight cleaning system
68
The windscreen wipers only operate if the ignition is switched on and the bon-
net is closed.
Winter setting of the windscreen wiper
If the windscreen wipers are in rest position, they cannot be folded out from
the windscreen. For this reason we recommend adjusting the windscreen wip-
ers in winter so that they can be folded out from the windscreen easily.
› Switch on the windscreen wipers.
› Switch off the ignition.
The windscreen wipers remain in the position in which they were when
switching off the ignition.
66Operation
Page 78 of 216
Downloaded from www.Manualslib.com manuals search engine WARNING (Continued)■No objects should be placed in the storage compartments nor in the
drinks holders; the vehicle occupants could be endangered if there is sud-
den braking or the vehicle collides with something.■
Ash, cigarettes, cigars and the like. may only be placed in the ashtray!
Car park ticket holder
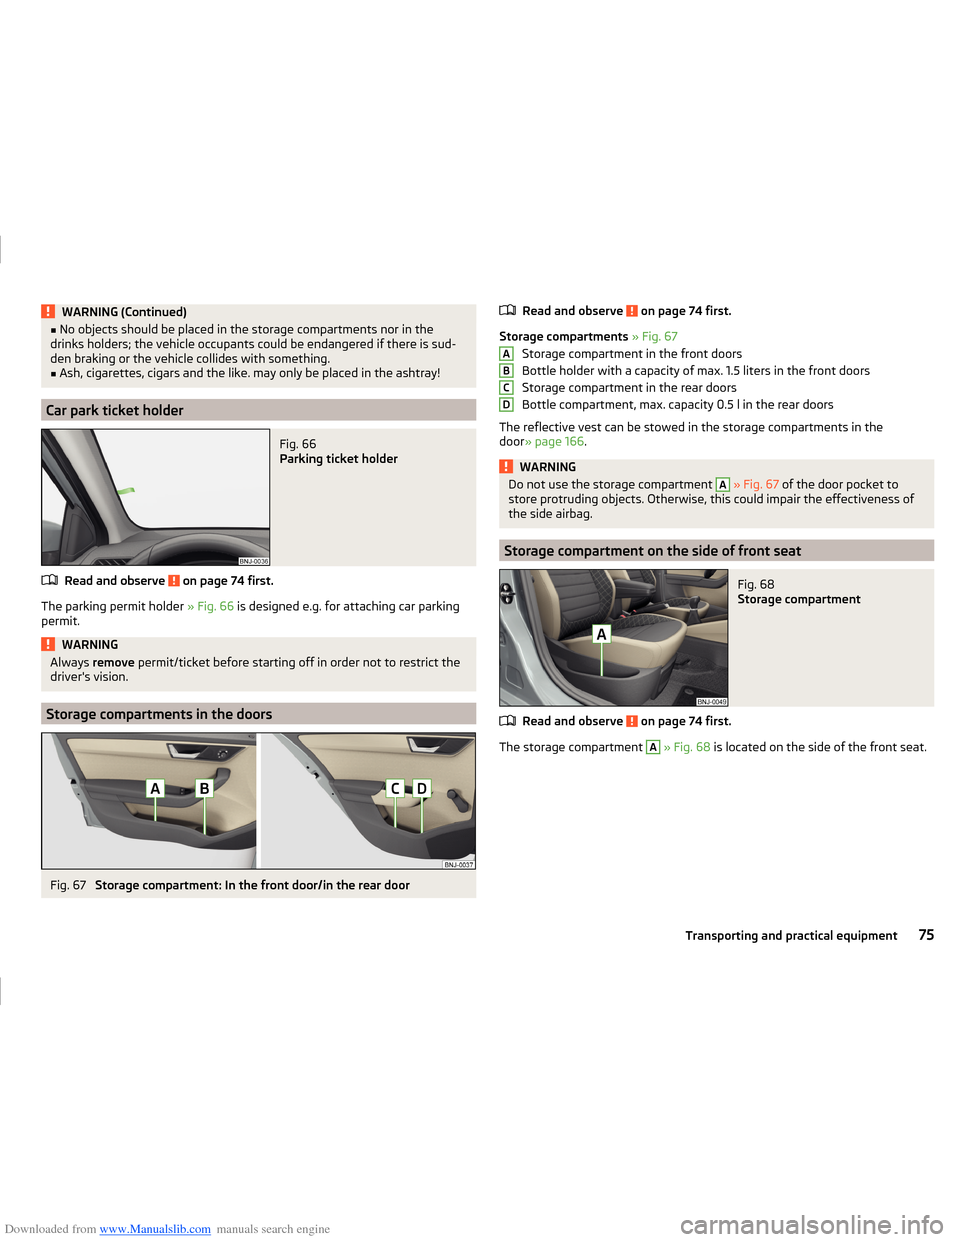
Fig. 66
Parking ticket holder
Read and observe on page 74 first.
The parking permit holder » Fig. 66 is designed e.g. for attaching car parking
permit.
WARNINGAlways remove permit/ticket before starting off in order not to restrict the
driver's vision.
Storage compartments in the doors
Fig. 67
Storage compartment: In the front door/in the rear door
Read and observe on page 74 first.
Storage compartments » Fig. 67
Storage compartment in the front doors
Bottle holder with a capacity of max. 1.5 liters in the front doors
Storage compartment in the rear doors
Bottle compartment, max. capacity 0.5 l in the rear doors
The reflective vest can be stowed in the storage compartments in the
door » page 166 .
WARNINGDo not use the storage compartment A » Fig. 67 of the door pocket to
store protruding objects. Otherwise, this could impair the effectiveness of
the side airbag.
Storage compartment on the side of front seat
Fig. 68
Storage compartment
Read and observe on page 74 first.
The storage compartment
A
» Fig. 68 is located on the side of the front seat.
ABCD75Transporting and practical equipment
Page 86 of 216
Downloaded from www.Manualslib.com manuals search engine Luggage compartment
Introduction
This chapter contains information on the following subjects:
Fastening elements
84
Fixing nets
84
Hooks
85
Storage compartments in the luggage compartment
85
Luggage compartment cover
86
Other positions of the luggage compartment cover
86
Roll-up cover
87
Storage compartments under the floor
87
Cargo element
88
Flexible storage compartment
88
Class N1 vehicles
88
Please observe the following for the purpose of maintaining good handling
characteristics of your vehicle:
›
Distribute loads as evenly as possible.
›
Place heavy objects as far forward as possible.
›
Attach the items of luggage to the lashing eyes or by using the fixing nets
» page 84 .
In the event of an accident, even small and light objects gain so much kinetic energy that they can cause severe injuries.
The magnitude of the kinetic energy is dependent on the speed at which the
vehicle is travelling and the weight of the object.
Example: In the event of a frontal collision at a speed of 50 km/h, an object
weighing 4.5 kg produces energy corresponding to 20 times its own weight.
This means that it results in a weight of approx. 90 kg “ ”.
Luggage compartment light
The warning light turns on when tailgate is opened.
The warning light turns off when the tailgate is closed.
If the boot lid is open and the ignition switched off, the light will extinguish
automatically after around 10 minutes.
WARNING■ Always store transported objects in the boot and attach them to the lash-
ing eyes.■
Loose objects can be thrown forward during a sudden manoeuvre or in
case of an accident and can injure the occupants or other road users.
■
Loose objects could hit a deployed airbag and injure occupants – risk to
life!
■
Please note that the handling properties of the vehicle may be affected
when transporting heavy objects as the centre of gravity can be shifted –
risk of accident. The speed and style of driving must be adjusted according-
ly.
■
If the items of luggage or objects are attached to the lashing eyes with
unsuitable or damaged lashing straps, injuries can occur in the event of
braking manoeuvres or accidents. To prevent items of luggage from moving
around, always use suitable lashing straps that are firmly attached to the
lashing eyes.
■
Items carried in the luggage compartment must be stowed in such a way
that no objects are able to slip forward under sudden driving manoeuvres
or braking – risk of injury.
■
When transporting objects in the luggage compartment that has been en-
larged by folding the rear seats forward, ensure the safety of the passen-
gers transported on the other rear seats » page 10.
■
Do not drive with the luggage compartment lid open or unlatched, other-
wise exhaust gases may get into the interior of the vehicle – risk of poison-
ing!
■
Do not exceed the permissible axle loads and permissible gross weight of
the vehicle – risk of accident!
■
Do not transport people in the boot!
CAUTION
■ Please ensure that the heating elements for the rear window heater are not
damaged as a result of abrasive objects.■
Tyre pressure must be adjusted to the load » page 161.
83Transporting and practical equipment
Page 141 of 216
Downloaded from www.Manualslib.com manuals search engine any other agreements. You should keep the confirmed warranty certificate and
the receipt for these accessories for this period, so that the commencement of
the warranty term may be verified.
In addition, ŠKODA Service Partners also stock a range of suitable car care
products as well as those parts which are subject to natural wear and tear,
such as tyres, batteries, bulbs and wiper blades.
Note
The accessories authorized by ŠKODA AUTO a.s. will be offered by the ŠKODA
Partners in all countries where ŠKODA AUTO a.s. has a sales and service net- work. This will usually be in the form of a printed catalogue of Original ŠKODA
Accessories, in the form of separate printed brochures or in the form of offers
for ŠKODA Genuine Accessories on the ŠKODA Partner's website.
Spoiler
Read and observe
on page 136 first.
If your new vehicle is fitted with a spoiler on the front bumper in combination
with the spoiler on the luggage compartment lid, then the following instruc-
tions must be adhered to.
› For safety reasons the vehicle must only ever be equipped with a spoiler on
the front bumper in combination with the associated spoiler on the tailgate.
› A spoiler cannot be fitted alone on the front bumper nor in combination with-
out a spoiler on the tailgate or in combination with an inappropriate spoiler
on the tailgate.
› We recommend that you consult a ŠKODA Service Partner for any repairs, re-
placement, fitting or removal of spoilers.
WARNING■ Work not properly performed on the spoilers on your vehicle can result in
faults - there is a risk of an accident and serious injury.■
If a front spoiler, full wheel trim, etc. is mounted retrospectively, it must
be ensured that the air supply to the front wheel brakes is not reduced.
The front brakes may overheat, which can have a negative impact on the
functioning of the braking system – there is a risk of an accident.
Component protection
Read and observe
on page 136 first.
Some electronic vehicle components (such as the instrument cluster) are fac-
tory-equipped with component protection.
Component protection has been developed as a protection mechanism for the
following situations.
› Impairment of factory- or garage-fitted electronic components after installa-
tion in another vehicle (for example, after a theft).
› Impairment of electronic components used outside the vehicle.
› The possibility of a legitimate installation or change of electronic compo-
nents for repairs at a specialist garage.
The activated component protection can be realized by functional limitations
of the specific electronic component. Seek help from a specialist garage.
Airbags
Read and observe
on page 136 first.
WARNING■Adjustments, repairs and modifications which have been carried out un-
professionally can cause damage, operational faults, and can also seriously
impair the effectiveness of airbag system – there is the risk of an accident
and fatal injury.■
A change in the suspension of the vehicle including the use of non-ap-
proved wheels and tyre combinations can alter the functioning of the air-
bag system - there is a risk of accident and fatal injury.
WARNINGInformation on the use of the airbag system■Never install any airbag parts into the vehicle that have been removed
from old cars or have been recycled.■
Never fit damaged airbag parts to a vehicle. The airbags may then not be
triggered properly or not at all in the event of an accident.
138General Maintenance
Page 203 of 216
Downloaded from www.Manualslib.com manuals search engine Index
Numbers and Symbols
12-volt power outlet
78
A
abroad lead-free petrol
148
Abroad Headlights
64
ABS Operation
115
Warning light33
Acceptance and recycling of used vehicles139
Accessories136
Adjusting Exterior mirrors
69
headrests70
Seat70
Steering wheel9
Adjusting the seats8
Adjustment Headlight beam
60
Adjustments and technical changes Spoiler
138
Adjustments and technical modifications Airbags
138
Advance warning/emergency braking Warning light
38
Air-conditioning system Air outlet vents
95
Airbag14
Adjustments and impairment of the airbag sys- tem
138
Deactivating18
Deployment15
Front airbag16
Head airbag18
Side airbag17
Switching off the front passenger airbag19
Warning light34
Airbag system14
Air conditioning94
Climatronic97
manual air conditioning97
Recirculated air mode96
Air outlet vents95
Alarm Switching off
54
Triggering54
Alcantara cleaning
145
Anodized parts Refer to vehicle maintenance
142
Anti-lock braking system (ABS)115
Anti-theft alarm system Activating/deactivating
54
Trailer134
Anti-theft wheel bolts 169
Armrest72
artificial leather145
Ashtray77
Assembling the bar ball, Step 1
129
bar ball, Step 2130
Assist systems114
Auto-check control39
Automatic driving lamp control61
Automatic gearbox Selector lever-emergency unlocking
179
Selector lever lock110
Starting-off and driving111
Tiptronic110
Using the selector lever109
Automatic gearbox modes109
Automatic load deactivation159
automatic transmission selector lever lock defect
110
Automatic transmission108
Kickdown111
Selector lever lock110
Automatic Transmission Malfunction
36
Warning light36
warning messages36
AUX82
Avoiding damage to your vehicle113
B
Ball head Check fitting
130
Ready position128, 129
Battery In the remote control key
177
Belts11
Belt tensioners14
Bicycle carrier90
Bonnet Closing
151
Opening151
Boot Class N1 vehicles
88
Hooks85
See Boot lid56
Boot lid automatic locking
56
Closing56
Opening56
Brake Assist (HBA)115
Brake booster106
brake fluid specification
156
Brake fluid155
Checking156
Information messages32
Brake pedal (automatic transmission) Indicator light
35
200Index