engine oil SKODA FABIA 2014 3.G / NJ Operating Instruction Manual
[x] Cancel search | Manufacturer: SKODA, Model Year: 2014, Model line: FABIA, Model: SKODA FABIA 2014 3.G / NJPages: 216, PDF Size: 30.9 MB
Page 130 of 216
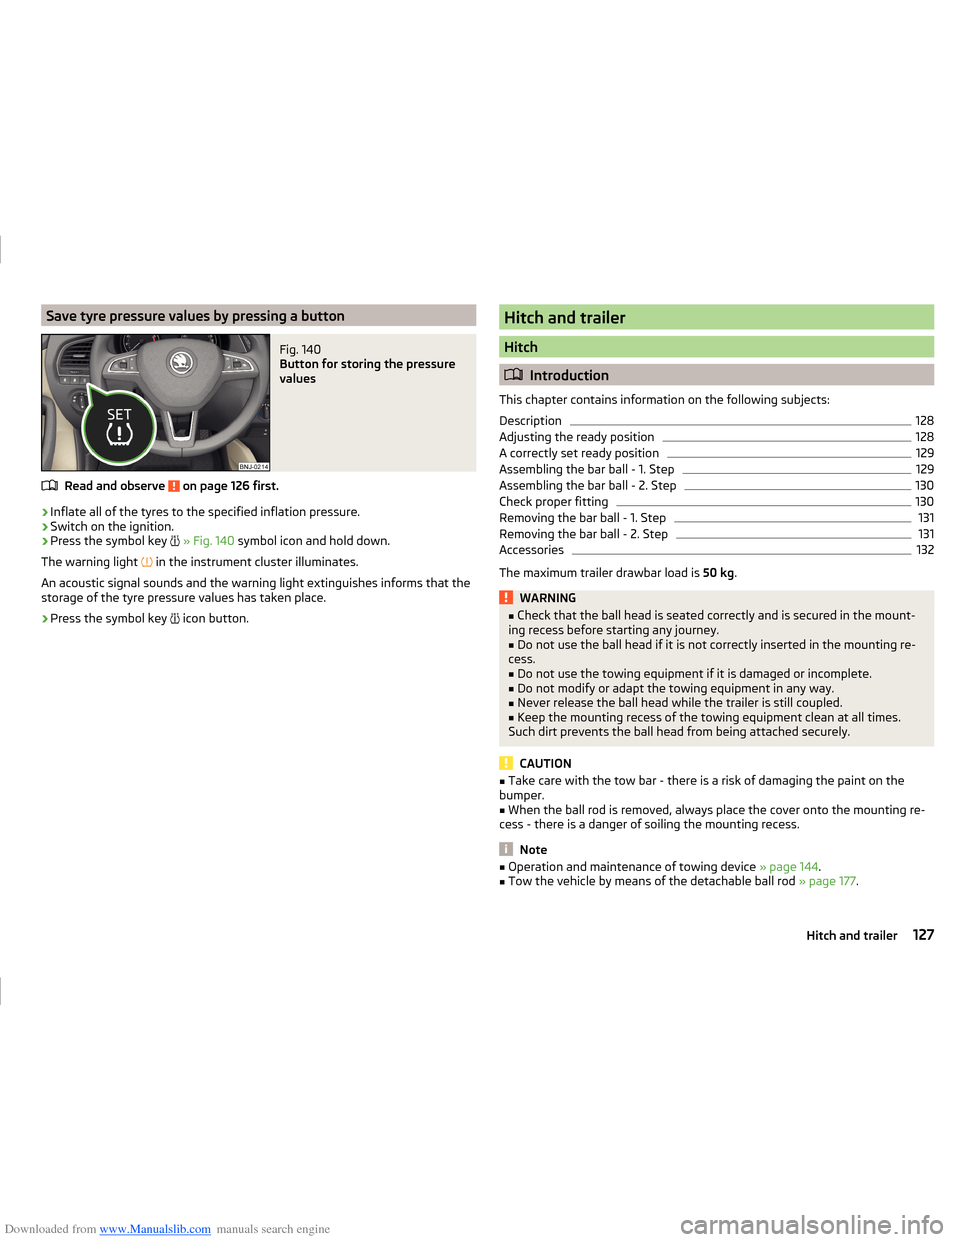
Downloaded from www.Manualslib.com manuals search engine Save tyre pressure values by pressing a buttonFig. 140
Button for storing the pressure
values
Read and observe on page 126 first.
›
Inflate all of the tyres to the specified inflation pressure.
›
Switch on the ignition.
›
Press the symbol key
» Fig. 140 symbol icon and hold down.
The warning light in the instrument cluster illuminates.
An acoustic signal sounds and the warning light extinguishes informs that the
storage of the tyre pressure values has taken place.
›
Press the symbol key icon button.
Hitch and trailer
Hitch
Introduction
This chapter contains information on the following subjects:
Description
128
Adjusting the ready position
128
A correctly set ready position
129
Assembling the bar ball - 1. Step
129
Assembling the bar ball - 2. Step
130
Check proper fitting
130
Removing the bar ball - 1. Step
131
Removing the bar ball - 2. Step
131
Accessories
132
The maximum trailer drawbar load is 50 kg.
WARNING■
Check that the ball head is seated correctly and is secured in the mount-
ing recess before starting any journey.■
Do not use the ball head if it is not correctly inserted in the mounting re-
cess.
■
Do not use the towing equipment if it is damaged or incomplete.
■
Do not modify or adapt the towing equipment in any way.
■
Never release the ball head while the trailer is still coupled.
■
Keep the mounting recess of the towing equipment clean at all times.
Such dirt prevents the ball head from being attached securely.
CAUTION
■ Take care with the tow bar - there is a risk of damaging the paint on the
bumper.■
When the ball rod is removed, always place the cover onto the mounting re-
cess - there is a danger of soiling the mounting recess.
Note
■ Operation and maintenance of towing device » page 144.■Tow the vehicle by means of the detachable ball rod » page 177.127Hitch and trailer
Page 139 of 216
Downloaded from www.Manualslib.com manuals search engine General Maintenance
Care and maintenance
Services, modifications and technical alterations
Introduction
This chapter contains information on the following subjects:
Vehicle operating under different weather conditions
136
Statutory checks
136
ŠKODA Service Partners
137
ŠKODA Original parts
137
ŠKODA Original accessories
137
Spoiler
138
Component protection
138
Airbags
138
Acceptance and recycling of used vehicles
139
The instructions and guidelines issued by ŠKODA AUTO a.s. must be observed
when making any modifications, repairs or technical changes to your vehicle.
Compliance with these guidelines and instructions is in the interest of the
roadworthiness and technical condition of your vehicle. The vehicle will comply
with road traffic regulations following the modifications, repairs and technical
changes.
Always consult a ŠKODA Partner » page 137before buying accessories or
parts, or before carrying out any modifications, repairs or technical alterations
to your vehicle.
WARNING■ Works on your vehicle, which have been carried out unprofessionally, can
cause operational faults – risk of accident!■
Interference on the electronic components and their software can lead to
operational faults. This interference can also impair not directly affected
systems because of the networking of the electronic components. The op-
erational safety of the vehicle may be at significant risk and parts may suf-
fer increased wear.
For the sake of the environmentTechnical documents regarding changes carried out on the vehicle must be
kept by the vehicle user, in order to be handed over to the recyclers later. This
ensures that vehicle recycling is in accordance with environmental regulations.
Note
■ We recommend only having these modifications, repairs and technical
changes performed by a specialist garage.■
Any damage caused by technical alterations made without the approval of
the manufacturer is excluded from the » Service schedule warranty.
■
The ŠKODA Partner cannot assume any liability for products which have not
been approved by ŠKODA AUTO a.s. even though these may be products with a
type approval or have been approved by a nationally recognised testing labo-
ratory.
■
We advise you only to use ŠKODA Original Accessories and ŠKODA Original
Parts which have been expressly approved for use on your vehicle. Reliability,
safety and suitability for your vehicle are guaranteed with these.
■
ŠKODA Original Accessories and ŠKODA Original Parts can be purchased from
a ŠKODA Partner who will also fit the purchased parts correctly.
Vehicle operating under different weather conditions
Read and observe
on page 136 first.
If you would like you operate your vehicle in countries other than its intended
weather conditions, you should contact a ŠKODA Partner.
They will advise you on certain precautions that should be taken to ensure the
full functioning of the vehicle as well as to prevent damage.
For example coolant and battery replacement or similar.
Statutory checks
Read and observe
on page 136 first.
Many countries have legislation requiring the operational reliability and road
worthiness and/or exhaust gas properties of a vehicle to be tested at specific
intervals. These tests can be carried out by workshops or testing stations that
have been legally authorised for this purpose.
136General Maintenance
Page 141 of 216
Downloaded from www.Manualslib.com manuals search engine any other agreements. You should keep the confirmed warranty certificate and
the receipt for these accessories for this period, so that the commencement of
the warranty term may be verified.
In addition, ŠKODA Service Partners also stock a range of suitable car care
products as well as those parts which are subject to natural wear and tear,
such as tyres, batteries, bulbs and wiper blades.
Note
The accessories authorized by ŠKODA AUTO a.s. will be offered by the ŠKODA
Partners in all countries where ŠKODA AUTO a.s. has a sales and service net- work. This will usually be in the form of a printed catalogue of Original ŠKODA
Accessories, in the form of separate printed brochures or in the form of offers
for ŠKODA Genuine Accessories on the ŠKODA Partner's website.
Spoiler
Read and observe
on page 136 first.
If your new vehicle is fitted with a spoiler on the front bumper in combination
with the spoiler on the luggage compartment lid, then the following instruc-
tions must be adhered to.
› For safety reasons the vehicle must only ever be equipped with a spoiler on
the front bumper in combination with the associated spoiler on the tailgate.
› A spoiler cannot be fitted alone on the front bumper nor in combination with-
out a spoiler on the tailgate or in combination with an inappropriate spoiler
on the tailgate.
› We recommend that you consult a ŠKODA Service Partner for any repairs, re-
placement, fitting or removal of spoilers.
WARNING■ Work not properly performed on the spoilers on your vehicle can result in
faults - there is a risk of an accident and serious injury.■
If a front spoiler, full wheel trim, etc. is mounted retrospectively, it must
be ensured that the air supply to the front wheel brakes is not reduced.
The front brakes may overheat, which can have a negative impact on the
functioning of the braking system – there is a risk of an accident.
Component protection
Read and observe
on page 136 first.
Some electronic vehicle components (such as the instrument cluster) are fac-
tory-equipped with component protection.
Component protection has been developed as a protection mechanism for the
following situations.
› Impairment of factory- or garage-fitted electronic components after installa-
tion in another vehicle (for example, after a theft).
› Impairment of electronic components used outside the vehicle.
› The possibility of a legitimate installation or change of electronic compo-
nents for repairs at a specialist garage.
The activated component protection can be realized by functional limitations
of the specific electronic component. Seek help from a specialist garage.
Airbags
Read and observe
on page 136 first.
WARNING■Adjustments, repairs and modifications which have been carried out un-
professionally can cause damage, operational faults, and can also seriously
impair the effectiveness of airbag system – there is the risk of an accident
and fatal injury.■
A change in the suspension of the vehicle including the use of non-ap-
proved wheels and tyre combinations can alter the functioning of the air-
bag system - there is a risk of accident and fatal injury.
WARNINGInformation on the use of the airbag system■Never install any airbag parts into the vehicle that have been removed
from old cars or have been recycled.■
Never fit damaged airbag parts to a vehicle. The airbags may then not be
triggered properly or not at all in the event of an accident.
138General Maintenance
Page 143 of 216
Downloaded from www.Manualslib.com manuals search engine Washing by handRead and observe
and on page 139 first.
Soften the dirt with plenty of water and rinse as much as you can of this off.
Clean the vehicle with a soft sponge, a washing glove or a washing brush.
Work from the top to the bottom - starting with the roof.
For stubborn dirt, agents specifically intended for this purpose are to be used.
Wash out the sponge or washing glove thoroughly at short intervals.
Clean wheels, door sills and similar parts last. Use a second sponge for such areas.
Give the vehicle a good rinse after washing it and dry it off using a chamois
leather.
WARNINGProtect your hands and arms from sharp-edged metal parts when cleaning
the underfloor or the inside of the wheel housings or the wheel trims – risk
of cuts!
CAUTION
■ Only apply slight pressure when cleaning the vehicle's paintwork.■Do not wash your vehicle in bright sunlight – there is a risk of paint damage.
Automatic car wash systems
Read and observe
and on page 139 first.
The usual precautionary measures must be taken before washing the vehicle
in an automatic car wash system (e.g. closing the windows including the slid-
ing/tilting roof, etc.).
If your vehicle is fitted with any particular attached parts, such as a spoiler,
roof rack system etc., it is best to consult the operator of the car wash system
beforehand.
The lips of the windscreen wiper rubbers must be cleaned and degreased with
cleaning agents especially formulated for the task after an automatic wash
with wax.
CAUTION■ Before driving through a car wash fold in the exterior mirrors - there is a risk
of damage.■
For vehicles with roof antenna the antenna rod should be unscrewed before
driving through a car wash - there is a risk of damage.
Washing with a high-pressure cleaner
Read and observe
and on page 139 first.
When washing the vehicle with a high-pressure cleaner, the instructions for
use of the equipment must be observed. This applies in particular to the pres-
sure used and to the spraying distance .
Maintain a sufficiently large distance to the parking aid sensors and soft mate-
rials such as rubber hoses or insulation material.
CAUTION
■ Do not aim the water jet directly at the lock cylinders or the door or opening
joints when washing the vehicle in the winter – there is a risk of freezing.■
The sensors of the parking aid can be sprayed only for a short time and there
must be a minimum distance of 10 cm - there is a risk of damage.
Note
See also Washing a vehicle with decorative film trim using a high-pressure
cleaner » page 142 .
Cleaning vehicle exterior
Introduction
This chapter contains information on the following subjects:
Vehicle paint work
141
Plastic parts
141
Rubber seals
141
Chrome and anodized parts
142
Decorative and protective foils
142
Windows and external mirrors
142
Headlight glasses
143
Door closing cylinder
143
Cavity protection
143
140General Maintenance
Page 145 of 216
Downloaded from www.Manualslib.com manuals search engine CAUTION■Do not treat the door seals or window guides with any cleaning agent.■An additional treatment of the seals can attack their protective coating and
road noise may be generated.
Chrome and anodized parts
Read and observe
and on page 141 first.
First clean the chrome parts and anodized parts with a damp cloth and thenpolish them with a soft, dry cloth.
If this method does not completely clean the parts, use cleaning products spe-
cially designed for this purpose.
CAUTION
■ Do not polish the chrome parts and anodized parts in a dusty environment -
risk of surface scratches.■
Never use aggressive cleaning agents or chemical solvents for these parts -
there is risk of damage.
Decorative and protective foils
Read and observe
and on page 141 first.
Wash the films with a mild soap solution and clean, warm water.
The following instructions must be observed for the high-pressure washing
the vehicle.
› The minimum distance between the nozzle and the vehicle body should be
50 cm.
› Keep the jet perpendicular to the film surface.
› The maximum water temperature is 50 °C.
› The maximum water pressure is 80 bar.
CAUTION
■
Never use aggressive cleaning agents or chemical solvents for the glued sur-
faces with films - there is a danger of film damage.■
Never use dirty cloths or chemical solvents for the glued surfaces with films -
there is a danger of damaging the film.
■
No ice scrapers should be used in the winter months to remove ice and snow
from the areas to which films have been applied. Do not remove frozen snow
or ice using other objects - there is a risk of damage to the film.
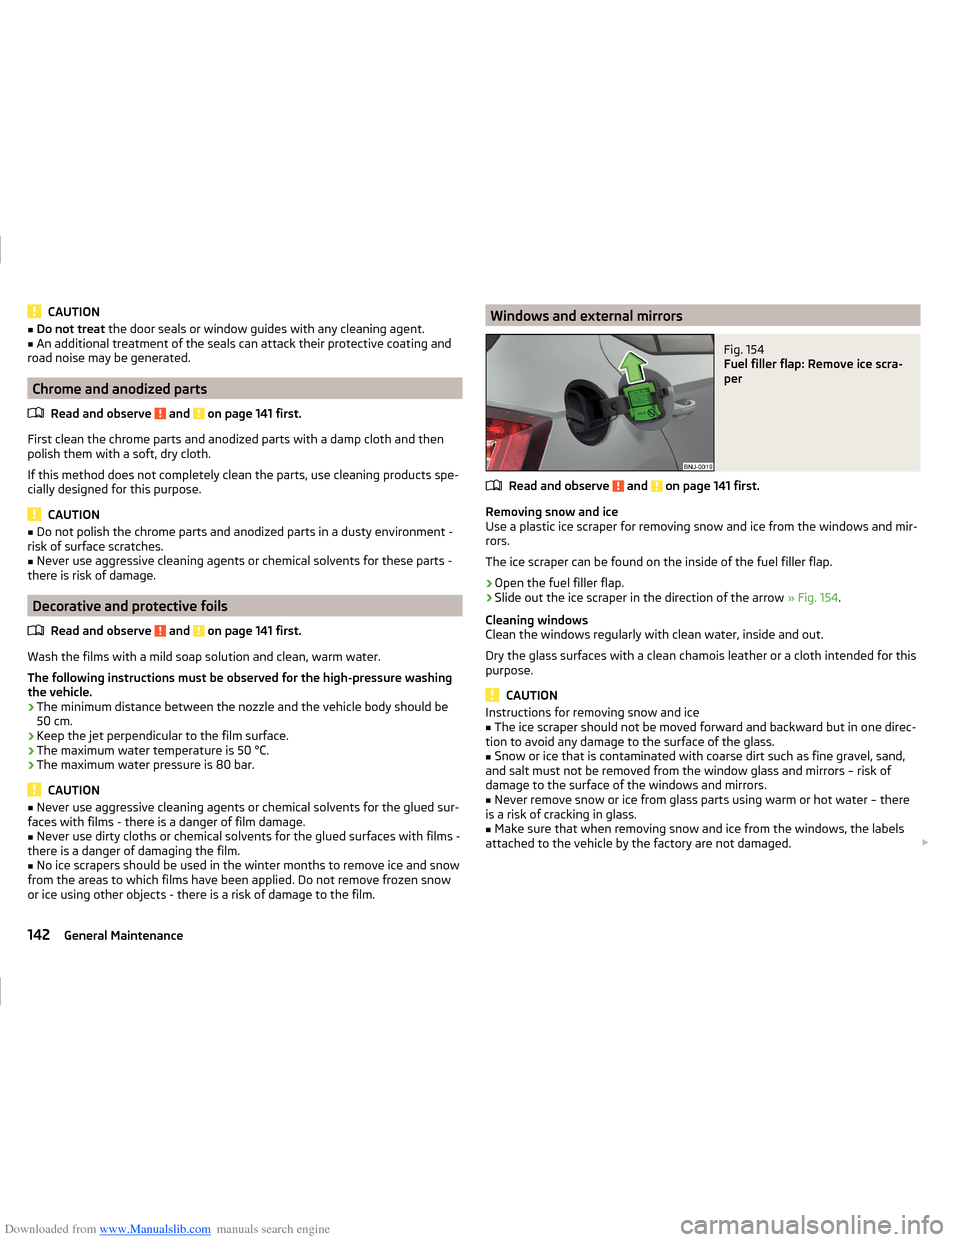
Windows and external mirrorsFig. 154
Fuel filler flap: Remove ice scra-
per
Read and observe and on page 141 first.
Removing snow and ice
Use a plastic ice scraper for removing snow and ice from the windows and mir-
rors.
The ice scraper can be found on the inside of the fuel filler flap.
›
Open the fuel filler flap.
›
Slide out the ice scraper in the direction of the arrow » Fig. 154.
Cleaning windows
Clean the windows regularly with clean water, inside and out.
Dry the glass surfaces with a clean chamois leather or a cloth intended for this
purpose.
CAUTION
Instructions for removing snow and ice■The ice scraper should not be moved forward and backward but in one direc-
tion to avoid any damage to the surface of the glass.■
Snow or ice that is contaminated with coarse dirt such as fine gravel, sand,
and salt must not be removed from the window glass and mirrors – risk of
damage to the surface of the windows and mirrors.
■
Never remove snow or ice from glass parts using warm or hot water – there
is a risk of cracking in glass.
■
Make sure that when removing snow and ice from the windows, the labels
attached to the vehicle by the factory are not damaged.
142General Maintenance
Page 147 of 216
Downloaded from www.Manualslib.com manuals search engine Towing device and mounting recessRead and observe
and on page 141 first.
Close the mounting recess with the cap to prevent any ingress of dirt.
In the event of dirt, clean the inner surfaces of the mounting recess and treat with a suitable preservative.
Before hitching a trailer check the ball head and apply a suitable grease where
necessary.
Fit the protective cap when stowing away the ball head to protect the luggage
compartment against dirt.
CAUTION
Apply grease to the inner part of the mounting recess. Make sure you do not
remove any grease.
Under-body protection
Read and observe
and on page 141 first.
The underside of your vehicle is already permanently protected by the factory
against chemical and mechanical influences.
It is not possible to guarantee that the protective coating will not suffer any
damage as the vehicle is driven.
We recommend that you have the protective coating under the body and on
the chassis inspected - preferably before the beginning and at the end of the
cold season.
WARNINGNever use additional underbody protection or anti-corrosion agents for ex-
haust pipes, catalytic converters, diesel particle filters or heat shields.
These substances could ignite when the engine reaches its operating tem-
perature - there is a risk of fire.Wiper blades
Read and observe
and on page 141 first.
Clean the wiper blades regularly with a glass cleaner. The wiper blades shouldbe cleaned with a sponge or cloth if they are heavily soiled by insect residues,
for example.
The wiper blades can become soiled with wax residues after washing in auto-
matic vehicle wash systems for example.
Interior care
Introduction
This chapter contains information on the following subjects:
Natural leather
145
Artificial leather, materials and Alcantara ®
145
Seat covers
146
Safety belts
146
We recommend using care products from ŠKODA Original Accessories that are
available from ŠKODA Partners. The instructions for use on the package must
be observed.
WARNING■ Care products may be harmful to your health if not used according to the
instructions.■
Always keep the automobile care products safe from people who are not
completely independent, e.g. children - there is a danger of poisoning!
■
Air fresheners and scents can be hazardous to heath when the tempera-
ture inside the vehicle is high.
CAUTION
■ Be sure to check clothing for colourfastness to avoid any damage or visible
stains on the material (leather), panels and textiles.■
Remove fresh stains such as those from ball-point pens, ink, lipstick, shoe
polish, etc., from the material (leather), panels and textiles as quickly as possi-
ble.
■
Do not attach scents and air fresheners to the dashboard – risk of damage to
the dash panel.
144General Maintenance
Page 148 of 216
Downloaded from www.Manualslib.com manuals search engine ■Do not attach any stickers to the filaments or glass antenna - there is risk of
damage.■
Do not clean the headlining with a brush – risk of damage to the lining sur-
face.
■
Cleaners containing solvents can damage the material being cleaned.
■
Apply only a small amount of the cleaning and care product.
For the sake of the environment
Used cans of vehicle care product represent hazardous waste that is harmful
to the environment. These must be disposed of in accordance with national
legislation.
Note
Because of the special tools and knowledge required, and to avoid any poten-
tial problems with the cleaning and care of the interior of your vehicle, we rec-
ommend that cleaning and care of the interior of your vehicle be carried out by
a ŠKODA Service Partner.
Natural leather
Read and observe
and on page 144 first.
The leather needs, depending on the strain placed on it, regular cleaning and
maintenance.
Dust and dirt in pores and creases cause abrasions on the surface and lead to
premature brittling of the leather surface. Therefore, they must be removed
regularly at short intervals with a cloth or vacuum cleaner.
Clean soiled leather surfaces with a cotton or woollen cloth lightly moistened
with water and then dry with a clean dry cloth »
.
Clean more severely soiled areas with a cloth soaked in a mild soap solution (2
tablespoons of natural soap to 1 litre of water).
To remove stains , use a cleaning agent specially designed for this purpose.
Treat the leather periodically with a suitable leather protector and use a skin
care cream with light blocker and impregnation after each cleaning.
CAUTION■ Ensure that the leather is not soaked through at any point during cleaning
and that no water gets into the stitching of the seams. The leather would then
become brittle and cracked.■
Avoid leaving the vehicle for lengthy periods in bright sunlight to avoid the
leather from bleaching. If the vehicle is parked in the open for lengthy periods,
protect the leather from direct sunlight by covering it.
■
The use of an additional mechanical steering wheel lock may damage the
leather surface of the steering wheel.
■
Some clothing materials, such as dark denim, do not have sufficient colour
fastness. This can cause damage or clearly visible discolouration to seat covers
even when treated correctly. This is particularly true for light-coloured uphols-
tery. This is not a defect in the seat cover, but poor colour fastness of the
clothing textiles.
■
Sharp-edged objects on items of clothing such as zip fasteners, rivets, sharp-
edged belts etc. may leave permanent scratches or signs of rubbing on the
surface or damage these. Damage of this nature cannot later be recognized as
a justified complaint.
Note
During the life of the vehicle, minor visible changes can occur on the leather
parts of the covers (e. g wrinkles or creases as a result of the stress of the cov-
ers).
Artificial leather, materials and Alcantara ®
Read and observe
and on page 144 first.
Synthetic leather
Clean the synthetic leather with a damp cloth.
If the synthetic leather does not come completely clean with this method, a
mild soap solution or specific cleaning agent must be used.
Fabrics
Clean upholstery cover materials and cloth trims on doors, boot cover, etc. us-
ing specific cleaning agents, e.g., dry foam.
Use a soft sponge, brush, or commercially available microfibre cloth.
Use a cloth and special detergent to clean the headlining.
Remove pilling and residues on upholstery with a brush.
Remove stubborn hair with a “cleaning glove”.
145Care and maintenance
Page 154 of 216
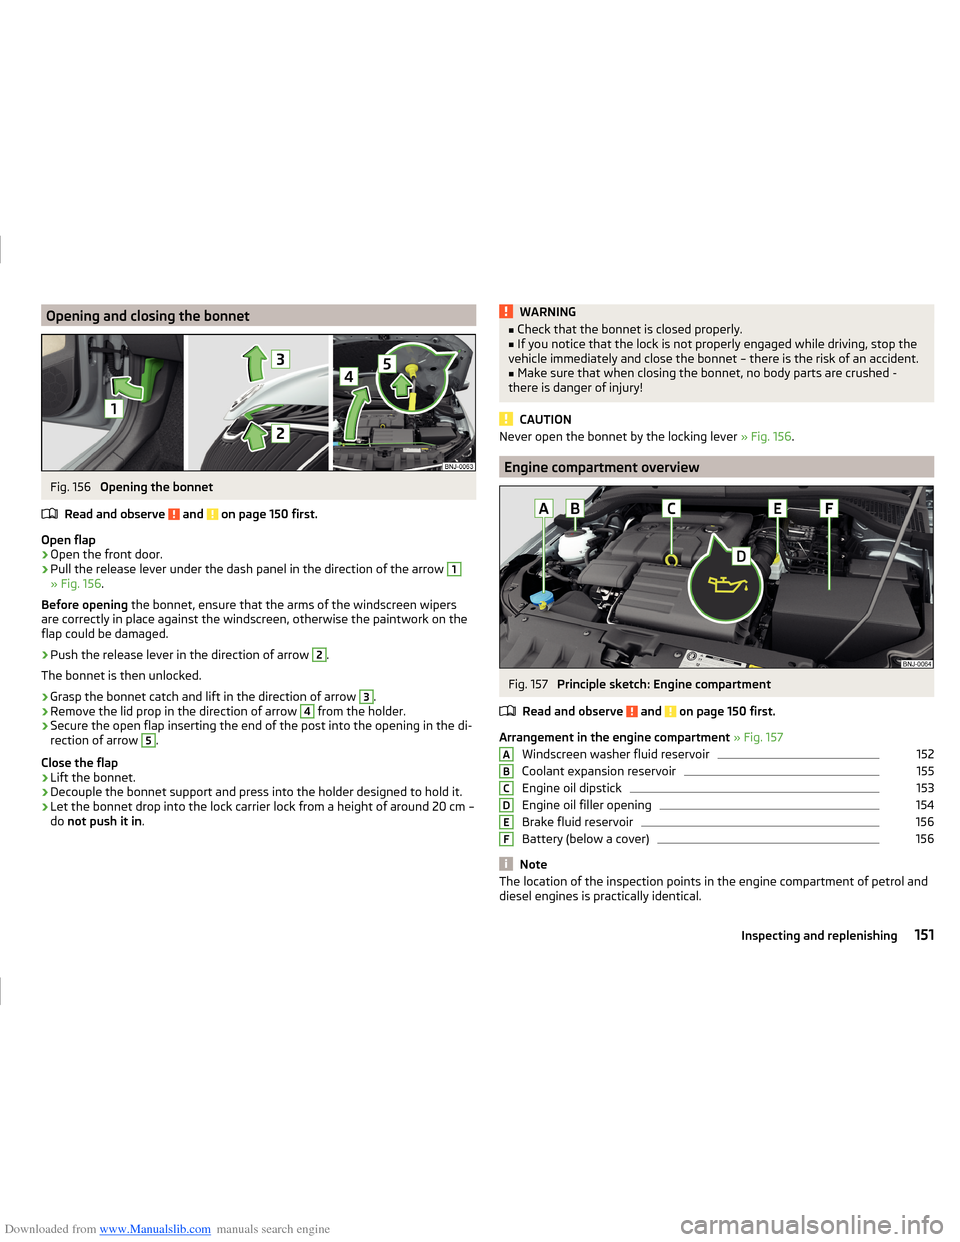
Downloaded from www.Manualslib.com manuals search engine Opening and closing the bonnetFig. 156
Opening the bonnet
Read and observe
and on page 150 first.
Open flap
›
Open the front door.
›
Pull the release lever under the dash panel in the direction of the arrow
1
» Fig. 156 .
Before opening the bonnet, ensure that the arms of the windscreen wipers
are correctly in place against the windscreen, otherwise the paintwork on the
flap could be damaged.
›
Push the release lever in the direction of arrow
2
.
The bonnet is then unlocked.
›
Grasp the bonnet catch and lift in the direction of arrow
3
.
›
Remove the lid prop in the direction of arrow
4
from the holder.
›
Secure the open flap inserting the end of the post into the opening in the di-
rection of arrow
5
.
Close the flap
›
Lift the bonnet.
›
Decouple the bonnet support and press into the holder designed to hold it.
›
Let the bonnet drop into the lock carrier lock from a height of around 20 cm –
do not push it in .
WARNING■
Check that the bonnet is closed properly.■If you notice that the lock is not properly engaged while driving, stop the
vehicle immediately and close the bonnet – there is the risk of an accident.■
Make sure that when closing the bonnet, no body parts are crushed -
there is danger of injury!
CAUTION
Never open the bonnet by the locking lever » Fig. 156.
Engine compartment overview
Fig. 157
Principle sketch: Engine compartment
Read and observe
and on page 150 first.
Arrangement in the engine compartment » Fig. 157
Windscreen washer fluid reservoir
152
Coolant expansion reservoir
155
Engine oil dipstick
153
Engine oil filler opening
154
Brake fluid reservoir
156
Battery (below a cover)
156
Note
The location of the inspection points in the engine compartment of petrol and
diesel engines is practically identical.ABCDEF151Inspecting and replenishing
Page 155 of 216
Downloaded from www.Manualslib.com manuals search engine Radiator fanRead and observe
and on page 150 first.
The radiator fan is powered by an electric motor. Operation is controlled ac-
cording to the temperature of the coolant.
WARNINGThe fan can intermittently continue to run for approximately 10 minutes af-
ter the ignition is switched off.
Windscreen washer system
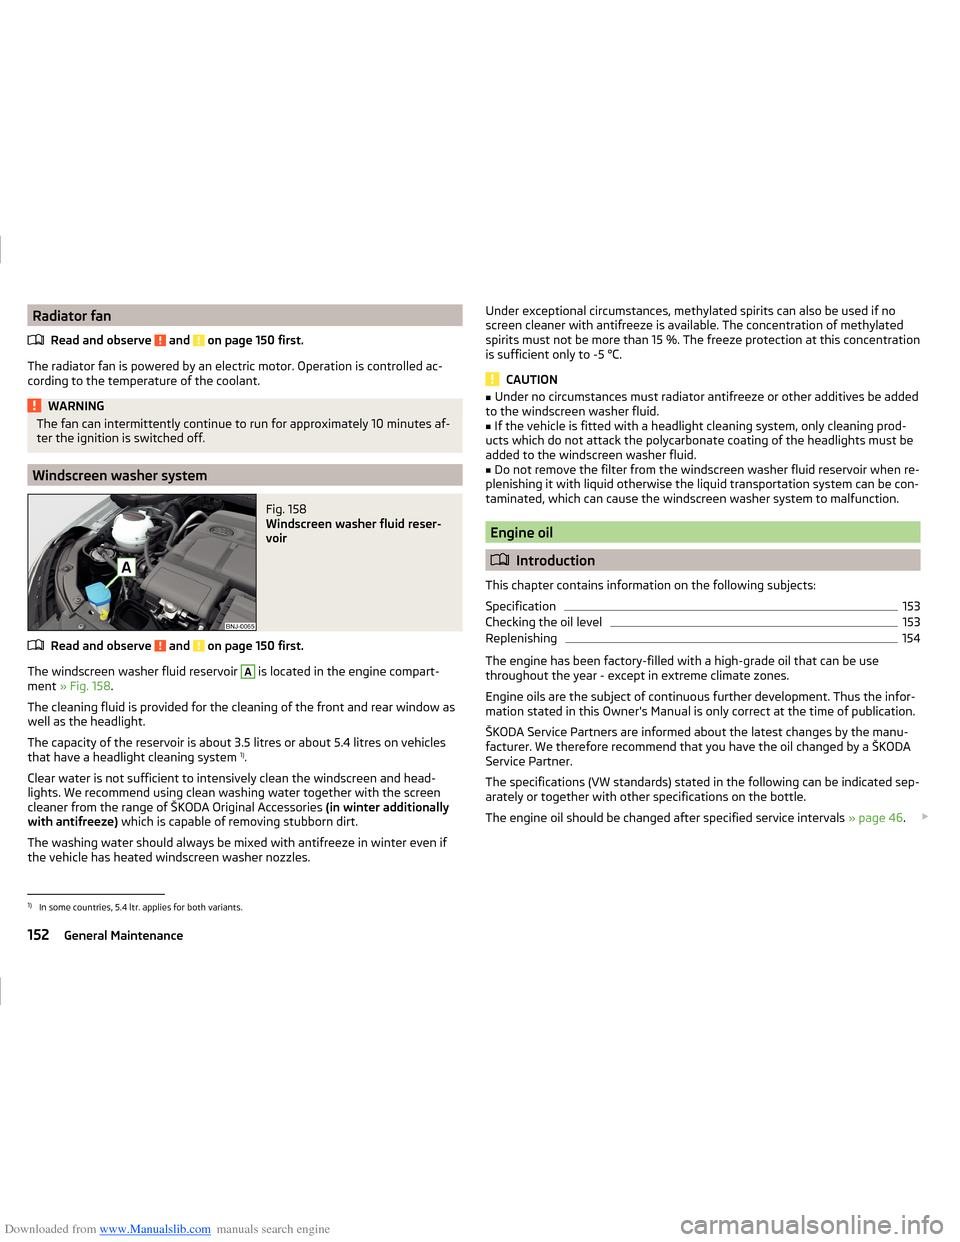
Fig. 158
Windscreen washer fluid reser-
voir
Read and observe and on page 150 first.
The windscreen washer fluid reservoir
A
is located in the engine compart-
ment » Fig. 158 .
The cleaning fluid is provided for the cleaning of the front and rear window as
well as the headlight.
The capacity of the reservoir is about 3.5 litres or about 5.4 litres on vehicles
that have a headlight cleaning system 1)
.
Clear water is not sufficient to intensively clean the windscreen and head-
lights. We recommend using clean washing water together with the screen
cleaner from the range of ŠKODA Original Accessories (in winter additionally
with antifreeze) which is capable of removing stubborn dirt.
The washing water should always be mixed with antifreeze in winter even if
the vehicle has heated windscreen washer nozzles.
Under exceptional circumstances, methylated spirits can also be used if no
screen cleaner with antifreeze is available. The concentration of methylated
spirits must not be more than 15 %. The freeze protection at this concentration
is sufficient only to -5 °C.
CAUTION
■ Under no circumstances must radiator antifreeze or other additives be added
to the windscreen washer fluid.■
If the vehicle is fitted with a headlight cleaning system, only cleaning prod-
ucts which do not attack the polycarbonate coating of the headlights must be
added to the windscreen washer fluid.
■
Do not remove the filter from the windscreen washer fluid reservoir when re-
plenishing it with liquid otherwise the liquid transportation system can be con-
taminated, which can cause the windscreen washer system to malfunction.
Engine oil
Introduction
This chapter contains information on the following subjects:
Specification
153
Checking the oil level
153
Replenishing
154
The engine has been factory-filled with a high-grade oil that can be use
throughout the year - except in extreme climate zones.
Engine oils are the subject of continuous further development. Thus the infor-
mation stated in this Owner's Manual is only correct at the time of publication.
ŠKODA Service Partners are informed about the latest changes by the manu-
facturer. We therefore recommend that you have the oil changed by a ŠKODA
Service Partner.
The specifications (VW standards) stated in the following can be indicated sep-
arately or together with other specifications on the bottle.
The engine oil should be changed after specified service intervals » page 46.
1)
In some countries, 5.4 ltr. applies for both variants.
152General Maintenance
Page 156 of 216
Downloaded from www.Manualslib.com manuals search engine WARNINGThe engine compartment of your car is a hazardous area. While working in
the engine compartment, be sure to observe the following warnings
» page 149 .
CAUTION
Do not pour any additives into the engine oil – risk of serious damage to the
engine parts.
Note
■ Before a long drive we recommend that you purchase and carry with you en-
gine oil which complies with the specification for your vehicle.■
We recommend that you use oils from ŠKODA Original Accessories.
■
You must wash yourself thoroughly if your skin has come into contact with
oil.
Specification
Read and observe
and on page 153 first.
Vehicles with variable service intervals
Petrol enginesSpecification1.0 l/44, 55 kW MPI - EU6VW 504 001.2 l/66, 81 kW TSIDiesel engineSpecification1.4 l/66, 77 kW TDI CRVW 507 00
Vehicles with fixed service intervals
Petrol enginesSpecification1.0 l/44, 55 kW MPI - EU6
VW 502 00
1.0 l/55 kW MPI - EU41.2 l/66, 81 kW TSI1.6 l/66, 81 kW MPIDiesel engineSpecification1.4 l/66, 77 kW TDI CRVW 507 00CAUTION■If the above engine oils are not available, a different engine oil can be used in
an emergency. To prevent damage to the engine, a maximum of 0.5 litres only
of the following engine oils may be used: ■ For petrol engine models: ACEA A3/ACEA B4 or API SN, (API SM);
■ For diesel engine models: ACEA C3 or API CJ-4.
Checking the oil level
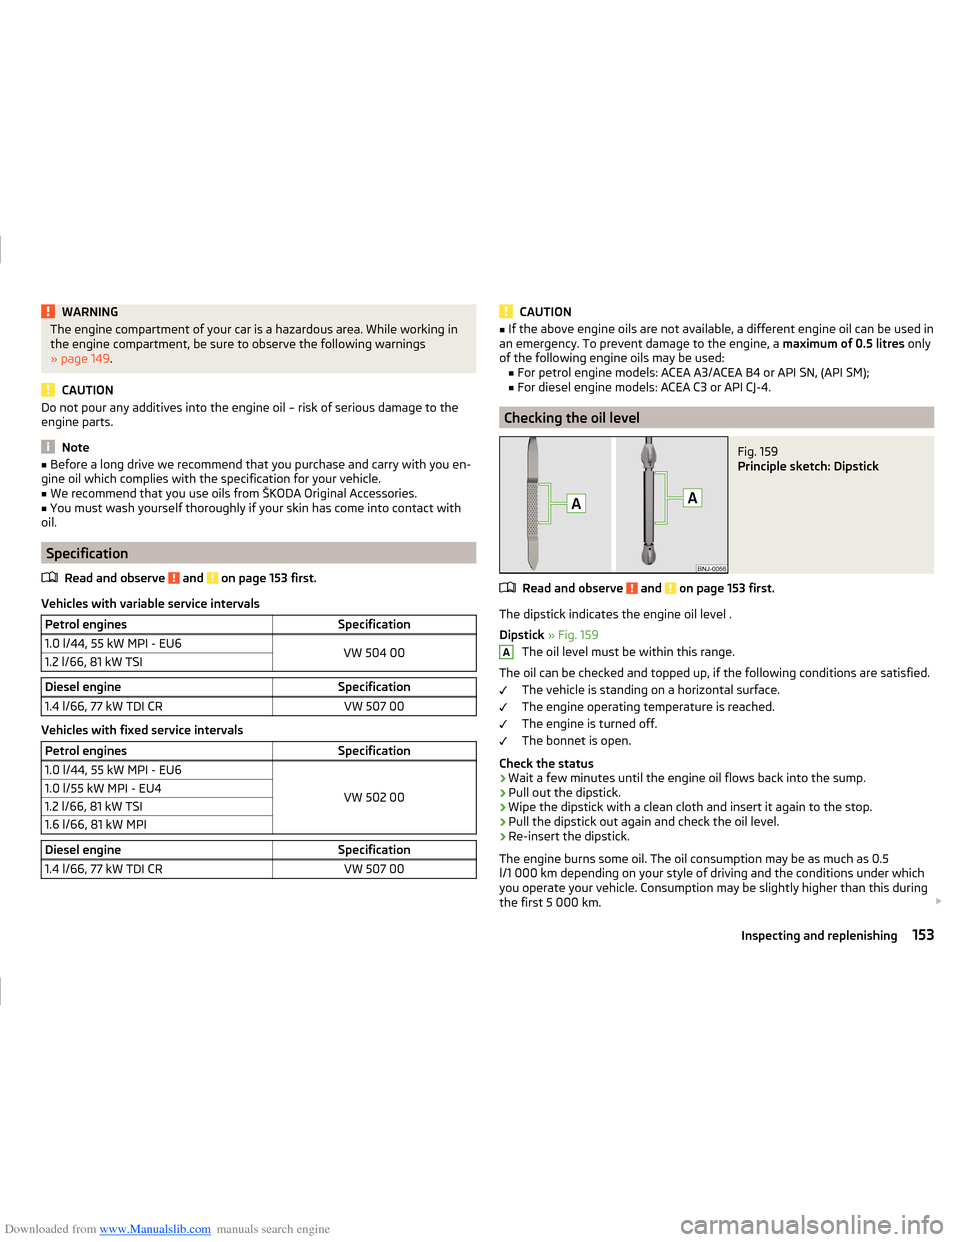
Fig. 159
Principle sketch: Dipstick
Read and observe and on page 153 first.
The dipstick indicates the engine oil level .
Dipstick » Fig. 159
The oil level must be within this range.
The oil can be checked and topped up, if the following conditions are satisfied. The vehicle is standing on a horizontal surface.
The engine operating temperature is reached.
The engine is turned off.
The bonnet is open.
Check the status
›
Wait a few minutes until the engine oil flows back into the sump.
›
Pull out the dipstick.
›
Wipe the dipstick with a clean cloth and insert it again to the stop.
›
Pull the dipstick out again and check the oil level.
›
Re-insert the dipstick.
The engine burns some oil. The oil consumption may be as much as 0.5
l/1 000 km depending on your style of driving and the conditions under which
you operate your vehicle. Consumption may be slightly higher than this during
the first 5 000 km.
A153Inspecting and replenishing