infotainment SKODA FABIA 2014 3.G / NJ Operating Instruction Manual
[x] Cancel search | Manufacturer: SKODA, Model Year: 2014, Model line: FABIA, Model: SKODA FABIA 2014 3.G / NJPages: 216, PDF Size: 30.9 MB
Page 118 of 216
Downloaded from www.Manualslib.com manuals search engine During an intervention of the system, the warning light flashes in the instru-
ment cluster.
Anti-lock braking system (ABS)
Read and observe
on page 114 first.
ABS prevents the wheels locking when braking. Thereby, it helps the driver to
maintain control of the vehicle.
The intervention of the ABS is noticeable from the pulsating movements of
the brake pedal which is accompanied by noises.
When the ABS system is active, do not pump the brakes or lift off the brake
pedal.
Traction control (TCS)
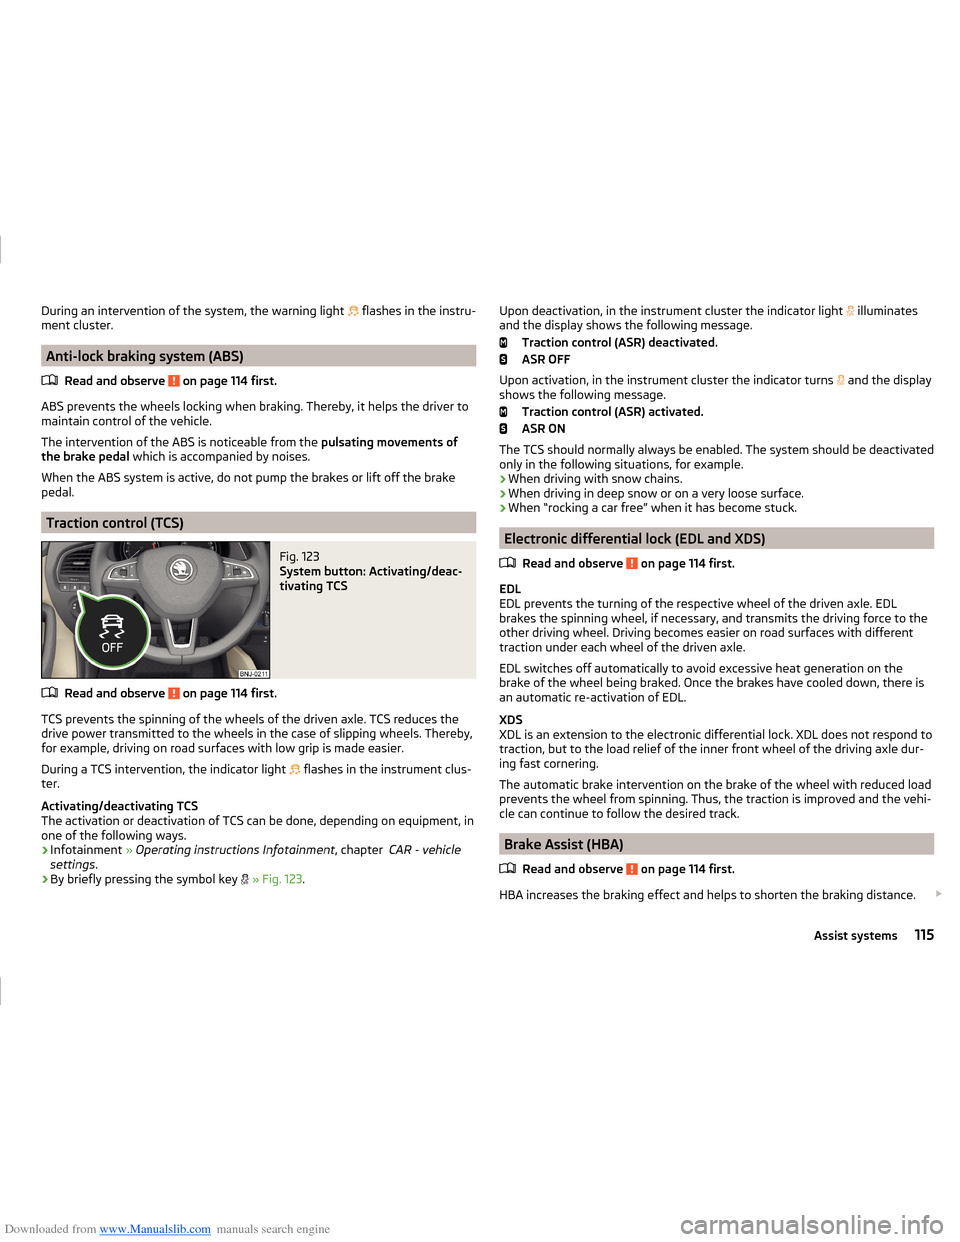
Fig. 123
System button: Activating/deac-
tivating TCS
Read and observe on page 114 first.
TCS prevents the spinning of the wheels of the driven axle. TCS reduces the drive power transmitted to the wheels in the case of slipping wheels. Thereby,
for example, driving on road surfaces with low grip is made easier.
During a TCS intervention, the indicator light flashes in the instrument clus-
ter.
Activating/deactivating TCS
The activation or deactivation of TCS can be done, depending on equipment, in
one of the following ways.
› Infotainment
» Operating instructions Infotainment , chapter CAR - vehicle
settings .
› By briefly pressing the symbol key
» Fig. 123 .
Upon deactivation, in the instrument cluster the indicator light illuminates
and the display shows the following message.
Traction control (ASR) deactivated.
ASR OFF
Upon activation, in the instrument cluster the indicator turns
and the display
shows the following message.
Traction control (ASR) activated.
ASR ON
The TCS should normally always be enabled. The system should be deactivated
only in the following situations, for example.
› When driving with snow chains.
› When driving in deep snow or on a very loose surface.
› When “rocking a car free” when it has become stuck.
Electronic differential lock (EDL and XDS)
Read and observe
on page 114 first.
EDL
EDL prevents the turning of the respective wheel of the driven axle. EDL
brakes the spinning wheel, if necessary, and transmits the driving force to the
other driving wheel. Driving becomes easier on road surfaces with different
traction under each wheel of the driven axle.
EDL switches off automatically to avoid excessive heat generation on the
brake of the wheel being braked. Once the brakes have cooled down, there is
an automatic re-activation of EDL.
XDS
XDL is an extension to the electronic differential lock. XDL does not respond to
traction, but to the load relief of the inner front wheel of the driving axle dur-
ing fast cornering.
The automatic brake intervention on the brake of the wheel with reduced load
prevents the wheel from spinning. Thus, the traction is improved and the vehi-
cle can continue to follow the desired track.
Brake Assist (HBA)
Read and observe
on page 114 first.
HBA increases the braking effect and helps to shorten the braking distance.
115Assist systems
Page 119 of 216
Downloaded from www.Manualslib.com manuals search engine The HBA is activated by very rapid depression of the brake pedal. To achieve
the shortest possible braking distance, the brake pedal must be applied firmly
until the vehicle has come to a complete standstill.
HBA is automatically switched off when the brake pedal is released.
Hill Start Assist (HHC)
Read and observe
on page 114 first.
HHC allows you to move your foot from the brake pedal to the accelerator ped-al without having to use the handbrake when pulling away on a gradient.
The system holds the brake pressure produced by the activation of the brake
pedal for approx. 2 seconds after the brake pedal is released.
HHC is active on slopes of >5 % when the driver door is closed. HHC is always
only active on slopes pulling away forwards or in reverse.
Multi collision brake (MCB)
Read and observe
on page 114 first.
The MCB helps to decrease speed after a collision through automatic brakinginterventions and to stabilize the vehicle. This reduces the risk of a subse-
quent crash due to uncontrolled vehicle movement.
The automatic brake interventions can take place only if the following condi-
tions are met.
There was a front, side and rear-end collision of a certain severity.
The impact speed was higher than approx. 10 km/h.
The brakes, the ESL and other required electrical systems remain function-
al after impact.
The accelerator pedal is not actuated.
Parking assistance (ParkPilot)
Introduction
This chapter contains information on the following subjects:
Function
117
Display in the Infotainment display
117Activation / deactivation118Automatic system activation when moving forward118
The parking aid (hereinafter referred to only as system) draws attention via
acoustic signals or the Infotainment display when manoeuvring around obsta-
cles in the vicinity of the vehicle.
WARNING■ The system only serves as an assistance and does not relieve the driver
of the responsibility for the vehicle operation.■
Moving persons or objects may not be recognised by the system sensors.
■
Under certain circumstances, surfaces of certain objects and types of
clothing cannot reflect the system signals. For this reason, such people or
objects may not be recognised by the system sensors.
■
External noise sources may affect the signals of the system sensors. Un-
der adverse conditions, this may cause objects or people to be not recog-
nised by the system.
■
Before reversing, you should make sure that there are no small obstacles,
such as rocks, thin posts, trailer drawbars etc. in front or behind your vehi-
cle. Such obstacles may not be recognised by the system sensors.
CAUTION
■ Keep the system sensors » Fig. 124 on page 117 clean, snow-and ice-free
and do not cover with any objects of any kind, otherwise the system function-
ing may be impaired.■
Under adverse weather conditions (heavy rain, water vapour, very low or
high temperatures etc.) system function may be limited “incorrect obstacle de- tection ”.
■
Additionally installed accessories such as e.g. bicycle carriers can impair the
system function.
116Driving
Page 120 of 216
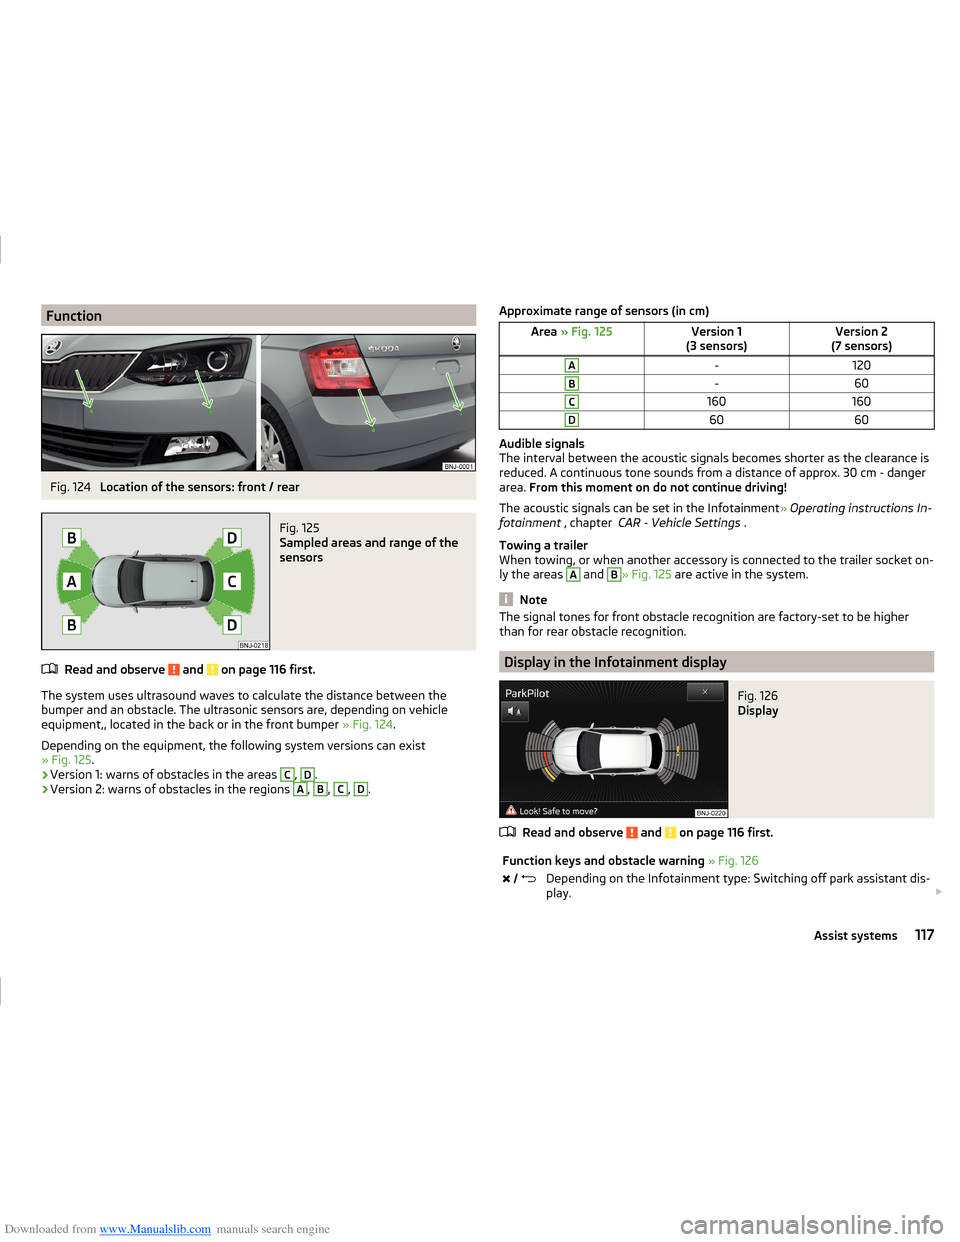
Downloaded from www.Manualslib.com manuals search engine FunctionFig. 124
Location of the sensors: front / rear
Fig. 125
Sampled areas and range of the
sensors
Read and observe and on page 116 first.
The system uses ultrasound waves to calculate the distance between the
bumper and an obstacle. The ultrasonic sensors are, depending on vehicle
equipment,, located in the back or in the front bumper » Fig. 124.
Depending on the equipment, the following system versions can exist
» Fig. 125 .
› Version 1: warns of obstacles in the areas
C
,
D
.
› Version 2: warns of obstacles in the regions
A
,
B
,
C
,
D
.
Approximate range of sensors (in cm)Area
» Fig. 125Version 1
(3 sensors)Version 2
(7 sensors)A-120B-60C160160D6060
Audible signals
The interval between the acoustic signals becomes shorter as the clearance is
reduced. A continuous tone sounds from a distance of approx. 30 cm - danger
area. From this moment on do not continue driving!
The acoustic signals can be set in the Infotainment » Operating instructions In-
fotainment , chapter CAR - Vehicle Settings .
Towing a trailer
When towing, or when another accessory is connected to the trailer socket on-
ly the areas
A
and
B
» Fig. 125 are active in the system.
Note
The signal tones for front obstacle recognition are factory-set to be higher
than for rear obstacle recognition.
Display in the Infotainment display
Fig. 126
Display
Read and observe and on page 116 first.
Function keys and obstacle warning » Fig. 126 Depending on the Infotainment type: Switching off park assistant dis-
play. 117Assist systems
Page 121 of 216

Downloaded from www.Manualslib.com manuals search engine Switching audible parking signals on/off.Message: Look! Safe to move?Colour of an object detected in the collision area (the distance to the
obstacle is less than 30 cm).
Stop driving in the direction of an ob-
stacle!Colour of an object detected in the manoeuvring area (the distance to
the obstacle is more than 30 cm).Colour of an object detected in the outside the manoeuvring area (the
distance to the obstacle is more than 30 cm).System failure (there is no indication of obstacles).
Activation / deactivation
Fig. 127
System key (option 2)
Read and observe and on page 116 first.
Activation
The activation of the system is initiated when the reverse gear is engaged, or
vehicles with the Variant 2, also by pressing the symbol key
» Fig. 127
.
This is confirmed by a short acoustic signal (the symbol in the button lights
up).
Deactivation
On vehicles with Version 1, the system can be deactivated by moving out of re-
verse gear.
For vehicles with Version 2, the system is deactivated by pressing the symbol
button or automatically at a speed over 10 km/h (the symbol
in the but-
ton goes out).
Displaying an error
If a warning signal sounds for about 3 seconds after activating the system and
there is no obstacle close to your car, this indicates a system fault. The fault is
also indicated by the symbol
flashing in the button. Seek help from a spe-
cialist garage.
Note
The system can only be activated with the symbol key at a speed of below
approx. 10 km / hr.
Automatic system activation when moving forward
Fig. 128
Infotainment display: Display
with automatic activation
Read and observe and on page 116 first.
The automatic system activation occurs when moving forward at a speed be-
low 10 km / h when the vehicle approaches an obstacle.
After activation, the following is shown in the left pane of the Infotainment
display » Fig. 128 .
Acoustic signals are sounded as of a distance from the obstacle of around
50 cm.
The automatic display can be enabled or disabled in the Infotainment » Oper-
ating instructions Infotainment , chapter CAR - vehicle settings .
Speed control system
Introduction
This chapter contains information on the following subjects:
Functioning
119
Operating Description
119
118Driving
Page 127 of 216
Downloaded from www.Manualslib.com manuals search engine Automatic Braking
If the driver fails to respond to the acute warning, the system starts to apply
the brakes automatically with increasing stopping power in several stages.
Brake assist
If the driver brakes inadequate with an impending collision, the system auto-
matically increases braking force.
The braking assistance only occurs as long as the brake pedal is being firmly
pressed down.
Note
■ If an automatic brake intervention is triggered by the system, the pressure in
the brake system increases and the brake pedal cannot be operated with the
normal pedal stroke.■
The automatic braking interventions can be cancelled by pressing the accel-
erator pedal or by steering intervention.
Disable / enable
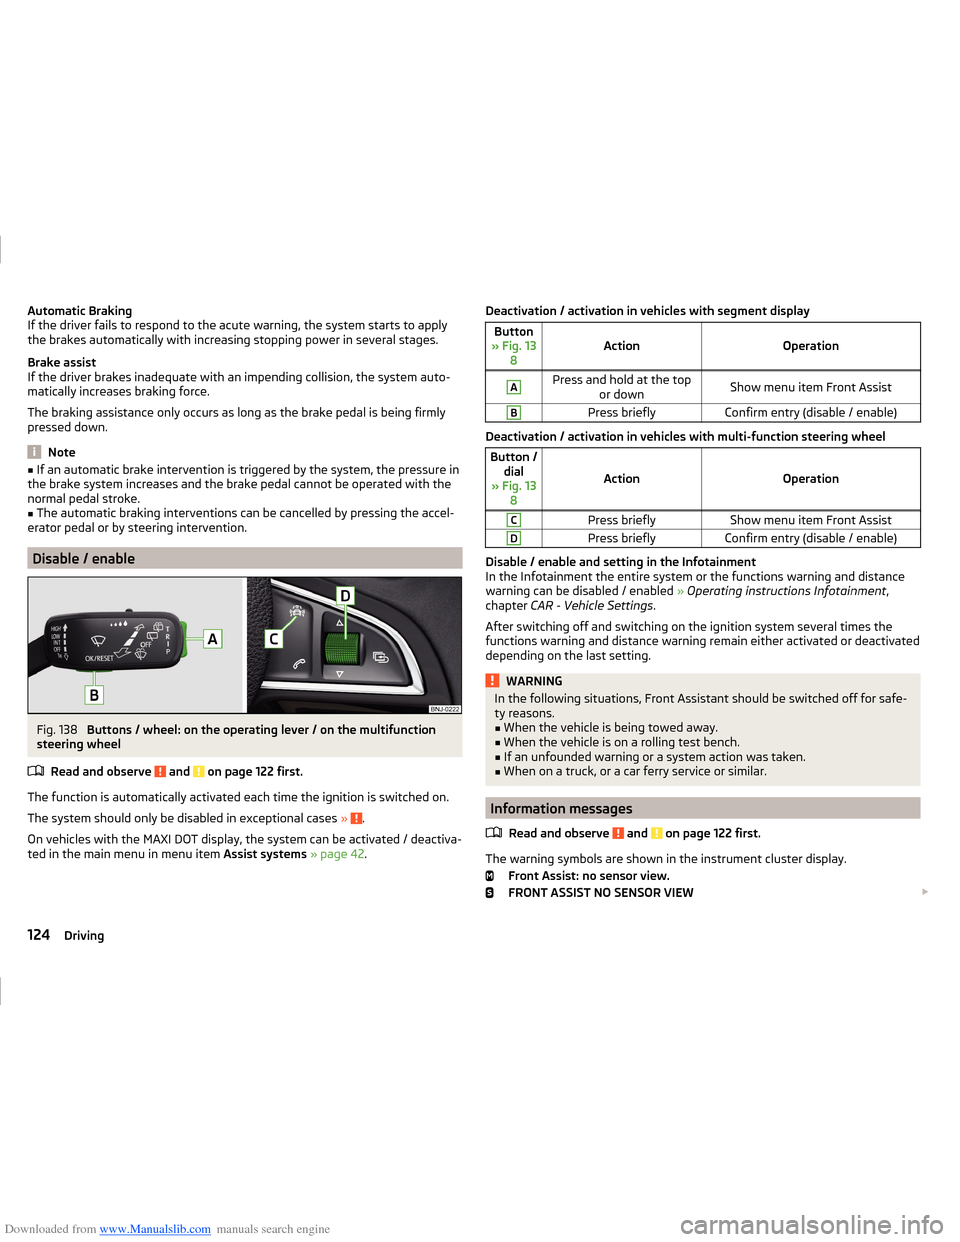
Fig. 138
Buttons / wheel: on the operating lever / on the multifunction
steering wheel
Read and observe
and on page 122 first.
The function is automatically activated each time the ignition is switched on.
The system should only be disabled in exceptional cases »
.
On vehicles with the MAXI DOT display, the system can be activated / deactiva-
ted in the main menu in menu item Assist systems » page 42 .
Deactivation / activation in vehicles with segment displayButton
» Fig. 13 8ActionOperation
APress and hold at the top or downShow menu item Front AssistBPress brieflyConfirm entry (disable / enable)
Deactivation / activation in vehicles with multi-function steering wheel
Button /dial
» Fig. 13 8
ActionOperation
CPress brieflyShow menu item Front AssistDPress brieflyConfirm entry (disable / enable)
Disable / enable and setting in the Infotainment
In the Infotainment the entire system or the functions warning and distance warning can be disabled / enabled » Operating instructions Infotainment ,
chapter CAR - Vehicle Settings .
After switching off and switching on the ignition system several times the
functions warning and distance warning remain either activated or deactivated
depending on the last setting.
WARNINGIn the following situations, Front Assistant should be switched off for safe-
ty reasons.■
When the vehicle is being towed away.
■
When the vehicle is on a rolling test bench.
■
If an unfounded warning or a system action was taken.
■
When on a truck, or a car ferry service or similar.
Information messages
Read and observe
and on page 122 first.
The warning symbols are shown in the instrument cluster display. Front Assist: no sensor view.
FRONT ASSIST NO SENSOR VIEW
124Driving
Page 128 of 216
Downloaded from www.Manualslib.com manuals search engine The sensor is soiled or covered.
Stop the car, switch off the engine and clean the sensor or eliminate the dis-
turbance causing the lack of visibility » Fig. 135 on page 122 .
If after engine start the message persists, then the help of a professional or-
ganisation is required.
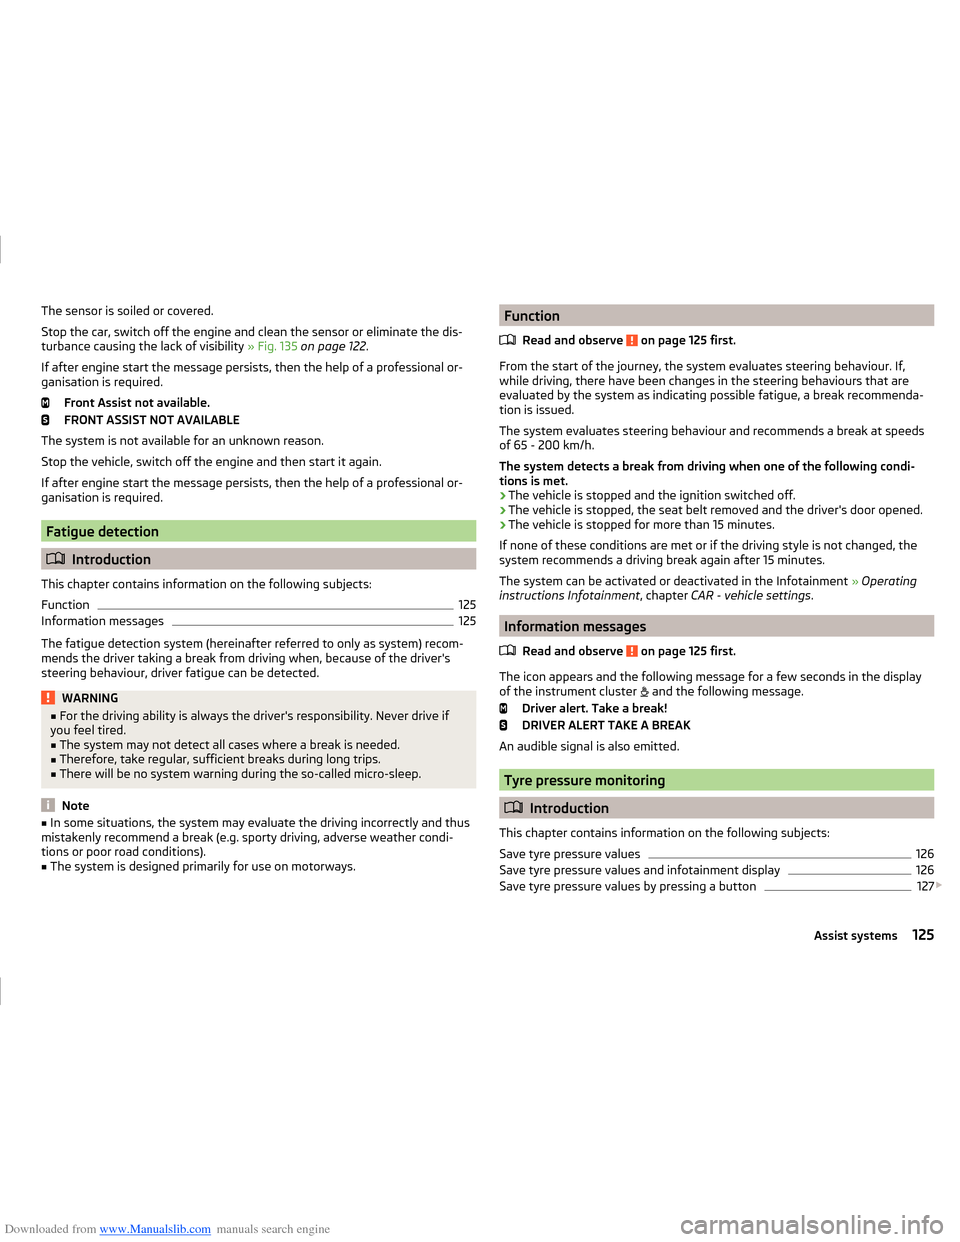
Front Assist not available.
FRONT ASSIST NOT AVAILABLE
The system is not available for an unknown reason.
Stop the vehicle, switch off the engine and then start it again.
If after engine start the message persists, then the help of a professional or- ganisation is required.
Fatigue detection
Introduction
This chapter contains information on the following subjects:
Function
125
Information messages
125
The fatigue detection system (hereinafter referred to only as system) recom-
mends the driver taking a break from driving when, because of the driver's
steering behaviour, driver fatigue can be detected.
WARNING■ For the driving ability is always the driver's responsibility. Never drive if
you feel tired.■
The system may not detect all cases where a break is needed.
■
Therefore, take regular, sufficient breaks during long trips.
■
There will be no system warning during the so-called micro-sleep.
Note
■ In some situations, the system may evaluate the driving incorrectly and thus
mistakenly recommend a break (e.g. sporty driving, adverse weather condi-
tions or poor road conditions).■
The system is designed primarily for use on motorways.
Function
Read and observe
on page 125 first.
From the start of the journey, the system evaluates steering behaviour. If,
while driving, there have been changes in the steering behaviours that are
evaluated by the system as indicating possible fatigue, a break recommenda-
tion is issued.
The system evaluates steering behaviour and recommends a break at speeds
of 65 - 200 km/h.
The system detects a break from driving when one of the following condi-
tions is met.
› The vehicle is stopped and the ignition switched off.
› The vehicle is stopped, the seat belt removed and the driver's door opened.
› The vehicle is stopped for more than 15 minutes.
If none of these conditions are met or if the driving style is not changed, the
system recommends a driving break again after 15 minutes.
The system can be activated or deactivated in the Infotainment » Operating
instructions Infotainment , chapter CAR - vehicle settings .
Information messages
Read and observe
on page 125 first.
The icon appears and the following message for a few seconds in the display
of the instrument cluster and the following message.
Driver alert. Take a break!
DRIVER ALERT TAKE A BREAK
An audible signal is also emitted.
Tyre pressure monitoring
Introduction
This chapter contains information on the following subjects:
Save tyre pressure values
126
Save tyre pressure values and infotainment display
126
Save tyre pressure values by pressing a button
127
125Assist systems
Page 129 of 216
Downloaded from www.Manualslib.com manuals search engine The tyre pressure monitoring function monitors (hereinafter referred to only as
a system) the tyre pressure while driving.
When changing the tyre inflation pressure, the warning light illuminates
in
the instrument cluster and an audible signal is heard.
Information on the procedure for the indication of change in tyre pressure val- ues » page 34 .
The system can only function properly if the tyres have the prescribed tyre
pressure and this pressure values are stored in the system.WARNING■ The correct tyre pressure values is always the driver's responsibility. The
tyre pressure should be checked regularly » page 161.■
The system cannot warn in case of very rapid loss of tyre pressure, e.g. in
the event of a sudden puncture.
Save tyre pressure values
Read and observe
on page 126 first.
The tyre pressure valuesare always stored in the system, if one of the follow-ing events is present.
› Change of tyre pressure values.
› Change one or more wheels.
› Change in position of a wheel on the vehicle.
› The warning light
in the instrument cluster.
The storage of the tyre pressure values depends on equipment, either in the
infotainment or by pressing a button.
WARNINGBefore storing the tyre pressures they must be inflated to the specified in-
flation pressure » page 161. If incorrect pressure values are storedthe sys-
tem may not warn even with a tyre pressure that is too low.
CAUTION
The tyre pressure values should be stored every 10 000 km or once a year to
ensure proper system function.Save tyre pressure values and infotainment displayFig. 139
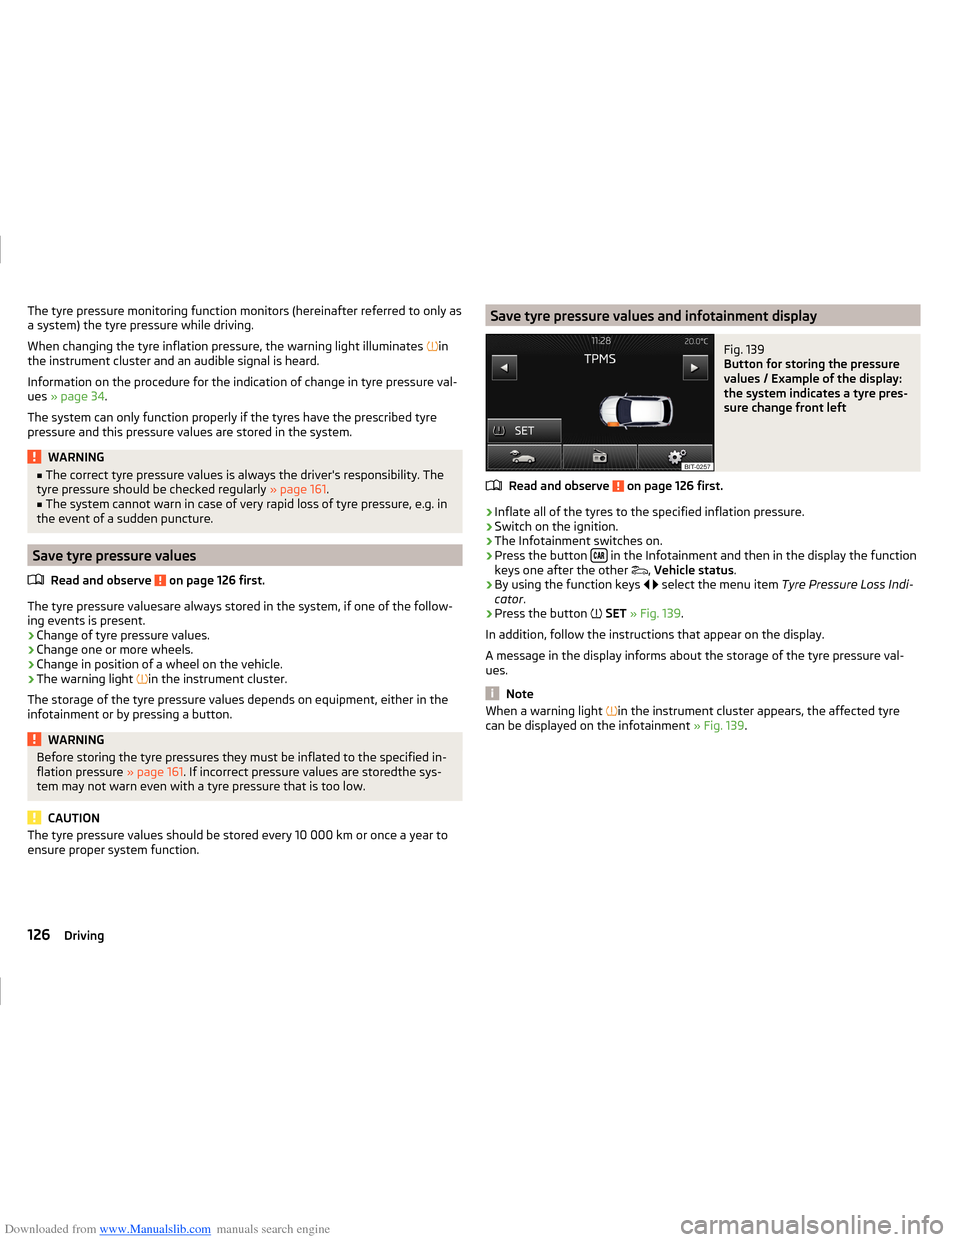
Button for storing the pressure
values / Example of the display:
the system indicates a tyre pres-
sure change front left
Read and observe on page 126 first.
›
Inflate all of the tyres to the specified inflation pressure.
›
Switch on the ignition.
›
The Infotainment switches on.
›
Press the button in the Infotainment and then in the display the function
keys one after the other ,
Vehicle status .
›
By using the function keys
select the menu item
Tyre Pressure Loss Indi-
cator .
›
Press the button
SET » Fig. 139 .
In addition, follow the instructions that appear on the display.
A message in the display informs about the storage of the tyre pressure val-
ues.
Note
When a warning light in the instrument cluster appears, the affected tyre
can be displayed on the infotainment » Fig. 139.126Driving
Page 162 of 216
Downloaded from www.Manualslib.com manuals search engine WARNING■When you charge a battery, hydrogen is released, and a highly explosive
gas mixture is also produced. An explosion can be caused through sparkling
over during unclamping or loosening of the cable plug while the ignition is
on.■
Creating a bridge between the poles on the battery (e.g. with metal ob-
jects - cables) creates a short circuit - risk of damage to the battery, explo-
sion and burning of the battery, jets of acid spurting out.
■
Avoid creating sparks when working with cables and electrical devices.
Strong sparking represents a risk of injury.
■
Before carrying out any work on the electrical system, switch off the en-
gine, the ignition and all electrical consumers and disconnect the negative
terminal
.
■
“Quick-charging” the vehicle battery is dangerous and requires a special
charger and specialist knowledge.
■
We therefore recommend that vehicle batteries be “rapidly charged” by a
specialist garage.
CAUTION
On vehicles with the START/STOP system or additional heating (auxiliary heat-
ing), the pole terminal of the charger must not be connected directly to the
negative terminal of the vehicle battery, but only to the engine earth
» page 174 .
Replacing
Read and observe
and on page 157 first.
The new vehicle battery must have the same capacity, voltage, current and thesame size as the original battery. Suitable vehicle battery types can be pur-
chased from a specialist garage.
We recommend that the battery is replaced by a specialist garage, where the
new vehicle battery will be installed properly and the original battery will be
disposed of in accordance with national regulations.
Disconnecting or reconnecting
Read and observe
and on page 157 first.
Disconnecting
›
Switch off the ignition.
›First, disconnect the negative terminal
first, then the positive terminal
of the battery.
Connecting›
First, connect the positive
first, then the negative
battery terminal.
After disconnecting and re-connecting the vehicle battery, the following func-
tions or devices are partially or completely inoperative.
Function / deviceOperating measureElectric windows» page 59RadioEnter code » operating instruc-
tions for the Infotainment dis-
play radioTime settings» page 31
CAUTION
■ Disconnect the vehicle battery only with the ignition turned off - there is a
risk of damaging the electrical system of the vehicle.■
Under no circumstances must the battery cables be connected incorrectly –
risk of a cable fire.
Note
■ After disconnecting and re-connecting the vehicle battery, we recommend
having the vehicle checked by a specialist to ensure that the full functionality
of all electrical systems is guaranteed.■
The data of the multi-function display will be reset.
Automatic load deactivation
Read and observe
and on page 157 first.
The vehicle voltage control unit automatically prevents the battery from dis-
charging when the battery is subjected to heavy loads. This may be noticed
from the following.
› The idling speed is raised to allow the generator to deliver more electricity to
the electrical system.
› Where appropriate large convenience consumers, e.g. seat heaters, rear win-
dow heaters, have their power limited or shut off completely if necessary.
159Inspecting and replenishing
Page 167 of 216
Downloaded from www.Manualslib.com manuals search engine Tyre labelRead and observe
on page 160 first.
Only fit radial tyres of the same type, size (rolling circumference) and the same
tread pattern on one axle on all four wheels.
When mounting new tyres the tyres have to be replaced axle by axle.
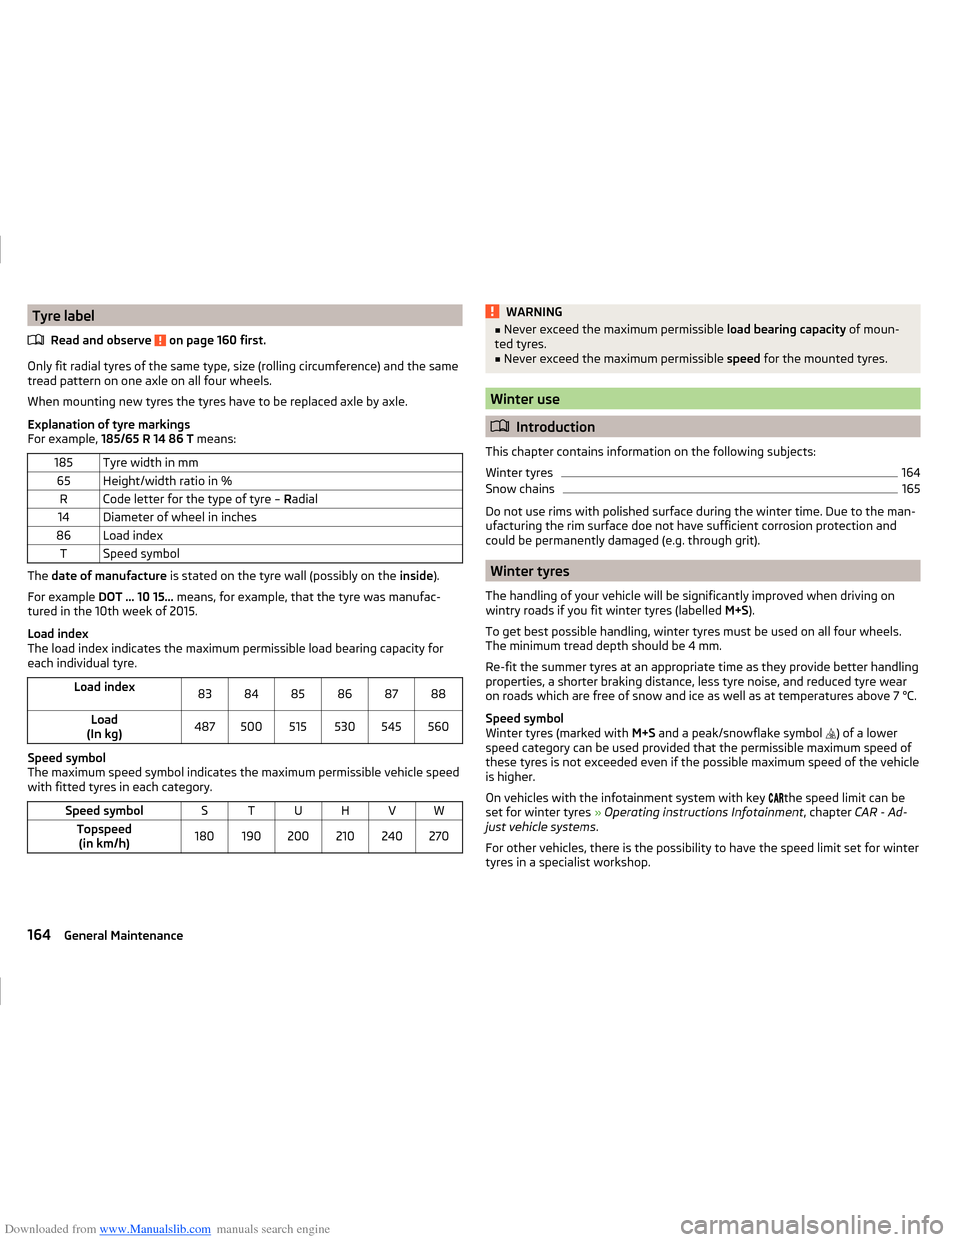
Explanation of tyre markings
For example, 185/65 R 14 86 T means:
185Tyre width in mm65Height/width ratio in %RCode letter for the type of tyre – Radial14Diameter of wheel in inches86Load indexTSpeed symbol
The date of manufacture is stated on the tyre wall (possibly on the inside).
For example DOT ... 10 15... means, for example, that the tyre was manufac-
tured in the 10th week of 2015.
Load index
The load index indicates the maximum permissible load bearing capacity for
each individual tyre.
Load index838485868788Load
(In kg)487500515530545560
Speed symbol
The maximum speed symbol indicates the maximum permissible vehicle speed
with fitted tyres in each category.
Speed symbolSTUHVWTopspeed (in km/h)180190200210240270WARNING■ Never exceed the maximum permissible load bearing capacity of moun-
ted tyres.■
Never exceed the maximum permissible speed for the mounted tyres.
Winter use
Introduction
This chapter contains information on the following subjects:
Winter tyres
164
Snow chains
165
Do not use rims with polished surface during the winter time. Due to the man-
ufacturing the rim surface doe not have sufficient corrosion protection and
could be permanently damaged (e.g. through grit).
Winter tyres
The handling of your vehicle will be significantly improved when driving on
wintry roads if you fit winter tyres (labelled M+S).
To get best possible handling, winter tyres must be used on all four wheels.
The minimum tread depth should be 4 mm.
Re-fit the summer tyres at an appropriate time as they provide better handling
properties, a shorter braking distance, less tyre noise, and reduced tyre wear
on roads which are free of snow and ice as well as at temperatures above 7 °C.
Speed symbol
Winter tyres (marked with M+S and a peak/snowflake symbol
) of a lower
speed category can be used provided that the permissible maximum speed of
these tyres is not exceeded even if the possible maximum speed of the vehicle
is higher.
On vehicles with the infotainment system with key the speed limit can be
set for winter tyres » Operating instructions Infotainment , chapter CAR - Ad-
just vehicle systems .
For other vehicles, there is the possibility to have the speed limit set for winter
tyres in a specialist workshop.
164General Maintenance
Page 195 of 216
Downloaded from www.Manualslib.com manuals search engine Technical data
Technical data
Vehicle data
Introduction
This chapter contains information on the following subjects:
Vehicle characteristics
192
Operating weight and payload
193
measurement of fuel consumption and CO 2 emissions according to ECE
Regulations and EU Directives
193
Dimensions
194
Departure angle
195
Vehicle-specific details per engine type
196
The details given in the vehicle's technical documentation always take prece-
dence over the details in the Owner's Manual.
The listed performance values were determined without performance-reduc- ing equipment, e.g. air conditioning system.
Vehicle characteristics
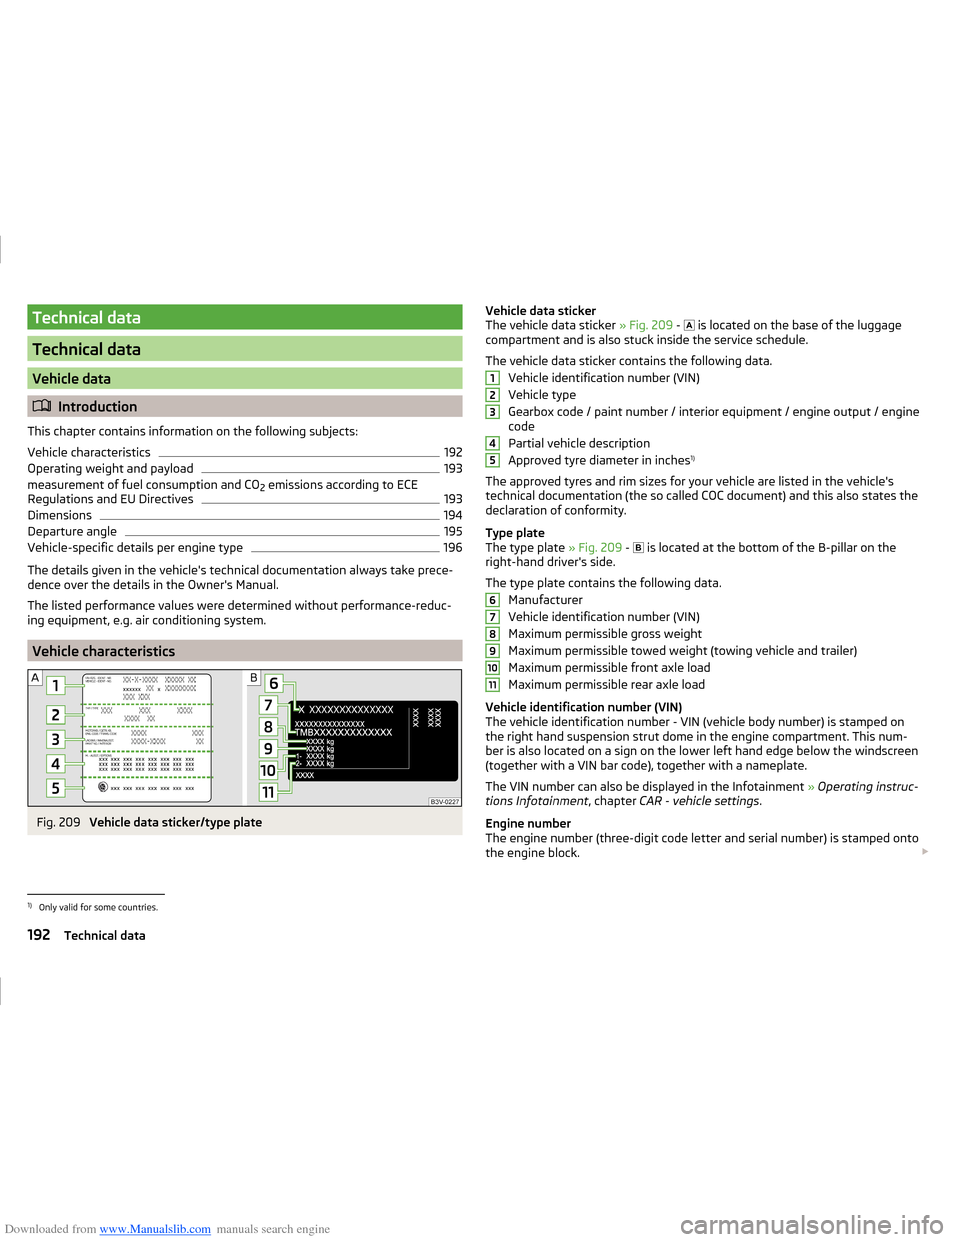
Fig. 209
Vehicle data sticker/type plate
Vehicle data sticker
The vehicle data sticker » Fig. 209 - is located on the base of the luggage
compartment and is also stuck inside the service schedule.
The vehicle data sticker contains the following data. Vehicle identification number (VIN)
Vehicle type
Gearbox code / paint number / interior equipment / engine output / engine code
Partial vehicle description
Approved tyre diameter in inches 1)
The approved tyres and rim sizes for your vehicle are listed in the vehicle's
technical documentation (the so called COC document) and this also states the
declaration of conformity.
Type plate
The type plate » Fig. 209 -
is located at the bottom of the B-pillar on the
right-hand driver's side.
The type plate contains the following data. Manufacturer
Vehicle identification number (VIN)
Maximum permissible gross weight
Maximum permissible towed weight (towing vehicle and trailer)
Maximum permissible front axle load
Maximum permissible rear axle load
Vehicle identification number (VIN)
The vehicle identification number - VIN (vehicle body number) is stamped on
the right hand suspension strut dome in the engine compartment. This num-
ber is also located on a sign on the lower left hand edge below the windscreen
(together with a VIN bar code), together with a nameplate.
The VIN number can also be displayed in the Infotainment » Operating instruc-
tions Infotainment , chapter CAR - vehicle settings .
Engine number
The engine number (three-digit code letter and serial number) is stamped onto
the engine block. 12345678910111)
Only valid for some countries.
192Technical data