ignition SKODA FABIA 2014 3.G / NJ Swing Infotinment Car Radio Manual
[x] Cancel search | Manufacturer: SKODA, Model Year: 2014, Model line: FABIA, Model: SKODA FABIA 2014 3.G / NJPages: 47, PDF Size: 4.35 MB
Page 6 of 47
Introductory information
Important notes
Introduction
This chapter contains information on the following subjects:
Declaration of Conformity
4
4
Warning messages
4
This Owner's Manual describes all possible equipment variants without identi-
fying them as special equipment, model variants or market-dependent equip-
ment.
Consequently, this vehicle does not need to contain all of the equipment com-
ponents described in this Owner's Manual.
The level of equipment of your vehicle refers to your purchase contract of the
vehicle. More information is available from the ŠKODA Partner 1)
where you
bought the vehicle.
This guide is meant only as a supplement to the information contained in the
operating instructions of the vehicle. Therefore, they can be used only in con-
junction with the latest manual for this vehicle. For a detailed description of
some functions listed in these instructions, see the Vehicle Manual for your ve-
hicle.
The illustrations can differ in minor details from your unit; they are only inten-
ded for general information.
WARNING■ Concentrate fully at all times on your driving! As the driver you are fully
responsible for the operation of your vehicle.■
Only use the device in a way that ensures that you are in full control of
your vehicle in every traffic situation - there is a risk of accident!
■
Adjust the volume to ensure that acoustic signals from outside, e.g. sirens
from vehicles which have the right of way, such as police, ambulance and
fire brigade vehicles, can be heard at all time.
■
High volumes can cause hearing damage.
Declaration of Conformity
Read and observe
on page 4 first.
ŠKODA AUTO a.s. hereby declares that the ŠKODA Infotainment systems meet
the basic requirements and additional provisions of Directive 1999/5/EC.
ŠKODA AUTO a.s. hereby declares that the “connection and the use of this
communication device is granted by the Nigerian Communications Commis-
sion.”
Read and observe on page 4 first.
Some electronic control units are factory-equipped with component protec-
tion.
Component protection serves as a protection mechanism for the following:
› for the impairment of factory- or garage-fitted control units after installation
in another vehicle (for example, after a theft);
› for the impairment of components operated outside of the vehicle.
› for the possibility of a legitimate installation or change of control units for re-
pairs at a ŠKODA 1)
specialist garage.
When component protection is enabled, the following message appears on the
unit display Component theft protection: the infotainment system is not fully
available at present. Please switch on the ignition.
If the component protection does not activate by switching on the ignition,
please contact a ŠKODA specialist garage.
Warning messages
Read and observe
on page 4 first.
The device turns off automatically under certain circumstances. The device in-
forms you for a few seconds by means of a text message on the device screen.
1)
Terms used
» manual , chapter Preface.
4Introductory information
Page 8 of 47
Touch screen
The unit is equipped with the so-called resistive (pressure / resistance) touch
screen.
The function keys on the screen can be operated by a light finger pressure to
the screen surface.
CAUTION
■ The screen can only be operated by a slight touch of a finger. With too much
pressure, the screen can be damaged.■
Do not use any objects to operate the screen, which could damage the
screen surface.
■
Solvent based cleaners can damage the screen surface.
■
Use a soft cloth and, if necessary, methylated spirits, to remove fingerprints
from the screen. When doing so, ensure that you do not cause damage to oth-
er parts of the interior.
Note
■ To protect the screen, a suitable protective film for touch screens can be
used.■
The brightness level can be set » page 13, Screen settings .
Switching the unit on/off
›
The unit is switched on or off by briefly pressing the on/off knob .
When the device is switched on, the audio source and operating mode that
were active before switching off the device will be restored.
If Telephone mode was active before you switched off the unit and the igni-
tion and Bluetooth ®
function is not switched on, the screen displays the mes-
sage » page 28 , Problems with the Telephone function . Switch on the igni-
tion or the Bluetooth ®
function » page 14 , Bluetooth ®
settings .
If the vehicle key is pulled out of the ignition lock while the unit is switched on,
the unit will switch off automatically. After switching on the ignition, the unit
is turned on automatically.
If the device was switched off using the
knob, then the device will not
switch on automatically after switching on the ignition.
If the vehicle is equipped with a starter button the device switches off auto- matically after the engine is switched off and the driver's door is opened. If you
open the driver's door before switching off the engine, the device will also
switch off.
When the ignition is switched off, the device switches off automatically after
approx. half an hour (discharge protection of the vehicle battery).
Adjusting volume
Increase the volume
›
Turn the knob to the right.
Reduce the volume
›
Turn the knob to the left.
Muting
›
Press the key or turn the knob to the left and set the volume to 0.
If something is being played over the media at the time of reducing the volume
with the adjustment knob
to 0 then what is being played over the media is
paused.
CAUTION
■ High volumes can cause sound resonance and sound distortion in the vehi-
cle.
Note
■ The change in volume is displayed on the screen.■The following symbol appears in the display when the sound is muted : .■
The speakers in the vehicle are matched for the power output of the device.
6Introductory information
Page 11 of 47
Some of the device's features are also displayed in the MAXI DOT display1)
.
Depending on the equipment they can be operated with the lever or the but-
tons / dials on the multifunction steering wheel.
Note
The buttons and wheels on the multifunction steering wheel will also be lit if
the ignition and the side light are switched on.
Operate with the control lever buttons
Fig. 5
Buttons on the control lever
The separate menus and menu items displayed in the MAXI DOT display can be operated as follows with the buttons on the control lever.
Functions of the buttons on the control leverBut- ton
» Fig. 5ActionFunction
APress and hold buttonDisplay main menuAPress brieflyswitch between menu items and menusBPress brieflyConfirm menu item or menuOperating the audio menu using the buttons / dials on the multifunction steering wheel
Fig. 6
Multifunction steering wheel - Audio menu
›In the main menu of the MAXI DOT display select the menu item
Audio .
The information displayed in MAXI DOT display
■ Radio
■ current radio station frequency band.
■ currently playing station of receivable radio stations in the given frequency
band if less than 5 are receivable.
■ if more than 5 stations can be received, a list of receivable radio stations is
displayed with an option to choose one of them.
■ TP traffic announcements.
■ Media
■ Title. 1)
The display in the MAXI DOT is described in the
» Manual , chapter Information system .
9Unit operation
Page 14 of 47
NoteThe buttons and wheels on the multifunction steering wheel will also be lit if
the ignition and the side light are switched on.Unit settings
Setup menu
Introduction
This chapter contains information on the following subjects:
Main Menu
12
Sound settings
13
Screen settings
13
Time and date settings
13
Keyboard settings
14
Additional keypad language settings
14
Unit settings
14
Restore factory settings
14
Bluetooth ®
settings
14
System Information
15
First and foremost, pay attention to the safety instructions » page 4 , Impor-
tant notes .
This chapter covers the basic settings of the device.
Additional settings are described in the individual menus ■ Volume » page 6
■ Radio » page 19
■ Media » page 23
■ Phone » page 28
■ Vehicle system settings » page 37
Main Menu
The basic parameters for the unit can be set from the Main menu.
Call up the main menu
›
Press the button.
■ Sound - Sound settings » page 13
■ Screen - Screen settings » page 13
12Unit settings
Page 15 of 47
■Time and date - Time and date settings » page 13
■ Language - Set the device language 1)
■ Keypad: - Keypad display for text entry » page 14
■ Additional keypad languages - setting of available keyboard languages in the
input screens » page 14
■ Units - Unit settings » page 14
■ Remove SD card safely - Safe removal of the SD storage card
■ Remove USB safely - safe removal of USB or iPod device
■ Factory settings - Restore to factory settings » page 14
■ Bluetooth - Settings for the Bluetooth ®
function » page 14
■ System information - Displays system information » page 15
■ Copyright - Information on licences and copyrights are only available in Eng-
lish
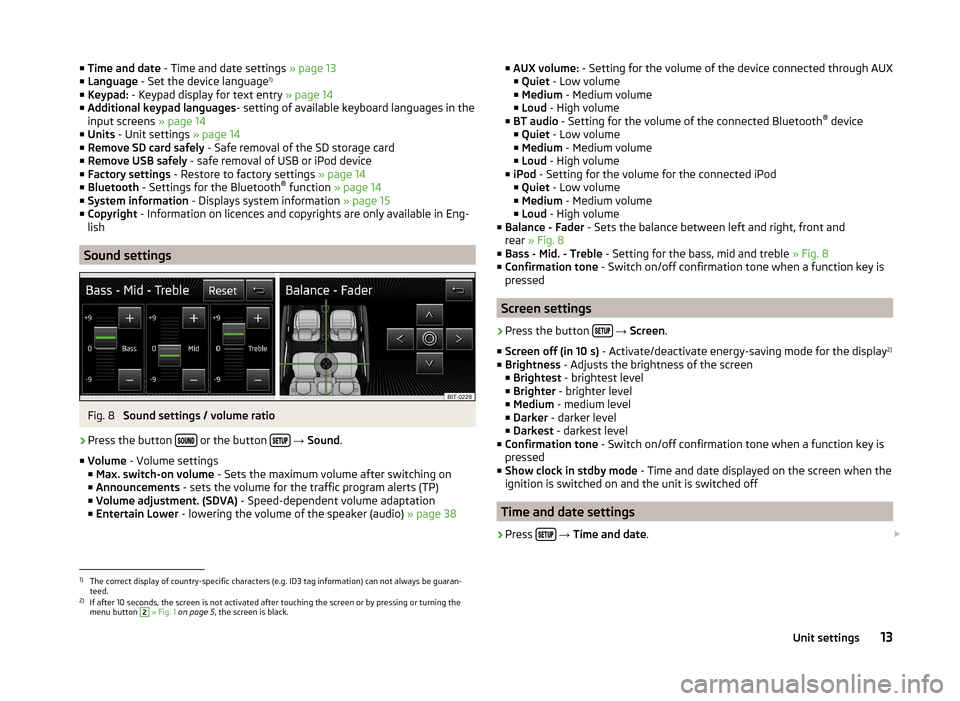
Sound settings
Fig. 8
Sound settings / volume ratio
›
Press the button or the button
→ Sound .
■ Volume - Volume settings
■ Max. switch-on volume - Sets the maximum volume after switching on
■ Announcements - sets the volume for the traffic program alerts (TP)
■ Volume adjustment. (SDVA) - Speed-dependent volume adaptation
■ Entertain Lower - lowering the volume of the speaker (audio) » page 38
■
AUX volume: - Setting for the volume of the device connected through AUX
■ Quiet - Low volume
■ Medium - Medium volume
■ Loud - High volume
■ BT audio - Setting for the volume of the connected Bluetooth ®
device
■ Quiet - Low volume
■ Medium - Medium volume
■ Loud - High volume
■ iPod - Setting for the volume for the connected iPod
■ Quiet - Low volume
■ Medium - Medium volume
■ Loud - High volume
■ Balance - Fader - Sets the balance between left and right, front and
rear » Fig. 8
■ Bass - Mid. - Treble - Setting for the bass, mid and treble » Fig. 8
■ Confirmation tone - Switch on/off confirmation tone when a function key is
pressed
Screen settings
›
Press the button
→ Screen .
■ Screen off (in 10 s) - Activate/deactivate energy-saving mode for the display 2)
■ Brightness - Adjusts the brightness of the screen
■ Brightest - brightest level
■ Brighter - brighter level
■ Medium - medium level
■ Darker - darker level
■ Darkest - darkest level
■ Confirmation tone - Switch on/off confirmation tone when a function key is
pressed
■ Show clock in stdby mode - Time and date displayed on the screen when the
ignition is switched on and the unit is switched off
Time and date settings
›
Press
→ Time and date .
1)
The correct display of country-specific characters (e.g. ID3 tag information) can not always be guaran-
teed.
2)
If after 10 seconds, the screen is not activated after touching the screen or by pressing or turning the menu button
2
» Fig. 1 on page 5 , the screen is black.
13Unit settings
Page 28 of 47
If an Apple device is connected as a Bluetooth®
player at the same time as a
USB device the Bluetooth ®
- player will then be separated » page 24.
Disconnect USB device›
Press the function key in the menu Media
→ Remove USB safely .
After disconnecting the USB audio source, playback will start from the last
played audio source. If this source is not available, the device switches to the
Radio menu.
Loading USB device
With the ignition on after connecting the USB device, the charging process is
automatically started (applies for devices where charging via the USB connec-
tor is possible).
The charging efficiency can be different compared to the charging from the
usual mains power supply.
Some connected devices may not be recognised and cannot be charged.
The charging of the connected device is automatically stopped after switching
off the ignition.
CAUTION
■ USB extension cables or reducers may affect the operation of the connected
external device.■
A video playback is not supported.
Note
When operating as well as connecting the external device, the respective op-
erating instructions are to be observed.
AUX - input
Read and observe
and on page 23 first.
The AUX input is located above the storage box of the front centre con-
sole » Fig. 15 on page 25 .
The AUX input can be an external device and can be connected via a connec- tion cable from the ŠKODA original accessories.
A external device connected to the AUX input cannot be operated from this
unit.
Connecting AUX audio sources
The standard 3.5 mm stereo jack plug is used for the AUX input. If the external
devices do not have this jack plug, you must use an adapter.
After connecting the AUX audio source, the source must be manually selected
for playback from this source » page 24.
Disconnect AUX audio source
After disconnecting the auxiliary audio source is no automatic change to an-
other audio source takes place.
CAUTION
■ The AUX input must only be used for audio devices!■If an external device is connected to the AUX input, which is equipped with
an adapter for external power supply, the sound may be impaired. This de-
pends on the quality of the adapter which is used.
Note
■ The volume can be adjusted by setting the input sensitivity of the connected
AUX audio source » page 13, Sound settings .■
The AUX input can be used for the enabled / disabled selection of the
source » page 23 , Media settings .
26Media
Page 29 of 47
Telephone
Telephone and communication equipment
Introduction
This chapter contains information on the following subjects:
Main menu
27
Problems with the Telephone function
28
Settings
28
First and foremost, pay attention to the safety instructions » page 4 , Impor-
tant notes .
The device allows for a wireless connection to the telephone. Your telephone
can be operated from the device.
The Telephone menu is available when the following conditions are met.
The ignition is switched on.
The Bluetooth ®
function on the device is switched on.
WARNING■ The national legal regulations for using a mobile phone in a vehicle must
be observed.■
The operation of mobile phones without connection to the external an-
tenna can lead to an increase in the strength of the electromagnetic field
inside the vehicle.
■
No objects such as mobile phone mounts, etc. must be attached to the
covers of the airbag modules or be located within their immediate vicinity.
■
Never leave a telephone in the deployment area of an airbag, on a seat,
on the dash panel or in another area, from which it can be thrown during a
sudden braking manoeuvre, an accident or a collision - there is a risk of in-
jury. There are storage compartments with lids and if necessary there is the
multimedia storage compartments to hold this » Vehicle owner's manual ,
chapter Transport and practical equipment .
■
Before transport of the vehicle by air, the Bluetooth ®
function must be
switched off by a specialist company.
CAUTION■ In areas with no signal and possibly in tunnels, garages and subways a tele-
phone conversation can be interrupted and no telephone connection can be
established - not even in an emergency!■
We recommend that the installation of communication equipment in a vehi-
cle be carried out by a specialist firm.
Note
■ The range of the telephone connection to the device using the Bluetooth ®
profile is limited to the vehicle interior. The range is dependent on local condi-
tions, e.g. obstacles between the devices and mutual interferences with other
devices. If your telephone is in a jacket pocket, for example, this can lead to
difficulties when establishing a connection with the device or transferring da-
ta.■
The functionality of the telephone is dependent on the telephone service op-
erator and the phone being used. Further information is available from the tel-
ephone service operator or can be taken from the telephone manual.
Main menu
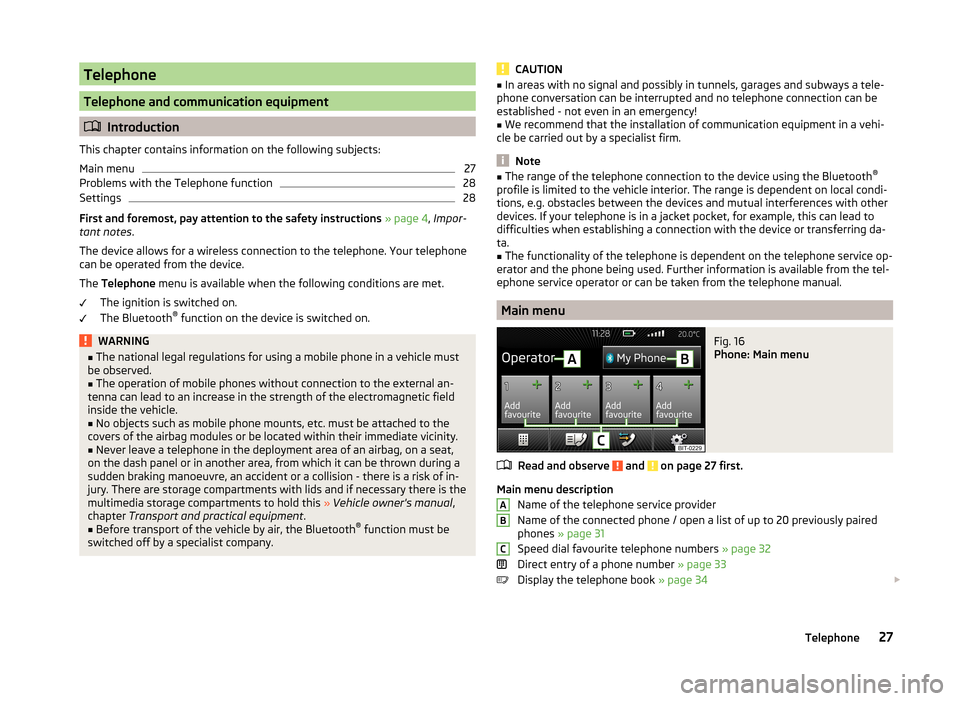
Fig. 16
Phone: Main menu
Read and observe and on page 27 first.
Main menu description
Name of the telephone service provider
Name of the connected phone / open a list of up to 20 previously paired
phones » page 31
Speed dial favourite telephone numbers » page 32
Direct entry of a phone number » page 33
Display the telephone book » page 34
ABC27Telephone
Page 30 of 47
Display of call list (there are new missed calls, the icon will appear here
with the information about the number of missed calls) » page 35
Menu settings for the Telephone » page 28
Call up the main menu›
Press the button.
If a telephone is connected to the device, the telephone mode main menu is
displayed » Fig. 16.
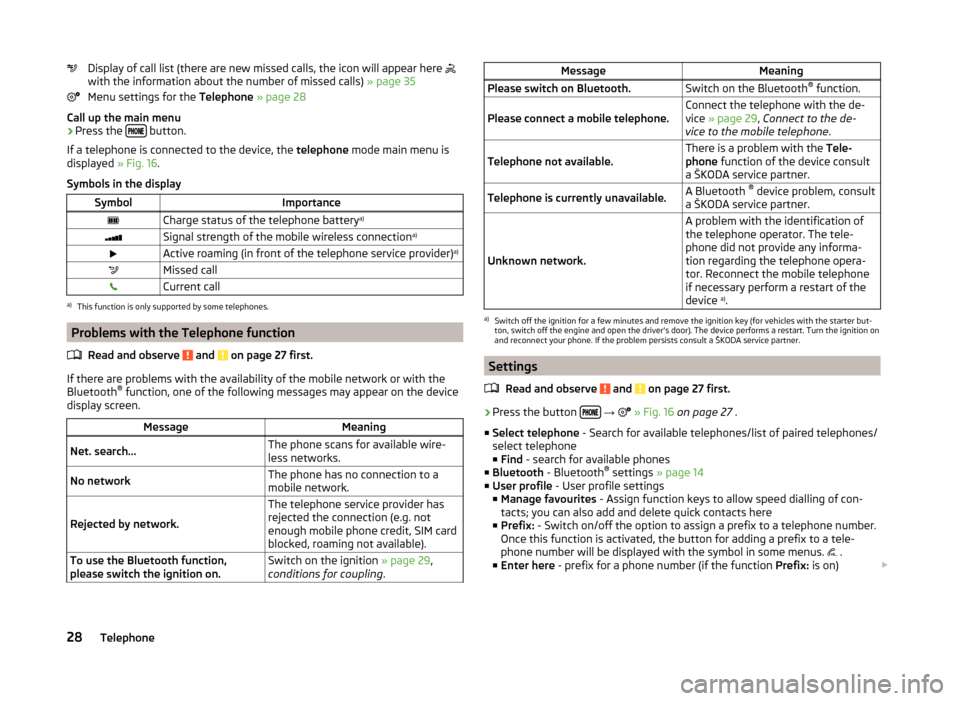
Symbols in the display
SymbolImportanceCharge status of the telephone battery a)Signal strength of the mobile wireless connection a)Active roaming (in front of the telephone service provider) a)Missed callCurrent calla)
This function is only supported by some telephones.
Problems with the Telephone function
Read and observe
and on page 27 first.
If there are problems with the availability of the mobile network or with theBluetooth ®
function, one of the following messages may appear on the device
display screen.
MessageMeaningNet. search…The phone scans for available wire-
less networks.No networkThe phone has no connection to a
mobile network.
Rejected by network.
The telephone service provider has
rejected the connection (e.g. not
enough mobile phone credit, SIM card
blocked, roaming not available).To use the Bluetooth function,
please switch the ignition on.Switch on the ignition » page 29,
conditions for coupling .MessageMeaningPlease switch on Bluetooth.Switch on the Bluetooth ®
function.Please connect a mobile telephone.Connect the telephone with the de-
vice » page 29 , Connect to the de-
vice to the mobile telephone .Telephone not available.There is a problem with the Tele-
phone function of the device consult
a ŠKODA service partner.Telephone is currently unavailable.A Bluetooth ®
device problem, consult
a ŠKODA service partner.
Unknown network.
A problem with the identification of
the telephone operator. The tele-
phone did not provide any informa-
tion regarding the telephone opera-
tor. Reconnect the mobile telephone
if necessary perform a restart of the
device a)
.a)
Switch off the ignition for a few minutes and remove the ignition key (for vehicles with the starter but-
ton, switch off the engine and open the driver's door). The device performs a restart. Turn the ignition on
and reconnect your phone. If the problem persists consult a ŠKODA service partner.
Settings
Read and observe
and on page 27 first.
›
Press the button
→
» Fig. 16 on page 27 .
■ Select telephone - Search for available telephones/list of paired telephones/
select telephone
■ Find - search for available phones
■ Bluetooth - Bluetooth ®
settings » page 14
■ User profile - User profile settings
■ Manage favourites - Assign function keys to allow speed dialling of con-
tacts; you can also add and delete quick contacts here
■ Prefix: - Switch on/off the option to assign a prefix to a telephone number.
Once this function is activated, the button for adding a prefix to a tele-
phone number will be displayed with the symbol in some menus. .
■ Enter here - prefix for a phone number (if the function Prefix: is on)
28Telephone
Page 31 of 47
■Sort by: - Options for the arrangement of the phone book 1)
■ Surname - Sort by contact name
■ 1st name - Sort by contact first name
■ Imp. contacts - Start update of the phone book 2)
» page 35 , Invite list
■ Select ringtone - Selection the ring tone is available if the connected tele-
phone does not support the in-band ringing function 3)
■ Reminder to your mobile - Switch on/off the reminder for a connected tele-
phone; the reminder is sent when the ignition is switched off and the igni-
tion key is removed (for vehicles with a starter button after switching off the
engine and opening the driver's door)
Connect to the device to the mobile telephone
Introduction
This chapter contains information on the following subjects:
conditions for coupling
29
Connect the device to the telephone
29
Connect the mobile telephone with the device
30
Connection with another paired mobile telephone
31
Bluetooth ®
- connection profile
31
Delete the telephone from the list of paired devices
32
Disconnection
32
First and foremost, pay attention to the safety instructions » page 4 , Impor-
tant notes .
The device is displayed in the telephone to be connected to as SKODA BT ...
... is replaced with the last four characters of the vehicle identification number
of your vehicle.
You can change the name of the device » page 14, Bluetooth ®
settings .
WARNINGThe device may require confirmation of certain features in the telephone
when pairing. Therefore do not carry out the pairing process while driving -
there is danger of accidents!Note■ The maximum number of phones registered is 20. Coupling a new phone af-
ter reaching the maximum number causes the telephone that has not been
coupled for the longest time to be automatically replaced.■
In some countries the connection via the Bluetooth ®
function, may be limi-
ted. Further information can be obtained from local authorities.
■
The range of the Bluetooth ®
signal to the system is restricted to the vehicle
interior. The signal can be affected by other equipment or obstacles, such as
luggage.
conditions for coupling
Read and observe
on page 29 first.
To connect a telephone with the device, the two devices must be paired.
Prerequisites for successful pairing: The ignition is switched on.
The Bluetooth ®
function of the device » page 14 and the telephone is
switched on.
The visibility of the device is switched on » page 14.
The visibility of the telephone is switched on.
The phone is within range of the Bluetooth ®
signal.
The pairing can be initiated from the device or from the telephone.
Connect the device to the telephone
Read and observe
on page 29 first.
A telephone is paired with the device
After switching on the ignition, the device attempts to automatically connect
to the last connected telephone.
During the connection setup and depending on the telephone type the device
screen displays may show ... Would you like to connect? and a menu will ap-
pear with the following function keys.
1)
This function is only supported by some telephones.
2)
Some telephones do not support downloading of contacts from the SIM card.
3)
The in-band ringing function makes it possible to use the ring tone of your telephone as the ring tone.
29Telephone
Page 32 of 47
›Connect
- pairing confirmation
› Cancel
- stops the coupling process
If the connection cannot be established, the device will then attempt to con- nect to other previously paired telephones one by one.
If there is also no connection, then a telephone search is to be started.
If the telephone to be connected has an active connection to another device,
then coupling occurs, but no connection is made.
No telephone is paired with the device
After switching on the ignition, on the device screen the message Please con-
nect a mobile telephone. appears and a menu with the following function
keys.
› Find telephone
- search for available telephones with activated Bluetooth ®
function and visibility
› Paired devices
- Opens a list of paired phones when a phone was already
paired with the device
›
- Opening of the settings menu
» page 28, Settings
After pressing the function key Find telephone the list is incrementally upda-
ted and displayed until the search for Bluetooth ®
devices is completed (after
about 1 min.).
Select the telephone you want from the list BT devices.
If the search fails, check that the conditions for successful pairing are
met » page 29 , conditions for coupling and repeat the whole process. Press
the function key Find.
Pairing confirmation
Depending on the telephone's Bluetooth ®
, conformation is in one of the fol-
lowing ways.
› Confirm the 6-digit PIN code 1)
displayed on the device screen and the tele-
phone display within 30 seconds on both the device and the telephone.
or› Confirm the connection request in the telephone.
› Enter the 4 digit PIN code shown on the unit display into the telephone with-
in 30 seconds 2)
.
Connection
After successful connection, the main menu Telephone appears » Fig. 16 on
page 27 .
In some phones, a confirmation regarding the downloading of the contacts in
the device memory is necessary. If no confirmation takes place on the phone
regarding the downloading of the contacts, then is no downloading of con-
tacts takes place.
Note
■ During the pairing process the option in the phone to remember the pass-
word for the next automatic connection can be selected 3)
.■
If the telephone supports the Bluetooth ®
profile A2DP or AVRCP 4)
, your tele-
phone display may prompt you to pair the telephone as a Bluetooth ®
player.
Connect the mobile telephone with the device
Read and observe
on page 29 first.
When pairing from the telephone, follow the instructions in the owner's man-
ual of the telephone.
›
Have the telephone search for available Bluetooth ®
devices.
›
Select the device in the list of Bluetooth ®
devices 5)
.
The following message is shown in the device screen during pairing ... Would
you like to connect? , and the following function keys are displayed.
› Connect
- confirmation of the coupling process
› Cancel
- stops the coupling process
Depending on the telephone's Bluetooth ®
, conformation is in one of the fol-
lowing ways.
1)
For devices with Bluetooth ®
v2.1 and later the telephone quick pairing procedure (SSP Secure Simple
Pairing) is used for pairing. This pairing method does not require the user to enter a PIN.
2)
The input and confirmation of the PIN code is not possible while driving.
3)
This function is only supported by some telephones.
4)
A2DP and AVRCP are Bluetooth ®
profiles that support multimedia functions.
5)
For the name of the device refer to the Bluetooth ®
settings » page 14 .
30Telephone