maintenance SKODA FABIA 2016 3.G / NJ User Guide
[x] Cancel search | Manufacturer: SKODA, Model Year: 2016, Model line: FABIA, Model: SKODA FABIA 2016 3.G / NJPages: 196, PDF Size: 31.86 MB
Page 135 of 196
Protection of cavities
All the cavities of your vehicle which are at risk from corrosion are protected by
a layer of long-lasting protective wax applied in the factory.
If any small amount of wax flow out of the cavities at high temperatures, these
must be removed with a plastic scraper and the stains cleaned using a petrole-
um cleaner.
Underbody
The underside of your vehicle is already permanently protected by the factory
against chemical and mechanical influences.
We recommend having the protective coating — preferably before the begin-
ning of winter and at the end of winter.
Product life of the films
Environmental influences (e.g. sunlight, humidity, air pollution, rockfall) affect
the life of the films. The films age and become brittle, which is normal; this
shall not be considered a fault.
The sunlight may also affect the depth of the film colour.
When transporting a load on the roof rack (e.g. roof box, etc.), there is an in- creased risk of film damage (e.g. due to rockfall from the secured load).
CAUTION
■ Vehicle paint
■ Repair damaged areas as soon as possible.
■ Matt-painted parts should not be treated with polishes or hard waxes.
■ Do not polish in a dusty environment - risk of paint scratches.
■ Do not apply polish to door seals or window guides.■
Plastic parts
■ Do not use paint polish.
■
Chromed and anodised parts
■ Do not polish in a dusty environment - risk of surface scratches.
■
Films
The following instructions must be observed, otherwise there is a risk of film
damage.
■ Do not use dirty cloths or sponges for cleaning.
■ Do not use a scraper or other means to remove ice and snow.
■ Do not polish the films
■ Do not use a high pressure cleaner on the films.
■
Rubber seals
■ Do not treat the door seals and window guides deal with anything - the
protective varnish coating could be damaged.
■ Windows and door mirrors
■ Do not clean the insides of the windows/mirrors with sharp objects - risk of
damage to the filaments or the antenna. ■ Do not use a cloth which has been used to polish the body - this could dirty
the window and impair visibility.■
Head / tail lights
■ Do not wipe head/tail lamps dry, do not use any sharp objects - risk of dam-
age to the protective coating and cracks forming on the headlamp glass cov-
ers.
■
Reversing camera
The following instructions must be observed, otherwise there is a risk of
camera damage.
■ Do not remove snow / ice with warm / hot water.
■ To wash, never use a pressure washer or steam jet.
■ For cleaning, do not use abrasive cleaners.
■
Door lock cylinders
■ Make sure that as little water as possible gets into the locking cylinder
when washing the vehicle - there is a risk of freezing the lock cylinder!
■
Wheels
■ Heavy soiling of the wheels can affect the balance of the wheels - the re-
sult can be a vibration, which can cause premature wear of the steering.
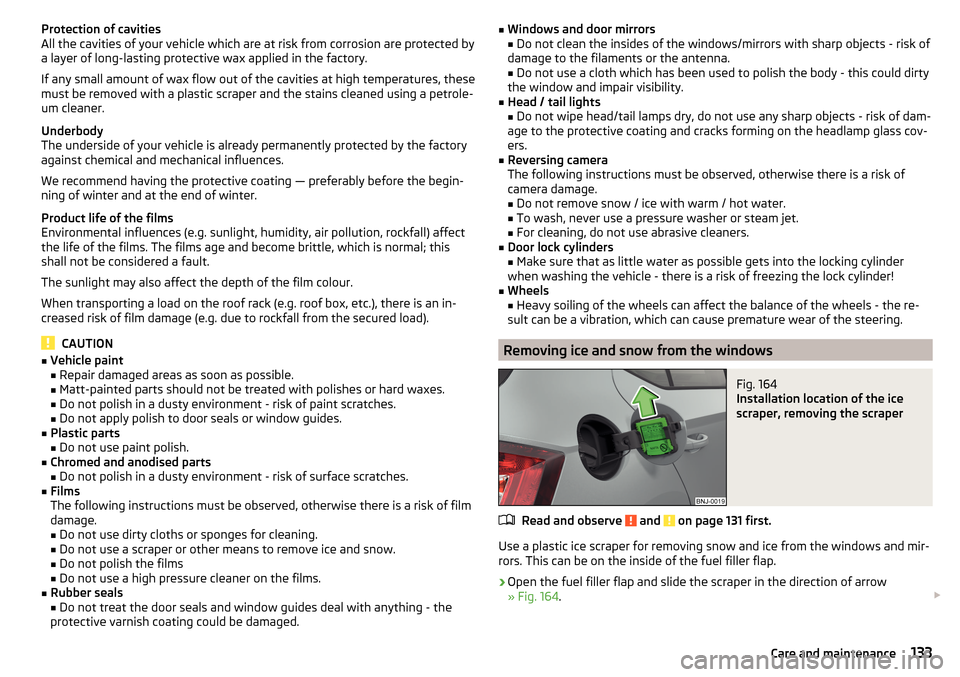
Removing ice and snow from the windows
Fig. 164
Installation location of the ice
scraper, removing the scraper
Read and observe and on page 131 first.
Use a plastic ice scraper for removing snow and ice from the windows and mir-
rors. This can be on the inside of the fuel filler flap.
›
Open the fuel filler flap and slide the scraper in the direction of arrow
» Fig. 164 .
133Care and maintenance
Page 136 of 196

CAUTION■Move the scraper in one direction only, otherwise there is a risk of damage to
the glass surface.■
Do not remove snow / ice on the surface that is soiled (e.g. pea gravel, sand,
road salt) - there is a risk of damaging the surface.
■
Remove snow / ice carefully, otherwise there is a risk of damaging the labels
that have been fitted to the vehicle by the factory.
Caring for the interior
Read and observe
and on page 131 first.
Vehicle compo- nentsCircumstancesRemedy
Natural leather /
Faux leather /
Alcantara ®
/
Material
Dust, surface
soilingVacuum cleanerSoiling (fresh)Water, slightly damp cotton / wool
cloth, if necessary, mild soap solution a)
,
then wipe off with a soft clothStubborn stainsCleaning fluid specifically for this taskCare (natural
leather)Treat the leather periodically with a
leather protecting fluid / use a care
cream with light blocker and impregna-
tion after each cleaningCare (Alcan-
tara ®
/ material)Remove stubborn hair using a “cleaning
glove”
Remove pills from materials with a
brushPlastic partsSoilingWater, slightly damp cloth or sponge, if
necessary cleaners specifically for this
purposeWindowsSoilingWash with clean water and dry with a
wipe specifically for that purposeCovers on electri-
cally heated seatsSoilingCleaners specifically for this purposeSeat belts » Soilingsoft cloth and mild soap solution a)a)
Mild soap solution = 2 tablespoons of natural soap to 1 litre of lukewarm water.
WARNING■
Never clean the seat belts chemically as chemical cleaning products could
destroy the fabric.■
Air fresheners and scents can be hazardous to heath when the tempera-
ture inside the vehicle is high.
CAUTION
■ Natural leather /Faux leather / Alcantara ®
/ material
■ Avoid standing for lengthy periods in bright sunlight, and protect the mate-
rials by covering to prevent them from fading.
■ Remove fresh stains (e.g. from pens, lipstick, shoe polish and similar) as
soon as possible.
■ Ensure that no part of the leather is soaked through during cleaning and
that no water gets into the seams - risk of damaging the leather!
■ Do not clean the roof panelling with a brush – risk of damage to the surface
of the panelling.
■ Do not use leather cleaners, floor wax, shoe cream, stain remover or similar
agents on Alcantara ®
seat upholstery.
■ Some clothing fabrics (e.g. dark denim) do not have sufficient colour fast-
ness - this could lead to clearly visible discolouration on the upholstery. This
is not a defect in the fabric.
■ Sharp objects on garments (e.g. zips, rivets, sharp- edged belts) can dam-
age the upholstery fabrics in the vehicle. Such damage will not be recognised
as a justified complaint.■
Plastic parts
■ Do not attach scents or air fresheners to the dash panel – risk of damage to
the dash panel.
■
Windows
■ Do not attach any stickers to the filaments or glass antenna - there is risk
of damage.
■
Covers on electrically heated seats ■ Do not clean either with water or with other liquids - risk of damage to the
heating system. ■ Do not dry by switching on the heating.
■
Seat belts
■ After cleaning the belts, allow them to dry before retracting them.
Note
During vehicle use, some minor changes may become visible on the leather
and Alcantara ®
(due to e.g. folds, discolouration).134General Maintenance
Page 138 of 196

The vehicle can only operate with unleaded petrol that meets standard EN
228 1)
, and contains maximum 10% bioethanol (E10).
Unleaded petrol 95/91 or 92 or 93 RON/ROZ
We recommend using petrol 95 RON.
Optionally, the petrol 91 ,92 or. 93 RON can be used (slight power loss, a slight-
ly increased fuel consumption).
Specified petrol is unleaded, min. 95 RON / ROZ
Use min. 95 ROZ petrol.
In an emergency , 91 . 92 or 93 ROZ petrol can be used (slight loss of power,
slightly increased fuel consumption) »
.
CAUTION
The following instructions must be observed, otherwise there is a risk of dam-
age to the engine and to the exhaust system.■
When petrol with a lower than the prescribed octane is used, only continue
driving at mid-range engine speeds and with minimal strain on the engine. Re-
fuel using petrol of the prescribed octane number as soon as possible.
■
Lower than 91 octane petrol should not be used, even in an emergency!
■
If a fuel other than unleaded fuel which complies to the above mentioned
standards (e.g. leaded petrol) is put in the tank by mistake, do not start the en-
gine or switch on the ignition.
CAUTION
Petrol additions (additives)■Unleaded petrol complying with the EN 228 standard 1 )
meets all the condi-
tions for problem-free engine operation. We therefore do not recommend mix-
ing fuel additives into the petrol - risk of engine damage or damage to the ex-
haust system.■
The following additives may not be used - risk of engine damage or damage
to the exhaust system! ■ Additives with metal components (metallic additives), in particular with
manganese and iron content.
■ Fuels with metallic content (e.g. LRP - lead replacement petrol).
Note■Unleaded petrol that has a higher octane number than that required by the
engine can be used without limitations.■
On vehicles with prescribed unleaded petrol 95/91, 92 or 93 RON, the use of
petrol with a higher octane number than 95 RON does not result in a noticea-
ble power increase or a lower fuel consumption.
■
On vehicles using the prescribed unleaded petrol of min. 95 RON, the use of
petrol with a higher octane number than 95 RON can lead to an increase in
power and reduction in fuel consumption.
Diesel fuel
Read and observe
and on page 135 first.
The correct fuel for your vehicle is specified on the inside of the fuel filler
flap » Fig. 165 on page 135 .
The vehicle can only be operated using diesel fuel that complies with the
standard EN 5902)
and contains a maximum 7% biodiesel (B7)3)
.
Operating under different weather conditions
Use only diesel in accordance with the current or expected weather conditions.
Ask the petrol station personnel whether the diesel fuel offered corresponds
to these conditions.
CAUTION
The following instructions must be observed, otherwise there is a risk of dam-
age to the engine and to the exhaust system.■
If a different fuel other than diesel fuel, which complies to the above men-
tioned standards (e.g. petrol) is used, do not start the engine or switch on the
ignition!
■
The biofuel RME must not be used!
1)
In Germany also DIN 51626-1 or E10 for unleaded petrol with octane rating 95 or 91 or DIN 51626-2 or E5
for unleaded petrol with octane rating 95.
2)
In Germany DIN 51628, in Austria ÖNORM C 1590, in Russia GOST R 52368-2005 / EN 590: 2004, in India
IS 1460 / Bharat IV or in an emergency IS 1460 / Bharat III.
3)
In Germany complying with standard DIN 52638, in Austria ÖNORM C 1590, in France EN 590.
136General Maintenance
Page 140 of 196

Opening and closing the bonnetFig. 167
Opening the bonnet
Read and observe
and on page 137 first.
Open flap
›
Ensure that the windscreen wipers are not raised away from the windscreen
- risk of damage to the bonnet.
›
Open the front door and pull the release lever below the dash panel in the
direction of arrow
1
» Fig. 167 .
›
Press the release lever in the direction of arrow
2
and the bonnet will be
unlocked.
›
Raise the bonnet in the direction of the arrow
3
.
›
Remove the lid prop in the direction of arrow
4
from the holder.
›
Secure the open flap inserting the end of the post into the opening in the di-
rection of arrow
5
.
Close the flap
›
Lift the bonnet.
›
Decouple the bonnet support and press into the holder designed to hold it.
›
Drop down the bonnet lid from a height of about 20 cm applying light pres-
sure until it clicks safely into place.
WARNING■ Never drive with the bonnet lid not properly closed - risk of accident!■Make sure that when closing the bonnet, no body parts are crushed -
there is danger of injury!Engine compartment overviewFig. 168
Arrangement (example) in the engine compartment
Read and observe
and on page 137 first.
Windscreen washer fluid reservoir
139
Coolant expansion reservoir
141
Engine oil dipstick
140
Engine oil filler opening
140
Brake fluid reservoir
142
Vehicle battery
142ABCDEF138General Maintenance
Page 142 of 196
Vehicles with fixed service intervalsPetrol enginesSpecification1.0 l/44, 55 kW MPI - EU6
VW 502 00
1.0 l/55 kW MPI - EU41.2 l/66, 81 kW TSI1.6 l/66, 81 kW MPIDiesel enginesSpecification1.4 l/55, 66, 77 kW TDI CRVW 507 00
Engine oil VW 505 01 can optionally be used in diesel engines without a DPF.
CAUTION
■
If no prescribed engine oil is available, then max. 0.5 l oil of the following
specifications can be refilled. ■Petrol engines: ACEA A3/ACEA B4 or API SN, (API SM);
■ Diesel engines: ACEA C3 or API CJ-4.
Check and refill
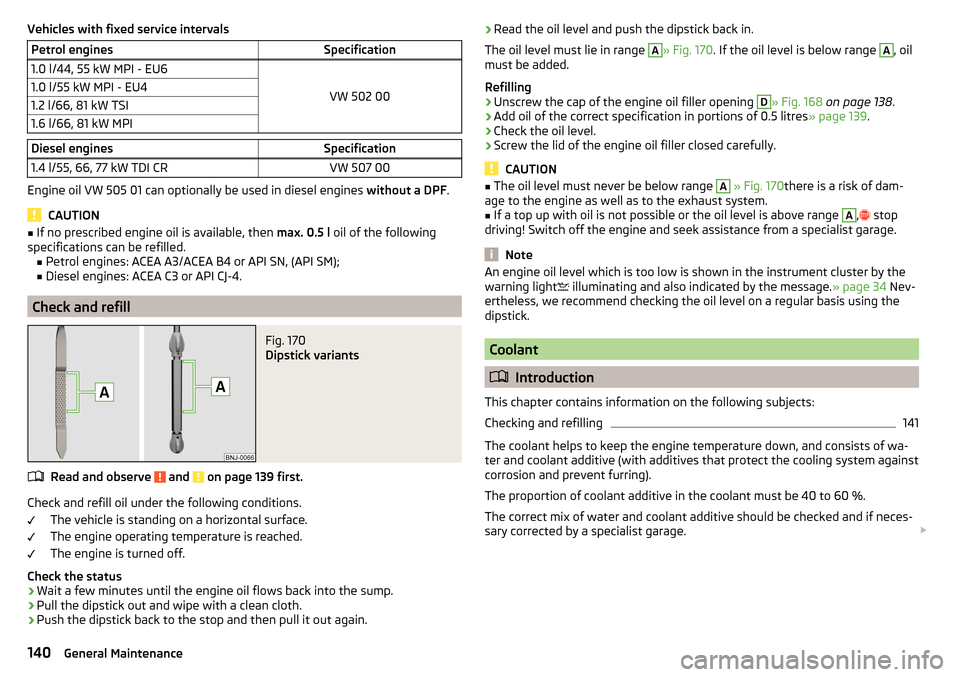
Fig. 170
Dipstick variants
Read and observe and on page 139 first.
Check and refill oil under the following conditions.
The vehicle is standing on a horizontal surface.
The engine operating temperature is reached.
The engine is turned off.
Check the status
›
Wait a few minutes until the engine oil flows back into the sump.
›
Pull the dipstick out and wipe with a clean cloth.
›
Push the dipstick back to the stop and then pull it out again.
› Read the oil level and push the dipstick back in.
The oil level must lie in range A
» Fig. 170 . If the oil level is below range
A
, oil
must be added.
Refilling
›
Unscrew the cap of the engine oil filler opening
D
» Fig. 168 on page 138 .
›
Add oil of the correct specification in portions of 0.5 litres » page 139.
›
Check the oil level.
›
Screw the lid of the engine oil filler closed carefully.
CAUTION
■
The oil level must never be below range A » Fig. 170 there is a risk of dam-
age to the engine as well as to the exhaust system.■
If a top up with oil is not possible or the oil level is above range
A
,
stop
driving! Switch off the engine and seek assistance from a specialist garage.
Note
An engine oil level which is too low is shown in the instrument cluster by the
warning light illuminating and also indicated by the message. » page 34 Nev-
ertheless, we recommend checking the oil level on a regular basis using the
dipstick.
Coolant
Introduction
This chapter contains information on the following subjects:
Checking and refilling
141
The coolant helps to keep the engine temperature down, and consists of wa-
ter and coolant additive (with additives that protect the cooling system against
corrosion and prevent furring).
The proportion of coolant additive in the coolant must be 40 to 60 %.
The correct mix of water and coolant additive should be checked and if neces-
sary corrected by a specialist garage.
140General Maintenance
Page 144 of 196

Brake fluidFig. 172
Brake fluid reservoir
Check the brake fluid under the following conditions.The vehicle is on a horizontal surface.
The engine is turned off.
Check brake fluid level - The brake fluid level must lie between the markings
“MIN” and “MAX” » Fig. 172.
Specification - The brake fluid must comply with the standard VW 501 14 (this
standard meets the requirements of FMVSS 116 DOT4).
WARNING■ The following instructions must be followed at all times when working on
the engine compartment » page 137.■
If the fluid level drops significantly within a short time or if it drops below
the “MIN” » Fig. 172mark, this may be an indication of a leak in the brake
system.
Stop driving - There is a risk of an accident! Seek help from a
specialist garage.
Note
■ The brake fluid is changed as part of a compulsory inspection service.■A low brake fluid level which is too low is indicated by the warning light
being shown on the display of the instrument cluster as well as the corre-
sponding message » page 29. We still recommend inspecting the brake fluid
level in the reservoir from time to time.Vehicle battery
Introduction
This chapter contains information on the following subjects:
Check condition
143
Charging
144
Disconnect/reconnect and change
144
The vehicle battery represents a power source for the motor to start and for the supply of electrical consumers in the car.
Automatic shutdown of consumers - vehicle battery discharge protection
The on-board power supply system tries to prevent the vehicle battery from
discharging in the following ways when it is subject to heavy loading. ▶ By increasing the engine idle speed.
▶ Through the power limitation of certain loads.
▶ By switching off some loads(heated seats, heated rear window) for as long
as necessary.
Warning symbols on the vehicle battery
SymbolMeaningAlways wear eye protection.Battery acid is severely caustic. Always wear gloves and eye pro-
tection.Keep fire, sparks, open flames and lit cigarettes well clear of the
vehicle battery.When charging the vehicle battery, a highly explosive gas mixture
is produced.Keep children away from the vehicle battery.WARNINGBattery acid is highly corrosive - it can cause injury, chemical burns or poi-
soning! Corrosive vapours in the air irritate and damage the respiratory
tract and the eyes. The following guidelines must be observed.■
Always wear protective gloves, eye and skin protection when handling
the vehicle battery.
142General Maintenance
Page 146 of 196

ChargingRead and observe
and on page 142 first.
Only charge the battery when the ignition and all consumers are switched off.
Refer to the instructions of the charger manufacturer.
Charging
›
For vehicles withthe START-STOPsystem or auxiliary heater
, connect the -
terminal of the charger on the battery’s
-pole,
the -terminal of the charg-
er to the ground point of the engine » page 157.
›
For vehicles without the START-STOPsystem or auxiliary heating, connect
the charger terminals to the corresponding battery poles ( to
,
to
).
›
Plug the mains cable of the charger into the power socket and switch the
charger on.
›
Once charging is complete: Switch off the charger and remove the mains ca-
ble from the power socket.
›
Disconnect the terminals of the charger from the vehicle battery.
A charging current of 0.1 multiple of the total vehicle battery capacity (or low-
er) must be used until full charging is achieved.
WARNING■ When charging the vehicle battery, hydrogen is released - risk of explo-
sion. An explosion can be caused through sparking while unclamping or
loosening the cable plug.■
So-called“quick-charging” of the vehicle battery is dangerous and re-
quires a special charger and specialist knowledge. Therefore, have“Quick
loading” carried out by a specialist garage.
Disconnect/reconnect and change
Read and observe
and on page 142 first.
The new vehicle battery must have the same capacity, voltage, current and the
same size as the original battery.
We recommend you have the battery replaced by a specialist garage.
›
To disconnect , switch off the ignition and disconnect the negative terminal
first , then disconnect the positive terminal
.
›
When
reconnecting the battery, reconnect the positive terminal first
, then
connect the negative terminal .
After disconnecting and re-connecting the vehicle battery, the following func-
tions or devices are partially or completely inoperative.Function / deviceOperating measurePower windows» page 52Time settings» page 37
CAUTION
■ Disconnect the battery only with the ignition and consumers turned off - risk
of damaging the electrical system of the vehicle.■
Before disconnecting the battery, always close all electric windows other-
wise malfunctions of the window can occur.
■
Under no circumstances mix up the charging cables – risk of fire.
Note
After disconnecting and reconnecting the vehicle battery, we recommend hav-
ing the vehicle checked by a specialist to ensure that the full functionality of
the vehicle is guaranteed.144General Maintenance
Page 148 of 196

Tyre pressureFig. 174
Label with a table of tyre sizes and tyre pressure value / inflate
tyres
The prescribed tyre inflation is on the sticker with pictograms
A
» Fig. 174 (for
some countries, the pictograms are replaced with a text).
Tyre pressure is always to match the load .
Inflation pressure for half load
Inflation pressure for environmentally friendly operation (slightly lower
fuel consumption and emissions)
Inflation pressure for full load
Tyre diameter in inches
This information serves merely as information for the prescribed tyre pres-
sure. This is not a list of shared tyre sizes for your vehicle. These are in the
vehicle's technical documentation, in the declaration of conformity (in so-
called COC document) and listed on the vehicle data » page 173.
Tyre pressure value on the front axle
Tyre pressure value on the rear axle
Check tyre pressures
Check the tyre pressure (including that of the emergency or spare wheel) at
least once a month and also before setting off on a long journey.
Always check the inflation pressure when the tyres are cold. Do not reduce the
higher pressure of warm tyres.
In vehicles with tyre pressure monitoring, tyre pressure values must be saved
each time the pressures are changed » page 117.
BCDEFGWARNING■
Do not drive with incorrect tyre pressure - risk of accident.■In the event of very rapid pressure loss (e.g. in the event of tyre damage)
an attempt should be made to bring the vehicle carefully to a stop without
sudden steering movements and without any hard braking - risk of acci-
dent.
Note
The declaration of conformity (the COC document) can be obtained from a
ŠKODA partner 1)
.
Tyre wear and wheel change
Fig. 175
Tyre wear indicator / wheel change
Tyre wear increases in the following circumstances.
▶ Incorrect tyre pressures.
▶ Driving style (e.g. fast cornering, rapid acceleration / braking).
▶ Incorrect wheel balancing (you should have the wheels balanced after
changing/repair tyres or if the steering “is drifting”).
▶ Wheel alignment errors.
There are wear indicator markers in the tyre profiles, indicating whether the
minimum permissible tread depth has been reached » Fig. 175 -
. A tyre
should be regarded as worn out when this indicator is flush with the tread.
Markings on the walls of the tyres through the letters “TWI” and/or other sym- bols (e.g. ), identify the position of the wear indicators.
To ensure uniform wear on all tyres, we recommend that you change the
wheels every 10 000 km, in line with the schedule » Fig. 175 -
.
1)
Only valid for some countries and some models.
146General Maintenance
Page 150 of 196

Operating in winter conditions
All-year (or “winter”) tyres
All-year or “winter”tyres (indicated by an M+S or a mountain peak/snowflake
symbol ) to improve the performance of the vehicle in winter conditions.
To get the best possible driving characteristics, all-year or “winter”tyres, with a
minimum tread depth of 4 mm on all four wheels, should be fitted.
If “winter” tyres are mounted, summer tyres should be fitted again in good
time as they provide better handling properties, a shorter braking distance,
less tyre noise and reduced tyre wear on roads which are free of snow and ice
as well as at temperatures above 7 °C.
Speed symbol
All-year or “winter”tyres (marked with M+S and a peak/snowflake symbol
) of
a lower speed category than listed in the vehicle’s technical documentation
can be used provided that the maximum permissible speed for these tyres is
not exceeded even if the maximum possible speed of the vehicle is higher.
For vehicles with Infotainment System with the key the speed limit for all-
season or“winter”Tires can be set » Owner's Manual infotainment . For other
vehicles, there is the option to set the speed limit for winter tyres at a special-
ist garage.
If the vehicle has all-season or “winter”tires of a lower speed category then
the specified maximum speed of the vehicle (referring to tyres that have not
been delivered by the factory, a warning label with the maximum value of the
speed category provided for the mounted tyres must be fixed in the interior of
the vehicle in a constantly visible place in the driver’s field of vision. The warn-
ing label (sticker) can be replaced by setting the maximum value of the speed
category supplied for the mounted tyres in Infotainment 1)
. This specification
defines the maximum vehicle speed with mounted all-season or “winter”tyres
that may not be exceeded.
Snow chains
The snow chains improve handling in wintry road conditions.
Remove the full wheel trims before installing the snow chains » page 152.
Snow chains must only be fitted on the front wheels and are applicable only to
the following wheel / tyre combinations.Rim sizePress depth DTyre size5J x 1435 mm175/70 R14
Only fit snow chains with links and locks not larger than 9 mm.
Rim sizePress depth DTyre size6J x 1538 mm185/60 R15
Only fit snow chains with links and locks not larger than 12 mm.
WARNINGDo not use chains on snow and ice-free routes - the handling would be im-
paired and there is a risk of damage to the tyres.1)
Valid in certain countries.
148General Maintenance
Page 185 of 196
Information on braking93
Warning lights29
Brake system101
Braking Running in
98
Breakdown kit154
Breakdown service see Help in an emergency
8
Bulbs Replacing
165
Button in driver's door electric windows
51
C
Camera See reversing camera
105
CAR See Owner´s Manual -Infotainment
6
Car battery Check condition
143
Cover143
Disconnecting and reconnecting144
Replacing144
Winter operation143
CAR button See Owner´s Manual -Infotainment
6
Car care131
Exterior132
Interior134
Outside133
Car computer see multifunction display
38
Care and maintenance127
Cargo element80
Carrier84
Car wash131
Car washing131
Exterior132
Interior134
washing131
Central locking44
Problems48
Central locking button46
Change battery
159
Changing Windscreen wiper blades
162
Changing a wheel151
Changing151
Changing gear Selector lever
96
Changing wheels Wheels
151
Charging a vehicle battery144
Check Brake fluid
142
Engine oil140
Fit ball head properly121
Oil level140
Checking Battery status
143
Coolant141
Checks Statutory checks
127
Children and safety20
Child safety lock48
Child seat20
Classification22
Installation location22, 23
in the passenger seat22
ISOFIX23
on the front passenger seat21
on the passenger seat21
TOP TETHER24
Cigarette lighter69
Cleaning the vehicle Outside133
Windows133
Climatronic85
Automatic operation87
Operating elements87
Recirculated air mode88
Clothes hook72
cockpit26
Cockpit Lighting
57
Coin and card holders67
Comfort signalling54
COMING HOME56
Compartments66
Component protection128
Computer see multifunction display
38
Coolant140
Checking141
Refilling141
Temperature display28
Warning light34
CORNER See Fog lights with the CORNER function
56
Correct routing of seat belt
14
Correct seated position10
Correct seating position12
Cruise Control System107
Cup holders68
D
DAY LIGHT see Daylight running lights
54
Daylight running lights54
dazzle59
De-icing rear window58
183Index