ECO mode SKODA FABIA 2016 3.G / NJ Owner's Manual
[x] Cancel search | Manufacturer: SKODA, Model Year: 2016, Model line: FABIA, Model: SKODA FABIA 2016 3.G / NJPages: 196, PDF Size: 31.86 MB
Page 8 of 196
On-board literature
You will always find this Owner's Manual in the on-board literature. Depending
on the equipment installed, the on-board literature may also contain the Info-
tainment Owner's Manual.
Owner´s Manual
These Owner´s Manual apply to all body versions of the vehicle and all related
models as well as for all equipment levels .
This Owner's Manual describes all possible equipment versions without iden-
tifying them as special equipment, model variants or market-dependent equip-
ment. Consequently, this vehicle does not contain all of the equipment com-
ponents described in this Owner's Manual.
The range of equipment installed in your vehicle depends on the purchase
contract for the vehicle. If you have any questions regarding the scope of
equipment, please contact a ŠKODA Partner.
The Pictures in this Owner's Manual are for illustration purposes only. The il-
lustrations can differ in minor details from your vehicle; they are only intended
to provide general information.
ŠKODA AUTO pursues a policy of ongoing product and model development
with all vehicles. Each time, therefore, any changes to the vehicle occur, the
scope of delivery may change in terms of its equipment and technology. The
information listed in this Owner's Manual corresponds to the information avail-
able at the time of going to press.
Therefore legal claims cannot be made based on the technical data, illustra-
tions and information contained in this Owner's Manual.
We recommend that web pages that are referred to in this Owner's Manual are
displayed using the classic view. Not all necessary information may be dis-
played correctly if the mobile view is chosen.
Infotainment Owner's Manual
The Infotainment Owner's Manual contains a description of the Infotainment
service and possibly also some functions and vehicle systems.Online user manualsFig. 1
On-board literature online on the
ŠKODA web pages
To display user manuals online proceed as follows.
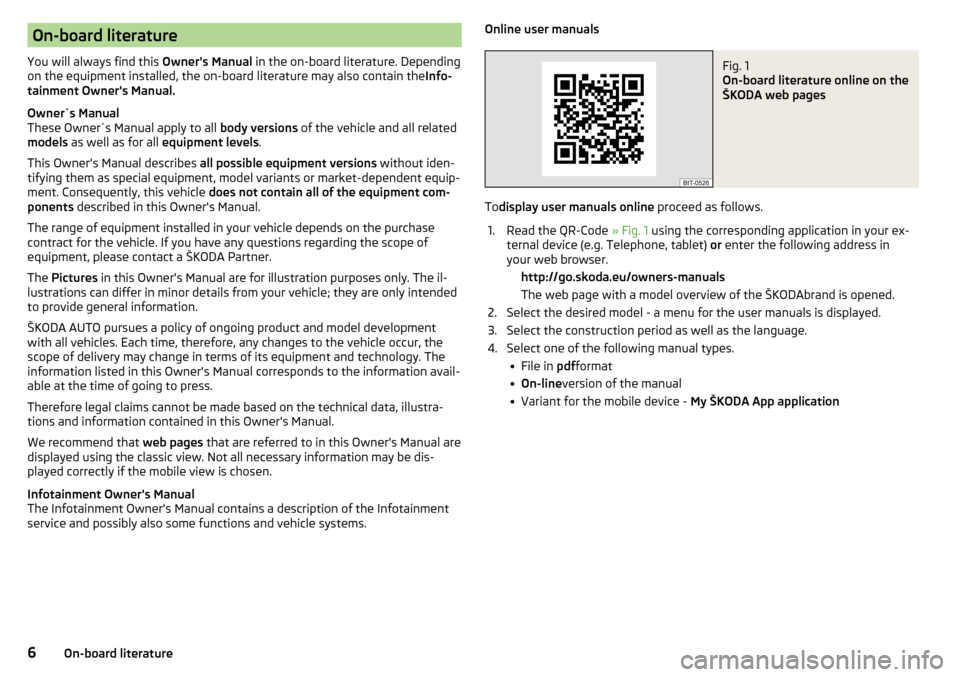
1.Read the QR-Code » Fig. 1 using the corresponding application in your ex-
ternal device (e.g. Telephone, tablet) or enter the following address in
your web browser. http://go.skoda.eu/owners-manuals The web page with a model overview of the ŠKODAbrand is opened.2.Select the desired model - a menu for the user manuals is displayed.3.Select the construction period as well as the language.4.Select one of the following manual types. File in pdfformat On-line version of the manual Variant for the mobile device - My ŠKODA App application6On-board literature
Page 29 of 196
Instruments and warning lights
Instrument cluster
Introduction
Fig. 17
Instrument cluster - Version 1
Fig. 18
Instrument cluster - Version 2
This chapter contains information on the following subjects:
Rev counter
27
Coolant temperature gauge
28
Fuel gauge
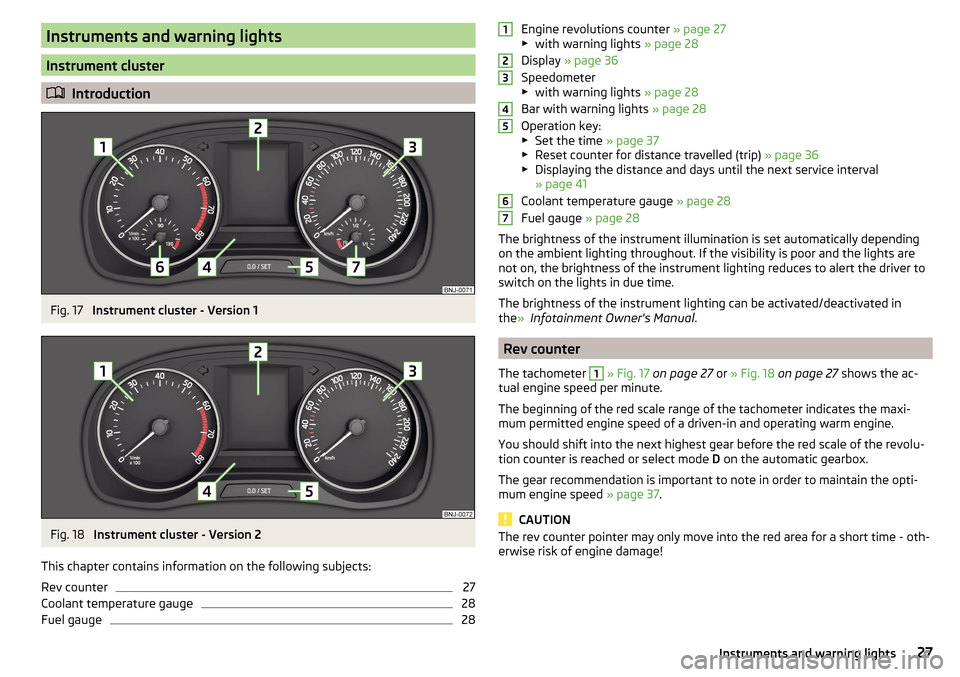
28Engine revolutions counter » page 27
▶ with warning lights » page 28
Display » page 36
Speedometer
▶ with warning lights » page 28
Bar with warning lights » page 28
Operation key: ▶ Set the time » page 37
▶ Reset counter for distance travelled (trip) » page 36
▶ Displaying the distance and days until the next service interval
» page 41
Coolant temperature gauge » page 28
Fuel gauge » page 28
The brightness of the instrument illumination is set automatically depending
on the ambient lighting throughout. If the visibility is poor and the lights are
not on, the brightness of the instrument lighting reduces to alert the driver to
switch on the lights in due time.
The brightness of the instrument lighting can be activated/deactivated in
the » Infotainment Owner's Manual .
Rev counter
The tachometer
1
» Fig. 17 on page 27 or » Fig. 18 on page 27 shows the ac-
tual engine speed per minute.
The beginning of the red scale range of the tachometer indicates the maxi-
mum permitted engine speed of a driven-in and operating warm engine.
You should shift into the next highest gear before the red scale of the revolu- tion counter is reached or select mode D on the automatic gearbox.
The gear recommendation is important to note in order to maintain the opti-
mum engine speed » page 37.
CAUTION
The rev counter pointer may only move into the red area for a short time - oth-
erwise risk of engine damage!123456727Instruments and warning lights
Page 33 of 196
Disconnecting the vehicle battery
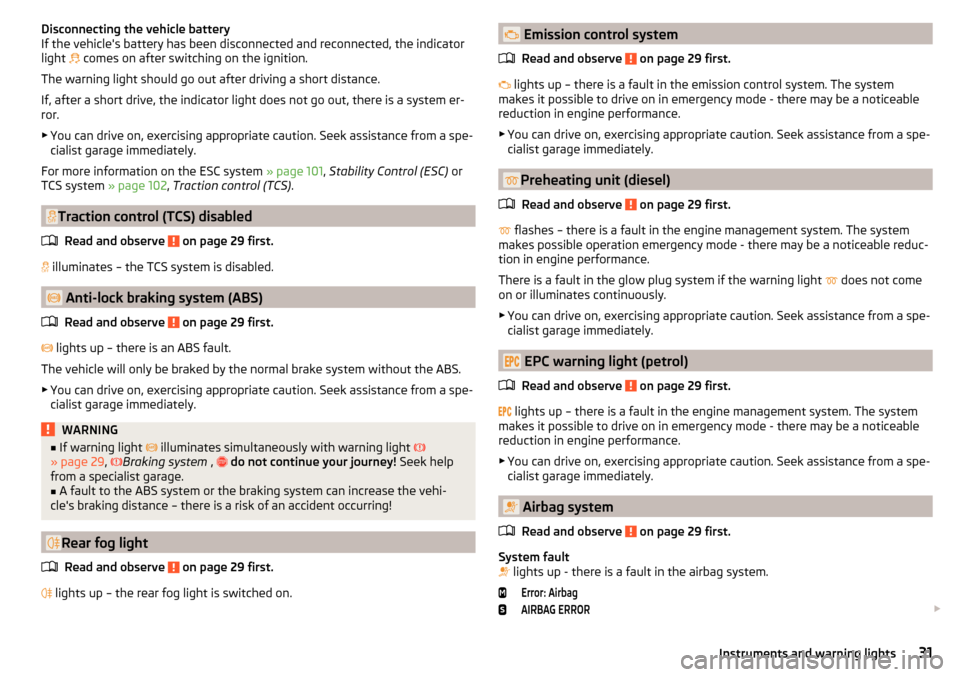
If the vehicle's battery has been disconnected and reconnected, the indicator
light
comes on after switching on the ignition.
The warning light should go out after driving a short distance.
If, after a short drive, the indicator light does not go out, there is a system er-
ror.
▶ You can drive on, exercising appropriate caution. Seek assistance from a spe-
cialist garage immediately.
For more information on the ESC system » page 101, Stability Control (ESC) or
TCS system » page 102, Traction control (TCS) .
Traction control (TCS) disabled
Read and observe
on page 29 first.
illuminates – the TCS system is disabled.
Anti-lock braking system (ABS)
Read and observe
on page 29 first.
lights up – there is an ABS fault.
The vehicle will only be braked by the normal brake system without the ABS.
▶ You can drive on, exercising appropriate caution. Seek assistance from a spe-
cialist garage immediately.
WARNING■ If warning light illuminates simultaneously with warning light
» page 29 , Braking system , do not continue your journey! Seek help
from a specialist garage.■
A fault to the ABS system or the braking system can increase the vehi-
cle's braking distance – there is a risk of an accident occurring!
Rear fog light
Read and observe
on page 29 first.
lights up – the rear fog light is switched on.
Emission control system
Read and observe
on page 29 first.
lights up – there is a fault in the emission control system. The system
makes it possible to drive on in emergency mode - there may be a noticeable
reduction in engine performance.
▶ You can drive on, exercising appropriate caution. Seek assistance from a spe-
cialist garage immediately.
Preheating unit (diesel)
Read and observe
on page 29 first.
flashes – there is a fault in the engine management system. The system
makes possible operation emergency mode - there may be a noticeable reduc-
tion in engine performance.
There is a fault in the glow plug system if the warning light does not come
on or illuminates continuously.
▶ You can drive on, exercising appropriate caution. Seek assistance from a spe-
cialist garage immediately.
EPC warning light (petrol)
Read and observe
on page 29 first.
lights up – there is a fault in the engine management system. The system
makes it possible to drive on in emergency mode - there may be a noticeable
reduction in engine performance.
▶ You can drive on, exercising appropriate caution. Seek assistance from a spe-
cialist garage immediately.
Airbag system
Read and observe
on page 29 first.
System fault
lights up - there is a fault in the airbag system.
Error: AirbagAIRBAG ERROR
31Instruments and warning lights
Page 39 of 196
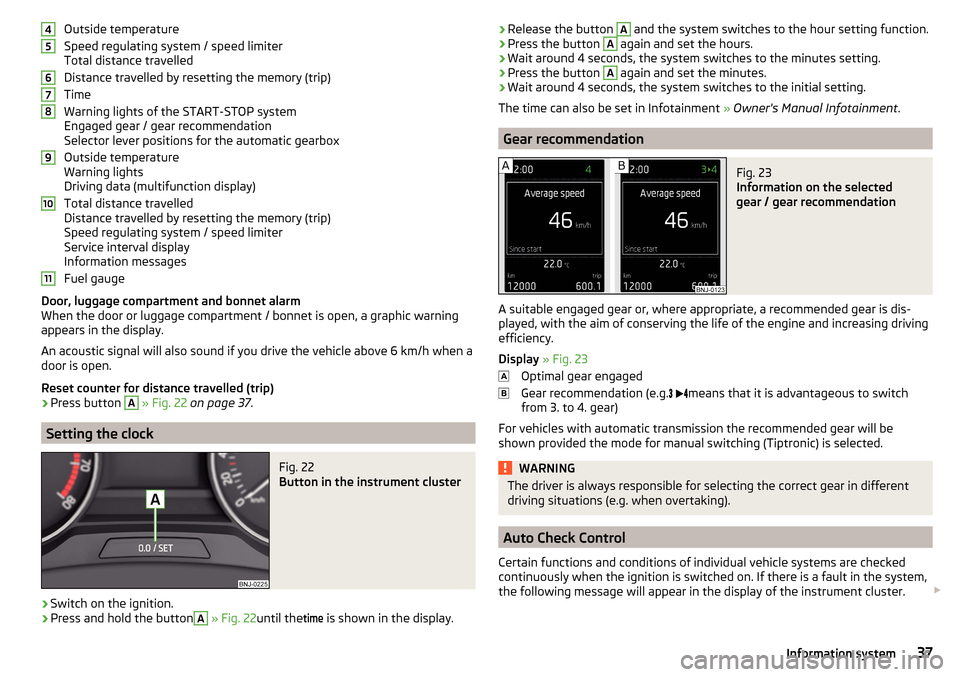
Outside temperature
Speed regulating system / speed limiter
Total distance travelled
Distance travelled by resetting the memory (trip)
Time
Warning lights of the START-STOP system
Engaged gear / gear recommendation
Selector lever positions for the automatic gearbox
Outside temperature
Warning lights
Driving data (multifunction display)
Total distance travelled
Distance travelled by resetting the memory (trip)
Speed regulating system / speed limiter
Service interval display
Information messages
Fuel gauge
Door, luggage compartment and bonnet alarm
When the door or luggage compartment / bonnet is open, a graphic warning
appears in the display.
An acoustic signal will also sound if you drive the vehicle above 6 km/h when a
door is open.
Reset counter for distance travelled (trip)›
Press button
A
» Fig. 22 on page 37 .
Setting the clock
Fig. 22
Button in the instrument cluster
›
Switch on the ignition.
›
Press and hold the button
A
» Fig. 22 until the
time
is shown in the display.
4567891011›Release the button A and the system switches to the hour setting function.›Press the button A again and set the hours.›
Wait around 4 seconds, the system switches to the minutes setting.
›
Press the button
A
again and set the minutes.
›
Wait around 4 seconds, the system switches to the initial setting.
The time can also be set in Infotainment » Owner's Manual Infotainment .
Gear recommendation
Fig. 23
Information on the selected
gear / gear recommendation
A suitable engaged gear or, where appropriate, a recommended gear is dis-
played, with the aim of conserving the life of the engine and increasing driving
efficiency.
Display » Fig. 23
Optimal gear engaged
Gear recommendation (e.g.
means that it is advantageous to switch
from 3. to 4. gear)
For vehicles with automatic transmission the recommended gear will be
shown provided the mode for manual switching (Tiptronic) is selected.
WARNINGThe driver is always responsible for selecting the correct gear in different
driving situations (e.g. when overtaking).
Auto Check Control
Certain functions and conditions of individual vehicle systems are checked
continuously when the ignition is switched on. If there is a fault in the system,
the following message will appear in the display of the instrument cluster.
37Information system
Page 41 of 196
The units and the display of some information can be set in Infotainment
» Owner's Manual Infotainment .
Data overview
Overview of driving data (depending on the vehicle equipment).
Range - Drive distance in km which can be covered with the existing tank ca-
pacity and with the same driving style. If you drive more efficiently this value
can increase.
Average fuel consumption - Is calculated continuously since the last time that
the memory was erased. After erasing the memory, no data will appear for the
first 100 m driven.
Current fuel consumption - When the vehicle is stationary or moving slowly,
the fuel consumption is displayed in l/h (in models in some countries the fol-
lowing appears --,- km/l).
Oil temperature if the temperature is lower than 50 °C or if there is a fault in
the system for checking the oil temperature, the symbols are displayed.
Warning at when the preset speed is exceeded allows the setting of a speed
limit where, if exceeded, an acoustic warning signal and a warning message
appears on the display of the instrument cluster.
Current Speed - Digital speedometer.
Average speed - Value constantly recalculated, for distance since last clearing
the memory. After erasing the memory, no data will appear for the first 300 m
driven.
Distance driven - Distance driven since the memory was last cleared.
Driving time - Driving time since last clearing the memory.
Coolant temperature - If the coolant temperature is in the range 70-120 °C,
the engine operating temperature has been reached. If the temperature is be-
low 70 ° C, high engine speeds and straining the engine should be avoided. If
the temperature is over 120°C, the warning light lights up in the instrument
cluster » page 34 .
Warning at when exceeding the set speed
The system offers the possibility to set a speed limit beyond which an acoustic
warning signal will sound and the following warning message appears in the
display of the instrument cluster.
Adjust the speed limit while the vehicle is stationary›Select the menu item
Warning at
at ( ) or ( ) and confirm.›
Set the desired speed limit is 5 km/h steps.
›
Confirm the set value, or wait several seconds; your settings will be saved
automatically.
Adjusting the speed limit while the vehicle is moving
›
Select the menu item
Warning at
at (
) or
(
) and confirm.
›
Drive at the desired speed.
›
Confirm the current speed as the speed limit.
The set speed limit can be manually adjusted later if needed.
Reset speed limit
›
Select the menu item
Warning at
at ( ) or
(
) and confirm.
›
By confirming the speed stored in the memory, the speed limit is reset.
The speed limit set mode is stored even after the ignition is switched off and
on. After a gap between driving exceeding 2 hours, the pre-set speed limit is
deactivated.
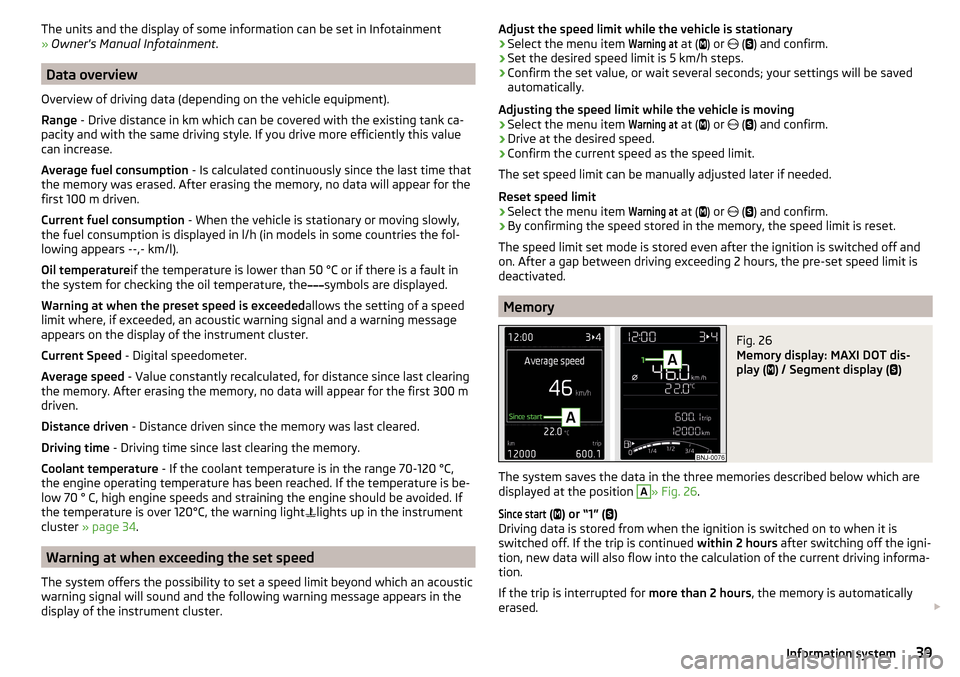
Memory
Fig. 26
Memory display: MAXI DOT dis-
play (
) / Segment display (
)
The system saves the data in the three memories described below which are
displayed at the position
A
» Fig. 26 .
Since start
(
) or “1” (
)
Driving data is stored from when the ignition is switched on to when it is
switched off. If the trip is continued within 2 hours after switching off the igni-
tion, new data will also flow into the calculation of the current driving informa-
tion.
If the trip is interrupted for more than 2 hours, the memory is automatically
erased.
39Information system
Page 87 of 196

The attachment points A and B are located on both sides of the vehicle
» Fig. 110 .
The mounting and dismounting of the basic carrier is carried out in accordance
with the instructions provided.
Roof load
The maximum permitted weight of the load incl. carriers is 75 kg.WARNINGThe following instructions must be observed to aid road safety when trans- porting cargo on the roof rack.■
Always distribute the load on the roof rack evenly and secure properly
with suitable lashing straps or tensioning straps.
■
When transporting heavy objects or objects which take up a large area on
the roof rack system, handling of the car may change as a result of the dis-
placement of the centre of gravity. The style of driving and speed must
therefore be adapted to circumstances.
■
The permissible roof load, permissible axle loads and gross permissible
weight of the vehicle must not be exceeded under any circumstances – risk
of accident.
CAUTION
■ Ensure that the boot lid does not hit the roof load when opened.■Ensure the roof aerial is not impaired by the load being transported.
Note
We recommend that you use a roof rack from ŠKODA Original Accessories.Heating and ventilation
Heating, manual air conditioning system, Climatronic
Introduction
This chapter contains information on the following subjects:
Heating and manual air conditioning
86
Climatronic (automatic air conditioning)
87
Climatronic - automatic operation
87
Recirculated air mode
88
Air outlet vents
88
The heater heats and ventilates the vehicle interior. The air conditioning sys-
tem also cools and dehumidifies the vehicle interior.
The heating effect is dependent upon the coolant temperature, thus full heat
output only occurs when the engine has reached its operating temperature.
The cooling system works under the following conditions. The cooling system is switched on.
The engine is running.
The outside temperature is above 2 °C.
The blower is switched on.
When the cooling system is switched on, it prevents misting of the windscreen
and windows.
It is possible to boost the effectiveness of the cooling system by briefly acti-
vating the air recirculation system » page 88.
Health protection
To reduce health risks (e.g. common colds), the following instructions for the
use of the cooling system are to be observed. ▶ The difference between the outside temperature and the inside temperature
should not be greater than 5 °C.
▶ The cooling system should be turned off about 10 minutes before the end of
the journey.
▶ Once a year, a disinfection of the air conditioner must be carried out by a
specialist company.
85Heating and ventilation
Page 90 of 196

Recirculated air modeRead and observe
on page 86 first.
The recirculation mode prevents contaminated outside air getting into the in-
terior of the vehicle. In recirculated air mode air is sucked out of the interior of
the vehicle and then fed back into the interior.
›
To switch on/off , press the
button.
Heater
If the air distribution control is set to position
when the recirculation mode is
switched on, the recirculated-air mode is switched off automatically.
Individually controlled air conditioning
Recirculated air mode is switched on automatically if the following conditions
are met.
The blower is switched on.
The airflow adjuster is outside position .
The temperature controller is turned to the left.
If the air distribution control is set to position when the recirculation mode is
switched on, the recirculated-air mode is automatically switched off.
Climatronic
If humidity increases in the vehicle, an automatic shutdown of air recirculation
can occur.
WARNINGThe recirculation system cannot be switched on for a longer period of time,
because no fresh air is fed through from the outside. “Stale air” may result
in fatigue in the driver and occupants, reduce attention levels and also
cause the windows to mist up. As soon as windows mist up, turn on the re-
circulation system immediately - The is a risk of an accident!
CAUTION
We recommend not smoking in the vehicle when the recirculating air operation
is switched on. The smoke sucked from the interior is deposited on the evapo-
rator of the air conditioner. This produces a permanent odour when the air
conditioning system is operating which can only be eliminated through consid-
erable effort and expense (replacement of compressor).Air outlet ventsFig. 113
Air outlet vents
Read and observe
on page 86 first.
The direction of airflow can be adjusted using the air outlet vents 3, 4
» Fig. 113 , the outlets can be opened and closed individually.
The setting of the airflow direction is carried out by moving the adjustment el-
ement
A
» Fig. 113 or in the desired direction.
Opening
›
Turn the regulator
B
upwards » Fig. 113.
›
Turn the regulator
B
to the right.
Closing
›
Turn the regulator
B
downwards » Fig. 113.
›
Turn the regulator
B
to the left.
Depending on the setting for air distribution, the air will flow from the follow-
ing air vents.
Set the direction of the air outletAir outlet vents » Fig. 1131. 2 . 41. 2 . 4 . 53 . 44 . 5 88Operation
Page 93 of 196

Switch on/off ignitionFig. 114
Positions of the vehicle key in the ignition lock / starter button
Read and observe
and on page 90 first.
Positions of the vehicle key in the ignition lock » Fig. 114 -
Ignition switched off, engine switched off
Ignition switched on
Starting engine
Switching on /off ignition in vehicles with starter button
›
Press the » Fig. 114 -
button, the ignition is turned on / off.
On vehicles with manual transmission the pedal must not be depressed to
switch on / off the ignition, otherwise the engine will start.
On vehicles with automatic transmission , the brake pedal must not be de-
pressed to switch on / off the ignition, otherwise the engine will start.
Starting / stopping the engine
Read and observe
and on page 90 first.
Before starting the engine
›
Firmly apply the handbrake.
›
For vehicles with manual transmission , shift gear stick to neutral, depress
the clutch pedal and hold it there until the engine starts.
›
For vehicles with automatic transmission , place the selector lever in position
P or N and » depress the brake pedal until the engine starts.
123Starting engine›On vehicles with Ignition lock, turn the key to position 3 and the engine
starts » Fig. 114 on page 91
. Then release the key, the engine will start au-
tomatically.
If the engine does not start within 10 seconds, turn the key to position 1
. Re-
peat the start-up process after 30 s.
›
On vehicles with starter button, press the button briefly » Fig. 114 on page 91 -
, the motor will start automatically.
For vehicles with diesel engines the glow plug warning light
goes on during
starting. The engine can be started after the indicator light goes out.
Switching the engine off
›
Stop the vehicle.
›
On vehicles with ignition lock, turn the key to position
1
» Fig. 114 on
page 91 .
›
On vehicles with
starter button, press the button » Fig. 114 on page 91 -
,
The engine and the ignition will be switched off simultaneously.
For vehicles with automatic transmission, the ignition key can only be removed if the selector lever is in position P .
Do not switch the engine off immediately at the end of your journey if the en-
gine has been working at high revs over a prolonged period, but leave it to run
at an idling speed for about 1 minute. This prevents any possible accumulation
of heat when the engine is switched off.
Emergency shutdown of the engine in vehicles with starter button
The system is equipped with a protective device against accidental switching
off, the engine can only be shut off while driving in the event of an emergency.
›
Keep the knob pressed » Fig. 114 on page 91 -
or press it twice within 1 sec-
ond.
After the emergency stop of the engine, the steering lock will remain un-
locked.
CAUTION
When the outdoor temperature is below -10 ° C, the selector lever when start-
ing must always be in P mode. 91Starting-off and driving
Page 99 of 196

Selector lever lockFig. 121
Shift lock button
Read and observe and on page 96 first.
The selector lever is locked in the P and N modes to prevent the forwards trav-
el mode from being selected accidentally and setting the vehicle in motion.
The selector lever is locked only when the vehicle is stationary and at speeds
up to 5 km/h.
The selector lever lock is indicated by the illumination of the warning light.
Releasing selector lever from mode P or N (selector lever lock)
›
Press the brake pedal and the lock button at the same time in the direction
of
1
» Fig. 121 .
To move the selector lever from mode N to D / S only the brake pedal is press-
ed.
The selector lever is not locked when quickly moving across the position N
(e.g. from R to D/S ). This, for example, helps to rock out a vehicle that is stuck,
e.g. in a bank of snow. The selector lever lock will engage if the lever is in posi-
tion N for more than approx. 2 seconds without the brake pedal being de-
pressed.
If it is not possible to release the gear selector from mode P in the usual man-
ner, then this can be emergency unlocked » page 160.
Note
If you want to switch the selector lever from mode P to mode D/S or vice ver-
sa, move the selector lever quickly. This prevents modes R or N from being se-
lected accidentally.Manual shifting (Tiptronic)Fig. 122
Selector lever
Read and observe and on page 96 first.
Tiptronic mode makes it possible to manually shift gears on the selector lever. This mode can be selected both while halted and while driving.
Switching to manual shifting using the selector lever
›
Push the gear selector from position D/S towards the right, or left in a right-
hand drive vehicle. The current gear is maintained.
Changing gear
›
To change up , tap the selector lever forwards
+
» Fig. 122 .
›
To change down , tap the selector lever backwards
-
» Fig. 122.
The currently selected gear is indicated in the » Fig. 120 on page 96 display.
The gearshift indicator must be observed when changing gear » page 37.
When accelerating, the gearbox automatically shifts up into the higher gear
just before the maximum permissible engine speed is reached. If a lower gear
is selected, the gearbox does not shift down until there is no risk of the engine
overrevving.
Note
It may be advantageous to use manual gear shifting when driving downhill, for
example. Shifting to a lower gear reduces the load on the brakes and hence
the wear of the brakes.97Starting-off and driving
Page 100 of 196
Starting-off and drivingRead and observe
and on page 96 first.
Moving off and pausing temporarily
›
Firmly depress and hold the brake pedal.
›
Start the engine.
›
Press the locking button and move the selector lever to the desired position
» page 96 .
›
Release the brake pedal and accelerate.
The selector lever position N does not have to be selected when stopping for a
short time (e.g. at a crossroads). However, the brake pedal should be de-
pressed, in order to prevent the vehicle from rolling.
Accelerating at maximum speed during the journey (kickdown function)
If the accelerator pedal is depressed while the vehicle is in forward drive mode,
the kick-down function is turned on.
The gear change is adjusted accordingly to achieve maximum acceleration.
WARNINGRapid acceleration ( e.g. on slippery roads) can lead to a loss of control over
the vehicle – There is a risk of accident!
Running in and economical driving
Introduction
This chapter contains information on the following subjects:
Running in the engine
98
Tips on economical driving
98
DriveGreen function
98
Running in the engine
During the first 1 500 km, the driving style is decisive for successful the run-
ning in process is.
During the first 1 000 km , the engine should not be charged with more than
3/4 of the maximum permitted engine revs and without the trailer.
From about 1 000 to 1 500 km the engine can be pushed up to the maximum
permitted engine speed.
Tips on economical driving
Fuel consumption depends on the driving style, road and weather conditions,
and similar such factors.
For an economical driving style, the following instructions must be observed. ▶ Avoid unnecessary acceleration and braking.
▶ Observe the recommended gear » page 37.
▶ Avoid full throttle and high speeds.
▶ Reduce idling.
▶ Avoid short distances.
▶ Ensure the correct tyre inflation pressure is maintained » page 146.
▶ Avoid unnecessary ballast.
▶ Remove the roof rack before driving if it is not needed.
▶ Only turn on electrical consumers (e.g. seat heating) for as long as necessary.
▶ Briefly ventilate before turning on the cooling system, do not use the cooling
system with the windows open.
▶ Do not leave windows open at high speeds.
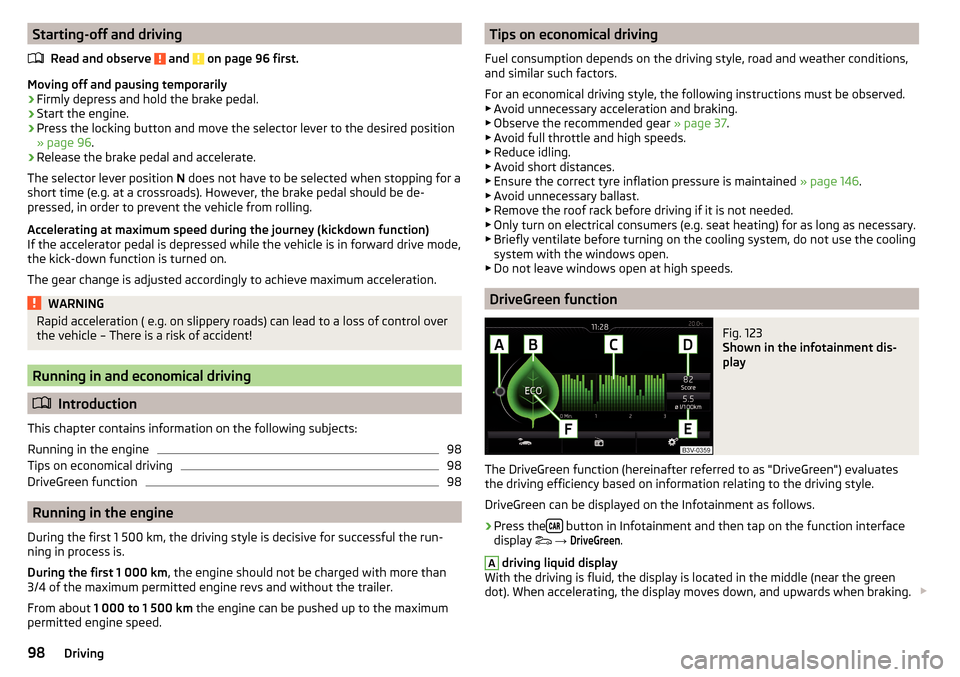
DriveGreen function
Fig. 123
Shown in the infotainment dis-
play
The DriveGreen function (hereinafter referred to as "DriveGreen") evaluates
the driving efficiency based on information relating to the driving style.
DriveGreen can be displayed on the Infotainment as follows.
›
Press the button in Infotainment and then tap on the function interface
display
→
DriveGreen
.
A
driving liquid display
With the driving is fluid, the display is located in the middle (near the green
dot). When accelerating, the display moves down, and upwards when braking.
98Driving