stop start SKODA FABIA 2016 3.G / NJ Owner's Manual
[x] Cancel search | Manufacturer: SKODA, Model Year: 2016, Model line: FABIA, Model: SKODA FABIA 2016 3.G / NJPages: 196, PDF Size: 31.86 MB
Page 4 of 196
Table of Contents
Materials defect liability and ŠKODA warranty
for new cars4
On-board literature
6
Notes
7
Structure of the Owner's Manual and further
information
8
Abbreviations
Safety
Passive Safety
10
General information
10
Correct and safe seated position
10
Seat belts
13
Wearing seat belts
13
Inertia reel and belt pre-tensioners
15
Airbag system
16
Description of the airbag system
16
Airbag deactivation
18
Transporting children safely
20
Child seat
20
Fastening systems
23
Operation
cockpit
26
Overview
25
Instruments and warning lights
27
Instrument cluster
27
Warning lights
28
Information system
36
Driver information system
36
Operation of the information system
38Driving data (Multifunction display)38MAXI DOT display40
Service interval display
41
SmartGate
42
Unlocking and opening
44
Unlocking and locking
44
Anti-theft alarm system
49
Tailgate
50
window operation
50
Lights and visibility
53
Lights
53
Interior lighting
57
Visibility
58
Windscreen wipers and washers
59
Rear view mirror
61
Seats and headrests
62
Front seats
62
Rear seats
63
Headrests
64
Front seat heater
65
Useful features
66
Interior fittings
66
Tablet holder
73
Transport of cargo
75
Luggage compartment and transporting
objects
75
Variable loading floor in the luggage
compartment
81
Bicycle carrier in the luggage compartment
82
Transportation on the roof rack
84
Heating and ventilation
85
Heating, manual air conditioning system,
Climatronic
85Driving
Starting-off and driving90
Starting and stopping the engine
90
START-STOPsystem
92
Brakes and Parking
93
Manual gear shifting and pedals
95
Automatic transmission
96
Running in and economical driving
98
Avoiding damage to your vehicle
99
Assist systems
100
General information
100
Braking and stabilisation systems
101
Parking aid (ParkPilot)
103
Reversing camera
105
Cruise Control System
107
Speed limiter
108
Adaptive Cruise Control (ACC)
110
Front Assist
114
Fatigue detection
116
Tyre pressure monitoring
117
Towing device and trailer
119
Hitch
119
Using hitch
123
General Maintenance
Care and maintenance
127
Service work, adjustments and technical
alterations
127
Service intervals
129
Cleaning and care
131
Inspecting and replenishing
135
Fuel
135
Engine compartment
137
Engine oil
139
Coolant
1402Table of Contents
Page 28 of 196
Operation
cockpit
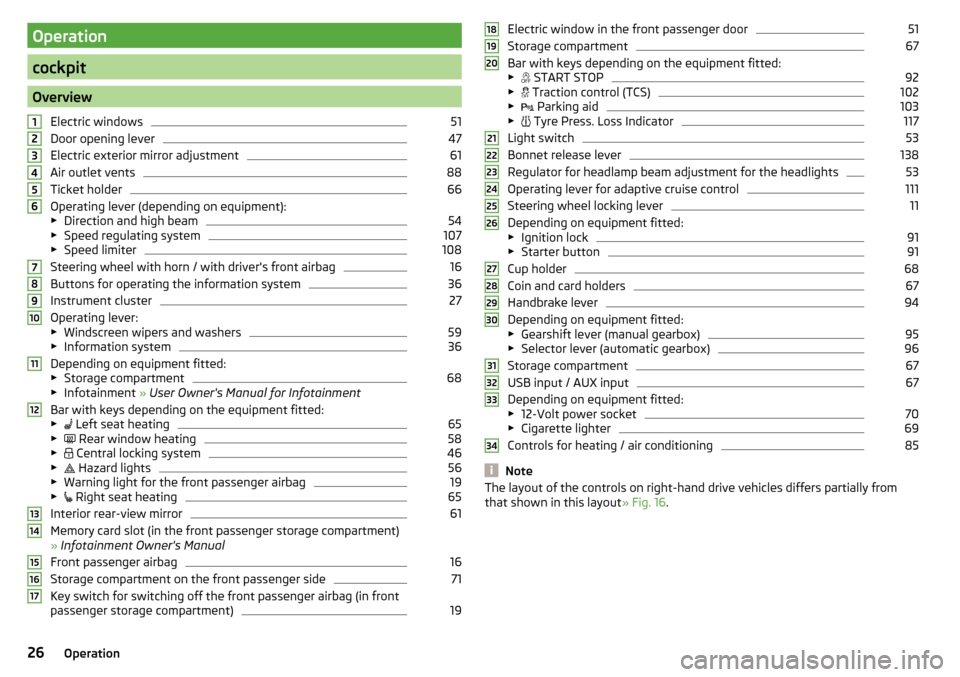
OverviewElectric windows
51
Door opening lever
47
Electric exterior mirror adjustment
61
Air outlet vents
88
Ticket holder
66
Operating lever (depending on equipment):
▶ Direction and high beam
54
▶Speed regulating system
107
▶Speed limiter
108
Steering wheel with horn / with driver's front airbag
16
Buttons for operating the information system
36
Instrument cluster
27
Operating lever:
▶ Windscreen wipers and washers
59
▶Information system
36
Depending on equipment fitted:
▶ Storage compartment
68
▶Infotainment » User Owner's Manual for Infotainment
Bar with keys depending on the equipment fitted:
▶ Left seat heating
65
▶
Rear window heating
58
▶
Central locking system
46
▶
Hazard lights
56
▶
Warning light for the front passenger airbag
19
▶
Right seat heating
65
Interior rear-view mirror
61
Memory card slot (in the front passenger storage compartment)
» Infotainment Owner's Manual
Front passenger airbag
16
Storage compartment on the front passenger side
71
Key switch for switching off the front passenger airbag (in front
passenger storage compartment)
191234567891011121314151617Electric window in the front passenger door51
Storage compartment
67
Bar with keys depending on the equipment fitted:
▶ START STOP
92
▶
Traction control (TCS)
102
▶
Parking aid
103
▶
Tyre Press. Loss Indicator
117
Light switch
53
Bonnet release lever
138
Regulator for headlamp beam adjustment for the headlights
53
Operating lever for adaptive cruise control
111
Steering wheel locking lever
11
Depending on equipment fitted:
▶ Ignition lock
91
▶Starter button
91
Cup holder
68
Coin and card holders
67
Handbrake lever
94
Depending on equipment fitted:
▶ Gearshift lever (manual gearbox)
95
▶Selector lever (automatic gearbox)
96
Storage compartment
67
USB input / AUX input
67
Depending on equipment fitted:
▶ 12-Volt power socket
70
▶Cigarette lighter
69
Controls for heating / air conditioning
85
Note
The layout of the controls on right-hand drive vehicles differs partially from
that shown in this layout » Fig. 16.181920212223242526272829303132333426Operation
Page 31 of 196
Fuel reserve32 Turn signal system32
Trailer turn signal lights
33
Fog lights
33
Speed regulating system / speed limiter
33
Brake pedal (automatic gearbox)
33
Main beam
33
Automatic gearbox
33
Rear seat belt warning light
33
Generator
34
Coolant
34
Engine oil pressure
34
Engine oil level
34
Lamp failure
35
Diesel particle filter (diesel)
35
Windscreen washer fluid level
35
START-STOPsystem
35
Display a low temperature
35
Adaptive cruise control (ACC)
36
Distance warning (Front Assist)
36
Advance warning / Emergency braking (Front Assist)
36
Service
36
The warning lights in the instrument cluster indicate certain functions or
faults.
Some warning lights can be accompanied by acoustic signals and messages in
the display of the instrument cluster.
After switching on the ignition, some warning lights light up briefly as a func-
tion test. If the tested systems are OK, the corresponding warning lights go
out a few seconds after switching on the ignition or after starting the engine.
The warning lights are at the following locations in the instrument clus-
ter » Fig. 17 on page 27 or» Fig. 18 on page 27 .
▶ Engine revolutions counter
1
▶Display
2
▶Speedometer
3
▶Bar with warning lights
4Warning lights in the display
Depending on the importance the warning light (danger) or (warning) illumi-
nates along with some of the warning lights in the bar with the warning lights.WARNING■ Ignoring illuminated indicator lights and related messages or instructions
in the instrument cluster display may lead to serious personal injury or
damage to the vehicle.■
If you have to stop for technical reasons, then park the vehicle at a safe
distance from the traffic, switch off the engine and activate the hazard
warning lights system » page 56. Place the warning triangle at the pre-
scribed distance.
■
The engine compartment of your car is a hazardous area. While working in
the engine compartment, be sure to observe the following warnings
» page 137 , Engine compartment .
handbrake
Read and observe
on page 29 first.
lights up – the hand brake has been applied.
An acoustic signal will sound if you drive the vehicle above 5 km/h while the
handbrake is still on.
▶ Release the handbrake.
Braking system
Read and observe
on page 29 first.
illuminates – the brake fluid level in the brake system is too low.
▶ Park the vehicle, stop driving!
Seek help from a specialist garage.
WARNINGA fault to the braking system can increase the vehicle’s braking distance -
There is a risk of an accident!
Front seat belt warning light
Read and observe
on page 29 first.
lights up - the driver or front passenger has not fastened their seat belt.
29Instruments and warning lights
Page 32 of 196
At a speed of over 30 km/h the warning lightflashes and an audible warning
sounds at the same time.
If the seat belt is not fastened by the driver or front passenger during the next
approx. 2 minutes, the warning signal is deactivated and the warning light
il-
luminates permanently.
Adaptive cruise control (ACC)
Read and observe
on page 29 first.
illuminates - the ACC delay is not sufficient.
▶ Apply the brake.
For more information about the ACC system » page 110.
Power steering / steering lock (Motor start-up with button
press)
Read and observe
on page 29 first.
Fault in the power steering
lights up – this indicates a complete failure of the power steering and the
steering assist is no longer working (significantly higher steering forces).
lights up – this indicates a partial failure of the power steering and the
steering forces can be greater.
▶ Switch off the ignition, start the engine again and travel a short distance.
▶ If the warning light does not go off, stop the vehicle,
stop driving
. Seek
help from a specialist garage.
▶ If the warning light does not go off, you can drive on, exercising appropriate
caution. Seek assistance from a specialist garage immediately.
Steering lock defective (engine start push-button)
An audible signal sounds as a warning.
flashes
Steering column lock faulty. Stop!STOP VEHICLE STEERING FAULTY
▶ Park the vehicle, and
stop driving . After switching off the ignition, it is no
longer possible to lock the steering, to activate the electrical components
(e.g. Infotainment ), to switch on the ignition again and to start the engine.
Seek help from a specialist garage.
flashes
Steering lock: Workshop!STEERING WORKSHOP
▶ You can drive on, exercising appropriate caution. Seek assistance from a spe-
cialist garage immediately.
Steering lock not unlocked (engine start push-button)
flashes
Move the steering wheel!MOVE STEERING WHEEL
▶ Move the steering wheel slightly back and forth, thereby facilitating unlock-
ing the steering lock.
▶ If the steering does also not unlock then, the help of a specialist garage is
required.
Disconnecting the vehicle battery
If the vehicle's battery has been disconnected and reconnected, the indicator
light comes on after switching on the ignition.
The warning light should go out after driving a short distance.
If, after the motor is restarted and a short drive, the indicator light does not go
out, there is a system error.
▶ You can drive on, exercising appropriate caution. Seek assistance from a spe-
cialist garage immediately.
Stability control (ESC) / Traction control (TCS)
Read and observe
on page 29 first.
flashes – the ESC or TCS is currently active.
System fault
lights up – there is an ESC or TCS fault.
▶ You can drive on, exercising appropriate caution. Seek assistance from a spe-
cialist garage immediately.
If the warning light comes on after starting the engine, the TCS may be
switched off for technical reasons. ▶ Switch the ignition off and on again.
If the warning light does not illuminate after you switch the engine back on,
the ASR is fully functional again.
30Operation
Page 34 of 196
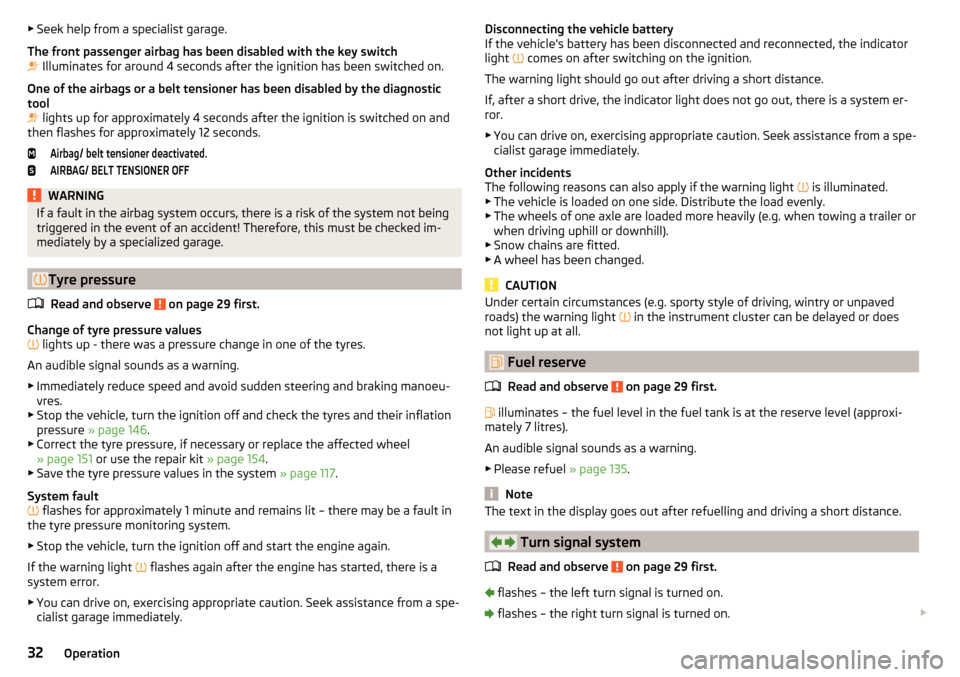
▶Seek help from a specialist garage.
The front passenger airbag has been disabled with the key switch
Illuminates for around 4 seconds after the ignition has been switched on.
One of the airbags or a belt tensioner has been disabled by the diagnostic
tool
lights up for approximately 4 seconds after the ignition is switched on and
then flashes for approximately 12 seconds.Airbag/ belt tensioner deactivated.AIRBAG/ BELT TENSIONER OFFWARNINGIf a fault in the airbag system occurs, there is a risk of the system not being
triggered in the event of an accident! Therefore, this must be checked im-
mediately by a specialized garage.
Tyre pressure
Read and observe
on page 29 first.
Change of tyre pressure values
lights up - there was a pressure change in one of the tyres.
An audible signal sounds as a warning. ▶ Immediately reduce speed and avoid sudden steering and braking manoeu-
vres.
▶ Stop the vehicle, turn the ignition off and check the tyres and their inflation
pressure » page 146 .
▶ Correct the tyre pressure, if necessary or replace the affected wheel
» page 151 or use the repair kit » page 154.
▶ Save the tyre pressure values in the system » page 117.
System fault
flashes for approximately 1 minute and remains lit – there may be a fault in
the tyre pressure monitoring system.
▶ Stop the vehicle, turn the ignition off and start the engine again.
If the warning light flashes again after the engine has started, there is a
system error.
▶ You can drive on, exercising appropriate caution. Seek assistance from a spe-
cialist garage immediately.
Disconnecting the vehicle battery
If the vehicle's battery has been disconnected and reconnected, the indicator
light
comes on after switching on the ignition.
The warning light should go out after driving a short distance.
If, after a short drive, the indicator light does not go out, there is a system er- ror.
▶ You can drive on, exercising appropriate caution. Seek assistance from a spe-
cialist garage immediately.
Other incidents
The following reasons can also apply if the warning light
is illuminated.
▶ The vehicle is loaded on one side. Distribute the load evenly.
▶ The wheels of one axle are loaded more heavily (e.g. when towing a trailer or
when driving uphill or downhill).
▶ Snow chains are fitted.
▶ A wheel has been changed.
CAUTION
Under certain circumstances (e.g. sporty style of driving, wintry or unpaved
roads) the warning light in the instrument cluster can be delayed or does
not light up at all.
Fuel reserve
Read and observe
on page 29 first.
illuminates – the fuel level in the fuel tank is at the reserve level (approxi-
mately 7 litres).
An audible signal sounds as a warning. ▶ Please refuel » page 135.
Note
The text in the display goes out after refuelling and driving a short distance.
Turn signal system
Read and observe
on page 29 first.
flashes – the left turn signal is turned on.
flashes – the right turn signal is turned on.
32Operation
Page 37 of 196
CAUTIONIf, under the given conditions, it is not possible to top up with engine oil,
stop driving - there is a risk of engine damage! Switch off the engine and seek
assistance from a specialist garage.
Lamp failure
Read and observe
on page 29 first.
illuminates – one of the lamps is faulty.
A message will appear in the display about the affected lamp.
Diesel particle filter (diesel)
Read and observe
on page 29 first.
The diesel particulate filter separates the soot particles from the exhaust. The
soot particles collect in the diesel particulate filter where they are burnt on a
regular basis.
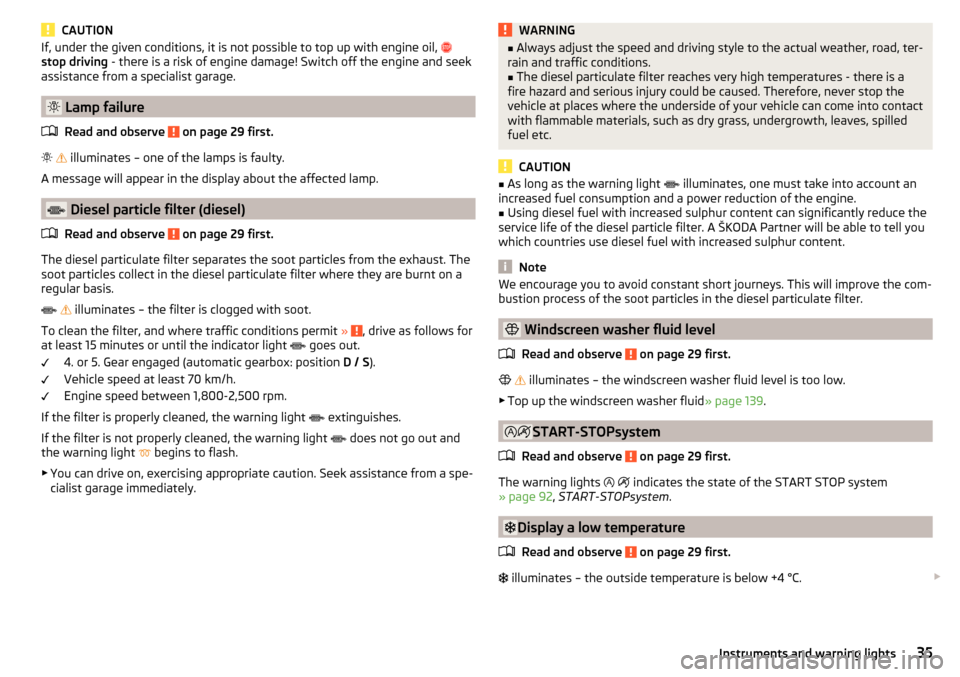
illuminates – the filter is clogged with soot.
To clean the filter, and where traffic conditions permit »
, drive as follows for
at least 15 minutes or until the indicator light goes out.
4. or 5. Gear engaged (automatic gearbox: position D / S).
Vehicle speed at least 70 km/h.
Engine speed between 1,800-2,500 rpm.
If the filter is properly cleaned, the warning light extinguishes.
If the filter is not properly cleaned, the warning light does not go out and
the warning light begins to flash.
▶ You can drive on, exercising appropriate caution. Seek assistance from a spe-
cialist garage immediately.
WARNING■ Always adjust the speed and driving style to the actual weather, road, ter-
rain and traffic conditions.■
The diesel particulate filter reaches very high temperatures - there is a
fire hazard and serious injury could be caused. Therefore, never stop the
vehicle at places where the underside of your vehicle can come into contact
with flammable materials, such as dry grass, undergrowth, leaves, spilled
fuel etc.
CAUTION
■ As long as the warning light illuminates, one must take into account an
increased fuel consumption and a power reduction of the engine.■
Using diesel fuel with increased sulphur content can significantly reduce the
service life of the diesel particle filter. A ŠKODA Partner will be able to tell you
which countries use diesel fuel with increased sulphur content.
Note
We encourage you to avoid constant short journeys. This will improve the com-
bustion process of the soot particles in the diesel particulate filter.
Windscreen washer fluid level
Read and observe
on page 29 first.
illuminates – the windscreen washer fluid level is too low.
▶ Top up the windscreen washer fluid » page 139.
START-STOPsystem
Read and observe
on page 29 first.
The warning lights
indicates the state of the START STOP system
» page 92 , START-STOPsystem .
Display a low temperature
Read and observe
on page 29 first.
illuminates – the outside temperature is below +4 °C.
35Instruments and warning lights
Page 38 of 196
WARNINGEven at temperatures around +4 °C, black ice may still be on the road sur-
face! Do not only rely upon the information given on the outside tempera-
ture display that there is no ice on the road.
Adaptive cruise control (ACC)
Read and observe
on page 29 first.
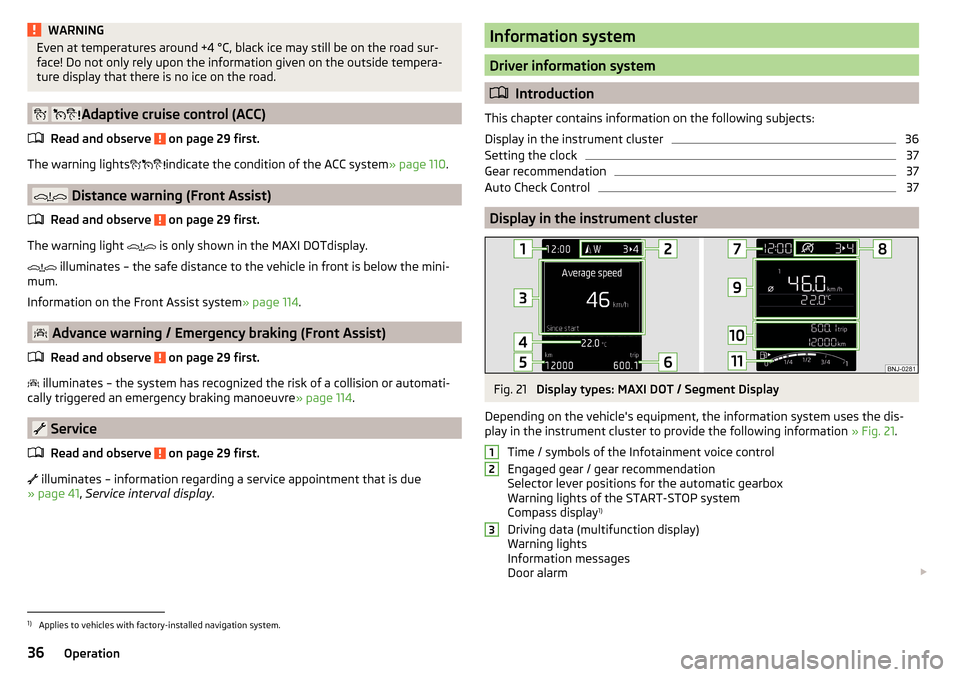
The warning lights indicate the condition of the ACC system
» page 110.
Distance warning (Front Assist)
Read and observe
on page 29 first.
The warning light is only shown in the MAXI DOTdisplay.
illuminates – the safe distance to the vehicle in front is below the mini-
mum.
Information on the Front Assist system » page 114.
Advance warning / Emergency braking (Front Assist)
Read and observe
on page 29 first.
illuminates – the system has recognized the risk of a collision or automati-
cally triggered an emergency braking manoeuvre » page 114.
Service
Read and observe
on page 29 first.
illuminates – information regarding a service appointment that is due
» page 41 , Service interval display .
Information system
Driver information system
Introduction
This chapter contains information on the following subjects:
Display in the instrument cluster
36
Setting the clock
37
Gear recommendation
37
Auto Check Control
37
Display in the instrument cluster
Fig. 21
Display types: MAXI DOT / Segment Display
Depending on the vehicle's equipment, the information system uses the dis-
play in the instrument cluster to provide the following information » Fig. 21.
Time / symbols of the Infotainment voice control
Engaged gear / gear recommendation
Selector lever positions for the automatic gearbox
Warning lights of the START-STOP system
Compass display 1)
Driving data (multifunction display)
Warning lights
Information messages
Door alarm
1231)
Applies to vehicles with factory-installed navigation system.
36Operation
Page 39 of 196
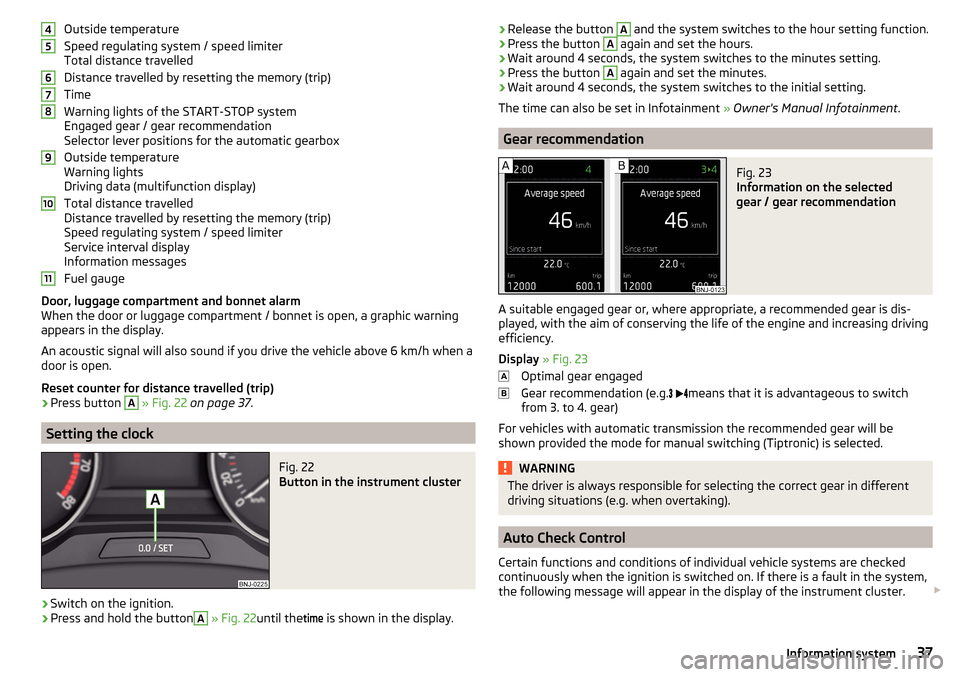
Outside temperature
Speed regulating system / speed limiter
Total distance travelled
Distance travelled by resetting the memory (trip)
Time
Warning lights of the START-STOP system
Engaged gear / gear recommendation
Selector lever positions for the automatic gearbox
Outside temperature
Warning lights
Driving data (multifunction display)
Total distance travelled
Distance travelled by resetting the memory (trip)
Speed regulating system / speed limiter
Service interval display
Information messages
Fuel gauge
Door, luggage compartment and bonnet alarm
When the door or luggage compartment / bonnet is open, a graphic warning
appears in the display.
An acoustic signal will also sound if you drive the vehicle above 6 km/h when a
door is open.
Reset counter for distance travelled (trip)›
Press button
A
» Fig. 22 on page 37 .
Setting the clock
Fig. 22
Button in the instrument cluster
›
Switch on the ignition.
›
Press and hold the button
A
» Fig. 22 until the
time
is shown in the display.
4567891011›Release the button A and the system switches to the hour setting function.›Press the button A again and set the hours.›
Wait around 4 seconds, the system switches to the minutes setting.
›
Press the button
A
again and set the minutes.
›
Wait around 4 seconds, the system switches to the initial setting.
The time can also be set in Infotainment » Owner's Manual Infotainment .
Gear recommendation
Fig. 23
Information on the selected
gear / gear recommendation
A suitable engaged gear or, where appropriate, a recommended gear is dis-
played, with the aim of conserving the life of the engine and increasing driving
efficiency.
Display » Fig. 23
Optimal gear engaged
Gear recommendation (e.g.
means that it is advantageous to switch
from 3. to 4. gear)
For vehicles with automatic transmission the recommended gear will be
shown provided the mode for manual switching (Tiptronic) is selected.
WARNINGThe driver is always responsible for selecting the correct gear in different
driving situations (e.g. when overtaking).
Auto Check Control
Certain functions and conditions of individual vehicle systems are checked
continuously when the ignition is switched on. If there is a fault in the system,
the following message will appear in the display of the instrument cluster.
37Information system
Page 52 of 196
CAUTIONThe opened glasses storage compartment reduces the effectiveness of the in-
terior monitor. To ensure the full functionality of the interior monitor, the
glasses storage compartment must always be closed before locking the vehi-
cle.
Tailgate
Introduction
This chapter contains information on the following subjects:
Opening / closing the boot lid
50
Delayed locking of the boot lid
50WARNING■ Never drive with the tailgate fully opened or slightly ajar otherwise ex-
haust gases may get into the interior of the vehicle – risk of poisoning.■
Ensure that the lock is properly engaged after closing the lid. Otherwise,
the lid might open suddenly while the vehicle is moving, even if the lid was
locked – There is a risk of an accident!
■
Make sure that when closing the boot lid, no body parts are crushed -
there is danger of injury!
■
Do not press on the rear window when closing the luggage compartment
lid, it could crack – There is a risk of injury!
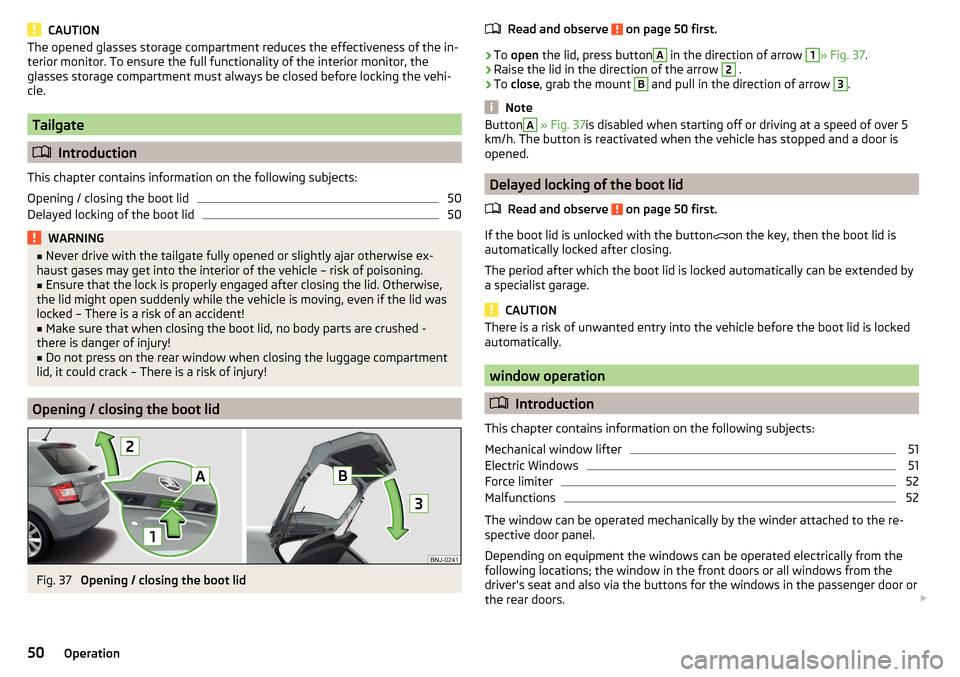
Opening / closing the boot lid
Fig. 37
Opening / closing the boot lid
Read and observe on page 50 first.›
To open the lid, press button
A
in the direction of arrow
1
» Fig. 37 .
›
Raise the lid in the direction of the arrow
2
.
›
To close , grab the mount
B
and pull in the direction of arrow
3
.
Note
ButtonA » Fig. 37 is disabled when starting off or driving at a speed of over 5
km/h. The button is reactivated when the vehicle has stopped and a door is
opened.
Delayed locking of the boot lid
Read and observe
on page 50 first.
If the boot lid is unlocked with the button on the key, then the boot lid is
automatically locked after closing.
The period after which the boot lid is locked automatically can be extended by
a specialist garage.
CAUTION
There is a risk of unwanted entry into the vehicle before the boot lid is locked
automatically.
window operation
Introduction
This chapter contains information on the following subjects:
Mechanical window lifter
51
Electric Windows
51
Force limiter
52
Malfunctions
52
The window can be operated mechanically by the winder attached to the re-
spective door panel.
Depending on equipment the windows can be operated electrically from the
following locations; the window in the front doors or all windows from the
driver's seat and also via the buttons for the windows in the passenger door or
the rear doors.
50Operation
Page 56 of 196
Note■If, with a dipped beam, the ignition is turned off, then the dipped beam will
automatically switch off 1)
and the parking lights will come on. The parking
lights are switched off when the ignition key is removed (for vehicles with the
start button, after opening the driver's door).■
If there is a fault in the light switch, the low beam comes on automatically.
Daylight running lights (DAY LIGHT)
Read and observe
on page 53 first.
The daytime running lights (hereinafter only referred to as "function") lightsthe front and rear vehicle area (only valid for some countries).
The lights are switched on automatically if the following conditions are met. The light switch is in the position or
.
The ignition is switched on.
The parking aid is activated.
Activating/deactivating function on vehicles with Infotainment
This function can be activated/deactivated in Infotainment » Infotainment
Owner´s Manual .
Deactivating on vehicles without Infotainment
›
Turn off the ignition, pull the indicator / main beam lever towards the steer- ing wheel, push down and hold in this position.
›
Switch on the ignition and hold the lever in the above position until an audi-
ble signal sounds (about 3 s).
Activating on vehicles without Infotainment
›
Turn off the ignition, pull the indicator / main beam lever towards the steer- ing wheel, push down and hold in this position.
›
Switch on the ignition and hold the lever in the above position until an audi-
ble signal sounds (about 3 s)..
WARNINGAlways switch on the low beam when the visibility is poor.Turn signal and main beamFig. 41
Operating lever: Turn signal and
main beam operation
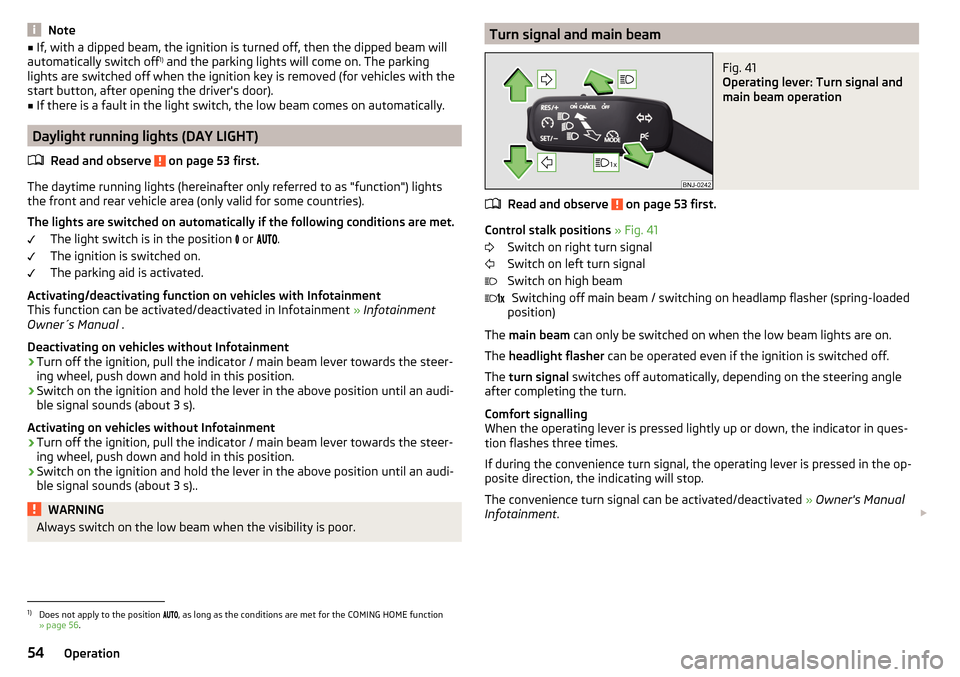
Read and observe on page 53 first.
Control stalk positions » Fig. 41
Switch on right turn signal
Switch on left turn signal
Switch on high beam Switching off main beam / switching on headlamp flasher (spring-loaded
position)
The main beam can only be switched on when the low beam lights are on.
The headlight flasher can be operated even if the ignition is switched off.
The turn signal switches off automatically, depending on the steering angle
after completing the turn.
Comfort signalling
When the operating lever is pressed lightly up or down, the indicator in ques-
tion flashes three times.
If during the convenience turn signal, the operating lever is pressed in the op-
posite direction, the indicating will stop.
The convenience turn signal can be activated/deactivated » Owner's Manual
Infotainment .
1)
Does not apply to the position , as long as the conditions are met for the COMING HOME function
» page 56 .
54Operation