fuel cap SKODA FABIA 2016 3.G / NJ Owner's Manual
[x] Cancel search | Manufacturer: SKODA, Model Year: 2016, Model line: FABIA, Model: SKODA FABIA 2016 3.G / NJPages: 196, PDF Size: 31.86 MB
Page 30 of 196

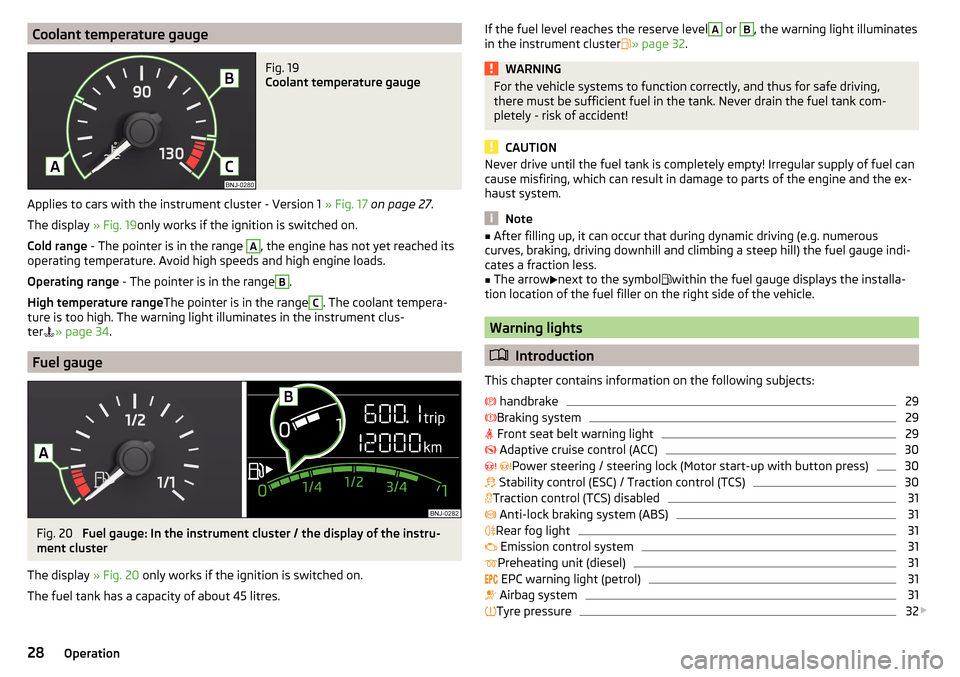
Coolant temperature gaugeFig. 19
Coolant temperature gauge
Applies to cars with the instrument cluster - Version 1 » Fig. 17 on page 27 .
The display » Fig. 19only works if the ignition is switched on.
Cold range - The pointer is in the range
A
, the engine has not yet reached its
operating temperature. Avoid high speeds and high engine loads.
Operating range - The pointer is in the range
B
.
High temperature range The pointer is in the range
C
. The coolant tempera-
ture is too high. The warning light illuminates in the instrument clus-
ter » page 34
.
Fuel gauge
Fig. 20
Fuel gauge: In the instrument cluster / the display of the instru-
ment cluster
The display » Fig. 20 only works if the ignition is switched on.
The fuel tank has a capacity of about 45 litres.
If the fuel level reaches the reserve levelA or B, the warning light illuminates
in the instrument cluster » page 32 .WARNINGFor the vehicle systems to function correctly, and thus for safe driving,
there must be sufficient fuel in the tank. Never drain the fuel tank com-
pletely - risk of accident!
CAUTION
Never drive until the fuel tank is completely empty! Irregular supply of fuel can
cause misfiring, which can result in damage to parts of the engine and the ex-
haust system.
Note
■ After filling up, it can occur that during dynamic driving (e.g. numerous
curves, braking, driving downhill and climbing a steep hill) the fuel gauge indi-
cates a fraction less.■
The arrow
next to the symbol
within the fuel gauge displays the installa-
tion location of the fuel filler on the right side of the vehicle.
Warning lights
Introduction
This chapter contains information on the following subjects:
handbrake
29
Braking system
29
Front seat belt warning light
29
Adaptive cruise control (ACC)
30
Power steering / steering lock (Motor start-up with button press)
30
Stability control (ESC) / Traction control (TCS)
30
Traction control (TCS) disabled
31
Anti-lock braking system (ABS)
31
Rear fog light
31
Emission control system
31
Preheating unit (diesel)
31
EPC warning light (petrol)
31
Airbag system
31
Tyre pressure
32
28Operation
Page 137 of 196

Inspecting and replenishing
Fuel
Introduction
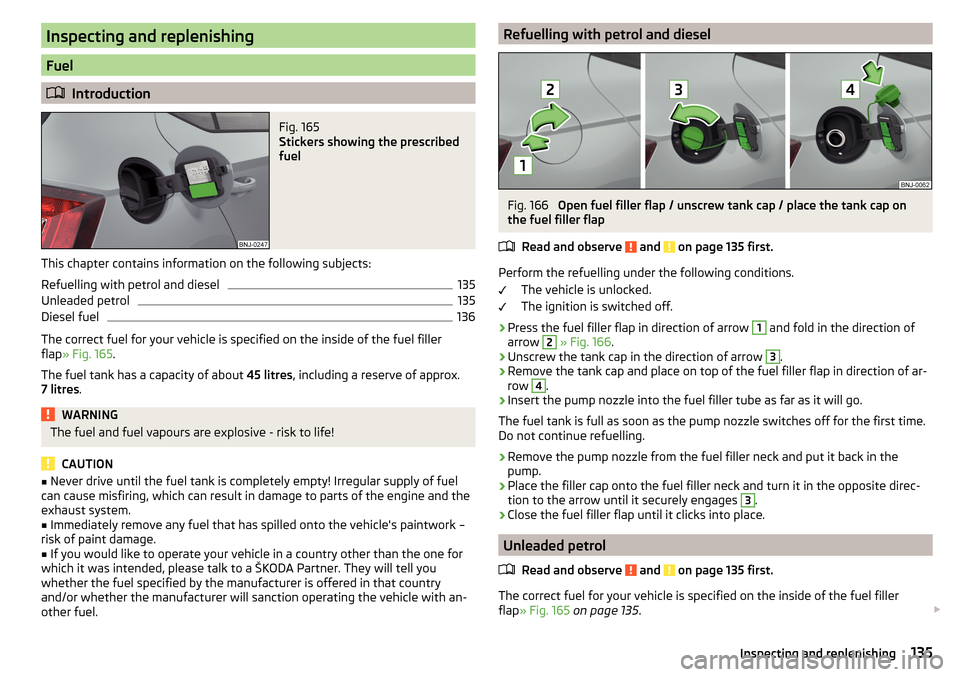
Fig. 165
Stickers showing the prescribed
fuel
This chapter contains information on the following subjects:
Refuelling with petrol and diesel
135
Unleaded petrol
135
Diesel fuel
136
The correct fuel for your vehicle is specified on the inside of the fuel filler
flap » Fig. 165 .
The fuel tank has a capacity of about 45 litres, including a reserve of approx.
7 litres .
WARNINGThe fuel and fuel vapours are explosive - risk to life!
CAUTION
■
Never drive until the fuel tank is completely empty! Irregular supply of fuel
can cause misfiring, which can result in damage to parts of the engine and the
exhaust system.■
Immediately remove any fuel that has spilled onto the vehicle's paintwork –
risk of paint damage.
■
If you would like to operate your vehicle in a country other than the one for
which it was intended, please talk to a ŠKODA Partner. They will tell you
whether the fuel specified by the manufacturer is offered in that country
and/or whether the manufacturer will sanction operating the vehicle with an-
other fuel.
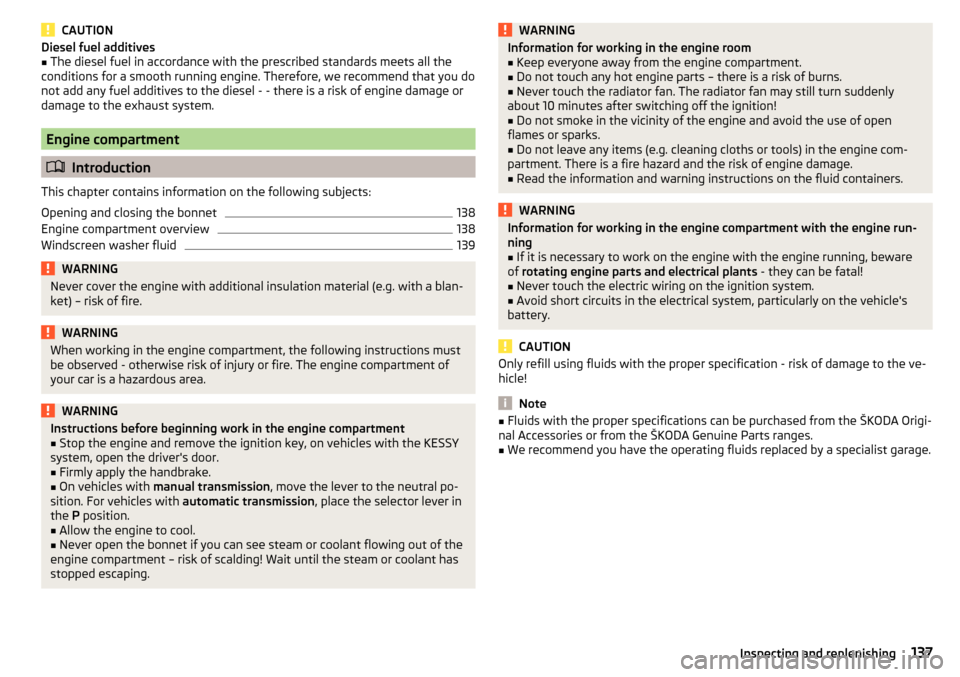
Refuelling with petrol and dieselFig. 166
Open fuel filler flap / unscrew tank cap / place the tank cap on
the fuel filler flap
Read and observe
and on page 135 first.
Perform the refuelling under the following conditions. The vehicle is unlocked.
The ignition is switched off.
›
Press the fuel filler flap in direction of arrow
1
and fold in the direction of
arrow
2
» Fig. 166 .
›
Unscrew the tank cap in the direction of arrow
3
.
›
Remove the tank cap and place on top of the fuel filler flap in direction of ar-
row
4
.
›
Insert the pump nozzle into the fuel filler tube as far as it will go.
The fuel tank is full as soon as the pump nozzle switches off for the first time.
Do not continue refuelling.
›
Remove the pump nozzle from the fuel filler neck and put it back in the
pump.
›
Place the filler cap onto the fuel filler neck and turn it in the opposite direc-
tion to the arrow until it securely engages
3
.
›
Close the fuel filler flap until it clicks into place.
Unleaded petrol
Read and observe
and on page 135 first.
The correct fuel for your vehicle is specified on the inside of the fuel filler
flap » Fig. 165 on page 135 .
135Inspecting and replenishing
Page 139 of 196

CAUTIONDiesel fuel additives■The diesel fuel in accordance with the prescribed standards meets all the
conditions for a smooth running engine. Therefore, we recommend that you do
not add any fuel additives to the diesel - - there is a risk of engine damage or
damage to the exhaust system.
Engine compartment
Introduction
This chapter contains information on the following subjects:
Opening and closing the bonnet
138
Engine compartment overview
138
Windscreen washer fluid
139WARNINGNever cover the engine with additional insulation material (e.g. with a blan-
ket) – risk of fire.WARNINGWhen working in the engine compartment, the following instructions must
be observed - otherwise risk of injury or fire. The engine compartment of
your car is a hazardous area.WARNINGInstructions before beginning work in the engine compartment■Stop the engine and remove the ignition key, on vehicles with the KESSY
system, open the driver's door.■
Firmly apply the handbrake.
■
On vehicles with manual transmission , move the lever to the neutral po-
sition. For vehicles with automatic transmission, place the selector lever in
the P position.
■
Allow the engine to cool.
■
Never open the bonnet if you can see steam or coolant flowing out of the
engine compartment – risk of scalding! Wait until the steam or coolant has
stopped escaping.
WARNINGInformation for working in the engine room■Keep everyone away from the engine compartment.■
Do not touch any hot engine parts – there is a risk of burns.
■
Never touch the radiator fan. The radiator fan may still turn suddenly
about 10 minutes after switching off the ignition!
■
Do not smoke in the vicinity of the engine and avoid the use of open
flames or sparks.
■
Do not leave any items (e.g. cleaning cloths or tools) in the engine com-
partment. There is a fire hazard and the risk of engine damage.
■
Read the information and warning instructions on the fluid containers.
WARNINGInformation for working in the engine compartment with the engine run-
ning■
If it is necessary to work on the engine with the engine running, beware
of rotating engine parts and electrical plants - they can be fatal!
■
Never touch the electric wiring on the ignition system.
■
Avoid short circuits in the electrical system, particularly on the vehicle's
battery.
CAUTION
Only refill using fluids with the proper specification - risk of damage to the ve-
hicle!
Note
■ Fluids with the proper specifications can be purchased from the ŠKODA Origi-
nal Accessories or from the ŠKODA Genuine Parts ranges.■
We recommend you have the operating fluids replaced by a specialist garage.
137Inspecting and replenishing
Page 176 of 196

Maximum permissible front axle load
Maximum permissible rear axle load
Vehicle identification number (VIN)
The vehicle identification number - VIN (vehicle body number) is stamped on
the right hand suspension strut dome in the engine compartment. This num-
ber is also located on a sign on the lower left hand edge below the windscreen
(together with a VIN bar code), together with a nameplate.
The VIN number can also be displayed in Infotainment » Owner´s Manual Info-
tainment .
Engine number
The engine number (three-digit code letter and serial number) is stamped onto
the engine block.
Supplementary Information (applies to Russia)
The full type approval number of the means of transport is indicated in the
registration documents, field 17.
Maximum permissible trailer weight
The listed maximum permissible trailer weight is only valid for altitudes up to
1000 m above sea level.
The engine output falls as altitude increases, as does the ability to climb.
Therefore, for every additional 1,000 m in height (or part), the maximum per-
missible towed weight must be reduced by 10 %.
The towed weight comprises the actual weights of the (loaded) towing vehicle and the (loaded) trailer.WARNINGDo not exceed the specified maximum permissible weights – risk of an acci-
dent and damage.
Operating weight
This value is only a guide value and corresponds to the lowest possible operat-
ing weight without any equipment added that would also increase the weight
(e.g. air conditioning, emergency or spare wheel etc.). It also includes a weight
allowance for the driver (75 kg), the weight of the operating fluids, the tool kit
and a fuel tank filled to 90 % capacity.
1011Operating weight - FabiaEngineGearboxOperating weight (kg)1.0 l/44 kW MPIMG10551.0 l/55 kW MPIMG (EU6)1055MG (EU4)10501.2 l./66 kW TSIMG11091.2 ltr./81 kW TSIMG1129DSG11541.6 l./66 kW MPIMG10861.6 l./81 kW MPIAG11261.4 l/55 kW TDI CRMG11561.4 l/66 kW TDI CRMG1156DSG11861.4 l/77 kW TDI CRMG1165
Operating weight - Fabia Combi
EngineGearboxOperating weight (kg)1.0 l/55 kW MPIMG (EU6)1079MG (EU4)10741.2 ltr./66 kW TSIMG11331.2 ltr./81 kW TSIMG1153DSG11781.6 l./66 kW MPIMG11101.6 l./81 kW MPIAG11501.4 l/55 kW TDI CRMG11801.4 l/66 kW TDI CRMG1180DSG12101.4 l/77 kW TDI CRMG1189
Note
If required, you can find out the precise weight of your vehicle by contacting a
specialist garage.174Technical data
Page 177 of 196

Payload
It is possible to calculate the approximate loading capacity from the difference
between the permissible total weight and the operating weight.
The payload consists of the following weights.
▶ The weight of the passengers.
▶ The weight of all items of luggage and other loads.
▶ The weight of the roof, including the roof rack system.
▶ The weight of the equipment that is excluded from the operating weight.
▶ Trailer drawbar load when towing a trailer (max. 50 kg).
measurement of fuel consumption and CO
2 emissions according to
ECE Regulations and EU Directives
The data on fuel consumption and CO 2 emissions were not available at the
time of going to press.
The data on fuel consumption and CO 2 emissions are given on the ŠKODA
websites or in the sales and technical vehicle documentation.
The measurement of the intra-urban cycle begins with a cold start of the en-
gine. Urban driving is then simulated.
In the extra-urban driving cycle, the vehicle is accelerated and decelerated in
all gears, corresponding to daily routine driving conditions. The driving speed
varies between 0 and 120 km/h.
The calculation of the combined fuel consumption considers a weighting of
about 37 % for the intra-urban cycle and 63 % for the extra-urban cycle.
Note
■ The emission and fuel consumption figures given on the ŠKODA websites or
in the commercial and technical vehicle documentation have been established
in accordance with rules and under conditions that are set out by statutory or
technical rules for the determination of operational and technical data of mo-
tor vehicles.■
Depending on the extent of the equipment, the driving style, traffic condi-
tions, weather influences and vehicle condition, consumption values can in
practice result in fuel economy figures in the use of the vehicle that differ from
the fuel consumption values listed on the ŠKODA websites or in the commer-
cial and technical vehicle documentation.
175Technical data
Page 192 of 196

VINVehicle Identification Number173
Visibility58
Visors59
Voice control See Owner´s Manual -Infotainment
6
W
Warning at when speeding
39
Warning display low temperature35
Warning lights28
Warning symbols see Warning lights
28
Warning triangle149
Warranty4
Waste container68
Weather conditions127
Weights173, 174, 175
Wheel bolts Anti-theft wheel bolts
153
Caps152
Loosening and tightening153
Wheels145
Full trim152
Load Index147
Snow chains148
Speed symbol147
Tyre age145
Tyre damage145
Tyre pressure146
Tyre storage145
Unidirectional tyres145
Winter tyres148
Wi-Fi42
See Owner´s Manual -Infotainment6
Wi-Fi direct43
window operation
50
Windscreen washer fluidRefilling139
Warning light35
Windscreen washer system59
Windscreen wipers and washers59
Activation60
Add fluid139
Replacing the windscreen wiper blade162
Replacing the windscreen wiper blades161
Service position of the windscreen wiper arms 161
winter operation
148
Winter operation All-year tyres
148
Car battery143
Diesel fuel136
Snow chains148
Winter tyres148
Winter tyres148
Wiper and washer activation
60
Wipers and washer Warning light for windscreen washer fluid level 35
Wiping interval
60
X
XDS
102
190Index