oil temperature SKODA FABIA 2016 3.G / NJ Owner's Manual
[x] Cancel search | Manufacturer: SKODA, Model Year: 2016, Model line: FABIA, Model: SKODA FABIA 2016 3.G / NJPages: 196, PDF Size: 31.86 MB
Page 31 of 196
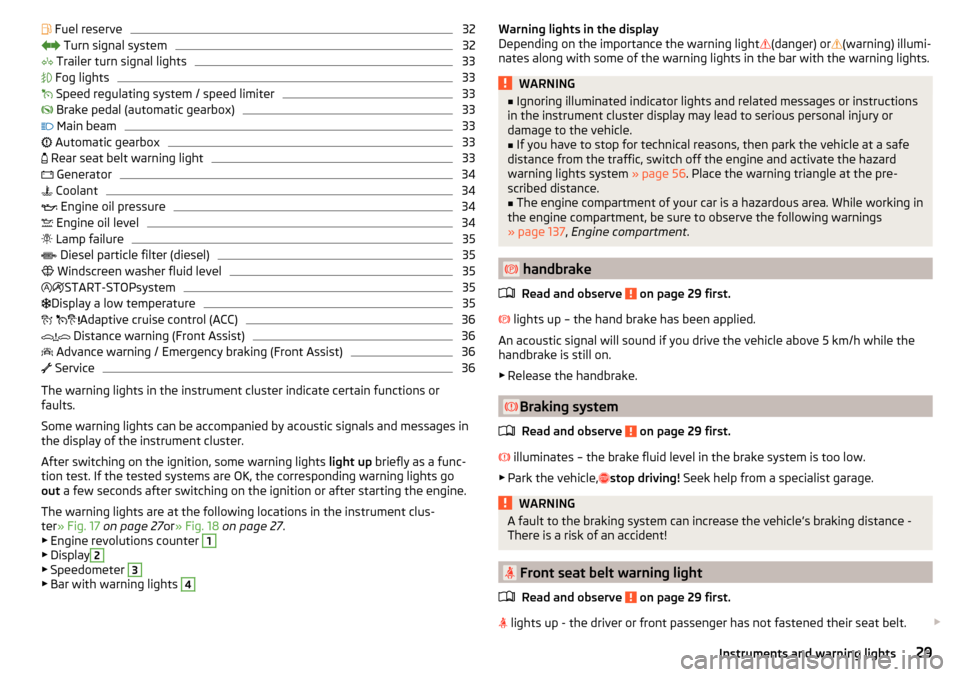
Fuel reserve32 Turn signal system32
Trailer turn signal lights
33
Fog lights
33
Speed regulating system / speed limiter
33
Brake pedal (automatic gearbox)
33
Main beam
33
Automatic gearbox
33
Rear seat belt warning light
33
Generator
34
Coolant
34
Engine oil pressure
34
Engine oil level
34
Lamp failure
35
Diesel particle filter (diesel)
35
Windscreen washer fluid level
35
START-STOPsystem
35
Display a low temperature
35
Adaptive cruise control (ACC)
36
Distance warning (Front Assist)
36
Advance warning / Emergency braking (Front Assist)
36
Service
36
The warning lights in the instrument cluster indicate certain functions or
faults.
Some warning lights can be accompanied by acoustic signals and messages in
the display of the instrument cluster.
After switching on the ignition, some warning lights light up briefly as a func-
tion test. If the tested systems are OK, the corresponding warning lights go
out a few seconds after switching on the ignition or after starting the engine.
The warning lights are at the following locations in the instrument clus-
ter » Fig. 17 on page 27 or» Fig. 18 on page 27 .
▶ Engine revolutions counter
1
▶Display
2
▶Speedometer
3
▶Bar with warning lights
4Warning lights in the display
Depending on the importance the warning light (danger) or (warning) illumi-
nates along with some of the warning lights in the bar with the warning lights.WARNING■ Ignoring illuminated indicator lights and related messages or instructions
in the instrument cluster display may lead to serious personal injury or
damage to the vehicle.■
If you have to stop for technical reasons, then park the vehicle at a safe
distance from the traffic, switch off the engine and activate the hazard
warning lights system » page 56. Place the warning triangle at the pre-
scribed distance.
■
The engine compartment of your car is a hazardous area. While working in
the engine compartment, be sure to observe the following warnings
» page 137 , Engine compartment .
handbrake
Read and observe
on page 29 first.
lights up – the hand brake has been applied.
An acoustic signal will sound if you drive the vehicle above 5 km/h while the
handbrake is still on.
▶ Release the handbrake.
Braking system
Read and observe
on page 29 first.
illuminates – the brake fluid level in the brake system is too low.
▶ Park the vehicle, stop driving!
Seek help from a specialist garage.
WARNINGA fault to the braking system can increase the vehicle’s braking distance -
There is a risk of an accident!
Front seat belt warning light
Read and observe
on page 29 first.
lights up - the driver or front passenger has not fastened their seat belt.
29Instruments and warning lights
Page 36 of 196
GeneratorRead and observe
on page 29 first.
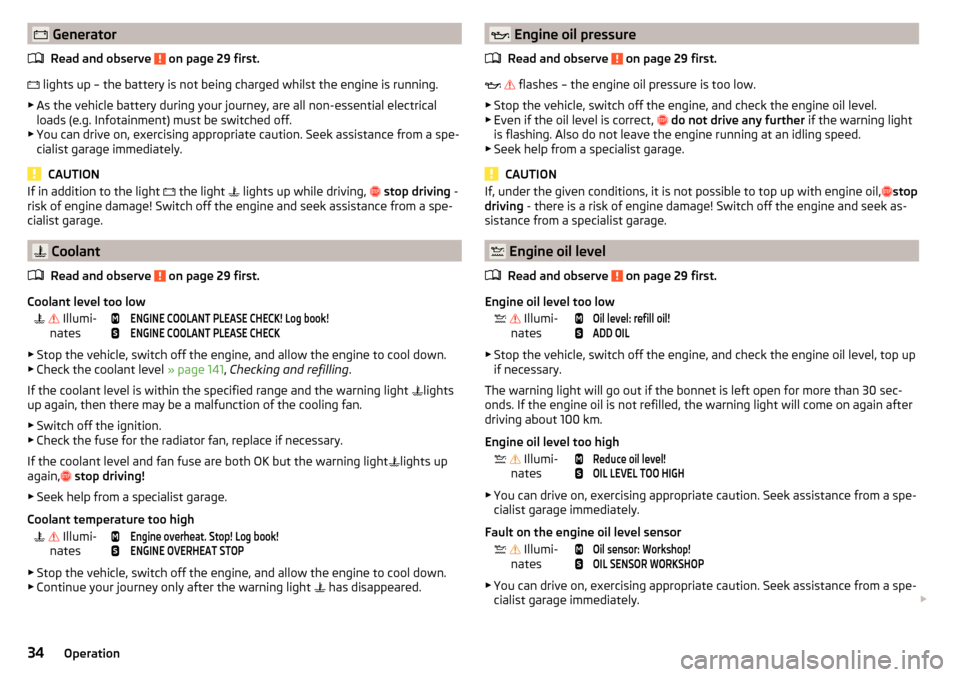
lights up – the battery is not being charged whilst the engine is running.
▶ As the vehicle battery during your journey, are all non-essential electrical
loads (e.g. Infotainment) must be switched off.
▶ You can drive on, exercising appropriate caution. Seek assistance from a spe-
cialist garage immediately.
CAUTION
If in addition to the light the light lights up while driving, stop driving -
risk of engine damage! Switch off the engine and seek assistance from a spe-
cialist garage.
Coolant
Read and observe
on page 29 first.
Coolant level too low
Illumi-
nates
ENGINE COOLANT PLEASE CHECK! Log book!ENGINE COOLANT PLEASE CHECK
▶ Stop the vehicle, switch off the engine, and allow the engine to cool down.
▶ Check the coolant level » page 141, Checking and refilling .
If the coolant level is within the specified range and the warning light lights
up again, then there may be a malfunction of the cooling fan.
▶ Switch off the ignition.
▶ Check the fuse for the radiator fan, replace if necessary.
If the coolant level and fan fuse are both OK but the warning light lights up
again,
stop driving!
▶ Seek help from a specialist garage.
Coolant temperature too high
Illumi-
nates
Engine overheat. Stop! Log book!ENGINE OVERHEAT STOP
▶ Stop the vehicle, switch off the engine, and allow the engine to cool down.
▶ Continue your journey only after the warning light has disappeared.
Engine oil pressure
Read and observe
on page 29 first.
flashes – the engine oil pressure is too low.
▶ Stop the vehicle, switch off the engine, and check the engine oil level.
▶ Even if the oil level is correct,
do not drive any further if the warning light
is flashing. Also do not leave the engine running at an idling speed.
▶ Seek help from a specialist garage.
CAUTION
If, under the given conditions, it is not possible to top up with engine oil, stop
driving - there is a risk of engine damage! Switch off the engine and seek as-
sistance from a specialist garage.
Engine oil level
Read and observe
on page 29 first.
Engine oil level too low
Illumi-
nates
Oil level: refill oil!ADD OIL
▶ Stop the vehicle, switch off the engine, and check the engine oil level, top up
if necessary.
The warning light will go out if the bonnet is left open for more than 30 sec-
onds. If the engine oil is not refilled, the warning light will come on again after
driving about 100 km.
Engine oil level too high
Illumi-
nates
Reduce oil level!OIL LEVEL TOO HIGH
▶ You can drive on, exercising appropriate caution. Seek assistance from a spe-
cialist garage immediately.
Fault on the engine oil level sensor
Illumi-
nates
Oil sensor: Workshop!OIL SENSOR WORKSHOP
▶ You can drive on, exercising appropriate caution. Seek assistance from a spe-
cialist garage immediately.
34Operation
Page 37 of 196
CAUTIONIf, under the given conditions, it is not possible to top up with engine oil,
stop driving - there is a risk of engine damage! Switch off the engine and seek
assistance from a specialist garage.
Lamp failure
Read and observe
on page 29 first.
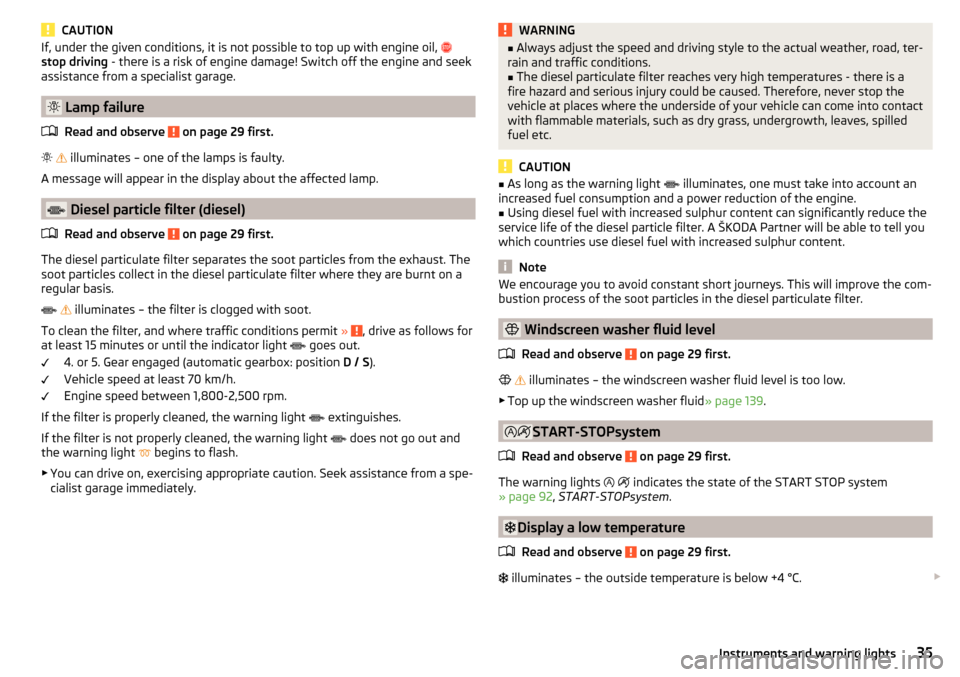
illuminates – one of the lamps is faulty.
A message will appear in the display about the affected lamp.
Diesel particle filter (diesel)
Read and observe
on page 29 first.
The diesel particulate filter separates the soot particles from the exhaust. The
soot particles collect in the diesel particulate filter where they are burnt on a
regular basis.
illuminates – the filter is clogged with soot.
To clean the filter, and where traffic conditions permit »
, drive as follows for
at least 15 minutes or until the indicator light goes out.
4. or 5. Gear engaged (automatic gearbox: position D / S).
Vehicle speed at least 70 km/h.
Engine speed between 1,800-2,500 rpm.
If the filter is properly cleaned, the warning light extinguishes.
If the filter is not properly cleaned, the warning light does not go out and
the warning light begins to flash.
▶ You can drive on, exercising appropriate caution. Seek assistance from a spe-
cialist garage immediately.
WARNING■ Always adjust the speed and driving style to the actual weather, road, ter-
rain and traffic conditions.■
The diesel particulate filter reaches very high temperatures - there is a
fire hazard and serious injury could be caused. Therefore, never stop the
vehicle at places where the underside of your vehicle can come into contact
with flammable materials, such as dry grass, undergrowth, leaves, spilled
fuel etc.
CAUTION
■ As long as the warning light illuminates, one must take into account an
increased fuel consumption and a power reduction of the engine.■
Using diesel fuel with increased sulphur content can significantly reduce the
service life of the diesel particle filter. A ŠKODA Partner will be able to tell you
which countries use diesel fuel with increased sulphur content.
Note
We encourage you to avoid constant short journeys. This will improve the com-
bustion process of the soot particles in the diesel particulate filter.
Windscreen washer fluid level
Read and observe
on page 29 first.
illuminates – the windscreen washer fluid level is too low.
▶ Top up the windscreen washer fluid » page 139.
START-STOPsystem
Read and observe
on page 29 first.
The warning lights
indicates the state of the START STOP system
» page 92 , START-STOPsystem .
Display a low temperature
Read and observe
on page 29 first.
illuminates – the outside temperature is below +4 °C.
35Instruments and warning lights
Page 41 of 196
The units and the display of some information can be set in Infotainment
» Owner's Manual Infotainment .
Data overview
Overview of driving data (depending on the vehicle equipment).
Range - Drive distance in km which can be covered with the existing tank ca-
pacity and with the same driving style. If you drive more efficiently this value
can increase.
Average fuel consumption - Is calculated continuously since the last time that
the memory was erased. After erasing the memory, no data will appear for the
first 100 m driven.
Current fuel consumption - When the vehicle is stationary or moving slowly,
the fuel consumption is displayed in l/h (in models in some countries the fol-
lowing appears --,- km/l).
Oil temperature if the temperature is lower than 50 °C or if there is a fault in
the system for checking the oil temperature, the symbols are displayed.
Warning at when the preset speed is exceeded allows the setting of a speed
limit where, if exceeded, an acoustic warning signal and a warning message
appears on the display of the instrument cluster.
Current Speed - Digital speedometer.
Average speed - Value constantly recalculated, for distance since last clearing
the memory. After erasing the memory, no data will appear for the first 300 m
driven.
Distance driven - Distance driven since the memory was last cleared.
Driving time - Driving time since last clearing the memory.
Coolant temperature - If the coolant temperature is in the range 70-120 °C,
the engine operating temperature has been reached. If the temperature is be-
low 70 ° C, high engine speeds and straining the engine should be avoided. If
the temperature is over 120°C, the warning light lights up in the instrument
cluster » page 34 .
Warning at when exceeding the set speed
The system offers the possibility to set a speed limit beyond which an acoustic
warning signal will sound and the following warning message appears in the
display of the instrument cluster.
Adjust the speed limit while the vehicle is stationary›Select the menu item
Warning at
at ( ) or ( ) and confirm.›
Set the desired speed limit is 5 km/h steps.
›
Confirm the set value, or wait several seconds; your settings will be saved
automatically.
Adjusting the speed limit while the vehicle is moving
›
Select the menu item
Warning at
at (
) or
(
) and confirm.
›
Drive at the desired speed.
›
Confirm the current speed as the speed limit.
The set speed limit can be manually adjusted later if needed.
Reset speed limit
›
Select the menu item
Warning at
at ( ) or
(
) and confirm.
›
By confirming the speed stored in the memory, the speed limit is reset.
The speed limit set mode is stored even after the ignition is switched off and
on. After a gap between driving exceeding 2 hours, the pre-set speed limit is
deactivated.
Memory
Fig. 26
Memory display: MAXI DOT dis-
play (
) / Segment display (
)
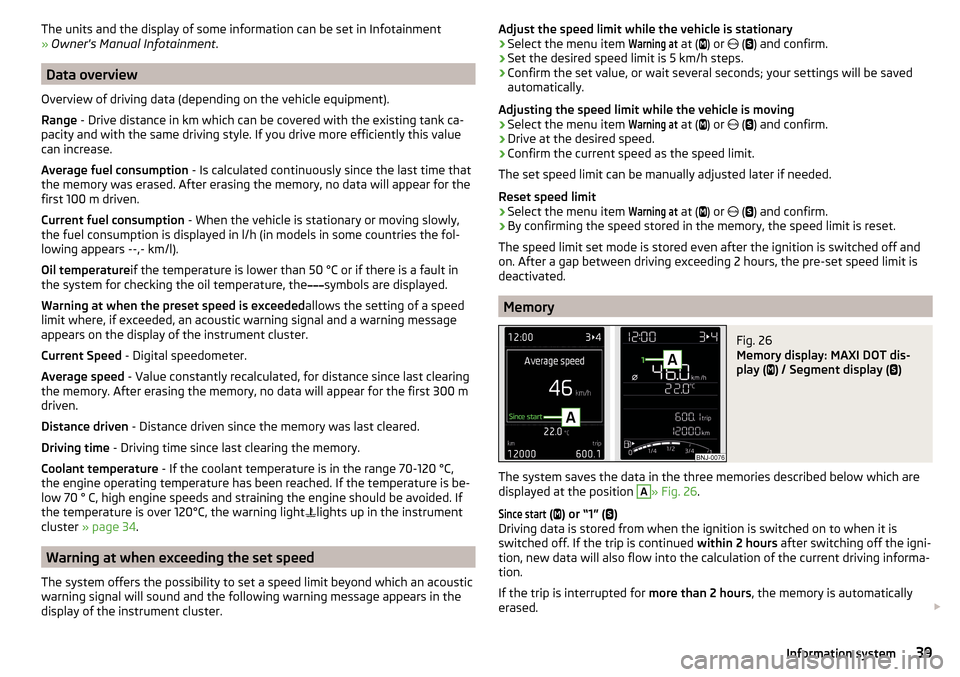
The system saves the data in the three memories described below which are
displayed at the position
A
» Fig. 26 .
Since start
(
) or “1” (
)
Driving data is stored from when the ignition is switched on to when it is
switched off. If the trip is continued within 2 hours after switching off the igni-
tion, new data will also flow into the calculation of the current driving informa-
tion.
If the trip is interrupted for more than 2 hours, the memory is automatically
erased.
39Information system
Page 134 of 196
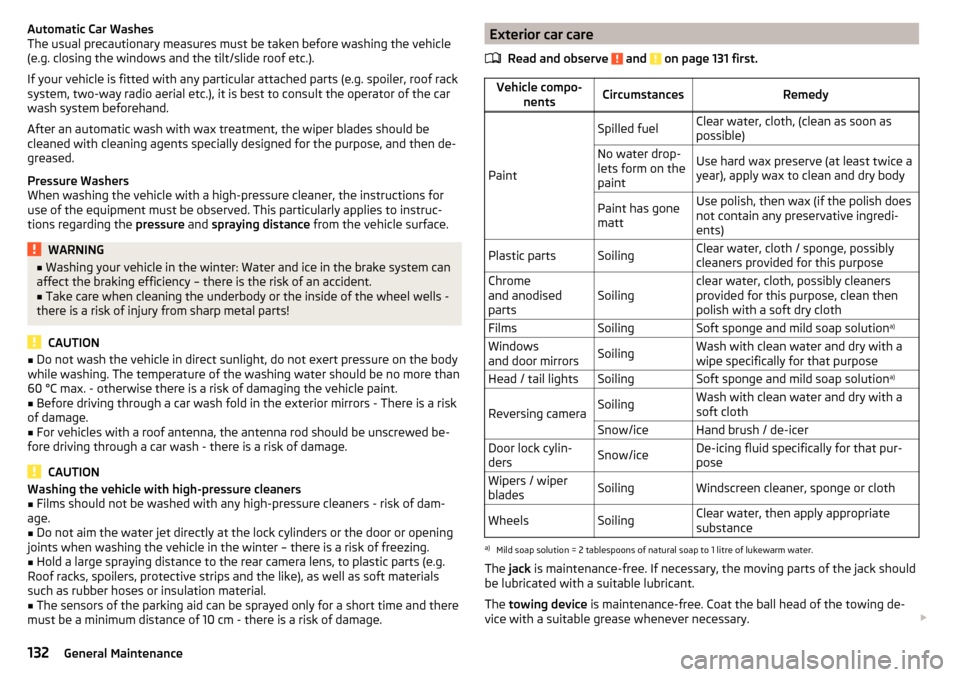
Automatic Car Washes
The usual precautionary measures must be taken before washing the vehicle
(e.g. closing the windows and the tilt/slide roof etc.).
If your vehicle is fitted with any particular attached parts (e.g. spoiler, roof rack system, two-way radio aerial etc.), it is best to consult the operator of the car
wash system beforehand.
After an automatic wash with wax treatment, the wiper blades should be
cleaned with cleaning agents specially designed for the purpose, and then de-
greased.
Pressure Washers
When washing the vehicle with a high-pressure cleaner, the instructions for
use of the equipment must be observed. This particularly applies to instruc-
tions regarding the pressure and spraying distance from the vehicle surface.WARNING■
Washing your vehicle in the winter: Water and ice in the brake system can
affect the braking efficiency – there is the risk of an accident.■
Take care when cleaning the underbody or the inside of the wheel wells -
there is a risk of injury from sharp metal parts!
CAUTION
■ Do not wash the vehicle in direct sunlight, do not exert pressure on the body
while washing. The temperature of the washing water should be no more than
60 °C max. - otherwise there is a risk of damaging the vehicle paint.■
Before driving through a car wash fold in the exterior mirrors - There is a risk
of damage.
■
For vehicles with a roof antenna, the antenna rod should be unscrewed be-
fore driving through a car wash - there is a risk of damage.
CAUTION
Washing the vehicle with high-pressure cleaners■Films should not be washed with any high-pressure cleaners - risk of dam-
age.■
Do not aim the water jet directly at the lock cylinders or the door or opening
joints when washing the vehicle in the winter – there is a risk of freezing.
■
Hold a large spraying distance to the rear camera lens, to plastic parts (e.g.
Roof racks, spoilers, protective strips and the like), as well as soft materials
such as rubber hoses or insulation material.
■
The sensors of the parking aid can be sprayed only for a short time and there
must be a minimum distance of 10 cm - there is a risk of damage.
Exterior car care
Read and observe
and on page 131 first.
Vehicle compo- nentsCircumstancesRemedy
Paint
Spilled fuelClear water, cloth, (clean as soon as
possible)No water drop-
lets form on the
paintUse hard wax preserve (at least twice a
year), apply wax to clean and dry bodyPaint has gone
mattUse polish, then wax (if the polish does
not contain any preservative ingredi-
ents)Plastic partsSoilingClear water, cloth / sponge, possibly
cleaners provided for this purposeChrome
and anodised
partsSoilingclear water, cloth, possibly cleaners
provided for this purpose, clean then
polish with a soft dry clothFilmsSoilingSoft sponge and mild soap solution a)Windows
and door mirrorsSoilingWash with clean water and dry with a
wipe specifically for that purposeHead / tail lightsSoilingSoft sponge and mild soap solution a)
Reversing cameraSoilingWash with clean water and dry with a
soft clothSnow/iceHand brush / de-icerDoor lock cylin-
dersSnow/iceDe-icing fluid specifically for that pur-
poseWipers / wiper
bladesSoilingWindscreen cleaner, sponge or clothWheelsSoilingClear water, then apply appropriate
substancea)
Mild soap solution = 2 tablespoons of natural soap to 1 litre of lukewarm water.
The jack is maintenance-free. If necessary, the moving parts of the jack should
be lubricated with a suitable lubricant.
The towing device is maintenance-free. Coat the ball head of the towing de-
vice with a suitable grease whenever necessary.
132General Maintenance
Page 135 of 196
Protection of cavities
All the cavities of your vehicle which are at risk from corrosion are protected by
a layer of long-lasting protective wax applied in the factory.
If any small amount of wax flow out of the cavities at high temperatures, these
must be removed with a plastic scraper and the stains cleaned using a petrole-
um cleaner.
Underbody
The underside of your vehicle is already permanently protected by the factory
against chemical and mechanical influences.
We recommend having the protective coating — preferably before the begin-
ning of winter and at the end of winter.
Product life of the films
Environmental influences (e.g. sunlight, humidity, air pollution, rockfall) affect
the life of the films. The films age and become brittle, which is normal; this
shall not be considered a fault.
The sunlight may also affect the depth of the film colour.
When transporting a load on the roof rack (e.g. roof box, etc.), there is an in- creased risk of film damage (e.g. due to rockfall from the secured load).
CAUTION
■ Vehicle paint
■ Repair damaged areas as soon as possible.
■ Matt-painted parts should not be treated with polishes or hard waxes.
■ Do not polish in a dusty environment - risk of paint scratches.
■ Do not apply polish to door seals or window guides.■
Plastic parts
■ Do not use paint polish.
■
Chromed and anodised parts
■ Do not polish in a dusty environment - risk of surface scratches.
■
Films
The following instructions must be observed, otherwise there is a risk of film
damage.
■ Do not use dirty cloths or sponges for cleaning.
■ Do not use a scraper or other means to remove ice and snow.
■ Do not polish the films
■ Do not use a high pressure cleaner on the films.
■
Rubber seals
■ Do not treat the door seals and window guides deal with anything - the
protective varnish coating could be damaged.
■ Windows and door mirrors
■ Do not clean the insides of the windows/mirrors with sharp objects - risk of
damage to the filaments or the antenna. ■ Do not use a cloth which has been used to polish the body - this could dirty
the window and impair visibility.■
Head / tail lights
■ Do not wipe head/tail lamps dry, do not use any sharp objects - risk of dam-
age to the protective coating and cracks forming on the headlamp glass cov-
ers.
■
Reversing camera
The following instructions must be observed, otherwise there is a risk of
camera damage.
■ Do not remove snow / ice with warm / hot water.
■ To wash, never use a pressure washer or steam jet.
■ For cleaning, do not use abrasive cleaners.
■
Door lock cylinders
■ Make sure that as little water as possible gets into the locking cylinder
when washing the vehicle - there is a risk of freezing the lock cylinder!
■
Wheels
■ Heavy soiling of the wheels can affect the balance of the wheels - the re-
sult can be a vibration, which can cause premature wear of the steering.
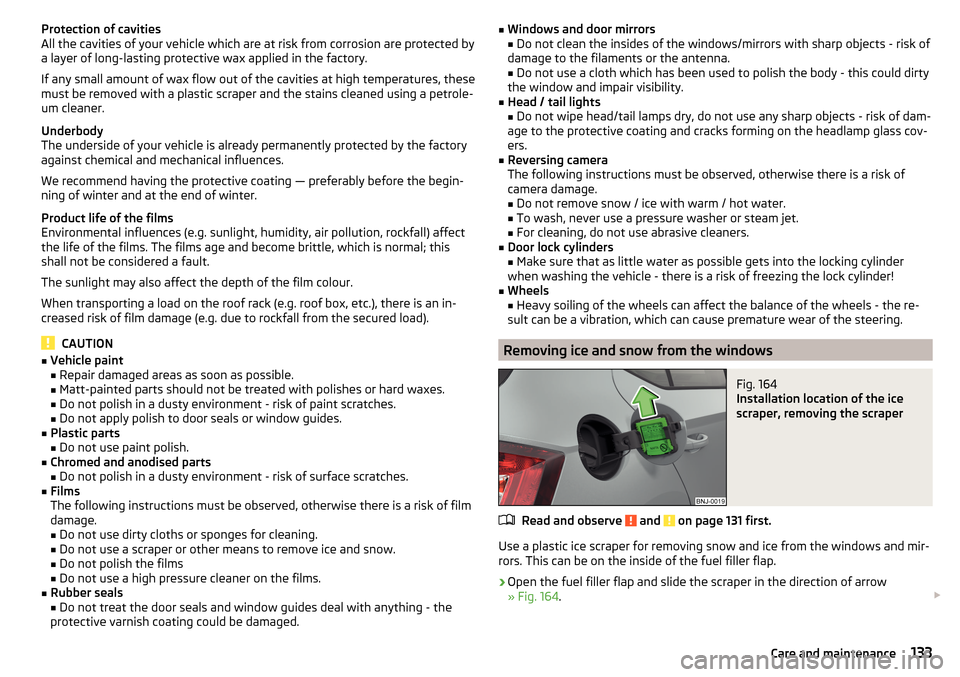
Removing ice and snow from the windows
Fig. 164
Installation location of the ice
scraper, removing the scraper
Read and observe and on page 131 first.
Use a plastic ice scraper for removing snow and ice from the windows and mir-
rors. This can be on the inside of the fuel filler flap.
›
Open the fuel filler flap and slide the scraper in the direction of arrow
» Fig. 164 .
133Care and maintenance
Page 142 of 196
Vehicles with fixed service intervalsPetrol enginesSpecification1.0 l/44, 55 kW MPI - EU6
VW 502 00
1.0 l/55 kW MPI - EU41.2 l/66, 81 kW TSI1.6 l/66, 81 kW MPIDiesel enginesSpecification1.4 l/55, 66, 77 kW TDI CRVW 507 00
Engine oil VW 505 01 can optionally be used in diesel engines without a DPF.
CAUTION
■
If no prescribed engine oil is available, then max. 0.5 l oil of the following
specifications can be refilled. ■Petrol engines: ACEA A3/ACEA B4 or API SN, (API SM);
■ Diesel engines: ACEA C3 or API CJ-4.
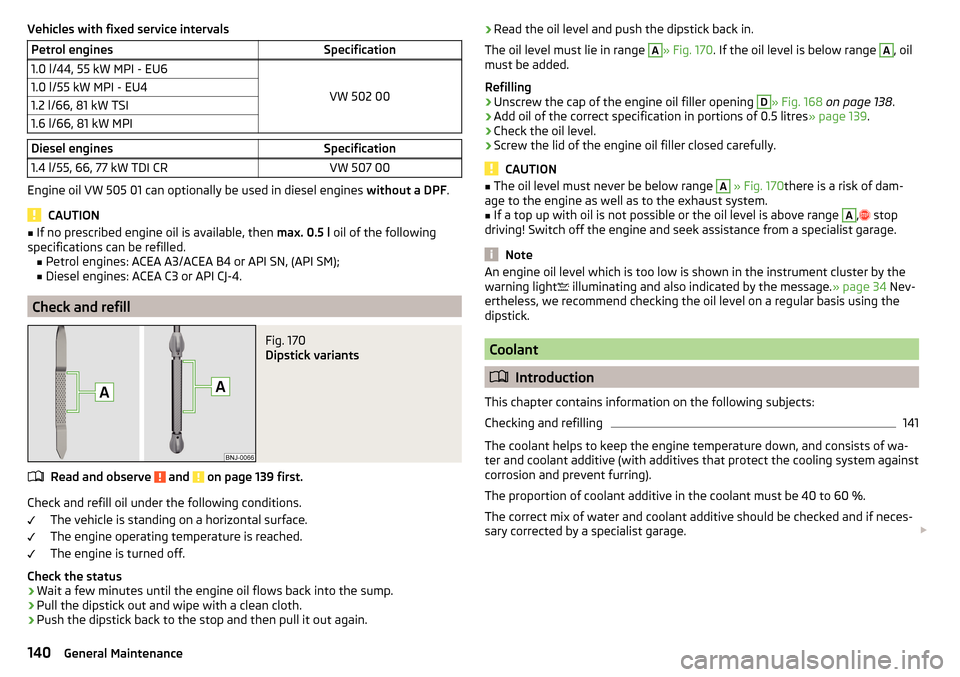
Check and refill
Fig. 170
Dipstick variants
Read and observe and on page 139 first.
Check and refill oil under the following conditions.
The vehicle is standing on a horizontal surface.
The engine operating temperature is reached.
The engine is turned off.
Check the status
›
Wait a few minutes until the engine oil flows back into the sump.
›
Pull the dipstick out and wipe with a clean cloth.
›
Push the dipstick back to the stop and then pull it out again.
› Read the oil level and push the dipstick back in.
The oil level must lie in range A
» Fig. 170 . If the oil level is below range
A
, oil
must be added.
Refilling
›
Unscrew the cap of the engine oil filler opening
D
» Fig. 168 on page 138 .
›
Add oil of the correct specification in portions of 0.5 litres » page 139.
›
Check the oil level.
›
Screw the lid of the engine oil filler closed carefully.
CAUTION
■
The oil level must never be below range A » Fig. 170 there is a risk of dam-
age to the engine as well as to the exhaust system.■
If a top up with oil is not possible or the oil level is above range
A
,
stop
driving! Switch off the engine and seek assistance from a specialist garage.
Note
An engine oil level which is too low is shown in the instrument cluster by the
warning light illuminating and also indicated by the message. » page 34 Nev-
ertheless, we recommend checking the oil level on a regular basis using the
dipstick.
Coolant
Introduction
This chapter contains information on the following subjects:
Checking and refilling
141
The coolant helps to keep the engine temperature down, and consists of wa-
ter and coolant additive (with additives that protect the cooling system against
corrosion and prevent furring).
The proportion of coolant additive in the coolant must be 40 to 60 %.
The correct mix of water and coolant additive should be checked and if neces-
sary corrected by a specialist garage.
140General Maintenance
Page 167 of 196
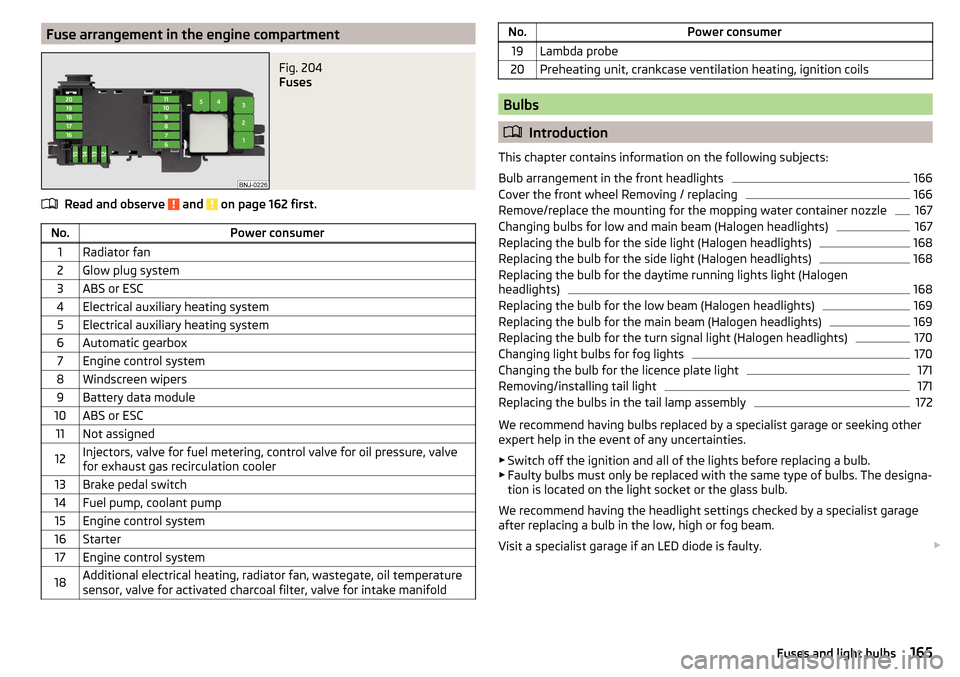
Fuse arrangement in the engine compartmentFig. 204
Fuses
Read and observe and on page 162 first.
No.Power consumer1Radiator fan2Glow plug system3ABS or ESC4Electrical auxiliary heating system5Electrical auxiliary heating system6Automatic gearbox7Engine control system8Windscreen wipers9Battery data module10ABS or ESC11Not assigned12Injectors, valve for fuel metering, control valve for oil pressure, valve
for exhaust gas recirculation cooler13Brake pedal switch14Fuel pump, coolant pump15Engine control system16Starter17Engine control system18Additional electrical heating, radiator fan, wastegate, oil temperature
sensor, valve for activated charcoal filter, valve for intake manifoldNo.Power consumer19Lambda probe20Preheating unit, crankcase ventilation heating, ignition coils
Bulbs
Introduction
This chapter contains information on the following subjects:
Bulb arrangement in the front headlights
166
Cover the front wheel Removing / replacing
166
Remove/replace the mounting for the mopping water container nozzle
167
Changing bulbs for low and main beam (Halogen headlights)
167
Replacing the bulb for the side light (Halogen headlights)
168
Replacing the bulb for the side light (Halogen headlights)
168
Replacing the bulb for the daytime running lights light (Halogen
headlights)
168
Replacing the bulb for the low beam (Halogen headlights)
169
Replacing the bulb for the main beam (Halogen headlights)
169
Replacing the bulb for the turn signal light (Halogen headlights)
170
Changing light bulbs for fog lights
170
Changing the bulb for the licence plate light
171
Removing/installing tail light
171
Replacing the bulbs in the tail lamp assembly
172
We recommend having bulbs replaced by a specialist garage or seeking other
expert help in the event of any uncertainties.
▶ Switch off the ignition and all of the lights before replacing a bulb.
▶ Faulty bulbs must only be replaced with the same type of bulbs. The designa-
tion is located on the light socket or the glass bulb.
We recommend having the headlight settings checked by a specialist garage after replacing a bulb in the low, high or fog beam.
Visit a specialist garage if an LED diode is faulty.
165Fuses and light bulbs
Page 185 of 196
Information on braking93
Warning lights29
Brake system101
Braking Running in
98
Breakdown kit154
Breakdown service see Help in an emergency
8
Bulbs Replacing
165
Button in driver's door electric windows
51
C
Camera See reversing camera
105
CAR See Owner´s Manual -Infotainment
6
Car battery Check condition
143
Cover143
Disconnecting and reconnecting144
Replacing144
Winter operation143
CAR button See Owner´s Manual -Infotainment
6
Car care131
Exterior132
Interior134
Outside133
Car computer see multifunction display
38
Care and maintenance127
Cargo element80
Carrier84
Car wash131
Car washing131
Exterior132
Interior134
washing131
Central locking44
Problems48
Central locking button46
Change battery
159
Changing Windscreen wiper blades
162
Changing a wheel151
Changing151
Changing gear Selector lever
96
Changing wheels Wheels
151
Charging a vehicle battery144
Check Brake fluid
142
Engine oil140
Fit ball head properly121
Oil level140
Checking Battery status
143
Coolant141
Checks Statutory checks
127
Children and safety20
Child safety lock48
Child seat20
Classification22
Installation location22, 23
in the passenger seat22
ISOFIX23
on the front passenger seat21
on the passenger seat21
TOP TETHER24
Cigarette lighter69
Cleaning the vehicle Outside133
Windows133
Climatronic85
Automatic operation87
Operating elements87
Recirculated air mode88
Clothes hook72
cockpit26
Cockpit Lighting
57
Coin and card holders67
Comfort signalling54
COMING HOME56
Compartments66
Component protection128
Computer see multifunction display
38
Coolant140
Checking141
Refilling141
Temperature display28
Warning light34
CORNER See Fog lights with the CORNER function
56
Correct routing of seat belt
14
Correct seated position10
Correct seating position12
Cruise Control System107
Cup holders68
D
DAY LIGHT see Daylight running lights
54
Daylight running lights54
dazzle59
De-icing rear window58
183Index
Page 186 of 196
DeactivationAirbag18
Delayed locking of the boot lid See boot lid
50
Departure angle177
Diesel136
Diesel fuel136
Diesel particle filter (DPF)35
Digital Clock37
Digital Service Plan131
Dipped beam53
Dipstick140
display cardinal points
36
Display Coolant temperature
28
Fuel level28
Gear changes37
In the instrument cluster36
MAXI DOT40
Service intervals41
Disposal Acceptance and recycling of used vehicles
129
Distance warning115
Warning light36
Door Child safety lock
48
Emergency locking160
Emergency locking of the driver's door159
Opening/Closing47
door alarm36
Drive Driving through water
99
DriveGreen98
driving emissions
175
fuel consumption175
Driving Maximum speed178
through water99
E
Economical driving
98
EDL102
Electric power windows Malfunctions
52
Electric windows50
Electric Windows Button in driver’s door’
51
Electronic differential lock (EDL, XDS)102
Electronic immobilizer90
Emergency Hazard warning light system
56
Jump-starting156, 157
Selector lever-unlocking160
Starting / stopping the engine with the push of a button
91
Starting the engine / stopping with the push of a button
92
Towing the vehicle157
Towing the vehicle using the trailer device159
Tyre repair154
Unlocking/locking the door159
Unlocking / locking the door160
Emergency equipment Fire extinguisher
150
First aid kit149
Jack150
Reflective vest149
Vehicle tool kit150
Warning triangle149
Emergency spare Removing / stowing
152
Emission control system31
Emissions175
Engine Information messages34
Running in98
Engine compartment137
Brake fluid142
Coolant140
Engine oil139
Overview138
Vehicle battery142
Windscreen washer fluid139
Engine drag torque control (MSR)101
Engine number173
engine oil specification
139
Engine oil139
Check140
Oil changing139
Refilling140
Warning light34
EPC31
ESC Operation
101
Warning light30
Extended warranty5
F
Fastening elements
76
Fatigue detection116
Films132
Fire extinguisher150
First aid kit149
Flashing54
Flexible storage compartment80
Fog lights Warning light
33
Fog lights/rear fog light55
Fog lights with the CORNER function56
Footmats95
see Footmats95
184Index