power steering SKODA FABIA 2016 3.G / NJ Owner's Manual
[x] Cancel search | Manufacturer: SKODA, Model Year: 2016, Model line: FABIA, Model: SKODA FABIA 2016 3.G / NJPages: 196, PDF Size: 31.86 MB
Page 28 of 196
Operation
cockpit
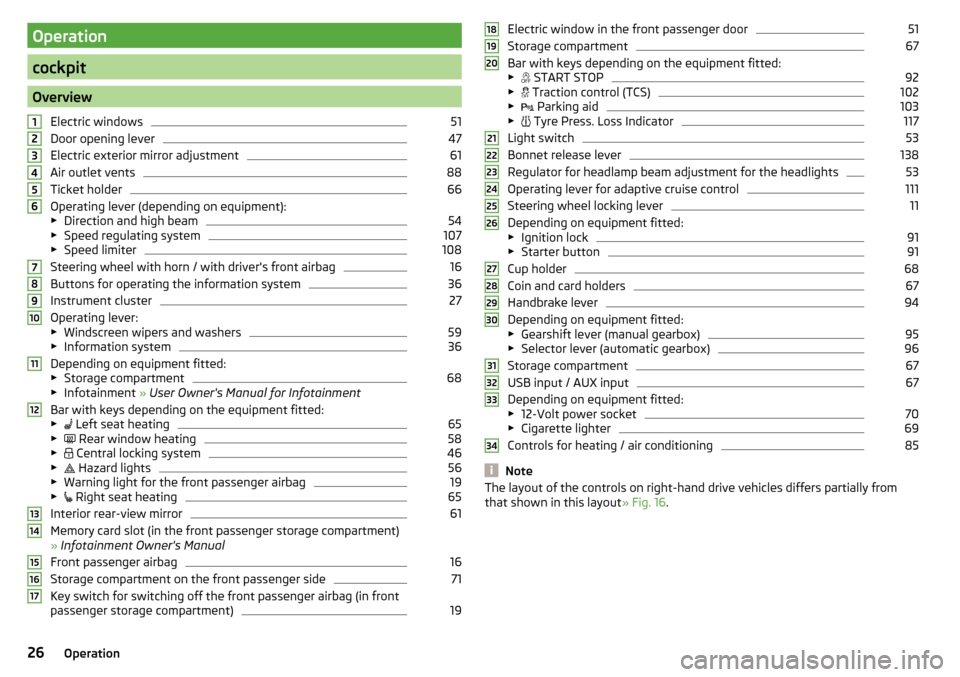
OverviewElectric windows
51
Door opening lever
47
Electric exterior mirror adjustment
61
Air outlet vents
88
Ticket holder
66
Operating lever (depending on equipment):
▶ Direction and high beam
54
▶Speed regulating system
107
▶Speed limiter
108
Steering wheel with horn / with driver's front airbag
16
Buttons for operating the information system
36
Instrument cluster
27
Operating lever:
▶ Windscreen wipers and washers
59
▶Information system
36
Depending on equipment fitted:
▶ Storage compartment
68
▶Infotainment » User Owner's Manual for Infotainment
Bar with keys depending on the equipment fitted:
▶ Left seat heating
65
▶
Rear window heating
58
▶
Central locking system
46
▶
Hazard lights
56
▶
Warning light for the front passenger airbag
19
▶
Right seat heating
65
Interior rear-view mirror
61
Memory card slot (in the front passenger storage compartment)
» Infotainment Owner's Manual
Front passenger airbag
16
Storage compartment on the front passenger side
71
Key switch for switching off the front passenger airbag (in front
passenger storage compartment)
191234567891011121314151617Electric window in the front passenger door51
Storage compartment
67
Bar with keys depending on the equipment fitted:
▶ START STOP
92
▶
Traction control (TCS)
102
▶
Parking aid
103
▶
Tyre Press. Loss Indicator
117
Light switch
53
Bonnet release lever
138
Regulator for headlamp beam adjustment for the headlights
53
Operating lever for adaptive cruise control
111
Steering wheel locking lever
11
Depending on equipment fitted:
▶ Ignition lock
91
▶Starter button
91
Cup holder
68
Coin and card holders
67
Handbrake lever
94
Depending on equipment fitted:
▶ Gearshift lever (manual gearbox)
95
▶Selector lever (automatic gearbox)
96
Storage compartment
67
USB input / AUX input
67
Depending on equipment fitted:
▶ 12-Volt power socket
70
▶Cigarette lighter
69
Controls for heating / air conditioning
85
Note
The layout of the controls on right-hand drive vehicles differs partially from
that shown in this layout » Fig. 16.181920212223242526272829303132333426Operation
Page 30 of 196
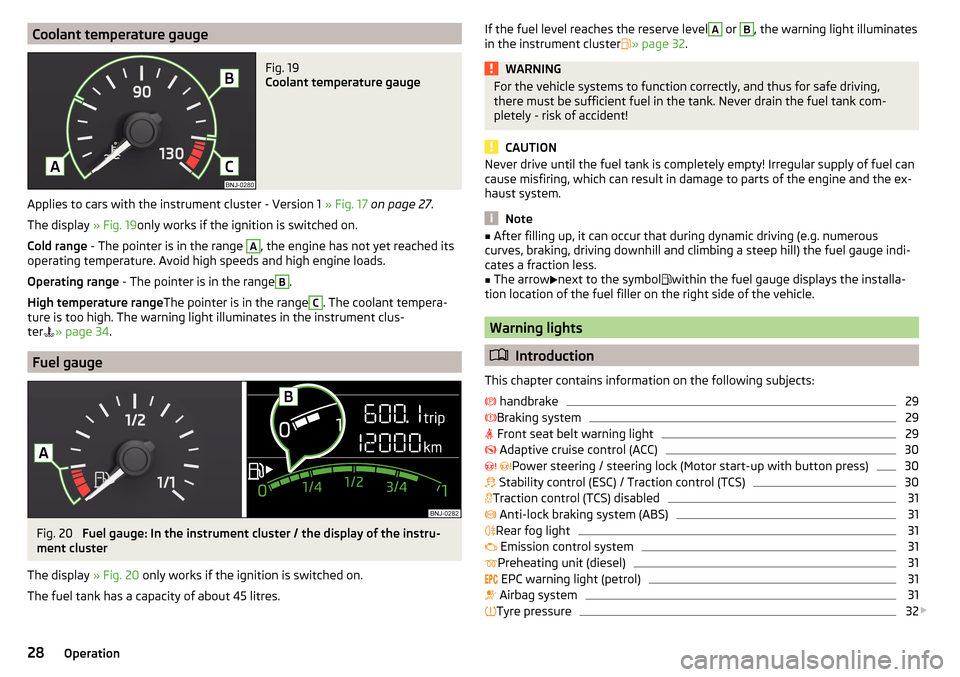
Coolant temperature gaugeFig. 19
Coolant temperature gauge
Applies to cars with the instrument cluster - Version 1 » Fig. 17 on page 27 .
The display » Fig. 19only works if the ignition is switched on.
Cold range - The pointer is in the range
A
, the engine has not yet reached its
operating temperature. Avoid high speeds and high engine loads.
Operating range - The pointer is in the range
B
.
High temperature range The pointer is in the range
C
. The coolant tempera-
ture is too high. The warning light illuminates in the instrument clus-
ter » page 34
.
Fuel gauge
Fig. 20
Fuel gauge: In the instrument cluster / the display of the instru-
ment cluster
The display » Fig. 20 only works if the ignition is switched on.
The fuel tank has a capacity of about 45 litres.
If the fuel level reaches the reserve levelA or B, the warning light illuminates
in the instrument cluster » page 32 .WARNINGFor the vehicle systems to function correctly, and thus for safe driving,
there must be sufficient fuel in the tank. Never drain the fuel tank com-
pletely - risk of accident!
CAUTION
Never drive until the fuel tank is completely empty! Irregular supply of fuel can
cause misfiring, which can result in damage to parts of the engine and the ex-
haust system.
Note
■ After filling up, it can occur that during dynamic driving (e.g. numerous
curves, braking, driving downhill and climbing a steep hill) the fuel gauge indi-
cates a fraction less.■
The arrow
next to the symbol
within the fuel gauge displays the installa-
tion location of the fuel filler on the right side of the vehicle.
Warning lights
Introduction
This chapter contains information on the following subjects:
handbrake
29
Braking system
29
Front seat belt warning light
29
Adaptive cruise control (ACC)
30
Power steering / steering lock (Motor start-up with button press)
30
Stability control (ESC) / Traction control (TCS)
30
Traction control (TCS) disabled
31
Anti-lock braking system (ABS)
31
Rear fog light
31
Emission control system
31
Preheating unit (diesel)
31
EPC warning light (petrol)
31
Airbag system
31
Tyre pressure
32
28Operation
Page 32 of 196
At a speed of over 30 km/h the warning lightflashes and an audible warning
sounds at the same time.
If the seat belt is not fastened by the driver or front passenger during the next
approx. 2 minutes, the warning signal is deactivated and the warning light
il-
luminates permanently.
Adaptive cruise control (ACC)
Read and observe
on page 29 first.
illuminates - the ACC delay is not sufficient.
▶ Apply the brake.
For more information about the ACC system » page 110.
Power steering / steering lock (Motor start-up with button
press)
Read and observe
on page 29 first.
Fault in the power steering
lights up – this indicates a complete failure of the power steering and the
steering assist is no longer working (significantly higher steering forces).
lights up – this indicates a partial failure of the power steering and the
steering forces can be greater.
▶ Switch off the ignition, start the engine again and travel a short distance.
▶ If the warning light does not go off, stop the vehicle,
stop driving
. Seek
help from a specialist garage.
▶ If the warning light does not go off, you can drive on, exercising appropriate
caution. Seek assistance from a specialist garage immediately.
Steering lock defective (engine start push-button)
An audible signal sounds as a warning.
flashes
Steering column lock faulty. Stop!STOP VEHICLE STEERING FAULTY
▶ Park the vehicle, and
stop driving . After switching off the ignition, it is no
longer possible to lock the steering, to activate the electrical components
(e.g. Infotainment ), to switch on the ignition again and to start the engine.
Seek help from a specialist garage.
flashes
Steering lock: Workshop!STEERING WORKSHOP
▶ You can drive on, exercising appropriate caution. Seek assistance from a spe-
cialist garage immediately.
Steering lock not unlocked (engine start push-button)
flashes
Move the steering wheel!MOVE STEERING WHEEL
▶ Move the steering wheel slightly back and forth, thereby facilitating unlock-
ing the steering lock.
▶ If the steering does also not unlock then, the help of a specialist garage is
required.
Disconnecting the vehicle battery
If the vehicle's battery has been disconnected and reconnected, the indicator
light comes on after switching on the ignition.
The warning light should go out after driving a short distance.
If, after the motor is restarted and a short drive, the indicator light does not go
out, there is a system error.
▶ You can drive on, exercising appropriate caution. Seek assistance from a spe-
cialist garage immediately.
Stability control (ESC) / Traction control (TCS)
Read and observe
on page 29 first.
flashes – the ESC or TCS is currently active.
System fault
lights up – there is an ESC or TCS fault.
▶ You can drive on, exercising appropriate caution. Seek assistance from a spe-
cialist garage immediately.
If the warning light comes on after starting the engine, the TCS may be
switched off for technical reasons. ▶ Switch the ignition off and on again.
If the warning light does not illuminate after you switch the engine back on,
the ASR is fully functional again.
30Operation
Page 160 of 196
The maximum towing speed is 50 km/h.
The vehicle must be transported on a special breakdown vehicle or trailer
if it is not possible to tow the vehicle in the way described or if the towing
distance is greater than 50 km.
Driver of the tow vehicle›
On vehicles with manual transmission , engage gear slowly when starting.
›
On vehicles with automatic transmission , accelerate with particular care.
›
Only then, approach correctly when the rope is taut.
Driver of the towed vehicle
›
If possible, the vehicle should be towed with the engine running. The brake
booster and power steering only operate if the engine is running, otherwise
much greater force has to be applied to the brake pedal and more power has
to be expended for steering.
›
If it is not possible to start the engine, switch on the ignition so that the
steering wheel does not lock and so that the turn signal lights, windscreen
wipers and windscreen washer system can be used.
›
Take the vehicle out of gear or move the selector lever into position N if the
vehicle is fitted with an automatic gearbox.
›
Keep the tow rope taut at all times during the towing procedure.
WARNING■ Spiral tow ropes must not be used for towing » Fig. 189- , the towing
eye may unscrew out of the vehicle - There is a risk of an accident.■
The tow rope should not be twisted - risk of accident.
CAUTION
■ Do not tow-start the engine – There is a risk of damaging the engine. The
battery from another vehicle can be used as a jump-start aid » page 156, Jump-
starting .■
For off-road towing manoeuvres, there is a risk to both vehicles that the fas-
teners may become overloaded and damaged.
Note
We recommend that you use a tow rope from ŠKODA Original Accessories.Front towing eyeFig. 190
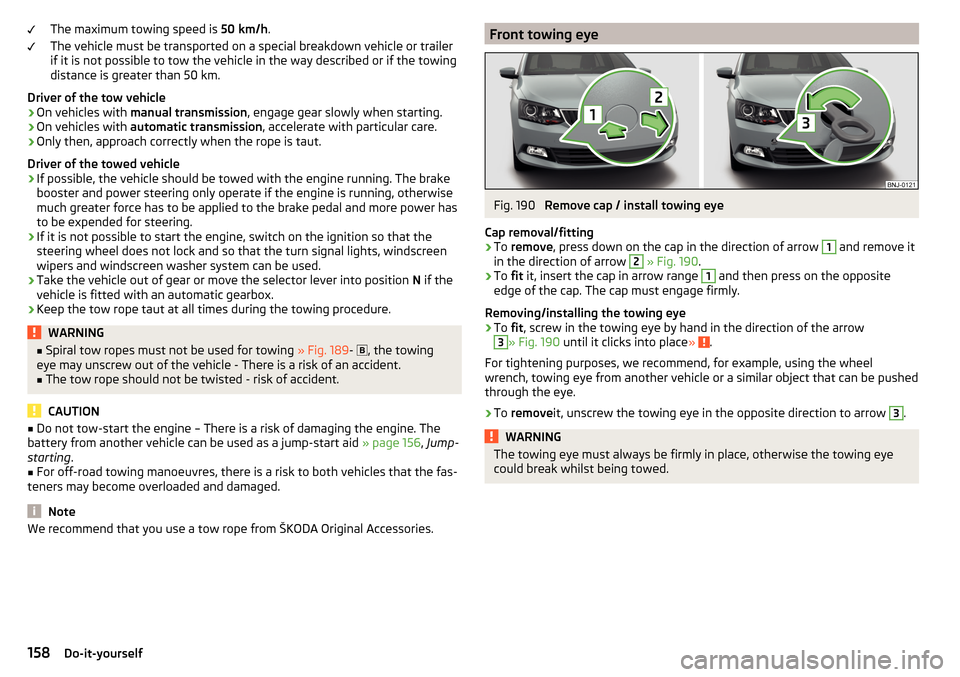
Remove cap / install towing eye
Cap removal/fitting
›
To remove , press down on the cap in the direction of arrow
1
and remove it
in the direction of arrow
2
» Fig. 190 .
›
To fit it, insert the cap in arrow range
1
and then press on the opposite
edge of the cap. The cap must engage firmly.
Removing/installing the towing eye
›
To fit, screw in the towing eye by hand in the direction of the arrow
3
» Fig. 190 until it clicks into place » .
For tightening purposes, we recommend, for example, using the wheel
wrench, towing eye from another vehicle or a similar object that can be pushed through the eye.
›
To remove it, unscrew the towing eye in the opposite direction to arrow
3
.
WARNINGThe towing eye must always be firmly in place, otherwise the towing eye
could break whilst being towed.158Do-it-yourself
Page 165 of 196
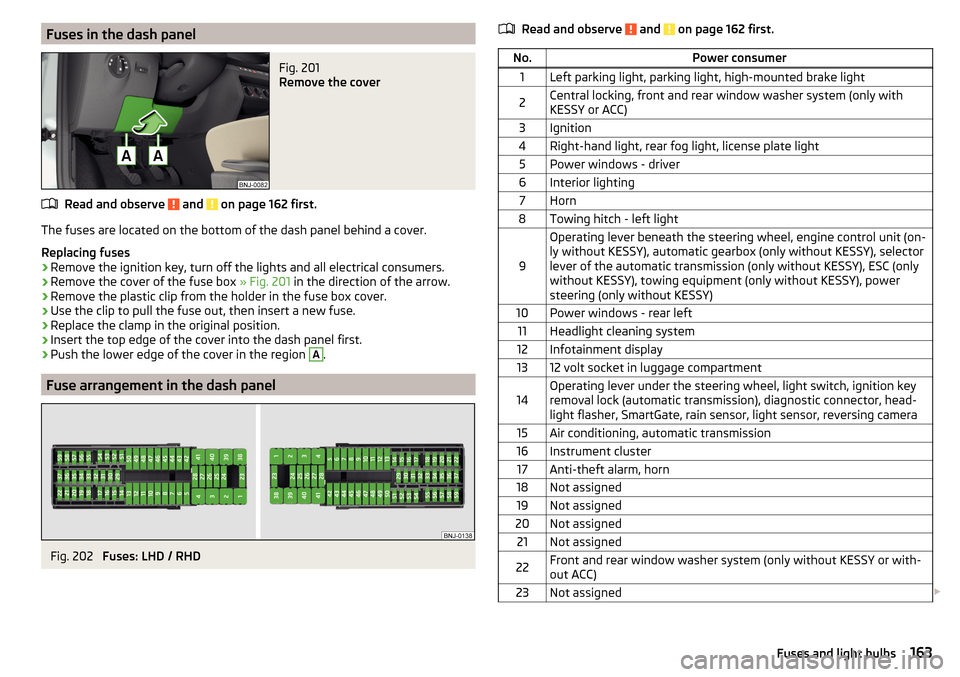
Fuses in the dash panelFig. 201
Remove the cover
Read and observe and on page 162 first.
The fuses are located on the bottom of the dash panel behind a cover.
Replacing fuses
›
Remove the ignition key, turn off the lights and all electrical consumers.
›
Remove the cover of the fuse box » Fig. 201 in the direction of the arrow.
›
Remove the plastic clip from the holder in the fuse box cover.
›
Use the clip to pull the fuse out, then insert a new fuse.
›
Replace the clamp in the original position.
›
Insert the top edge of the cover into the dash panel first.
›
Push the lower edge of the cover in the region
A
.
Fuse arrangement in the dash panel
Fig. 202
Fuses: LHD / RHD
Read and observe and on page 162 first.No.Power consumer1Left parking light, parking light, high-mounted brake light2Central locking, front and rear window washer system (only with
KESSY or ACC)3Ignition4Right-hand light, rear fog light, license plate light5Power windows - driver6Interior lighting7Horn8Towing hitch - left light
9
Operating lever beneath the steering wheel, engine control unit (on-
ly without KESSY), automatic gearbox (only without KESSY), selector
lever of the automatic transmission (only without KESSY), ESC (only
without KESSY), towing equipment (only without KESSY), power
steering (only without KESSY)10Power windows - rear left11Headlight cleaning system12Infotainment display1312 volt socket in luggage compartment14Operating lever under the steering wheel, light switch, ignition key
removal lock (automatic transmission), diagnostic connector, head-
light flasher, SmartGate, rain sensor, light sensor, reversing camera15Air conditioning, automatic transmission16Instrument cluster17Anti-theft alarm, horn18Not assigned19Not assigned20Not assigned21Not assigned22Front and rear window washer system (only without KESSY or with-
out ACC)23Not assigned 163Fuses and light bulbs
Page 166 of 196
No.Power consumer24Blower fan for the air conditioning system, heating, air conditioning,
heating25Not assigned26Heated front seats27Rear window wiper28Not assigned29airbag30Electric windows, light switches, reversing light switch, exterior mir-
rors, feed for the central toolbar, feed for the side toolbar, rear view
mirror, air-conditioning system, park assist31Fuel pump, radiator fan, cruise control, front and rear window wash-
er, engine start32Diagnostic connector, headlight range adjustment33Clutch pedal switch34Heated windscreen washer jets35Not assigned36Heated front seats37Radar38Not assigned39Electrical auxiliary heating system40Not assigned41Rear window heating42Power windows - front passenger43Trailer device - electrical outlet44Cigarette lighter, 12-volt power socket45Power windows - rear right46Front and rear window washer, operating lever under the steering
wheel47Trailer device - electrical outlet48Towing hitch - right light49Fuel pump50Infotainment51Heating of the external mirrorNo.Power consumer52KESSY53KESSY steering lock54Not assigned55Heated front seats56Not assigned57Not assigned58Not assigned59Not assigned
Fuses in the engine compartment
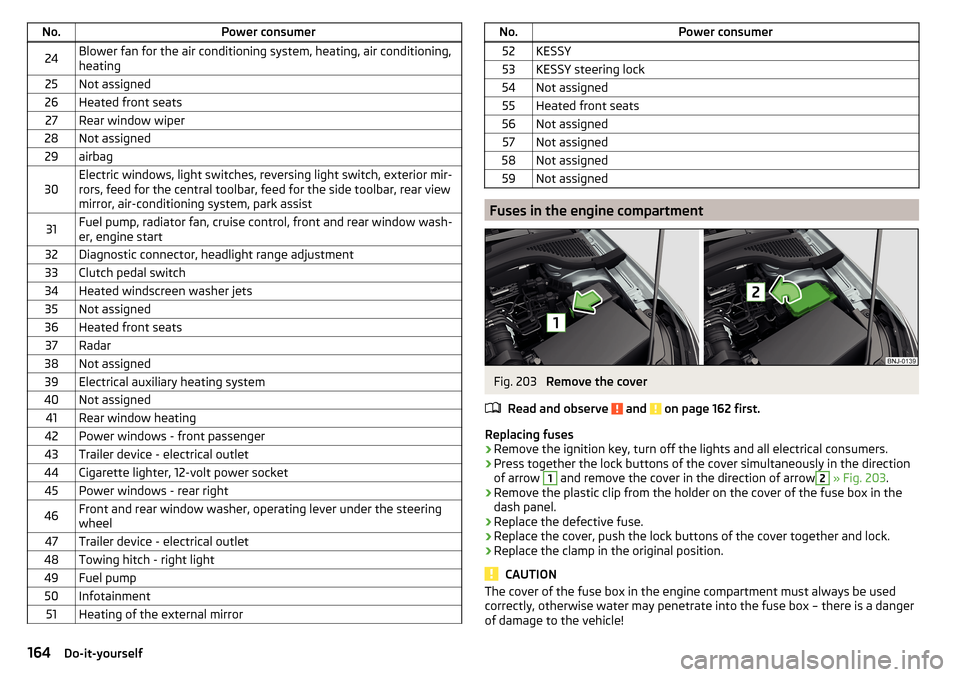
Fig. 203
Remove the cover
Read and observe
and on page 162 first.
Replacing fuses
›
Remove the ignition key, turn off the lights and all electrical consumers.
›
Press together the lock buttons of the cover simultaneously in the direction
of arrow
1
and remove the cover in the direction of arrow
2
» Fig. 203 .
›
Remove the plastic clip from the holder on the cover of the fuse box in the
dash panel.
›
Replace the defective fuse.
›
Replace the cover, push the lock buttons of the cover together and lock.
›
Replace the clamp in the original position.
CAUTION
The cover of the fuse box in the engine compartment must always be used
correctly, otherwise water may penetrate into the fuse box – there is a danger
of damage to the vehicle!164Do-it-yourself
Page 189 of 196
Original accessories128
overview cockpit
26
Overview Engine compartment
138
Fuses162
Warning lights28
P
Parking
94
Parking aid103
Reversing camera105
Parking aid103
Automatic system activation when moving for- ward
105
Function103
Parking assistance Activation / deactivation
105
Display in the Infotainment display104
Parking lights53
Parking the vehicle see Parking
94
ParkPilot103
Parts replacement127
Passive safety Before every journey
10
Driving safety10
Passive Safety10
Pedals95
Footmats95
Petrol135
Pockets73
Pockets in the luggage compartment77
Power steering30
Practical features Pockets
73
Storage compartment for umbrella72
storage compartment under the passenger seat72
Waste container68
Preheating unit31
R
Radio See Owner´s Manual - Infotainment
6
Raise vehicle153
Rear fog light55
Warning light31
Rear seats63
Rear View Camera Function keys
106
Operation106
Orientation Lines106
Rear view mirror61
Rear window - heater58
Recirculated air mode88
Refilling Coolant
141
Engine oil140
Windscreen washer fluid139
Reflective vest149
Refuelling135
Fuel135
Regulation Headlight beam
53
remote Synchronization process
48
Remote Change battery
159
Remote control Unlocking/locking the vehicle
45
Removing the bar ball, Step 1
122
bar ball, Step 2122
Repairs and technical alterations127
Replacing Bulbs165
Fuses162
Windscreen wiper blades161
Rev counter27
Reversing camera105
Rims145
Roller blind Luggage compartment cover
79
Roof Load
84
Roof rack84
Running in Brake pads
93
Engine98
Tyres145
S
SafeLock
47
safety air bag
16
Safety10
Child safety20
Child safety seats20
Correct seated position10
Headrests64
ISOFIX23
TOP TETHER24
SAFE, SAFELOCK See SafeLock
47
Saving electrical energy98
Saving fuel98
SD card See Owner´s Manual -Infotainment
6
Seat belt height adjustment
14
Warning light33
187Index
Page 190 of 196
Seat belts13
Belt tensioners15
fastening and unfastening14
Seatbelts Inertia reels
15
Seat belts Warning light
29
Seats Adjusting the front seats
62
front62
Front armrest63
Headrests64
Heating65
Rear63
Rear seat64
Rear seat backrests63
Setting62
Seats and headrest62
see Instrument cluster see Instrument cluster
27
Selector lever96
Selector lever control96
Selector lever lock Warning light
33
service127
Service Service interval display
41
Warning light36
Service intervals129, 130
Service Plan131
Setting Headrests
64
Mirror61
Seat belt height14
Seats62
Setting the Clock
37
Set to lower position of the variable loading floor
81
upper position of the variable loading floor81
shifting Tiptronic97
SmartGate connection using Wi-Fi direct
43
Connection via Wi-Fi42
introductory information42
Password/PIN code change43
Setting43
SmartLink See Owner´s Manual -Infotainment
6
Snow chains148
sockets 12-volt power socket in the luggage compart-ment
70
12-volt socket in the interior70
Sound See Owner´s Manual -Infotainment
6
Spare wheel147
Removing / stowing152
Speed limiter108
Warning light33
Speed regulating system Warning light
33
Speed symbol147
Spoiler128
Stabilisation system101
Stability Control (ESC)101
START-STOP92
Jump-starting157
Manually deactivating/activating the system93
operation92
Warning light35
START-STOP system92
Start engine Immobilizer
90
Starter button Lock / unlock the steering lock
90
Problems with the engine start92
Starting / stopping the engine91
Switch on/off ignition91
Starting engine Jump-starting156
Starting the engine Jump-starting
157
Key91
Starter button91
Steering lock (KESSY system) Warning light
30
steering wheel Correct posture
11
Steering wheel Buttons
38
setting11
Stopping see Parking
94
Stopping the engine Key
91
Starter button91
Storage66
storage compartment Glasses compartment
71
under the passenger seat72
Storage compartment in the doors
67
in the front arm rest71
in the front centre console67
in the rear centre console73
on the dash panel68
on the front passenger side71
on the side of the front seat72
Storage compartments66
sun visor59
Sun visors59
Switch Car battery
144
Switching the lights on and off53
Switch off Alarm
49
Switch off ignition91
Key91
188Index
Page 191 of 196
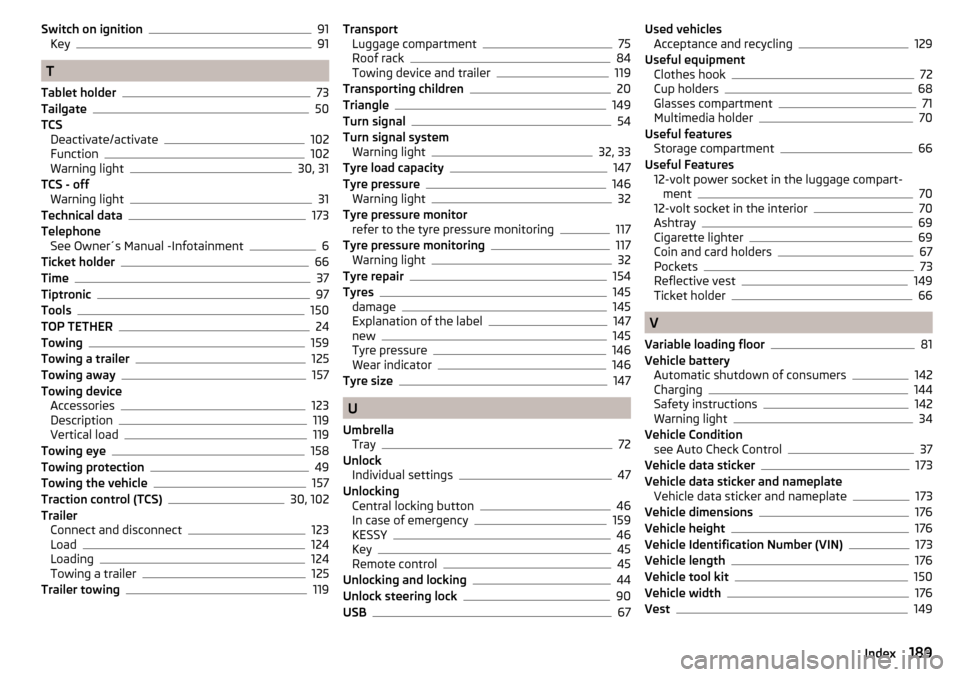
Switch on ignition91
Key91
T
Tablet holder
73
Tailgate50
TCS Deactivate/activate
102
Function102
Warning light30, 31
TCS - off Warning light
31
Technical data173
Telephone See Owner´s Manual -Infotainment
6
Ticket holder66
Time37
Tiptronic97
Tools150
TOP TETHER24
Towing159
Towing a trailer125
Towing away157
Towing device Accessories
123
Description119
Vertical load119
Towing eye158
Towing protection49
Towing the vehicle157
Traction control (TCS)30, 102
Trailer Connect and disconnect
123
Load124
Loading124
Towing a trailer125
Trailer towing119
Transport Luggage compartment75
Roof rack84
Towing device and trailer119
Transporting children20
Triangle149
Turn signal54
Turn signal system Warning light
32, 33
Tyre load capacity147
Tyre pressure146
Warning light32
Tyre pressure monitor refer to the tyre pressure monitoring
117
Tyre pressure monitoring117
Warning light32
Tyre repair154
Tyres145
damage145
Explanation of the label147
new145
Tyre pressure146
Wear indicator146
Tyre size147
U
Umbrella Tray
72
Unlock Individual settings
47
Unlocking Central locking button
46
In case of emergency159
KESSY46
Key45
Remote control45
Unlocking and locking44
Unlock steering lock90
USB67
Used vehicles Acceptance and recycling129
Useful equipment Clothes hook
72
Cup holders68
Glasses compartment71
Multimedia holder70
Useful features Storage compartment
66
Useful Features 12-volt power socket in the luggage compart-ment
70
12-volt socket in the interior70
Ashtray69
Cigarette lighter69
Coin and card holders67
Pockets73
Reflective vest149
Ticket holder66
V
Variable loading floor
81
Vehicle battery Automatic shutdown of consumers
142
Charging144
Safety instructions142
Warning light34
Vehicle Condition see Auto Check Control
37
Vehicle data sticker173
Vehicle data sticker and nameplate Vehicle data sticker and nameplate
173
Vehicle dimensions176
Vehicle height176
Vehicle Identification Number (VIN)173
Vehicle length176
Vehicle tool kit150
Vehicle width176
Vest149
189Index