SKODA KODIAQ 2016 1.G Owner's Manual
Manufacturer: SKODA, Model Year: 2016, Model line: KODIAQ, Model: SKODA KODIAQ 2016 1.GPages: 344, PDF Size: 58.96 MB
Page 171 of 344
›Tap the function surface
.›Select the recipient of the message from the displayed list or phone number
by tapping the function surface
» Fig. 207 -
.›
Tap the function surface
» Fig. 207 -
, the message is sent.
While composing the message in the function surface is
the number of en-
tered characters displayed » Fig. 206 -
.
The maximum number of characters entered in a message is 440. If a message
is longer than 70 characters, then it is split into multiple messages.
Viewing the text message
After opening the view message function » Fig. 206 -
the following functions
can be executed.
The text can be read out by the device's generated voice
The text can be stored as a draft
Open a list of templates with the option to replace the recorded text with
the selected template
Open the contact list
The message can be edited, as long as the text range is within the entered
view.
Contact list
After the list has been opened the following functions can be executed
» Fig. 207 -
.
Insert a contact in the recipient list
Contact search
Enter the telephone number
Return to view the message
After selecting the contact number or entering the telephone number, the re- cipient list will be displayed in the screen » Fig. 207 -
.
Recipient list
The following functions can be performed by tapping one of the functional sur-
faces » Fig. 207 -
.
To display the contact list with the option to add/remove additional mes-
sage recipients / (to return to the recipient list » Fig. 207 -
the function-
al .
Removal of the contact from the recipient list
ASending the message
Return to view the message
Incoming text message
When you receive a new message, the number of new messages received is
displayed next to the function surface
and at the same time the icon in the
status bar is
displayed.
›
To Open the list of received messages tap on the button , then the func-
tion surface
→
.
›
Select a message.
The message content and the following menu is displayed.
The text can be read out by the device's generated voice
Display a menu with additional options
▶
Reply with template
- Reply using a template
▶
Delete current text message
- Distance of displayed text message (applies to
Infotainment Columbus, when the SIM card is inserted in the external
module or the phone is connected via the Bluetooth ®
profile RSAP)
▶
Display numbers
- Recognition of telephone numbers in the message in-
cluding the contact number (recognised numbers can be dialled directly
or edited before dialling, or may be sent to this message)
Forwarding a message with the option to edit the message before sending
Reply to the sender via a message
169Telephone
Page 172 of 344
Hotspot (WLAN) and data connection
Hotspot (WLAN)
Introduction to the subject
Applies to Infotainment Columbus, Amundsen.
WLAN can be used to connect to the Internet, to playback audio files in the menu media (if the connected external device allows this) or for operating the
device using an application in the external device (e.g. ŠKODA Media Command
or ŠKODA One App).
The requirement for the WLAN function is that the ignition is switched on. Af-
ter switching on the ignition, the last-used WLAN connection appears.
It is possible to connect up to 8 external devices to the Infotainment hotspot
and at the same time to connect Infotainment to the hotspot of other external
devices.
If there is a SIM card with activated data services in the external module of In-
fotainment Columbus or there is a connection to the phone via Bluetooth ®
profile RSAP, a connection cannot be established to the external device hot- spot.
connect an external device to the hotspot (WLAN) infotainment
Switch Infotainment hotspot on / off
›
Press the button, then tap on the function surface
Tap on
→
WLAN
→
Mobile hotspot
→
Mobile hotspot
.
Set infotainment Hotspot
▶ Press the
button, then tap on the function surface
Tap on
→
WLAN
→
Mobile hotspot
→
Hotspot (WLAN) settings
.
▶ Setting required menu items from the following menu.
■
Security level:
- Setting the connection security
■
Network key
- Entering the access password
■
SSID:
- Name of the infotainment Hotspots
■
Do not send network name (SSID)
-Turn Infotainment hotspot visibility on/off
▶ Tap the function surface Store to save the parameters of the Infotainment
hotspot.
Connect ▶ Enable the Wi-Fi in the external device and search for any available hotspots.
▶ Select the Infotainment hotspot (if necessary, enter the required password).
▶ Confirm the connection.
Establish secure connection using WPS (applies to Infotainment Amundsen) ▶ Turn on Infotainment in the device.
▶ Press the
button, then tap on the function surface
→
WIRELESS INTER-NET ACCESS
→
WIRELESS INTERNET ACCESS
→
WPS quick connection (WPS button)
Tap.
▶ Turn on the option to connect to Infotainment hotspot using WPS.
Note
If the external device is connected to the Infotainment hotspot (WLAN), then
the data connection to the external device cannot be used.
Connect infotainment with the hotspot (WLAN) of the external
device
Fig. 208
List of available wireless networks: Infotainment Columbus / in-
fotainment Amundsen
›
To Turn on / off the Infotainment WLAN press the button , then the
function surface →
→
WIRELESS INTERNET ACCESS
→
WIRELESS INTERNET ACCESS
→
WIRELESS INTERNET ACCESS
Tap.
170Infotainment
Page 173 of 344
Show available hotspots
▶ Press the button, then tap on the function surface
→
WIRELESS INTER-NET ACCESS
→
WIRELESS INTERNET ACCESS
1)
Tap.
With WLAN activated, a list of available or previously connected hotspots with
the following information and function surfaces is displayed » Fig. 208.
Searching for available hotspots
Turn Infotainment WLAN on/off
Manual hotspot search and connect
Automatic establishment of the secure connection to the hotspot via WPS
(Applies to Infotainment Amundsen)
Functional surfaces of the available hotspots
Disconnection from the currently connected hotpot by deleting the Info-
tainment memory access password (The function surface will only be
shown when connected)
Current connection
Wi-Fi strength of the external device
Connect ▶ Turn on Infotainment in the device.
▶ Show the list of available hotspots, if necessary, update the list by tapping
the function surface
Find
.
▶ Select the desired hotspot.
▶ If the access to the hotspot is password protected, then enter the required
password.
Search for connection manually and connect ▶ Turn on Infotainment in the device.
▶ Display list of available hotspots.
▶ Tap on the function surface
Manual settings
and set the required hotspot pa-
rameters.
▶ Tap the function surface
Connect
.
▶ If the parameters for the search are set correctly and the hotspot is available,
then the connection will take place.
ABCDEFEstablish secure connection using WPS (applies to Infotainment Amundsen) ▶ Turn on Infotainment in the device.
▶ In the external device, turn on the option to connect to the external device
via WPS.
▶ Press the
button, then tap on the function surface
Tap on →
WLAN
→
Mobile hotspot
→
WPS quick connection (WPS button)
.
End connection to the hotspot ▶ Press button when the desired Hotspot (WLAN) is found
,then the func-
tion surface →
→
WIRELESS INTERNET ACCESS
→
WIRELESS INTERNET ACCESS
→
Delete
Tap.
Data Connection
Using the data connection, Infotainment can be connected to the Internet. The
data connection can be established in one of the following ways.
Data connection via WLAN
›
Connect Infotainment to the hotspot of an external device with activated da-
ta services » page 170, Connect infotainment with the hotspot (WLAN) of the
external device .
Data connection using the SIM card in the external module (applies to
Infotainment Columbus)
›
Insert a SIM card with activated data services in the external mod-
ule » page 162 , Use the SIM card in the external module .
Data connection using rSAP (applies to Infotainment Columbus)
›
Connect Infotainment via Bluetooth ®
profile rSAP to a telephone with activa-
ted data services » page 163, rSAP .
Data connection using CarStick (applies to Infotainment Columbus,
Amundsen)
The prerequisite for the correct function is in Carstick inserted SIM card size
mini (Standard Size 25x15 mm) with activated data services. The CarstickIP-
MENT supports the wireless network using the standard 2G and 3G,
To the connection proceed as follows.
›
Turn on the ignition and switch on Infotainment.
›
In the Front USB » page 90 the Carstick insert with inserted SIM card.
›
Wait until the light on Carstick permanently illuminated.
1)
As long as Infotainment is connected to the hotspot of the external device, its hotspot name is displayed
in this function surface.
171Hotspot (WLAN) and data connection
Page 174 of 344
›Observe the infotainment screen and if necessary, adjust the required net-
work of data service provider.›
If the SIM card is protected by a PIN code, then the PIN code of the SIM card
must be entered » Fig. 195 on page 162 ,
›
Confirm the entered PIN code.
or
›
If you would like to save the entered PIN code in the device memory, then
press the function key
Tap the PIN-code is stored and simultaneously con-
firmed.
The display of the signal strength, connection type and a possible data trans-
fer occurs in the status bar by the symbol left next to the time.
The parameters of the telephone service provider network can be set
» page 132 ,
CAUTION
When inserting an incorrectly sized SIM card, there is a risk of damage to the
CarStick device.
Note
The Internet connection may be chargeable based on the terms and conditions
of your data provider.SmartLink
Introductory information
Introduction to the subject
Fig. 209
Information on SmartLink on the
ŠKODA websites
Read in the QR code » Fig. 209orenter the following address in the web brows-
er to open the website with information on the SmartLink system.
http://go.skoda.eu/connectivity-smartlink
SmartLink offers the option to display certified applications on an external de-
vice equipped with a USB device on the Infotainment screen and to operate
them.
SmartLink supports the following communication systems. ▶ Android Auto
▶ Apple CarPlay
▶ MirrorLink ®
Using the applications in the connected external device, you can use naviga-
tion to make a call and to listen to music.
For reasons of safety, the operation of some applications while driving is not
possible or only limited.
Depending on the model of the connected external device, some applications
can be started using voice activation, via the Infotainment screen, using the
operating elements on Infotainment, or using the buttons on the multi-func-
tion steering wheel.
The voice control of the connected external device can be activated by holding
the button
or holding the button
on the multifunction steering
wheel.
172Infotainment
Page 175 of 344
CAUTIONTo establish the connection, it is necessary that the date and time in Infotain-
ment are set correctly. If the date and time setting is based on the GPS signal,
then problems may arise with establishing a connection with a poor GPS signal
reception.
Note
■ During the connection process, information messages may be displayed on
the Infotainment screen, and in the phone display. These messages must be
observed and confirmed if necessary (e.g. Release of data transfer, enabling
the contact import, release of text messages).■
We recommend that you use extension cords from ŠKODA Original Accesso-
ries.
■
With some connected devices, it is necessary that the connected external
device is unlocked over the entire duration of the connection for trouble-free
functioning of the SmartLink function“”.
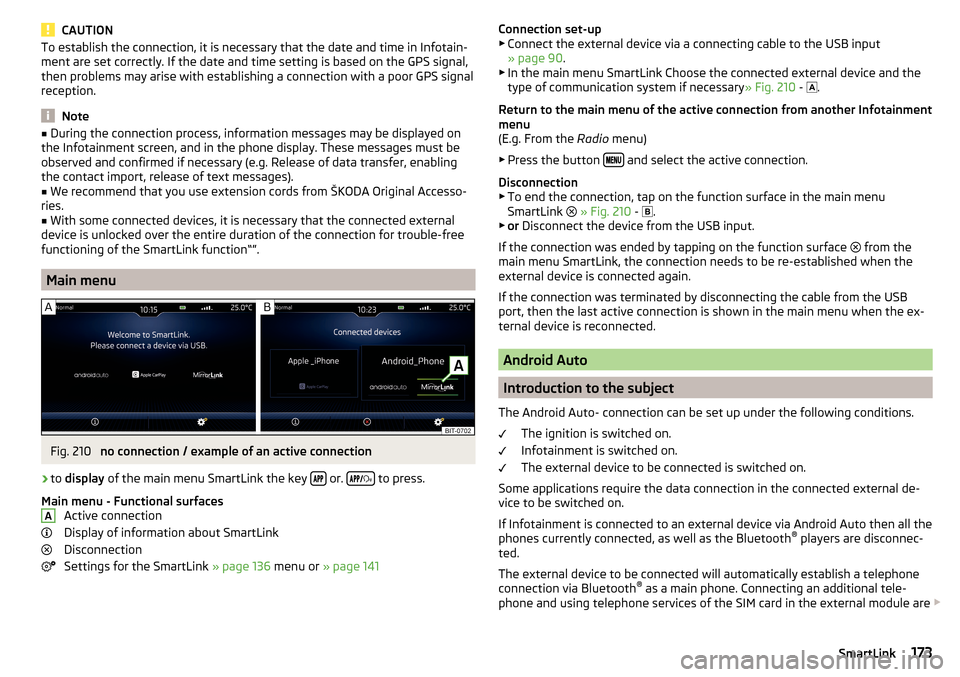
Main menu
Fig. 210
no connection / example of an active connection
›
to display of the main menu SmartLink the key or.
to press.
Main menu - Functional surfaces Active connection
Display of information about SmartLink
Disconnection
Settings for the SmartLink » page 136 menu or » page 141
AConnection set-up
▶ Connect the external device via a connecting cable to the USB input
» page 90 .
▶ In the main menu SmartLink Choose the connected external device and the
type of communication system if necessary » Fig. 210 -
.
Return to the main menu of the active connection from another Infotainment
menu
(E.g. From the Radio menu)
▶ Press the button
and select the active connection.
Disconnection ▶ To end the connection, tap on the function surface in the main menu
SmartLink
» Fig. 210 -
.
▶ or Disconnect the device from the USB input.
If the connection was ended by tapping on the function surface from the
main menu SmartLink, the connection needs to be re-established when the
external device is connected again.
If the connection was terminated by disconnecting the cable from the USB
port, then the last active connection is shown in the main menu when the ex-
ternal device is reconnected.
Android Auto
Introduction to the subject
The Android Auto- connection can be set up under the following conditions. The ignition is switched on.
Infotainment is switched on.
The external device to be connected is switched on.
Some applications require the data connection in the connected external de-
vice to be switched on.
If Infotainment is connected to an external device via Android Auto then all the
phones currently connected, as well as the Bluetooth ®
players are disconnec-
ted.
The external device to be connected will automatically establish a telephone
connection via Bluetooth ®
as a main phone. Connecting an additional tele-
phone and using telephone services of the SIM card in the external module are
173SmartLink
Page 176 of 344
not possible for the duration of the connection. A possible data connection us-
ing the SIM card inserted in the external module remains operational
» page 171 .
An external device connected using Android Auto cannot be used as an audio source in the menu Media.
If route guidance is taking place at this moment in Infotainment, then there is
the option to start the route guidance in the Android Auto application. This is
also true reciprocally.
A list of devices and applications that the Android Autoconnection supports
can be found on the Google websites. Functionality is not guaranteed outside
of the supported regions.
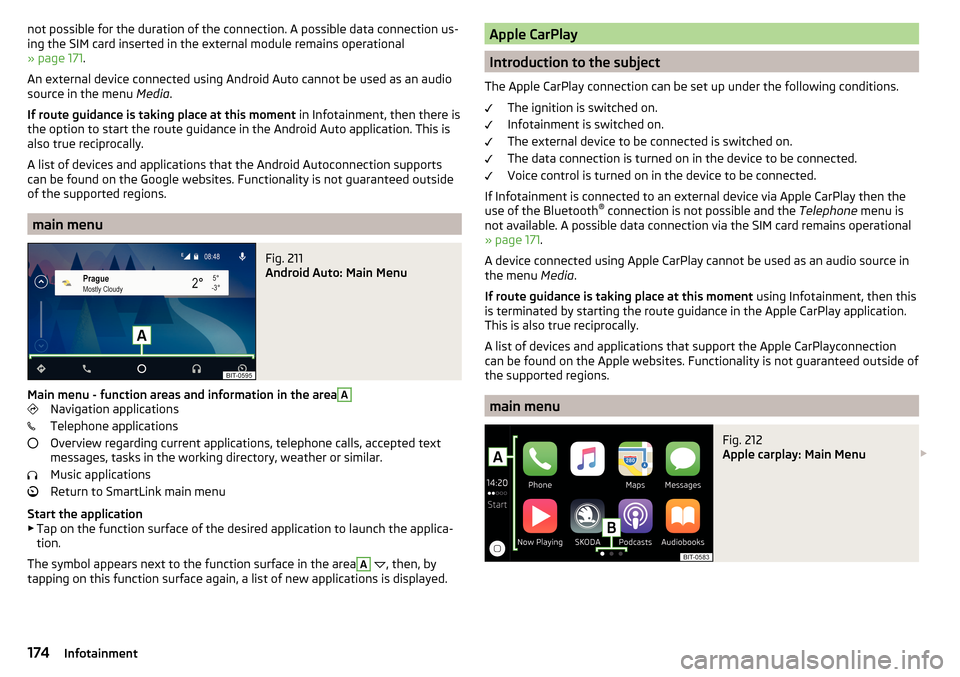
main menu
Fig. 211
Android Auto: Main Menu
Main menu - function areas and information in the area
A
Navigation applications
Telephone applications
Overview regarding current applications, telephone calls, accepted text
messages, tasks in the working directory, weather or similar.
Music applications
Return to SmartLink main menu
Start the application ▶ Tap on the function surface of the desired application to launch the applica-
tion.
The symbol appears next to the function surface in the area
A
, then, by
tapping on this function surface again, a list of new applications is displayed.
Apple CarPlay
Introduction to the subject
The Apple CarPlay connection can be set up under the following conditions. The ignition is switched on.
Infotainment is switched on.
The external device to be connected is switched on.
The data connection is turned on in the device to be connected.
Voice control is turned on in the device to be connected.
If Infotainment is connected to an external device via Apple CarPlay then the use of the Bluetooth ®
connection is not possible and the Telephone menu is
not available. A possible data connection via the SIM card remains operational
» page 171 .
A device connected using Apple CarPlay cannot be used as an audio source in
the menu Media.
If route guidance is taking place at this moment using Infotainment, then this
is terminated by starting the route guidance in the Apple CarPlay application.
This is also true reciprocally.
A list of devices and applications that support the Apple CarPlayconnection
can be found on the Apple websites. Functionality is not guaranteed outside of
the supported regions.
main menu
Fig. 212
Apple carplay: Main Menu
174Infotainment
Page 177 of 344
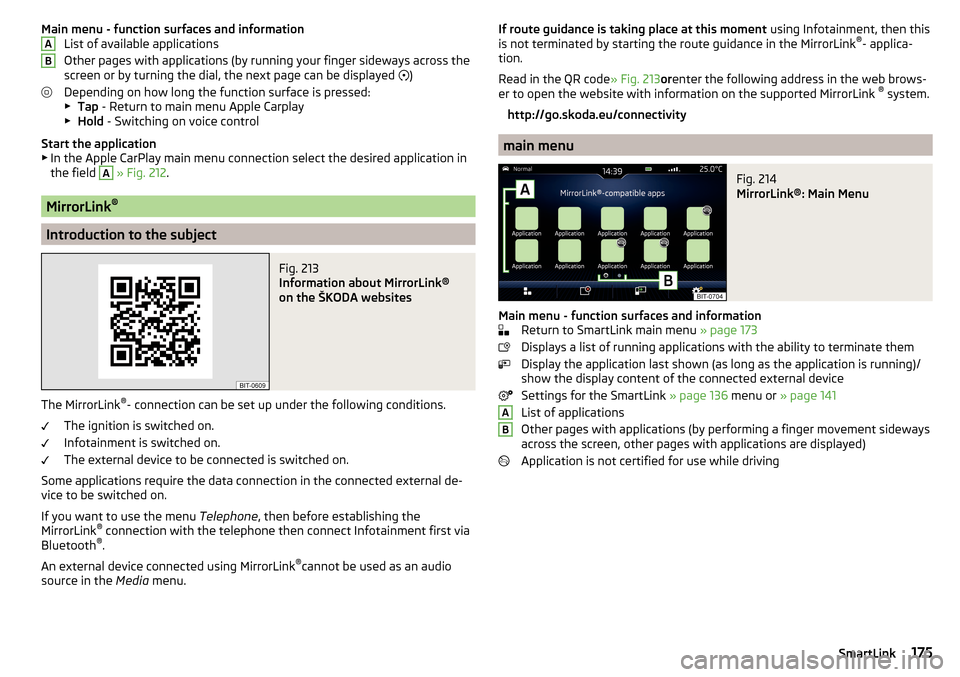
Main menu - function surfaces and informationList of available applications
Other pages with applications (by running your finger sideways across the
screen or by turning the dial, the next page can be displayed
)
Depending on how long the function surface is pressed: ▶ Tap - Return to main menu Apple Carplay
▶ Hold - Switching on voice control
Start the application ▶ In the Apple CarPlay main menu connection select the desired application in
the field A
» Fig. 212 .
MirrorLink ®
Introduction to the subject
Fig. 213
Information about MirrorLink®
on the ŠKODA websites
The MirrorLink ®
- connection can be set up under the following conditions.
The ignition is switched on.
Infotainment is switched on.
The external device to be connected is switched on.
Some applications require the data connection in the connected external de-
vice to be switched on.
If you want to use the menu Telephone, then before establishing the
MirrorLink ®
connection with the telephone then connect Infotainment first via
Bluetooth ®
.
An external device connected using MirrorLink ®
cannot be used as an audio
source in the Media menu.
ABIf route guidance is taking place at this moment using Infotainment, then this
is not terminated by starting the route guidance in the MirrorLink ®
- applica-
tion.
Read in the QR code » Fig. 213orenter the following address in the web brows-
er to open the website with information on the supported MirrorLink ®
system.
http://go.skoda.eu/connectivity
main menu
Fig. 214
MirrorLink®: Main Menu
Main menu - function surfaces and information Return to SmartLink main menu » page 173
Displays a list of running applications with the ability to terminate them
Display the application last shown (as long as the application is running)/
show the display content of the connected external device
Settings for the SmartLink » page 136 menu or » page 141
List of applications
Other pages with applications (by performing a finger movement sideways
across the screen, other pages with applications are displayed)
Application is not certified for use while driving
AB175SmartLink
Page 178 of 344
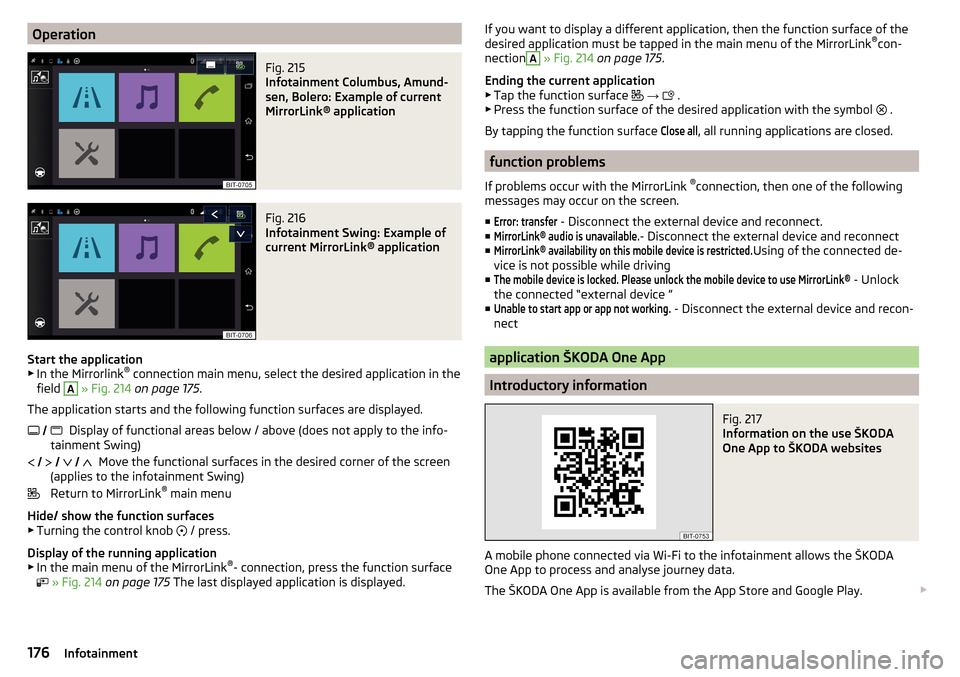
OperationFig. 215
Infotainment Columbus, Amund-
sen, Bolero: Example of current
MirrorLink® application
Fig. 216
Infotainment Swing: Example of
current MirrorLink® application
Start the application ▶ In the Mirrorlink ®
connection main menu, select the desired application in the
field
A
» Fig. 214 on page 175 .
The application starts and the following function surfaces are displayed. Display of functional areas below / above (does not apply to the info-
tainment Swing)
Move the functional surfaces in the desired corner of the screen
(applies to the infotainment Swing)
Return to MirrorLink ®
main menu
Hide/ show the function surfaces ▶ Turning the control knob / press.
Display of the running application
▶ In the main menu of the MirrorLink ®
- connection, press the function surface
» Fig. 214 on page 175 The last displayed application is displayed.
If you want to display a different application, then the function surface of the
desired application must be tapped in the main menu of the MirrorLink ®
con-
nectionA
» Fig. 214 on page 175 .
Ending the current application
▶ Tap the function surface
→
.
▶ Press the function surface of the desired application with the symbol
.
By tapping the function surface
Close all
, all running applications are closed.
function problems
If problems occur with the MirrorLink ®
connection, then one of the following
messages may occur on the screen.
■
Error: transfer
- Disconnect the external device and reconnect.
■
MirrorLink® audio is unavailable.
- Disconnect the external device and reconnect
■
MirrorLink® availability on this mobile device is restricted.
Using of the connected de-
vice is not possible while driving
■
The mobile device is locked. Please unlock the mobile device to use MirrorLink®
- Unlock
the connected “external device ”
■
Unable to start app or app not working.
- Disconnect the external device and recon-
nect
application ŠKODA One App
Introductory information
Fig. 217
Information on the use ŠKODA
One App to ŠKODA websites
A mobile phone connected via Wi-Fi to the infotainment allows the ŠKODA
One App to process and analyse journey data.
The ŠKODA One App is available from the App Store and Google Play.
176Infotainment
Page 179 of 344
Read in the QR code» Fig. 217orenter the following address in the web brows-
er to open the website with information on the SmartLink system.
http://go.skoda.eu/infotainment
For the full functionality of the ŠKODA One App, data transmission of external
devices must be switched on in the infotainment.
Applies to Infotainment Columbus, Amundsen, Bolero
▶ To Open the list of received messages tap on the button
, then the func-
tion surface
Tap →
Mobile device data transfer
→
Activate data transfer for ŠKODAApps
.
Applies to Infotainment Swing ▶ To the Switched data transmission external devices the key
press, then
the function surface →
Data transfer mobile devices
Tap.
Note
Some features of the application may not be available in all countries, there
may possibly exist a functional impairment while driving » page 120, Mobile
phones and applications ,
Connecting to Infotainment
The mobile phone can be connected to the infotainment using the function
SmartLink or via Wi-Fi.
Connection by SmartLink
›
Switch on the ignition.
›
The connection means SmartLink (e.g.. MirrorLink ®
) build up » page 172 ,
›
In the list of available applications, the application ŠKODA One App choose.
Depending on the model of the connected external device, some applications
can be started using voice activation, via the Infotainment screen, using the
operating elements on Infotainment, or using the buttons on the multi-func-
tion steering wheel.
Once connected, the contents of the application in the infotainment screen
may be displayed.
A possible connection of the mobile phone to the Infotainment via Wi-Fi will be
terminated after the connection using SmartLink.
Navigation menu (Applies to Infotainment Columbus, Amundsen)
›
Switch on the ignition.
›
Build up the Wi-Fi connection » page 170,
›In the tablet, start the application ŠKODA Media Command.
Disconnect the connection
The connection can be switched off in one of the following ways.›
Switch off the ignition for longer than 5 seconds (for vehicles with a starter
button, switch off the engine and open the driver's door).
›
The connection in the application ŠKODA One App break up.
›
The mobile phone from the USB input disconnect or terminate the Wi-Fi con-
nection.
177SmartLink
Page 180 of 344
Navigation
Introductory information
Navigation - function sequence
Applies to Infotainment Columbus, Amundsen.
Route guidance is started as follows.
›
Search for/ enter a new destination or Select one of the stored destinations.
›
Confirm the route calculation in the destination details or if necessary, adjust
the route options.
›
Select the preferred route type, if this is requested by Infotainment.
A route calculation occurs and route guidance starts.
The route guidance is provided by graphical driving recommendations and nav. announcements.
The is an option to add additional destinations during route guidance, or to
adapt the route.
If a traffic radio station is available, information concerning traffic delays is
evaluated by Infotainment and, if necessary, an alternative route is offered.
If you deviate from the route, then a new route calculation is carried out.
GPS satellite signal
Infotainment uses the GPS (Global Positioning System) satellite signal for
route guidance.
Outside the range of the GPS satellite signal (e.g. in dense vegetation, in tun-
nels, parking garages, etc.), Infotainment navigates only with restrictions using
vehicle sensors.
The unit offers the possibility to show in the split screen display the following
Position
» Fig. 222 on page 181 information about the current geographical po-
sition of the vehicle and the satellite signal.
Geographical longitude
Geographical latitude
Elevation
Number of received/available satellites
If no GPS satellite signal is available, no values are displayed.
Navigation data
Navigation data source Columbus
The navigation data is stored in the Infotainment memory.
Navigation data source Amundsen
The navigation data is stored on an Original SD Card.
In order to ensure the function of the navigation, the Original SD card, with the
navigation data, must be inserted in the respective slot in the external module
» page 123 .
If the original SD card is damaged or lost, a new original SD card can be pur-
chased from the ŠKODA Original Accessories.
With a Non-original SD Card, navigation does not work .
Determining the version of the navigation data›
In the Navigation main menu, tap the function surface
Tap
→
Version infor-mation
.
Update navigation data
We recommend that you update the navigation data on a regular basis (e.g.
Due to newly developed roads and changed traffic signs).
The information on updating the navigation data is to be obtained from a
ŠKODA partner or on the following ŠKODA Internet pages.
http://go.skoda.eu/updateportal
Update navigation data online
When activated online services infotainment online » page 118 can the naviga-
tion data for the infotainment Columbus Updating online » page 179, Naviga-
tion data and POI categories Import / Update online ,
If an update of the navigation data for the current vehicle position or the desti-
nation of the route is available, which in this regard from a Infotainment auto-
matic Note issued and offered an upgrade option.
An online update of navigation data is also manually feasible as follows.
▶ In the Navigation main menu, tap the function surface
→
version information
→
→
Update (online)
→
Map update
Tap.
▶ The Select / the desired country / region.
▶ Tap on the function surface
Retrieve
.
During the upgrade process, infotainment is usable without limitation.
178Infotainment