brake fluid SKODA KODIAQ 2016 1.G Owner's Manual
[x] Cancel search | Manufacturer: SKODA, Model Year: 2016, Model line: KODIAQ, Model: SKODA KODIAQ 2016 1.GPages: 344, PDF Size: 58.96 MB
Page 5 of 344
Infotainment settings - Swing138Infotainment system settings138
Radio menu settings
140
Media menu settings
140
Import contactsTelephone menu settings
140
SmartLink menu settings
141
Radio
141
service
141
Media
144
service
144
Audio sources
146
Images
151
Image viewer
151
Video DVD
153
video player
153
Media Command
154
Operation
154
Telephone
156
Introductory information
156
Pairing and connecting
159
Use the SIM card in the external module
162
rSAP
163
Telephone functions
164
Text messages (SMS)
168
Hotspot (WLAN) and data connection
170
Hotspot (WLAN)
170
Data Connection
171
SmartLink
172
Introductory information
172
Android Auto
173
Apple CarPlay
174
MirrorLink®
175
application ŠKODA One App
176Navigation 178Introductory information178
Search for destination and enter
182
Import your own goals
187
Map
189
Route guidance
192
Route
194
Waypoint mode
196
Traffic reports
199
Vehicle systems
201
CAR - Vehicle settings
201
Driving
Starting-off and Driving
202
Starting and stopping the engine
202
START-STOP-System
204
Brakes and Parking
206
Manual gear changing and pedals
208
Automatic transmission
209
Running in the engine and economical
driving
212
Avoiding damage to your vehicle
213
Assist systems
215
General information
215
Braking and stabilisation systems
215
OFF ROAD mode
218
Parking aid (ParkPilot)
220
Rear traffic alert and wizard for “Blind
spot”Monitoring
224
Rear View Camera
227
Area View (AreaView)
230
Park Assist
233
Trailer manoeuvring assistant (Trailer Assist)
237
Cruise Control System
239
Speed limiter
241
Adaptive Cruise Control (ACC)
243Front Assist248Select the driving mode (Driving Mode
Selection)251
Proactive passenger protection (Crew Protect
Assist)
253
Spurhalteassistent (Lane Assist)
254
Traffic jam assistant
256
Assistant for emergencies
257
Traffic sign recognition
257
Fatigue detection
259
Tyre pressure monitoring
260
Towing device and trailer
261
Hitch
261
Using hitch
263
General Maintenance
Care and maintenance
266
Service work, adjustments and technical
alterations
266
Service intervals
268
Cleaning and care
270
Inspecting and replenishing
274
Fuel
274
AdBlue ®
and its refilling
277
Engine compartment
278
Engine oil
280
Coolant
281
Brake fluid
282
Vehicle battery
283
Wheels
285
Wheels and tyres
285
Operating in winter conditions
2883Table of Contents
Page 14 of 344
Safety
Passive Safety
General information
Introduction
This chapter contains information on the following subjects:
Before setting off
12
Driving safety
12
This section of the manual includes important information on the subject of
passive safety. We have combined everything here which you should be famili-
ar with, for example, regarding seat belts, airbags, safety of children and any-
thing similar.
Other important safety information can also be found in the following chapters
of this Owner´s Manual. The Owner´s Manual should therefore always be in
the vehicle.
Before setting off
For your own safety and the safety of the people travelling with you, please
pay attention to the following points before setting off.
▶ Check the function of the lighting and turn signal systems.
▶ Check the function of the wipers and check the wiper blades for wear. Check
the windscreen washer fluid level.
▶ Ensure that all of the windows offer good visibility to the outside.
▶ Adjust the rear-view mirror so that vision to the rear is guaranteed. Ensure
that the mirrors are not covered.
▶ Check the tyre inflation pressure.
▶ Check the engine oil, brake fluid and coolant level.
▶ Secure all items of luggage.
▶ Do not exceed the permissible axle loads and permissible gross weight of the
vehicle.
▶ Close all doors as well as the bonnet and boot lid.
▶ Ensure that no objects can obstruct the pedals.
▶
Protect children by using a suitable child seat » page 23, Transporting chil-
dren safely .
▶ Adopt the correct seated position. Instruct your passengers to assume the
correct seated position » page 12, Correct and safe seated position .
Driving safety
In the interests of traffic safety, the following information must be observed. ▶ Do not become distracted from concentrating on the traffic situation, (e.g. by
your passengers or mobile phone calls).
▶ Never drive when your driving ability is impaired, (e.g. due to medication, al-
cohol or drugs).
▶ Keep to the traffic regulations and the permissible speed limit.
▶ Always adjust the driving speed to the road, traffic and weather conditions.
▶ Take regular breaks on long journeys (at least every two hours).
Correct and safe seated position
Introduction
This chapter contains information on the following subjects:
Driver’s correct seated position
13
Adjusting the steering wheel position
13
Passenger’s correct seating position
14
Passengers’ correct seating position on the rear seats
14
Always assume the correct seated position before setting off and do not
change this position while driving. Also advise your passengers to adopt the
correct seated position and not to change this position while the car is moving.
The following list contains instructions for the Passenger which, if not ob-
served, may cause serious injuries or death. ▶ Do not lean against the dash panel.
▶ Do not put your feet on the dash panel.
The following list contains instructions for all Passengers which, if not ob-
served, may cause serious injuries or death.
▶ Do not sit only on the front part of the seat.
▶ Do not sit facing to the side.
▶ Do not lean out of the window.
▶ Do not put your limbs out of the window.
▶ Do not put your feet on the seat cushion.
12Safety
Page 36 of 344
Fuel reserve38 Lane Departure Warning (Lane Assist)38
Turn signal system
38
Trailer turn signal lights
38
Fog lights
38
Speed regulating system / speed limiter
38
Brake pedal (automatic gearbox)
38
Auto Hold function
39
Main beam
39
Automatic gearbox
39
Rear seat belt warning light
39
Generator
39
Coolant
39
Engine oil pressure
40
Engine oil level
40
AdBlue ®
(diesel engine)
40
Lamp failure
41
Diesel particle filter (diesel)
41
Windscreen washer fluid level
41
High-beam assistant
41
START-STOPsystem
41
Display of a low temperature
42
Water in the fuel filter (diesel engine)
42
Adaptive Cruise Control (ACC)
42
Front Assist
42
Front assist
42
Economy mode
42
OFF ROAD mode
42
Adaptive Chassis Control (DCC)
42
Service
43
The warning lights in the instrument cluster indicate certain functions or
faults.
Some warning lights can be accompanied by acoustic signals and messages in
the display of the instrument cluster.
After switching on the ignition, some warning lights light up briefly as a func-
tion test. If the tested systems are OK, the corresponding warning lights go
out a few seconds after switching on the ignition or after starting the engine.
The warning lights are located at the following positions in the instrument
cluster » Fig. 20 on page 32 .
▶ Engine revolutions counter 1
▶Display
2
▶Speedometer
3
▶Bar with warning lights
5
Warning lights in the display
Depending on the importance the warning light
(danger) or
(warning) illu-
minate along with some of the warning lights in the list with the warning
lights.
Depending on vehicle equipment some warning lights can be displayed in col-
our on the display. For example. the coolant warning lamp may be represented
as follows.
▶ - Segment display / monochromatic (“black and white”) MAXI DOT display
▶ - Coloured MAXI DOT display
WARNING■
Ignoring illuminated warning lights and related messages or instructions
in the display of the instrument cluster may lead to serious personal injury
or damage to the vehicle.■
If you have to stop for technical reasons, then park the vehicle at a safe
distance from the traffic, switch off the engine and switch on the hazard
warning lights » page 70. Place the warning triangle at the prescribed dis-
tance.
■
The engine compartment of your car is a hazardous area. While working in
the engine compartment, be sure to observe the following warnings
» page 278 .
Parking brake
Read and observe
on page 34 first.
illuminates - the parking brake is switched on.
Parking brake error
Illumi-
nates
Error: electronic parking brakePARKING BRAKE FAILURE
▶ Seek help from a specialist garage.
34Operation
Page 37 of 344
Parking on a slope that is too steep Illumi-
nates
Parking brake: gradient too steep. Log book!GRADIENT TOO STEEP
▶ Find a parking space on a flat surface or on a slope that is not so steep.
Brake system
Read and observe
on page 34 first.
illuminates – the brake fluid level in the brake system is too low.
▶ Stop the vehicle, switch off the engine, and check the level of the brake fluid
» page 282 .
WARNING■
If the warning light lights up at the same time as warning light
» page 36 , Anti-lock braking system (ABS) , do not continue your
journey! Seek help from a specialist garage.■
A fault to the ABS system or the braking system can increase the vehi-
cle's braking distance – risk of accident!
Front seat belt warning light
Read and observe
on page 34 first.
lights up - the driver or front passenger has not fastened their seat belt.
At a speed of more than approximately 30 km/h, the warning light flashes
and an audible warning sounds at the same time.
If the seat belt is not fastened by the driver or front passenger during the next
approx. 2 minutes, the warning signal is deactivated and the warning light
illuminates permanently.
Adaptive cruise control (ACC)
Read and observe
on page 34 first.
illuminates - the ACC delay is not sufficient.
▶ Apply the brake.
For more information about the ACC system » page 243.
Power steering / steering lock (KESSY system)
Read and observe
on page 34 first.
Fault in the power steering
lights up – this indicates a complete failure of the power steering and the
steering assist is no longer working (significantly higher steering forces).
lights up – this indicates a partial failure of the power steering and the
steering forces can be greater.
▶ Seek help from a specialist garage.
Steering lock defect (KESSY system)
An audible signal sounds as a warning.
flashes
Steering column lock faulty. Stop!STOP VEHICLE STEERING FAULTY
▶ Park the vehicle,
stop driving ! After switching off the ignition, it is no lon-
ger possible to lock the steering, to activate the electrical components (e.g.
Infotainment ), to switch on the ignition again and to start the engine. Seek
help from a specialist garage.
flashes
Steering lock: Workshop!STEERING WORKSHOP
▶ You can drive on, exercising appropriate caution. Seek assistance from a spe-
cialist garage immediately.
Steering column lock not unlocked (System KESSY)
flashes
Move the steering wheel!MOVE STEERING WHEEL
▶ Move the steering wheel slightly back and forth, thereby facilitating unlock-
ing the steering lock.
▶ If the steering does also not unlock then, the help of a specialist garage is
required.
Disconnecting the vehicle battery
If the vehicle's battery has been disconnected and reconnected, the indicator
light comes on after switching on the ignition.
The warning light should go out after driving a short distance.
If, after the motor is restarted and a short drive, the indicator light does not go
out, there is a system error.
35Instruments and warning lights
Page 208 of 344
Brakes and Parking
Introduction
This chapter contains information on the following subjects:
Electric parking brake
206
Auto Hold function
207
Parking
208
The wear of the brake pads is dependent on the operating conditions and driv-
ing style. Under difficult conditions (e.g. urban, sporty driving style) the condi-
tion of the brakes should also be checked by a specialist garage between the
service intervals.
The performance of the brakes can be delayed if the brakes are damp, iced up
in winter or if covered in a layer of salt . The brakes are cleaned and dried by
applying the brakes several times »
.
Corrosion on the brake discs and dirt on the brake pads occur if the vehicle has
been parked for a long period and if you do not make much use of the braking
system. The brakes are cleaned by applying the brakes several times »
.
Before travelling a long distance with a steep gradient , reduce speed and
shift into the next lowest gear. As a result, the braking effect of the engine will
be used, reducing the load on the brakes. If you do have to brake, this should
be carried out at intervals.
Emergency braking display - when an emergency braking is performed, the
automatic flashing of the brake lights are used to alert the traffic behind.
New brake pads must first be “worn in” because these do not initially have the
best possible braking effect. Drive especially carefully for the first 200 km or
so.
A too low brake fluid level can cause faults in the braking system , the warn-
ing light illuminates in the instrument cluster
» page 35,
Brake system
. If
the warning light does not illuminate and an extended stopping distance is re-
quired, then driving should be adapted according to the unknown cause of
fault and restricted braking effect - seek the assistance of a specialist garage
immediately.
The brake booster increases the pressure generated with the brake pedal. The
brake booster only operates when the engine is running.
WARNING■ Greater physical effort is required for braking when the engine is switch-
ed off – risk of accident!■
During the braking procedure on a vehicle with manual transmission,
when the vehicle is in gear and at low revs, press the clutch pedal. Other-
wise, the functionality of the brake system may be impaired – risk of acci-
dent!
■
Do not press the brake pedal if braking is now required. This causes the
brakes to overheat and can also result in a longer braking distance and ex-
cessive wear - risk of accident!
■
Braking for the purpose of drying and cleaning the brake discs should be
carried out only if the traffic conditions permit. Do not place any other road
users in jeopardy.
■
Recommendations for new brake pads have to be observed.
■
When stopping and parking, the parking brake should always be on, oth-
erwise the vehicle could move off - there is the risk of an accident!
■
If a front spoiler, full wheel trim, etc. is mounted retrospectively, it must
be ensured that the air supply to the front wheel brakes is not reduced.
Otherwise, the functionality of the brake system may be impaired – risk of
accident!
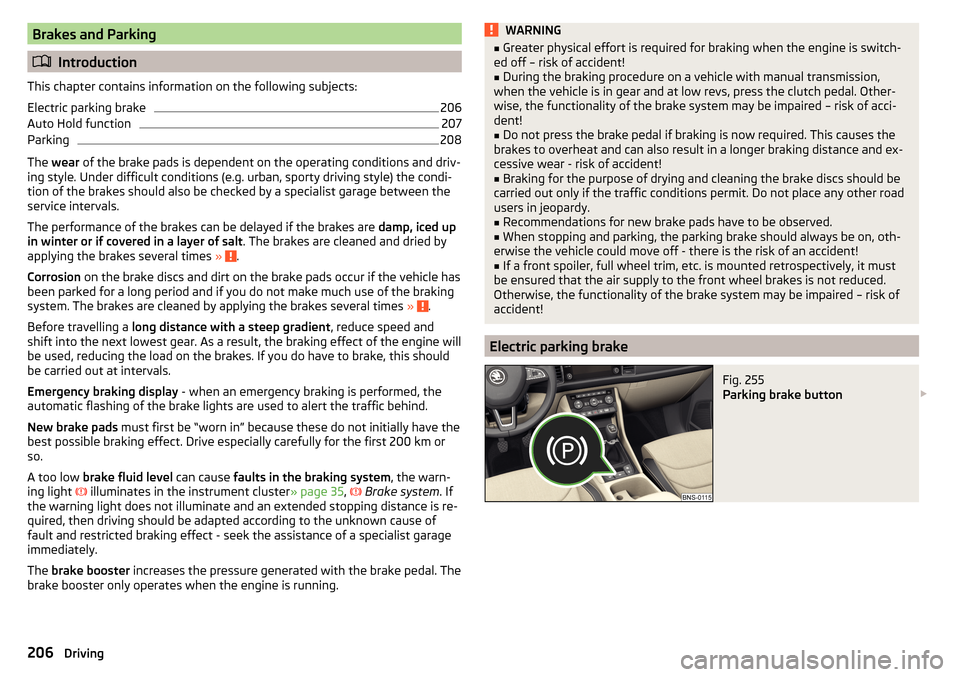
Electric parking brake
Fig. 255
Parking brake button
206Driving
Page 271 of 344
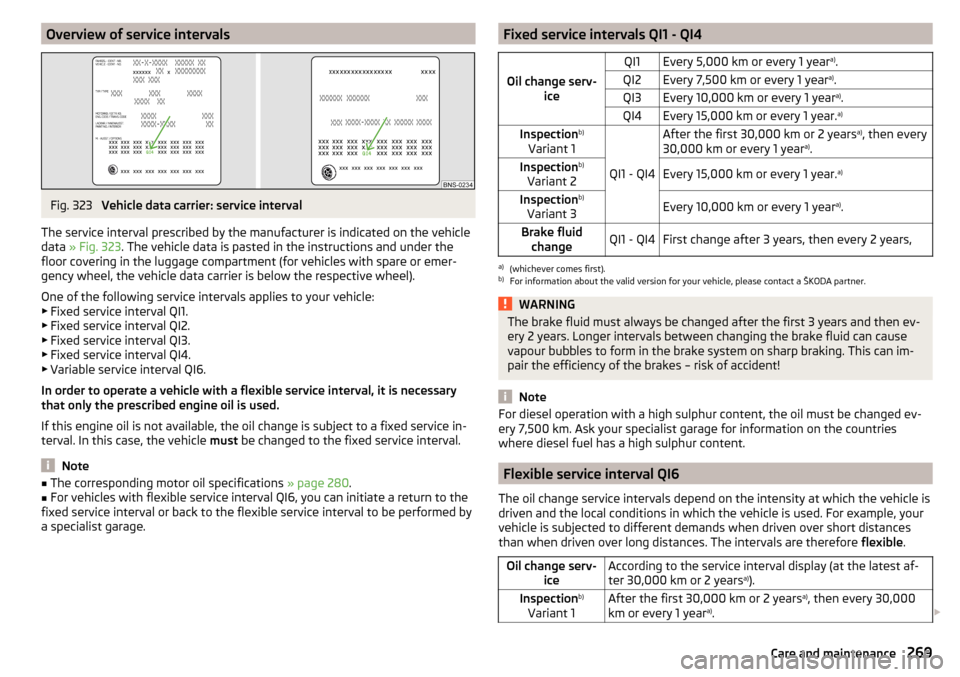
Overview of service intervalsFig. 323
Vehicle data carrier: service interval
The service interval prescribed by the manufacturer is indicated on the vehicle
data » Fig. 323 . The vehicle data is pasted in the instructions and under the
floor covering in the luggage compartment (for vehicles with spare or emer-
gency wheel, the vehicle data carrier is below the respective wheel).
One of the following service intervals applies to your vehicle:
▶ Fixed service interval QI1.
▶ Fixed service interval QI2.
▶ Fixed service interval QI3.
▶ Fixed service interval QI4.
▶ Variable service interval QI6.
In order to operate a vehicle with a flexible service interval, it is necessary
that only the prescribed engine oil is used.
If this engine oil is not available, the oil change is subject to a fixed service in-
terval. In this case, the vehicle must be changed to the fixed service interval.
Note
■
The corresponding motor oil specifications » page 280.■For vehicles with flexible service interval QI6, you can initiate a return to the
fixed service interval or back to the flexible service interval to be performed by
a specialist garage.Fixed service intervals QI1 - QI4
Oil change serv- ice
QI1Every 5,000 km or every 1 year a)
.QI2Every 7,500 km or every 1 year a)
.QI3Every 10,000 km or every 1 year a)
.QI4Every 15,000 km or every 1 year. a)Inspectionb)
Variant 1
QI1 - QI4
After the first 30,000 km or 2 years a)
, then every
30,000 km or every 1 year a)
.Inspection b)
Variant 2Every 15,000 km or every 1 year. a)Inspectionb)
Variant 3Every 10,000 km or every 1 year a)
.Brake fluid
changeQI1 - QI4First change after 3 years, then every 2 years,a)
(whichever comes first).
b)
For information about the valid version for your vehicle, please contact a ŠKODA partner.
WARNINGThe brake fluid must always be changed after the first 3 years and then ev-
ery 2 years. Longer intervals between changing the brake fluid can cause
vapour bubbles to form in the brake system on sharp braking. This can im-
pair the efficiency of the brakes – risk of accident!
Note
For diesel operation with a high sulphur content, the oil must be changed ev-
ery 7,500 km. Ask your specialist garage for information on the countries
where diesel fuel has a high sulphur content.
Flexible service interval QI6
The oil change service intervals depend on the intensity at which the vehicle is
driven and the local conditions in which the vehicle is used. For example, your
vehicle is subjected to different demands when driven over short distances
than when driven over long distances. The intervals are therefore flexible.
Oil change serv-
iceAccording to the service interval display (at the latest af-
ter 30,000 km or 2 years a)
).Inspection b)
Variant 1After the first 30,000 km or 2 years a)
, then every 30,000
km or every 1 year a)
. 269Care and maintenance
Page 272 of 344
Inspectionb)
Variant 2Every 15,000 km or every 1 year a)
.Brake fluid
changeFirst change after 3 years, then every 2 years,a)
(whichever comes first).
b)
For information about the valid version for your vehicle, please contact a ŠKODA partner.
WARNINGThe brake fluid must always be changed after the first 3 years and then ev-
ery 2 years. Longer intervals between changing the brake fluid can cause
vapour bubbles to form in the brake system on sharp braking. This can im-
pair the efficiency of the brakes – risk of accident!
Digital Service Plan
A specialist garage does not confirm the corresponding service evidence in this
Owner´s Manual, but in the service information system called Digital Service
Plan.
Therefore, we recommend that you always print the respective Service Certifi-
cate as evidence of the service work carried out.
Benefits of the digital service plan
▶ High level of security when it comes to the manipulation of the event entries.
▶ Transparent documentation of service work carried out.
▶ Protection against loss or damage of the event entries – you receive a com-
plete service-verification if required.
▶ Optional; request of complete verification in electronic form.
▶ You can have the vehicle serviced in any specialist garage (also abroad) – the
database is accessible worldwide.
▶ Increased transparency when purchasing a used vehicle due to event entries
being stored centrally.
▶ The system entries support you in the enforcement of obligations under the
ŠKODA extended warranty and mobility guarantee.
Cleaning and care
Introduction
This chapter contains information on the following subjects:
Washing the vehicle
270
Caring for the outside of the vehicle
271
Remove ice and snow from the windows
273
Caring for the interior
273
Regular and thorough care retains the value of your vehicle.
When using the care product, always observe the instructions on the packag-
ing. We recommend that you use the preservative from the ŠKODA Original Ac-
cessories.
WARNING■ Vehicle care products may be harmful to your health if not used according
to the instructions.■
Always keep the vehicle care products safe from people who are not com-
pletely independent, e.g. children - there is a danger of poisoning!
CAUTION
■ Do not use any insect sponges, rough kitchen sponges or similar cleaning
products – risk of damaging the paintwork surface.■
Do not use aggressive cleaning agents or chemical solvents - there is a dan-
ger of damaging the material that is to be cleaned.
Note
We recommend that the vehicle is cleaned and cared for by a ŠKODA Service
Partner.
Washing the vehicle
Read and observe
and on page 270 first.
The best way to protect your vehicle against harmful environmental influencesis frequent washing.
270General Maintenance
Page 280 of 344
We recommend when refilling using refill bottles that you use refill bottles
from ŠKODA Original Accessories.
When adding AdBlue ®
take note of the minimum and maximum AdBlue ®
tank
capacity shown in the display of the instrument cluster » page 40.
Refill AdBlue ®
under the following conditions.
The vehicle is on a horizontal surface.
The ignition is switched off.
Refilling›
Press the fuel filler flap in direction of arrow
1
and fold in the direction of
arrow
2
» Fig. 328 .
›
Unscrew the tank cap in the direction of arrow
3
.
›
Remove the tank cap and place in the recess on top of the fuel filler flap in
the direction of arrow
4
.
›
Refill AdBlue ®
in the neck
A
by means of a refill or a fuel nozzle refill (follow
the instructions on the container or the instructions of the petrol station op-
erator).
The AdBlue ®
- tank is full when no AdBlue ®
flows from the refill bottle or as
soon as the correctly operated pump cuts out for the first time. Do not contin-
ue refilling AdBlue ®
.
›
After refilling AdBlue ®
put the cap on the fuel filler neck and turn in the oppo-
site direction of the arrow
3
until it engages.
›
Close the fuel filler flap until it clicks into place.
Before continuing your journey , switch on just the ignition for 30 s so that the
refilling can be recognized by the system. Only then start the engine.
Engine compartment
Introduction
This chapter contains information on the following subjects:
Open the bonnet and close
279
Engine compartment overview
279
Windscreen washer fluid
280WARNINGNever cover the engine with additional insulation material (e.g. with a cov-
er) – risk of fire!WARNINGWhen working in the engine compartment, the following instructions must
be observed - risk of injury or fire. The engine compartment of your car is a
hazardous area!WARNINGInstructions before beginning work in the engine compartment■Stop the engine and remove the ignition key, on vehicles with the KESSY
system, open the driver's door.■
Switch on the parking brake.
■
For vehicles with manual transmission the lever into the neutral position.
On vehicles with automatic transmission , place the selector lever in the P
position.
■
Allow the engine to cool.
■
Never open the bonnet if you can see steam or coolant flowing out of the
engine compartment – risk of scalding! Wait until the steam or coolant has
stopped escaping.
WARNINGInformation for working in the engine room■Keep everyone away from the engine compartment.■
Do not touch any hot engine parts – risk of burns!
■
Never touch the radiator fan. The radiator fan suddenly switch on approx.
10 minutes after switching off the ignition!
■
Do not smoke or use open flames in the vicinity of the engine.
■
Do not leave any items (e.g. cloths or tools) in the engine compartment.
This presents a fire hazard and the risk of engine damage.
■
Read and observe the information and warning instructions on the fluid
containers.
WARNINGInformation for working in the engine compartment with the engine run-
ning■
If it is necessary to work on the engine compartment with the engine run-
ning, then observe the rotating engine parts and electrical plants - it can
be fatal!
■
Never touch the electric wiring on the ignition system.
■
Avoid short circuits in the electrical system, particularly on the vehicle's
battery.
278General Maintenance
Page 281 of 344
CAUTIONRefill only operating fluids of the correct specification - danger of damaging
the vehicle!
Note
■ Fluids with the proper specifications can be purchased from the ŠKODA Origi-
nal Accessories or from the ŠKODA Genuine Parts ranges.■
We recommend you have the battery replaced by a specialist garage.
Open the bonnet and close
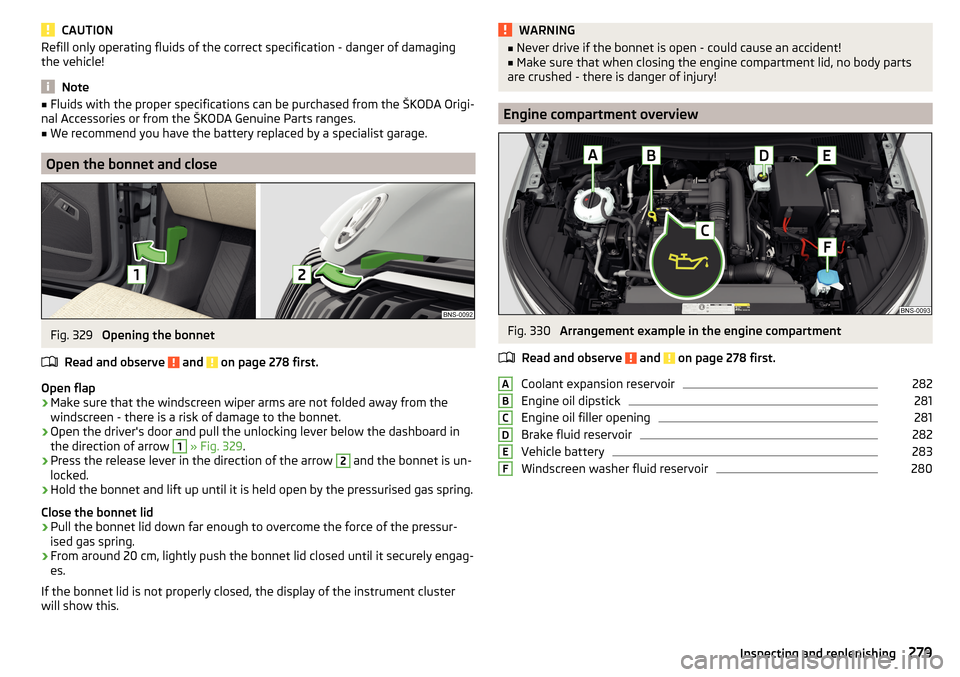
Fig. 329
Opening the bonnet
Read and observe
and on page 278 first.
Open flap
›
Make sure that the windscreen wiper arms are not folded away from the
windscreen - there is a risk of damage to the bonnet.
›
Open the driver's door and pull the unlocking lever below the dashboard in
the direction of arrow
1
» Fig. 329 .
›
Press the release lever in the direction of the arrow
2
and the bonnet is un-
locked.
›
Hold the bonnet and lift up until it is held open by the pressurised gas spring.
Close the bonnet lid
›
Pull the bonnet lid down far enough to overcome the force of the pressur-
ised gas spring.
›
From around 20 cm, lightly push the bonnet lid closed until it securely engag-
es.
If the bonnet lid is not properly closed, the display of the instrument cluster
will show this.
WARNING■ Never drive if the bonnet is open - could cause an accident!■Make sure that when closing the engine compartment lid, no body parts
are crushed - there is danger of injury!
Engine compartment overview
Fig. 330
Arrangement example in the engine compartment
Read and observe
and on page 278 first.
Coolant expansion reservoir
282
Engine oil dipstick
281
Engine oil filler opening
281
Brake fluid reservoir
282
Vehicle battery
283
Windscreen washer fluid reservoir
280ABCDEF279Inspecting and replenishing
Page 284 of 344
CAUTIONDo not cover the radiator or fit any parts (e.g. auxiliary lights) in front of the air
intakes - there is a risk of the engine overheating.
Checking and refilling
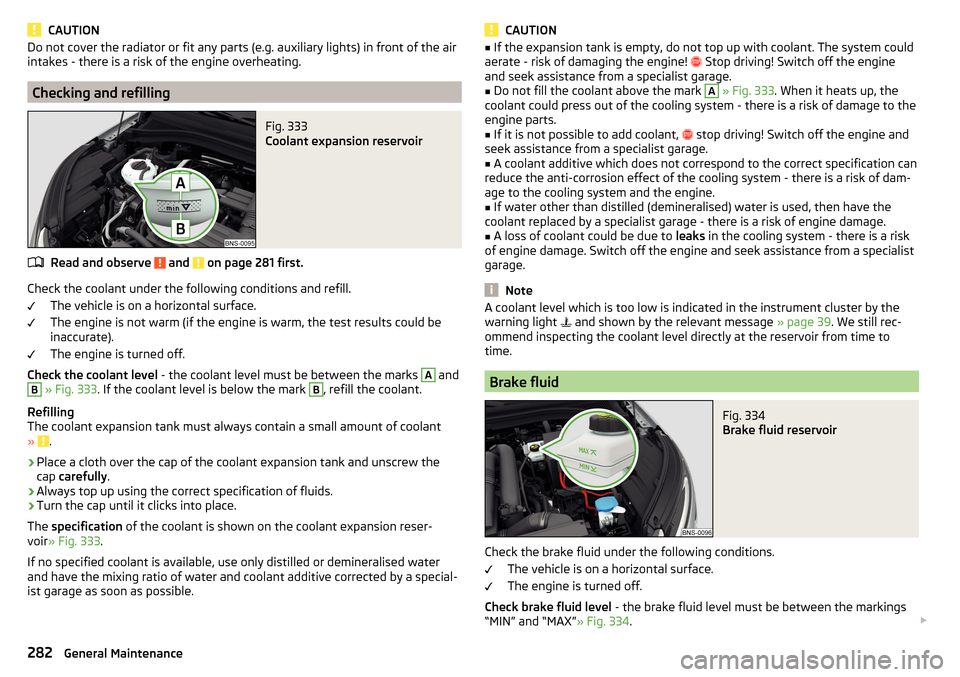
Fig. 333
Coolant expansion reservoir
Read and observe and on page 281 first.
Check the coolant under the following conditions and refill.
The vehicle is on a horizontal surface.
The engine is not warm (if the engine is warm, the test results could be
inaccurate).
The engine is turned off.
Check the coolant level - the coolant level must be between the marks
A
and
B
» Fig. 333 . If the coolant level is below the mark
B
, refill the coolant.
Refilling
The coolant expansion tank must always contain a small amount of coolant
»
.
›
Place a cloth over the cap of the coolant expansion tank and unscrew the
cap carefully .
›
Always top up using the correct specification of fluids.
›
Turn the cap until it clicks into place.
The specification of the coolant is shown on the coolant expansion reser-
voir » Fig. 333 .
If no specified coolant is available, use only distilled or demineralised water
and have the mixing ratio of water and coolant additive corrected by a special-
ist garage as soon as possible.
CAUTION■ If the expansion tank is empty, do not top up with coolant. The system could
aerate - risk of damaging the engine! Stop driving! Switch off the engine
and seek assistance from a specialist garage.■
Do not fill the coolant above the mark
A
» Fig. 333 . When it heats up, the
coolant could press out of the cooling system - there is a risk of damage to the
engine parts.
■
If it is not possible to add coolant,
stop driving! Switch off the engine and
seek assistance from a specialist garage.
■
A coolant additive which does not correspond to the correct specification can
reduce the anti-corrosion effect of the cooling system - there is a risk of dam-
age to the cooling system and the engine.
■
If water other than distilled (demineralised) water is used, then have the
coolant replaced by a specialist garage - there is a risk of engine damage.
■
A loss of coolant could be due to leaks in the cooling system - there is a risk
of engine damage. Switch off the engine and seek assistance from a specialist
garage.
Note
A coolant level which is too low is indicated in the instrument cluster by the
warning light and shown by the relevant message » page 39. We still rec-
ommend inspecting the coolant level directly at the reservoir from time to
time.
Brake fluid
Fig. 334
Brake fluid reservoir
Check the brake fluid under the following conditions.
The vehicle is on a horizontal surface.
The engine is turned off.
Check brake fluid level - the brake fluid level must be between the markings
“MIN” and “MAX” » Fig. 334.
282General Maintenance