reset infotainment system SKODA KODIAQ 2016 1.G Owner's Manual
[x] Cancel search | Manufacturer: SKODA, Model Year: 2016, Model line: KODIAQ, Model: SKODA KODIAQ 2016 1.GPages: 344, PDF Size: 58.96 MB
Page 46 of 344
Door alarm
Eco tips
Service interval display
Outside temperature
Cruise control / speed limiter
Total distance travelled
Distance travelled by resetting the memory (trip)
Time
Warning lights of the START-STOP system
Engaged gear / gear recommendation
Selector lever positions for the automatic gearbox
Outside temperature
Warning lights
Driving data (multifunction display)
Total distance travelled
Distance travelled by resetting the memory (trip)
Cruise control / speed limiter
Service interval display
Information messages
Door, luggage compartment and bonnet alarm
When the door or luggage compartment / bonnet is open, a graphic warning
appears in the display.
An acoustic signal will also sound if you drive the vehicle above 6 km/h when a
door is open.
Reset counter for distance travelled (trip)›
Press button
A
» Fig. 25 on page 44 .
Setting the clock
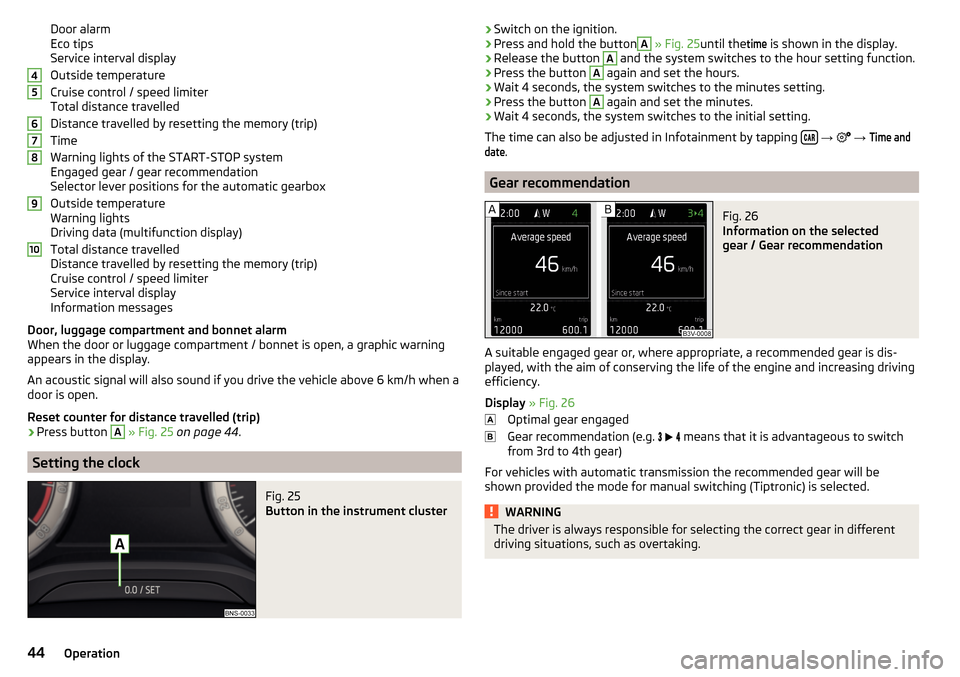
Fig. 25
Button in the instrument cluster
45678910›Switch on the ignition.›Press and hold the buttonA
» Fig. 25 until the
time
is shown in the display.›
Release the button
A
and the system switches to the hour setting function.
›
Press the button
A
again and set the hours.
›
Wait 4 seconds, the system switches to the minutes setting.
›
Press the button
A
again and set the minutes.
›
Wait 4 seconds, the system switches to the initial setting.
The time can also be adjusted in Infotainment by tapping
→
→
Time anddate
.
Gear recommendation
Fig. 26
Information on the selected
gear / Gear recommendation
A suitable engaged gear or, where appropriate, a recommended gear is dis-
played, with the aim of conserving the life of the engine and increasing driving
efficiency.
Display » Fig. 26
Optimal gear engaged
Gear recommendation (e.g.
means that it is advantageous to switch
from 3rd to 4th gear)
For vehicles with automatic transmission the recommended gear will be
shown provided the mode for manual switching (Tiptronic) is selected.
WARNINGThe driver is always responsible for selecting the correct gear in different
driving situations, such as overtaking.44Operation
Page 48 of 344
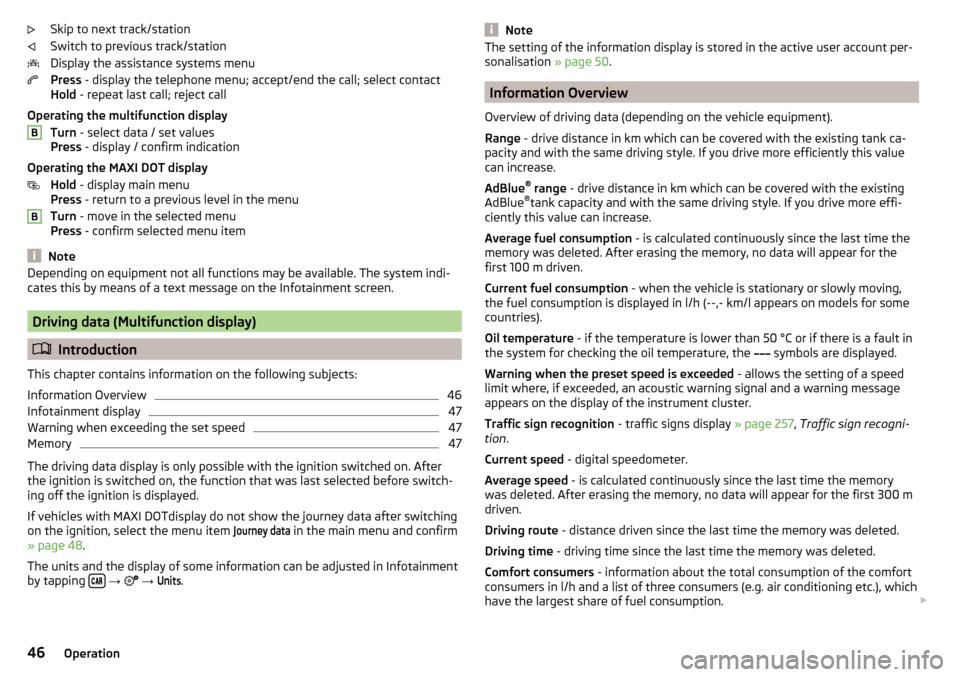
Skip to next track/station
Switch to previous track/station
Display the assistance systems menu
Press - display the telephone menu; accept/end the call; select contact
Hold - repeat last call; reject call
Operating the multifunction display Turn - select data / set values
Press - display / confirm indication
Operating the MAXI DOT display Hold - display main menu
Press - return to a previous level in the menu
Turn - move in the selected menu
Press - confirm selected menu item
Note
Depending on equipment not all functions may be available. The system indi-
cates this by means of a text message on the Infotainment screen.
Driving data (Multifunction display)
Introduction
This chapter contains information on the following subjects:
Information Overview
46
Infotainment display
47
Warning when exceeding the set speed
47
Memory
47
The driving data display is only possible with the ignition switched on. After
the ignition is switched on, the function that was last selected before switch-
ing off the ignition is displayed.
If vehicles with MAXI DOTdisplay do not show the journey data after switching
on the ignition, select the menu item
Journey data
in the main menu and confirm
» page 48 .
The units and the display of some information can be adjusted in Infotainment
by tapping
→
→
Units
.
BBNoteThe setting of the information display is stored in the active user account per-
sonalisation » page 50.
Information Overview
Overview of driving data (depending on the vehicle equipment).
Range - drive distance in km which can be covered with the existing tank ca-
pacity and with the same driving style. If you drive more efficiently this value
can increase.
AdBlue ®
range - drive distance in km which can be covered with the existing
AdBlue ®
tank capacity and with the same driving style. If you drive more effi-
ciently this value can increase.
Average fuel consumption - is calculated continuously since the last time the
memory was deleted. After erasing the memory, no data will appear for the
first 100 m driven.
Current fuel consumption - when the vehicle is stationary or slowly moving,
the fuel consumption is displayed in l/h (--,- km/l appears on models for some
countries).
Oil temperature - if the temperature is lower than 50 °C or if there is a fault in
the system for checking the oil temperature, the symbols are displayed.
Warning when the preset speed is exceeded - allows the setting of a speed
limit where, if exceeded, an acoustic warning signal and a warning message
appears on the display of the instrument cluster.
Traffic sign recognition - traffic signs display » page 257, Traffic sign recogni-
tion .
Current speed - digital speedometer.
Average speed - is calculated continuously since the last time the memory
was deleted. After erasing the memory, no data will appear for the first 300 m
driven.
Driving route - distance driven since the last time the memory was deleted.
Driving time - driving time since the last time the memory was deleted.
Comfort consumers - information about the total consumption of the comfort
consumers in l/h and a list of three consumers (e.g. air conditioning etc.), which
have the largest share of fuel consumption.
46Operation
Page 49 of 344
There is the option to show/hide the representation of the menu items of the
multifunction display in Infotainment in the instrument cluster display by tap-
ping
→
→
Instrument cluster
and reset the journey data.
Infotainment display
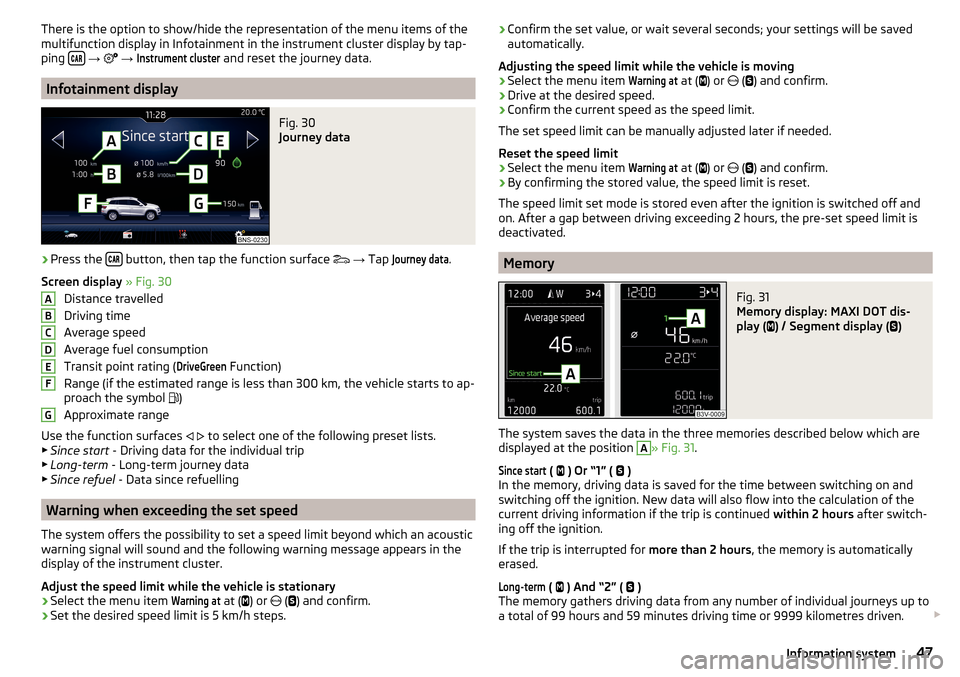
Fig. 30
Journey data
›
Press the button, then tap the function surface
→ Tap
Journey data
.
Screen display » Fig. 30
Distance travelled
Driving time
Average speed
Average fuel consumption
Transit point rating (
DriveGreen
Function)
Range (if the estimated range is less than 300 km, the vehicle starts to ap-
proach the symbol )
Approximate range
Use the function surfaces
to select one of the following preset lists.
▶ Since start - Driving data for the individual trip
▶ Long-term - Long-term journey data
▶ Since refuel - Data since refuelling
Warning when exceeding the set speed
The system offers the possibility to set a speed limit beyond which an acoustic
warning signal will sound and the following warning message appears in the
display of the instrument cluster.
Adjust the speed limit while the vehicle is stationary
›
Select the menu item
Warning at
at ( ) or
(
) and confirm.
›
Set the desired speed limit is 5 km/h steps.
ABCDEFG› Confirm the set value, or wait several seconds; your settings will be saved
automatically.
Adjusting the speed limit while the vehicle is moving›
Select the menu item
Warning at
at (
) or
(
) and confirm.
›
Drive at the desired speed.
›
Confirm the current speed as the speed limit.
The set speed limit can be manually adjusted later if needed.
Reset the speed limit
›
Select the menu item
Warning at
at (
) or
(
) and confirm.
›
By confirming the stored value, the speed limit is reset.
The speed limit set mode is stored even after the ignition is switched off and
on. After a gap between driving exceeding 2 hours, the pre-set speed limit is
deactivated.
Memory
Fig. 31
Memory display: MAXI DOT dis-
play (
) / Segment display (
)
The system saves the data in the three memories described below which are
displayed at the position
A
» Fig. 31 .
Since start
(
) Or “1” (
)
In the memory, driving data is saved for the time between switching on and
switching off the ignition. New data will also flow into the calculation of the
current driving information if the trip is continued within 2 hours after switch-
ing off the ignition.
If the trip is interrupted for more than 2 hours, the memory is automatically
erased.
Long-term
( ) And “2” (
)
The memory gathers driving data from any number of individual journeys up to
a total of 99 hours and 59 minutes driving time or 9999 kilometres driven.
47Information system
Page 51 of 344
Symbols in the displayCharge status of the telephone battery 1)
Signal strength 1 )
A telephone is connected to the unit
Missed calls (if there are several missed calls, the number of calls is shown
next to the symbol)
Switch-off microphone
Menu item
Assist systems
The following systems are activated/deactivated in the
Assist systems
menu
item.
▶ Front Assist
▶ Lane Assist
▶ Rear Traffic Alert
▶ Assist system for blind spot monitoring
Service interval display
Introduction
This chapter contains information on the following subjects:
Displaying the distance and days until the next service interval
49
Service messages
49
Resetting the service interval display
50
The service interval display shows the kilometres or days until the next service
event.
Information regarding the service intervals » page 268.
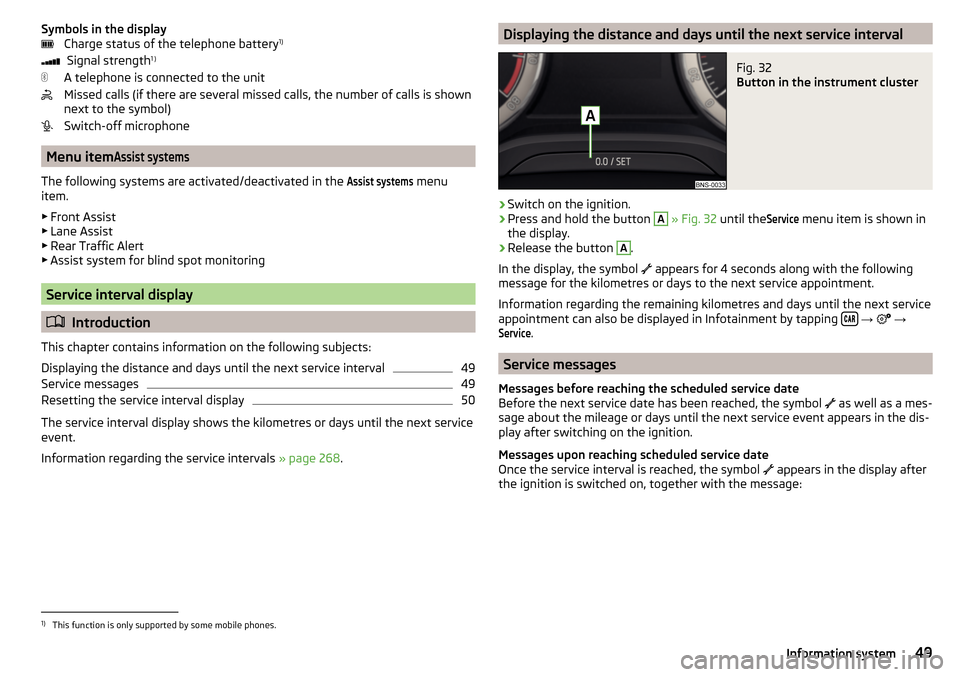
Displaying the distance and days until the next service intervalFig. 32
Button in the instrument cluster
›
Switch on the ignition.
›
Press and hold the button
A
» Fig. 32 until the
Service
menu item is shown in
the display.
›
Release the button
A
.
In the display, the symbol appears for 4 seconds along with the following
message for the kilometres or days to the next service appointment.
Information regarding the remaining kilometres and days until the next service appointment can also be displayed in Infotainment by tapping
→
→
Service
.
Service messages
Messages before reaching the scheduled service date
Before the next service date has been reached, the symbol as well as a mes-
sage about the mileage or days until the next service event appears in the dis-
play after switching on the ignition.
Messages upon reaching scheduled service date
Once the service interval is reached, the symbol appears in the display after
the ignition is switched on, together with the message:
1)
This function is only supported by some mobile phones.
49Information system
Page 52 of 344
Resetting the service interval display
We recommend that the display reset is completed by a specialist garage.
We recommend that you do not reset the service interval display yourself. In-
correctly setting the service interval display could cause problems to the vehi-
cle.
Variable service interval
For vehicles with variable service intervals, after resetting the oil change serv-
ice display in a specialist garage, the values of the new service interval are dis-
played, which are based on the previous operating conditions of the vehicle.
These values are then continuously matched according to the actual operating
conditions of the vehicle.
Personalization
Introduction
This chapter contains information on the following subjects:
Operating principle
50
Overview of some personalized functions
51
Setting the personalization
51
Thanks to the personalisation, more drivers have the opportunity to use a ve-
hicle with individually set system functions by means of a user account which
is assigned to the respective vehicle key.
WARNINGMake all adjustments when the vehicle is stationary - otherwise there is
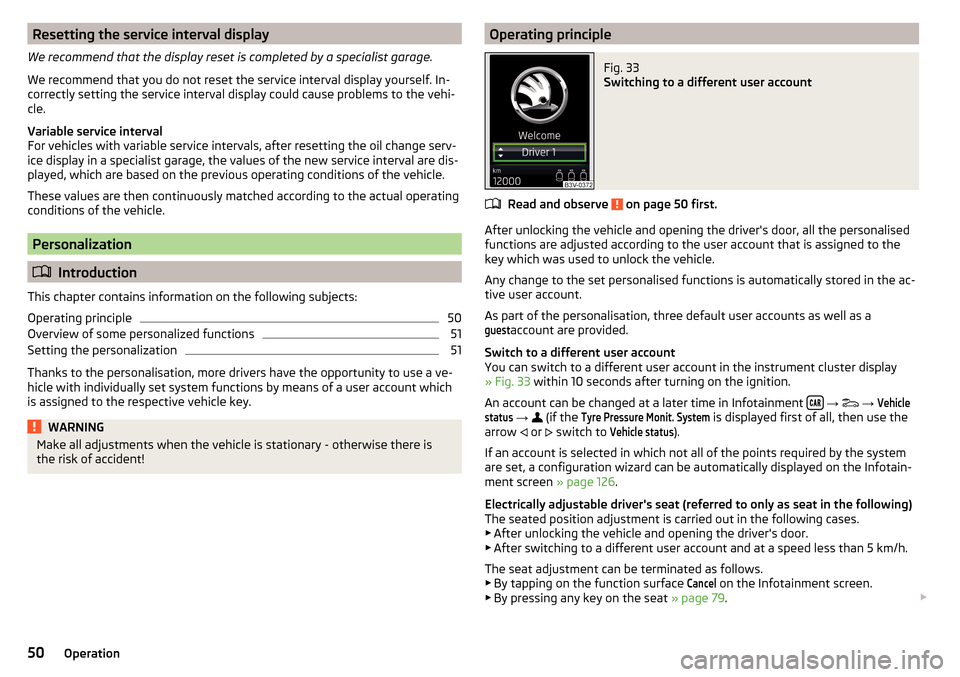
the risk of accident!Operating principleFig. 33
Switching to a different user account
Read and observe on page 50 first.
After unlocking the vehicle and opening the driver's door, all the personalised
functions are adjusted according to the user account that is assigned to the
key which was used to unlock the vehicle.
Any change to the set personalised functions is automatically stored in the ac- tive user account.
As part of the personalisation, three default user accounts as well as a
guest
account are provided.
Switch to a different user account
You can switch to a different user account in the instrument cluster display
» Fig. 33 within 10 seconds after turning on the ignition.
An account can be changed at a later time in Infotainment
→
→
Vehiclestatus
→
(if the
Tyre Pressure Monit. System
is displayed first of all, then use the
arrow or
switch to
Vehicle status
).
If an account is selected in which not all of the points required by the system
are set, a configuration wizard can be automatically displayed on the Infotain-
ment screen » page 126.
Electrically adjustable driver's seat (referred to only as seat in the following)
The seated position adjustment is carried out in the following cases. ▶ After unlocking the vehicle and opening the driver's door.
▶ After switching to a different user account and at a speed less than 5 km/h.
The seat adjustment can be terminated as follows.
▶ By tapping on the function surface
Cancel
on the Infotainment screen.
▶ By pressing any key on the seat » page 79.
50Operation
Page 53 of 344
NoteVehicles with the personalisation function are provided with three vehicle
keys.
Overview of some personalized functions
Read and observe
on page 50 first.
▶Driving mode - the last selected mode, mode setting
Individual
▶Setting the electrically adjustable driver's seat.
▶ Exterior mirror adjustment.
▶ Assistance systems - Lane Assist, parking aid (Park Pilot).
▶ Light - ambient lighting, convenience turn signal, COMING HOME / LEAVING
HOME.
▶ Climatronic - temperature in each individual area, fan speed, recirculation
mode.
▶ Infotainment settings - brightness level of the screen, keyboard arrange-
ment.
▶ Radio - sound settings, station sorting.
▶ Media - shuffle / repeat title, selected video format.
▶ Voice control - acoustic signals.
▶ Navigation - home address, alternative routes, recommended route, remind-
er of the lack of fuel.
Note
The scope of the personalisation functions is dependent on the type of Info-
tainment package.
Setting the personalization
Read and observe
on page 50 first.
›
On Infotainment, press the button, then tap the function surface
→
Personalisation
.
The following menu items are displayed.
Personalisation
Active
- activate/deactivate the personalisation
Select a user account
A list of user accounts with the option to manage user accounts and to switch
to another account.
■ - Account management with the following options:
■Rename user account
- rename the user account (not applicable to the
Guest
account)
■
Copy settings to another account
- copy the settings of an active user account to
another user account
■
Reset user account
- reset the selected user account to factory settings
Adjusting ■
Key assignment:
- options for assigning the vehicle key to the user account:
■
Manual
- detected vehicle key must be assigned to the active user account
manually
■
Automatic
- detected vehicle key automatically assigned to a different ac-
count of the active user account
■
Assign vehicle key to current user account
- manual assignment of the detected ve-
hicle key to the active user account - follow the instructions on the Infotain-
ment screen
■
Reset all
- reset the personalisation and the user accounts to factory settings
51Information system
Page 117 of 344
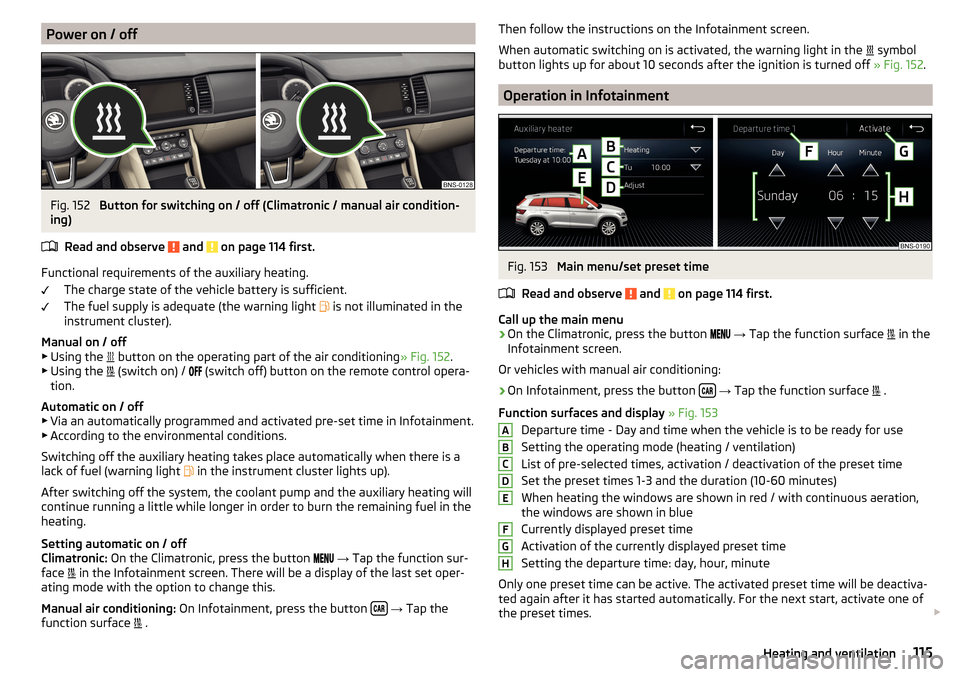
Power on / offFig. 152
Button for switching on / off (Climatronic / manual air condition-
ing)
Read and observe
and on page 114 first.
Functional requirements of the auxiliary heating. The charge state of the vehicle battery is sufficient.
The fuel supply is adequate (the warning light is not illuminated in the
instrument cluster).
Manual on / off ▶ Using the button on the operating part of the air conditioning
» Fig. 152.
▶ Using the (switch on) /
(switch off) button on the remote control opera-
tion.
Automatic on / off ▶ Via an automatically programmed and activated pre-set time in Infotainment.
▶ According to the environmental conditions.
Switching off the auxiliary heating takes place automatically when there is a
lack of fuel (warning light in the instrument cluster lights up).
After switching off the system, the coolant pump and the auxiliary heating will
continue running a little while longer in order to burn the remaining fuel in the
heating.
Setting automatic on / off
Climatronic: On the Climatronic, press the button
→ Tap the function sur-
face in the Infotainment screen. There will be a display of the last set oper-
ating mode with the option to change this.
Manual air conditioning: On Infotainment, press the button
→ Tap the
function surface .
Then follow the instructions on the Infotainment screen.
When automatic switching on is activated, the warning light in the
symbol
button lights up for about 10 seconds after the ignition is turned off » Fig. 152.
Operation in Infotainment
Fig. 153
Main menu/set preset time
Read and observe
and on page 114 first.
Call up the main menu
›
On the Climatronic, press the button
→ Tap the function surface
in the
Infotainment screen.
Or vehicles with manual air conditioning:
›
On Infotainment, press the button
→ Tap the function surface
.
Function surfaces and display » Fig. 153
Departure time - Day and time when the vehicle is to be ready for use
Setting the operating mode (heating / ventilation)
List of pre-selected times, activation / deactivation of the preset time Set the preset times 1-3 and the duration (10-60 minutes)
When heating the windows are shown in red / with continuous aeration,
the windows are shown in blue
Currently displayed preset time
Activation of the currently displayed preset time
Setting the departure time: day, hour, minute
Only one preset time can be active. The activated preset time will be deactiva-
ted again after it has started automatically. For the next start, activate one of
the preset times.
ABCDEFGH115Heating and ventilation
Page 131 of 344
Not recognising a voice command
If a voice command is not detected three times in succession from Infotain-
ment, then the voice control is stopped.
Correction of a voice command input
A voice command can be corrected, modified or re-entered by pressing the
button
or the button
on the multifunction steering wheel. However,
this is only possible as long as the symbol
appears on the screen.
You do not have to wait until the voice command is recognised by Infotain-
ment.
Voice commands can be used anytime during voice control
Voice commandOperation“ Back ”Return to the previous menu“Help ”reproducing and displaying possible voice com-
mands
Voice commands that can be used while browsing the list entries
Voice commandOperation“ Next page ”
Browse menu / list / directory
“Previous page ”“First page ”“Last page ”
Additional Information
Navigation - applies to Infotainment Columbus
If the set Infotainment language matches with the language of the currently
selected country when entering the destination, then the destination address
is entered in one step .
The voice command “ Navigate” and immediately the city, street and street
number (if it is included in the navigation data) Interest (POI) or a contact with
the previously stored address, can be issued.
Navigation - applies to Infotainment Amundsen
To the destination, you are first required to issue the command “enter ad-
dress” and then follow Infotainment instructions.
You can say the house number and a further additional address in the form of
a number where necessary. Infotainment will then offer the number combina-
tion it has found if the house number and the further address supplement,
where appropriate, exists in the street entered.
It is not necessary to spell city and street names if the entered destination is
located in a country that has no voice control available for the language.
Navigation - activated online services
When activated online services ŠKODA Connect » page 117 a POI search online
by Pronouncing “ Search Online POI ” possible.
Radio
In order for a radio station can be selected using voice command, the station
must be stored in the list of available stations » page 142 or in the preset list
» page 143 .
Updating the Infotainment software
Fig. 173
Available software updates on
the ŠKODA websites
The software update ensures optimum operation of Infotainment (e.g. Com-
patibility with new phones).
Current information on Infotainment compatibility can be found on the follow-
ing ŠKODA Internet pages. This is carried out by reading the QR code » Fig. 173
or after entering the following address into the web browser.
http://go.skoda.eu/updateportal
Applies to Infotainment Columbus, Amundsen, Bolero
▶ To determine the software version , press the
button, then tap on the
System information function surface Tap on
→
System information
.
▶ To start the software update , press the button, then tap on the system
information function surface
→
system information
→
Update software
Tap.
129Infotainment operation
Page 134 of 344
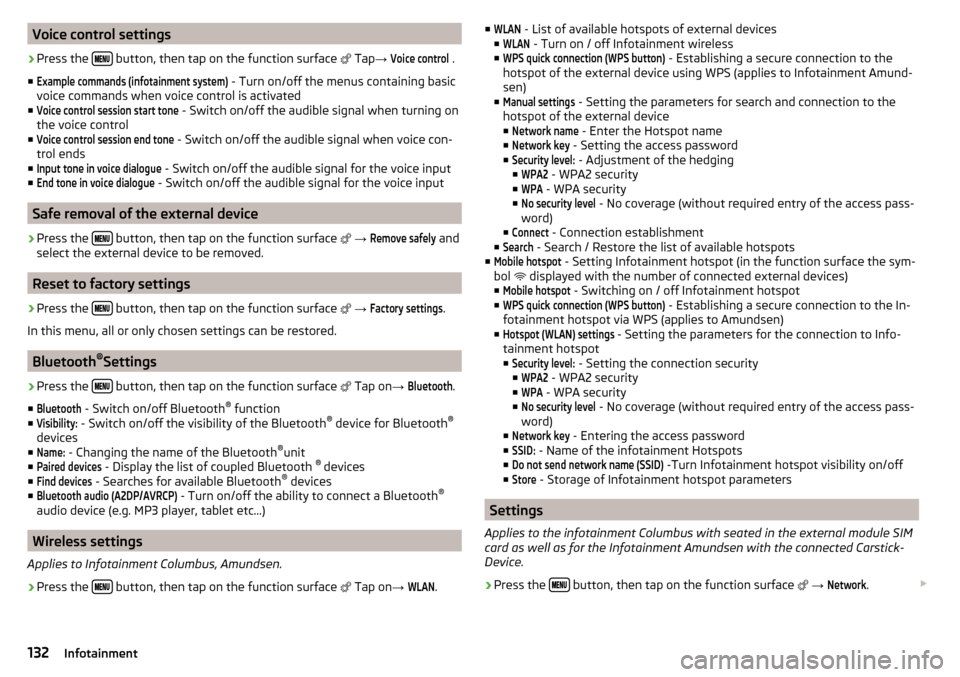
Voice control settings›
Press the button, then tap on the function surface
Tap →
Voice control
.
■
Example commands (infotainment system)
- Turn on/off the menus containing basic
voice commands when voice control is activated
■
Voice control session start tone
- Switch on/off the audible signal when turning on
the voice control
■
Voice control session end tone
- Switch on/off the audible signal when voice con-
trol ends
■
Input tone in voice dialogue
- Switch on/off the audible signal for the voice input
■
End tone in voice dialogue
- Switch on/off the audible signal for the voice input
Safe removal of the external device
›
Press the button, then tap on the function surface
→
Remove safely
and
select the external device to be removed.
Reset to factory settings
›
Press the button, then tap on the function surface
→
Factory settings
.
In this menu, all or only chosen settings can be restored.
Bluetooth ®
Settings
›
Press the button, then tap on the function surface
Tap on
→
Bluetooth
.
■
Bluetooth
- Switch on/off Bluetooth ®
function
■
Visibility:
- Switch on/off the visibility of the Bluetooth ®
device for Bluetooth ®
devices
■
Name:
- Changing the name of the Bluetooth ®
unit
■
Paired devices
- Display the list of coupled Bluetooth ®
devices
■
Find devices
- Searches for available Bluetooth ®
devices
■
Bluetooth audio (A2DP/AVRCP)
- Turn on/off the ability to connect a Bluetooth ®
audio device (e.g. MP3 player, tablet etc...)
Wireless settings
Applies to Infotainment Columbus, Amundsen.
›
Press the button, then tap on the function surface
Tap on
→
WLAN
.
■WLAN - List of available hotspots of external devices
■WLAN
- Turn on / off Infotainment wireless
■
WPS quick connection (WPS button)
- Establishing a secure connection to the
hotspot of the external device using WPS (applies to Infotainment Amund- sen)
■
Manual settings
- Setting the parameters for search and connection to the
hotspot of the external device ■
Network name
- Enter the Hotspot name
■
Network key
- Setting the access password
■
Security level:
- Adjustment of the hedging
■
WPA2
- WPA2 security
■
WPA
- WPA security
■
No security level
- No coverage (without required entry of the access pass-
word)
■
Connect
- Connection establishment
■
Search
- Search / Restore the list of available hotspots
■
Mobile hotspot
- Setting Infotainment hotspot (in the function surface the sym-
bol displayed with the number of connected external devices)
■
Mobile hotspot
- Switching on / off Infotainment hotspot
■
WPS quick connection (WPS button)
- Establishing a secure connection to the In-
fotainment hotspot via WPS (applies to Amundsen)
■
Hotspot (WLAN) settings
- Setting the parameters for the connection to Info-
tainment hotspot
■
Security level:
- Setting the connection security
■
WPA2
- WPA2 security
■
WPA
- WPA security
■
No security level
- No coverage (without required entry of the access pass-
word)
■
Network key
- Entering the access password
■
SSID:
- Name of the infotainment Hotspots
■
Do not send network name (SSID)
-Turn Infotainment hotspot visibility on/off
■
Store
- Storage of Infotainment hotspot parameters
Settings
Applies to the infotainment Columbus with seated in the external module SIM
card as well as for the Infotainment Amundsen with the connected Carstick-
Device.
›
Press the button, then tap on the function surface
→
Network
.
132Infotainment
Page 135 of 344
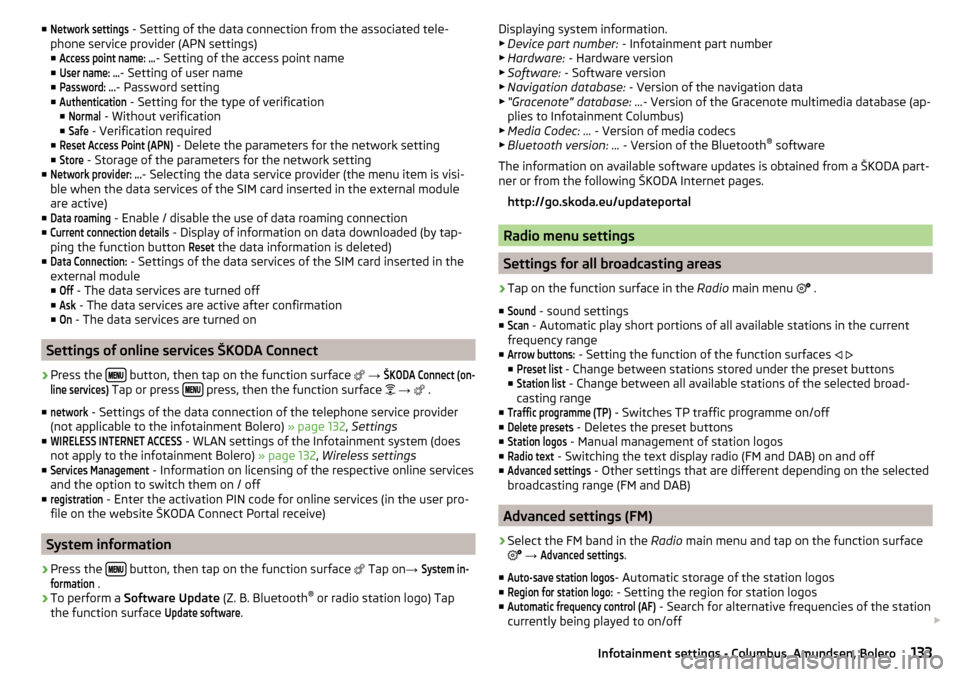
■Network settings - Setting of the data connection from the associated tele-
phone service provider (APN settings) ■Access point name: ...
- Setting of the access point name
■
User name: …
- Setting of user name
■
Password: ...
- Password setting
■
Authentication
- Setting for the type of verification
■
Normal
- Without verification
■
Safe
- Verification required
■
Reset Access Point (APN)
- Delete the parameters for the network setting
■
Store
- Storage of the parameters for the network setting
■
Network provider: ...
- Selecting the data service provider (the menu item is visi-
ble when the data services of the SIM card inserted in the external module
are active)
■
Data roaming
- Enable / disable the use of data roaming connection
■
Current connection details
- Display of information on data downloaded (by tap-
ping the function button
Reset
the data information is deleted)
■
Data Connection:
- Settings of the data services of the SIM card inserted in the
external module
■
Off
- The data services are turned off
■
Ask
- The data services are active after confirmation
■
On
- The data services are turned on
Settings of online services ŠKODA Connect
›
Press the button, then tap on the function surface
→
ŠKODA Connect (on-line services)
Tap or press press, then the function surface
→
.
■
network
- Settings of the data connection of the telephone service provider
(not applicable to the infotainment Bolero) » page 132, Settings
■
WIRELESS INTERNET ACCESS
- WLAN settings of the Infotainment system (does
not apply to the infotainment Bolero) » page 132, Wireless settings
■
Services Management
- Information on licensing of the respective online services
and the option to switch them on / off
■
registration
- Enter the activation PIN code for online services (in the user pro-
file on the website ŠKODA Connect Portal receive)
System information
›
Press the button, then tap on the function surface
Tap on
→
System in-formation
.
›
To perform a Software Update (Z. B. Bluetooth®
or radio station logo) Tap
the function surface
Update software
.
Displaying system information.
▶ Device part number: - Infotainment part number
▶ Hardware: - Hardware version
▶ Software: - Software version
▶ Navigation database: - Version of the navigation data
▶ “Gracenote” database: ... - Version of the Gracenote multimedia database (ap-
plies to Infotainment Columbus)
▶ Media Codec: ... - Version of media codecs
▶ Bluetooth version: ... - Version of the Bluetooth ®
software
The information on available software updates is obtained from a ŠKODA part-
ner or from the following ŠKODA Internet pages.
http://go.skoda.eu/updateportal
Radio menu settings
Settings for all broadcasting areas
›
Tap on the function surface in the Radio main menu
.
■
Sound
- sound settings
■
Scan
- Automatic play short portions of all available stations in the current
frequency range
■
Arrow buttons:
- Setting the function of the function surfaces
■
Preset list
- Change between stations stored under the preset buttons
■
Station list
- Change between all available stations of the selected broad-
casting range
■
Traffic programme (TP)
- Switches TP traffic programme on/off
■
Delete presets
- Deletes the preset buttons
■
Station logos
- Manual management of station logos
■
Radio text
- Switching the text display radio (FM and DAB) on and off
■
Advanced settings
- Other settings that are different depending on the selected
broadcasting range (FM and DAB)
Advanced settings (FM)
›
Select the FM band in the Radio main menu and tap on the function surface
→
Advanced settings
.
■
Auto-save station logos
- Automatic storage of the station logos
■
Region for station logo:
- Setting the region for station logos
■
Automatic frequency control (AF)
- Search for alternative frequencies of the station
currently being played to on/off
133Infotainment settings - Columbus, Amundsen, Bolero