all wheel drive SKODA OCTAVIA 2006 Owner´s Manual
[x] Cancel search | Manufacturer: SKODA, Model Year: 2006, Model line: OCTAVIA, Model: SKODA OCTAVIA 2006Pages: 218, PDF Size: 5.48 MB
Page 14 of 218
CAUTION
The driver is always responsible for selecting the correct gear in different driving
situations, such as overtaking. ÐMultifunction display (onboard computer)
ä
Introduction
This chapter contains information on the following subjects:
Memory 12
Operation 13
Multifunction display details 13
Warning against excessive speeds 14
The multifunction display can only be operated when the ignition is switched on.
After the ignition is switched on, the function displayed is the one which you last
selected before switching off the ignition.
The multi-functional indicator appears in the display » Fig. 5
on page 12 or in the
information display » page 15 depending on the equipment fitted to your vehi-
cle.
In vehicles with an information display » page 15, there is an option to fade out
some of the information. WARNING
■ Concentrate fully at all times on your driving! As the driver you are fully re-
sponsible for the operation of your vehicle. ■ Do not only rely upon the information given on the outside temperature dis-
play that there is no ice on the road. Even at temperatures around +4 °C, black
ice may still be on the road surface – warning, drive with care! Note
■ In certain national versions the displays appear in the Imperial system of meas-
ures. ■ If the display of the second speed is activated in mph, the current speed is not
indicated in km/h on the display. Ð Memory
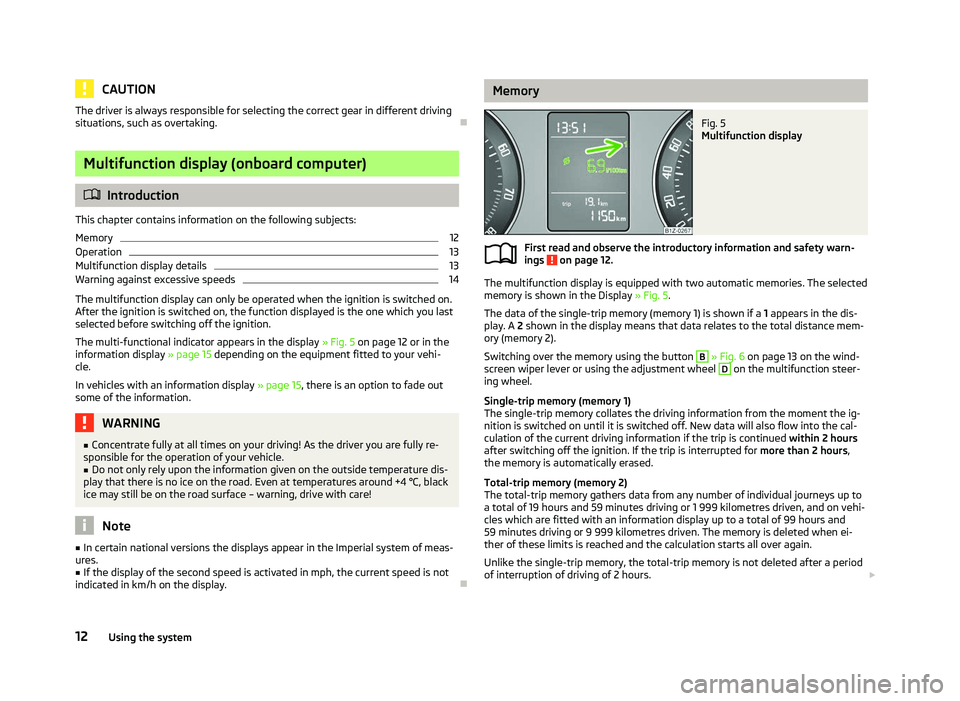
Fig. 5
Multifunction display
First read and observe the introductory information and safety warn-
ings on page 12.
The multifunction display is equipped with two automatic memories. The selected
memory is shown in the Display » Fig. 5.
The data of the single-trip memory (memory 1) is shown if a 1 appears in the dis-
play. A 2 shown in the display means that data relates to the total distance mem-
ory (memory
2).
Switching over the memory using the button B
» Fig. 6 on page 13 on the wind-
screen wiper lever or using the adjustment wheel D
on the multifunction steer-
ing wheel.
Single-trip memory (memory 1)
The single-trip memory collates the driving information from the moment the ig-
nition is switched on until it is switched off. New data will also flow into the cal-
culation of the current driving information if the trip is continued within 2 hours
after switching off the ignition. If the trip is interrupted for more than 2 hours,
the memory is automatically erased.
Total-trip memory (memory 2)
The total-trip memory gathers data from any number of individual journeys up to
a total of 19
hours and 59 minutes driving or 1 999 kilometres driven, and on vehi-
cles which are fitted with an information display up to a total of 99 hours and
59 minutes driving or 9 999 kilometres driven. The memory is deleted when ei-
ther of these limits is reached and the calculation starts all over again.
Unlike the single-trip memory, the total-trip memory is not deleted after a period
of interruption of driving of 2 hours. £
ä
12 Using the system
Page 15 of 218
Note
All information in the memory 1 and 2 is erased if the battery of the vehicle is dis-
connected. ÐOperation
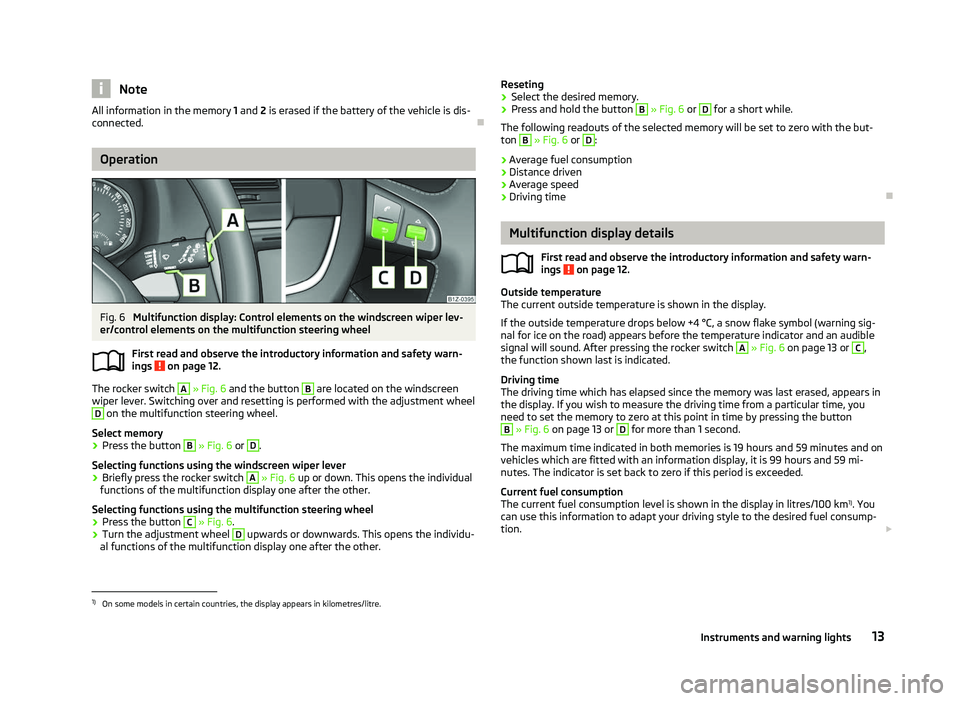
Fig. 6
Multifunction display: Control elements on the windscreen wiper lev-
er/control elements on the multifunction steering wheel
First read and observe the introductory information and safety warn-
ings on page 12.
The rocker switch A
» Fig. 6
and the button B
are located on the windscreen
wiper lever. Switching over and resetting is performed with the adjustment wheel D
on the multifunction steering wheel.
Select memory
› Press the button B
» Fig. 6 or D
.
Selecting functions using the windscreen wiper lever
› Briefly press the rocker switch A
» Fig. 6
up or down. This opens the individual
functions of the multifunction display one after the other.
Selecting functions using the multifunction steering wheel
› Press the button C
» Fig. 6.
› Turn the adjustment wheel D
upwards or downwards. This opens the individu-
al functions of the multifunction display one after the other.
ä Reseting
› Select the desired memory.
› Press and hold the button B
» Fig. 6 or D
for a short while.
The following readouts of the selected memory will be set to zero with the but-
ton B
» Fig. 6 or D
:
› Average fuel consumption
› Distance driven
› Average speed
› Driving time Ð Multifunction display details
First read and observe the introductory information and safety warn-
ings on page 12.
Outside temperature
The current outside temperature is shown in the display.
If the outside temperature drops below +4
°C, a snow flake symbol (warning sig-
nal for ice on the road) appears before the temperature indicator and an audible
signal will sound. After pressing the rocker switch A
» Fig. 6 on page 13 or C
,
the function shown last is indicated.
Driving time
The driving time which has elapsed since the memory was last erased, appears in
the display. If you wish to measure the driving time from a particular time, you
need to set the memory to zero at this point in time by pressing the button B
» Fig. 6 on page 13 or D
for more than 1 second.
The maximum time indicated in both memories is 19 hours and 59
minutes and on
vehicles which are fitted with an information display, it is 99 hours and 59 mi-
nutes. The indicator is set back to zero if this period is exceeded.
Current fuel consumption
The current fuel consumption level is shown in the display in litres/100 km 1)
. You
can use this information to adapt your driving style to the desired fuel consump-
tion. £
ä
1)
On some models in certain countries, the display appears in kilometres/litre.
13
Instruments and warning lights
Page 16 of 218
The display appears in litres/hour if the vehicle is stationary or driving at a low
speed
1)
.
Average fuel consumption
The average fuel consumption since the memory was last erased is shown in the
display in litres/100
km2)
» page 12.
If you wish to determine the average fuel consumption over a certain period of
time, you must set the memory at the start of the new measurement to zero us-
ing the button B
» Fig. 6 on page 13
. After erasing the memory, no value appears
in the display until you have driven 300 m.
The display is updated regularly while you are driving.
Range
The estimated range in kilometres is shown on the display. It indicates the dis-
tance you can still drive with your vehicle based on the level of fuel in the tank
and the same style of driving.
The display is shown in steps of 10 km. After lighting up of the warning light for
the fuel reserve the display is shown in steps of 5 km.
The fuel consumption over the last 50 km is used to calculate the range. The
range will increase if you drive in a more economical manner.
If the memory is set to zero (after disconnecting the battery), the fuel consump-
tion of 10 ltr./100 km is calculated for the range; afterwards the value is adapted
accordingly to the style of driving.
Distance travelled
The distance driven since the memory was last erased appears in the dis-
play » page 12.
If you wish to measure the distance travelled from a particular point in time, you
need to set the memory to zero at this point in time by pressing the button B
» Fig. 6 on page 13 or D
.
The maximum distance indicated in both memories is 1
999 km or 9 999 km on
vehicles with an information display. The indicator is set back to zero if this period
is exceeded. Average speed
The average speed since the memory was last erased is shown in the display in
km/hour
» page 12 . If you wish to determine the average speed over a certain pe-
riod of time, you need to set the memory to zero at the start of the measurement
using the button B
» Fig. 6 on page 13 or D
.
After erasing the memory, no value appears in the display until you have driven
approx. 300 m.
The display is updated regularly while you are driving.
Current speed
The current speed which is identical to the display of the speedometer 2
»
Fig. 2
on page 8 is indicated on the display.
Oil temperature
If the oil temperature is lower than 50 °C or if a fault in the system for checking
the oil temperature is present, - -.- is displayed instead of the oil temperature. Ð Warning against excessive speeds
First read and observe the introductory information and safety warn-
ings on page 12.
Adjust the speed limit while the vehicle is stationary
›
With the button A
» Fig. 6
on page
13 or, if applicable, the adjustment wheel D
, select the menu item
Warning against excessive speeds .
› Press the button B
or D
to activate the ability to set the speed limit (value
flashes).
› Set the desired speed limit, e.g. 50 km/h, with the button A
or, if applicable,
the adjustment wheel D
.
› Press the button B
or D
to confirm the set speed limit, or wait approx. 5 sec-
onds and the setting is saved automatically (the value stops flashing).
This allows you to set the speed in 5 km/h intervals.
Adjusting the speed limit while the vehicle is moving
› With the button A
» Fig. 6
on page
13 or, if applicable, the adjustment wheel D
, select the menu item
Warning against excessive speeds .
› Drive at the desired speed, e.g. 50 km/h.
£
ä
1)
On some models in certain countries, the display appears in --,- kilometres/litres if the vehicle is sta-
tionary.
2) On some models in certain countries, the display appears in kilometres/litre.
14 Using the system
Page 17 of 218
›
Press the button B
or D
to accept the current speed as the speed limit (the
value flashes).
If you wish to change the set speed limit, it is changed in 5
km/h intervals (e.g. the
accepted speed of 47 km/h increases to 50 km/h or decreases to 45 km/h).
› Press again the button B
or D
to confirm the speed limit, or wait approx. 5
seconds and the setting is saved automatically (the value stops flashing).
Change or delete speed limit
› With the button A
» Fig. 6
on page
13 or, if applicable, the adjustment wheelD
, select the menu item
Warning against excessive speeds .
› Pressing the button B
or D
deletes the speed limit.
› Pressing the button B
or D
again activates change mode for the speed limit.
If the set speed limit is exceeded, an audible signal will sound as a warning. At
the same time the message Warning against excessive speeds appears on the
display with the set limit value.
The set speed limit value remains stored even after switching off the ignition. ÐMAXI DOT (information display)
ä
Introduction
This chapter contains information on the following subjects:
Main menu 15
Settings 16
Door, boot lid and bonnet warning 17
Auto Check Control 17
The information display provides you with information on the current operating
state of your vehicle . The information system also provides you with data (de-
pending on the equipment installed in the vehicle) relating to the radio, mobile
phone, multi-functional indicator, navigation system, the unit connected to the
MDI input and the automatic gearbox » page 102.WARNING
Concentrate fully at all times on your driving! As the driver you are fully re-
sponsible for the operation of your vehicle. CAUTION
Pull out the ignition key if coming in contact with the display (e.g. when cleaning)
to prevent any possible damage. Ð Main menu
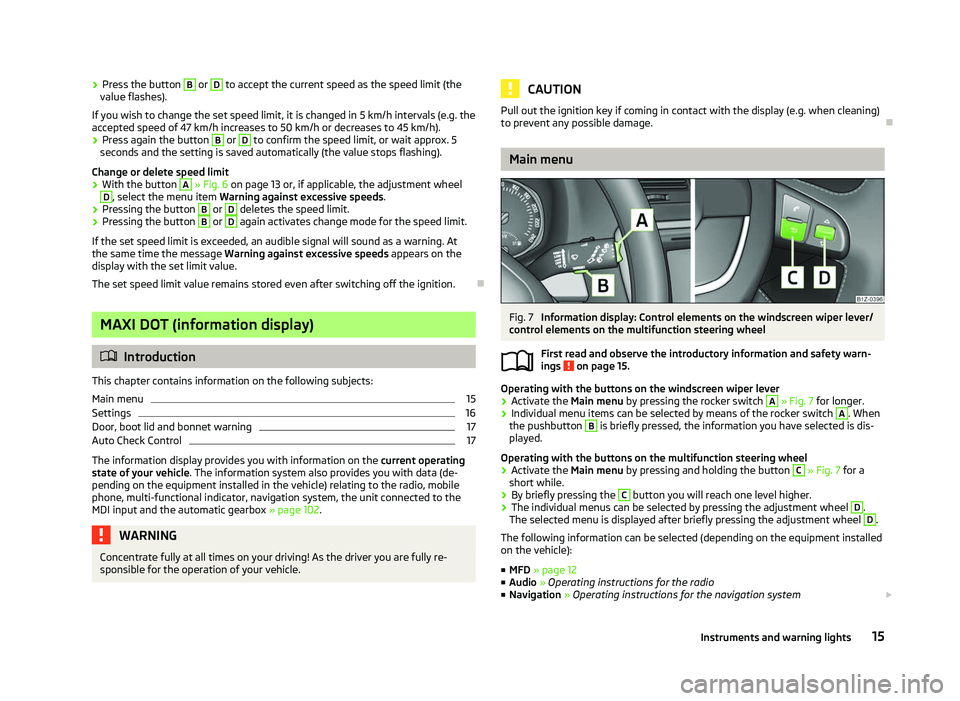
Fig. 7
Information display: Control elements on the windscreen wiper lever/
control elements on the multifunction steering wheel
First read and observe the introductory information and safety warn-
ings on page 15.
Operating with the buttons on the windscreen wiper lever
›
Activate the Main menu
by pressing the rocker switch A
» Fig. 7 for longer.
› Individual menu items can be selected by means of the rocker switch A
. When
the pushbutton B
is briefly pressed, the information you have selected is dis-
played.
Operating with the buttons on the multifunction steering wheel
› Activate the Main menu
by pressing and holding the button C
» Fig. 7
for a
short while.
› By briefly pressing the C
button you will reach one level higher.
› The individual menus can be selected by pressing the adjustment wheel D
.
The selected menu is displayed after briefly pressing the adjustment wheel D
.
The following information can be selected (depending on the equipment installed
on the vehicle):
■ MFD » page 12
■ Audio » Operating instructions for the radio
■ Navigation » Operating instructions for the navigation system £
ä
15
Instruments and warning lights
Page 18 of 218
■
Phone » page 107
■ Aux.
Heating » page 87
■ Assistants » page 41
■ Vehicle status » page 17
■ Settings » page 16
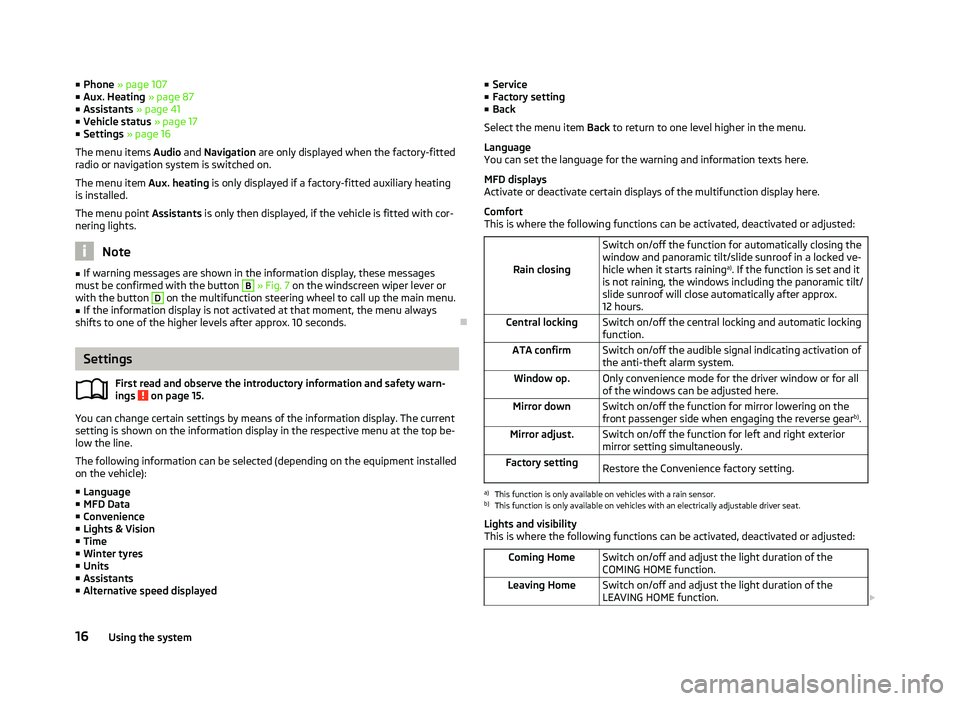
The menu items Audio and Navigation are only displayed when the factory-fitted
radio or navigation system is switched on.
The menu item Aux. heating is only displayed if a factory-fitted auxiliary heating
is installed.
The menu point Assistants is only then displayed, if the vehicle is fitted with cor-
nering lights. Note
■ If warning messages are shown in the information display, these messages
must be confirmed with the button B
» Fig. 7 on the windscreen wiper lever or
with the button D
on the multifunction steering wheel to call up the main menu.
■ If the information display is not activated at that moment, the menu always
shifts to one of the higher levels after approx. 10
seconds.ÐSettings
First read and observe the introductory information and safety warn-
ings on page 15.
You can change certain settings by means of the information display. The current
setting is shown on the information display in the respective menu at the top be-
low the line.
The following information can be selected (depending on the equipment installed
on the vehicle):
■ Language
■ MFD Data
■ Convenience
■ Lights & Vision
■ Time
■ Winter tyres
■ Units
■ Assistants
■ Alternative speed displayed
ä ■
Service
■ Factory setting
■ Back
Select the menu item Back to return to one level higher in the menu.
Language
You can set the language for the warning and information texts here.
MFD displays
Activate or deactivate certain displays of the multifunction display here.
Comfort
This is where the following functions can be activated, deactivated or adjusted:
Rain closing Switch on/off the function for automatically closing the
window and panoramic tilt/slide sunroof in a locked ve-
hicle when it starts raining
a)
. If the function is set and it
is not raining, the windows including the panoramic tilt/
slide sunroof will close automatically after approx.
12 hours.
Central locking Switch on/off the central locking and automatic locking
function.
ATA confirm Switch on/off the audible signal indicating activation of
the anti-theft alarm system.
Window op. Only convenience mode for the driver window or for all
of the windows can be adjusted here.
Mirror down Switch on/off the function for mirror lowering on the
front passenger side when engaging the reverse gear b)
.
Mirror adjust. Switch on/off the function for left and right exterior
mirror setting simultaneously.
Factory setting Restore the Convenience factory setting. a)
This function is only available on vehicles with a rain sensor.
b) This function is only available on vehicles with an electrically adjustable driver seat.
Lights and visibility
This is where the following functions can be activated, deactivated or adjusted:
Coming Home Switch on/off and adjust the light duration of the
COMING HOME
function.
Leaving Home Switch on/off and adjust the light duration of the
LEAVING HOME function. £16
Using the system
Page 45 of 218
The fog lights with the function CORNER are adjusted according to the steering
angle or after switching on the turn signal light
1)
in the following circumstances:
› the vehicle is stationary and the engine is running or it moves with a speed of
maximum 40 km/h;
› the daytime running lights are not switched on;
› the low beam is switched on or the light switch is in the position
and the
intensity of the ambient light causes the low beam to be switched on;
› the fog lights are not switched on;
› no reverse gear is engaged. Note
If the reverse gear is engaged during the active function CORNER, both fog lights
illuminate. ÐRear fog light
First read and observe the introductory information and safety warn-
ings on page 39.
Switching on
› First of all, turn the light switch to position
or » Fig. 24 on page 42.
› Pull the light switch to position 2
.
If the vehicle is not fitted with fog lights » page 42, the rear fog light is switched
on by turning the light switch to the position or and is pulled out directly to
the position 2
. This switch does not have two positions, but only one position.
The warning light
lights up in the instrument cluster when the rear fog light is
switched on » page 18.
Only the rear fog light on the trailer lights up if the vehicle has a factory-fitted
towing device or a towing device from ŠKODA original accessories and it is driven
with a trailer and the rear fog light switched on.
The rear fog light is located in the rear light array on the driver's side. Ð
ä Instrument lighting
Fig. 25
Dash panel: Instrument lighting
First read and observe the introductory information and safety warn-
ings on page 39.
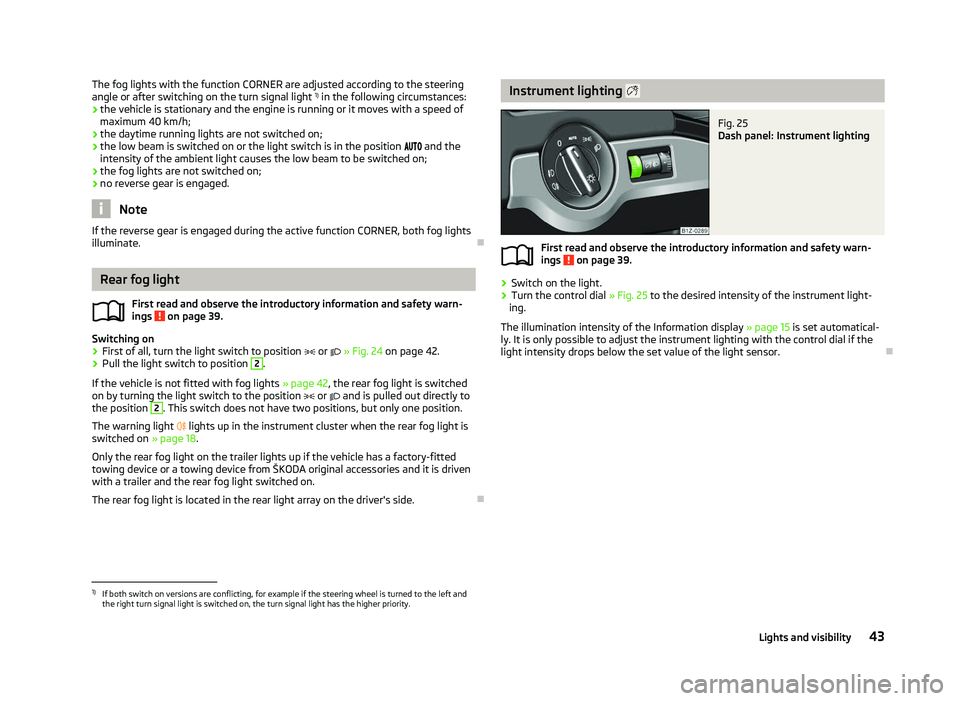
›
Switch on the light.
› Turn the control dial
» Fig. 25 to the desired intensity of the instrument light-
ing.
The illumination intensity of the Information display »
page 15 is set automatical-
ly. It is only possible to adjust the instrument lighting with the control dial if the
light intensity drops below the set value of the light sensor. Ð
ä
1)
If both switch on versions are conflicting, for example if the steering wheel is turned to the left and
the right turn signal light is switched on, the turn signal light has the higher priority.
43
Lights and visibility
Page 56 of 218
Seats and Stowage
Front seats
ä
Introduction
This chapter contains information on the following subjects:
Manually adjusting the front seats 55
Adjusting front seats electrically 55
Storing setting 56
Assigning the remote control key to the memory button 56
Retrieving the seat and exterior mirror settings 56
The driver's seat should be adjusted in such a way that the pedals can be fully
pressed to the floor with slightly bent legs.
The seat backrest on the driver's seat should be adjusted in such a way that the
upper point of the steering wheel can be easily reached with slightly bent arms.
Correct adjustment of the seats is particularly important for:
› safely and quickly reaching the controls;
› a relaxed, fatigue-free body position;
› achieving the maximum protection offered by the seat belts and the airbag
system. WARNING
■ Only adjust the driver's seat when the vehicle is stationary - risk of accident!
■ Caution when adjusting the seat! You may suffer injuries or bruises as a re-
sult of adjusting the seat without paying proper attention. ■ As the electric front seats can also be adjusted when the ignition is switch-
ed off (even when the ignition key is withdrawn), never leave children unat-
tended in the car. ■ The seat backrests must not be angled too far back when driving otherwise
this will affect proper operation of the seat belts and of the airbag system -
risk of injury! ■ Never carry more people than the number of seats in the vehicle. WARNING (Continued)
■ Each occupant must correctly fasten the seat belt belonging to the seat.
Children must be fastened » page 135, Transporting children safely with a
suitable restraint system.
■ The front seats and the head restraints must always be adjusted to match
the body size of the seat occupant as well as the seat belts must always be
correctly fastened in order to provide an optimal protection for you and your
occupants.
■ Always keep your feet in the footwell when the car is being driven - never
place your feet on the instrument panel, out of the window or on the surfaces
of the seats. This is particularly important for the front seat passenger. You
will be exposed to increased risk of injury if it becomes necessary to apply the
brake or in the event of an accident. If an airbag is deployed, you may suffer
fatal injuries when adopting an incorrect seated position!
■ It is important for the driver and front passenger to maintain a distance of at
least 25 cm from the steering wheel or dash panel. Not maintaining this mini-
mum distance will mean that the airbag system will not be able to properly
protect you - hazard!
■ Ensure that there are no objects in the footwell as they may get caught be-
hind the pedals when driving or applying the braking. You would then no lon-
ger be able to operate the clutch, brake or accelerate.
■ Do not transport any objects on the front passenger seat except objects
(e.g. child safety seat) provided for this purpose - risk of accident! Note
After a certain time, play can develop within the adjustment mechanism of the
backrest angle. Ð
54 Using the system
Page 94 of 218
Note
■ The engine can only be started with a genuine ŠKODA key with the matching
code. ■ The engine running noises may louder at first be louder for a short time after
starting the cold engine. This is quite normal and is not an operating problem. ■ After switching off the ignition, the radiator fan can intermittently continue to
operate for approx. 10
minutes.
■ If the engine does not start up after a second attempt, the fuse for the fuel
pump/glow plug system (Diesel engines) may have a fault. Check the fuse and re-
place, if necessary » page 190, Fuses in the dash panel
or seek assistance from a
ŠKODA specialist garage.
■ We recommend locking the steering wheel whenever leaving the vehicle. This
acts as a deterrent against the attempted theft of your car. ÐAdjusting the steering wheel position
Fig. 93
Adjustable steering wheel: Lever below the steering wheel/safe dis-
tance to the steering wheel
First read and observe the introductory information and safety warn-
ings on page 91.
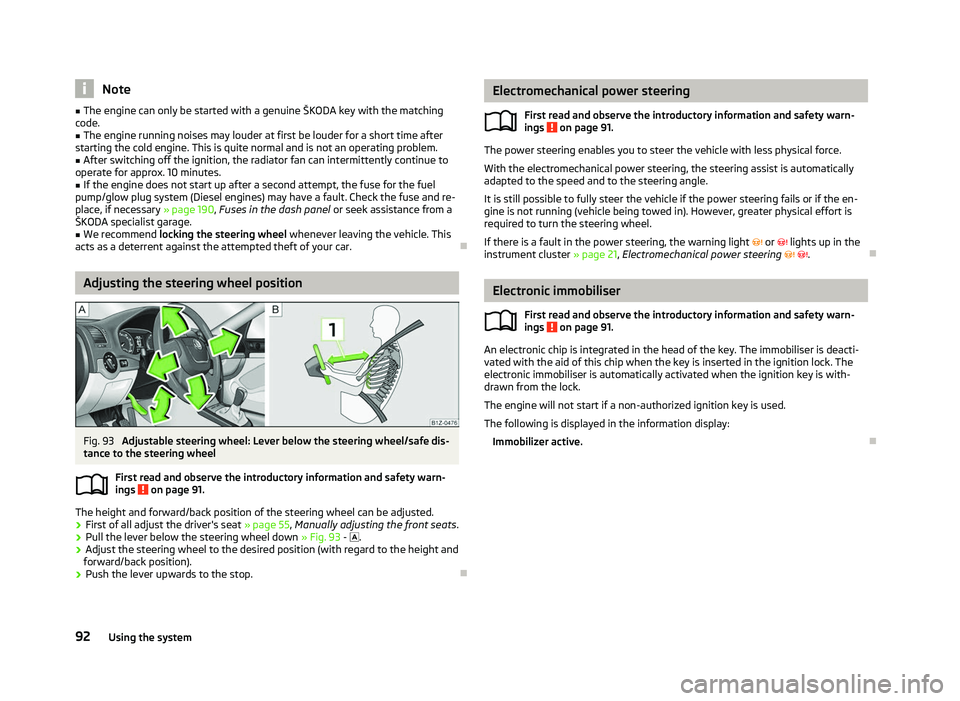
The height and forward/back position of the steering wheel can be adjusted.
›
First of all adjust the driver's seat
» page 55, Manually adjusting the front seats .
› Pull the lever below the steering wheel down
» Fig. 93 - .
› Adjust the steering wheel to the desired position (with regard to the height and
forward/back position).
› Push the lever upwards to the stop. Ð
ä Electromechanical power steering
First read and observe the introductory information and safety warn-
ings on page 91.
The power steering enables you to steer the vehicle with less physical force.
With the electromechanical power steering, the steering assist is automatically
adapted to the speed and to the steering angle.
It is still possible to fully steer the vehicle if the power steering fails or if the en-
gine is not running (vehicle being towed in). However, greater physical effort is
required to turn the steering wheel.
If there is a fault in the power steering, the warning light or lights up in the
instrument cluster » page 21, Electromechanical power steering . Ð Electronic immobiliser
First read and observe the introductory information and safety warn-
ings on page 91.
An electronic chip is integrated in the head of the key. The immobiliser is deacti-
vated with the aid of this chip when the key is inserted in the ignition lock. The
electronic immobiliser is automatically activated when the ignition key is with-
drawn from the lock.
The engine will not start if a non-authorized ignition key is used.
The following is displayed in the information display: Immobilizer active. Ð
ä
ä
92 Using the system
Page 96 of 218
Antilock brake system (ABS) 96
Traction control system (TCS) 96
Electronic Differential Lock (EDS and XDS) 97
WARNING
■ The brake booster only operates when the engine is running. Greater physi-
cal effort for braking is required when the engine is switched off - risk of acci-
dent!
■ Depress the clutch pedal when stopping or braking a vehicle with a petrol
engine and manual transmission in the low rev range. If you fail to do so, the
functionality of the brake booster can be impaired - risk of accident!
■ If a front spoiler, full wheel trim, etc. is mounted retrospectively, it must be
ensured that the air supply to the front wheel brakes is not reduced. Other-
wise, the functionality of the brake system could be impaired - risk of acci-
dent! ■ Please note that the handbrake must be fully released. A handbrake which
is only partially released can result in the rear brakes overheating, which can
have a negative effect on the operation of the brake system - risk of accident!
■ Never leave children unattended in the vehicle. The children might, for ex-
ample, release the handbrake or take the vehicle out of gear. The vehicle
might then move off - risk of accident!
■ A lack of fuel can cause irregular engine running or cause the engine to shut
down. The brake assist systems would then be without function - risk of acci-
dent! ■ Adjust the speed and driving style to the current visibility, weather, road and
traffic conditions. The increased safety offered by the brake assist systems
must not tempt you to take greater risks than otherwise - risk of an accident!
■ The normal braking system is still fully functional if there is an ABS fault.
Visit a ŠKODA specialist garage immediately and adjust your style of driving
according to the damage to the ABS as you will not know how great the dam-
age is and the limitation it is placing on the braking efficiency. CAUTION
■ Observe the recommendations on the new brake pads » page 139.
■ Never let the brakes slip with light pressure on the pedal if braking is not neces-
sary. This causes the brakes to overheat and can also result in a longer braking
distance and excessive wear.
■ All four wheels must be fitted with the same tyres approved by the manufactur-
er to ensure the brake assist systems operate correctly. Note
■ If the brakes are applied in full and the control unit for the braking system con-
siders the situation to be dangerous for the following traffic, the brake light
flashes automatically. After the speed was reduced below around 10 km/h or the
vehicle was stopped, the brake light stops flashing and the hazard warning light
system switches on. The hazard warning light system is switched off automatical-
ly after accelerating or driving off again. ■ Before negotiating a steep downhill section, reduce the speed, shift down into
the next lower gear (manual gearbox) or select a lower drive position (automatic
gearbox). As a result, the braking effect of the engine will be used, reducing the
load on the brakes. Any additional braking should be completed intermittently,
not continuously. ■ Changes to the vehicle (e.g. to the engine, brakes, chassis or another combina-
tion of tyres and wheels) can influence the functionality of the brake assist sys-
tems »
page 177, Accessories, changes and replacement of parts .
■ If a fault occurs in the ABS system, the ESC, ASR and EDL also do not work. A
warning light »
page 22 comes on if a fault occurs in the ABS system. Ð Information for braking
First read and observe the introductory information and safety warn-
ings on page 93.
Wear-and-tear
The wear of the brake pads is dependent on the operating conditions and driving
style. The brake pads wear more quickly if a lot of journeys are completed in
towns and over short distances or if a very sporty style of driving is adopted. If
operated under severe conditions, the thickness of the brake pads must be
checked by a ŠKODA specialist garage before the next service appointment.
Wet roads or road salt
The performance of the brakes can be delayed as the brake discs and brake pads
may be moist or have a coating of ice or layer of salt on them in winter. The
brakes are cleaned and dried by applying the brakes several times.
Corrosion
Corrosion on the brake discs and dirt on the bake pads occur if the vehicle has
been parked for a long period and if you do not make much use of the braking
system. If the brake system is not used much or if there is corrosion on the sur-
face, we recommend cleaning the brake discs by firmly applying the brakes from a
fairly high speed. £
ä
94 Using the system
Page 97 of 218
Faults in the brake surface
If it is found that the braking distance has suddenly become longer and that the
brake pedal can be depressed further, the brake system may be faulty. Visit a
ŠKODA specialist garage immediately and adjust your style of driving appropriate-
ly as you will not know how great the damage is.
Low brake fluid level
An insufficient level of brake fluid may result in problems in the brake system. The
level of the brake fluid is monitored electronically
» page 19, Brake system .
Brake booster
The brake booster increases the pressure generated with the brake pedal. The
brake booster only operates when the engine is running. ÐHandbrake
Fig. 95
Centre console: Handbrake
First read and observe the introductory information and safety warn-
ings on page 93.
Apply
› Pull the handbrake lever firmly upwards.
Loosening
› Pull the handbrake lever up slightly and
at the same time push in the locking
button » Fig. 95 .
› Move the lever right down while pressing the lock button.
The handbrake warning light lights up when the handbrake is applied, provided
the ignition is on.
A warning signal sounds if the vehicle is inadvertently driven off with the hand-
brake applied.
The following is displayed in the information display: ä Release parking brake!
The handbrake warning is activated if the vehicle is driven at a speed of more
than 6 km/h for more than 3
seconds. Ð Stabilisation Control (ESC)
Fig. 96
ESC system: TCS button
First read and observe the introductory information and safety warn-
ings on page 93.
The ESC is automatically activated after starting the engine. The ESC helps to
maintain control of the vehicle in situations where it is being operated at its dy-
namic limits, such as a sudden change to the direction of travel. The risk of skid-
ding is reduced and your car thus offers greater driving stability depending on the
conditions of the road surface.
The direction which the driver wishes to take is determined based on the steering
angle and the speed of the vehicle and is constantly compared with the actual
behaviour of the vehicle. In the event of deviations, such as if the car starts to
skid, the ESC automatically brakes the appropriate wheel.
The ESC cannot be switched off, the button » Fig. 96
only deactivates the TCS
system and the warning light in the instrument cluster lights up.
During an intervention of the system, the warning light flashes in the instru-
ment cluster.
In the event of an ESC fault, the ESC warning light illuminates in the instrument
cluster
» page 22.
The following systems are integrated into the electronic stabilisation control
(ESC):
› Antilock brake system (ABS),
› Traction control (TCS),
£
ä
95
Starting-off and Driving