USB SKODA OCTAVIA 2008 2.G / (1Z) Bolero Car Radio Manual
[x] Cancel search | Manufacturer: SKODA, Model Year: 2008, Model line: OCTAVIA, Model: SKODA OCTAVIA 2008 2.G / (1Z)Pages: 25, PDF Size: 0.94 MB
Page 15 of 25

Basic setting13
ical damage. Severe scratches cause reading errors which can make the CD jump or
“get stuck”. All CDs must be treated carefu lly and always be stored in a protective
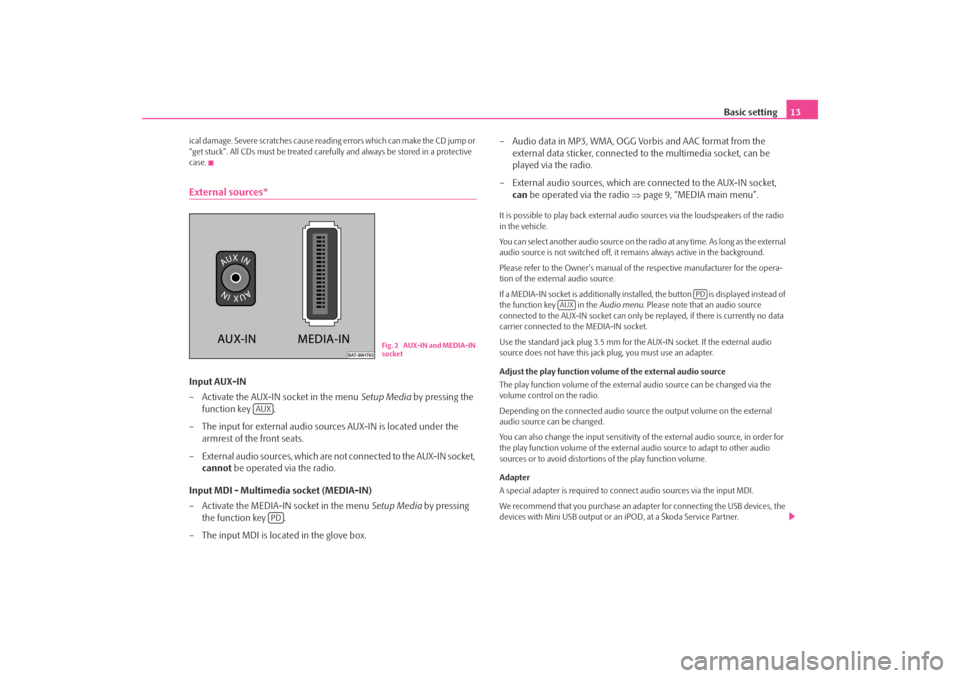
case.External sources*Input AUX-IN
– Activate the AUX-IN socket in the menu Setup Media by pressing the
function key .
– The input for external audio sour ces AUX-IN is located under the
armrest of the front seats.
– External audio sources, which are no t connected to the AUX-IN socket,
cannot be operated via the radio.
Input MDI - Multimedia socket (MEDIA-IN)
– Activate the MEDIA-IN socket in the menu Setup Media by pressing
the function key .
– The input MDI is loca ted in the glove box. – Audio data in MP3, WMA, OGG Vorbis and AAC format from the
external data sticker, connected to the multimedia socket, can be
played via the radio.
– External audio sources, which are connected to the AUX-IN socket,
can be operated via the radio ⇒page 9, “MEDIA main menu”.
It is possible to play back external audi o sources via the loudspeakers of the radio
in the vehicle.
You can select another audio source on the ra dio at any time. As long as the external
audio source is not switched off, it re mains always active in the background.
Please refer to the Owner's manual of the respective manufacturer for the opera-
tion of the external audio source.
If a MEDIA-IN socket is additionally installed, the button is displayed instead of
the function key in the Audio menu. Please note that an audio source
connected to the AUX-IN socket can only be replayed, if there is currently no data
carrier connected to the MEDIA-IN socket.
Use the standard jack plug 3.5 mm for the AUX-IN socket. If the external audio
source does not have this jack plug, you must use an adapter.
Adjust the play function volume of the external audio source
The play function volume of the external audio source can be changed via the
volume control on the radio.
Depending on the connected audio source the output volume on the external
audio source can be changed.
You can also change the input sensitivity of the external audio source, in order for
the play function volume of the external audio source to adapt to other audio
sources or to avoid distortions of the play function volume.
Adapter
A special adapter is required to connect audio sources via the input MDI.
We recommend that you purchase an adap ter for connecting the USB devices, the
devices with Mini USB output or an iPOD, at a Škoda Service Partner.
Fig. 2 AUX-IN and MEDIA-IN
socket
AUX
PD
PD
AUX
s3d0.3.book Page 13 Monday, August 11, 2008 12:49 PM
Page 16 of 25

Basic setting
14Conditions for proper connection•
Only USB devices with the specification 2.0 can be connected.
•
The version of the file allocation tabl e FAT (File Allocation Table) of the
connected device must be FAT16 (< 2 GB) or FAT32 (> 2 GB).
•
In order to replay from a unit with a hard disk (HDD) which includes a large data
volume, it can lead to a time delay when reading in the overview of the music data.
•
In order to replay from a unit, which incl udes a complicated folder structure, it
can lead to a time delay when readin g in the overview of the music data.
•
The folder structure in the connected uni t must not exceed a depth of 8 levels.
One folder must not contai n more than 1°000° data.
•
A USB extension cable or USB distributo r (HUB) must not be used to connect
the unit.
WARNING
•
On no account place an external audio source on the dash panel. You
could make sudden manoeuvres in th e passenger compartment and injure
the occupants.
•
On no account place an external audio source close to the airbags. You
could be thrown back in the passen ger compartment by the airbags being
deployed and injure the occupants.
•
You must not hold the external audio source in the hand or on the knees
while driving. You could make sudden manoeuvres in the passenger
compartment and injure the occupants.
•
Always guide the connection cable of the external audio source in such a
way that is does not re strict you when driving.Caution
The AUX-IN socket must only be used for audio sources!
Note
•
The external audio source, which is conne cted via AUX-IN, can only be used if
no unit is connected via MDI at the same time.
•
If an external audio source is connecte d via AUX-IN, which is equipped with an
adapter for external power supply, it can o ccur that the audio signal is interrupted.
This depends on the quality of the adapter which is used.
•
The loudspeakers in the vehicle are matc hed to a power output of the radio of
30°W.
Range selector key SETUPMain menu set-ups (Setup)– Press the range selector key to open the main menu Set-ups.
– Select the area for which you wish to change the set-ups or carry out set-ups by pressing on your selection.
– Press on the function key , to switch back to the last selected menu.Overview of the set-up menus – When in the radio mode, carry out set-ups for the function of the arrow
keys, for the displayed memory keys, th e memory list and the traffic reports.
– Determine the set-ups for the play and display of MP3 data and activate
or deactivate the external audio sources.
– Change the system set-ups such as voice response and time and cancel
or delete stored set-ups in individual areas.
– Select preferred TMC station and determine the area for TMC
announcements.
– Adjust the brightness of the displa y, day/night design of the map display
and select/deselect the confirmation tone for the keystroke.
– Update the phone book in the unit, delete all call lists and modify the
assignment of the shortcut keys.
SETUP
RadioMediaSystemTraffic informationScreenPhone
s3d0.3.book Page 14 Monday, August 11, 2008 12:49 PM