warning light SKODA OCTAVIA 2008 2.G / (1Z) Workshop Manual
[x] Cancel search | Manufacturer: SKODA, Model Year: 2008, Model line: OCTAVIA, Model: SKODA OCTAVIA 2008 2.G / (1Z)Pages: 304, PDF Size: 17.69 MB
Page 85 of 304
Seats and Stowage
84
Seat heaters*
You can heat the surfaces of the seats and of the backrests of the front
seats and the two outer rear seats.
Front seats
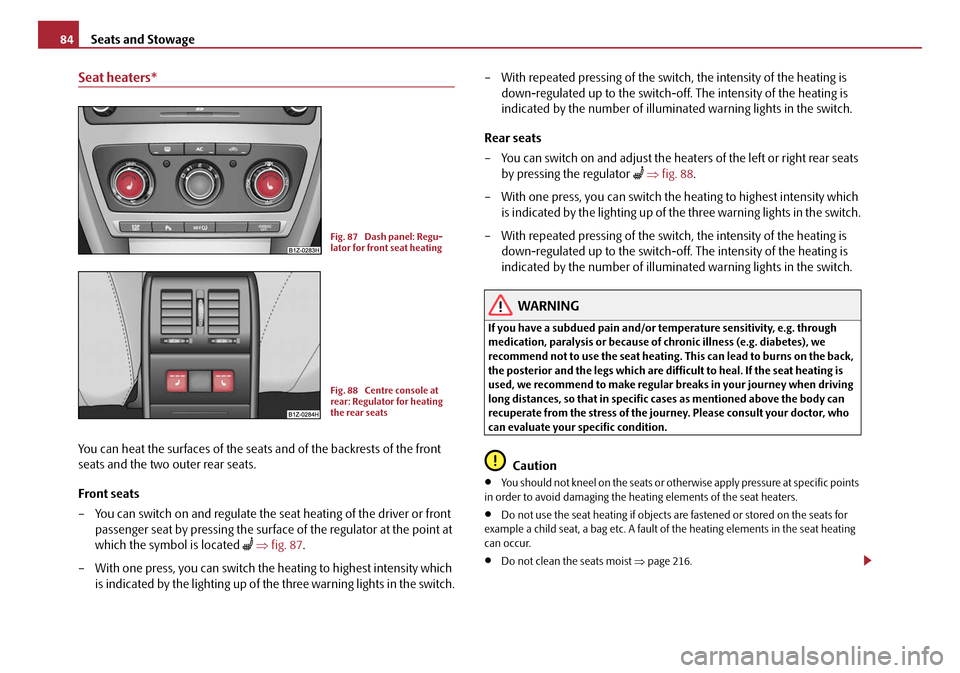
– You can switch on and regulate the seat heating of the driver or front
passenger seat by pressing the surface of the regulator at the point at
which the symbol is located
⇒ fig. 87 .
– With one press, you can switch the heating to highest intensity which is indicated by the lighting up of th e three warning lights in the switch. – With repeated pressing of the switch, the intensity of the heating is
down-regulated up to the switch-off . The intensity of the heating is
indicated by the number of illuminated warning lights in the switch.
Rear seats
– You can switch on and adjust the heat ers of the left or right rear seats
by pressing the regulator
⇒ fig. 88 .
– With one press, you can switch the heating to highest intensity which is indicated by the lighting up of the three warning lights in the switch.
– With repeated pressing of the switch, the intensity of the heating is down-regulated up to the switch-off . The intensity of the heating is
indicated by the number of illuminated warning lights in the switch.
WARNING
If you have a subdued pain and/or temperature sensitivity, e.g. through
medication, paralysis or because of ch ronic illness (e.g. diabetes), we
recommend not to use the seat heating. This can lead to burns on the back,
the posterior and the legs which are difficult to heal. If the seat heating is
used, we recommend to make regular br eaks in your journey when driving
long distances, so that in specific cases as mentioned above the body can
recuperate from the stress of the journey. Please consult your doctor, who
can evaluate your specific condition.
Caution
•You should not kneel on the seats or otherwise apply pressure at specific points
in order to avoid damaging the heating elements of the seat heaters.
•Do not use the seat heating if objects ar e fastened or stored on the seats for
example a child seat, a bag etc. A fault of the heating elements in the seat heating
can occur.
•Do not clean the seats moist ⇒page 216.
Fig. 87 Dash panel: Regu-
lator for front seat heating
Fig. 88 Centre console at
rear: Regulator for heating
the rear seats
20A5Facelift.book Page 84 Saturday, September 6, 2008 2:13 PM
Page 86 of 304
Seats and Stowage85
Using the systemSafetyDriving TipsGeneral MaintenanceBreakdown assistanceTechnical Data
Note
•The seat heating should only be switched on when the engine is running. This
has a significant effect of sa ving on the battery capacity.
•If the on-board voltage drop s, the seat heating is switched off automatically, in
order to provide sufficient electrical energy for the engine control.
Pedals
Concerning a secure depressing of the pe dal, you should use only footmats from
the Škoda genuine accessories.
Operation of the pedals must not be hindered!
WARNING
•Greater pedal distances may be needed when there is a fault in the brake
system.
•Do not place any footmats or other additional floor coverings in the area
of the pedals in order to ensure that all the pedals can be fully depressed and
are able to return unobstructed to their initial position - risk of accident!
•There must be no objects on the floor which could roll under the pedals.
You would then no longer be able to apply the brakes, operate the clutch or
accelerator - risk of accident!
luggage compartment
Loading the luggage compartment
Please observe the following in the inte rest of having good handling char-
acteristics of your vehicle:
– Distribute the items of luggage as evenly as possible.
– Place heavy objects as far forward as possible. – Attach the items of luggage to the lashing eyes or the safety net*
⇒page 86.
In the event of an accident, there is such a high kinetic energy which is produced by
small and light objects that they can caus e severe injuries. The magnitude of the
kinetic energy depends on the speed at wh ich the vehicle is travelling and on the
weight of the object. The speed at which the vehicle is travelling is in this case the
more significant factor.
Example: In the event of a frontal collision at a speed of 50 km/h, an unsecured
object with a weight of 4.5 kg produces an energy, which corresponds to 20 times
its own weight. This means that it results in a weight of approx. 90 kg. You can
imagine the injuries that can occur, if this “bullet” is flying through the interior
compartment and hits an occupant.
WARNING
•Store the objects in the luggage compartment and attach them to the
lashing eyes.
•Loose objects in the passenger co mpartment can be thrown forward
during a sudden manoeuvre or in case of an accident and can injure the
occupants or other oncoming traffic. This risk is still increased, if the objects
which are flying around are hit by a deployed airbag. In this case, the objects
which are thrown back can injure the occupants - hazard.
•Please note that the handling properties of your vehicle may be affected
when transporting heavy objects as a result of the displacement of the
centre of gravity. The speed and style of driving must be adjusted accord-
ingly.
•The items carried in the luggage compartment should be stored in such
a way that no objects are able to slip forward if there are any sudden driving
or braking manoeuvres under taken - risk of injury!
•Never drive with the boot lid fully opened or slightly ajar otherwise
exhaust gases may get into the interior of the vehicle - risk of poisoning!
•On no account exceed the permissible axle loads and the permissible
gross weight of the vehicle - risk of accident!
•Never transport occupants in the luggage compartment!
20A5Facelift.book Page 85 Saturday, September 6, 2008 2:13 PM
Page 89 of 304

Seats and Stowage
88
Luggage net* (Octavia)
The luggage net is designed for the tranportation of lighter objects.
WARNING
•In the luggage net you must only store objects (up to a total weight of 1.5
kg). Heavy objects are not secured sufficiently - risk of injury!
•No objects with sharp edges should be stored in the luggage net, because
they can damage the luggage net.
Luggage compartment cover* (Octavia)
You can use the luggage compartment cover behind the head
restraints for storing light and soft items.
The luggage compartment cover can be removed as required if one must
transport bulky goods.
– Unhook the support straps on the boot lid ⇒fig. 96 .
– Place the cover on the side supports.
– Pull the cover out of the holder horizontally to the rear.
– Install again by pushing the luggage compartment cover forwards into the holder and hanging the support straps on the boot lid.
You can stow the removed luggage compartm ent cover behind the rear seat back-
rest.
WARNING
No objects should be placed on the luggage compartment cover, the vehicle
occupants could be endangered if th ere is sudden braking or the vehicle
collides with something.
Fig. 95 Luggage compart-
ment: Luggage net
Fig. 96 Removing the
luggage compartment cover
A1
A2
A2A1
20A5Facelift.book Page 88 Saturday, September 6, 2008 2:13 PM
Page 92 of 304

Seats and Stowage91
Using the systemSafetyDriving TipsGeneral MaintenanceBreakdown assistanceTechnical Data
Net partition (Estate)*
Use the net partition behind the rear seats
Unrolling
– Fold down the stowage compartment cover behind the rear seats
⇒fig. 102.
– Pull the net partition at the bracket out of the housing in direc- tion of the holders ⇒fig. 103 .
– Insert the cross rod into one of the mounts and push the cross rod forward. – In the same way, fix the cross rod to the other side of the vehicle,
mount .
– Fold the stowage compartment cover downwards.
Rolling up
– Fold down the stowage compartment cover behind the rear seats ⇒fig. 102 .
– Pull the cross rod back slightly, first on the one side then on the other side and take the cross rod out of the mount ⇒fig. 103 .
– Hold the cross rod in such a way that the net partition can roll up
slowily and without damage into housing .
– Fold the stowage compartment cover downwards.
If you wish to use the entire luggage compartment, you can remove the luggage
compartment cover ⇒page 89, fig. 97 .
WARNING
•First check for yourself that the cros s road is inserted into the mounts
in the front position!
•Pay attention that the rear seat backrest is correctly interlocked. It is only
then that the three-point seat belt for the middle seat can reliably fulfil its
function.
Fig. 102 Folding down the
stowage compartment cover
Fig. 103 Unrolling net parti-
tion
AAAB
AC
AC
AC
AC
AB
AC
20A5Facelift.book Page 91 Saturday, September 6, 2008 2:13 PM
Page 93 of 304

Seats and Stowage
92
Use behind the front seats
Unrolling
– Fold the rear seats forwards ⇒page 81
– Pull the net partiton net at the plate out of the housing ⇒fig. 104 .
– Insert the cross rod into the mount first on the one side and push the cross rod forward.
– In the same way, fix the cross rod to the other side of the vehicle, mount .
Rolling up
– Pull the cross rod back slightly, first on the one side then on the other side and take the cross rod out of the mount ⇒fig. 104.
– Hold the cross rod in such a way that the net partition can roll up
slowily and without damage into housing .
– Fold the rear seats back into its original position.
WARNING
•The belt locks and the belts must be in their original position after folding
back the rear seats and seat backrests - they must be ready to use.
•The seat backrests must be securely interlocked in position so that no
objects in the luggage compartment can slide into the passenger compart-
ment if there is sudden braking - risk of injury!
•Pay attention that the rear seat backrest is correctly interlocked. It is only
then that the three-point seat belt for the middle seat can reliably fulfil its
function.
•First check for yourself that the cross road is inserted into the mounts
in the front position!
Removing and installing net partition housing
Removing
– Fold the rear seats forwards ⇒page 81
– Open the right rear door.
– Push the net partition housing ⇒fig. 105 in the direction of arrow
and take it out of the mounts of the rear seat backrests in the direc-
tion of the arrow .
Fig. 104 Unrolling net parti-
tion
AAAB
AC
AC
AC
AB
AC
Fig. 105 Rear seats: Net
partition housing
AA
A1
A2
20A5Facelift.book Page 92 Saturday, September 6, 2008 2:13 PM
Page 98 of 304
Seats and Stowage97
Using the systemSafetyDriving TipsGeneral MaintenanceBreakdown assistanceTechnical Data
Rear ashtray - high centre console*
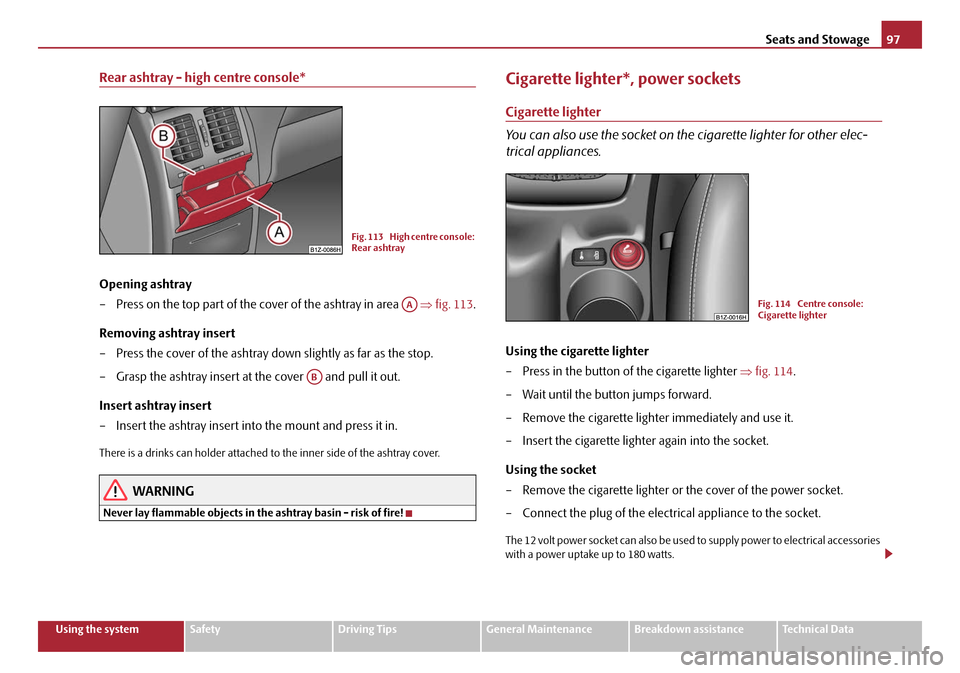
Opening ashtray
– Press on the top part of the cover of the ashtray in area ⇒fig. 113 .
Removing ashtray insert
– Press the cover of the ashtray down slightly as far as the stop.
– Grasp the ashtray insert at the cover and pull it out.
Insert ashtray insert
– Insert the ashtray insert into the mount and press it in.
There is a drinks can holder attached to the inner side of the ashtray cover.
WARNING
Never lay flammable objects in the ashtray basin - risk of fire!
Cigarette lighter*, power sockets
Cigarette lighter
You can also use the socket on the cigarette lighter for other elec-
trical appliances.
Using the cigarette lighter
– Press in the button of the cigarette lighter ⇒fig. 114 .
– Wait until the button jumps forward.
– Remove the cigarette lighter immediately and use it.
– Insert the cigarette lighter again into the socket.
Using the socket
– Remove the cigarette lighter or the cover of the power socket.
– Connect the plug of the electrical appliance to the socket.
The 12 volt power socket can also be used to supply power to electrical accessories
with a power uptake up to 180 watts.
Fig. 113 High centre console:
Rear ashtray
AA
AB
Fig. 114 Centre console:
Cigarette lighter
20A5Facelift.book Page 97 Saturday, September 6, 2008 2:13 PM
Page 99 of 304
Seats and Stowage
98
WARNING
•Take care when using the cigarette lighter! Not paying proper attention
or incorrect use the cigarette lighter in an uncontrolled manner may result in
burns.
•The cigarette lighter and the power so cket also operates when the igni-
tion is switched off or the ignition key withdrawn. You should therefore
never leave children unattended in the vehicle.
Caution
Always use matching plugs to av oid damaging the power socket.
Note
•Connecting electrical components when the engine is not running will
drain the battery of the vehicle - risk of battery draining!
•Further information ⇒page 243, “Accessories, changes and replacement of
parts”.
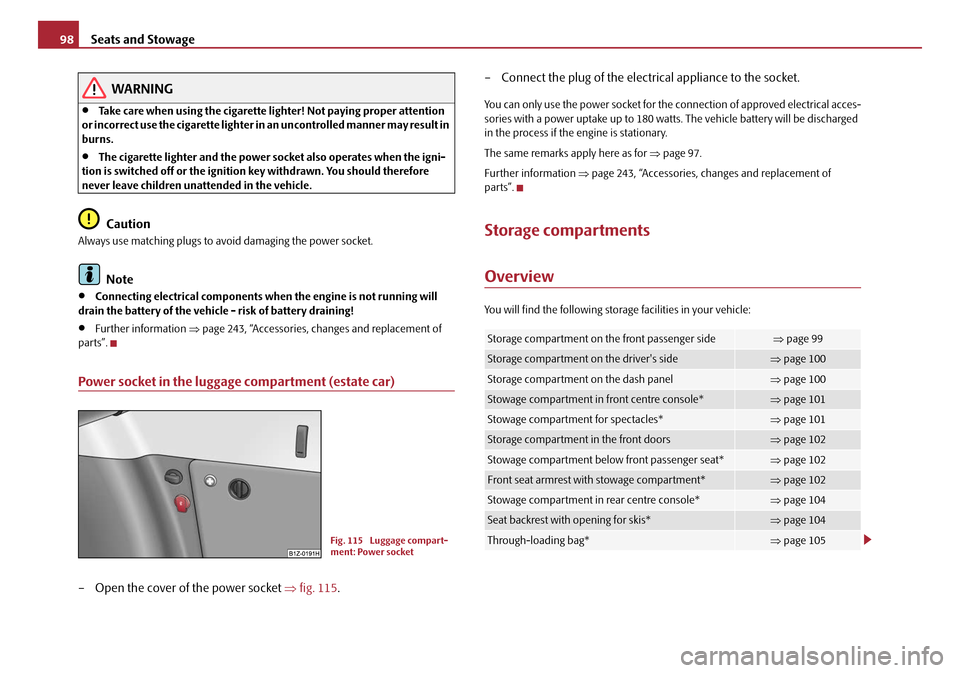
Power socket in the luggage compartment (estate car)
– Open the cover of the power socket ⇒fig. 115 . – Connect the plug of the electr
ical appliance to the socket.
You can only use the power socket for the connection of approved electrical acces-
sories with a power uptake up to 180 watts. The vehicle battery will be discharged
in the process if the engine is stationary.
The same remarks apply here as for ⇒page 97.
Further information ⇒page 243, “Accessories, changes and replacement of
parts”.
Storage compartments
Overview
You will find the following stor age facilities in your vehicle:
Fig. 115 Luggage compart-
ment: Power socket
Storage compartment on the front passenger side⇒page 99
Storage compartment on the driver's side⇒page 100
Storage compartment on the dash panel⇒page 100
Stowage compartment in front centre console*⇒page 101
Stowage compartment for spectacles*⇒page 101
Storage compartment in the front doors⇒page 102
Stowage compartment below front passenger seat*⇒page 102
Front seat armrest with stowage compartment*⇒page 102
Stowage compartment in rear centre console*⇒page 104
Seat backrest with opening for skis*⇒page 104
Through-loading bag*⇒page 105
20A5Facelift.book Page 98 Saturday, September 6, 2008 2:13 PM
Page 101 of 304
Seats and Stowage
100
Opening the air inlet when the air conditioning system is on causes fresh or interior
air to flow into the storage compartment.
Storage compartment on the driver's side
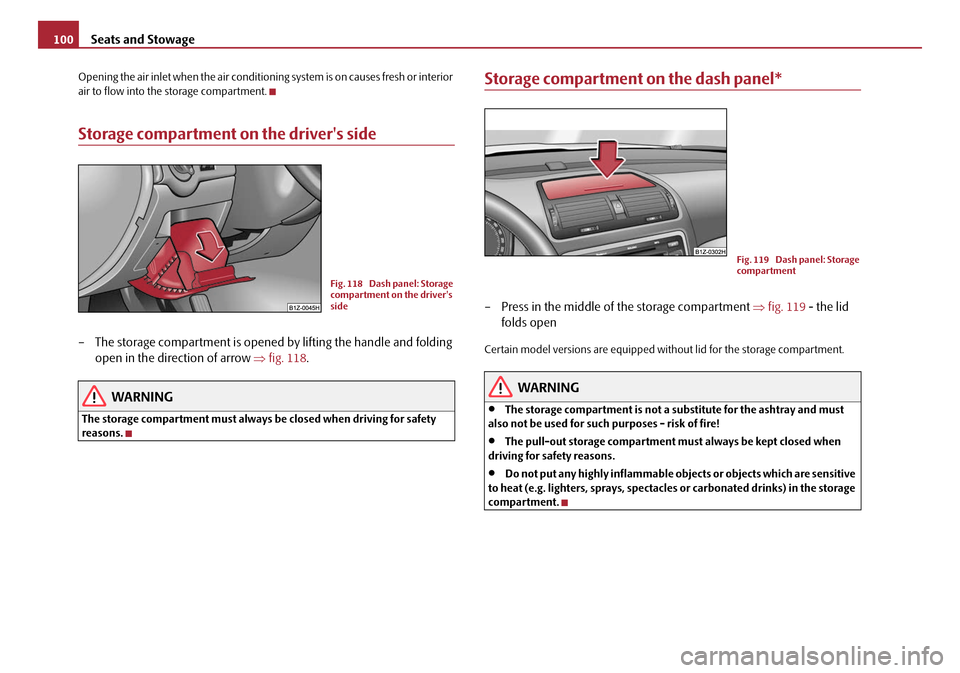
– The storage compartment is opened by lifting the handle and folding
open in the direction of arrow ⇒fig. 118 .
WARNING
The storage compartment must always be closed when driving for safety
reasons.
Storage compartment on the dash panel*
– Press in the middle of the storage compartment ⇒fig. 119 - the lid
folds open
Certain model versions are equipped without lid for the storage compartment.
WARNING
•The storage compartment is not a substitute for the ashtray and must
also not be used for such purposes - risk of fire!
•The pull-out storage compartment mu st always be kept closed when
driving for safety reasons.
•Do not put any highly inflammable objects or objects which are sensitive
to heat (e.g. lighters, sprays, spectacles or carbonated drinks) in the storage
compartment.
Fig. 118 Dash panel: Storage
compartment on the driver's
side
Fig. 119 Dash panel: Storage
compartment
20A5Facelift.book Page 100 Saturday, September 6, 2008 2:13 PM
Page 107 of 304
Seats and Stowage
106
– Carefully fold the empty (dry) through-loading bag together, place it in the luggage compartment and secure it to prevent it slipping.
WARNING
•After placing items into the through- loading bag, you must secure the
bag with the securing belt .
•The securing belt must hold the items tight.
•Ensure that the securing belt on ski sport articles lies in the middle
between the bindings (see imprint on the through-loading bag).
Note
•Place the skis with the tips facing the front, snowboards and ski sticks with the
tips facing the rear into the through-loading bag.
•If there are several pairs of skis in the through-loading bag, ensure that the bind-
ings are positioned at the same height.
•The through-loading bag must never be folded together or stowed when
moist.
Side compartment*
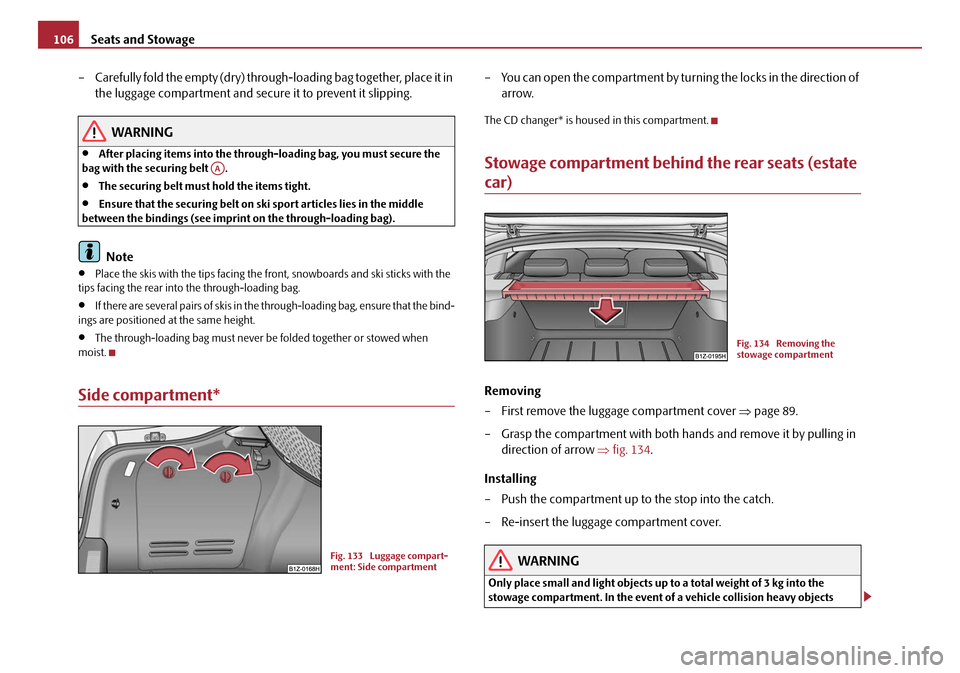
– You can open the compartment by turning the locks in the direction of arrow.
The CD changer* is housed in this compartment.
Stowage compartment behind the rear seats (estate
car)
Removing
– First remove the luggage compartment cover ⇒page 89.
– Grasp the compartment with both hands and remove it by pulling in direction of arrow ⇒fig. 134 .
Installing
– Push the compartment up to the stop into the catch.
– Re-insert the luggage compartment cover.
WARNING
Only place small and light objects up to a total weight of 3 kg into the
stowage compartment. In the event of a vehicle collision heavy objects
AA
Fig. 133 Luggage compart-
ment: Side compartment
Fig. 134 Removing the
stowage compartment
20A5Facelift.book Page 106 Saturday, September 6, 2008 2:13 PM
Page 108 of 304
Seats and Stowage107
Using the systemSafetyDriving TipsGeneral MaintenanceBreakdown assistanceTechnical Data
could be thrown out of the compartment - risk of injuries! For this reason,
the front part of the luggage compartmen
t cover must always cover over the
stowage compartment.
Clothes hooks*
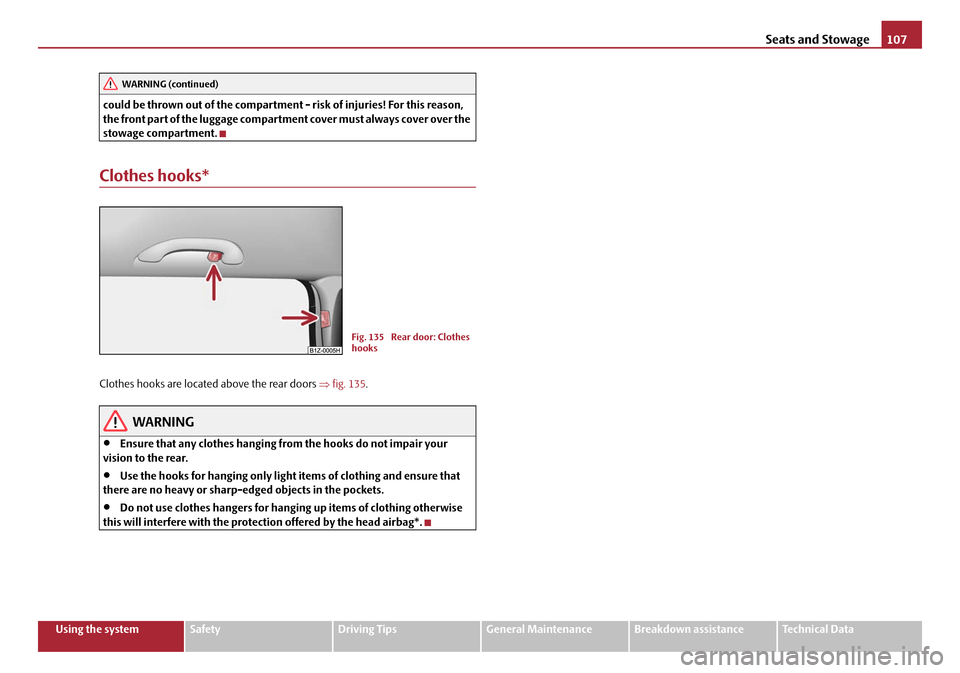
Clothes hooks are located above the rear doors ⇒fig. 135 .
WARNING
•Ensure that any clothes hanging from the hooks do not impair your
vision to the rear.
•Use the hooks for hanging only light items of clothing and ensure that
there are no heavy or sharp- edged objects in the pockets.
•Do not use clothes hangers for hanging up items of clothing otherwise
this will interfere with the protection offered by the head airbag*.
WARNING (continued)
Fig. 135 Rear door: Clothes
hooks
20A5Facelift.book Page 107 Saturday, September 6, 2008 2:13 PM