power steering SKODA OCTAVIA 2008 2.G / (1Z) Owner's Manual
[x] Cancel search | Manufacturer: SKODA, Model Year: 2008, Model line: OCTAVIA, Model: SKODA OCTAVIA 2008 2.G / (1Z)Pages: 304, PDF Size: 17.69 MB
Page 4 of 304
Contents3
Using the systemSafetyDriving TipsGeneral MaintenanceBreakdown assistanceTechnical Data
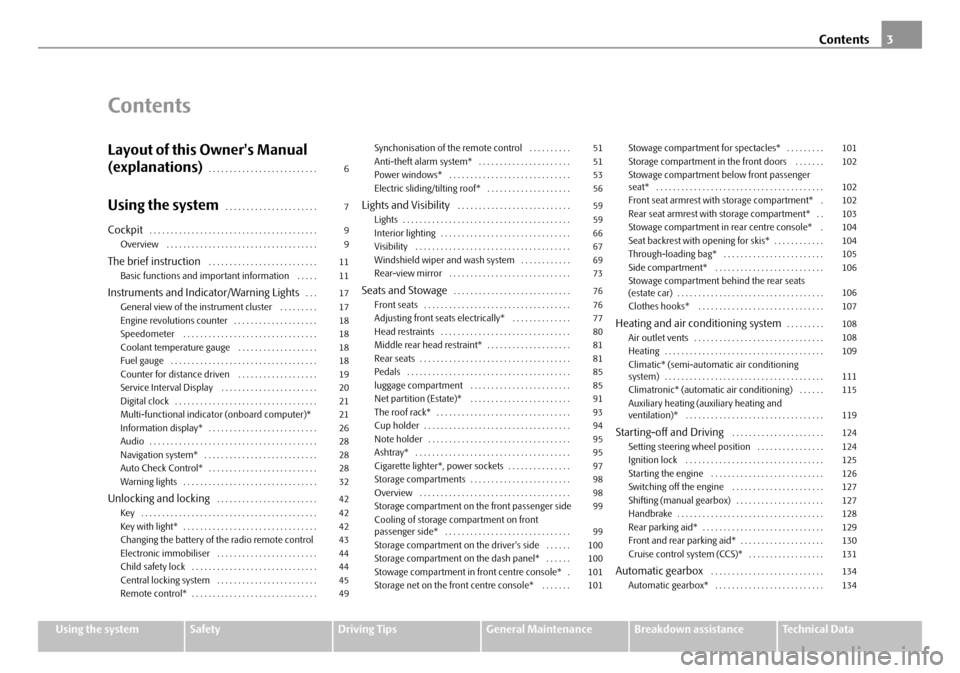
Contents
Layout of this Owner's Manual
(explanations)
. . . . . . . . . . . . . . . . . . . . . . . . . .
Using the system. . . . . . . . . . . . . . . . . . . . . .
Cockpit. . . . . . . . . . . . . . . . . . . . . . . . . . . . . . . . . . . . . . . .
Overview . . . . . . . . . . . . . . . . . . . . . . . . . . . . . . . . . . . .
The brief instruction . . . . . . . . . . . . . . . . . . . . . . . . . .
Basic functions and important information . . . . .
Instruments and Indicator/Warning Lights. . .
General view of the instrument cluster . . . . . . . . .
Engine revolutions counter . . . . . . . . . . . . . . . . . . . .
Speedometer . . . . . . . . . . . . . . . . . . . . . . . . . . . . . . . .
Coolant temperature gauge . . . . . . . . . . . . . . . . . . .
Fuel gauge . . . . . . . . . . . . . . . . . . . . . . . . . . . . . . . . . . .
Counter for distance driven . . . . . . . . . . . . . . . . . . .
Service Interval Display . . . . . . . . . . . . . . . . . . . . . . .
Digital clock . . . . . . . . . . . . . . . . . . . . . . . . . . . . . . . . . .
Multi-functional indicato r (onboard computer)*
Information display* . . . . . . . . . . . . . . . . . . . . . . . . . .
Audio . . . . . . . . . . . . . . . . . . . . . . . . . . . . . . . . . . . . . . . .
Navigation system* . . . . . . . . . . . . . . . . . . . . . . . . . . .
Auto Check Control* . . . . . . . . . . . . . . . . . . . . . . . . . .
Warning lights . . . . . . . . . . . . . . . . . . . . . . . . . . . . . . . .
Unlocking and locking . . . . . . . . . . . . . . . . . . . . . . . .
Key . . . . . . . . . . . . . . . . . . . . . . . . . . . . . . . . . . . . . . . . . .
Key with light* . . . . . . . . . . . . . . . . . . . . . . . . . . . . . . . .
Changing the battery of the radio remote control
Electronic immobiliser . . . . . . . . . . . . . . . . . . . . . . . .
Child safety lock . . . . . . . . . . . . . . . . . . . . . . . . . . . . . .
Central locking system . . . . . . . . . . . . . . . . . . . . . . . .
Remote control* . . . . . . . . . . . . . . . . . . . . . . . . . . . . . . Synchonisation of the remote control . . . . . . . . . .
Anti-theft alarm system* . . . . . . . . . . . . . . . . . . . . . .
Power windows* . . . . . . . . . . . . . . . . . . . . . . . . . . . . .
Electric sliding/tilting roof* . . . . . . . . . . . . . . . . . . . .
Lights and Visibility . . . . . . . . . . . . . . . . . . . . . . . . . . .
Lights . . . . . . . . . . . . . . . . . . . . . . . . . . . . . . . . . . . . . . . .
Interior lighting . . . . . . . . . . . . . . . . . . . . . . . . . . . . . . .
Visibility . . . . . . . . . . . . . . . . . . . . . . . . . . . . . . . . . . . . .
Windshield wiper and wash system . . . . . . . . . . . .
Rear-view mirror . . . . . . . . . . . . . . . . . . . . . . . . . . . . .
Seats and Stowage. . . . . . . . . . . . . . . . . . . . . . . . . . . .
Front seats . . . . . . . . . . . . . . . . . . . . . . . . . . . . . . . . . . .
Adjusting front seats electrically* . . . . . . . . . . . . . .
Head restraints . . . . . . . . . . . . . . . . . . . . . . . . . . . . . . .
Middle rear head restraint* . . . . . . . . . . . . . . . . . . . .
Rear seats . . . . . . . . . . . . . . . . . . . . . . . . . . . . . . . . . . . .
Pedals . . . . . . . . . . . . . . . . . . . . . . . . . . . . . . . . . . . . . . .
luggage compartment . . . . . . . . . . . . . . . . . . . . . . . .
Net partition (Estate)* . . . . . . . . . . . . . . . . . . . . . . . .
The roof rack* . . . . . . . . . . . . . . . . . . . . . . . . . . . . . . . .
Cup holder . . . . . . . . . . . . . . . . . . . . . . . . . . . . . . . . . . .
Note holder . . . . . . . . . . . . . . . . . . . . . . . . . . . . . . . . . .
Ashtray* . . . . . . . . . . . . . . . . . . . . . . . . . . . . . . . . . . . . .
Cigarette lighter*, power sockets . . . . . . . . . . . . . . .
Storage compartments . . . . . . . . . . . . . . . . . . . . . . . .
Overview . . . . . . . . . . . . . . . . . . . . . . . . . . . . . . . . . . . .
Storage compartment on the front passenger side
Cooling of storage compartment on front
passenger side* . . . . . . . . . . . . . . . . . . . . . . . . . . . . . .
Storage compartment on the driver's side . . . . . .
Storage compartment on the dash panel* . . . . . .
Stowage compartment in front centre console* .
Storage net on the front centre console* . . . . . . . Stowage compartment for spectacles* . . . . . . . . .
Storage compartment in the front doors . . . . . . .
Stowage compartment below front passenger
seat* . . . . . . . . . . . . . . . . . . . . . . . . . . . . . . . . . . . . . . . .
Front seat armrest with storage compartment* .
Rear seat armrest with storage compartment* . .
Stowage compartment in rear centre console* .
Seat backrest with opening for skis* . . . . . . . . . . . .
Through-loading bag* . . . . . . . . . . . . . . . . . . . . . . . .
Side compartment* . . . . . . . . . . . . . . . . . . . . . . . . . .
Stowage compartment behind the rear seats
(estate car) . . . . . . . . . . . . . . . . . . . . . . . . . . . . . . . . . . .
Clothes hooks* . . . . . . . . . . . . . . . . . . . . . . . . . . . . . .
Heating and air conditioning system. . . . . . . . .
Air outlet vents . . . . . . . . . . . . . . . . . . . . . . . . . . . . . . .
Heating . . . . . . . . . . . . . . . . . . . . . . . . . . . . . . . . . . . . . .
Climatic* (semi-automatic air conditioning
system) . . . . . . . . . . . . . . . . . . . . . . . . . . . . . . . . . . . . . .
Climatronic* (automatic air conditioning) . . . . . .
Auxiliary heating (auxiliary heating and
ventilation)* . . . . . . . . . . . . . . . . . . . . . . . . . . . . . . . . .
Starting-off and Driving . . . . . . . . . . . . . . . . . . . . . .
Setting steering wheel position . . . . . . . . . . . . . . . .
Ignition lock . . . . . . . . . . . . . . . . . . . . . . . . . . . . . . . . .
Starting the engine . . . . . . . . . . . . . . . . . . . . . . . . . . .
Switching off the engine . . . . . . . . . . . . . . . . . . . . . .
Shifting (manual gearbox) . . . . . . . . . . . . . . . . . . . . .
Handbrake . . . . . . . . . . . . . . . . . . . . . . . . . . . . . . . . . . .
Rear parking aid* . . . . . . . . . . . . . . . . . . . . . . . . . . . . .
Front and rear parking aid* . . . . . . . . . . . . . . . . . . . .
Cruise control system (CCS)* . . . . . . . . . . . . . . . . . .
Automatic gearbox . . . . . . . . . . . . . . . . . . . . . . . . . . .
Automatic gearbox* . . . . . . . . . . . . . . . . . . . . . . . . . .
6
7
9
9
11
11
17
17
18
18
18
18
19
20
21
21
26
28
28
28
32
42
42
42
43
44
44
45
49 51
51
53
56
59
59
66
67
69
73
76
76
77
80
81
81
85
85
91
93
94
95
95
97
98
98
99
99
100
100
101
101 101
102
102
102
103
104
104
105
106
106
107
108
108
109
111
115
119
124
124
125
126
127
127
128
129
130
131
134
134
20A5Facelift.book Page 3 Saturday, September 6, 2008 2:13 PM
Page 5 of 304
Contents
4
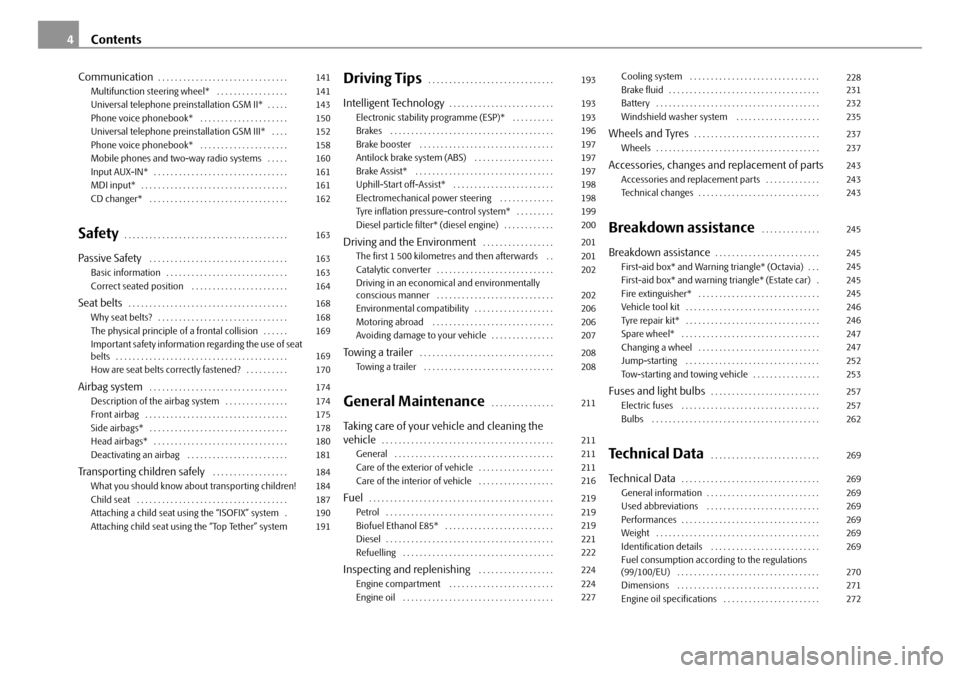
Communication. . . . . . . . . . . . . . . . . . . . . . . . . . . . . . .
Multifunction steering wheel* . . . . . . . . . . . . . . . . .
Universal telephone preinstallation GSM II* . . . . .
Phone voice phonebook* . . . . . . . . . . . . . . . . . . . . .
Universal telephone preinstallation GSM III* . . . .
Phone voice phonebook* . . . . . . . . . . . . . . . . . . . . .
Mobile phones and two-way radio systems . . . . .
Input AUX-IN* . . . . . . . . . . . . . . . . . . . . . . . . . . . . . . . .
MDI input* . . . . . . . . . . . . . . . . . . . . . . . . . . . . . . . . . . .
CD changer* . . . . . . . . . . . . . . . . . . . . . . . . . . . . . . . . .
Safety. . . . . . . . . . . . . . . . . . . . . . . . . . . . . . . . . . . . . . .
Passive Safety . . . . . . . . . . . . . . . . . . . . . . . . . . . . . . . . .
Basic information . . . . . . . . . . . . . . . . . . . . . . . . . . . . .
Correct seated position . . . . . . . . . . . . . . . . . . . . . . .
Seat belts. . . . . . . . . . . . . . . . . . . . . . . . . . . . . . . . . . . . . .
Why seat belts? . . . . . . . . . . . . . . . . . . . . . . . . . . . . . . .
The physical principle of a frontal collision . . . . . .
Important safety information regarding the use of seat
belts . . . . . . . . . . . . . . . . . . . . . . . . . . . . . . . . . . . . . . . . .
How are seat belts correctly fastened? . . . . . . . . . .
Airbag system . . . . . . . . . . . . . . . . . . . . . . . . . . . . . . . . .
Description of the airbag system . . . . . . . . . . . . . . .
Front airbag . . . . . . . . . . . . . . . . . . . . . . . . . . . . . . . . . .
Side airbags* . . . . . . . . . . . . . . . . . . . . . . . . . . . . . . . . .
Head airbags* . . . . . . . . . . . . . . . . . . . . . . . . . . . . . . . .
Deactivating an airbag . . . . . . . . . . . . . . . . . . . . . . . .
Transporting children safely . . . . . . . . . . . . . . . . . .
What you should know about transporting children!
Child seat . . . . . . . . . . . . . . . . . . . . . . . . . . . . . . . . . . . .
Attaching a child seat using the “ISOFIX” system .
Attaching child seat using the “Top Tether” system
Driving Tips. . . . . . . . . . . . . . . . . . . . . . . . . . . . . .
Intelligent Technology. . . . . . . . . . . . . . . . . . . . . . . . .
Electronic stability programme (ESP)* . . . . . . . . . .
Brakes . . . . . . . . . . . . . . . . . . . . . . . . . . . . . . . . . . . . . . .
Brake booster . . . . . . . . . . . . . . . . . . . . . . . . . . . . . . . .
Antilock brake system (ABS) . . . . . . . . . . . . . . . . . . .
Brake Assist* . . . . . . . . . . . . . . . . . . . . . . . . . . . . . . . . .
Uphill-Start off-Assist* . . . . . . . . . . . . . . . . . . . . . . . .
Electromechanical power steering . . . . . . . . . . . . .
Tyre inflation pressure-control system* . . . . . . . . .
Diesel particle filter* (diesel engine) . . . . . . . . . . . .
Driving and the Environment . . . . . . . . . . . . . . . . .
The first 1 500 kilometres and then afterwards . .
Catalytic converter . . . . . . . . . . . . . . . . . . . . . . . . . . . .
Driving in an economical and environmentally
conscious manner . . . . . . . . . . . . . . . . . . . . . . . . . . . .
Environmental compatibility . . . . . . . . . . . . . . . . . . .
Motoring abroad . . . . . . . . . . . . . . . . . . . . . . . . . . . . .
Avoiding damage to your vehicle . . . . . . . . . . . . . . .
Towing a trailer. . . . . . . . . . . . . . . . . . . . . . . . . . . . . . . .
Towing a trailer . . . . . . . . . . . . . . . . . . . . . . . . . . . . . . .
General Maintenance. . . . . . . . . . . . . . .
Taking care of your vehicle and cleaning the
vehicle. . . . . . . . . . . . . . . . . . . . . . . . . . . . . . . . . . . . . . . . .
General . . . . . . . . . . . . . . . . . . . . . . . . . . . . . . . . . . . . . .
Care of the exterior of vehicle . . . . . . . . . . . . . . . . . .
Care of the interior of vehicle . . . . . . . . . . . . . . . . . .
Fuel. . . . . . . . . . . . . . . . . . . . . . . . . . . . . . . . . . . . . . . . . . . .
Petrol . . . . . . . . . . . . . . . . . . . . . . . . . . . . . . . . . . . . . . . .
Biofuel Ethanol E85* . . . . . . . . . . . . . . . . . . . . . . . . . .
Diesel . . . . . . . . . . . . . . . . . . . . . . . . . . . . . . . . . . . . . . . .
Refuelling . . . . . . . . . . . . . . . . . . . . . . . . . . . . . . . . . . . .
Inspecting and replenishing . . . . . . . . . . . . . . . . . .
Engine compartment . . . . . . . . . . . . . . . . . . . . . . . . .
Engine oil . . . . . . . . . . . . . . . . . . . . . . . . . . . . . . . . . . . . Cooling system . . . . . . . . . . . . . . . . . . . . . . . . . . . . . . .
Brake fluid . . . . . . . . . . . . . . . . . . . . . . . . . . . . . . . . . . . .
Battery . . . . . . . . . . . . . . . . . . . . . . . . . . . . . . . . . . . . . . .
Windshield washer system . . . . . . . . . . . . . . . . . . . .
Wheels and Tyres. . . . . . . . . . . . . . . . . . . . . . . . . . . . . .
Wheels . . . . . . . . . . . . . . . . . . . . . . . . . . . . . . . . . . . . . . .
Accessories, changes and replacement of partsAccessories and replacement parts . . . . . . . . . . . . .
Technical changes . . . . . . . . . . . . . . . . . . . . . . . . . . . . .
Breakdown assistance . . . . . . . . . . . . . .
Breakdown assistance. . . . . . . . . . . . . . . . . . . . . . . . .
First-aid box* and Warning triangle* (Octavia) . . .
First-aid box* and warning triangle* (Estate car) .
Fire extinguisher* . . . . . . . . . . . . . . . . . . . . . . . . . . . . .
Vehicle tool kit . . . . . . . . . . . . . . . . . . . . . . . . . . . . . . . .
Tyre repair kit* . . . . . . . . . . . . . . . . . . . . . . . . . . . . . . . .
Spare wheel* . . . . . . . . . . . . . . . . . . . . . . . . . . . . . . . . .
Changing a wheel . . . . . . . . . . . . . . . . . . . . . . . . . . . . .
Jump-starting . . . . . . . . . . . . . . . . . . . . . . . . . . . . . . . .
Tow-starting and towing vehicle . . . . . . . . . . . . . . . .
Fuses and light bulbs. . . . . . . . . . . . . . . . . . . . . . . . . .
Electric fuses . . . . . . . . . . . . . . . . . . . . . . . . . . . . . . . . .
Bulbs . . . . . . . . . . . . . . . . . . . . . . . . . . . . . . . . . . . . . . . .
Technical Data . . . . . . . . . . . . . . . . . . . . . . . . . .
Technical Data. . . . . . . . . . . . . . . . . . . . . . . . . . . . . . . . .
General information . . . . . . . . . . . . . . . . . . . . . . . . . . .
Used abbreviations . . . . . . . . . . . . . . . . . . . . . . . . . . .
Performances . . . . . . . . . . . . . . . . . . . . . . . . . . . . . . . . .
Weight . . . . . . . . . . . . . . . . . . . . . . . . . . . . . . . . . . . . . . .
Identification details . . . . . . . . . . . . . . . . . . . . . . . . . .
Fuel consumption according to the regulations
(99/100/EU) . . . . . . . . . . . . . . . . . . . . . . . . . . . . . . . . . .
Dimensions . . . . . . . . . . . . . . . . . . . . . . . . . . . . . . . . . .
Engine oil specifications . . . . . . . . . . . . . . . . . . . . . . .
141
141
143
150
152
158
160
161
161
162
163
163
163
164
168
168
169
169
170
174
174
175
178
180
181
184
184
187
190
191
193
193
193
196
197
197
197
198
198
199
200
201
201
202
202
206
206
207
208
208
211
211
211
211
216
219
219
219
221
222
224
224
227228
231
232
235
237
237
243
243
243
245
245
245
245
245
246
246
247
247
252
253
257
257
262
269
269
269
269
269
269
269
270
271
272
20A5Facelift.book Page 4 Saturday, September 6, 2008 2:13 PM
Page 10 of 304
Cockpit9
Using the systemSafetyDriving TipsGeneral MaintenanceBreakdown assistanceTechnical Data
Cockpit
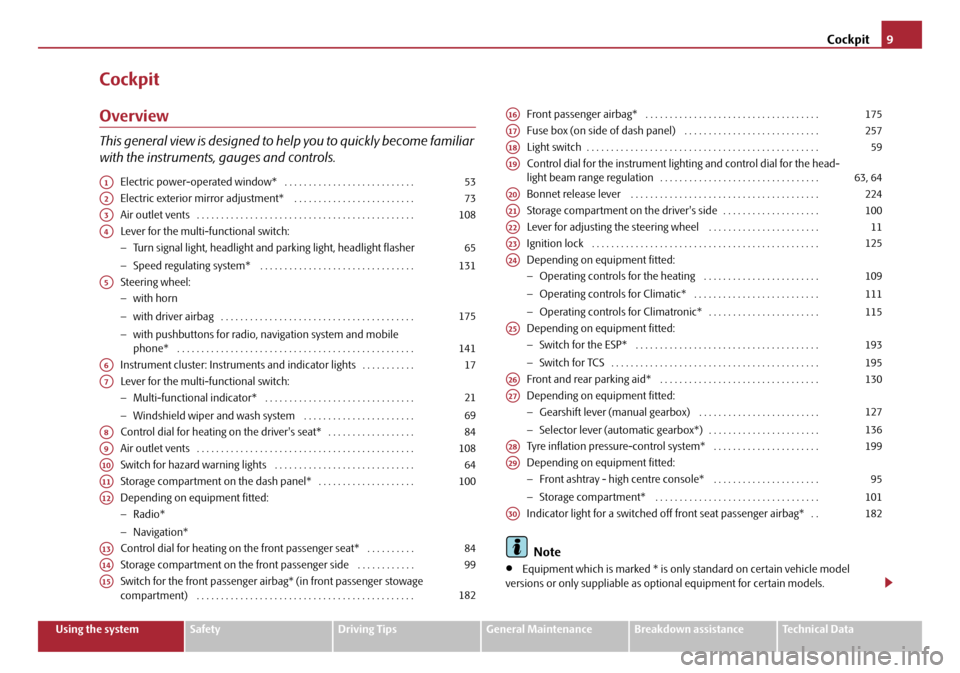
Overview
This general view is designed to help you to quickly become familiar
with the instruments, gauges and controls.
Electric power-operated window* . . . . . . . . . . . . . . . . . . . . . . . . . . .
Electric exterior mirror adjustment* . . . . . . . . . . . . . . . . . . . . . . . . .
Air outlet vents . . . . . . . . . . . . . . . . . . . . . . . . . . . . . . . . . . . . . . . . . . . . .
Lever for the multi-functional switch:
−Turn signal light, headlight and parking light, headlight flasher
− Speed regulating system* . . . . . . . . . . . . . . . . . . . . . . . . . . . . . . . .
Steering wheel:
− with horn
− with driver airbag . . . . . . . . . . . . . . . . . . . . . . . . . . . . . . . . . . . . . . . .
− with pushbuttons for radio, na vigation system and mobile
phone* . . . . . . . . . . . . . . . . . . . . . . . . . . . . . . . . . . . . . . . . . . . . . . . . .
Instrument cluster: Instrum ents and indicator lights . . . . . . . . . . .
Lever for the multi-functional switch:
− Multi-functional indicator* . . . . . . . . . . . . . . . . . . . . . . . . . . . . . . .
− Windshield wiper and wash system . . . . . . . . . . . . . . . . . . . . . . .
Control dial for heating on the driver's seat* . . . . . . . . . . . . . . . . . .
Air outlet vents . . . . . . . . . . . . . . . . . . . . . . . . . . . . . . . . . . . . . . . . . . . . .
Switch for hazard warning lights . . . . . . . . . . . . . . . . . . . . . . . . . . . . .
Storage compartment on the dash panel* . . . . . . . . . . . . . . . . . . . .
Depending on equipment fitted:
− Radio*
− Navigation*
Control dial for heating on the front passenger seat* . . . . . . . . . .
Storage compartment on the front passenger side . . . . . . . . . . . .
Switch for the front passenger airbag* (in front passenger stowage
compartment) . . . . . . . . . . . . . . . . . . . . . . . . . . . . . . . . . . . . . . . . . . . . . Front passenger airbag* . . . . . . . . . . . . . . . . . . . . . . . . . . . . . . . . . . . .
Fuse box (on side of dash panel) . . . . . . . . . . . . . . . . . . . . . . . . . . . .
Light switch . . . . . . . . . . . . . . . . . . . . . . . . . . . . . . . . . . . . . . . . . . . . . . . .
Control dial for the instrument lighting and control dial for the head-
light beam range regulation . . . . . . . . . . . . . . . . . . . . . . . . . . . . . . . . .
Bonnet release lever . . . . . . . . . . . . . . . . . . . . . . . . . . . . . . . . . . . . . . .
Storage compartment on the driver's side . . . . . . . . . . . . . . . . . . . .
Lever for adjusting the steering wheel . . . . . . . . . . . . . . . . . . . . . . .
Ignition lock . . . . . . . . . . . . . . . . . . . . . . . . . . . . . . . . . . . . . . . . . . . . . . .
Depending on equipment fitted:
−
Operating controls for the heating . . . . . . . . . . . . . . . . . . . . . . . .
− Operating controls for Climatic* . . . . . . . . . . . . . . . . . . . . . . . . . .
− Operating controls for Climatronic* . . . . . . . . . . . . . . . . . . . . . . .
Depending on equipment fitted:
− Switch for the ESP* . . . . . . . . . . . . . . . . . . . . . . . . . . . . . . . . . . . . . .
− Switch for TCS . . . . . . . . . . . . . . . . . . . . . . . . . . . . . . . . . . . . . . . . . . .
Front and rear parking aid* . . . . . . . . . . . . . . . . . . . . . . . . . . . . . . . . .
Depending on equipment fitted:
− Gearshift lever (manual gearbox) . . . . . . . . . . . . . . . . . . . . . . . . .
− Selector lever (automatic gearbox*) . . . . . . . . . . . . . . . . . . . . . . .
Tyre inflation pressure-control system* . . . . . . . . . . . . . . . . . . . . . .
Depending on equipment fitted:
− Front ashtray - high centre console* . . . . . . . . . . . . . . . . . . . . . .
− Storage compartment* . . . . . . . . . . . . . . . . . . . . . . . . . . . . . . . . . .
Indicator light for a switched off front seat passenger airbag* . .
Note
•Equipment which is marked * is only standard on certain vehicle model
versions or only suppliable as op tional equipment for certain models.
A153
A273
A3108
A4
65
131
A5
175
141
A617
A7
21
69
A884
A9108
A1064
A11100
A12
A1384
A1499
A15182
A16175
A17257
A1859
A1963, 64
A20224
A21100
A2211
A23125
A24
109
111
115
A25
193
195
A26130
A27
127
136
A28199
A29
95
101
A30182
20A5Facelift.book Page 9 Saturday, September 6, 2008 2:13 PM
Page 34 of 304
Instruments and Indicator/Warning Lights33
Using the systemSafetyDriving TipsGeneral MaintenanceBreakdown assistanceTechnical Data
WARNING
•If you do not pay attention to the warning lights coming on and the corre-
sponding descriptions and warning notes, this may result in severe body
injuries or major vehicle damage.
•The engine compartment of your car is a hazardous area. There is a risk
of injuries, scalding, accidents and fire when working in the engine
compartment, e.g. inspecting and replenis hing oil and other fluids. It is also
essential to observe all warnings ⇒page 225, “Working in the engine
compartment”.
Note
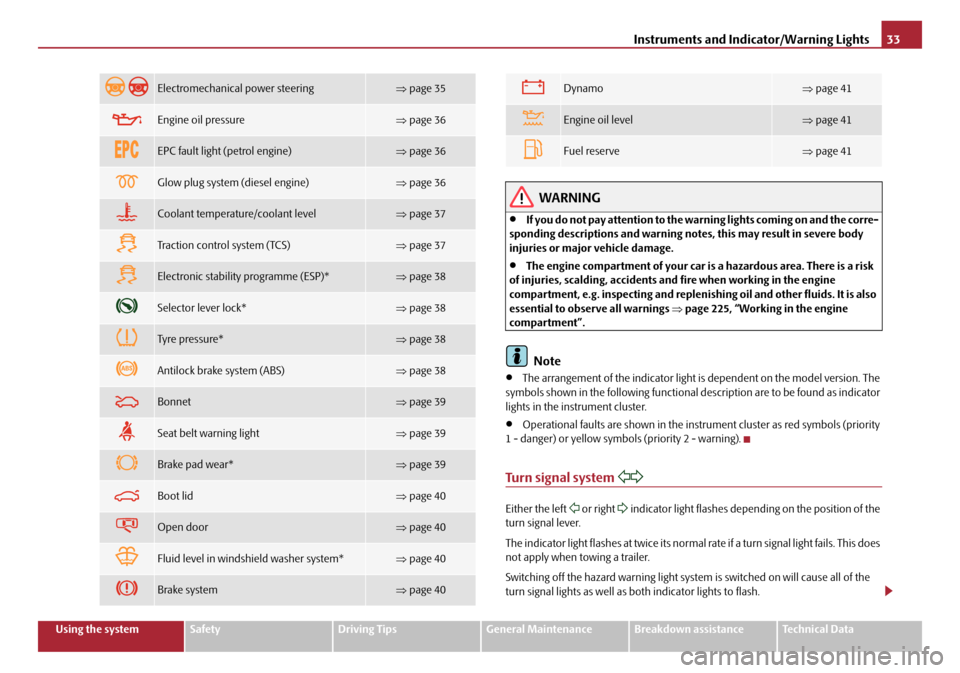
•The arrangement of the indicator light is dependent on the model version. The
symbols shown in the following functional description are to be found as indicator
lights in the instrument cluster.
•Operational faults are shown in the instrument cluster as red symbols (priority
1 - danger) or yellow symbols (priority 2 - warning).
Turn signal system
Either the left or right indicator light flashes depending on the position of the
turn signal lever.
The indicator light flashes at twice its normal rate if a turn signal light fails. This does
not apply when towing a trailer.
Switching off the hazard warning light system is switched on will cause all of the
turn signal lights as well as both indicator lights to flash.
Electromechanica l power steering⇒page 35
Engine oil pressure⇒page 36
EPC fault light (petrol engine)⇒page 36
Glow plug system (diesel engine)⇒page 36
Coolant temperature/coolant level⇒page 37
Tra c t i o n c o n t r o l s y s t e m ( TC S )⇒page 37
Electronic stability programme (ESP)*⇒page 38
Selector lever lock*⇒page 38
Tyre pressure*⇒page 38
Antilock brake system (ABS)⇒page 38
Bonnet⇒page 39
Seat belt warning light⇒page 39
Brake pad wear*⇒page 39
Boot lid⇒page 40
Open door⇒page 40
Fluid level in windshield washer system*⇒page 40
Brake system⇒page 40
Dynamo⇒page 41
Engine oil level⇒page 41
Fuel reserve⇒page 41
20A5Facelift.book Page 33 Saturday, September 6, 2008 2:13 PM
Page 36 of 304
Instruments and Indicator/Warning Lights35
Using the systemSafetyDriving TipsGeneral MaintenanceBreakdown assistanceTechnical Data
•Always adjust your speed to suit weather, road, region and traffic condi-
tions. The route indicated by the warning light must not tempt you to disre-
gard the national regulations for road traffic.
Caution
As long as the warning light lights up, one must take into account an increased
fuel consumption and in certain circumst ances a power reduction of the engine.
Note
Further information about diesel particle filter ⇒page 200.
Airbag system
Monitoring the airbag system
The warning light
comes on for a few seconds when the ignition is switched on.
There is a fault in the system if the warning light does not go out or flashes while
driving ⇒. This also applies if the warning light does not come on when the igni-
tion is switched on.
The following text will be displayed in the information display*:
Airbag fault!
The functionality of the airbag system is also monitored electronically, when one
airbag has been switched off
Front, side and head airbags or belt tensioner which have been switched off
using the vehicle system tester:
•The warning light lights up for 4 seconds after switching on the ignition and
then flashes again for 12 seconds afterwards in 2 second intervals.
The following text will be displayed in the information display*:
Airbag/belt tensioner deactivated! Front passenger airbags switched off
using the switch for front passenger
airbags* in stowage compartmen t on the front passenger side:
•The warning light comes on for 4 seconds after the ignition has been
switched on.
•Switching off airbags is indicated in the middle of the dash panel by the lighting
up of the indicator light (airbag switched off) ⇒ page 182.
WARNING
Have the airbag system checked immediat ely by a specialist garage if a fault
exists. Otherwise, there is a risk of th e airbag not being activated in the event
of an accident.
Control system for exhaust
The warning light comes on after the ignition has been switched on.
If the warning light does not go out after starting the engine or it lights up when
driving, a fault exists in an exhaust rele vant component. The engine management
system selects an emergency programme which enables you to drive to the nearest
specialist garage by adopting a gentle style of driving.
Electromechanical power steering
The warning light comes on for a few seconds when the ignition is switched on.
If the warning light after switching on the ignition or when driving lights up contin-
uously, a fault exists in the electromechanical power steering.
•If the yellow warning light lights up , this indicates a partial failure of the
power steering and the steeri ng forces can be greater.
•If the red warning light lights up , this indicates a complete failure of the
power steering and the steering assist has failed (significant ly higher steering
forces).
Further information ⇒page 198.
WARNING (continued)
20A5Facelift.book Page 35 Saturday, September 6, 2008 2:13 PM
Page 37 of 304
Instruments and Indicator/Warning Lights
36
WARNING
Contact your specialist garage if the power steering is defective.
Note
•If the yellow warning light goes out after starting the engine again and a short
drive, it is not necessary to visit a specialist garage.
•If the battery has been disconnected an d reconnected, the yellow warning light comes on after switching on the ignition. The warning light must go out after
driving a short distance.
Engine oil pressure
The warning light comes on for a few seconds 4) when the ignition is switched
on.
Stop the vehicle and sw itch the engine off if the warning light does not go off
after the engine has started or flashes while driving. Check the oil level and top up
with oil as necessary ⇒page 228, “Replenishing engine oil”.
An audible signal sounds three times as an additional warning signal.
Do not continue your journey if for some reason it is not possible under the
conditions prevailing to top up with oil. Keep the engine switched off and obtain
professional assistance from a specialist garage, otherwise it could lead to severe
engine damage.
Do not drive any further if the warning light flashes even if the oil is at the correct
level. Do not run the engine not at idling speed either. Contact the nearest specialist
garage to obtain professional assistance.
The following text will be displayed in the information display*:
Oil Pressure Engine off! Owner's manual
WARNING
•If you must stop for technical reasons, then park the vehicle at a safe
distance from the traffic and switch off the engine and switch on the hazard
warning light system.
•The red oil pressure light is not an oil level indicator! One should
therefore check the oil level at regular intervals, preferably after every refu-
eling stop.
EPC fault light (petrol engine)
The (Electronic Power Control) warning light comes on for a few seconds when
the ignition is switched on.
If the warning light
does not go out or lights up after starting the engine, a fault
exists in the engine control. The engine management system selects an emergency
programme which enables you to drive to the nearest specialist garage by adopting
a gentle style of driving.
The following text will be displayed in the information display*:
Engine fault Workshop! (Engine fault workshop!)
Glow plug system (diesel engine)
The warning light lights up for a cold engine when switching on the ignition
(pre-heat position) 2 ⇒ page 125. Start the engine after the indicator light goes out.
The glow plug indicato r light will come on for about 1 second if the engine is at a
normal operating temperature or if the outside temperature is above +5°C. This
means that you can start the engine right away.
There is a fault in the glow plug system if the warning light
does not come on
at all or lights up continuously . Contact a specialist garage as soon as possible to
obtain assistance.
If the warning light
begins to flash while driving, a fault exists in the engine
control. The engine management system selects an emergency programme which 4)The warning light on vehicles fitted with information display does not come on after
switching the ignition on, but only if a fault exists or the engine oil level is too low.
20A5Facelift.book Page 36 Saturday, September 6, 2008 2:13 PM
Page 43 of 304
Unlocking and locking
42
Unlocking and locking
Key
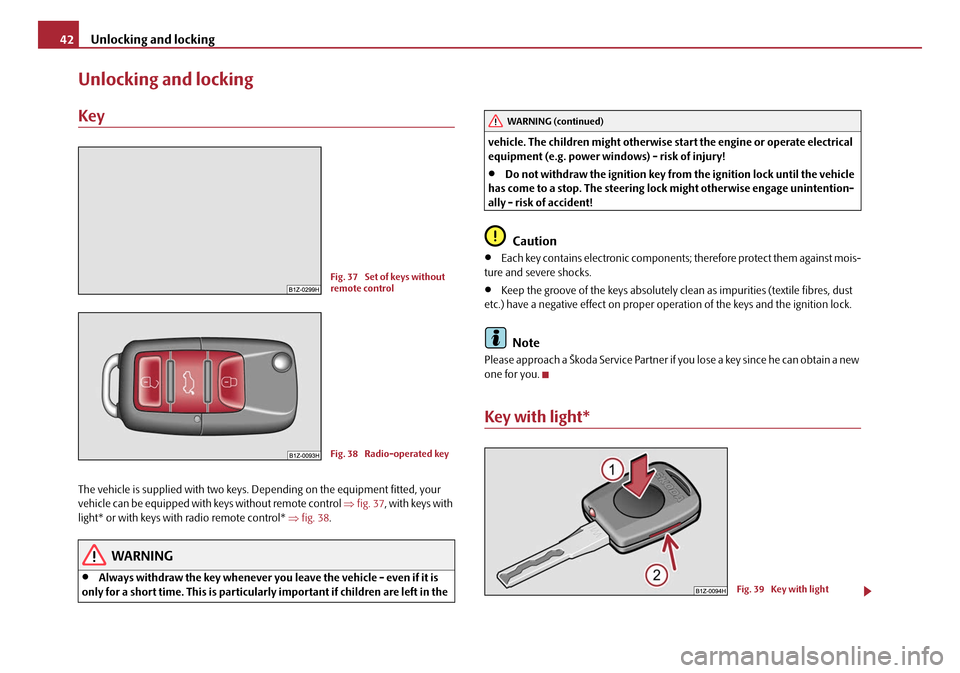
The vehicle is supplied with two keys. Depending on the equipment fitted, your
vehicle can be equipped with keys without remote control ⇒fig. 37 , with keys with
light* or with keys with radio remote control* ⇒fig. 38 .
WARNING
•Always withdraw the key whenever you leave the vehicle - even if it is
only for a short time. This is particularly important if children are left in the vehicle. The children might otherwise st
art the engine or operate electrical
equipment (e.g. power windows) - risk of injury!
•Do not withdraw the ignition key from the ignition lock until the vehicle
has come to a stop. The steering lock might otherwise engage unintention-
ally - risk of accident!
Caution
•Each key contains electronic components; therefore protect them against mois-
ture and severe shocks.
•Keep the groove of the keys absolutely cl ean as impurities (textile fibres, dust
etc.) have a negative effect on proper op eration of the keys and the ignition lock.
Note
Please approach a Škoda Service Partner if you lose a key since he can obtain a new
one for you.
Key with light*
Fig. 37 Set of keys without
remote control
Fig. 38 Radio-operated key
WARNING (continued)
Fig. 39 Key with light
20A5Facelift.book Page 42 Saturday, September 6, 2008 2:13 PM
Page 126 of 304
Starting-off and Driving125
Using the systemSafetyDriving TipsGeneral MaintenanceBreakdown assistanceTechnical Data
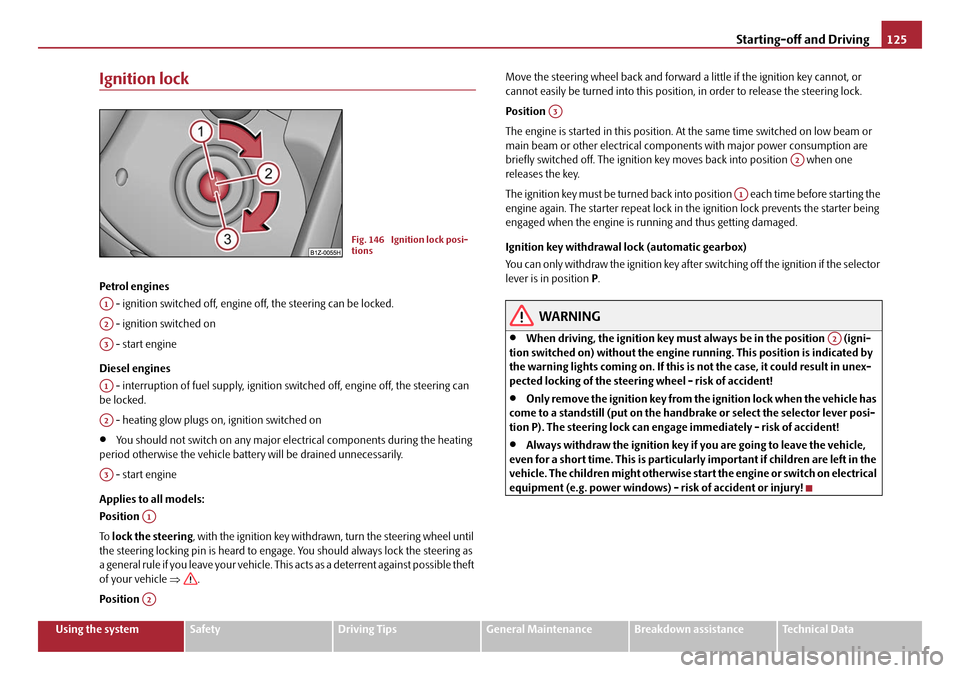
Ignition lock
Petrol engines
- ignition switched off, engine off, the steering can be locked.
- ignition switched on
- start engine
Diesel engines - interruption of fuel supply, ignition switched off, engine off, the steering can
be locked.
- heating glow plugs on, ignition switched on
•You should not switch on any major elec trical components during the heating
period otherwise the vehicle batter y will be drained unnecessarily.
- start engine
Applies to all models:
Position
To lock the steering , with the ignition key withdrawn, turn the steering wheel until
the steering locking pin is heard to engage. You should always lock the steering as
a general rule if you leave your vehicle. This acts as a deterrent against possible theft
of your vehicle ⇒.
Position Move the steering wheel back and forward
a little if the ignition key cannot, or
cannot easily be turned into this position, in order to release the steering lock.
Position
The engine is started in this position. At the same time switched on low beam or
main beam or other electrical compon ents with major power consumption are
briefly switched off. The ignition key moves back into position when one
releases the key.
The ignition key must be turned back into position each time before starting the
engine again. The starter repeat lock in th e ignition lock prevents the starter being
engaged when the engine is ru nning and thus getting damaged.
Ignition key withdrawal lock (automatic gearbox)
You can only withdraw the ignition key after switching off the ignition if the selector
lever is in position P .
WARNING
•When driving, the ignition key must always be in the position (igni-
tion switched on) without the engine running. This position is indicated by
the warning lights coming on. If this is not the case, it could result in unex-
pected locking of the steering wheel - risk of accident!
•Only remove the ignition key from the ignition lock when the vehicle has
come to a standstill (put on the handbrake or select the selector lever posi-
tion P). The steering lock can enga ge immediately - risk of accident!
•Always withdraw the ignition key if you are going to leave the vehicle,
even for a short time. This is particularly important if children are left in the
vehicle. The children might otherwise star t the engine or switch on electrical
equipment (e.g. power windows) - risk of accident or injury!
Fig. 146 Ignition lock posi-
tions
A1
A2
A3
A1
A2
A3
A1
A2
A3
A2
A1
A2
20A5Facelift.book Page 125 Saturday, September 6, 2008 2:13 PM
Page 162 of 304
Communication161
Using the systemSafetyDriving TipsGeneral MaintenanceBreakdown assistanceTechnical Data
Operation of mobile phones or two-way radio systems may interfere with func-
tioning of the electronic systems of your
vehicle. The reasons for this may be:
•no external aerial
•external aerial incorrectly installed
•transmission power greater than 10 watts.
You should also be aware of the fact that only an external aerial makes it possible
to achieve the optimal range of such equipment.
WARNING
•If a mobile phone or two-way radio sy stem is operated inside the vehicle
without using an external aerial, or wi th an external aerial which has been
incorrectly installed, the result can be excessive electromagnetic fields
which may cause harm to your health.
•Please concentrate fully at all times on your driving!
•You must not install two-way radio systems, mobile phones or mounts
on the covers of the airbags or within the immediate deployment range of
airbags. This might result in injuries to the occupants in the event of an acci-
dent.
Note
Please also refer to the operating instru ctions of the mobile phones and two-way
radio systems.
Input AUX-IN*
The input AUX-IN is located below the armrest* of the front seats and is marked
with . The equipment AUX-IN can only be us ed in combination with a radio or
navigation system installed in the factory.
The input AUX-IN connects the external audio sources (e. g. iPod or mp3 player)
and records music from these devices via your radio* or your navigation*. The description of the operation can be
found in the relevant Owner's Manual of
your radio* or your navigation*.
Note
•If an external audio source is conne cted via AUX-IN, which has a separate
power supply, this can lead to an interfer ence of the audio signals. It depends on
the properties of the adapter.
•The loudspeakers in the vehicle are matched to a power output of 30 W.
MDI input*
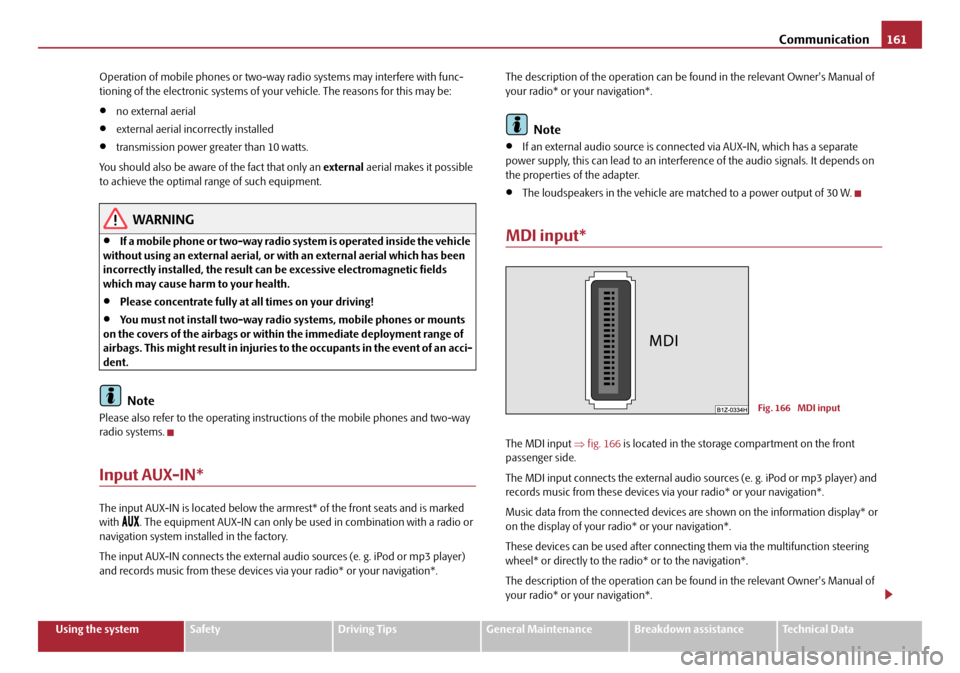
The MDI input ⇒fig. 166 is located in the storage compartment on the front
passenger side.
The MDI input connects the external audio sources (e. g. iPod or mp3 player) and
records music from these devices via your radio* or your navigation*.
Music data from the connected devices ar e shown on the information display* or
on the display of your radio* or your navigation*.
These devices can be used after connectin g them via the multifunction steering
wheel* or directly to the ra dio* or to the navigation*.
The description of the operation can be found in the relevant Owner's Manual of
your radio* or your navigation*.
Fig. 166 MDI input
20A5Facelift.book Page 161 Saturday, September 6, 2008 2:13 PM
Page 197 of 304
Intelligent Technology
196
WARNING
Even with this additional function the vehicle cannot be steered automati-
cally! The driver is furthermore fully reponsible for the steering of the
vehicle!
Brakes
What has a negative effect on braking efficiency?
Wear-and-tear
Wear-and-tear to the brake pads is greatly dependent on the operating conditions
of the vehicle and your style of driving. Particularly if you drive a great deal in towns
and over short distances or if you adopt a sporty style of driving, it may be neces-
sary to have the thickness of the brake pads inspected at a specialist garage
between the service inspections.
Wet roads or road salt
There may be a certain delay before the brakes take full effect under certain condi-
tions such as when driving through water, during heavy rain showers or after the
vehicle has been washed in an automatic vehicle wash, since the brake discs and
brake pads may be moist or even have a coating of ice on them in winter. You
should dry the brakes as soon as possib le (by applying and releasing the brakes
several times, if the road conditions and the traffic situation allows it).
There also may be a certain delay before the full braking efficiency is available when
driving on roads which have been treated wi th road salt if you have not used the
brakes for some considerable time beforeha nd. The layer of salt on the brake discs
and brake pads must first be rubb ed off when you apply the brakes.
Corrosion
Corrosion on the brake discs and dirt on th e bake pads occur if the vehicle has been
parked for a long period and if you do not make much use of the braking system.
We recommend cleaning the brake discs by firmly applying the brakes at a fairly
high speed if you do not make much use of the braking system or if surface corro-
sion is present ⇒. Faults in the brake surface
If you notice that the braking distance
has suddenly become longer and that the
brake pedal can be depressed further, it is possible that a brake circuit of the dual-
circuit brake system has failed. Drive, in such cases, to the nearest specialist garage
without delay in order to have the problem rectified. Drive at a reduced speed while
on your way to the dealer and adapt your style of driving to the higher brake pedal
pressure required.
Low brake fluid level
An insufficient level of brake fluid may result in problems in the brake system. The
level of the brake fluid is monitored electronically ⇒page 40, “Brake system ”.
WARNING
•Only apply the brakes for the purpos e of drying and cleaning the brake
discs if the traffic conditions permit this. Do not place any other road users
in jeopardy.
•When retrospectively mounting a front spoiler, solid wheel hubs etc. one
must ensure that the air supply to the front wheel brakes is not reduced
otherwise the braking system could run too hot.
•Allow for the fact that new brake pads do not achieve their full braking
efficiency until approximately 200 kilo metres. New brake pads must be first
“run in” before they develop their optimal friction force. You can, however,
compensate for this slightly reduced braking force by increasing the pres-
sure on the brake pedal. This guidelin e also applies to any new brake pads
installed at a future date.
Caution
•Never allow the brakes to ru b by applying slight pressure if you do not wish to
brake the vehicle. This causes the brakes to overheat and can also result in a longer
braking distance and excessive wear.
•Before negotiating a steep downhill sect ion, please reduce your speed, shift
down into the next lower gear (manual ge arbox) or select a lower driving stage
(automatic gearbox). This enables you to make full use of the braking power of the
20A5Facelift.book Page 196 Saturday, September 6, 2008 2:13 PM