phone SKODA OCTAVIA 2011 2.G / (1Z) Bolero Car Radio Manual
[x] Cancel search | Manufacturer: SKODA, Model Year: 2011, Model line: OCTAVIA, Model: SKODA OCTAVIA 2011 2.G / (1Z)Pages: 23, PDF Size: 0.7 MB
Page 3 of 23
Table of Contents
General information
. . . . . . . . . . . . . . . . . . . . . . 2
Owner's Manual . . . . . . . . . . . . . . . . . . . . . . . . . . . . . . . . . . . . 2
Symbols in the text of the operating instructions . . . 2
Equipment overview . . . . . . . . . . . . . . . . . . . . . . . . . . . . . . 2
Important information . . . . . . . . . . . . . . . . . . . . . . . . . . . . . 2
Anti-theft protection . . . . . . . . . . . . . . . . . . . . . . . . . . . . . . 3
General - operation . . . . . . . . . . . . . . . . . . . . . . . . . . . . . . . . 4
Basic setting . . . . . . . . . . . . . . . . . . . . . . . . . . . . . . . . . 5
Switching the unit on and off . . . . . . . . . . . . . . . . . . . . .5
Tone settings . . . . . . . . . . . . . . . . . . . . . . . . . . . . . . . . . . . . . 5
Radio mode . . . . . . . . . . . . . . . . . . . . . . . . . . . . . . . . . . . . . . . . 5
MEDIA operation . . . . . . . . . . . . . . . . . . . . . . . . . . . . . . . . . . . 7
SETUP . . . . . . . . . . . . . . . . . . . . . . . . . . . . . . . . . . . . . . . . . . . . . . 11
Telephone operation . . . . . . . . . . . . . . . . . . . . . . . . . . . . . . 14 1
Table of Contents
Page 4 of 23
General information
Owner's Manual This Owner's manual describes
all possible equipment variants without identify-
ing them as special equipment, model variants or market-dependent equipment.
Consequently, this vehicle does not need to contain all of the equipment compo-
nents described in this Owner's manual.
The scope of equipment for your vehicle is described in the sales documentation
you were given when purchasing the car. For more information, contact your local
ŠKODA retailer. Ð
Symbols in the text of the operating instructions Explanation of symbols
Ð
End of a section.
The section is continued on the next page. Ð
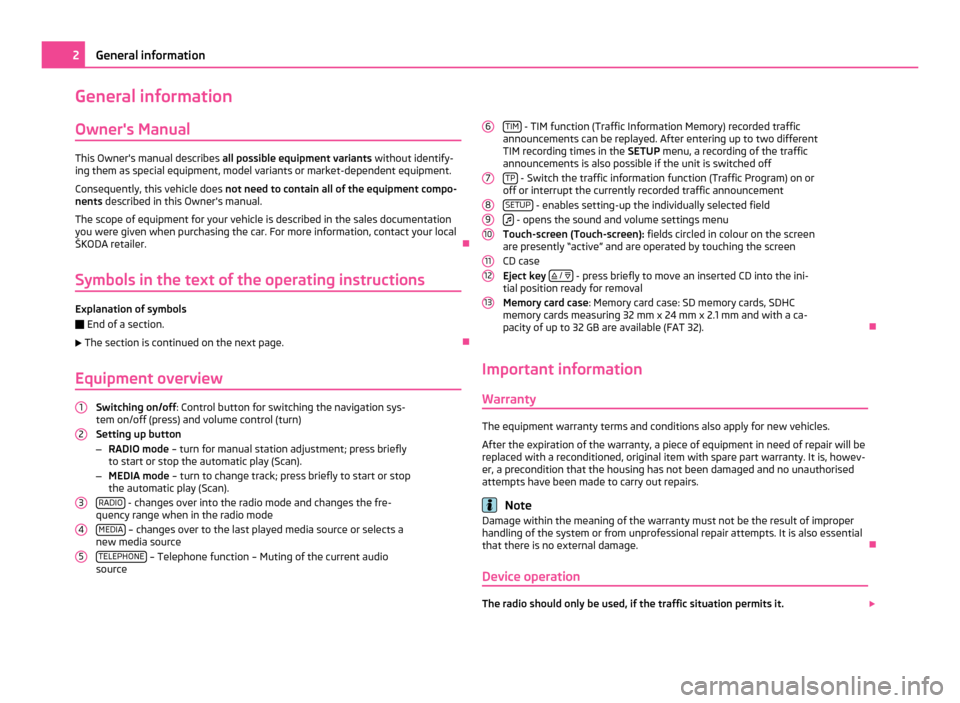
Equipment overview Switching on/off
: Control button for switching the navigation sys-
tem on/off (press) and volume control (turn)
Setting up button
– RADIO mode – turn for manual station adjustment; press briefly
to start or stop the automatic play (Scan).
– MEDIA mode – turn to change track; press briefly to start or stop
the automatic play (Scan).
RADIO - changes over into the radio mode and changes the fre-
quency range when in the radio mode
MEDIA – changes over to the last played media source or selects a
new media source
TELEPHONE – Telephone function – Muting of the current audio
source
1 2
3
4
5 TIM
- TIM function (Traffic Information Memory) recorded traffic
announcements can be replayed. After entering up to two different
TIM recording times in the SETUP menu, a recording of the traffic
announcements is also possible if the unit is switched off
TP - Switch the traffic information function (Traffic Program) on or
off or interrupt the currently recorded traffic announcement
SETUP - enables setting-up the individually selected field
- opens the sound and volume settings menu
Touch-screen (Touch-screen): fields circled in colour on the screen
are presently
“active” and are operated by touching the screen
CD case
Eject key
/
- press briefly to move an inserted CD into the ini-
tial position ready for removal
Memory card case: Memory card case: SD memory cards, SDHC
memory cards measuring 32 mm x 24 mm x 2.1 mm and with a ca-
pacity of up to 32 GB are available (FAT 32). Ð
Important information Warranty The equipment warranty terms and conditions also apply for new vehicles.
After the expiration of the warranty, a piece of equipment in need of repair will be
replaced with a reconditioned, original item with spare part warranty. It is, howev-
er, a precondition that the housing has not been damaged and no unauthorised
attempts have been made to carry out repairs. Note
Damage within the meaning of the warranty must not be the result of improper
handling of the system or from unprofessional repair attempts. It is also essential
that there is no external damage. Ð
Device operation The radio should only be used, if the traffic situation permits it.
6 7
8
9
10
11
12
132
General information
Page 10 of 23
If an audio source cannot be selected at the present time because, for example,
no data carrier has been inserted (e.g no memory card), the function key will be
displayed with a grey background.
Function keys for controlling the current audio sources
- pressing this briefly changes over to the beginning of the current title or
chapter, repeated pressing changes over to the beginning of the previous title or
chapter.
- briefly pressing this changes over to the next title or chapter.
- Pause: the play function is stopped at the current position and the symbol
changes to - pressing
will continue the play function at this position.
Selectable audio sources in the menu MEDIA CD - changes over to the last played CD from the internal CD changer.
SD card - changes over to an inserted memory card.
AUX - changes over to a connected external audio source. Operating an externally
connected audio source is possible with certain restrictions and depends largely
on the type of the connection.
BT Audio - changes over to the telephone - wireless MP3 transmission from the
telephone preinstallation.
Additional function keys in the MEDIA main menu
Scan - starts the automatic play
Scan. If
Scan is already displayed with the func-
tion key, the automatic play has started - press the button to terminate.
Mix - starts the random play function
Mix
. If
Mix is already displayed with the
function key, the random play function has started - press the function key to ter-
minate.
Repeat - opens the pop-up window for switching on the repeat function. In addi-
tion, it is determined if only the current Track or the current
CD or the current
Folder for the MP3 operation is repeated.
Selection - opens the playlist of the current media source in order to choose anoth-
er track or source. Ð
Inserting or ejecting a CD Inserting the CD
–
Press
/
. –
Choose the location 1 ....
6 for storing the CD in the internal CD changer. Wait
until “
Please insert CD ” is displayed.
– Push a CD with the written side facing up as far as possible into the CD case
until it is automatically drawn in. The play function will start automatically.
Taking out the CD
– Press on the button
/ , the CD is driven to the initial position.
If a CD is not taken out in the initial position, it will be reinserted after approxi-
mately 10 seconds for safety reasons.
WMA Data (Windows Media Audio)
The copyright of audio data compressed by Windows Media A
udio, can also be
protected by the DRM procedure ( Digital Rights Management). Such WMA data is
not supported by the unit. Ð
Inserting or removing a memory card Inserting a memory card
–
Push the memory card into the memory card case with the trimmed edge to
the front right, until it is locked in position. The play function will start auto-
matically.
Taking out a memory card
– Press against the spring resistance of the inserted memory card, the memory
card “skips” back into the Eject position.
Only MP3 data and unprotected WMA data can be read from the SD card. All other
data is ignored.
Memory card empty or data not readable
If a memory card is inserted, on which no audio data has been stored, it will not
be
switched over into the memory card mode after the loading procedure. In the
menu MEDIA the function key SD card remains inactive in the top display line and
the function cannot be seleced. 8
Basic setting
Page 14 of 23
Overview of the set-up menus
Radio - When in the radio mode, carry out set-ups for the function of the arrow
keys, for the displayed memory keys, the memory list and the traffic reports.
Media - Determine the set-ups for the play and display of MP3 data and activate or
deactivate the external audio sources.
System - Change the system set-ups such as voice response and time and cancel
or delete stored set-ups in individual areas.
Traffic info – Select your preferred TMC station and determine the area for TMC an-
nouncements.
Touch-screen - Adjust the brightness of the touch-screen, day/night design of the
map display and select/deselect the confirmation tone for the key stroke.
Telephone – Update the telephone book in the unit, delete all call lists and modify
the assignment of the shortcut keys. Ð
Setup radio Call up the menu
Setup Radio by pressing the selector key SETUP and the function
key Radio .
Activate AF The function alternative frequency (AF) ensures that the best receivable frequen-
cy of the selected station is automatically and precisely set. The replay of the
broadcast can be muted briefly during the search process according to the best
receivable frequency. If no alternative frequency of the set station can be found
and the station no longer offers a satisfactory quality, then please select another
station.
RDS Regional Certain programs of the broadcasting companies are divided into regional pro-
grams at specific times. That is why in individual regions the regional programs of
a station can broadcast different contents.
First of all the unit attempts to set only alternative frequencies of the selected
station.
If the quality is however so low, that there is a risk of a
“program loss”, the unit
also accepts “related” frequencies.
Search mode Sets the source from which to select the stations in radio mode. ●
Station list - opens the list of the presently receivable radio stations.
● Station list - opens the list of the presently receivable radio stations.
Preset list Select station keys for display.
Delete preset list Delete preset list.
Preferred TMC station
If the
“preferred” TMC station can no longer be received, the system automatically
searches for the TMC station offering the best reception for the currently driven
area. You can determine in the Setup Radio from which TMC station the reports
are to be announced. Ð
Traffic station set-ups Open the
TIM settings menu by pressing the range selector key SETUP and the
function key Traffic info .
– Press on the left of the display on TIM recording time in order to open the Re-
cording time setting menu.
– In the Recording time setting menu, briefly press on the arrow keys or
on
the display below the hours or minutes indication, in order to decrement or in-
crement the respective time unit.
– Keep pressing the corresponding arrow key, in order to continuously change
the time unit. Release the button if the desired value has been reached.
– Press the function key in order to accept the indicated TIM recording time
and to exit the Recording time setting menu.
– In this way you can set both desired TIM recording times.
– Activate or deactivate the desired TIM recording time by pressing the function
key Active . If the check-box is active
the accompanying TIM recording time is
activated.
The unit starts with the recording 90 minutes before the set start time and ends
the recording 30 minutes afterwards. Ð12
Basic setting
Page 15 of 23
Setup Media
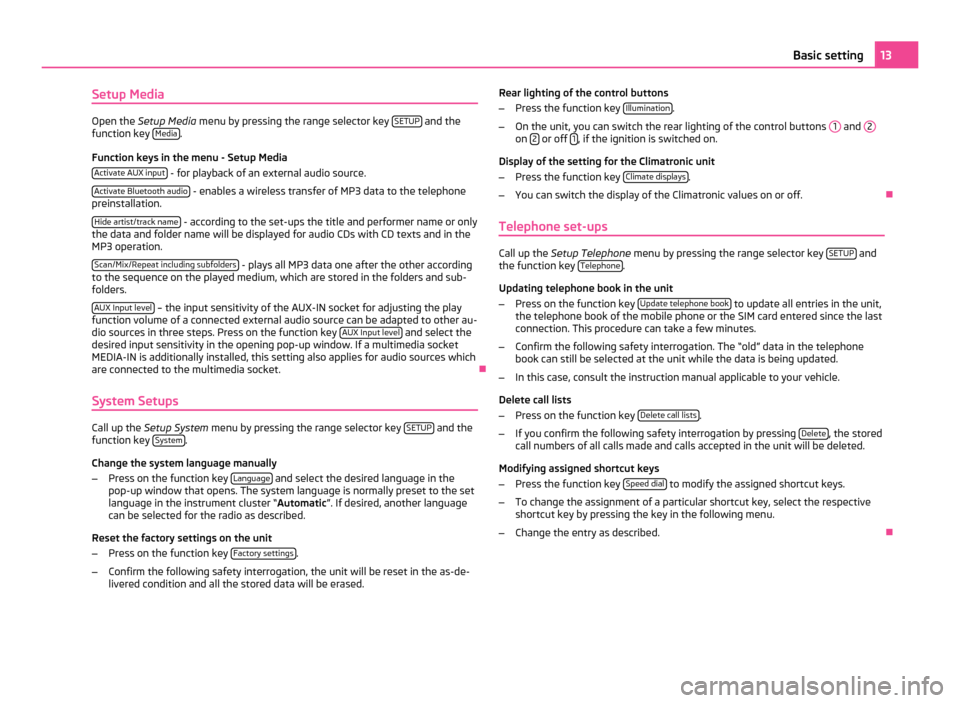
Open the
Setup Media menu by pressing the range selector key SETUP and the
function key Media .
Function keys in the menu - Setup Media Activate AUX input - for playback of an external audio source.
Activate Bluetooth audio - enables a wireless transfer of MP3 data to the telephone
preinstallation.
Hide artist/track name - according to the set-ups the title and performer name or only
the data and folder name will be displayed for audio CDs with CD texts and in the
MP3 operation.
Scan/Mix/Repeat including subfolders - plays all MP3 data one after the other according
to the sequence on the played medium, which are stored in the folders and sub-
folders.
AUX Input level – the input sensitivity of the AUX-IN socket for adjusting the play
function volume of a connected external audio source can be adapted to other au-
dio sources in three steps. Press on the function key AUX
Input level and select the
desired input sensitivity in the opening pop-up window. If a multimedia socket
MEDIA-IN is additionally installed, this setting also applies for audio sources which
are connected to the multimedia socket. Ð
System Setups Call up the
Setup System menu by pressing the range selector key SETUP and the
function key System .
Change the system language manually
– Press on the function key Language and select the desired language in the
pop-up window that opens. The system language is normally preset to the set
language in the instrument cluster
“ Automatic ”. If desired, another language
can be selected for the radio as described.
Reset the factory settings on the unit
– Press on the function key Factory settings .
– Confirm the following safety interrogation, the unit will be reset in the as-de-
livered condition and all the stored data will be erased. Rear lighting of the control buttons
–
Press the function key Illumination .
– On the unit, you can switch the rear lighting of the control buttons 1 and
2 on
2 or off
1 , if the ignition is switched on.
Display of the setting for the Climatronic unit
– Press the function key Climate displays .
– You can switch the display of the Climatronic values on or off. Ð
Telephone set-ups Call up the
Setup Telephone menu by pressing the range selector key SETUP and
the function key Telephone .
Updating telephone book in the unit
– Press on the function key Update telephone book to update all entries in the unit,
the telephone book of the mobile phone or the SIM card entered since the last
connection. This procedure can take a few minutes.
– Confirm the following safety interrogation. The “old” data in the telephone
book can still be selected at the unit while the data is being updated.
– In this case, consult the instruction manual applicable to your vehicle.
Delete call lists
– Press on the function key Delete call lists .
– If you confirm the following safety interrogation by pressing Delete , the stored
call numbers of all calls made and calls accepted in the unit will be deleted.
Modifying assigned shortcut keys
– Press the function key Speed dial to modify the assigned shortcut keys.
– To change the assignment of a particular shortcut key, select the respective
shortcut key by pressing the key in the following menu.
– Change the entry as described. Ð 13
Basic setting
Page 16 of 23
Telephone operation
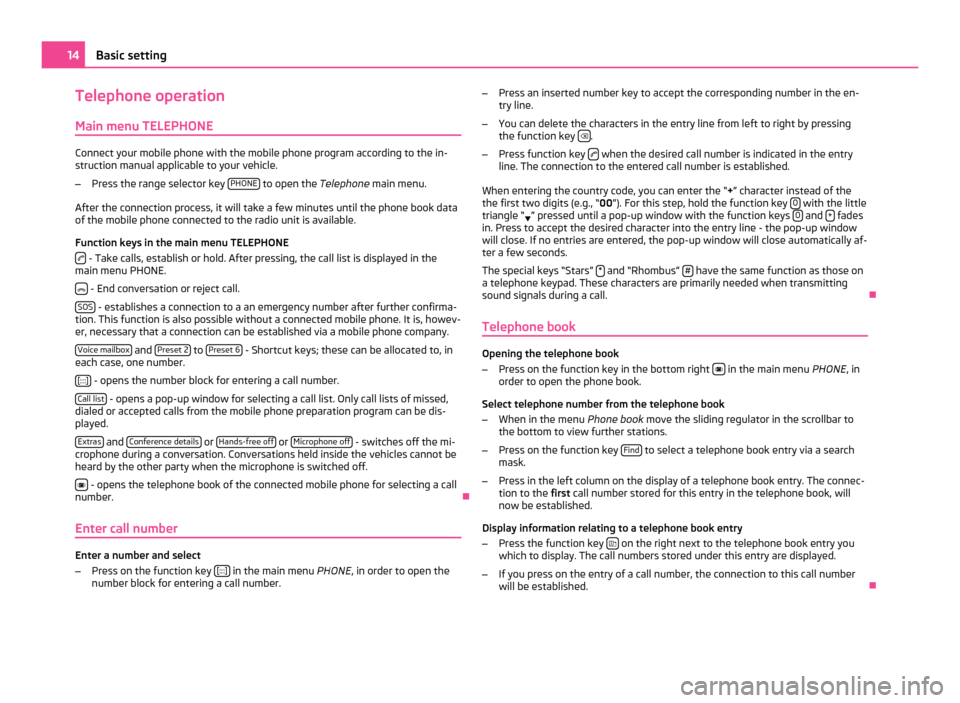
Main menu TELEPHONE Connect your mobile phone with the mobile phone program according to the in-
struction manual applicable to your vehicle.
– Press the range selector key PHONE to open the
Telephone main menu.
After the connection process, it will take a few minutes until the phone book data
of the mobile phone connected to the radio unit is available.
Function keys in the main menu TELEPHONE - Take calls, establish or hold. After pressing, the call list is displayed in the
main menu PHONE.
- End conversation or reject call.
SOS - establishes a connection to a an emergency number after further confirma-
tion. This function is also possible without a connected mobile phone. It is, howev-
er, necessary that a connection can be established via a mobile phone company.
Voice mailbox and
Preset 2 to
Preset 6 - Shortcut keys; these can be allocated to, in
each case, one number.
[:::] - opens the number block for entering a call number.
Call list - opens a pop-up window for selecting a call list. Only call lists of missed,
dialed or accepted calls from the mobile phone preparation program can be dis-
played.
Extras and
Conference details or
Hands-free off or
Microphone off - switches off the mi-
crophone during a conversation. Conversations held inside the vehicles cannot be
heard by the other party when the microphone is switched off.
- opens the telephone book of the connected mobile phone for selecting a call
number. Ð
Enter call number Enter a number and select
–
Press on the function key [:::] in the main menu
PHONE, in order to open the
number block for entering a call number. –
Press an inserted number key to accept the corresponding number in the en-
try line.
– You can delete the characters in the entry line from left to right by pressing
the function key .
– Press function key when the desired call number is indicated in the entry
line. The connection to the entered call number is established.
When entering the country code, you can enter the
“+” character instead of the
the first two digits (e.g., “00 ”). For this step, hold the function key 0 with the little
triangle “ ” pressed until a pop-up window with the function keys
0 and
+ fades
in. Press to accept the desired character into the entry line - the pop-up window
will close. If no entries are entered, the pop-up window will close automatically af-
ter a few seconds.
The special keys
“Stars” * and “Rhombus”
# have the same function as those on
a telephone keypad. These characters are primarily needed when transmitting
sound signals during a call. Ð
Telephone book Opening the telephone book
–
Press on the function key in the bottom right in the main menu
PHONE, in
order to open the phone book.
Select telephone number from the telephone book
– When in the menu Phone book move the sliding regulator in the scrollbar to
the bottom to view further stations.
– Press on the function key Find to select a telephone book entry via a search
mask.
– Press in the left column on the display of a telephone book entry. The connec-
tion to the first call number stored for this entry in the telephone book, will
now be established.
Display information relating to a telephone book entry
– Press the function key on the right next to the telephone book entry you
which to display. The call numbers stored under this entry are displayed.
– If you press on the entry of a call number, the connection to this call number
will be established. Ð14
Basic setting
Page 17 of 23
Search for an entry in the telephone book
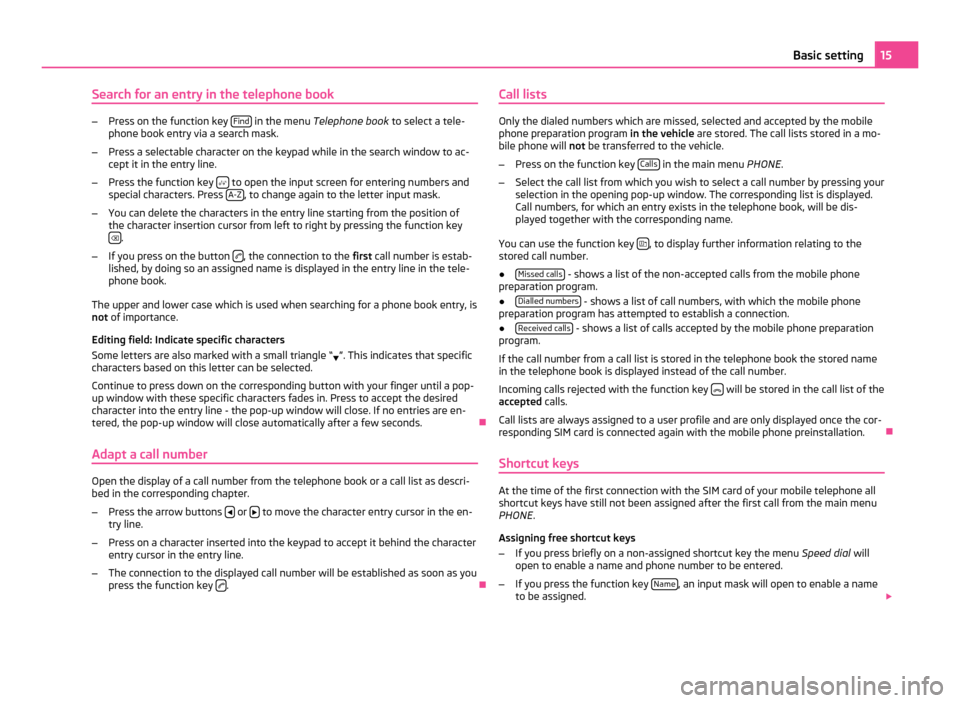
–
Press on the function key Find in the menu
Telephone book to select a tele-
phone book entry via a search mask.
– Press a selectable character on the keypad while in the search window to ac-
cept it in the entry line.
– Press the function key to open the input screen for entering numbers and
special characters. Press A-Z , to change again to the letter input mask.
– You can delete the characters in the entry line starting from the position of
the character insertion cursor from left to right by pressing the function key .
– If you press on the button , the connection to the
first call number is estab-
lished, by doing so an assigned name is displayed in the entry line in the tele-
phone book.
The upper and lower case which is used when searching for a phone book entry, is
not of importance.
Editing field: Indicate specific characters
Some letters are also marked with a small triangle
“ ”. This indicates that specific
characters based on this letter can be selected.
Continue to press down on the corresponding button with your finger until a pop-
up window with these specific characters fades in. Press to accept the desired
character into the entry line - the pop-up window will close. If no entries are en-
tered, the pop-up window will close automatically after a few seconds. Ð
Adapt a call number Open the display of a call number from the telephone book or a call list as descri-
bed in the corresponding chapter.
– Press the arrow buttons or
to move the character entry cursor in the en-
try line.
– Press on a character inserted into the keypad to accept it behind the character
entry cursor in the entry line.
– The connection to the displayed call number will be established as soon as you
press the function key .
ÐCall lists Only the dialed numbers which are missed, selected and accepted by the mobile
phone preparation program
in the vehicle are stored. The call lists stored in a mo-
bile phone will not be transferred to the vehicle.
– Press on the function key Calls in the main menu
PHONE.
– Select the call list from which you wish to select a call number by pressing your
selection in the opening pop-up window. The corresponding list is displayed.
Call numbers, for which an entry exists in the telephone book, will be dis-
played together with the corresponding name.
You can use the function key , to display further information relating to the
stored call number.
● Missed calls - shows a list of the non-accepted calls from the mobile phone
preparation program.
● Dialled numbers - shows a list of call numbers, with which the mobile phone
preparation program has attempted to establish a connection.
● Received calls - shows a list of calls accepted by the mobile phone preparation
program.
If the call number from a call list is stored in the telephone book the stored name
in the telephone book is displayed instead of the call number.
Incoming calls rejected with the function key will be stored in the call list of the
accepted calls.
Call lists are always assigned to a user profile and are only displayed once the cor-
responding SIM card is connected again with the mobile phone preinstallation. Ð
Shortcut keys At the time of the first connection with the SIM card of your mobile telephone all
shortcut keys have still not been assigned after the first call from the main menu
PHONE
.
Assigning free shortcut keys
– If you press briefly on a non-assigned shortcut key the menu Speed dial will
open to enable a name and phone number to be entered.
– If you press the function key Name , an input mask will open to enable a name
to be assigned. 15
Basic setting
Page 18 of 23
–
Press the function key Number . The input screen to enter a phone number is
opened.
– Press the function key Call lists or
Telephone book to accept a call number for
these shortcut keys from the corresponding list.
– Press the function key to erase all entries in all entry lines at once after
confirmation with OK .
– If you have completed your entries in the Menu Speed dial, press the function
key OK .
– The entered name will be displayed in the shortcut key of the main menu
PHONE . The call number entered will be assigned to a shortcut key.
Calling up a connection via the shortcut key
– Briefly press an assigned shortcut key to establish the connection to the as-
signed call number.
Modifying assigned shortcut keys
– If the assignment of a shortcut key is to be modified, keep pressing the corre-
sponding shortcut key until the menu Speed dial has opened for modification.
The assignment of the shortcut keys remains stored in the unit and will only be
displayed again when the corresponding SIM card is connected again to the mo-
bile phone preparation program.
Shortcut key Voice mailboxThe shortcut key
Voice mail box has not yet been assigned a call number in the fac-
tory, as this depends upon the corresponding mobile phone company and country.
The name for this shortcut key has, however, been specified and cannot be
changed. You should now store your mail box number so that you can quickly
check your voice mail.
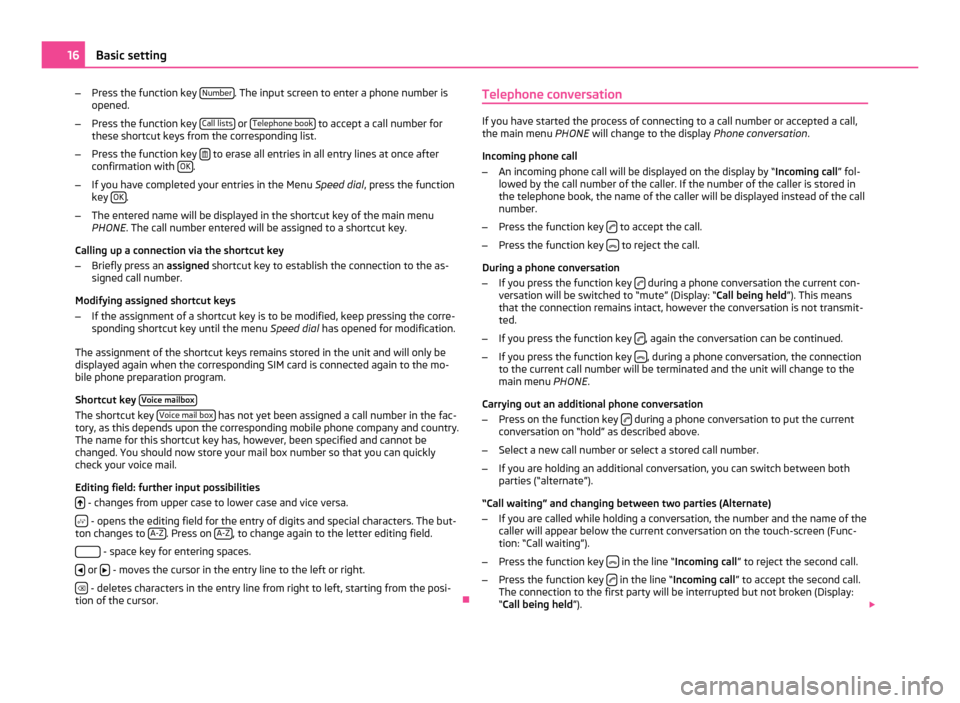
Editing field: further input possibilities
- changes from upper case to lower case and vice versa.
- opens the editing field for the entry of digits and special characters. The but-
ton changes to A-Z . Press on
A-Z , to change again to the letter editing field.
- space key for entering spaces.
or
- moves the cursor in the entry line to the left or right.
- deletes characters in the entry line from right to left, starting from the posi-
tion of the cursor. ÐTelephone conversation If you have started the process of connecting to a call number or accepted a call,
the main menu
PHONE will change to the display Phone conversation.
Incoming phone call
– An incoming phone call will be displayed on the display by “ Incoming call” fol-
lowed by the call number of the caller. If the number of the caller is stored in
the telephone book, the name of the caller will be displayed instead of the call
number.
– Press the function key to accept the call.
– Press the function key to reject the call.
During a phone conversation
– If you press the function key during a phone conversation the current con-
versation will be switched to
“mute” (Display: “ Call being held”). This means
that the connection remains intact, however the conversation is not transmit-
ted.
– If you press the function key , again the conversation can be continued.
– If you press the function key , during a phone conversation, the connection
to the current call number will be terminated and the unit will change to the
main menu PHONE .
Carrying out an additional phone conversation
– Press on the function key during a phone conversation to put the current
conversation on “hold
” as described above.
– Select a new call number or select a stored call number.
– If you are holding an additional conversation, you can switch between both
parties (“alternate”).
“Call waiting
” and changing between two parties (Alternate)
– If you are called while holding a conversation, the number and the name of the
caller will appear below the current conversation on the touch-screen (Func-
tion: “Call waiting”
).
– Press the function key in the line “Incoming call
” to reject the second call.
– Press the function key in the line “Incoming call
” to accept the second call.
The connection to the first party will be interrupted but not broken (Display:
“Call being held ”). 16
Basic setting
Page 19 of 23
–
If you press the function key in the line “Call being held
”, the conversation
with this party will continue and the other party will be “put on hold”. In this
way you can alternate between two parties.
– Press the function key , to break the connection to the call number dis-
played in this line.
DTMF key tones
A particular DTMF key tone is assigned to each each key of a phone. DTMF key
tones are used, for example, for the input of a password via the phone or for
choosing a colleague in a
“Call center”.
If a DTMF key tone has to be entered during a conversation, you can open the
keypad field by pressing the function key at the bottom left and follow the in-
structions (for example: “For a private conversation with one of our co-workers,
please press 3 ”).
You can store a longer DTMF key tone on your mobile phone. If, during a conversa-
tion, this DTMF key tone has to be entered, call up the corresponding entry from
the telephone book as described.
If you press in the input mask on the function key Enter numbers , the displayed
character sequence in the entry line will be played as DTMF key tone sequence.
Please note that in a DTMF key tone sequence the character
“+” must not appear,
as it interrupts the playing of a DTMF key tone. Ð 17
Basic setting