turn signal SKODA OCTAVIA 2011 2.G / (1Z) Columbus Navigation System Manual
[x] Cancel search | Manufacturer: SKODA, Model Year: 2011, Model line: OCTAVIA, Model: SKODA OCTAVIA 2011 2.G / (1Z)Pages: 47, PDF Size: 1.09 MB
Page 10 of 47

Voice control of the radio navigation system
General information
Introduction Thanks to this equipment, you can operate a few functions of your navigation sys-
tem via the microphone installed in the vehicle; a so-called “Speak what you see
on the touch-screen” system.
You can use the voice control in the operating modes RADIO, MEDIA, PHONE, MAP
and NAV .
You can adjust the volume during the call at any time by turning the control but-
ton 1 .
Switch on voice control (dialogue)
● Press the button .
Switching off voice control (dialogue)
● After running the voice command, voice control switches off automatically.
● By pressing one of the buttons which are located on the side of the touch-
screen of the unit or by touching the touch-screen (if the button Fade out is not
pressed in the help display).
● By pronouncing the command “Cancel ”.
● If the system does not receive a command or does not recognise the command
while the dialogue is switched on, it answers with the question
“Pardon?” and
thus makes it possible to pronounce a new command. If the system does not re-
ceive a second voice command, you will be offered help. If the system does not
receive a third voice command, you receive the message “ Cancel” and the voice
control switches off.
Optimum understanding of the commands depends on several factors:
● Speak with a normal tone of voice without intonation and excessive pauses.
● Avoid a bad pronunciation.
● Do not use any abbreviations - always pronounce the full command.
● Do not speak, if the system makes an announcement. As long as the system
has not finished the announcement, it will not react to an additional command.
● Close the doors, windows and sliding roof, in order to avoid disturbing influen-
ces of the environment on the understanding of the commands. ●
We recommend to speak louder at higher speeds; but with a calm voice, so
that the increased surrounding noise does not drown out the command.
● During the dialogue limit additional noise in the vehicle, e.g. simultaneously
talking occupants.
● The microphone for voice control is directed to the driver as well as to the
front passenger. Therefore the driver and the front passenger can operate the
unit. Ð
Dialogue The period of time in which the system is ready to receive voice commands and to
carry them out is called a
dialogue. The system reacts with an audible feedback
and guides you through the individual functions.
Selecting long and short dialogue
The nature of the dialogue can be set by pressing the button on the unit and
by pronouncing the command
“long dialogue ” or “short dialogue ”.
The nature of the dialogue can also be set manually in the operating mode SETUP
→ Voice control →
Dialogue style →
Long or
Short .
If you select the short dialogue, the system shortens some messages or replaces
them by an audible signal (gong), thus the operation is accelerated.
If you select the long dialogue, the system gives the whole message without
shortening it.
The entered voice commands are the same for the long and short dialogue.
Interrupt messages
The message just given can be ended by briefly pressing the button on the
unit. Thus, it is possible to pronounce an additional voice command sooner. Ð
Voice commands The voice control is only possible in the following languages:
Czech, English, German, French, Spanish, Portuguese, Dutch, Italian .8
Voice control of the radio navigation system
Page 17 of 47

RADIO mode
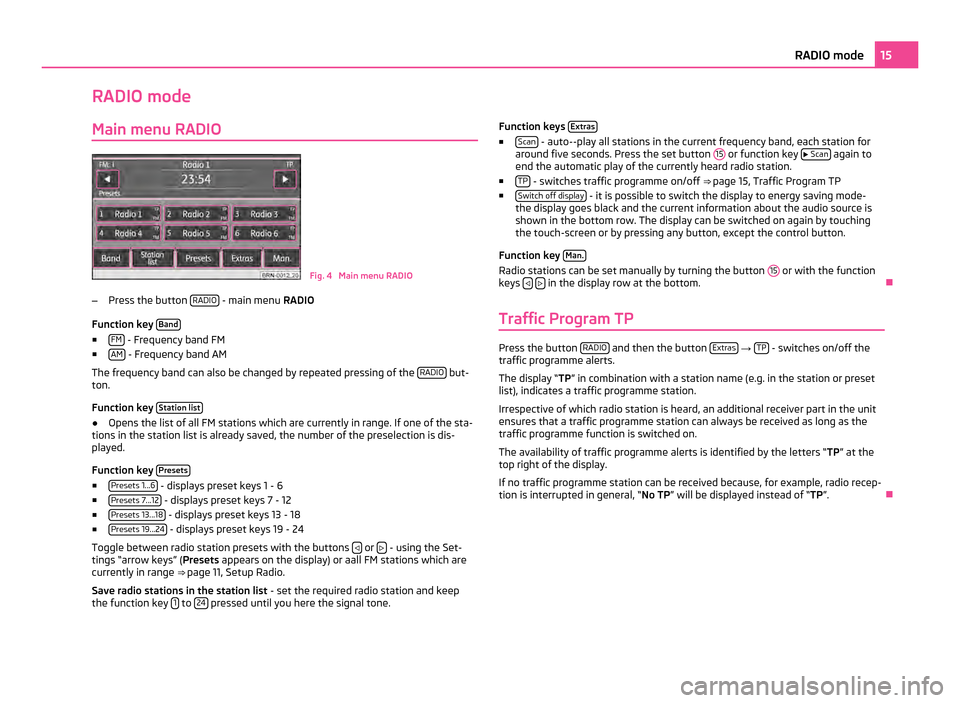
Main menu RADIO Fig. 4 Main menu RADIO
– Press the button RADIO - main menu
RADIO
Function key Band■
FM - Frequency band FM
■ AM - Frequency band AM
The frequency band can also be changed by repeated pressing of the RADIO but-
ton.
Function key Station list●
Opens the list of all FM stations which are currently in range. If one of the sta-
tions in the station list is already saved, the number of the preselection is dis-
played.
Function key Presets■
Presets 1...6 - displays preset keys 1 - 6
■ Presets 7...12 - displays preset keys 7 - 12
■ Presets 13...18 - displays preset keys 13 - 18
■ Presets 19...24 - displays preset keys 19 - 24
Toggle between radio station presets with the buttons or
- using the Set-
tings
“arrow keys” ( Presets appears on the display) or aall FM stations which are
currently in range ⇒ page 11, Setup Radio.
Save radio stations in the station list - set the required radio station and keep
the function key 1 to
24 pressed until you here the signal tone. Function keys
Extras ■
Scan - auto--play all stations in the current frequency band, each station for
around five seconds. Press the set button 15 or function key
Scan again to
end the automatic play of the currently heard radio station.
■ TP - switches traffic programme on/off
⇒
page 15, Traffic Program TP
■ Switch off display - it is possible to switch the display to energy saving mode-
the display goes black and the current information about the audio source is
shown in the bottom row. The display can be switched on again by touching
the touch-screen or by pressing any button, except the control button.
Function key Man. Radio stations can be set manually by turning the button
15 or with the function
keys
in the display row at the bottom.
Ð
Traffic Program TP Press the button
RADIO and then the button
Extras →
TP - switches on/off the
traffic programme alerts.
The display “TP ” in combination with a station name (e.g. in the station or preset
list), indicates a traffic programme station.
Irrespective of which radio station is heard, an additional receiver part in the unit
ensures that a traffic programme station can always be received as long as the
traffic programme function is switched on.
The availability of traffic programme alerts is identified by the letters “TP ” at the
top right of the display.
If no traffic programme station can be received because, for example, radio recep-
tion is interrupted in general,
“ No TP ” will be displayed instead of “TP ”.Ð 15
RADIO mode
Page 22 of 47

WARNING (Continued)
● You must not hold the external audio source in the hand or on the knees
while driving. You could make sudden manoeuvres in the passenger compart-
ment and injure the occupants.
● Always guide the connection cable of the external audio source in such a
way that is does not restrict you when driving. CAUTION
The AUX socket must only be used for audio sources! Note
● The external audio source, which is connected via AUX-IN, can only be used if
no unit is connected via MDI at the same time.
● If an external audio source is connected via AUX, which is equipped with an
adapter for external power supply, it can occur that the audio signal is interrupted.
This depends on the quality of the adapter which is used. Ð
Hard drive (HDD) Store MP3 and WMA data on the hard disk (HDD) Saving 100 music titles of average length of time (3 - 5 minutes) will take approxi-
mately 40 minutes.
If the unit is switched off during the saving process, the saving process will be ter-
minated with the last fully saved title.
Select, save and edit title name and folder
On the memory card, choose the title or folder you want to save on the hard drive.
■ Press the button MEDIA followed by the function key
Selection .
■ - open menu for the folder editing
■ Play - automatic playback
■ Copy - saves title or folder to the hard drive
■ Insert file/folder here - saves directly to the current folder of the hard
drive
■ New folder - creates a new folder
■ Cancel - cancels save ■
Rename - opens input display for changing the title or folder name
■ Delete - deletes the selected title or folder
A folder can have a max. of 7 sub-folders. Press the function key to open the
appropriate higher priority folder.
You can continue listening to this or another audio source while storing other au-
dio data. Ð
Video mode Insert Video-DVD and start Fig. 6 Operating the DVD/Film menu
Push a Video-DVD with the printed side facing up as far as possible into the CD/
DVD case until it is automatically drawn in.
The Video-DVD will start automatically. The readout of the data from the Video-
DVD can take a few seconds, during which time the touch-screen turns dark.
The TV picture will only be displayed when the vehicle is stationary. The touch-
screen is switched off while driving, but the sound can still be heard.
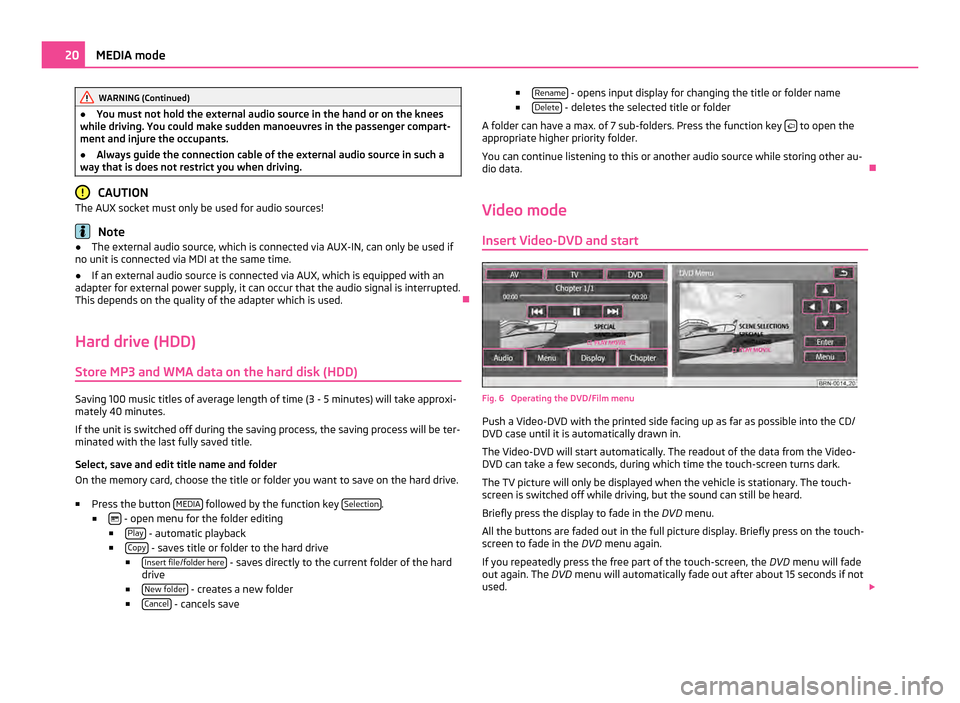
Briefly press the display to fade in the DVD menu.
All the buttons are faded out in the full picture display. Briefly press on the touch-
screen to fade in the DVD menu again.
If you repeatedly press the free part of the touch-screen, the DVD menu will fade
out again. The DVD menu will automatically fade out after about 15 seconds if not
used. 20
MEDIA mode