key battery SKODA OCTAVIA 2012 3.G / (5E) Owner's Manual
[x] Cancel search | Manufacturer: SKODA, Model Year: 2012, Model line: OCTAVIA, Model: SKODA OCTAVIA 2012 3.G / (5E)Pages: 222, PDF Size: 13.52 MB
Page 21 of 222
NoteThe text in the information display goes out after refuelling and driving a short
distance.
Safety systems
If the warning light lights up, there is a fault in the airbag or pedestrian protec-
tion system.
Airbag system
The following message is shown in the information cluster display:
Error: airbag
or AIRBAG ERROR
The functionality of the airbag system is monitored electronically even if one of
the airbags is switched off.
The following applies if one of the airbags or the belt tensioner was switched
off with the diagnostic equipment:
The warning light
lights up for approx. 4 seconds after switching on the igni-
tion and then flashes again for approx. 12 seconds.
The following message is shown in the information cluster display: Airbag/belt tensioner deactivated.
or AIRBAG/BELT TENSIONER OFF
The following applies if the front passenger airbag has been switched off using the key switch in the storage compartment:
› The indicator light
comes on for around 4 seconds after the ignition has been
switched on;
› The warning light
in the display
in the middle of the dash
panel lights up after switching on the ignition » page 151.
Passenger protection system The following message is shown in the information cluster display:
Error: pedestrian protection
or
PASSENGER PROTECTION SYSTEM ERROR
Further information » page 153.WARNINGIf there is a fault in the safety system, have it checked immediately by a
ŠKODA specialist garage. Otherwise, there is a risk of the systems not being
activated in the event of an accident.
Tyre pressure
The warning light
lights up, if there is a substantial drop in inflation pressure in
one of the tyres. Check and adjust the pressure in all tyres » page 181.
An audible signal sounds as a warning signal.
If the warning light
lights up, there is a fault in the system.
Seek help from a ŠKODA specialist garage. Further information » page 185, Tyre control display .
Note
If the vehicle's battery has been disconnected and reconnected, the warning light
comes on after switching on the ignition. If the warning light does not go out
after moving a short distance, this means there is an error in the system. Seek
help from a ŠKODA specialist garage.
Windscreen washer fluid level
If the windscreen washer fluid level is too low, the warning light
comes on. Top
up with washer fluid.
Top up with liquid » page 176.
The following message is shown in the information cluster display: Top up washer fluid!
or
WASHER FLUID PLEASE TOP UP
19Instruments and warning lights
Page 30 of 222
Unlocking and locking
Vehicle key
Introductory information
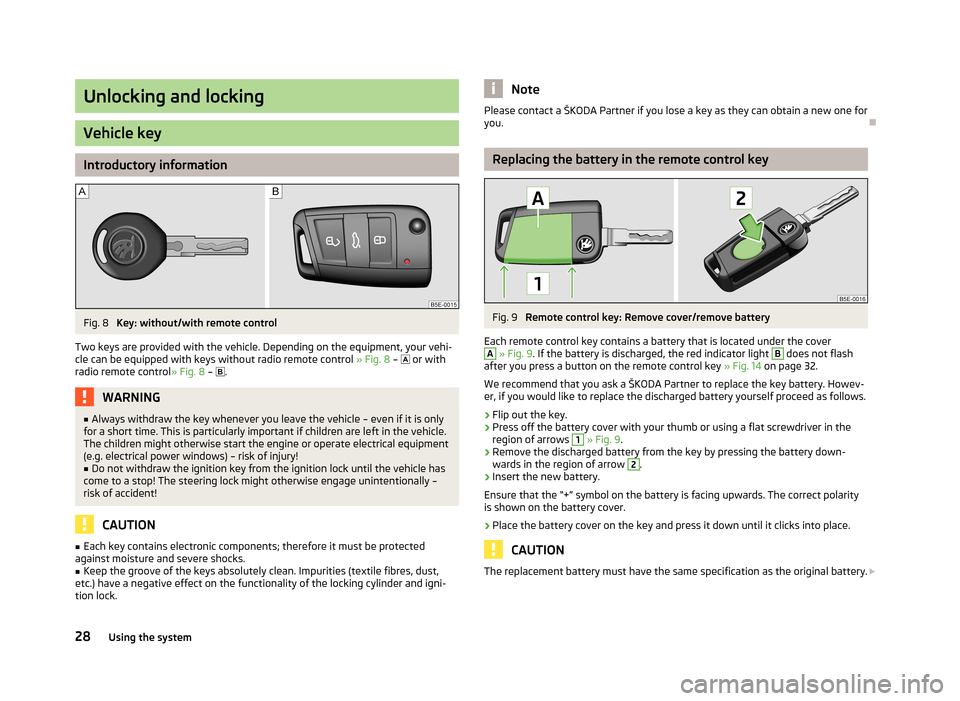
Fig. 8
Key: without/with remote control
Two keys are provided with the vehicle. Depending on the equipment, your vehi- cle can be equipped with keys without radio remote control » Fig. 8 –
or with
radio remote control » Fig. 8 –
.
WARNING■
Always withdraw the key whenever you leave the vehicle – even if it is only
for a short time. This is particularly important if children are left in the vehicle.
The children might otherwise start the engine or operate electrical equipment
(e.g. electrical power windows) – risk of injury!■
Do not withdraw the ignition key from the ignition lock until the vehicle has
come to a stop! The steering lock might otherwise engage unintentionally – risk of accident!
CAUTION
■ Each key contains electronic components; therefore it must be protected
against moisture and severe shocks.■
Keep the groove of the keys absolutely clean. Impurities (textile fibres, dust,
etc.) have a negative effect on the functionality of the locking cylinder and igni-
tion lock.
NotePlease contact a ŠKODA Partner if you lose a key as they can obtain a new one for you.
Replacing the battery in the remote control key
Fig. 9
Remote control key: Remove cover/remove battery
Each remote control key contains a battery that is located under the cover
A
» Fig. 9 . If the battery is discharged, the red indicator light
B
does not flash
after you press a button on the remote control key » Fig. 14 on page 32.
We recommend that you ask a ŠKODA Partner to replace the key battery. Howev- er, if you would like to replace the discharged battery yourself proceed as follows.
›
Flip out the key.
›
Press off the battery cover with your thumb or using a flat screwdriver in theregion of arrows
1
» Fig. 9 .
›
Remove the discharged battery from the key by pressing the battery down-
wards in the region of arrow
2
.
›
Insert the new battery.
Ensure that the “+” symbol on the battery is facing upwards. The correct polarity
is shown on the battery cover.
›
Place the battery cover on the key and press it down until it clicks into place.
CAUTION
The replacement battery must have the same specification as the original battery. 28Using the system
Page 31 of 222
For the sake of the environmentDispose of the used battery in accordance with national legal provisions.
Note
The key has to be synchronised if the vehicle cannot be unlocked or locked with
the remote control key after replacing the battery » page 33.
Child safety lock
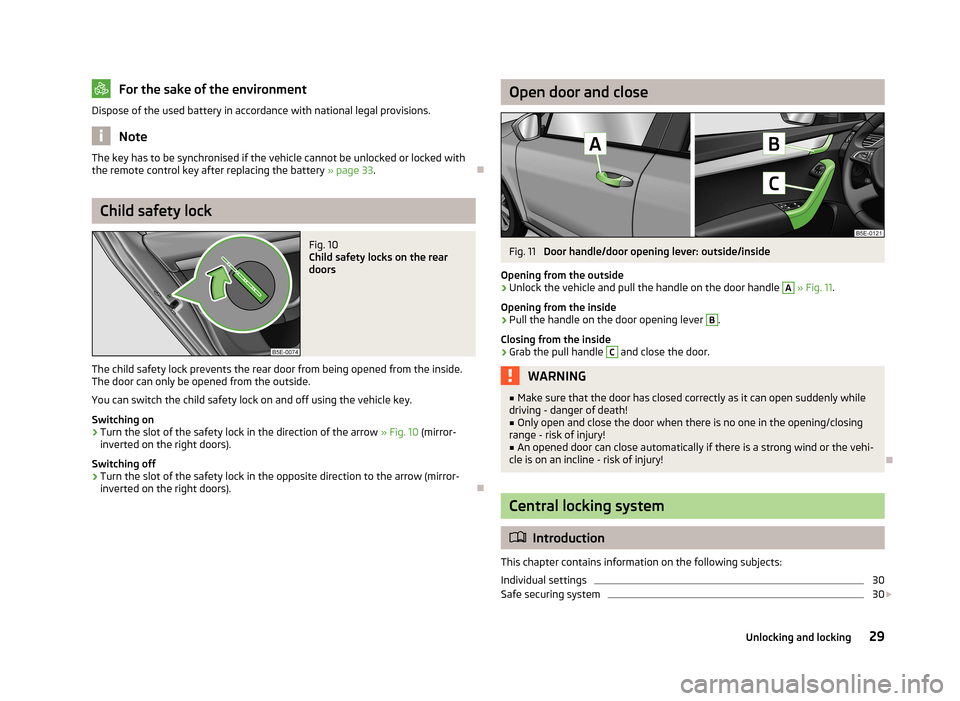
Fig. 10
Child safety locks on the rear
doors
The child safety lock prevents the rear door from being opened from the inside.
The door can only be opened from the outside.
You can switch the child safety lock on and off using the vehicle key.
Switching on
›
Turn the slot of the safety lock in the direction of the arrow » Fig. 10 (mirror-
inverted on the right doors).
Switching off
›
Turn the slot of the safety lock in the opposite direction to the arrow (mirror- inverted on the right doors).
Open door and closeFig. 11
Door handle/door opening lever: outside/inside
Opening from the outside
›
Unlock the vehicle and pull the handle on the door handle
A
» Fig. 11 .
Opening from the inside
›
Pull the handle on the door opening lever
B
.
Closing from the inside
›
Grab the pull handle
C
and close the door.
WARNING■ Make sure that the door has closed correctly as it can open suddenly while
driving - danger of death!■
Only open and close the door when there is no one in the opening/closing
range - risk of injury!
■
An opened door can close automatically if there is a strong wind or the vehi-
cle is on an incline - risk of injury!
Central locking system
Introduction
This chapter contains information on the following subjects:
Individual settings
30
Safe securing system
30
29Unlocking and locking
Page 34 of 222
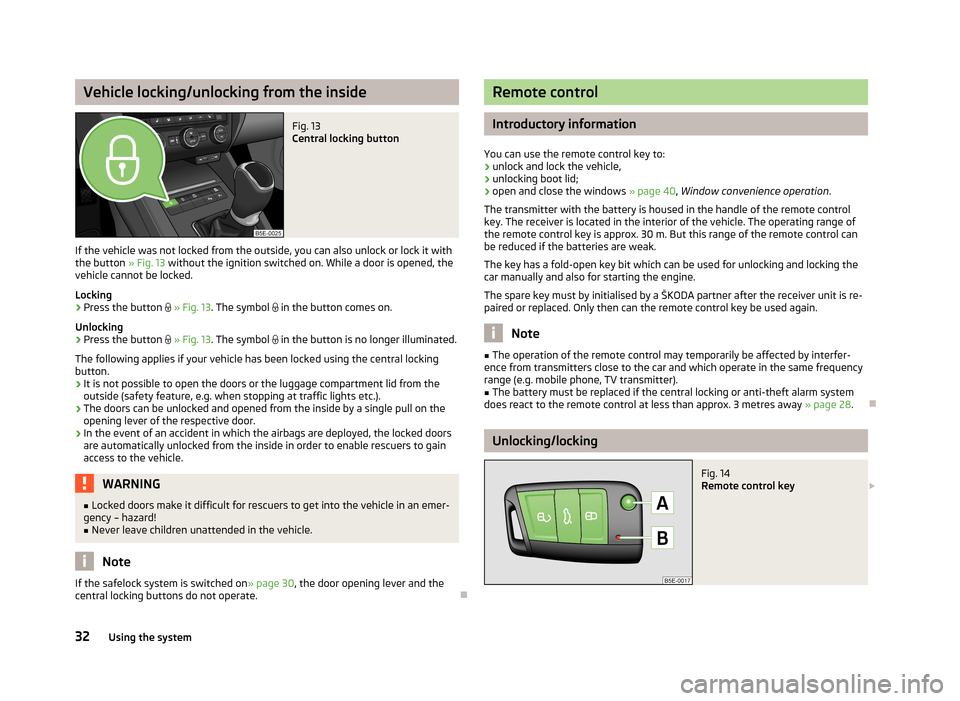
Vehicle locking/unlocking from the insideFig. 13
Central locking button
If the vehicle was not locked from the outside, you can also unlock or lock it with
the button » Fig. 13 without the ignition switched on. While a door is opened, the
vehicle cannot be locked.
Locking
›
Press the button
» Fig. 13 . The symbol
in the button comes on.
Unlocking
›
Press the button
» Fig. 13 . The symbol
in the button is no longer illuminated.
The following applies if your vehicle has been locked using the central locking button.
› It is not possible to open the doors or the luggage compartment lid from the
outside (safety feature, e.g. when stopping at traffic lights etc.).
› The doors can be unlocked and opened from the inside by a single pull on the
opening lever of the respective door.
› In the event of an accident in which the airbags are deployed, the locked doors
are automatically unlocked from the inside in order to enable rescuers to gain access to the vehicle.
WARNING■ Locked doors make it difficult for rescuers to get into the vehicle in an emer-
gency – hazard!■
Never leave children unattended in the vehicle.
Note
If the safelock system is switched on » page 30
, the door opening lever and the
central locking buttons do not operate.
Remote control
Introductory information
You can use the remote control key to:
› unlock and lock the vehicle,
› unlocking boot lid;
› open and close the windows
» page 40, Window convenience operation .
The transmitter with the battery is housed in the handle of the remote control
key. The receiver is located in the interior of the vehicle. The operating range of
the remote control key is approx. 30 m. But this range of the remote control can
be reduced if the batteries are weak.
The key has a fold-open key bit which can be used for unlocking and locking the
car manually and also for starting the engine.
The spare key must by initialised by a ŠKODA partner after the receiver unit is re-
paired or replaced. Only then can the remote control key be used again.
Note
■ The operation of the remote control may temporarily be affected by interfer-
ence from transmitters close to the car and which operate in the same frequency
range (e.g. mobile phone, TV transmitter).■
The battery must be replaced if the central locking or anti-theft alarm system
does react to the remote control at less than approx. 3 metres away » page 28.
Unlocking/locking
Fig. 14
Remote control key
32Using the system
Page 35 of 222
Unlocking the vehicle
Locking the vehicle
Unlocking the boot lid
Folding out/folding up of the key bit
Warning light
Unlocking
The turn signal lights flash twice as confirmation that the vehicle has been un-
locked.
If you unlock the vehicle and do not open a door or the boot lid within the next
45 seconds, the vehicle will lock again automatically and the safelock system or
anti-theft alarm system will be switched on. This function is intended to prevent
the car being unlocked unintentionally.
The seat and mirror are adjusted after the vehicle is unlocked » page 61, Memo-
ry function of the power seat .
Locking
The turn signal lights flash once as confirmation that the vehicle has been locked.
If the doors or the luggage compartment lid remain open after the vehicle has
been locked, the turn signal lights do not flash until they have been closed.
The current position of the seat and mirror after the vehicle is locked » page 61,
Memory function of the remote control key .
If the button
is accidentally pressed before the key is inserted into the ignition,
press the button to unlock the vehicle.
WARNINGIf the car is locked from the outside and the safelock system is switched on,
there must not be any person in the car as it is then not possible to open ei-
ther a door or a window from the inside. The locked doors make it more diffi-
cult for rescuers to get into the vehicle in an emergency – hazard!
Note
■ Only operate the remote control when the doors and luggage compartment lid
are closed and the vehicle is in your line of sight.■
If the driver door is open, the vehicle cannot be locked using the remote control
key.
ABSynchronization
If the vehicle does not unlock when pressing the remote control, the key may not be synchronised. This can occur when the buttons on the remote control key areactuated a number of times outside of the operative range of the equipment or
the battery in the remote control key was replaced.
This means it is necessary to synchronise the key as follows:
› press any button on the remote control key;
› pressing of the button means that the door will unlock with the key within 1 mi-
nute.
KESSY system
Introductory information
The KESSY system (Keyless Entry Start Exit System) enables a comfort unlocking
and locking of the vehicle and starting the engine without actively using the
key » page 92 , Starting and stopping the engine . The KESSY system is integra-
ted in the central locking system and all of the functions of the remote control.
Locking/unlocking
Fig. 15
KESSY: Name of the zones and unlocking/sensors in the handle of
the front door
The vehicle is locked/unlocked when the key is at a maximum distance of around
1.5 m from the handle on the front door or from the handle of the boot lid.
33Unlocking and locking
Page 36 of 222
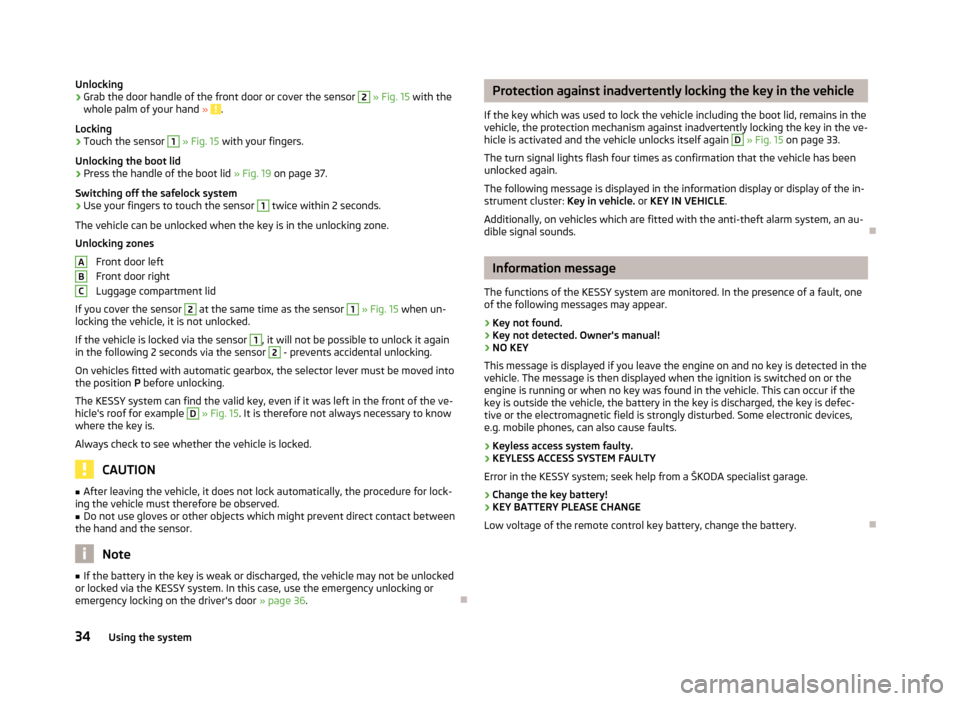
Unlocking›Grab the door handle of the front door or cover the sensor 2 » Fig. 15 with the
whole palm of your hand » .
Locking
›
Touch the sensor
1
» Fig. 15 with your fingers.
Unlocking the boot lid
›
Press the handle of the boot lid » Fig. 19 on page 37.
Switching off the safelock system
›
Use your fingers to touch the sensor
1
twice within 2 seconds.
The vehicle can be unlocked when the key is in the unlocking zone.
Unlocking zones
Front door left
Front door right
Luggage compartment lid
If you cover the sensor
2
at the same time as the sensor
1
» Fig. 15 when un-
locking the vehicle, it is not unlocked.
If the vehicle is locked via the sensor
1
, it will not be possible to unlock it again
in the following 2 seconds via the sensor
2
- prevents accidental unlocking.
On vehicles fitted with automatic gearbox, the selector lever must be moved into the position P before unlocking.
The KESSY system can find the valid key, even if it was left in the front of the ve-
hicle's roof for example
D
» Fig. 15 . It is therefore not always necessary to know
where the key is.
Always check to see whether the vehicle is locked.
CAUTION
■ After leaving the vehicle, it does not lock automatically, the procedure for lock-
ing the vehicle must therefore be observed.■
Do not use gloves or other objects which might prevent direct contact between
the hand and the sensor.
Note
■ If the battery in the key is weak or discharged, the vehicle may not be unlocked
or locked via the KESSY system. In this case, use the emergency unlocking or emergency locking on the driver's door » page 36.ABCProtection against inadvertently locking the key in the vehicle
If the key which was used to lock the vehicle including the boot lid, remains in the
vehicle, the protection mechanism against inadvertently locking the key in the ve-
hicle is activated and the vehicle unlocks itself again D
» Fig. 15 on page 33.
The turn signal lights flash four times as confirmation that the vehicle has been
unlocked again.
The following message is displayed in the information display or display of the in-
strument cluster: Key in vehicle. or KEY IN VEHICLE .
Additionally, on vehicles which are fitted with the anti-theft alarm system, an au- dible signal sounds.
Information message
The functions of the KESSY system are monitored. In the presence of a fault, one of the following messages may appear.
› Key not found.
› Key not detected. Owner's manual!
› NO KEY
This message is displayed if you leave the engine on and no key is detected in the vehicle. The message is then displayed when the ignition is switched on or the
engine is running or when no key was found in the vehicle. This can occur if the
key is outside the vehicle, the battery in the key is discharged, the key is defec-
tive or the electromagnetic field is strongly disturbed. Some electronic devices,
e.g. mobile phones, can also cause faults.
› Keyless access system faulty.
› KEYLESS ACCESS SYSTEM FAULTY
Error in the KESSY system; seek help from a ŠKODA specialist garage.
› Change the key battery!
› KEY BATTERY PLEASE CHANGE
Low voltage of the remote control key battery, change the battery.
34Using the system
Page 37 of 222
Parking the vehicle
If the vehicle is not unlocked within 60 or 90 seconds, the sensors in the handle of the driver /front passenger's door is deactivated automatically » Fig. 15 on
page 33.
Activation after 60 hours›
Unlock the driver's door using the sensor
2
» Fig. 15 on page 33.
›
Press the handle of the boot lid.
›
Unlock the vehicle using the button on the remote control key.
›
Unlocking the driver's door in an emergency
» page 36.
Activation after 90 hours
›
Unlock the vehicle using the button on the remote control key.
›
Unlocking the driver's door in an emergency
» page 36.
Anti-theft alarm system
Introductory information
The anti-theft alarm system increases the level of protection against people
seeking to break into the vehicle. The system triggers audible and visual warning
signals if an attempt is made to break into the vehicle.
Activating
The anti-theft alarm system is activated by locking the vehicle or inserting the key in the driver's door. It is activated 30 seconds after locking the door.
If you unlock the vehicle and do not open a door or the boot lid within the next45 seconds, the vehicle will lock again automatically and the safelock system or
anti-theft alarm system will be switched on. This function is intended to prevent
the car being unlocked unintentionally.
Deactivating
The anti-theft alarm system is deactivated by unlocking the vehicle. If the vehicle
is not opened within 45 seconds, the anti-theft alarm system is automatically ac-
tivated again.
The alarm system is also deactivated if you unlock the driver door using the key
within 45 seconds of locking the vehicle.
If the vehicle is unlocked by inserting the key into the driver door, the key must
be inserted into the ignition lock and the ignition switched on within 15 seconds
of unlocking the door to deactivate the alarm system. The alarm is triggered if
the ignition is not switched on within 15 seconds.
Triggering the alarm
An alarm is triggered when the following monitored areas of the vehicle have a fault:
› bonnet;
› boot lid;
› doors;
› ignition lock;
› Vehicle inclination
» page 36;
› Interior of the vehicle
» page 36;
› A drop in voltage of the on-board power supply;
› Socket of the factory-fitted towing device
» page 110, Driving with a trailer .
An alarm is immediately triggered if either of the two battery terminals is discon-
nected while the anti-theft alarm system is activated.
Switching off the alarm
The alarm is switched off by unlocking the vehicle or switching on the ignition.
CAUTION
Before leaving the car, it must be checked that all of the windows, doors and the
sliding/tilting roof are properly closed to ensure the full functionality of the anti-
theft alarm system.
Note
The working life of the alarm siren is 5 years.
35Unlocking and locking
Page 43 of 222
The convenience opening of the windows by means of the key in the driver's/
front passenger's lock is only possible within 45 seconds of deactivating or acti-
vating the alarm system.
Setting options
Information on the setting » operating instructions for Infotainment , chapter Set-
ting vehicle systems (CAR button) .
Operational faults in the automatic power windows
First read and observe the introductory information and safety warn-
ings
on page 38.
The automatic power windows do not work if the vehicle battery was disconnec-
ted and connected while a window is open. The system must be activated.
Proceed as follows in order to re-establish the function:
›
Switch on the ignition.
›
Pull the top edge of the button and close the window.
›
Release the button.
›
Pull the relevant button upwards again for approx. 3 seconds, and keep it press-ed down.
In the winter, ice accumulating on the surface of the window may cause there to be more resistance when closing the window. The window will stop and move
back several centimetres.
It is necessary to deactivate the force limiter to close the window » page 40.
Power panoramic sliding/sliding tilting roof
Introductory information
The power panoramic sliding/tilting roof (abbreviated in the following as 'sliding/
tilting roof'), can only be when the ignition is turned on and when the outdoor temperature is higher than -20 °C.
The sliding/tilting roof can still be operated for approx. 10 minutes after switching the ignition off. However, as soon as the driver or front passenger's door is
opened it is no longer possible to operate the sliding/tilting roof.
CAUTION■ Always close the sliding/tilting roof before disconnecting the battery.■If the battery has been disconnected and reconnected, it is possible that the
sliding/tilting roof does not operate correctly. Next, move the rotary switch into
position A
» Fig. 24 on page 41, pull it, and hold onto the recess downwards
and forwards tightly. The sliding/tilting roof opens and closes again after around 10 seconds. Do not release the control dial until it has done so.
Using the system
Fig. 24
Control dial for the sliding/tilting
roof
Comfort position
›
Turn the switch to position
C
» Fig. 24 .
When the sliding/tilting roof is in the comfort position, the intensity of the wind noise is reduced.
Open partially
›
Turn the switch to a position in area
D
.
Open fully
›
Turn the switch to position
B
and hold it in this position (spring-tensioned po-
sition).
Tilting roof
›
Turn the switch to position
A
.
›
Press the switch in the region of the lug
E
towards the roof.
Closing
›
Turn the switch to position
A
» Fig. 24 .
›
Press the switch on the recess
E
down and then pull it forwards.
41Unlocking and locking
Page 73 of 222
Sockets
12-Volt power socket
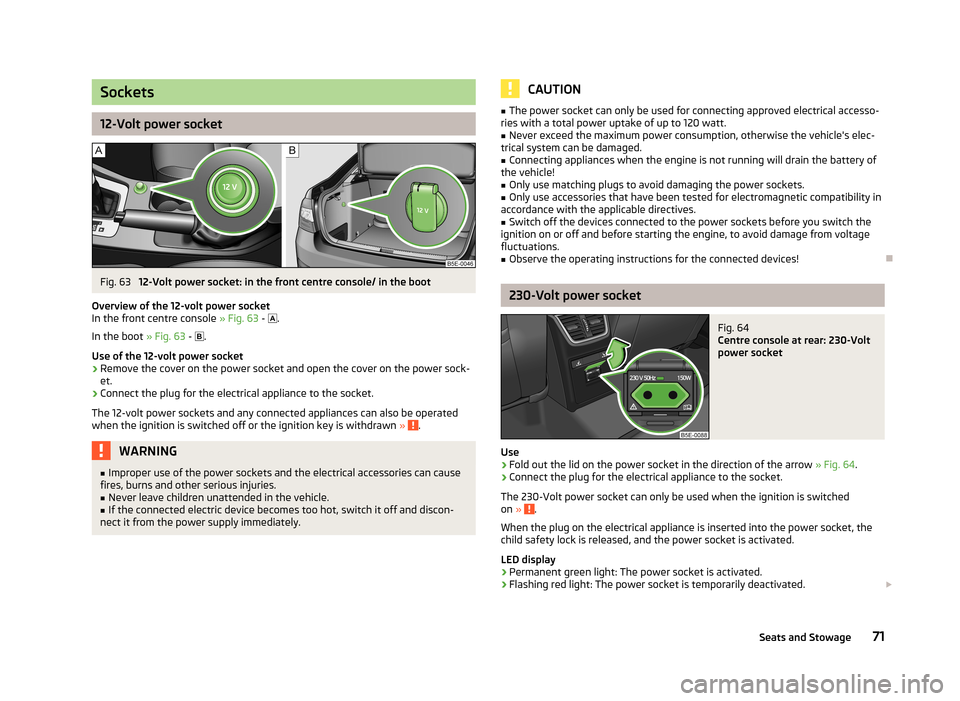
Fig. 63
12-Volt power socket: in the front centre console/ in the boot
Overview of the 12-volt power socket
In the front centre console » Fig. 63 -
.
In the boot » Fig. 63 -
.
Use of the 12-volt power socket
›
Remove the cover on the power socket and open the cover on the power sock-
et.
›
Connect the plug for the electrical appliance to the socket.
The 12-volt power sockets and any connected appliances can also be operated when the ignition is switched off or the ignition key is withdrawn »
.
WARNING■
Improper use of the power sockets and the electrical accessories can cause
fires, burns and other serious injuries.■
Never leave children unattended in the vehicle.
■
If the connected electric device becomes too hot, switch it off and discon-
nect it from the power supply immediately.
CAUTION■ The power socket can only be used for connecting approved electrical accesso-
ries with a total power uptake of up to 120 watt.■
Never exceed the maximum power consumption, otherwise the vehicle's elec-
trical system can be damaged.
■
Connecting appliances when the engine is not running will drain the battery of
the vehicle!
■
Only use matching plugs to avoid damaging the power sockets.
■
Only use accessories that have been tested for electromagnetic compatibility in
accordance with the applicable directives.
■
Switch off the devices connected to the power sockets before you switch the
ignition on or off and before starting the engine, to avoid damage from voltage
fluctuations.
■
Observe the operating instructions for the connected devices!
230-Volt power socket
Fig. 64
Centre console at rear: 230-Volt
power socket
Use
›
Fold out the lid on the power socket in the direction of the arrow » Fig. 64
.
›
Connect the plug for the electrical appliance to the socket.
The 230-Volt power socket can only be used when the ignition is switched on »
.
When the plug on the electrical appliance is inserted into the power socket, the
child safety lock is released, and the power socket is activated.
LED display › Permanent green light: The power socket is activated.
› Flashing red light: The power socket is temporarily deactivated.
71Seats and Stowage
Page 94 of 222
Starting-off and Driving
Starting and stopping the engine
Introduction
This chapter contains information on the following subjects:
Adjusting the steering wheel position
93
Power steering
93
Electronic immobiliser
93
Ignition lock
94
Starting engine
94
Switching the engine off
94
Starting and stopping the engine on vehicles with the KESSY system » page 95.
WARNING■
Never adjust the steering wheel when the vehicle is moving only when the
vehicle is stationary!■
Maintain a distance of 25 cm
1
to the steering wheel » Fig. 89 on page 93
– . Not maintaining this minimum distance will mean that the airbag system
will not be able to properly protect you – hazard!
■
The lever for adjusting the steering wheel must be locked whilst driving so
that the position of the steering wheel cannot accidently change during the journey – risk of accident!
■
If the steering wheel is adjusted further towards the head, the protection
provided by the driver airbag in the event of an accident is reduced. Check
that the steering wheel is aligned to the chest.
■
When driving, hold the steering wheel with both hands firmly on the outer
edge in the 9 o'clock and 3 o'clock position. Never hold the steering wheel in
the 12 o'clock position or in any other way (e.g. in the middle or inner edge of the steering wheel). In such cases, you could injure the arms, hands and head
when the driver airbag is deployed.
WARNING (Continued)■ When driving, the ignition key must always be in the position 2 » Fig. 90 on
page 94 (ignition switched on) without the engine running. This position is
indicated by the warning lights coming on. If this is not the case, it could result
in unexpected locking of the steering wheel – risk of accident!■
Only pull the ignition key from the ignition lock when the vehicle has come
to a complete stop (by applying the handbrake). Otherwise the steering wheel
could block – risk of accident!
■
When leaving the vehicle, the ignition must always be removed. This is par-
ticularly important if children are left in the vehicle. Otherwise the children
could, for example, start the engine – risk of accident or injury!
■
Never leave the engine running in unventilated or closed rooms. The ex-
haust gases of the engine contain besides the odorless and colourless carbon
monoxide a poisonous gas – hazard! Carbon monoxide can cause uncon-
sciousness and death.
■
Never leave the vehicle unattended with the engine running.
■
Never switch off the engine before the vehicle is stationary – risk of acci-
dent!
CAUTION
■ The starter may only be operated (ignition key position 3 » Fig. 90 on
page 94), if the engine is not running. The starter or engine can be damaged if
the starter is activated when the engine is running.■
Avoid high engine revolutions, full throttle and high engine loads as long as the
engine has not yet reached its operating temperature – risk of damaging the en-
gine!
■
Do not tow start the engine - danger of damaging the engine! On vehicles with
a catalytic converter, unburnt fuel may get into the catalytic converter where it
may ignite. This in turn may damage the catalytic converter. The battery from an- other vehicle can be used as a jump-start aid » page 195.
■
Do not switch the engine off immediately at the end of your journey after the
engine has been operated over a prolonged period at high loads but leave it to
run at an idling speed for about 1 minute. This prevents any possible accumulation of heat when the engine is switched off.
For the sake of the environment
Do not warm up the engine while the vehicle is stationary. If possible, start your
journey as soon as the engine has started. Through this the engine reaches its
operating temperature more rapidly and the pollutant emissions are lower. 92Using the system