light SKODA OCTAVIA 2013 3.G / (5E) Amundsen Navigation System Manual
[x] Cancel search | Manufacturer: SKODA, Model Year: 2013, Model line: OCTAVIA, Model: SKODA OCTAVIA 2013 3.G / (5E)Pages: 83, PDF Size: 4.7 MB
Page 8 of 83
touch screenFirst read and observe the introductory information given on page 5.
The unit is equipped with a so-called touch screen
11
» Fig. 1 on page 5which can
only be operated by the touch of a finger.
CAUTION
■ The screen can be operated by a slight touch of a finger. Do not apply pressure
to the screen - risk of damage!■
Do not use any objects to operate the screen - risk of damage!
■
Do not use solvents such as benzene or turpentine for cleaning, since they may
damage the screen surface.
Note
■ Use a soft cloth and, if necessary, methylated spirits, to remove fingerprints
from the screen. When doing so, ensure that you do not cause damage to other parts of the interior.■
It is not possible to operate the screen with your fingernails or while wearing
gloves.
■
Do not affix anything to the area of the unit below the screen. This could affect
the operation of the sensors for the zoom function.
■
You can use a touchscreen protector film that does not affect the touchscreen's
functionality to protect it.
■
The brightness of the screen is adjusted automatically depending on the bright-
ness of the interior lighting. The automatic setting can be adjusted manual-
ly » page 19 .
Switching the unit on/off
First read and observe the introductory information given on page 5.
›
Press the knob to switch the unit on or off.
When the unit is switched on, the audio source last active and the most recently
selected menu before the unit was switched off will be restored.
If telephone mode was active before you switched off the unit and the ignition
and Bluetooth ®
function is not switched on, the screen displays the mes-
sage » page 36 . Switch on the ignition or the Bluetooth ®
function » page 21 .
If the vehicle key is pulled out of the ignition lock while the unit is switched on,
the unit will switch off automatically. After switching on the ignition, the unit is
turned on automatically.
The unit will not be switched on automatically when the ignition is switched on if
the unit was switched off using the
knob.
The unit will switch off automatically after the engine is switched off and the
door is opened if your vehicle is fitted with the KESSY system. The unit will switch
off if you open the driver's door before switching off the engine.
When the ignition is switched off, the unit switches itself off automatically after
approximately half an hour (prevents the vehicle battery being drained).
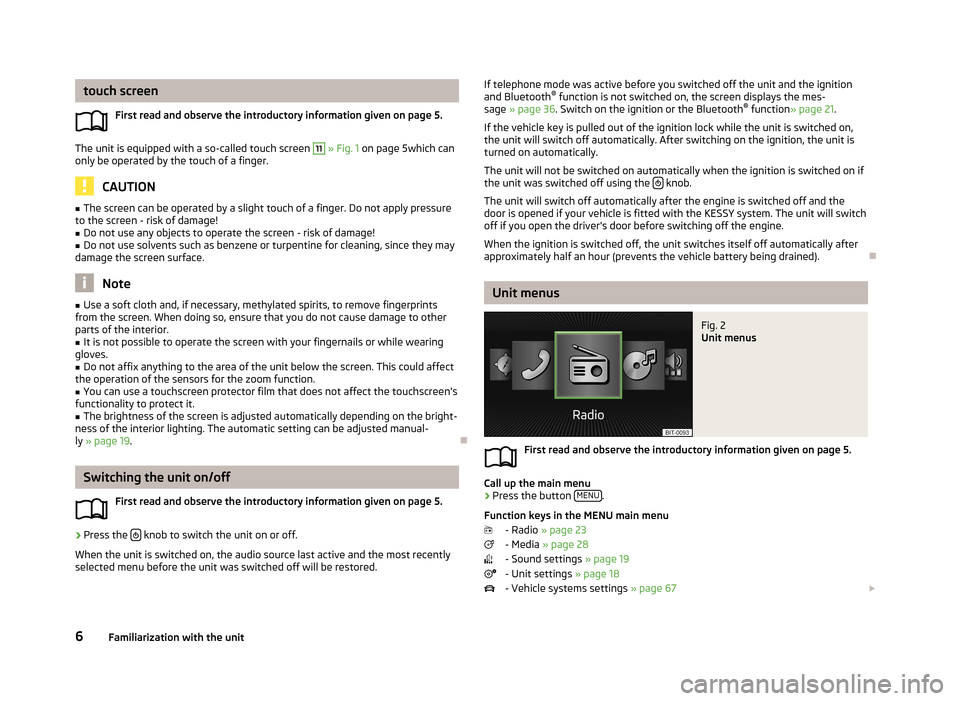
Unit menus
Fig. 2
Unit menus
First read and observe the introductory information given on page 5.
Call up the main menu
›
Press the button MENU.
Function keys in the MENU main menu - Radio » page 23
- Media » page 28
- Sound settings » page 19
- Unit settings » page 18
- Vehicle systems settings » page 67
6Familiarization with the unit
Page 10 of 83
Unit operation
In the unit screen
Introduction
This chapter contains information on the following subjects:
Operation
8
Input screen with keyboard
9
Input screen with numeric keyboard
9
First and foremost, pay attention to the safety instructions » page 4 , Important
notes .
This chapter covers the operation of the unit and working with the touchscreen
and with various types of input keyboard.
Operation
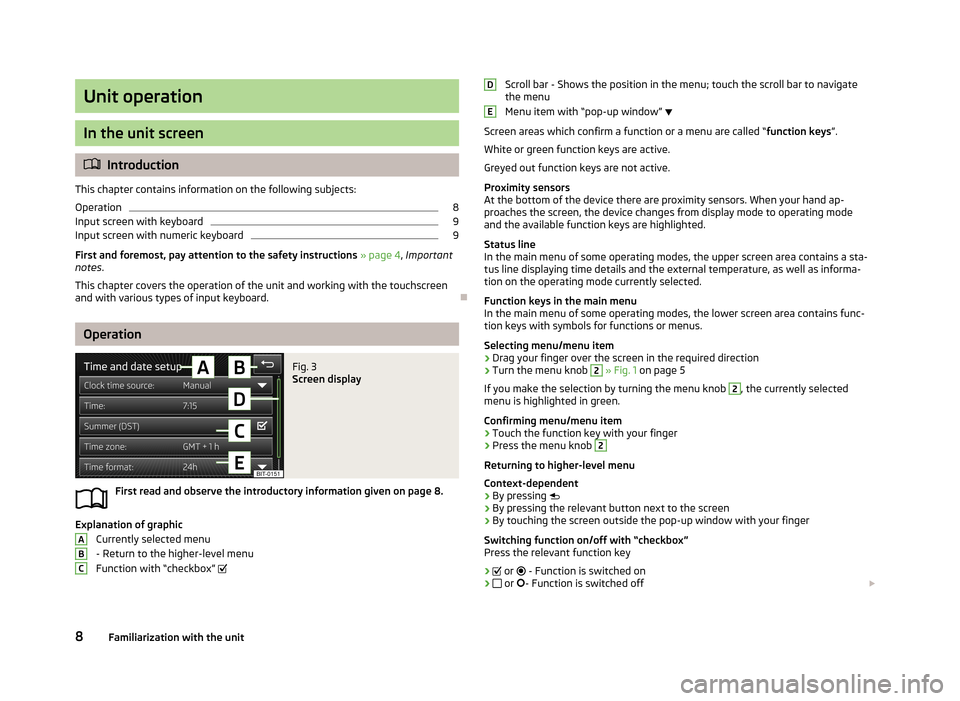
Fig. 3
Screen display
First read and observe the introductory information given on page 8.
Explanation of graphic
Currently selected menu
- Return to the higher-level menu
Function with “checkbox”
ABCScroll bar - Shows the position in the menu; touch the scroll bar to navigate
the menu
Menu item with “pop-up window”
Screen areas which confirm a function or a menu are called “ function keys”.
White or green function keys are active.
Greyed out function keys are not active.
Proximity sensors
At the bottom of the device there are proximity sensors. When your hand ap- proaches the screen, the device changes from display mode to operating mode
and the available function keys are highlighted.
Status line
In the main menu of some operating modes, the upper screen area contains a sta-
tus line displaying time details and the external temperature, as well as informa- tion on the operating mode currently selected.
Function keys in the main menu
In the main menu of some operating modes, the lower screen area contains func-
tion keys with symbols for functions or menus.
Selecting menu/menu item
› Drag your finger over the screen in the required direction
› Turn the menu knob 2
» Fig. 1 on page 5
If you make the selection by turning the menu knob
2
, the currently selected
menu is highlighted in green.
Confirming menu/menu item
› Touch the function key with your finger
› Press the menu knob
2
Returning to higher-level menu
Context-dependent
› By pressing
› By pressing the relevant button next to the screen
› By touching the screen outside the pop-up window with your finger
Switching function on/off with “checkbox” Press the relevant function key
›
or
- Function is switched on
›
or
- Function is switched off
DE8Familiarization with the unit
Page 12 of 83
In MAXI DOT Display
Introduction
This chapter contains information on the following subjects:
Operate using the lever
10
Multifunction steering wheel- Radio/Media
10
Multifunction steering wheel - Phone
12
Multifunction steering wheel - Navigation
13
First and foremost, pay attention to the safety instructions » page 4 , Important
notes .
This chapter discusses operation of the unit and its menus using the operating
lever or the buttons on the multifunction steering wheel. Information about the
device functions appears in the MAXI DOT display.
The keys can only control the menu functions in the MAXI DOT display.
Note
If the ignition and the side lights are switched on, the buttons and dials on the
multifunction steering wheel will also be illuminated.
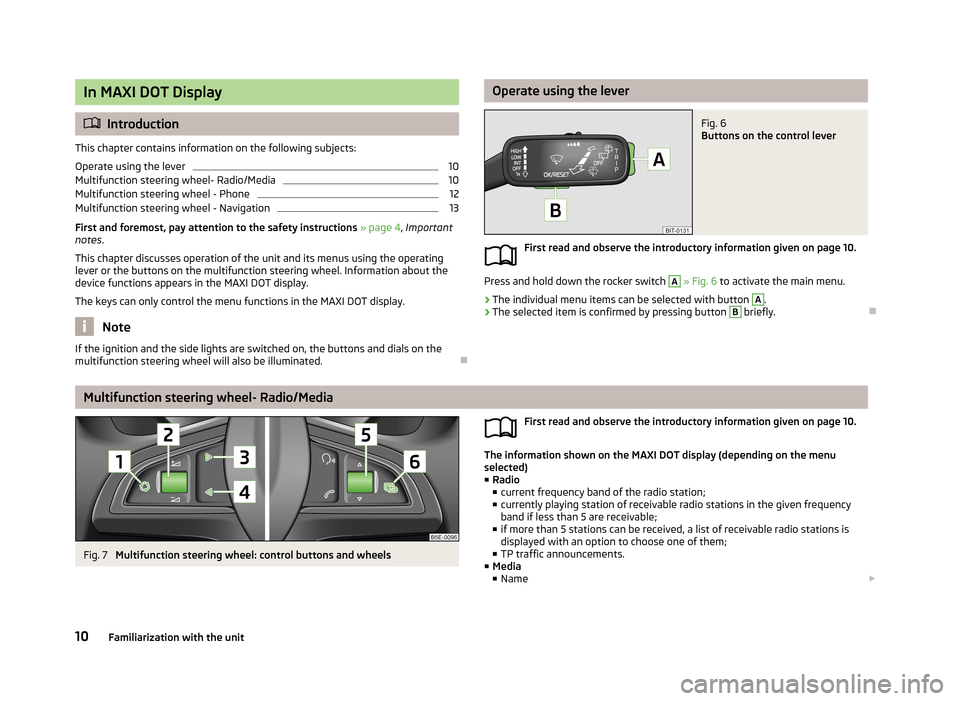
Operate using the leverFig. 6
Buttons on the control lever
First read and observe the introductory information given on page 10.
Press and hold down the rocker switch
A
» Fig. 6 to activate the main menu.
›
The individual menu items can be selected with button
A
.
›
The selected item is confirmed by pressing button
B
briefly.
Multifunction steering wheel- Radio/Media
Fig. 7
Multifunction steering wheel: control buttons and wheels
First read and observe the introductory information given on page 10.
The information shown on the MAXI DOT display (depending on the menu
selected) ■ Radio
■ current frequency band of the radio station;
■ currently playing station of receivable radio stations in the given frequency
band if less than 5 are receivable;
■ if more than 5 stations can be received, a list of receivable radio stations is
displayed with an option to choose one of them;
■ TP traffic announcements.
■ Media
■ Name
10Familiarization with the unit
Page 18 of 83
Voice the descriptions of the function keys highlighted in green. For example, thefunction key Dial no. can be accessed through the voice command “ Call number.”
Voice control settings » page 21.
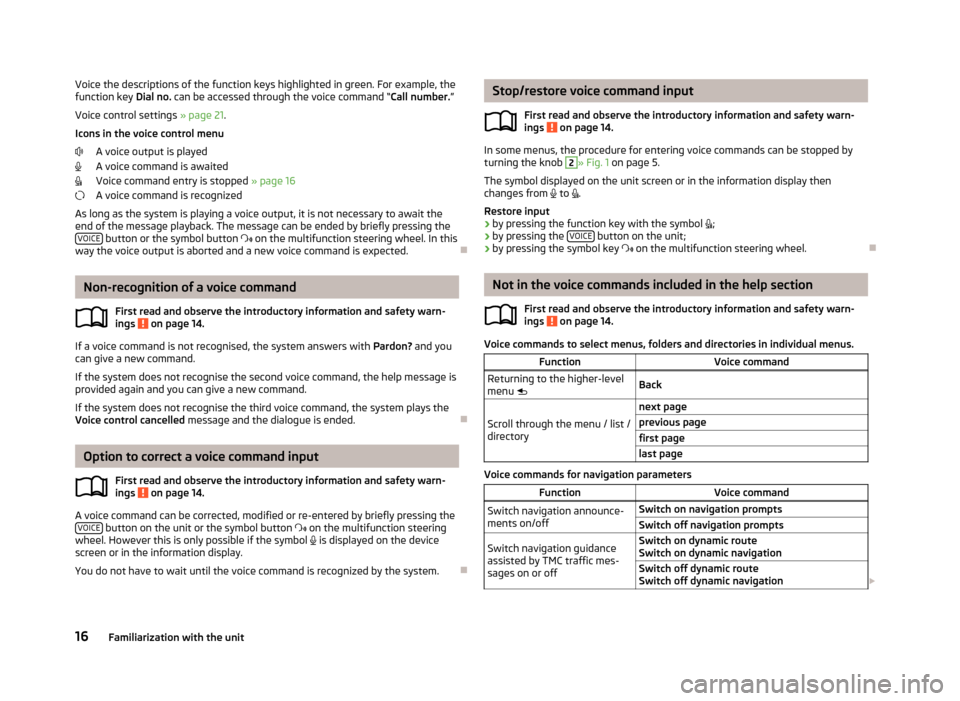
Icons in the voice control menu A voice output is played
A voice command is awaited
Voice command entry is stopped » page 16
A voice command is recognized
As long as the system is playing a voice output, it is not necessary to await the
end of the message playback. The message can be ended by briefly pressing the VOICE
button or the symbol button
on the multifunction steering wheel. In this
way the voice output is aborted and a new voice command is expected.
Non-recognition of a voice command
First read and observe the introductory information and safety warn-
ings
on page 14.
If a voice command is not recognised, the system answers with Pardon? and you
can give a new command.
If the system does not recognise the second voice command, the help message is provided again and you can give a new command.
If the system does not recognise the third voice command, the system plays theVoice control cancelled message and the dialogue is ended.
Option to correct a voice command input
First read and observe the introductory information and safety warn-ings
on page 14.
A voice command can be corrected, modified or re-entered by briefly pressing the VOICE button on the unit or the symbol button
on the multifunction steering
wheel. However this is only possible if the symbol
is displayed on the device
screen or in the information display.
You do not have to wait until the voice command is recognized by the system.
Stop/restore voice command input
First read and observe the introductory information and safety warn-ings
on page 14.
In some menus, the procedure for entering voice commands can be stopped by
turning the knob
2
» Fig. 1 on page 5.
The symbol displayed on the unit screen or in the information display then
changes from to .
Restore input › by pressing the function key with the symbol
;
› by pressing the
VOICE
button on the unit;
› by pressing the symbol key
on the multifunction steering wheel.
Not in the voice commands included in the help section
First read and observe the introductory information and safety warn-ings
on page 14.
Voice commands to select menus, folders and directories in individual menus.
FunctionVoice commandReturning to the higher-level
menu BackScroll through the menu / list /
directory
next pageprevious pagefirst pagelast page
Voice commands for navigation parameters
FunctionVoice commandSwitch navigation announce-
ments on/offSwitch on navigation promptsSwitch off navigation promptsSwitch navigation guidance
assisted by TMC traffic mes-
sages on or offSwitch on dynamic route
Switch on dynamic navigationSwitch off dynamic route
Switch off dynamic navigation 16Familiarization with the unit
Page 21 of 83
■Navigation database: ... - Version of the navigation data
■ Media codec: ... - Media codec version
■ Update software - manual software upgrade
■ Copyright - Information on licences and copyrights are only available in English
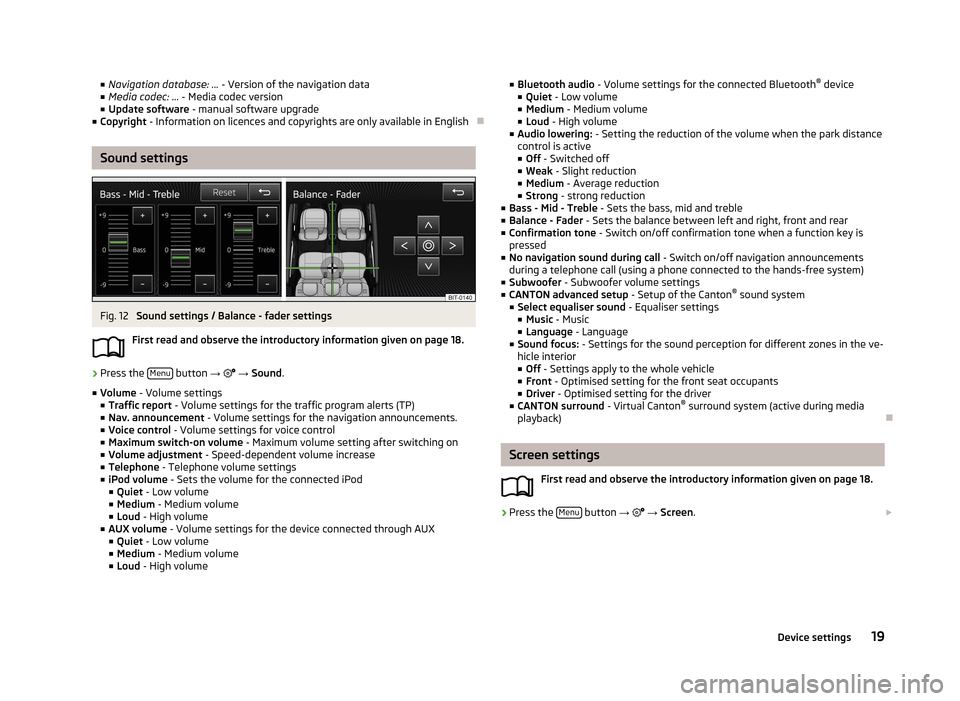
Sound settings
Fig. 12
Sound settings / Balance - fader settings
First read and observe the introductory information given on page 18.
›
Press the Menu button
→
→ Sound .
■ Volume - Volume settings
■ Traffic report - Volume settings for the traffic program alerts (TP)
■ Nav. announcement - Volume settings for the navigation announcements.
■ Voice control - Volume settings for voice control
■ Maximum switch-on volume - Maximum volume setting after switching on
■ Volume adjustment - Speed-dependent volume increase
■ Telephone - Telephone volume settings
■ iPod volume - Sets the volume for the connected iPod
■ Quiet - Low volume
■ Medium - Medium volume
■ Loud - High volume
■ AUX volume - Volume settings for the device connected through AUX
■ Quiet - Low volume
■ Medium - Medium volume
■ Loud - High volume
■
Bluetooth audio - Volume settings for the connected Bluetooth ®
device
■ Quiet - Low volume
■ Medium - Medium volume
■ Loud - High volume
■ Audio lowering: - Setting the reduction of the volume when the park distance
control is active ■ Off - Switched off
■ Weak - Slight reduction
■ Medium - Average reduction
■ Strong - strong reduction
■ Bass - Mid - Treble - Sets the bass, mid and treble
■ Balance - Fader - Sets the balance between left and right, front and rear
■ Confirmation tone - Switch on/off confirmation tone when a function key is
pressed
■ No navigation sound during call - Switch on/off navigation announcements
during a telephone call (using a phone connected to the hands-free system)
■ Subwoofer - Subwoofer volume settings
■ CANTON advanced setup - Setup of the Canton®
sound system
■ Select equaliser sound - Equaliser settings
■ Music - Music
■ Language - Language
■ Sound focus: - Settings for the sound perception for different zones in the ve-
hicle interior
■ Off - Settings apply to the whole vehicle
■ Front - Optimised setting for the front seat occupants
■ Driver - Optimised setting for the driver
■ CANTON surround - Virtual Canton®
surround system (active during media
playback)
Screen settings
First read and observe the introductory information given on page 18.
›
Press the Menu button
→
→ Screen .
19Device settings
Page 47 of 83
Navigation
Description of the navigation system
Preface to navigation
Introduction
This chapter contains information on the following subjects:
Main menu
45
Navigation data
46
First and foremost, pay attention to the safety instructions » page 4 , Important
notes .
The unit uses the GPS (Global Positioning System) satellite system for navigation.
The satellite signal allows you to determine your current vehicle position.
If the unit is outside the range of the GPS satellite signal (e.g. in dense vegeta-
tion, in tunnels, parking garages, etc.), the unit navigates only with restrictions
using on-vehicle sensors.
Navigation is done:
› by graphical instructions in the device screen and Maxi DOT display;
› via voice guidance.
The navigation unit can be operated: › using the buttons on the unit
» page 45;
› using the function keys in the unit screen
» page 45;
› using voice control
» page 14.
› on the MAXI DOT display
» page 13 .
WARNING■
Information about traffic lights, stop and right of way signs, parking and
stopping restrictions as well as lane constrictions and speed restrictions is not
taken into account for navigation by the unit.■
Always adjust the driving speed to the road, traffic and weather conditions.
WARNING (Continued)■ The navigation announcement provided may vary from current situations,
e.g. due to road works or out-of-date navigation data.■
The volume should be adjusted to ensure that acoustic signals from outside,
e.g. sirens from vehicles which have the right of way, such as police, ambu-
lance and fire brigade vehicles, can be heard at all time.
CAUTION
In some countries, some unit features can no longer be selected when the vehicle
is running faster than a certain speed. This is not a malfunction, but complies with the national legal regulations.
Main menu
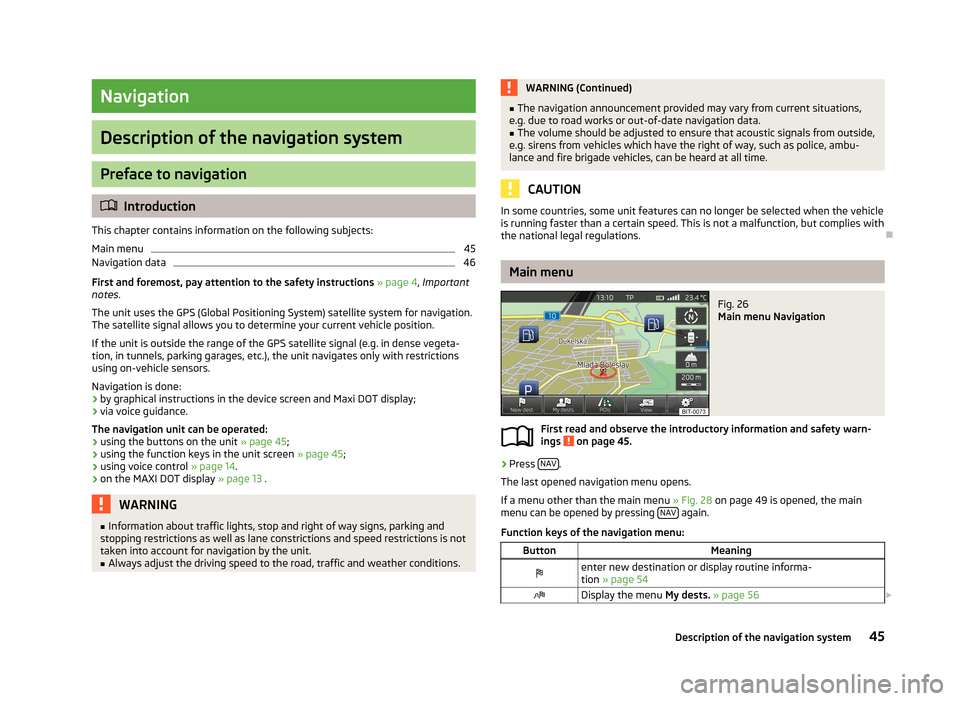
Fig. 26
Main menu Navigation
First read and observe the introductory information and safety warn-
ings on page 45.
›
Press NAV.
The last opened navigation menu opens.
If a menu other than the main menu » Fig. 28 on page 49 is opened, the main
menu can be opened by pressing NAV
again.
Function keys of the navigation menu:
ButtonMeaningenter new destination or display routine informa- tion » page 54Display the menu My dests. » page 56 45Description of the navigation system
Page 49 of 83
■Import destinations - Import previously prepared custom destina-
tions » page 57
■ Version information - View the current version of the navigation data
Route options
First read and observe the introductory information given on page 46.
›
In the Navigation main menu, press → Route options .
■ Suggest 3 alternative routes - Switch on/off manual selection of the route type
(economical, fast, short) » page 62
■ Route: - Automatic selection of the preferred route type (manual route selec-
tion is switched off)
■ Economical - Calculate the most economical route with shortest travelling
time and distance travelled – displayed in green
■ Fast - Calculate the fastest route to the destination, even if a detour is neces-
sary - displayed in red
■ Short - Calculate the shortest route to the destination, even if a longer travel-
ling time is required - displayed in orange
■ Dynamic route - Switch on/off dynamic route calculation using TMC traffic re-
ports » page 64
■ Avoid motorways - Switch on/off the use of motorways in the route calcula-
tion
■ Avoid ferries and motorail trains - Switch on/off avoidance of ferries and
motorail trains
■ Avoid toll roads - Switch on/off the use of toll roads in the route calculation
■ Avoid tunnels - Switch on/off the use of tunnels for which tolls have to paid
in the route calculation
■ Avoid routes requiring toll stickers - Switch on/off the use of roads requiring
road tax disk display (with a valid road tax disk) in the route calculation
■ Available toll stickers - Displays the list of roads requiring road tax disk display
Map
First read and observe the introductory information given on page 46.
›
In the Navigation main menu, press
→ Map .
■
Day/night: -Selection of map display colour
■ Day - coloured
■ Night - in shades of grey
■ Automatic - Map with light or dark coloured background; the background
changes once you turn on the lights (does not apply to daytime running lights)
■ Autozoom - Switch on/off the automatic zoom in/out of the map display while
driving » page 49
■ Show traffic signs - Switch on/off the display of traffic signs
■ Select categories for POIs - Select POIs to be displayed in the map from a list of
available POIs (max. 10 POIs) » page 60
■ Show brands for POIs - Switch on/off the display company logos at the POIs
■ Show favourites - Switch on/off the display of favourites
■ Lane guidance - Switch on/off the display of a window with the recommended
lane for complicated intersections » page 63
Fuelling options
First read and observe the introductory information given on page 46.
›
In the Navigation main menu, press
Fuel options .
■ Select preferred fuel station - Selects your preferred fuel station brand (the se-
lected station brand will be displayed on the first positions of the list of nearest
fuel stations found)
■ Fuel warning - Switch on/off the display of the warning message for low on fuel
Warning: fuel tank almost empty. Would you like to find a fuel station nearby?
If the message appears in the unit screen, the system offers the following fea-
tures:
■ Cancel - Close the window with the warning
■ Find - Search for the nearest fuel station
Navigation announcements
First read and observe the introductory information given on page 46.
›
In the Navigation main menu, press
→ Nav. announcement .
■ Volume - Set the volume of the navigation announcements
■ No voice guidance during call - Switch on/off navigation announcements during
a telephone call (using a phone connected to the hands-free system » page 35)
47Description of the navigation system
Page 52 of 83
ButtonMeaningDisplay the automatic map scale
Switch auto-zoom on/off during route guidance. Active auto-
zoom is indicated by a green symbol. If Autozoom is active, the
map scale will change automatically, depending on the driven route (motorway trip: large map scale - city: small map scale)a)
To display the elevation, the signal of at least five satellites must be received. Also, the route guid-
ance must not be running in demo mode.
Switch off auto-zoom by touching → or by changing the map scale. Touch
again (function key highlighted in green) to switch on auto-zoom. Autozoom
can also be switched on/off in the navigation settings » page 47
Auto-zoom is only functional when the map is aligned with the vehicle position
(the function key with symbol
is not displayed).
Traffic signs
First read and observe the introductory information given on page 48.
The traffic sign display can be switched on in the unit screen » page 47.
The system provides the option of displaying the traffic signs
B
» Fig. 28 on
page 49on the screen which are stored in the navigation data of the maps.
If the Traffic signs split screen is not switched on, only one traffic sign is dis-
played on the unit screen.
Switching on the traffic sign display function » page 47.
Only one traffic sign is displayed without the additional signs in the screen out-
side the split screen » page 52.
Extra window
Introduction
This chapter contains information on the following subjects:
Menus in extra window
50
Audio
51Compass51Manoeuvre52
Traffic signs
52
GPS
53
First and foremost, pay attention to the safety instructions » page 4 , Important
notes .
Menus in extra window
First read and observe the introductory information given on page 50.
Depending on the context of the selected menus, additional information is dis-
played in the split screen.
Switching on
›
In the navigation main menu, press NAV
or
›
In the Navigation main menu, press .
→ Split screen .
The last opened split screen is displayed.
Switching off
›
In the navigation main menu, press NAV
or
›
in the split screen on
or
›
In the Navigation main menu, press .
→ Split screen .
Menus in the split screen
■ Audio - Playback operation of the currently selected audio source » page 51
■ Compass - Display the current vehicle location in relation to the compass direc-
tions » page 51
■ Manoeuv. - Display of the next or following navigation announcement (manoeu-
vre) » page 52
■ Traffic - Display of traffic signs which are stored in the navigation data of the
maps » page 52
■ GPS - Display of the geographical coordinates of the current vehicle loca-
tion » page 53
50Navigation
Page 69 of 83
Vehicle
Vehicle systems
Vehicle settings
Introduction
This chapter contains information on the following subjects:
Selecting driving mode
67
Vehicle data
68
Auxiliary heater and ventilation
69
ESC system
70
Tires
70
Driver assistance
70
Parking and manoeuvring
71
Light
71
Mirrors and wiper
72
Opening and closing
72
Seats
72
Multifunction display
72
Service
73
Restore factory settings
73
Climatronic settings
73
First and foremost, pay attention to the safety instructions
» page 4 , Important
notes .
Settings relating to the vehicle systems can only be made when the ignition is
switched on.
Note
■ The individual systems are described in the » Vehicle Owner's Manual .■If the functions of some systems are disabled, some functions, such as parts of
the ESC system, are switched on again automatically for security reasons, after
switching the ignition off and on.■
When you press the button CAR, the last displayed menu from
is displayed.
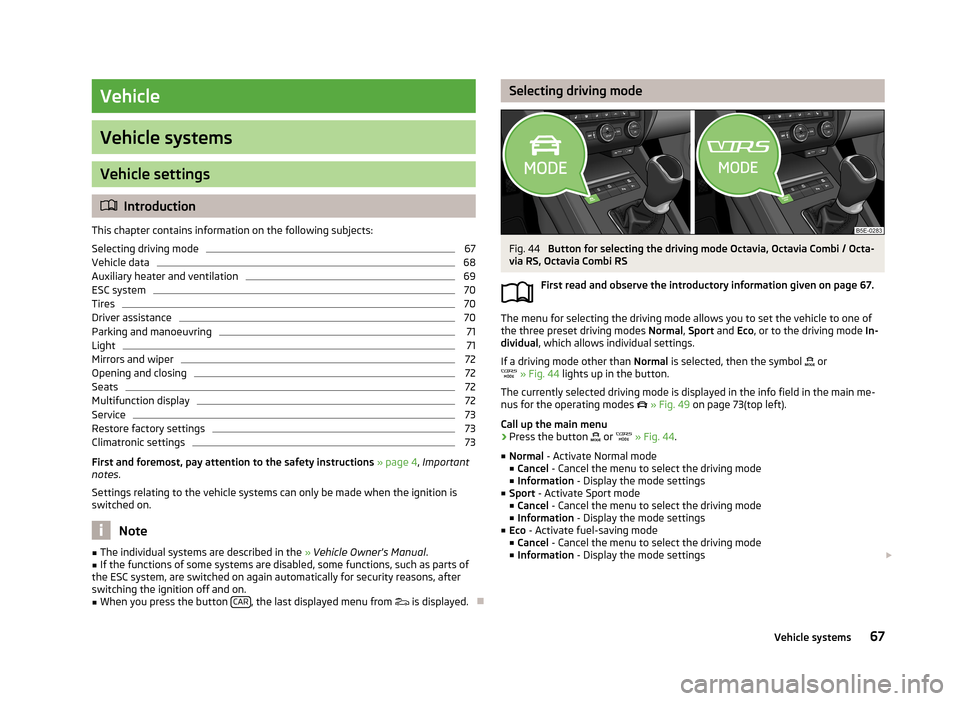
Selecting driving modeFig. 44
Button for selecting the driving mode Octavia, Octavia Combi / Octa-
via RS, Octavia Combi RS
First read and observe the introductory information given on page 67.
The menu for selecting the driving mode allows you to set the vehicle to one of
the three preset driving modes Normal, Sport and Eco, or to the driving mode In-
dividual , which allows individual settings.
If a driving mode other than Normal is selected, then the symbol
or
» Fig. 44 lights up in the button.
The currently selected driving mode is displayed in the info field in the main me-
nus for the operating modes
» Fig. 49 on page 73(top left).
Call up the main menu
›
Press the button
or
» Fig. 44 .
■ Normal - Activate Normal mode
■ Cancel - Cancel the menu to select the driving mode
■ Information - Display the mode settings
■ Sport - Activate Sport mode
■ Cancel - Cancel the menu to select the driving mode
■ Information - Display the mode settings
■ Eco - Activate fuel-saving mode
■ Cancel - Cancel the menu to select the driving mode
■ Information - Display the mode settings
67Vehicle systems
Page 70 of 83
■Individual - Activate the Individual mode
■ Cancel - Cancel the menu to select the driving mode
■ Setup - Individual setting
■ Steering: - Set the power steering characteristics
■ Normal - Normal
■ Sport - Sports
■ Engine: - Set the engine (drive) characteristics
■ Normal - Normal
■ Sport - Sports
■ Eco - Economical
■ ACC: - Set the vehicle acceleration when adaptive cruise control is activated
■ Normal - Normal
■ Sport - Sports
■ Eco - Economical
■ Dynamic bend light.: - Set the characteristics of the adaptive headlights
■ Normal - Normal
■ Sport - Sports
■ Eco - Economical
■ Air conditioning: - Set the Climatronic characteristics
■ Normal - Normal
■ Eco - Economical
■ Reset mode - Sets the profile Normal
Note
If you do not operate the unit for longer than approx. 10 seconds in the "Select
driving mode" menu, it will switch to the last selected menu or switch itself off.
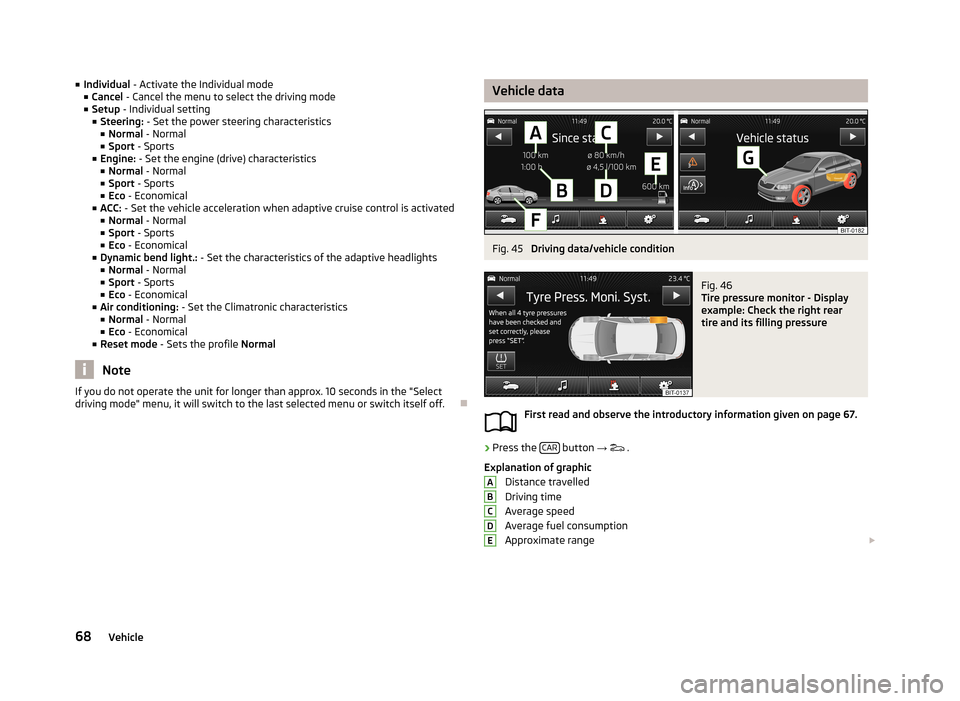
Vehicle dataFig. 45
Driving data/vehicle condition
Fig. 46
Tire pressure monitor - Display
example: Check the right rear
tire and its filling pressure
First read and observe the introductory information given on page 67.
›
Press the CAR button
→
.
Explanation of graphic Distance travelled
Driving time
Average speed
Average fuel consumption
Approximate range
ABCDE68Vehicle